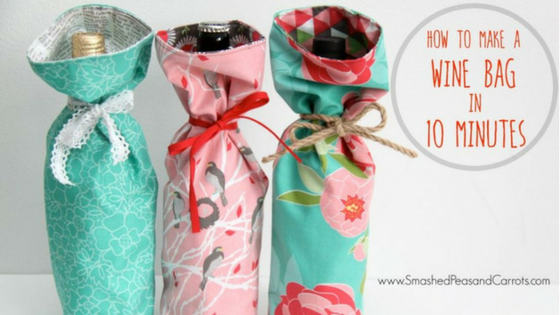
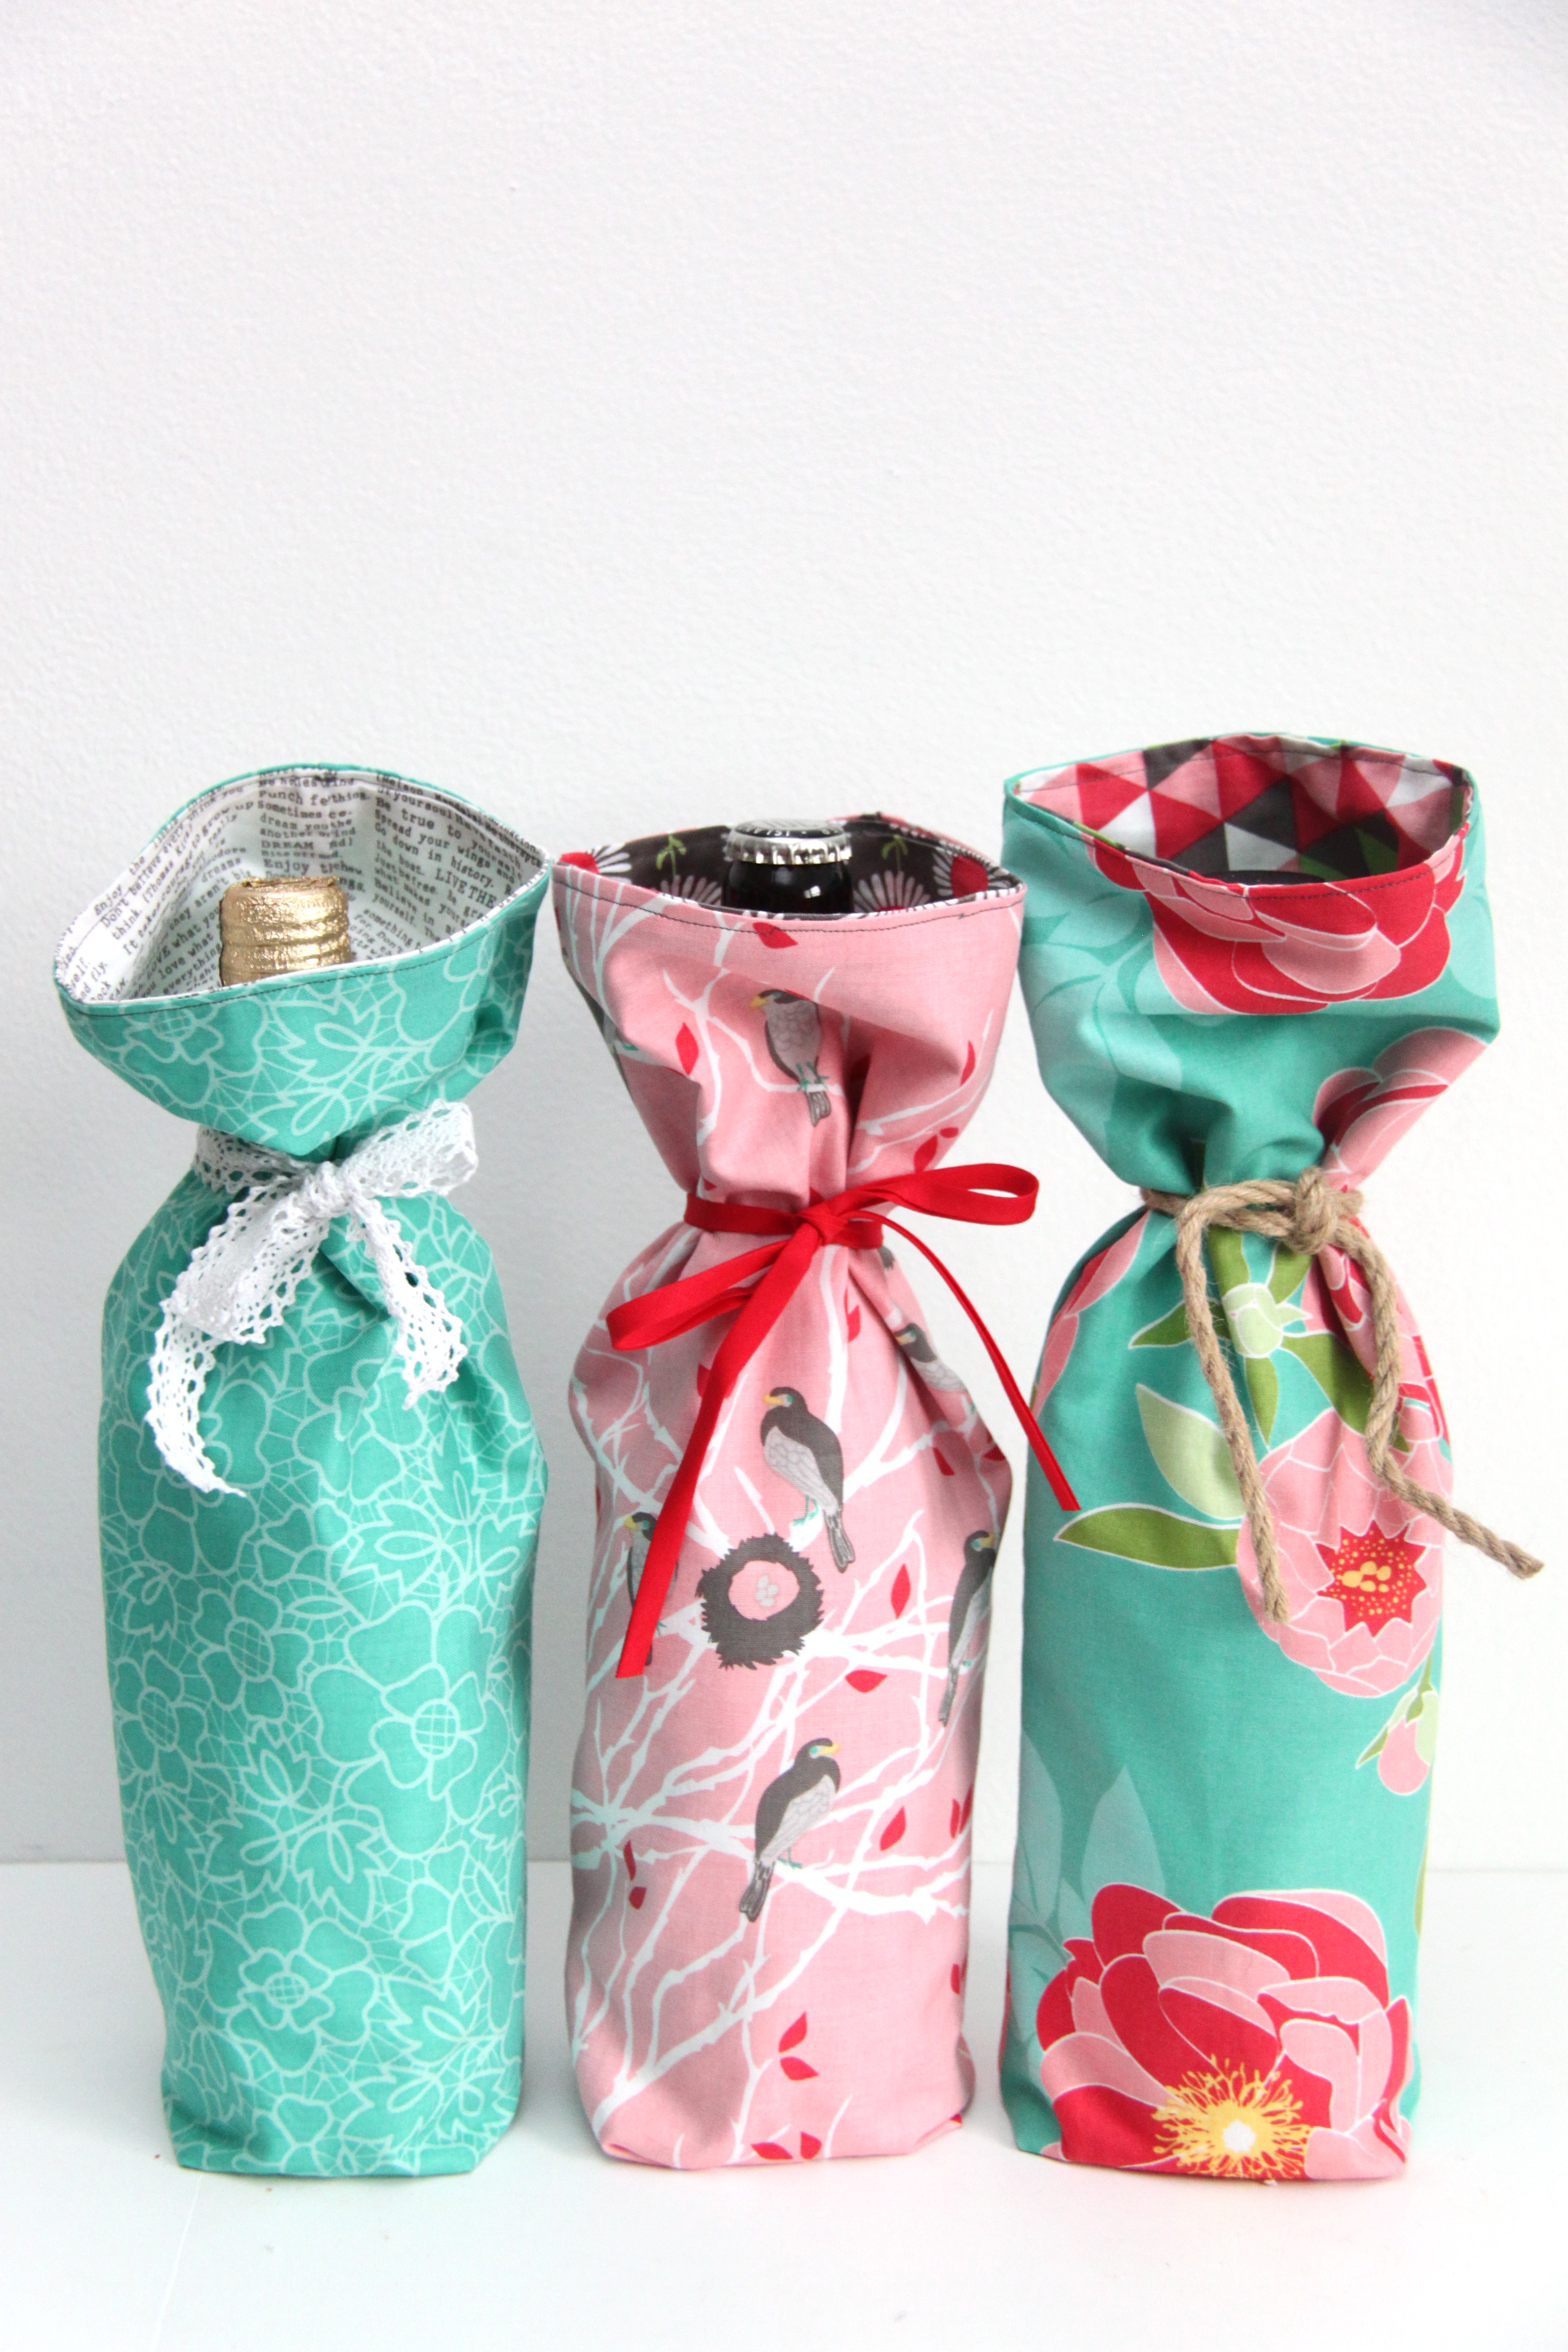
Hello! It’s Maggie from Smashed Peas and Carrots! I am so happy to be here again to share another fun tutorial with you using Riley Blake’s beautiful Cottage Garden fabrics. Today I will be teaching you how to make a fabulous Wine Bag, and it will only take you 10 minute. 10 minutes!!! So fast you could whip up quite a few in less than an hour and have an array of pretty packaged hostess gifts to bring to all of your holiday parties.


All you need is the following to make one bag: 10 Minute Wine Bag Tutorial one 12 x 16 inch piece of fabric one 12 x 16 inch piece of coordinating fabric 12-15 inch piece of lace, trim, ribbon, jute or twine for the tie.
First, fold each piece of fabric right sides together the long ways so that each piece measures 6 x 16 inches. Then sew down the long raw edge and the bottom raw (making an L-shape) using a 1/2 inch seam allowance.

Next, pinch the two corners you just made (one at a time) and fold them over the seam at at the bottom of the bag (like the picture above on the right). Measure 1.5 inches from the tip of the corner and sew horizontally across the corner. Do this on both corners.
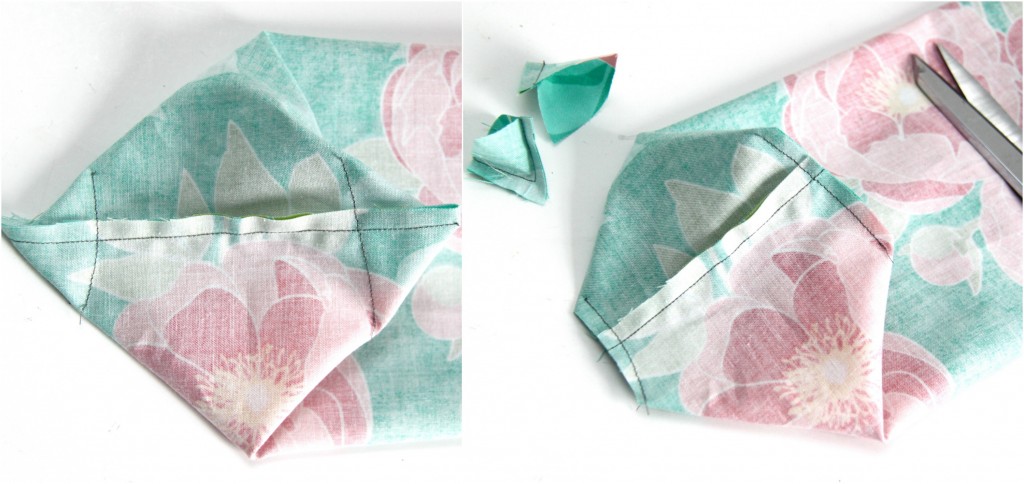
The bottom of you both fabric pieces should look like the picture above on the left. Take a pair of scissors and clip both corners off making sure not to cut through the seam you sewed together earlier.

Now flip the fabric that will be the outside of your wine bag so that it is right side out. Leave the inner fabric so that it is still wrong sides out.

Place the inner fabric bag inside the outer fabric bag making sure the seams match up (like the picture above on the left). Then fold each raw edge inward about 1/2 inch and pin together. I did this starting at the seam so that I knew they would be matched up as I pinned around the circle.

Then just top stitch the raw edges together using a 1/4 seam allowance. Ta-Da!!!! You now have yourself a darling little wine bag! Just insert your wine bottle, champagne, or sparkling apple juice inside and tie the top closed with a piece of lace, trim, ribbon, or twine and you are ready to head to all your holiday parties this season!

Thank you so much for letting me share this fun tutorial with you and I hope you get a chance to make a few for the holidays. There is nothing better than gifting something pretty!!! Make sure to come and me here on my blog, Smashed Peas and Carrots, or at these places: Facebook // Twitter // Pinterest //Instagram // Google+