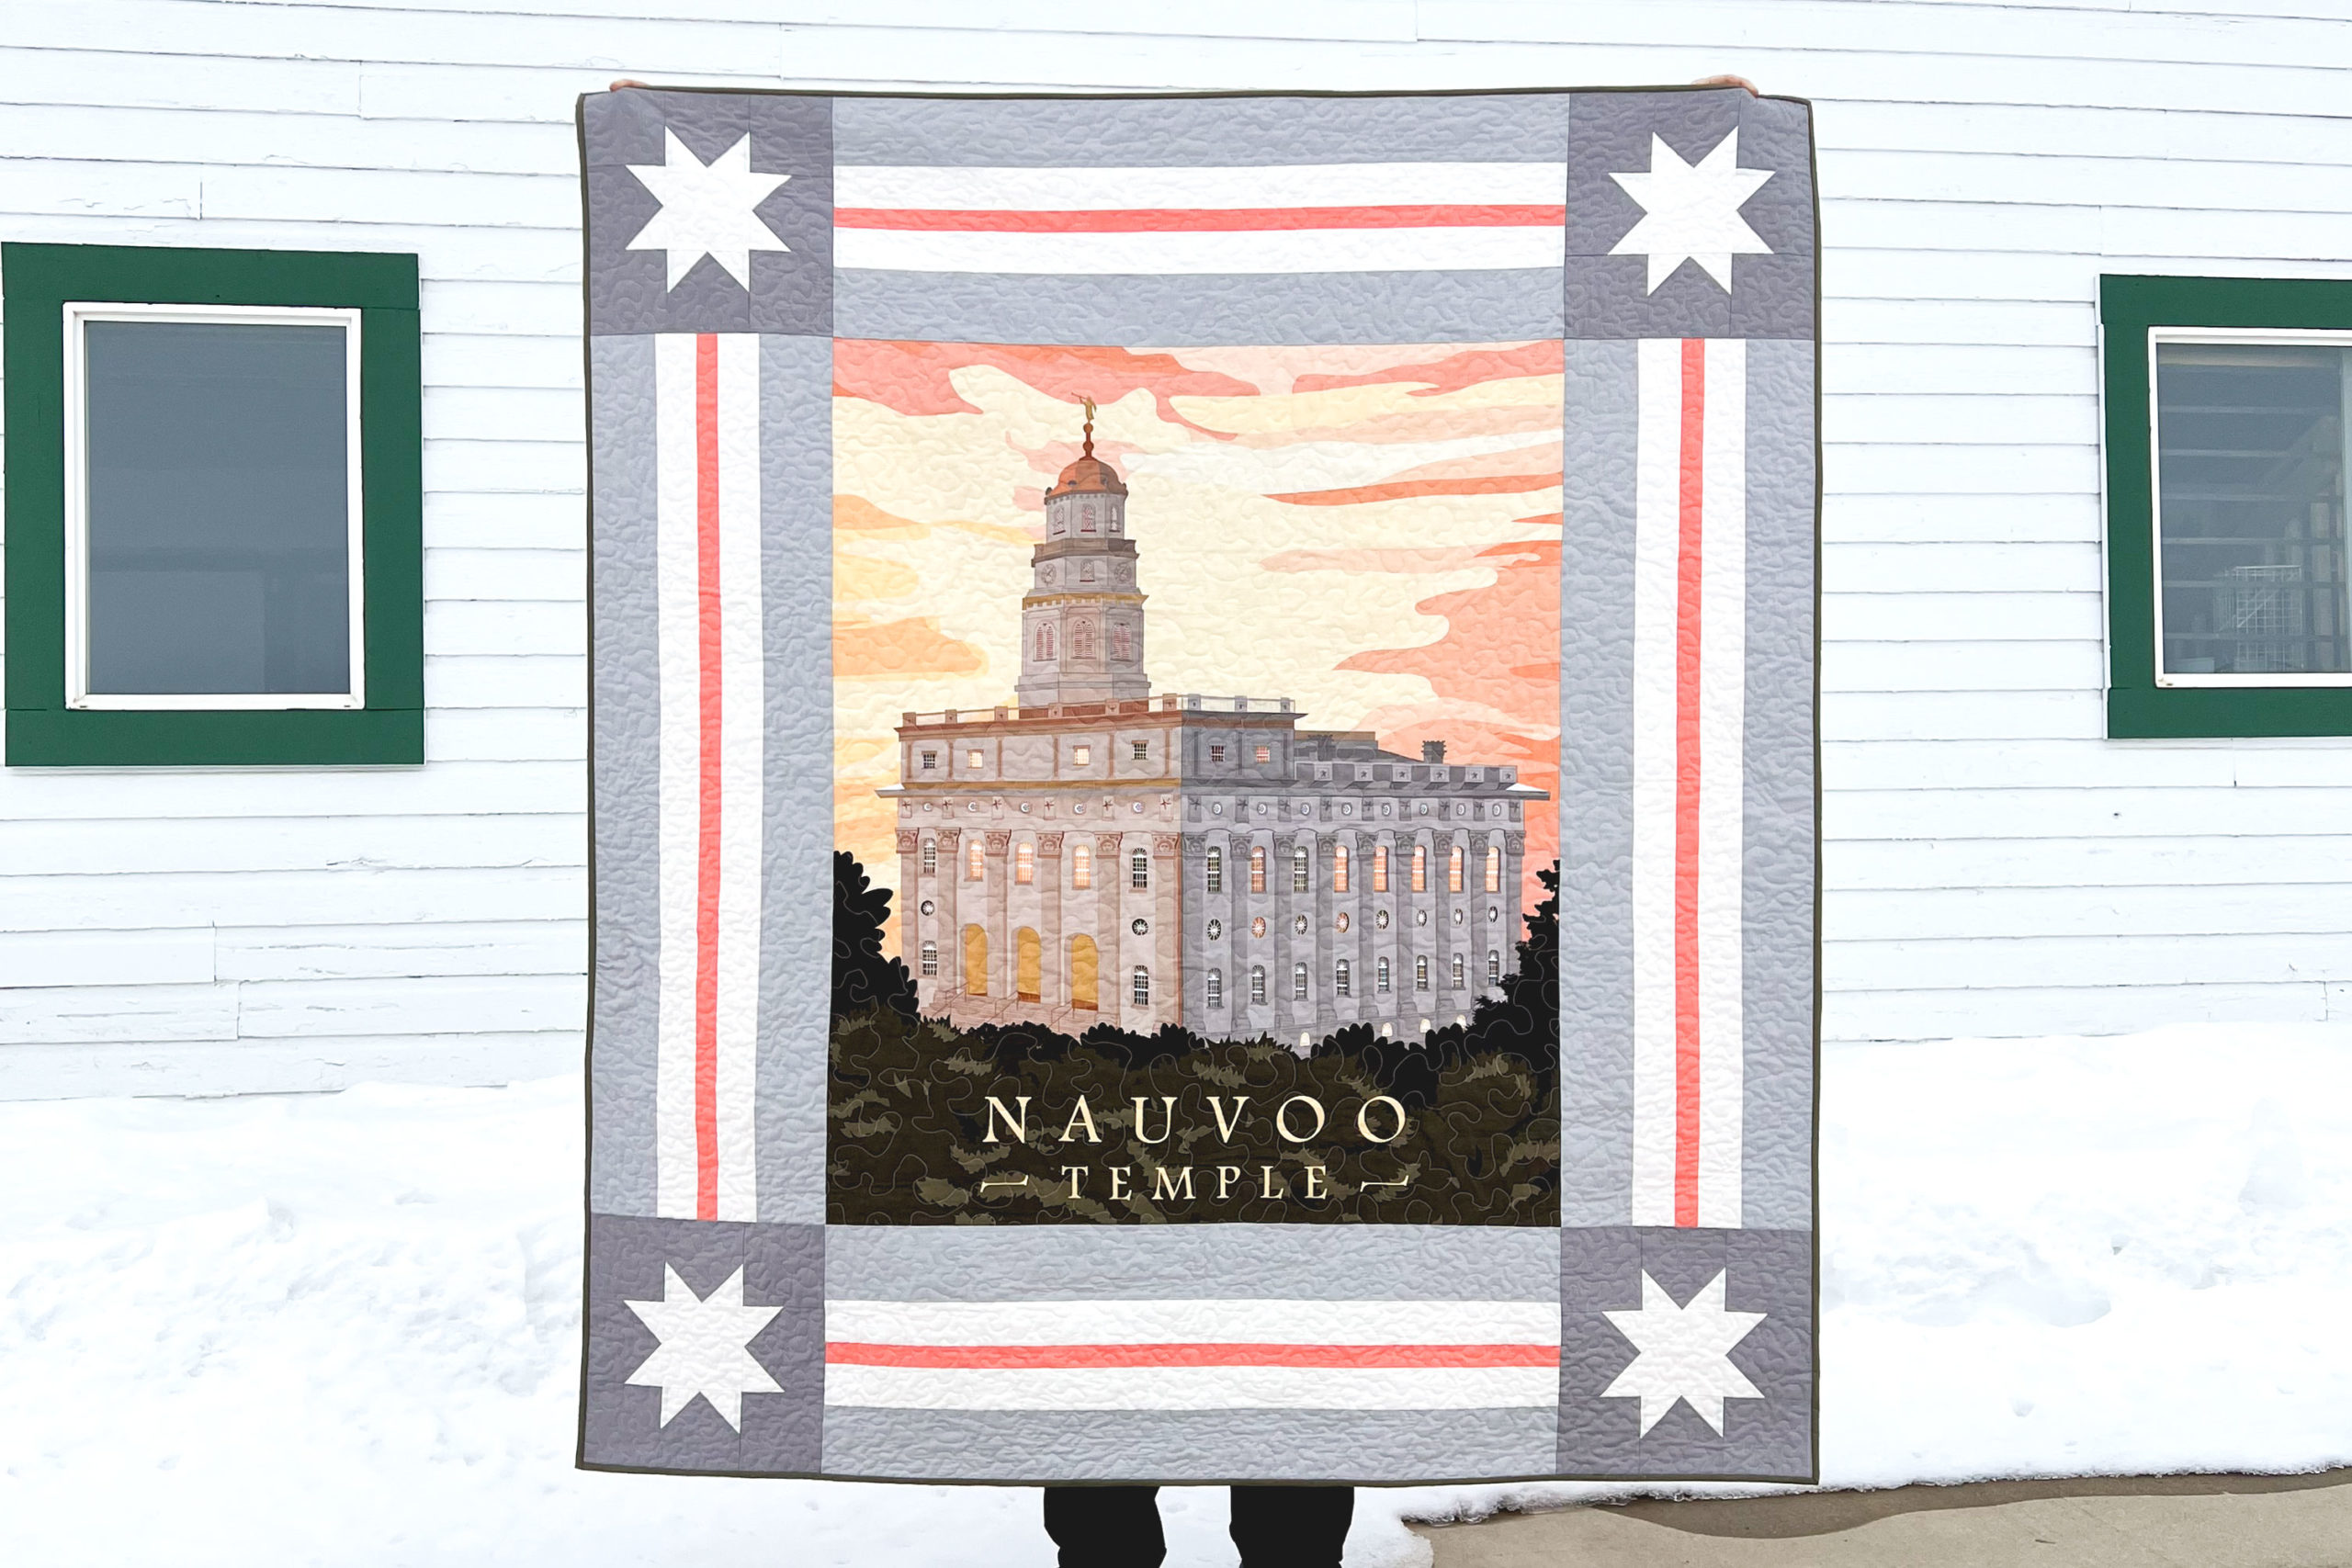
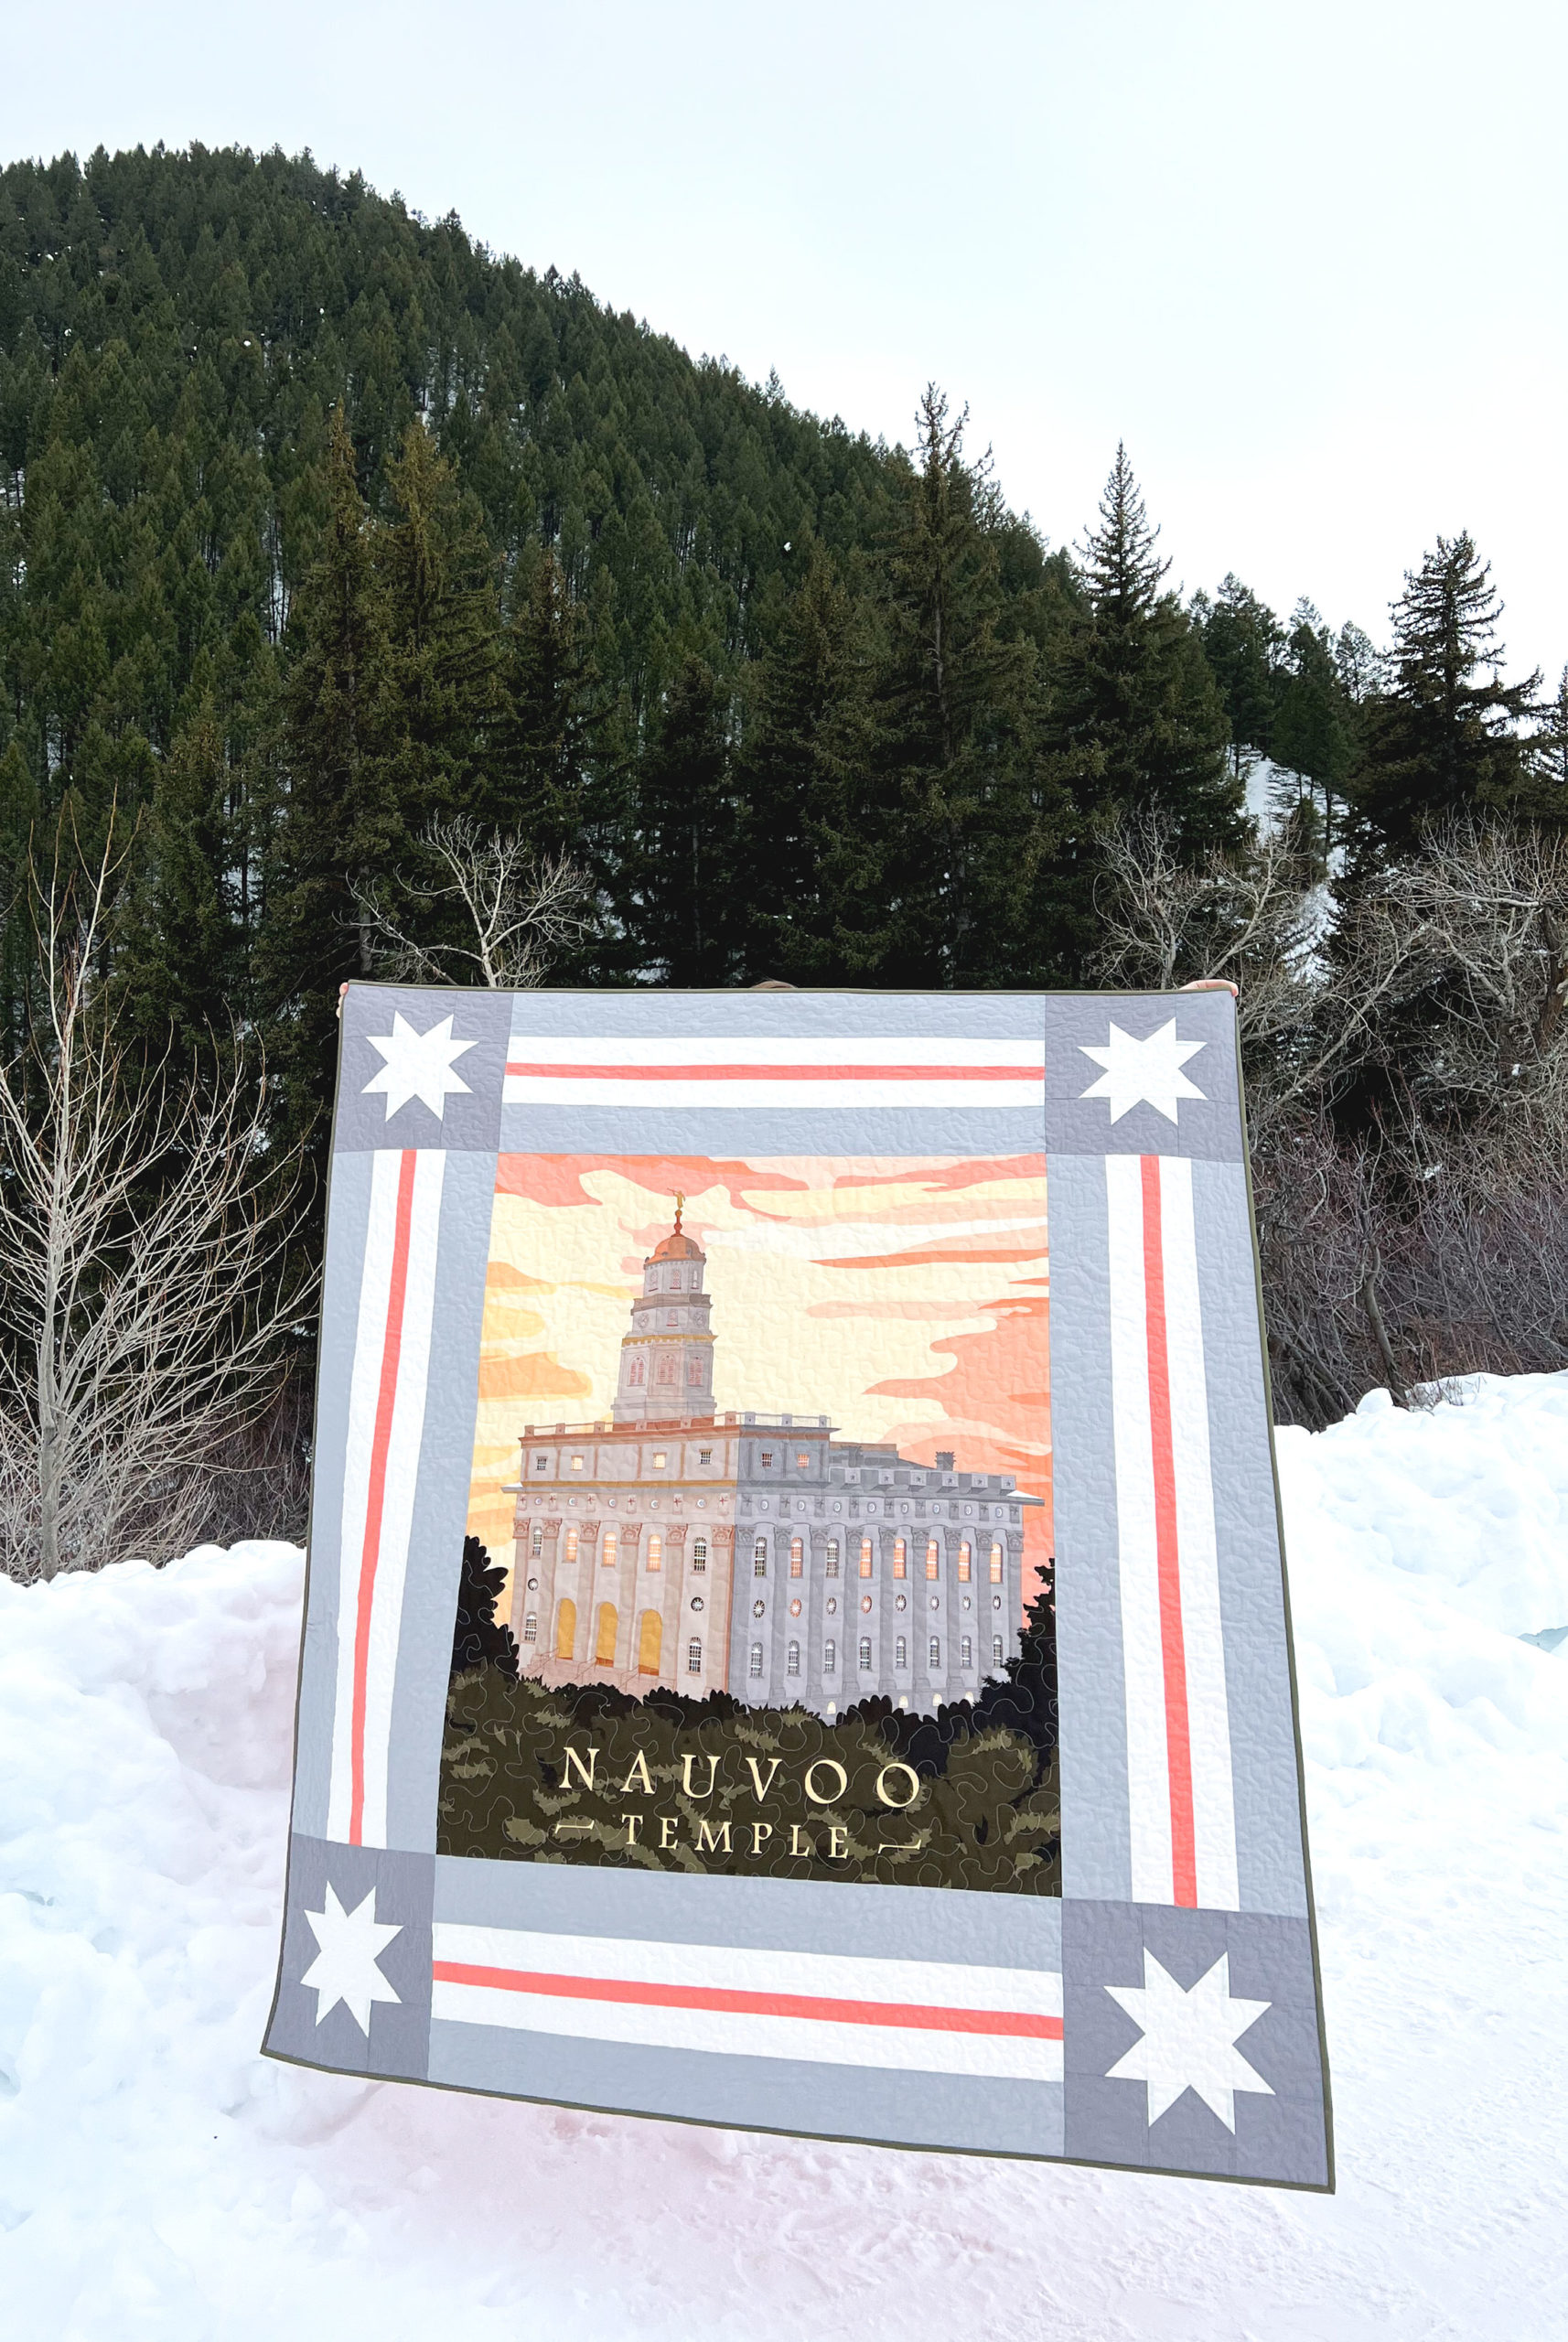
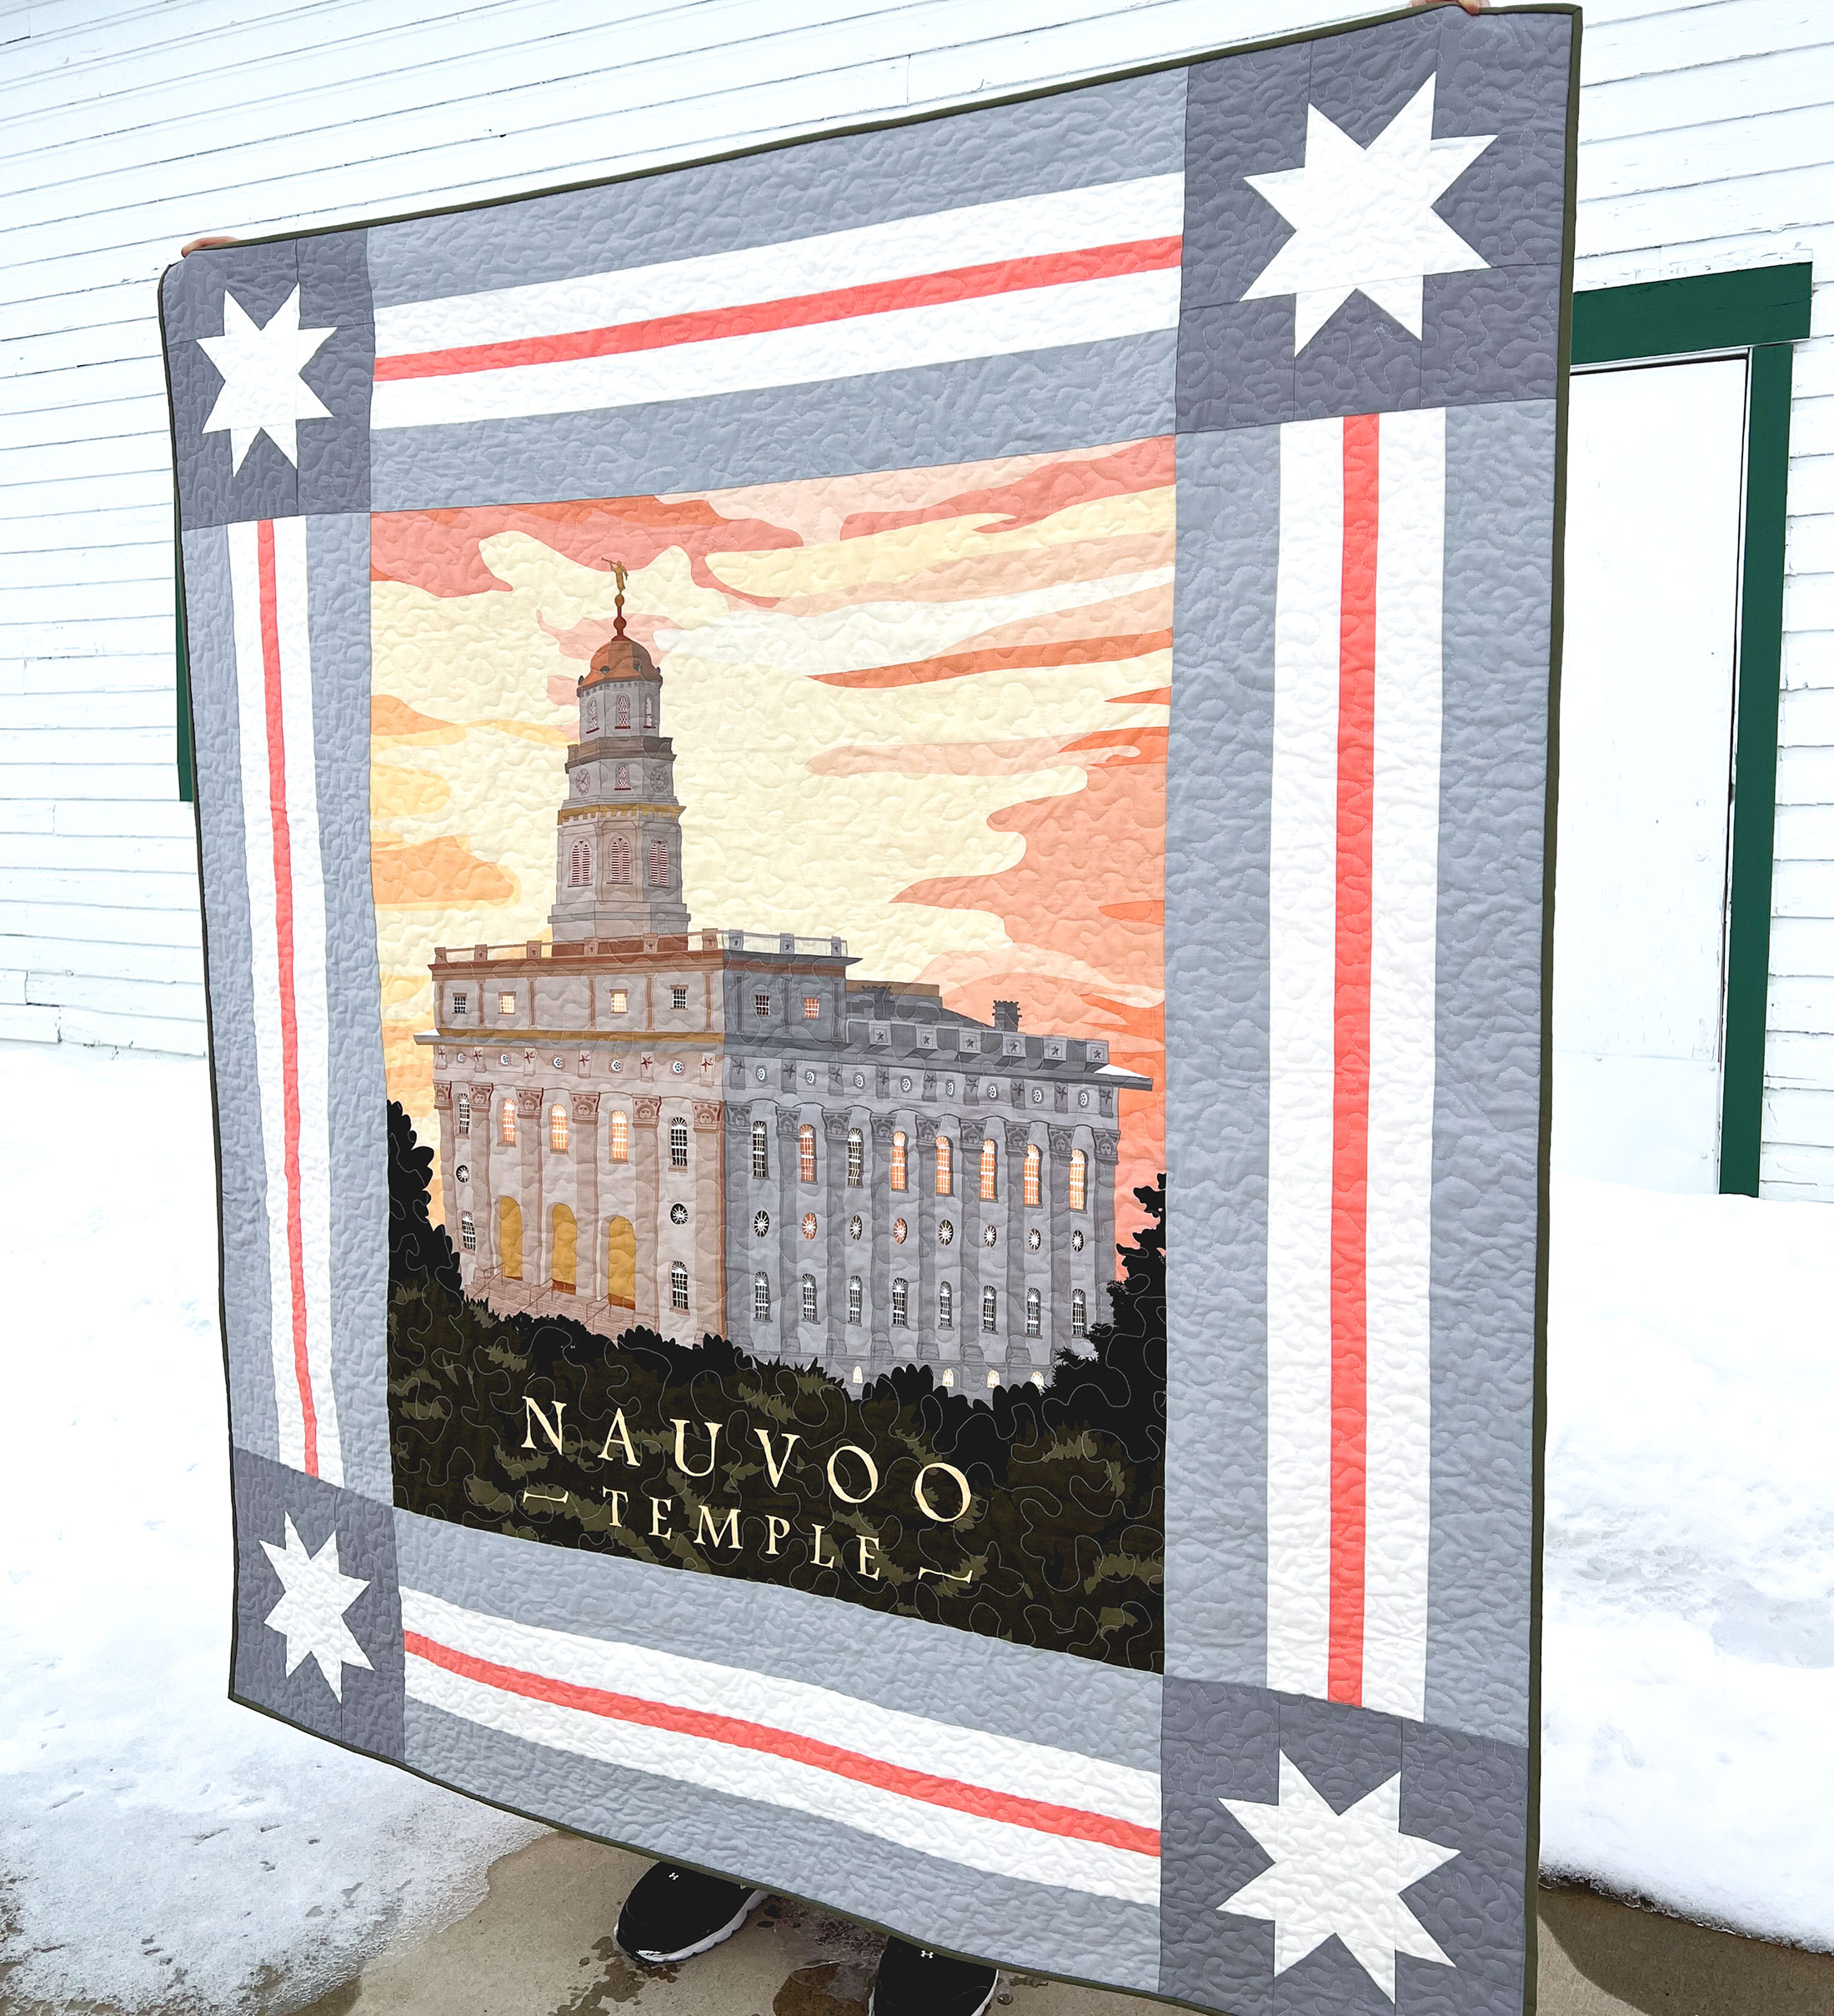
As a mom of six and a business owner, I really try to make the most of the sewing time I have. Typically that means making small projects that can be finished in one sitting. Which is why I love fabric panels! They help create a stunning project in much less time. Plus, they are so beautiful. Whether it’s a “cheater” panel that looks like patchwork, or the panel is a work of art- like this Temple, a panel creates a beautiful focal point for any sewing project. I wanted to create a pattern that would take a fabric panel and turn it into a good sized lap quilt quickly and easily. This Star Frame panel quilt tutorial will show you just how to do it. Finished quilt measures approx. 60″ (w) X 67″ (h).
I am Amy from Ameroonie Designs and I’m so happy to be here to share this tutorial as part of the Temples fabric project tour!
Temples Fabric
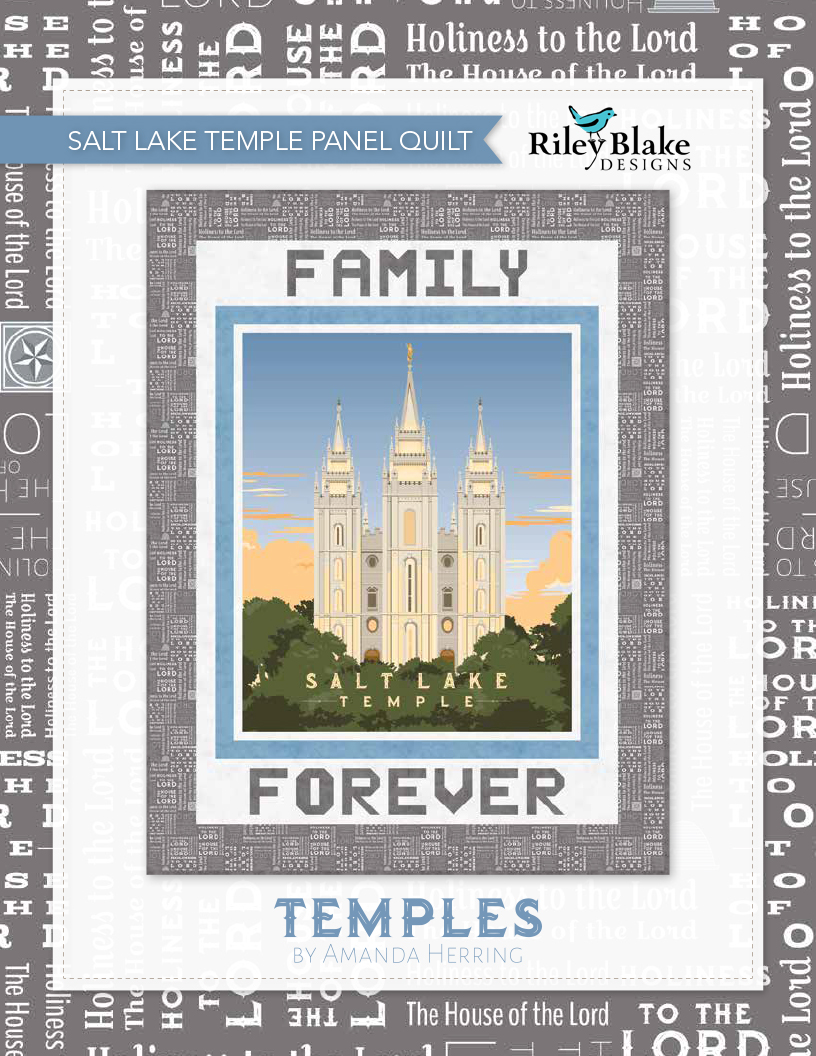
Temples is a line of fabric panels that features temples from the Church of Jesus Christ of Latter Day Saints. These beautiful buildings are gorgeously designed by Amanda Herring and other RBD designers. The large scale of these panels make them fantastic for this quilt pattern that beautifully frames out this lovely art.
Star Frame Panel Quilt Tutorial
Note that all seam allowances are 1/4″.
Fabric Requirements:
Confetti cottons are so rich and beautiful they are perfect for this project. If you do use a print, I strongly recommend a non-directional one to keep things much simpler during the cutting and construction. The fabric color I used for this quilt will be listed after the requirement in parentheses.
For the border fabrics, once you remove the selvedges, the width of the fabric you use may be just short (but extremely close) to just cut WOF strips, OR you can piece the sides (the height of the panel) together, OR you can trim the panel 1/2″- 1″ so it will fit the width of your border fabric more easily. Another option is to just purchase 1 1/4 yard cuts of the three border fabrics to ensure plenty of fabric (there will be a generous amount of the inner border fabric and a bit less, but still extra fabric of the second border left over). Note that one or the other of these (second or inner border) leftover fabrics may also be used for the star fabric, so keep that in mind when calculating fabric purchases.
- One fabric panel- I recommend a large panel, this one measured 36″ X 43 1/2″
- Cornerstone Fabric- 1/2 yard: (Riley Gray)
- Star Fabric- if not using leftover border fabric- 1/4 yard: (LeCreme)
- Outer Border Fabric- 1 yard: (silver)
- Second Border Fabric- 5/8 yard: (Le Creme)
- Inner Border Fabric- 1/4 yard: (salmon)
- Backing fabric- 5 yards: (salmon in Blossom)
- Binding fabric- 5/8 yard: (avocado)
Cutting Instructions:
You will need to first measure your panel to get your Width and Height measurements for the border pieces, they will be indicated by WOP (width of panel) and HOP (height of panel in the list below)
- 32- 4 1/2″ X 4 1/2″ squares from cornerstone fabric
- 32- 2 1/2″ X 2 1/2″ squares from star fabric
- 4- 4 1/2″ X 4 1/2″ squares from star fabric
- 4-4″ X WOP from outer border fabric
- 4- 4″ X HOP from outer border fabric
- 4- 2 1/2″ X WOP from second border fabric
- 4- 2 1/2″ X HOP from second border fabric
- 2- 1 1/2″ X WOP from inner border fabric
- 2- 1 1/2″ X HOP from inner border fabric
Assemble Star Cornerstone blocks:
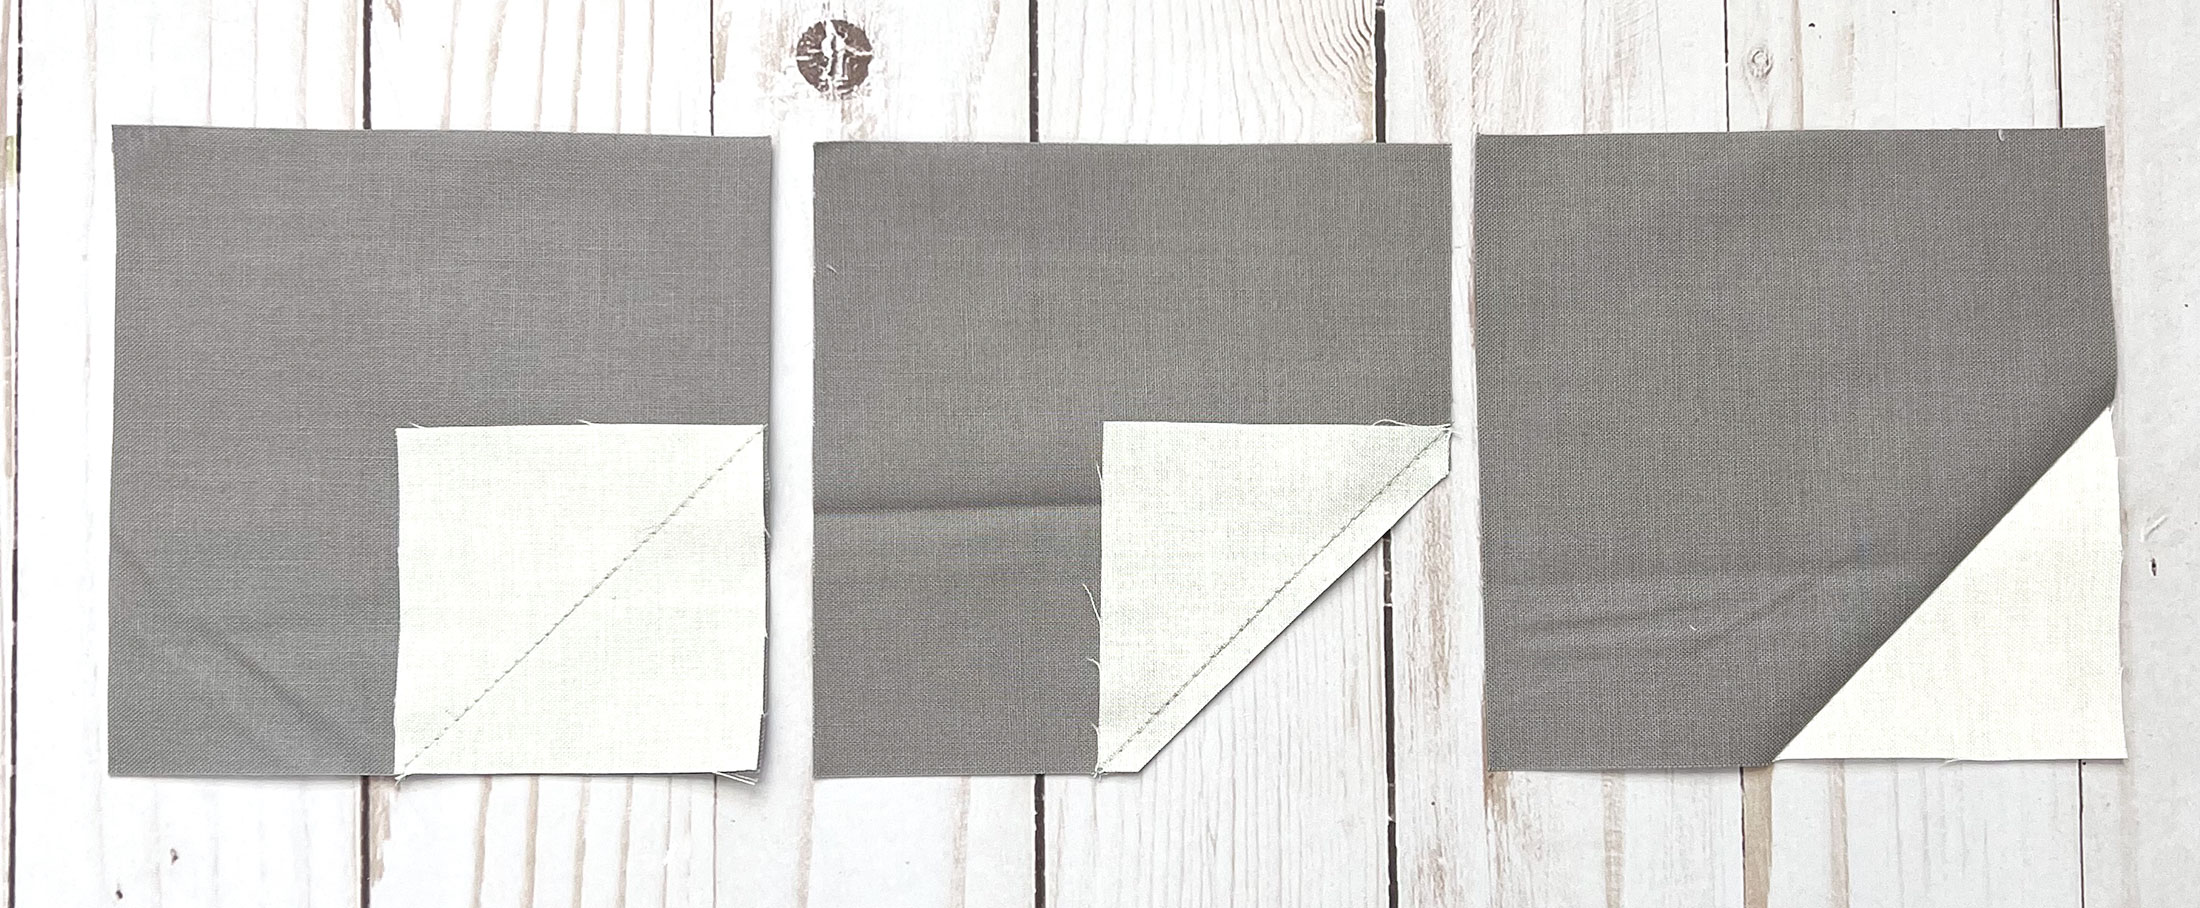
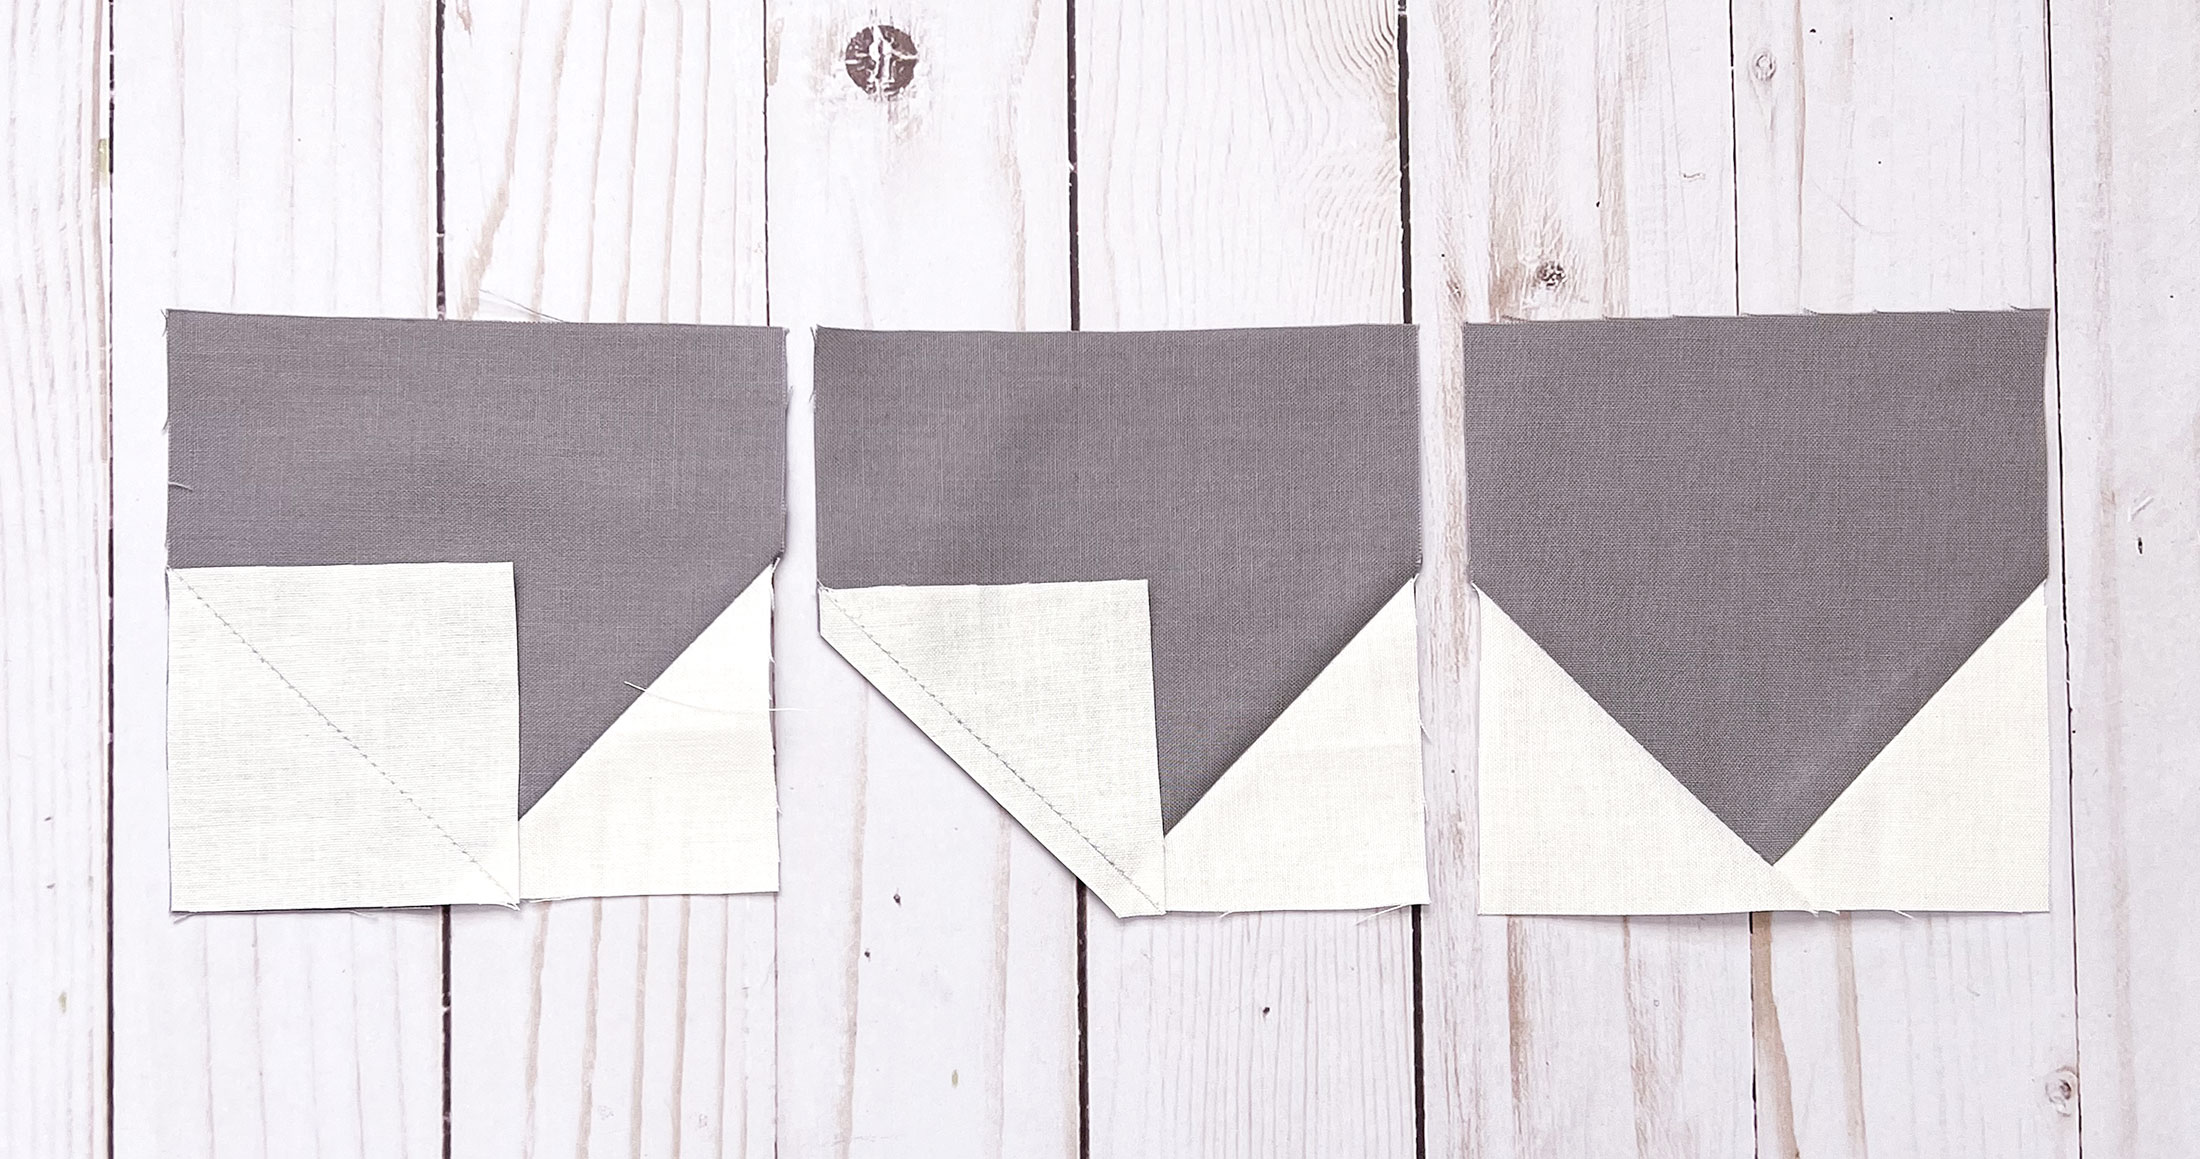
- Begin by drawing a diagonal line on all 32- 2 1/2″ star squares.
- Place one 2 1/2″ square on the bottom right corner of one 4 1/2″ cornerstone square.
- Next, sew ON the drawn line.
- Cut a scant 1/4″ seam allowance away from the sewn line toward the corner.
- Press the star fabric away from the cornerstone fabric.
- Now, take a second 2 1/2″ square and place it on the bottom left corner of the cornerstone square. Note the angle of the drawn line should connect the two outside edges of the cornerstone square.
- Again, sew on the drawn line and cut a scant 1/4″ seam allowance away from the sewn line.
- Finally, press the star fabric away from the cornerstone square.
- Repeat to create 16 total star point blocks.
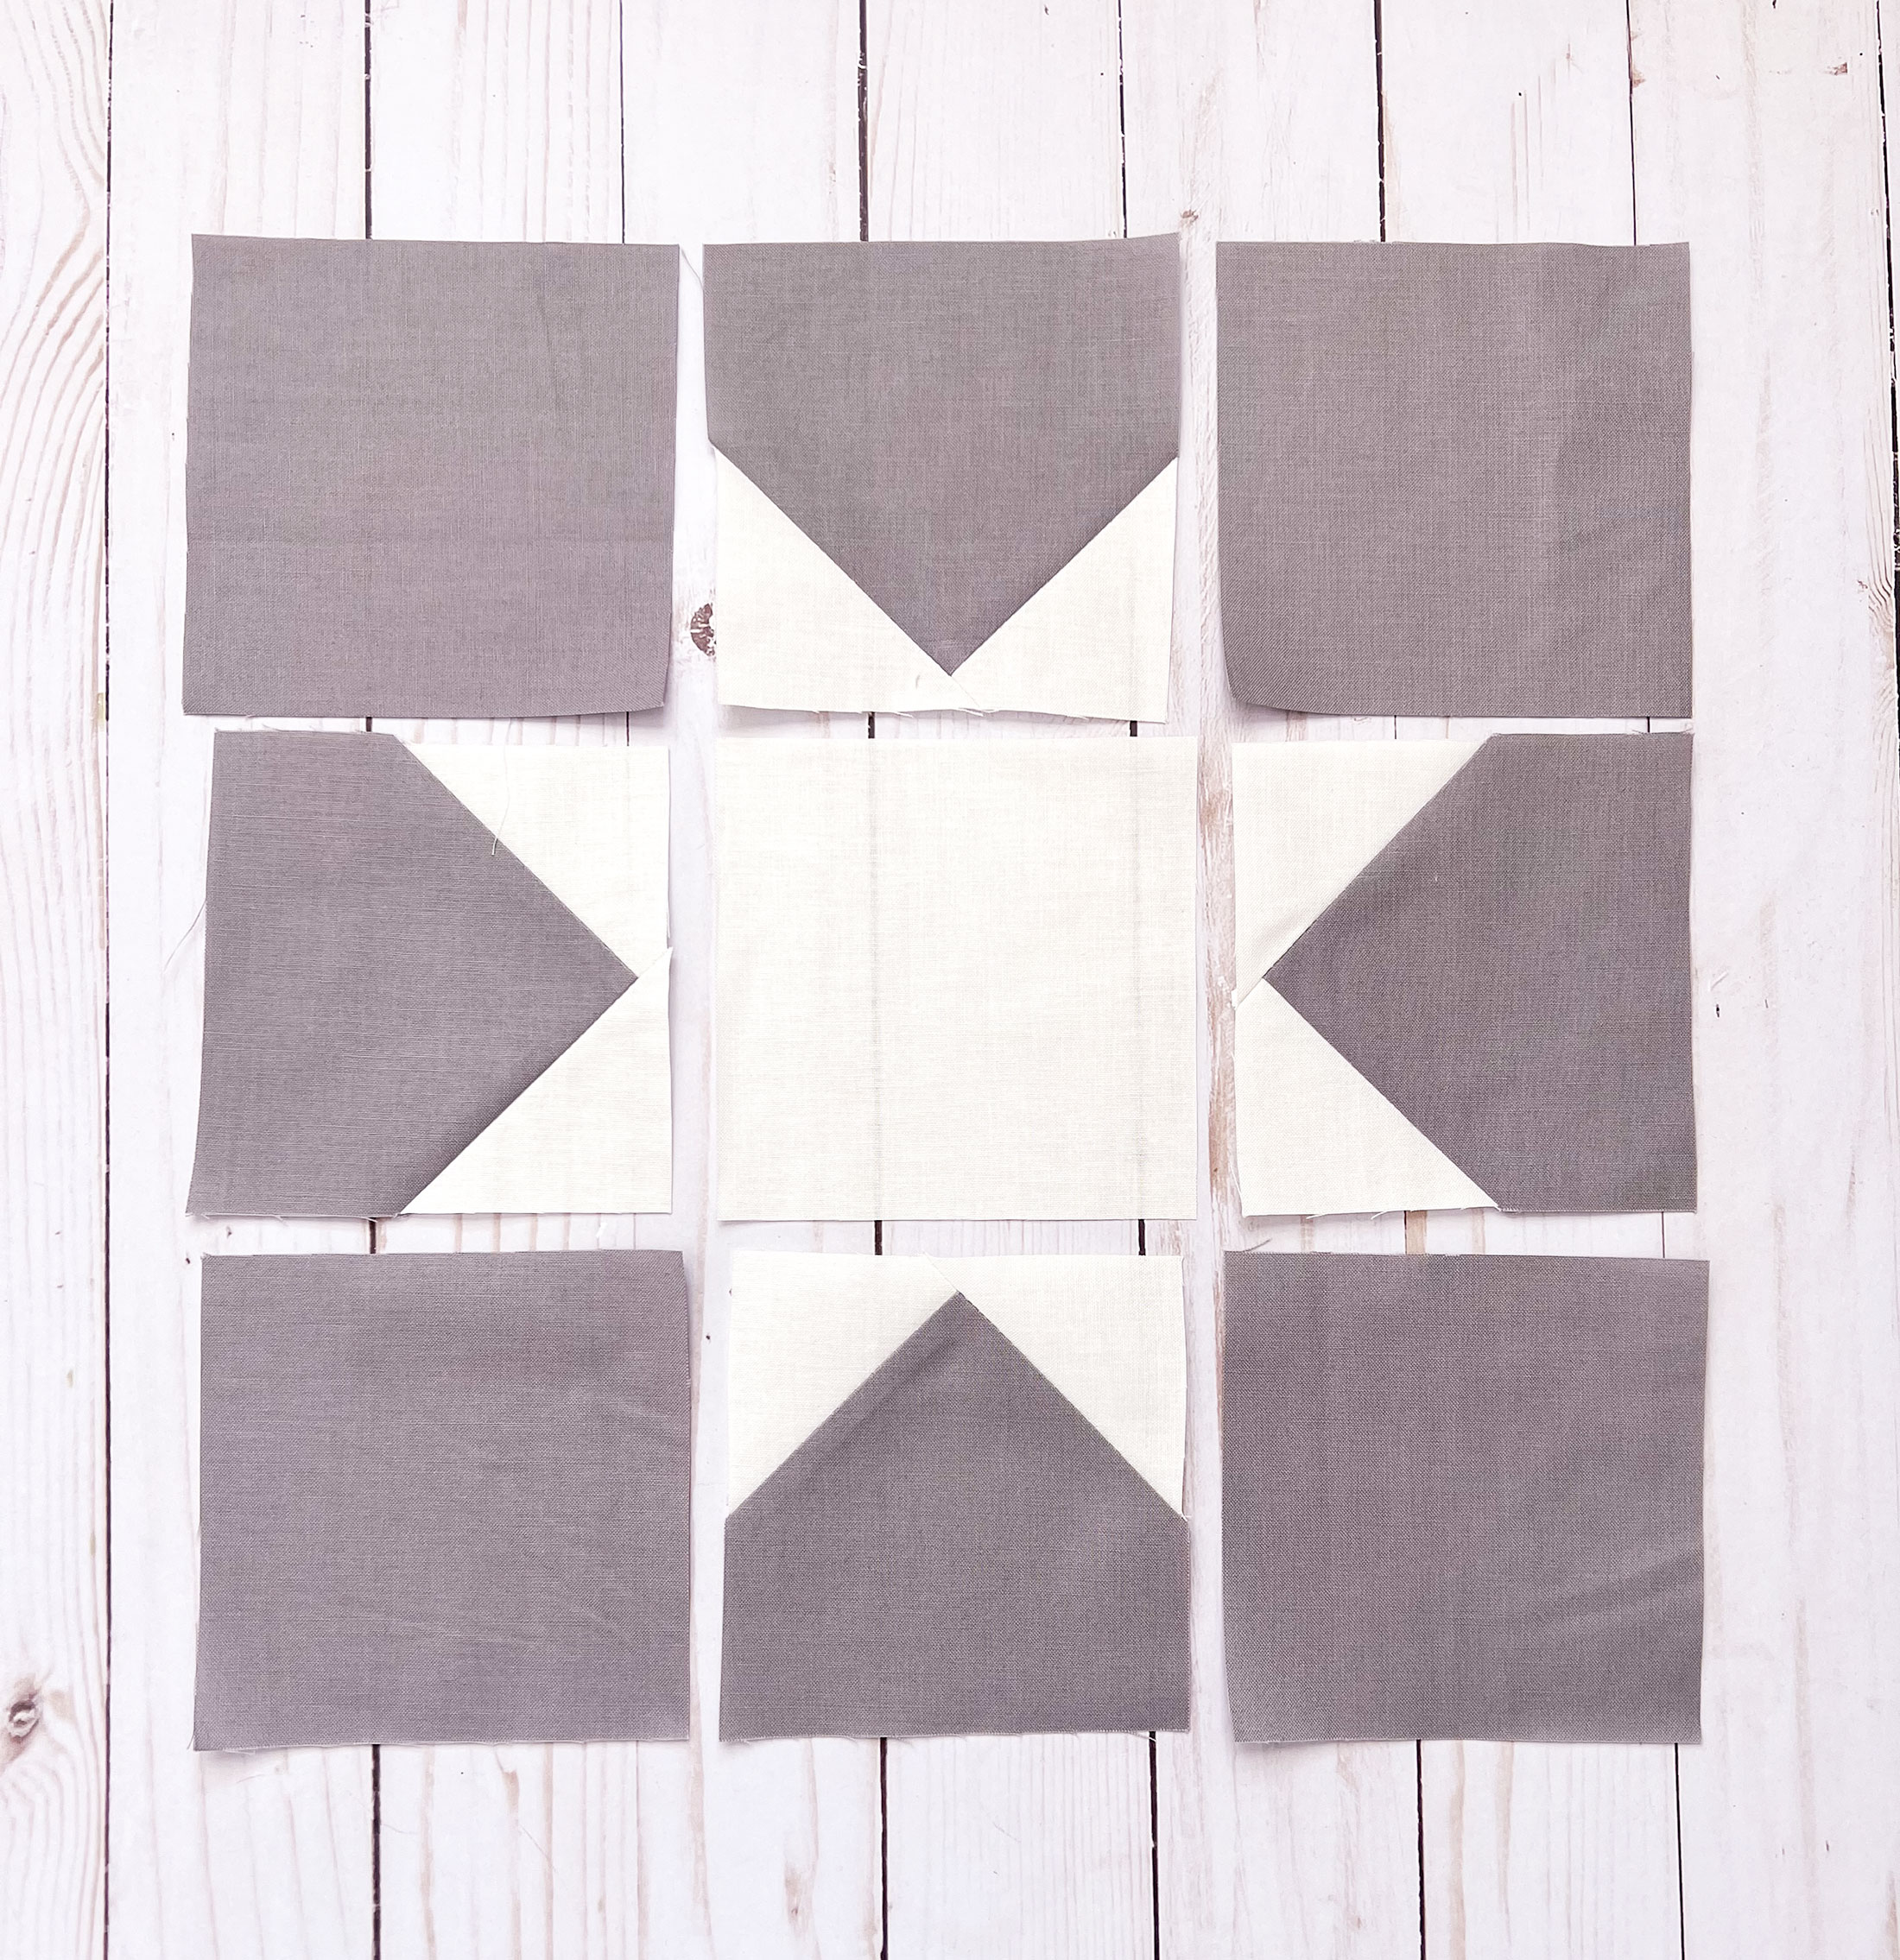
- Take FOUR- 4 1/2″ cornerstone squares, ONE- 4 1/2″ star square and FOUR of the newly created Star Point blocks and arrange as shown to create a sawtooth star block.
- Sew the squares in the three rows together, using a 1/4″ seam allowance. Press the seam allowance toward the solid 4 1/2″ square.
- Next, sew the three rows together. The seams should “nest” together.
- Repeat to create a total of FOUR Cornerstone Star blocks.
Frame Border Assembly
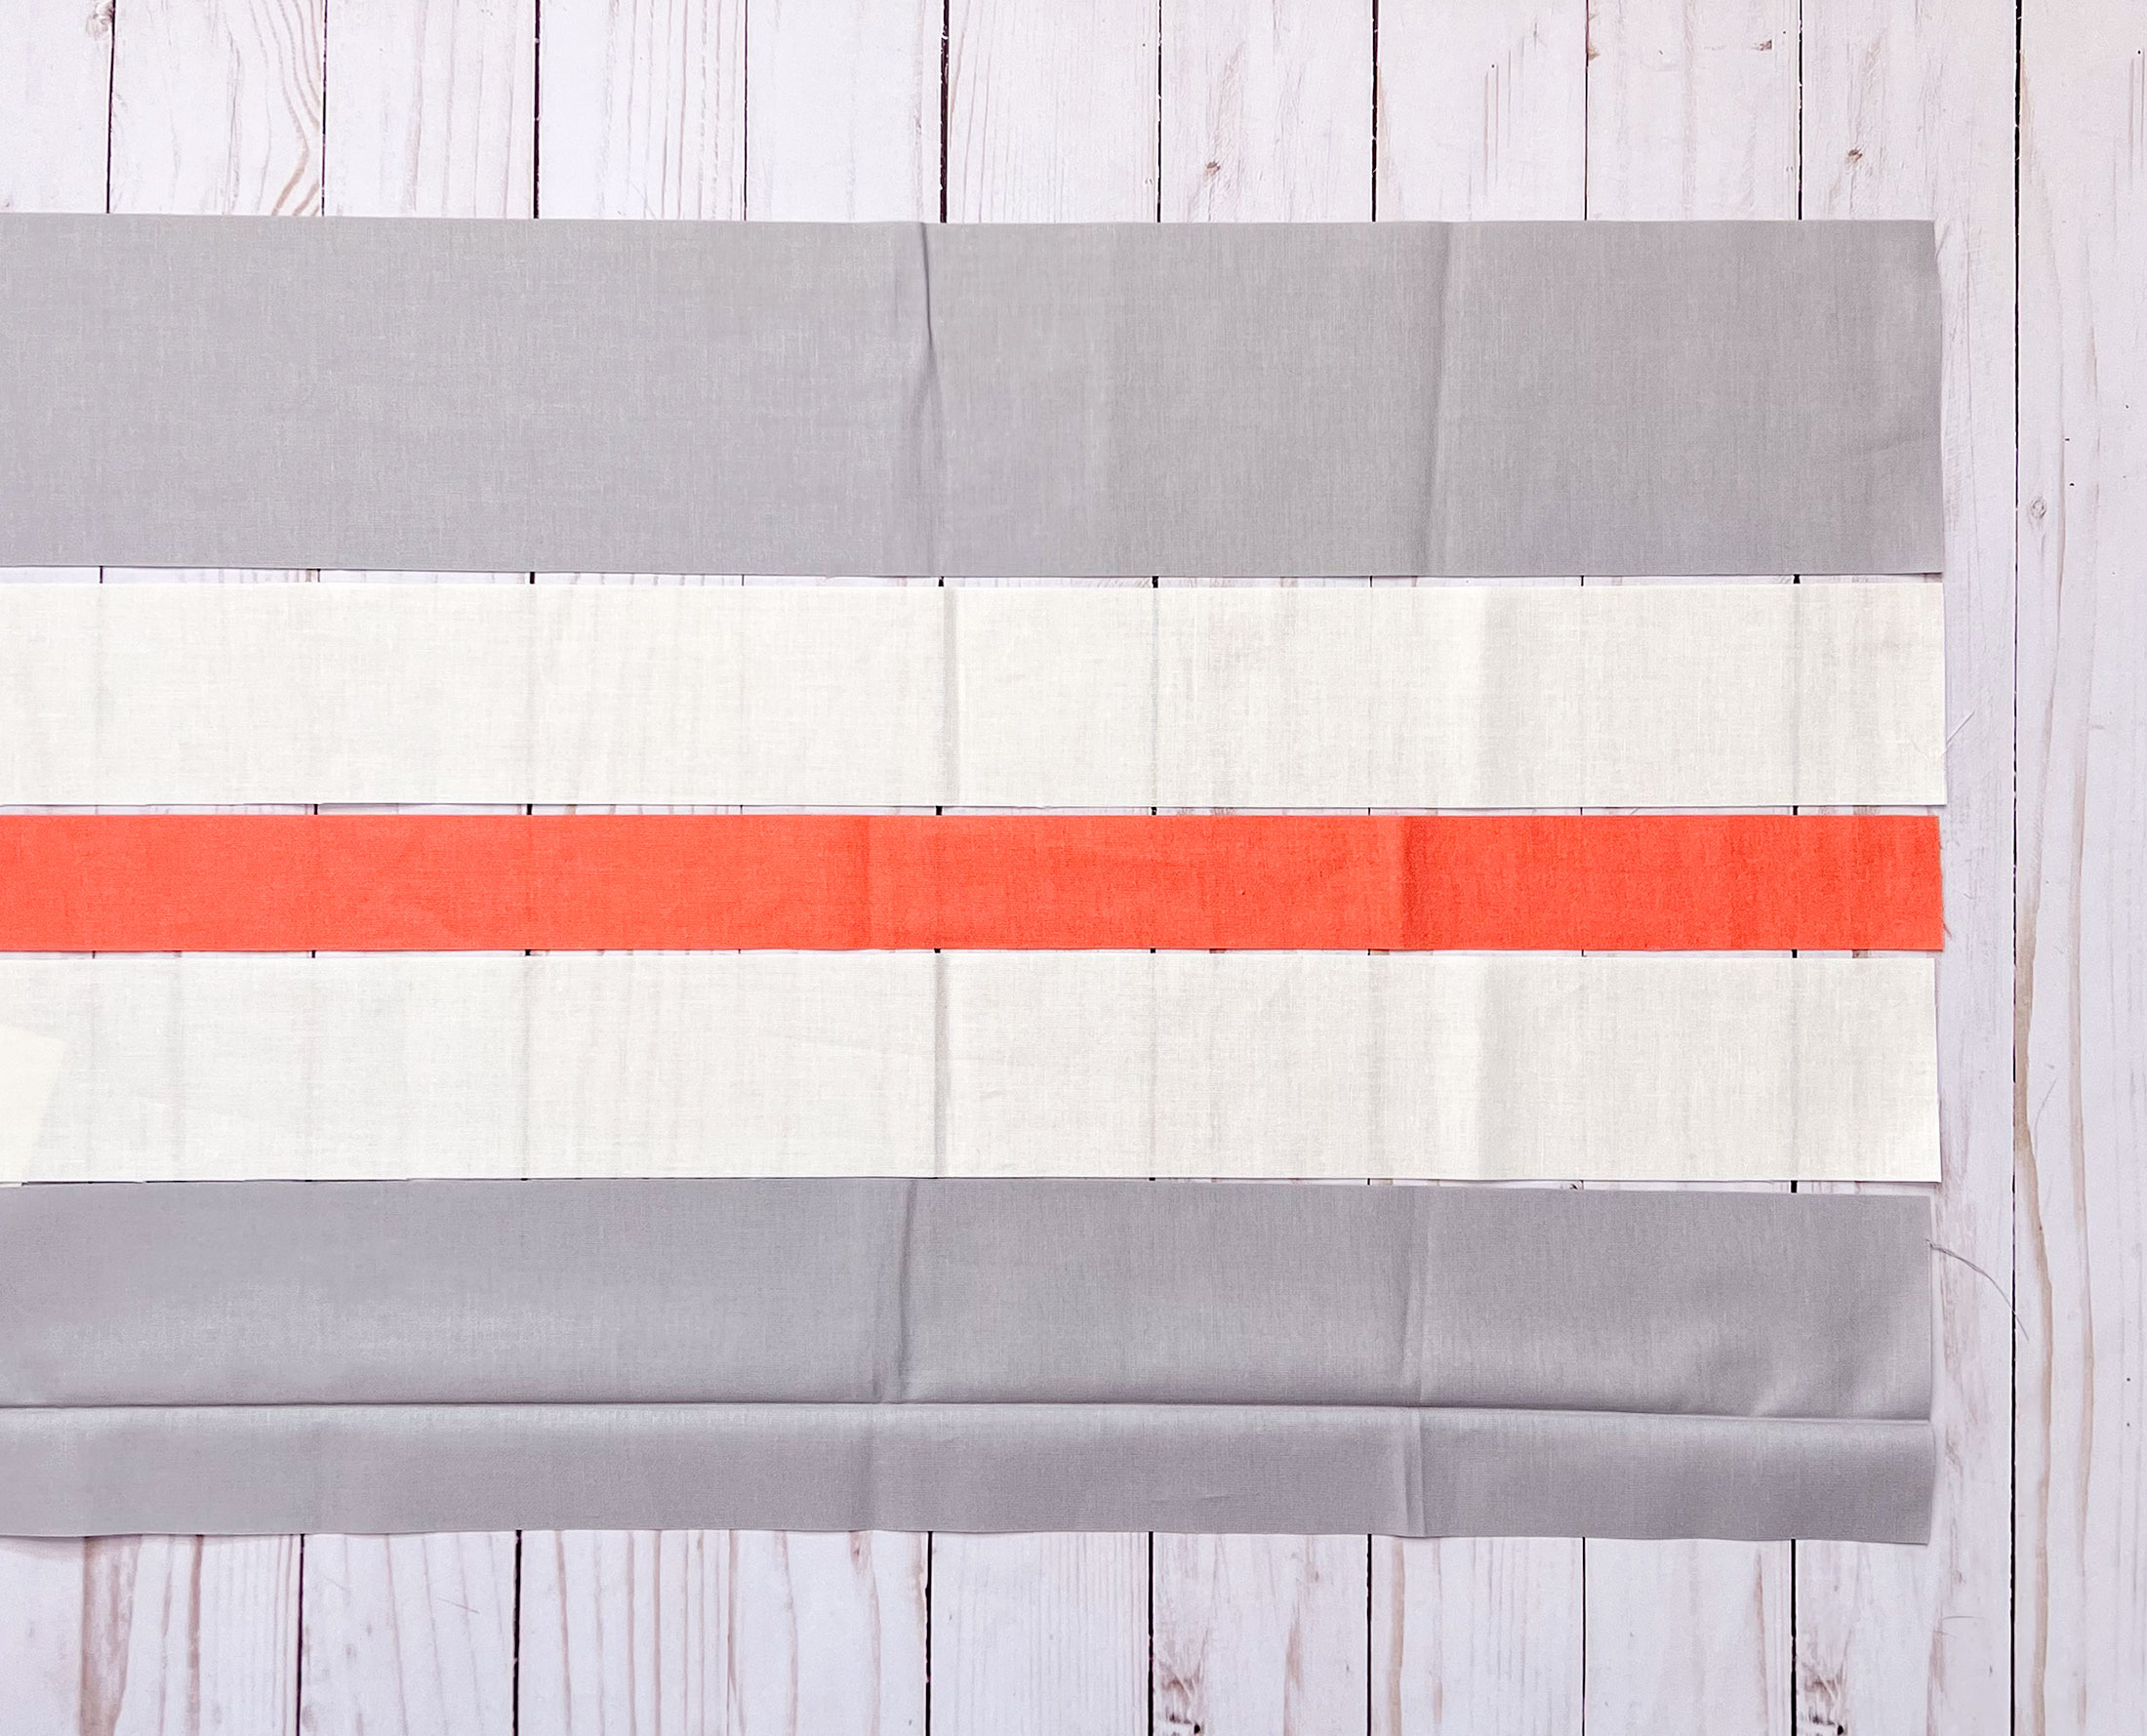
- Arrange TWO 4″ X WOP outer border strips, TWO- 2 1/2″ X WOP second border strips and ONE 1 1/2″ X WOP inner border strip as shown above.
- Sew the strips together.
- Press the seam allowance toward the darker fabric.
- Repeat for the second set of WOP strips and both sets of HOP strips to create 2- WOP border sets and 2- HOP border sets.
*Some tips for sewing these long strips: you want to make sure you are not stretching the fabric as you sew. Starching your fabric before cutting the strips may be helpful. Using pins is also helpful. Be sure as you sew the strips that the fabric isn’t being pulled down off your sewing surface. This will help prevent or minimize at least, wavy edges on your quilt.
Assembling the Star Frame Panel Quilt
- Sew TWO Star Cornerstone blocks to either side of ONE WOP Border Strips. Press the seam allowance toward the cornerstone blocks.
- Repeat for the second WOP Border strip and remaining TWO Star Cornerstone blocks.
- Sew the TWO HOP Border Strips to either side of the panel. Press the seam allowance toward the panel.
- Sew the TWO Cornerstone/WOP border sets to the top and bottom of the panel.
- Press the quilt top well.
- Finish your quilt as desired!
This is such a fun and satisfying finish. And a great way to let the art in a fabric panel shine. I already have plans for another version, using another panel! If you enjoyed this tutorial, I hope you will follow me over on my blog Ameroonie Designs and sign up for my newsletter, as well as join me on Instagram for tutorials, tips and lots of fun!
Happy Sewing, friends!