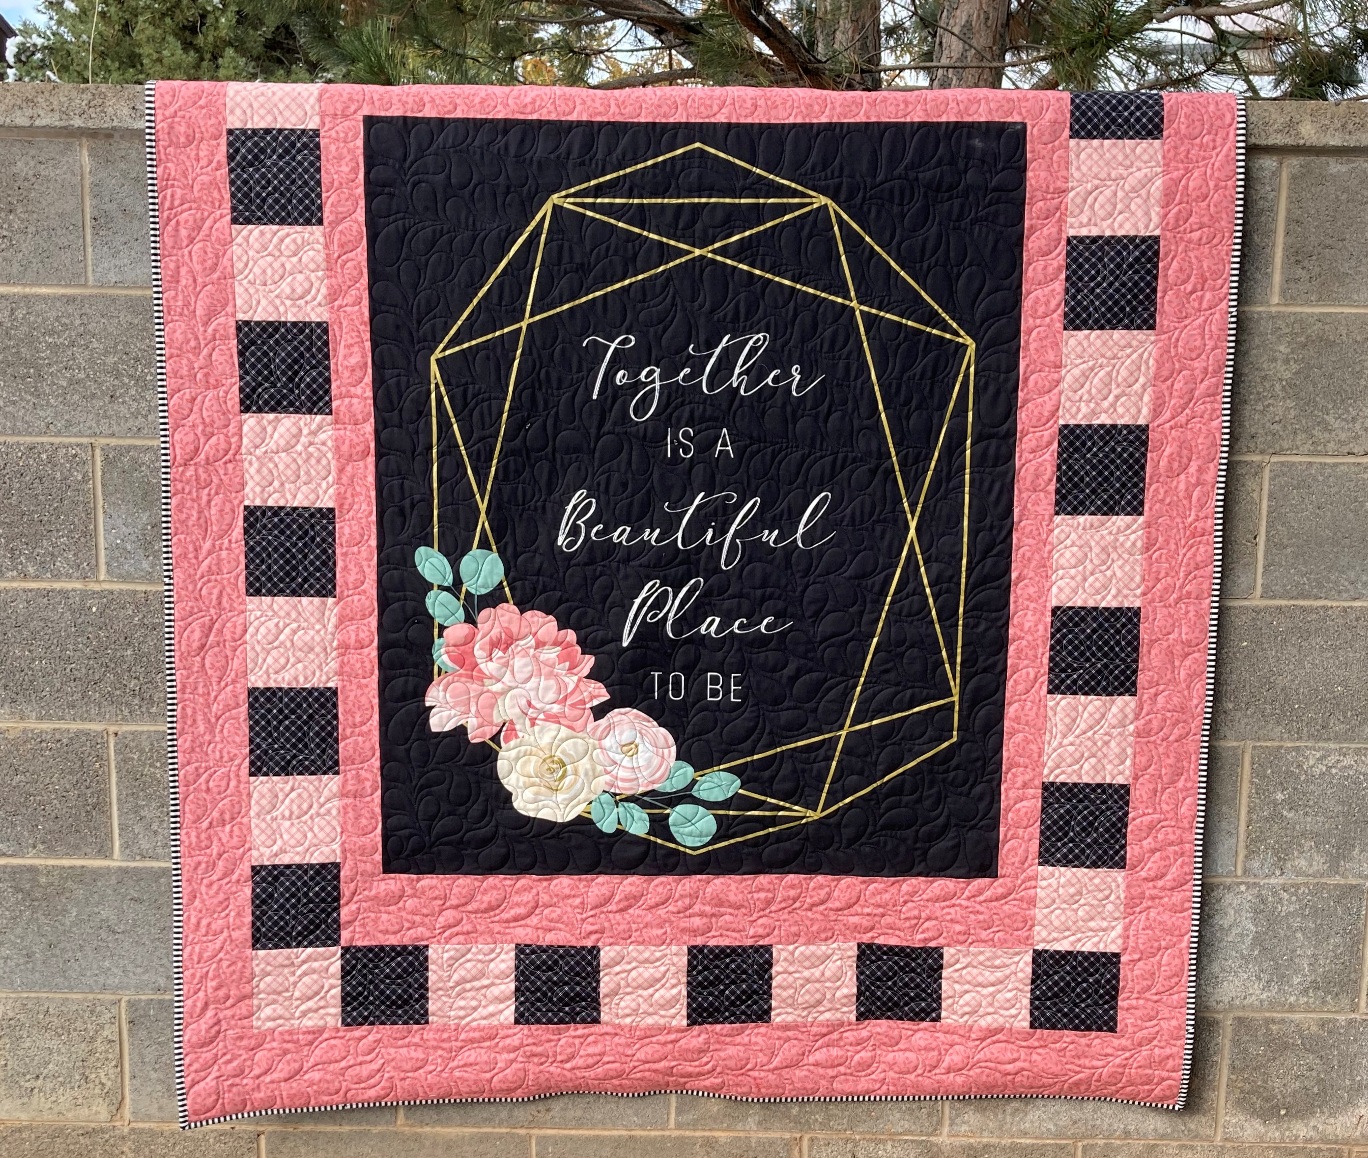
Hello Friends! It’s Melissa Corry from Happy Quilting here and I am thrilled to be bringing you a new quilt finish and a tutorial to go along with it! I just love a good panel, and they make for some stunning quilts!! I was immediately drawn to the gorgeous Together is a Beautiful Place to Be Panel from the At First Sight Fabric Line by Dani Mogstad. It is so beautiful in it’s simple elegance. So I thought, why not add some simply borders and make a stunning Wedding Quilt that you can whip up in no time at all 🙂
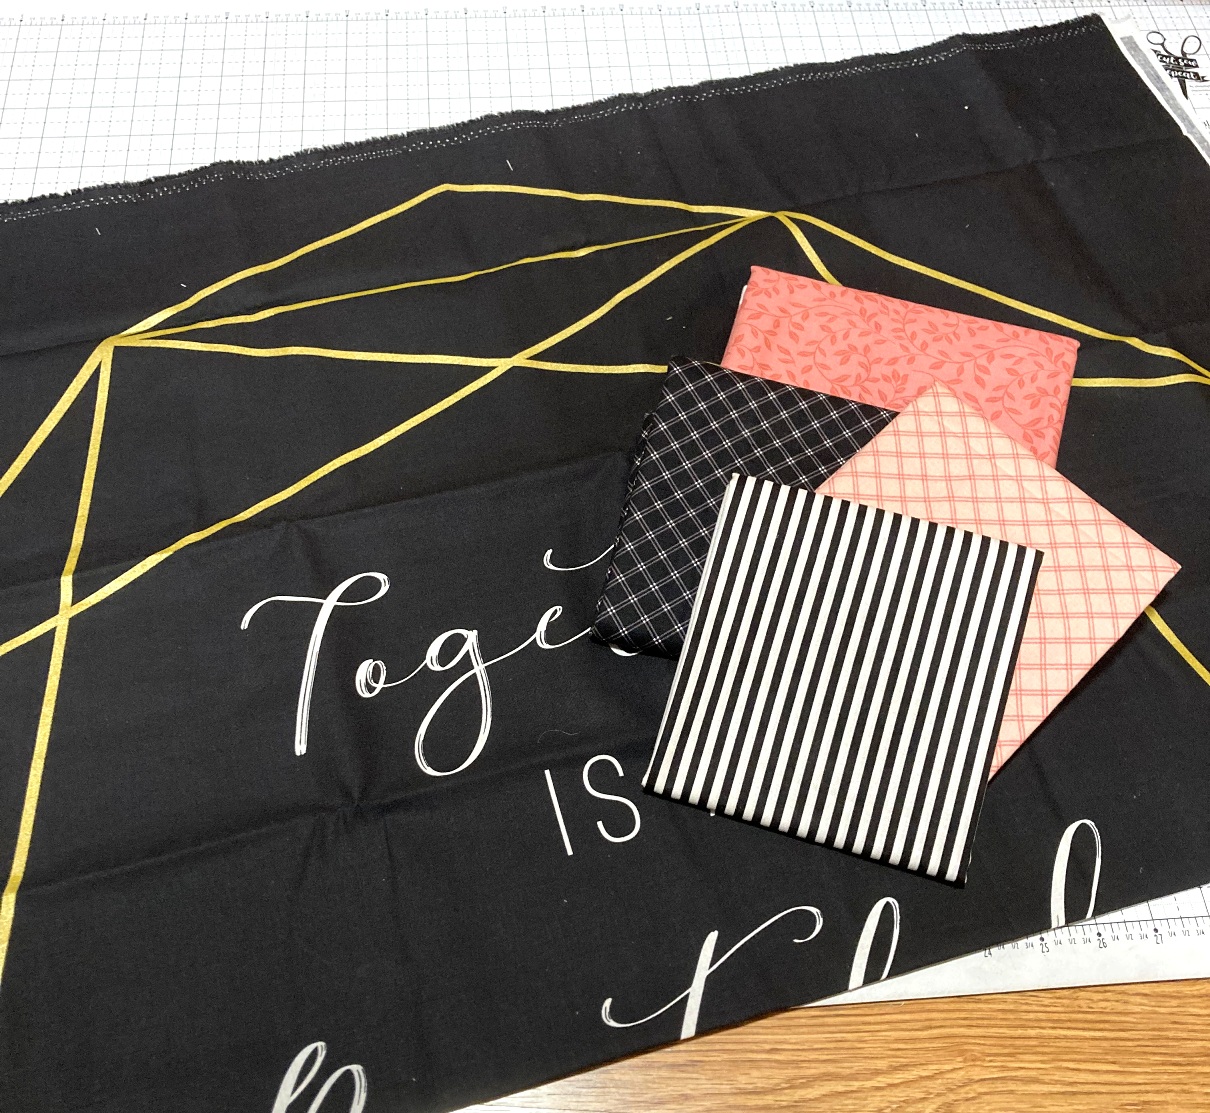
For our tutorial today, we are using the beautiful panel I mentioned and 4 prints from the At First Sight Line to make the borders. I choose the Coral Vine for the inner and outer border so that it would really pop against the black. Then the blush and black plaid print make up the patchwork border, which really brings back the colors of the panel. And of course, you can never go wrong with a striped binding, especially when it is in black and white 😉

The quilt finishes at 58″ x 70″ so it makes for a perfect lap size quilt. It is a wonderful go-to wedding gift when you need to whip up something quick that also looks amazing!! So, let’s get to making your own!!!
MATERIALS NEEDED:
To make your own Simple Wedding Panel Quilt you will need
1 At Fist Sight Panel Black Sparkle
1 1/2 Yards of At First Sight Vines Coral
1/2 Yard of At Fist Sight Plaid Blush
1/2 Yards of At First Sight Plaid Black
1/2 Yard of At First Stripe Black
3 1/2 Yards of Backing Fabric
STEP 1 – CUTTING
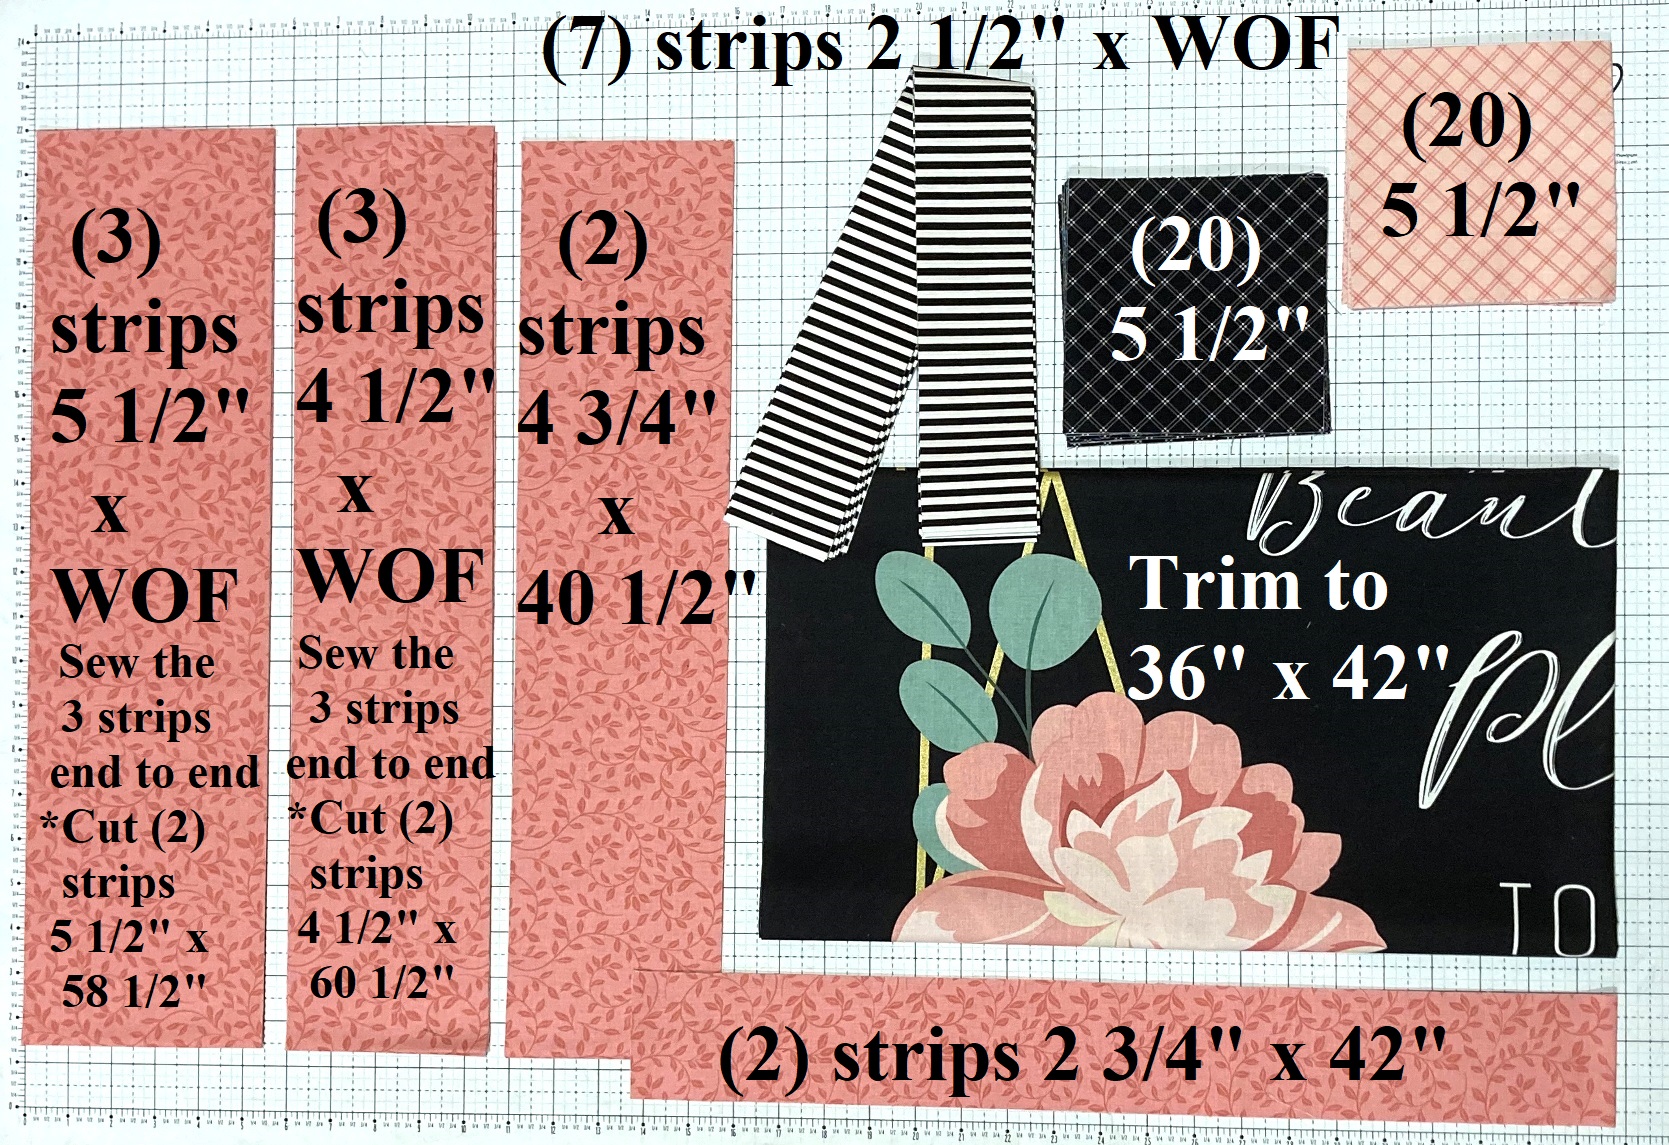
Begin by Trimming the Panel to measure 36″ x 42″. This is super close to the selvage, and if you have to cut a little selvage into the panel that is fine, as long as it is less than 1/4″ it will just go into the seam allowance.
From the Coral Vine Print cut:
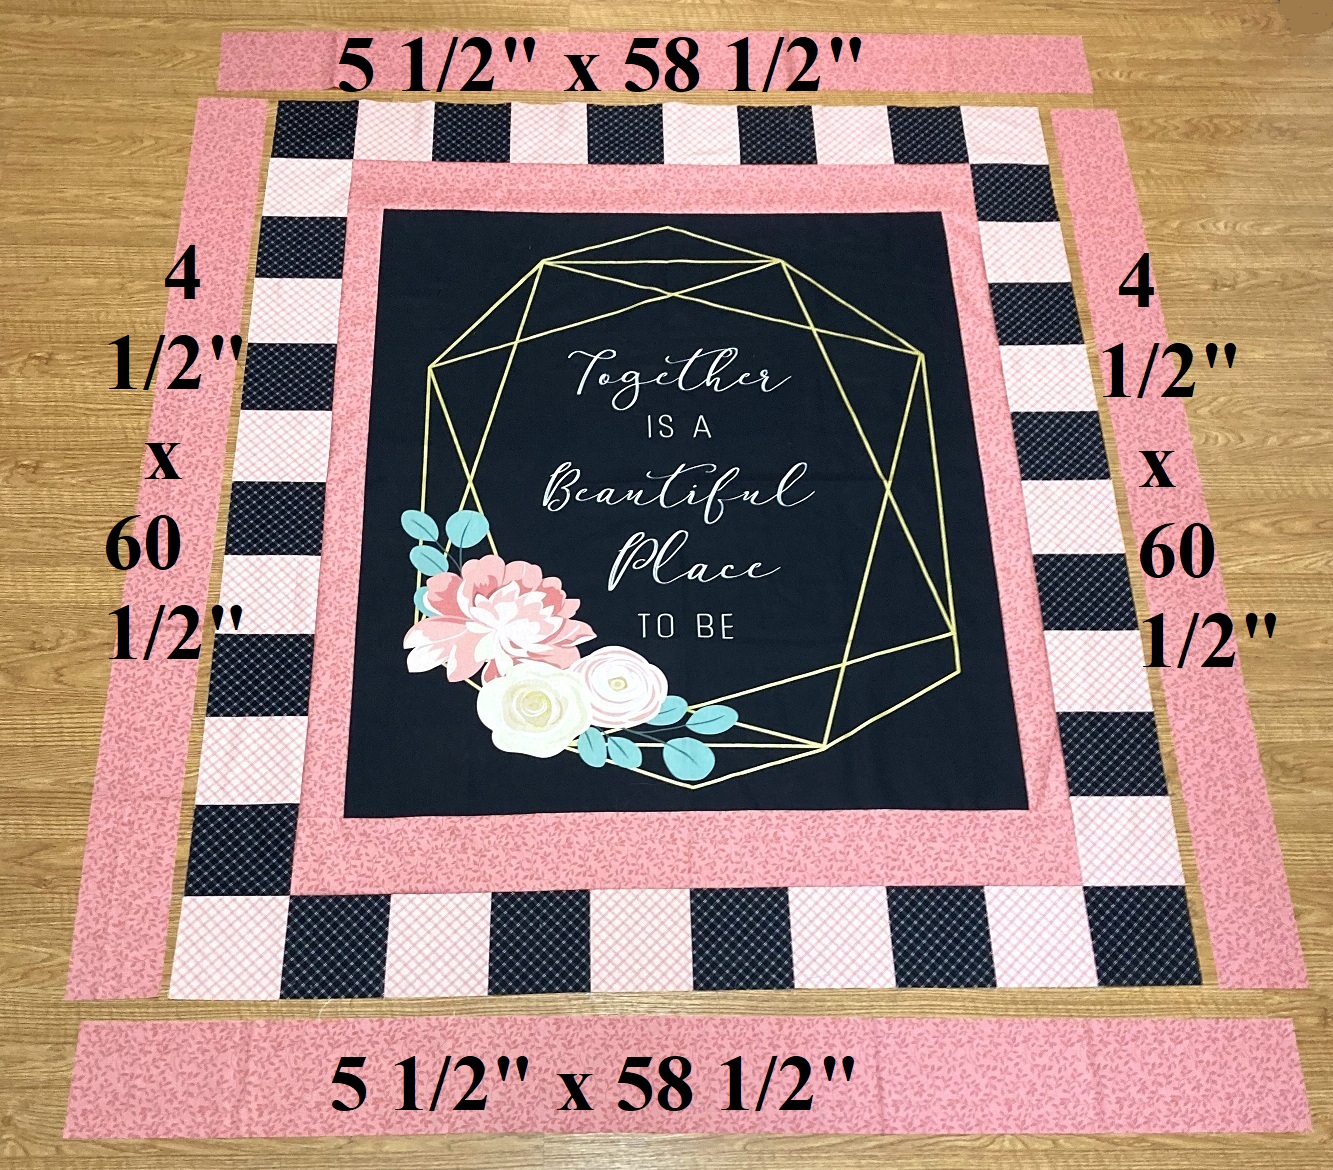
(3) 5 1/2″ x WOF strips. Sew the 3 strips end to end and subcut (2) 5 1/2″ x 58 1/2″ strips for the outer border.
(3) 4 1/2″ x WOF strips. Sew the 3 strips end to end and subcut (2) 4 1/2″ x 60 1/2″ strips for the outer border.
(2) 4 3/4″ x 40 1/2″ strips for the inner border.
(2) 2 3/4″ x 42″ strips for the inner border.
From the Black Plaid Print cut:
(20) 5 1/2″ x 5 1/2″ squares for the patchwork border.
From the Blush Plaid Print cut:
(20) 5 1/2″ x 5 1/2″ squares for the patchwork border.
From the Stripe Fabric cut:
(7) 2 1/2″ x WOF Strips for binding.
STEP 2 – ADDING THE INNER BORDER
And with the cutting done, we are ready to do some stitching. Layout the Panel and the 4 Inner Border Coral Strips as shown below.
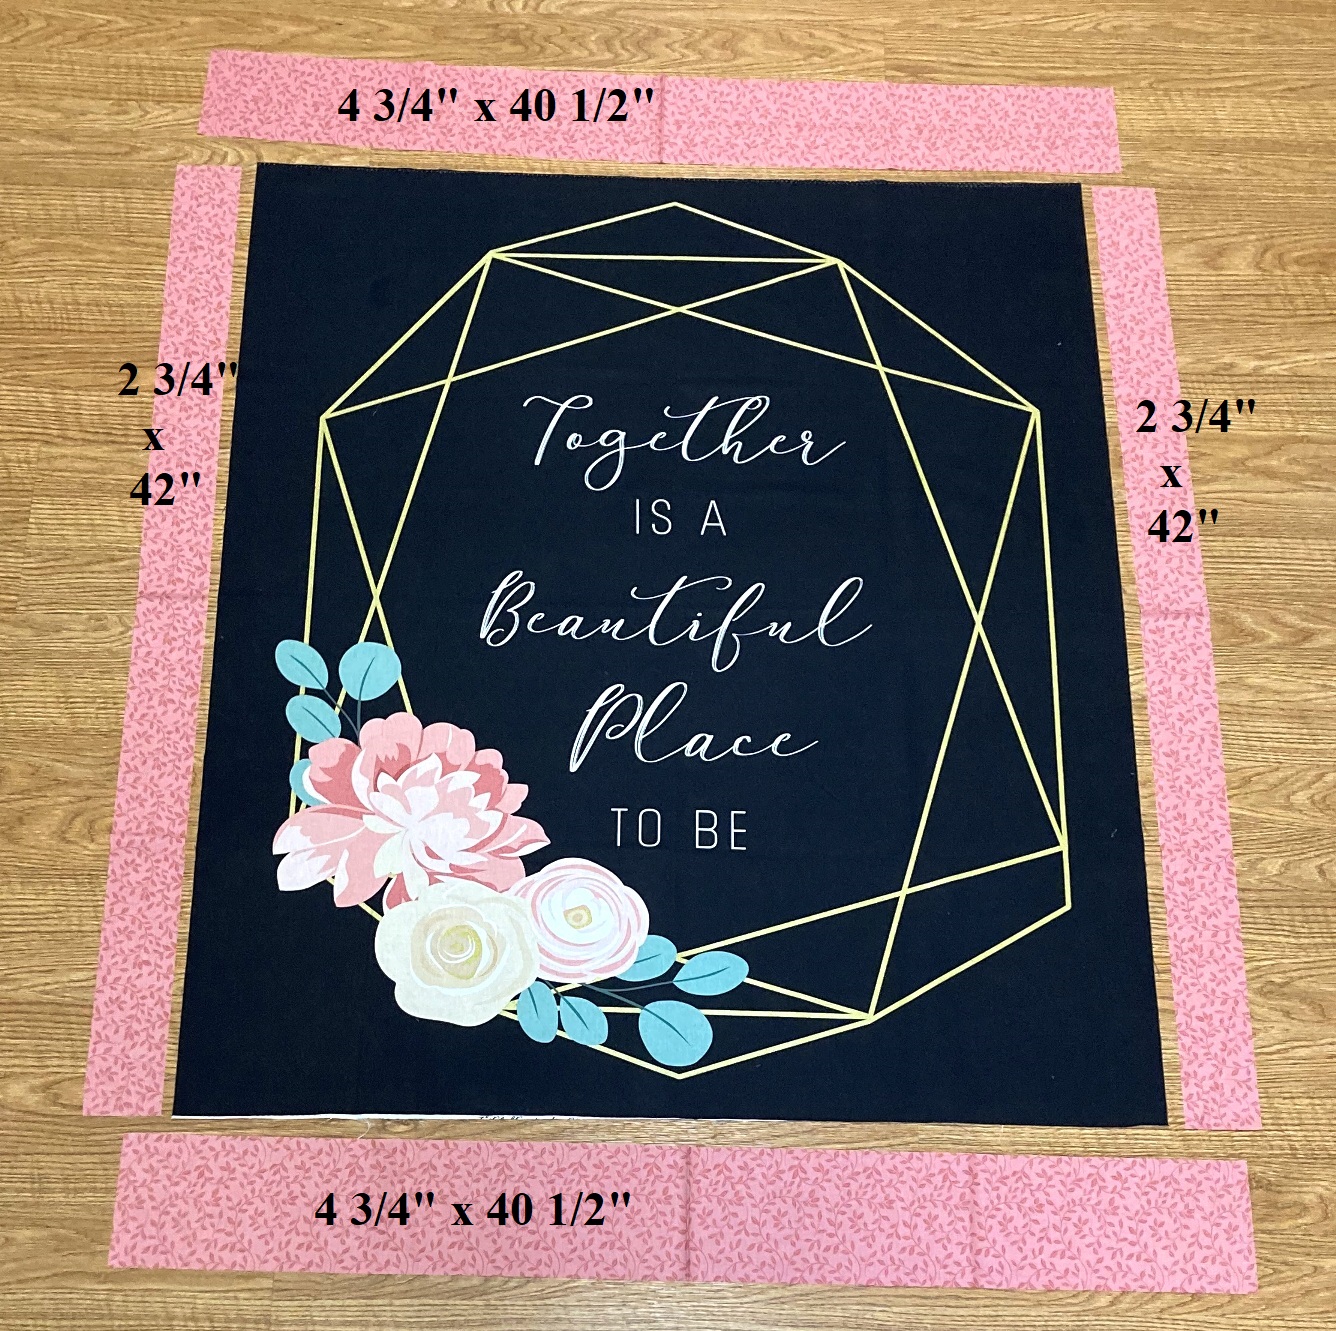
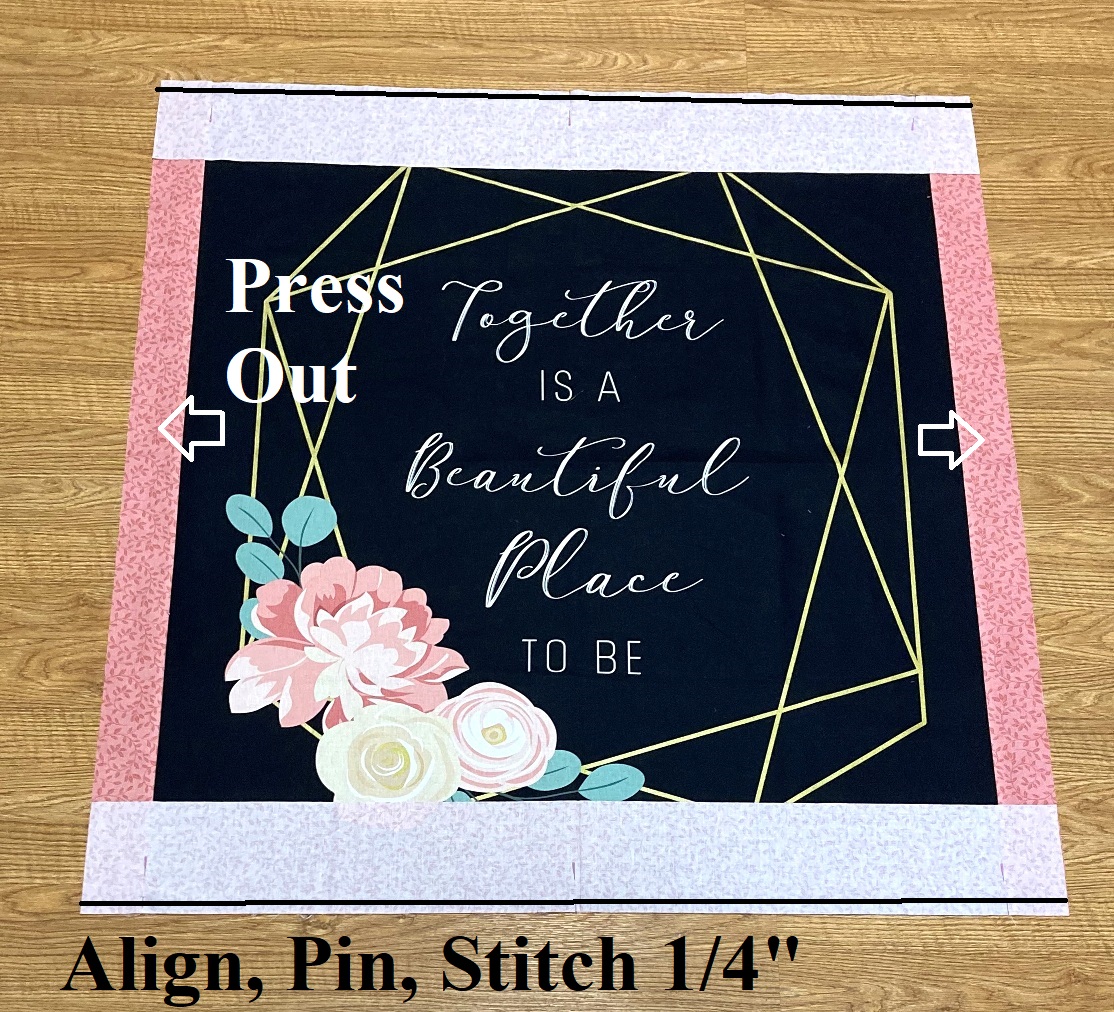
Place the side strips onto the sides of the Panel with right sides together. Align and pin the strips, and then stitch a 1/4″ seam along the two edges.

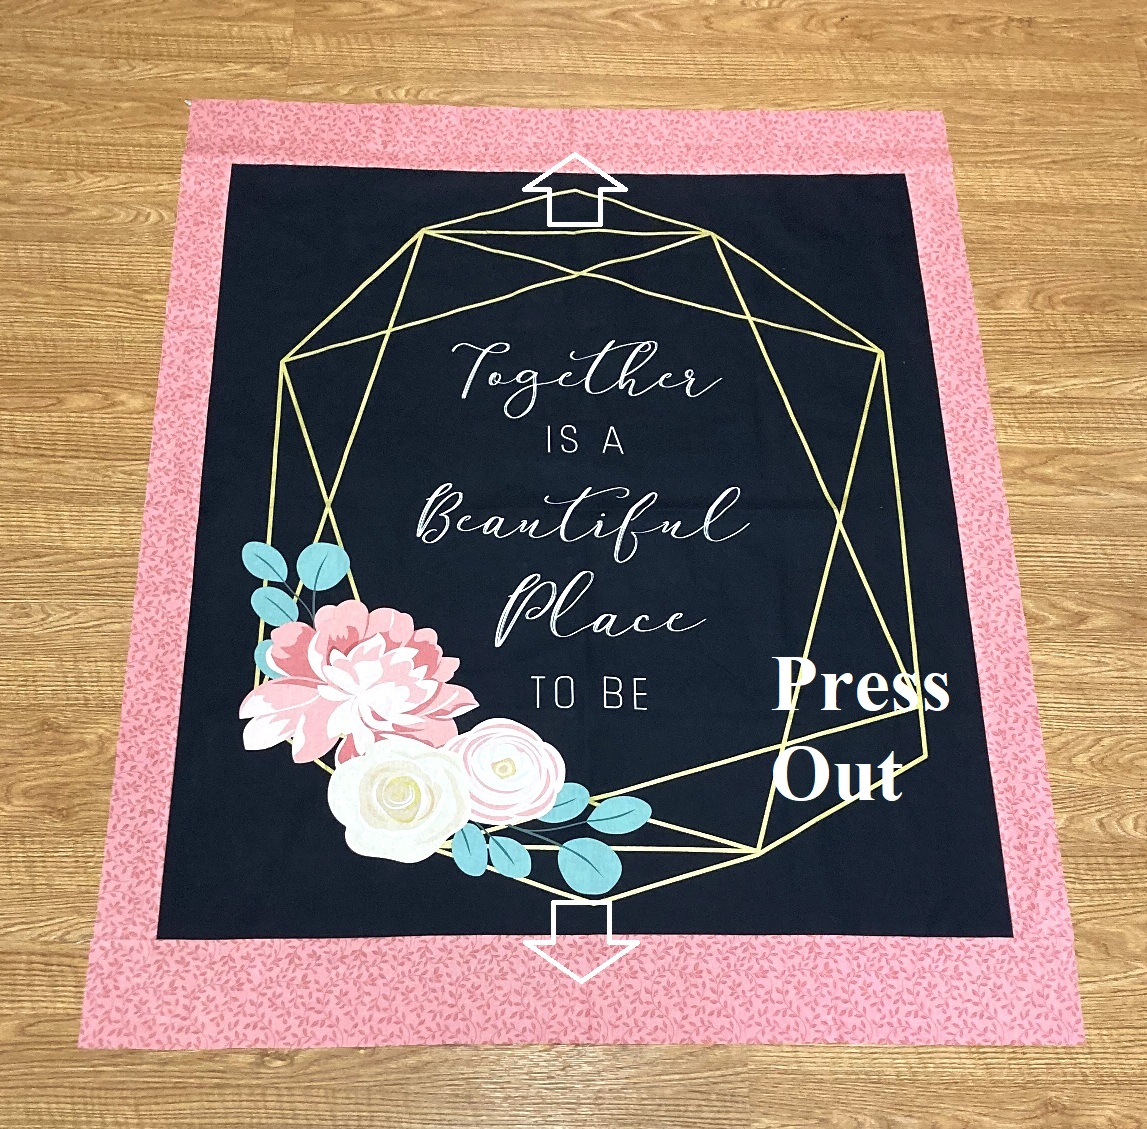
Press the seams out towards the Coral strips. Place the top and bottom strips onto the top and bottom of the Panel with right sides together. Align and pin the strips, and then stitch a 1/4″ seam along the two edges.
Press the seams out towards the Coral strips. You can now set the bordered panel aside for a minute while we make the patchwork border.
STEP 3 – ADDING THE PATCHWORK BORDER
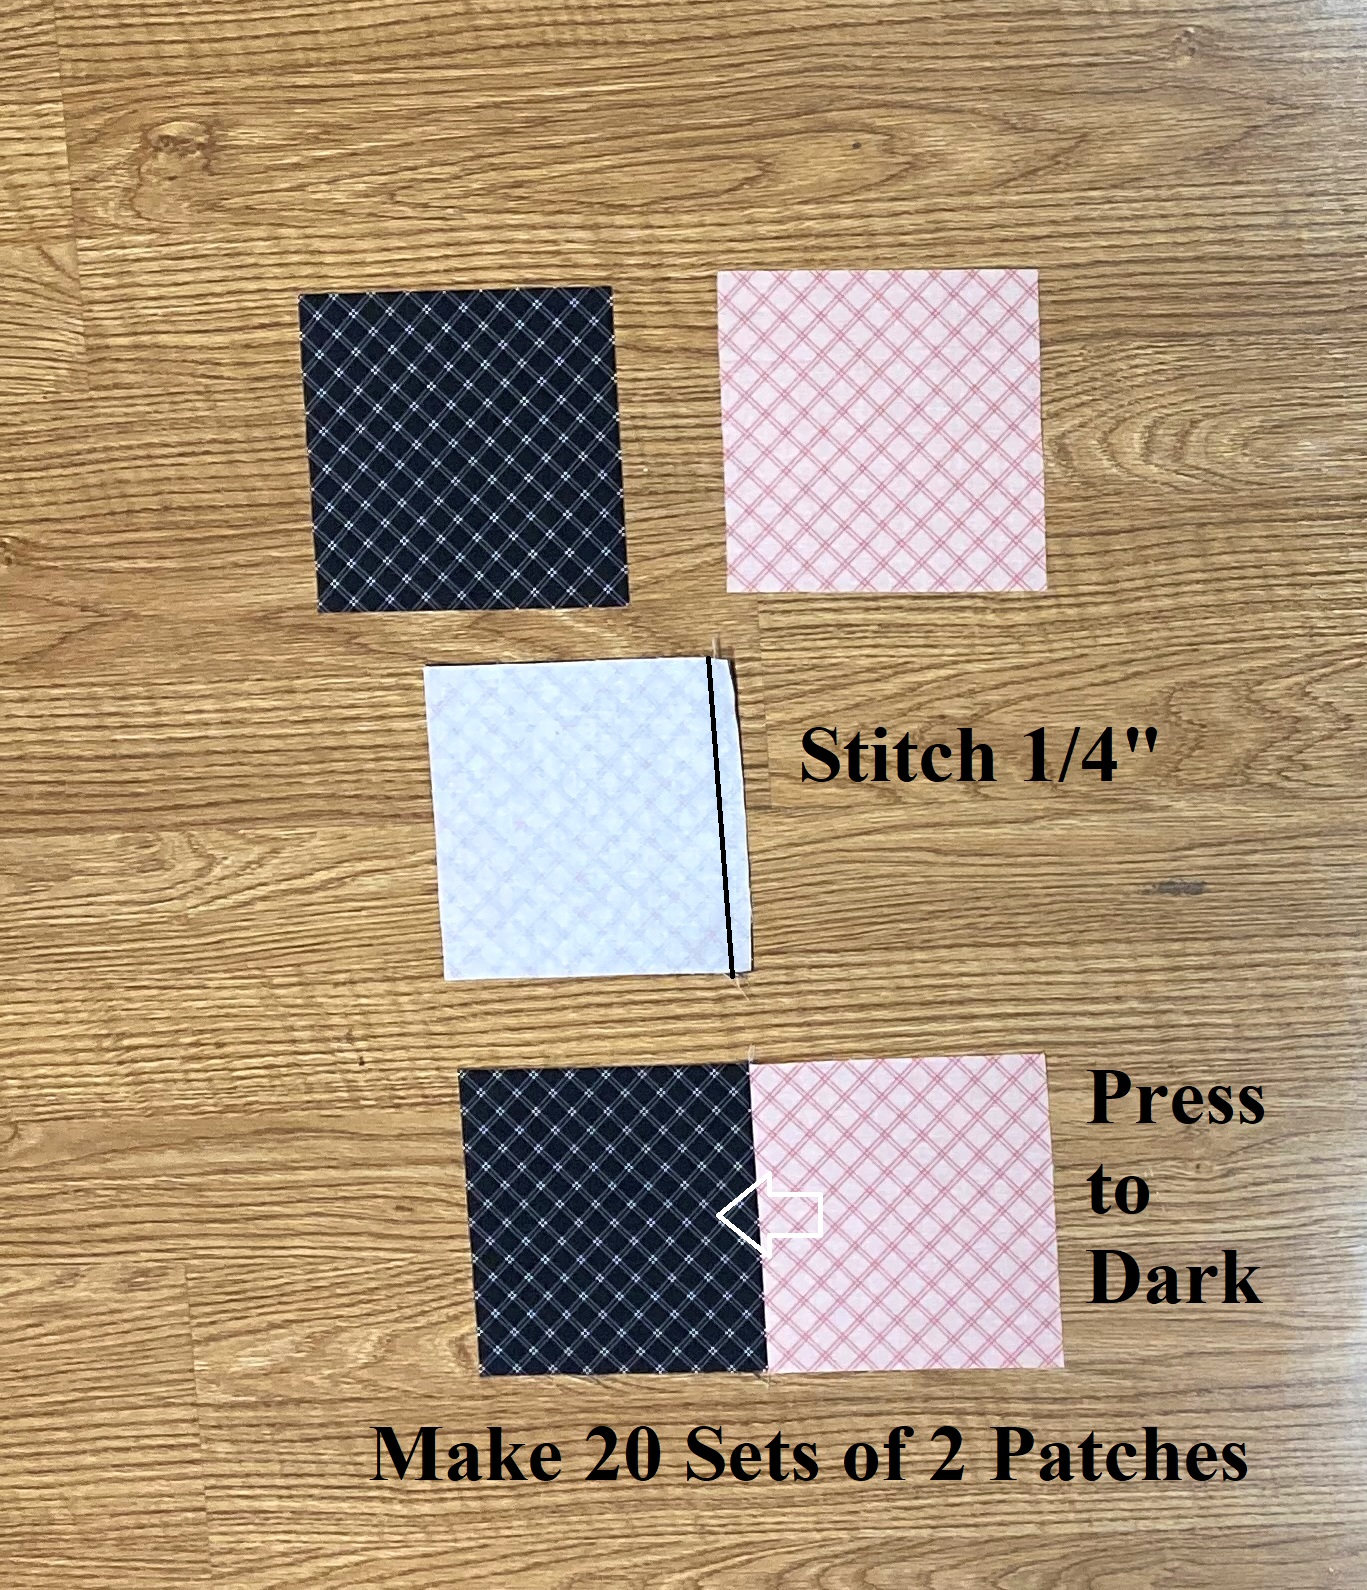
Layout a Black Plaid and a Blush Plaid 5 1/2″ square as shown below. Place the Blush square onto the Black square with right sides together and align the raw edges. Stitch a 1/4″ seam along the edge. Press the seam towards the Black square. Repeat and Chain Stitch the pairs to make a total of 20 Two Patch Units.
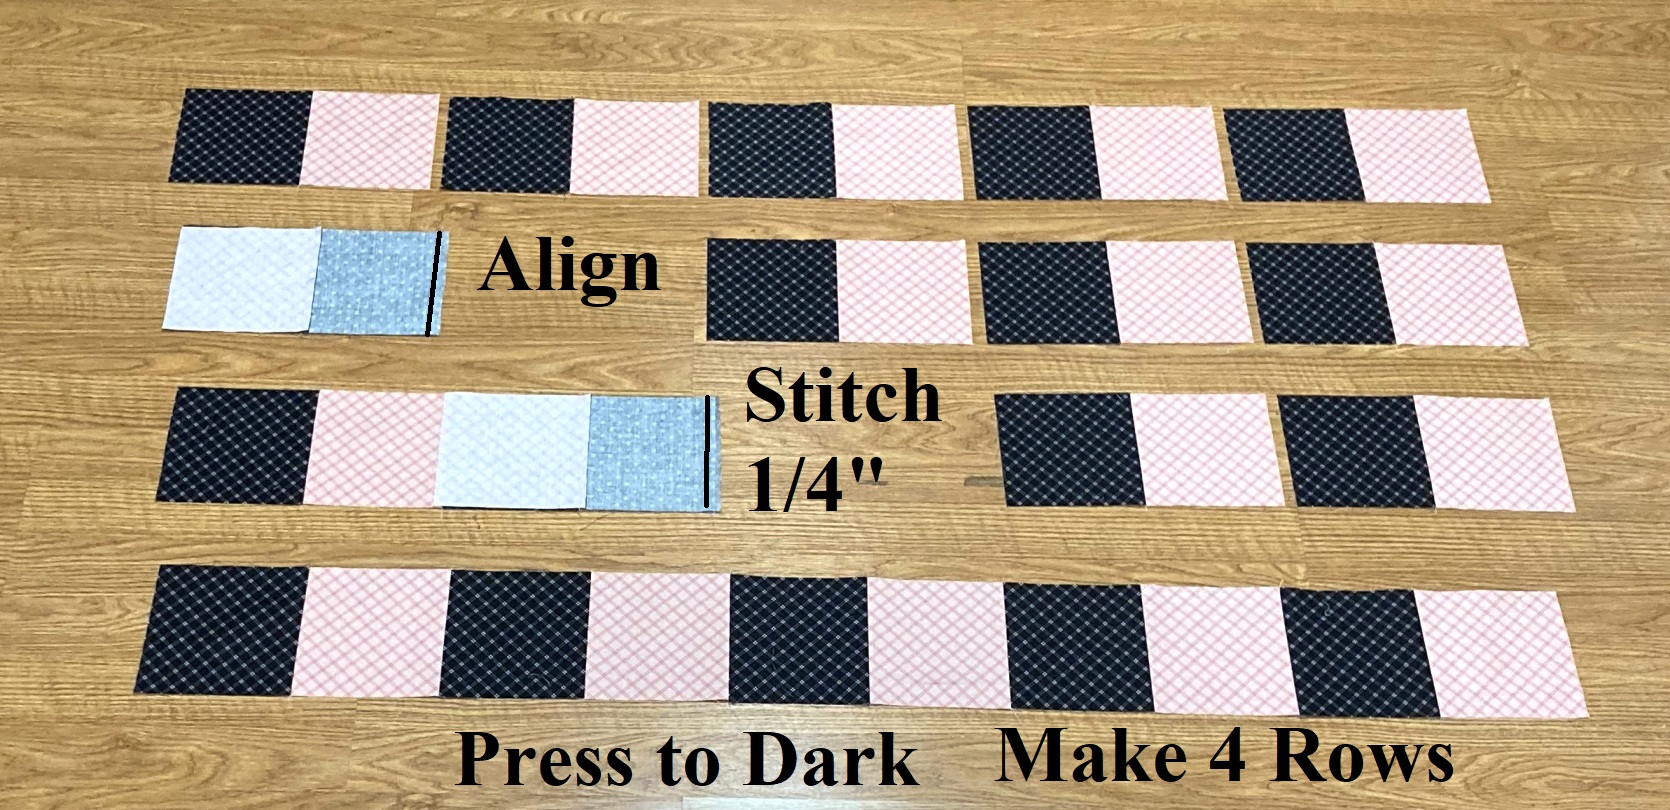
Layout 5 Two Patch Units in a row as shown below. Place the second Two Patch Unit in the row onto the first with right sides together and align the raw edges. Stitch a 1/4″ seam along the pinned edge. Then place the third Two Patch Unit in the row onto the now sewn together first and second units, with right sides together. Align and stitch a 1/4″ seam. Continue in this fashion until you have sewn all 5 Two Patch Units into a row. Press the seams towards the Black squares. Repeat and Chain Stitch to make 4 Patchwork Rows Total.
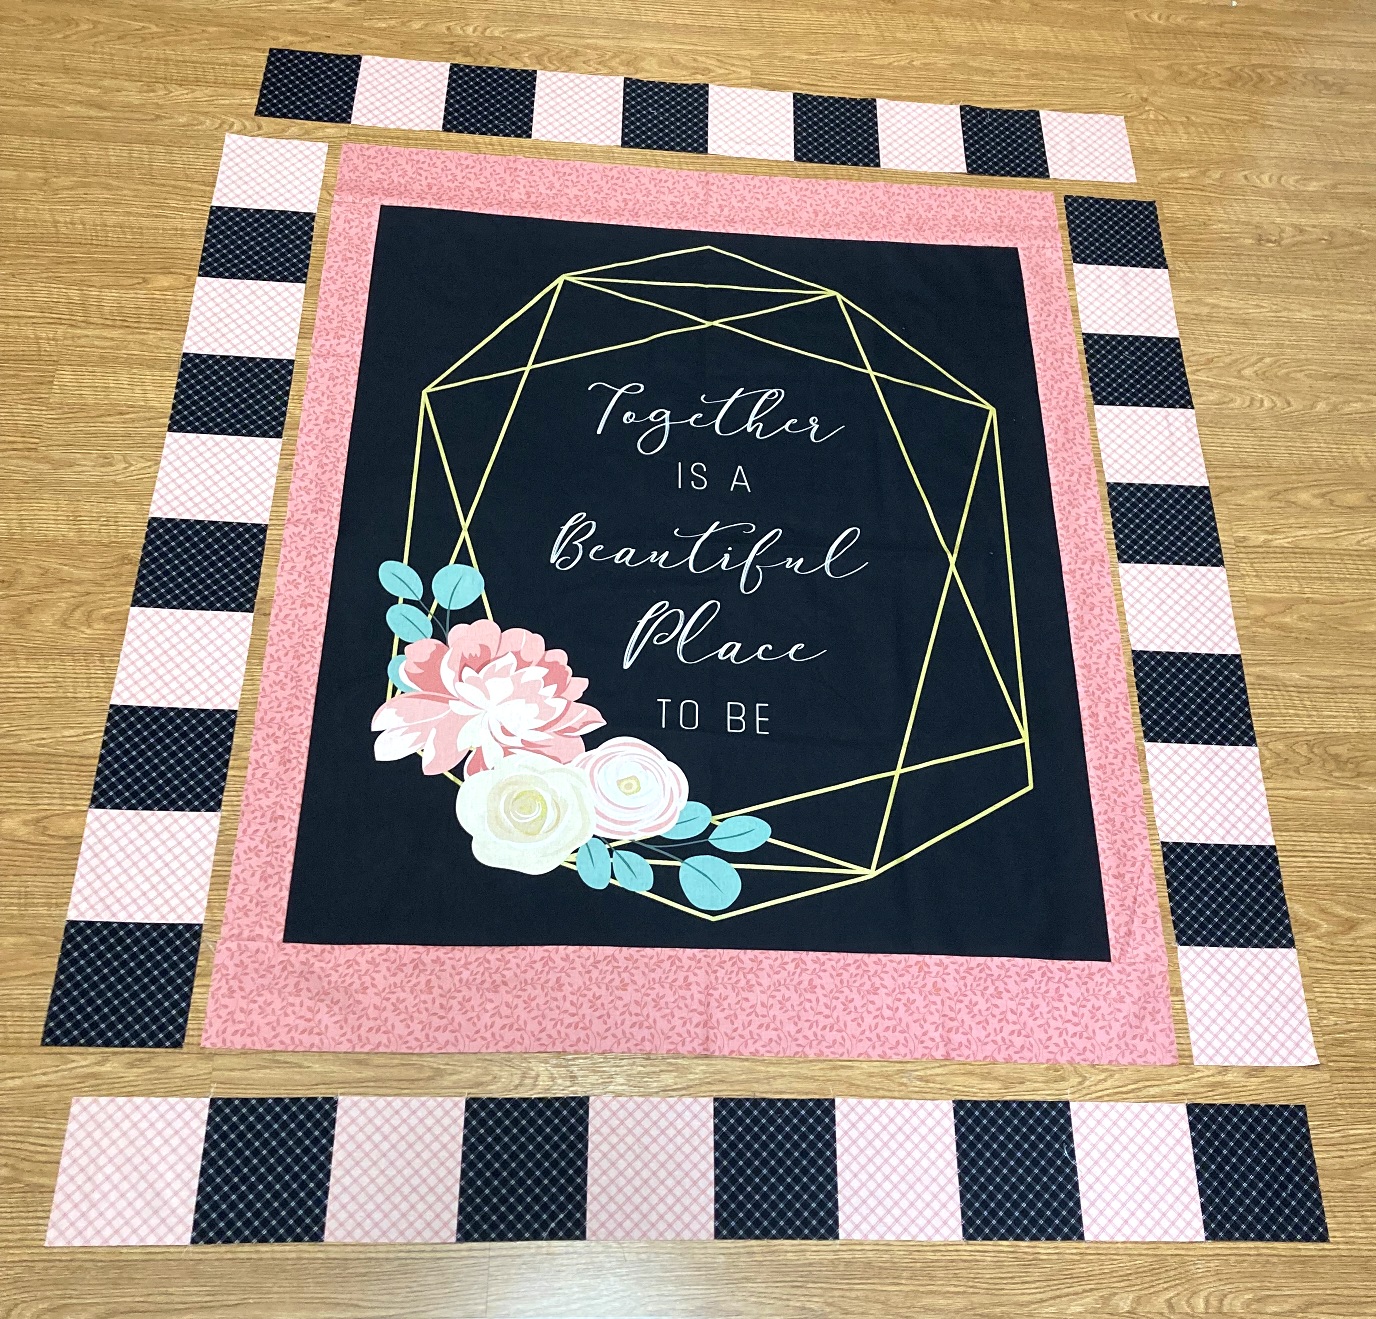
Layout the Bordered Panel and the 4 Patchwork Rows as shown below, taking note of the placement of the Blush and Black squares.
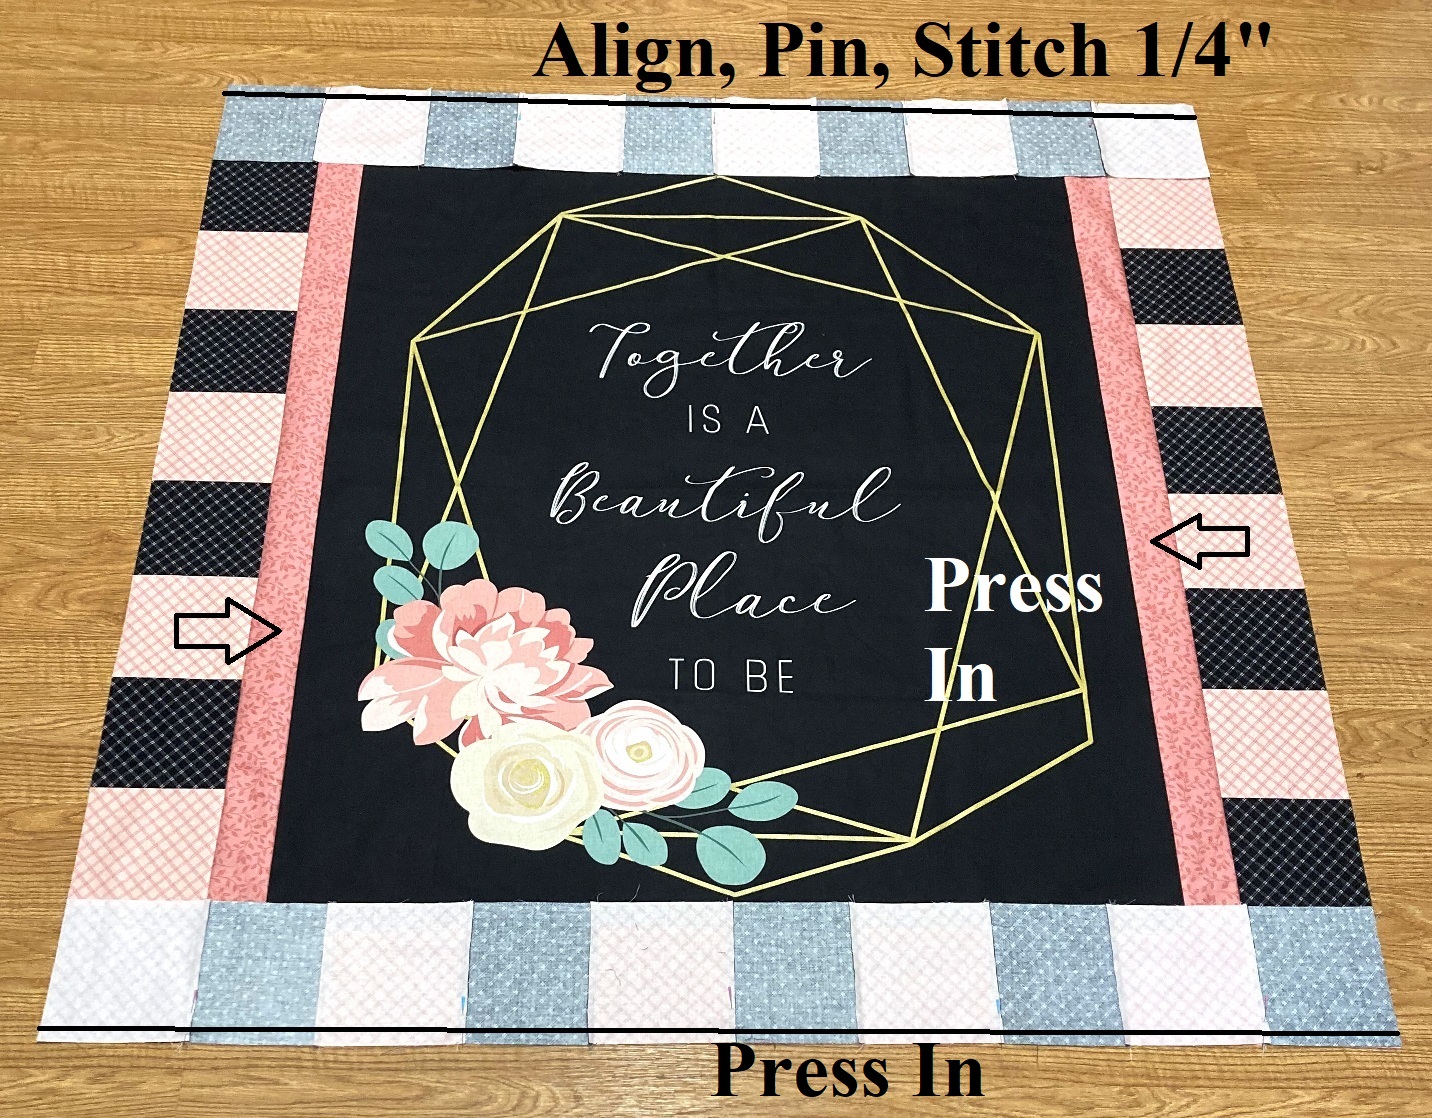
Place the side Patchwork Rows onto the sides of the Bordered Panel with right sides together. Align and pin the rows, and then stitch a 1/4″ seam along the two edges.
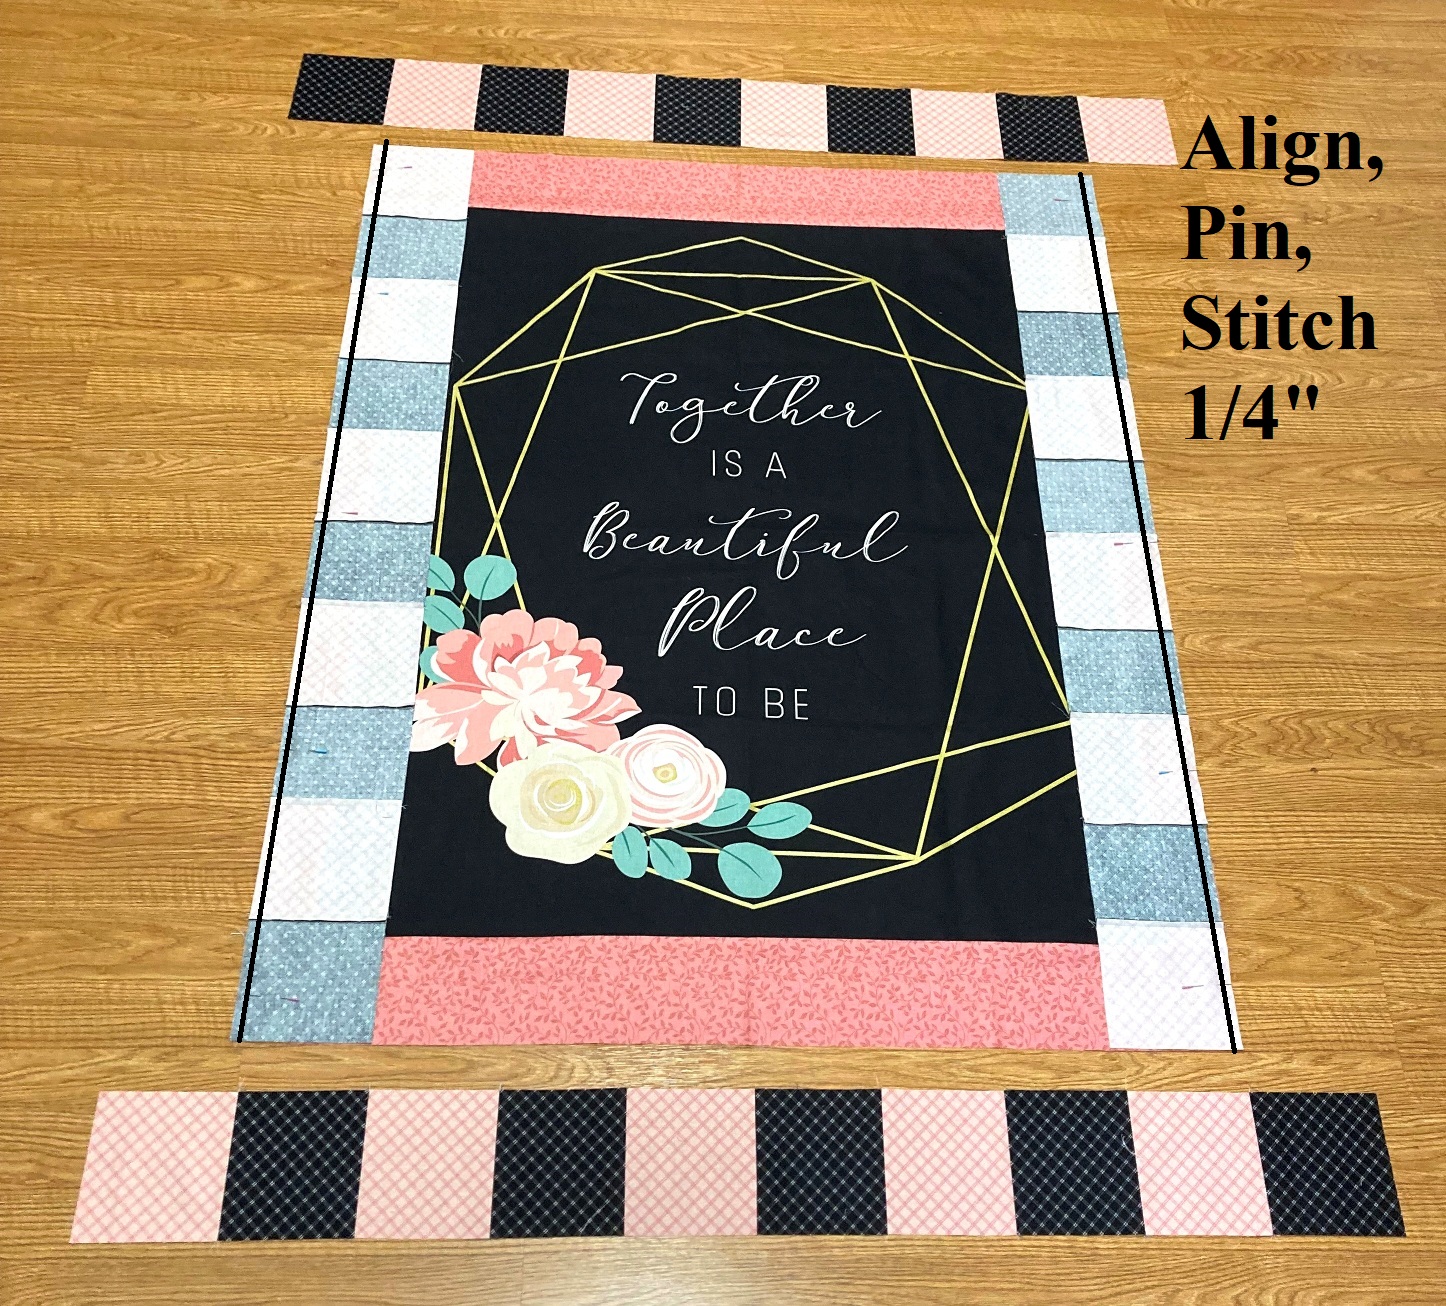
Press the seams in towards the Coral strips. Place the top and bottom Patchwork rows onto the top and bottom of the Bordered Panel with right sides together. Align and pin the rows, and then stitch a 1/4″ seam along the two edges. Once again, press the seam allowances in towards the Coral strips.
STEP 4 – ADDING THE OUTER BORDER
And now you are ready to add the final Outer Border. Layout the Double Bordered Panel and the 4 Outer Border Coral Strips as shown below.
Place the side strips onto the sides of the Double Bordered Panel with right sides together. Align and pin the strips, and then stitch a 1/4″ seam along the two edges.
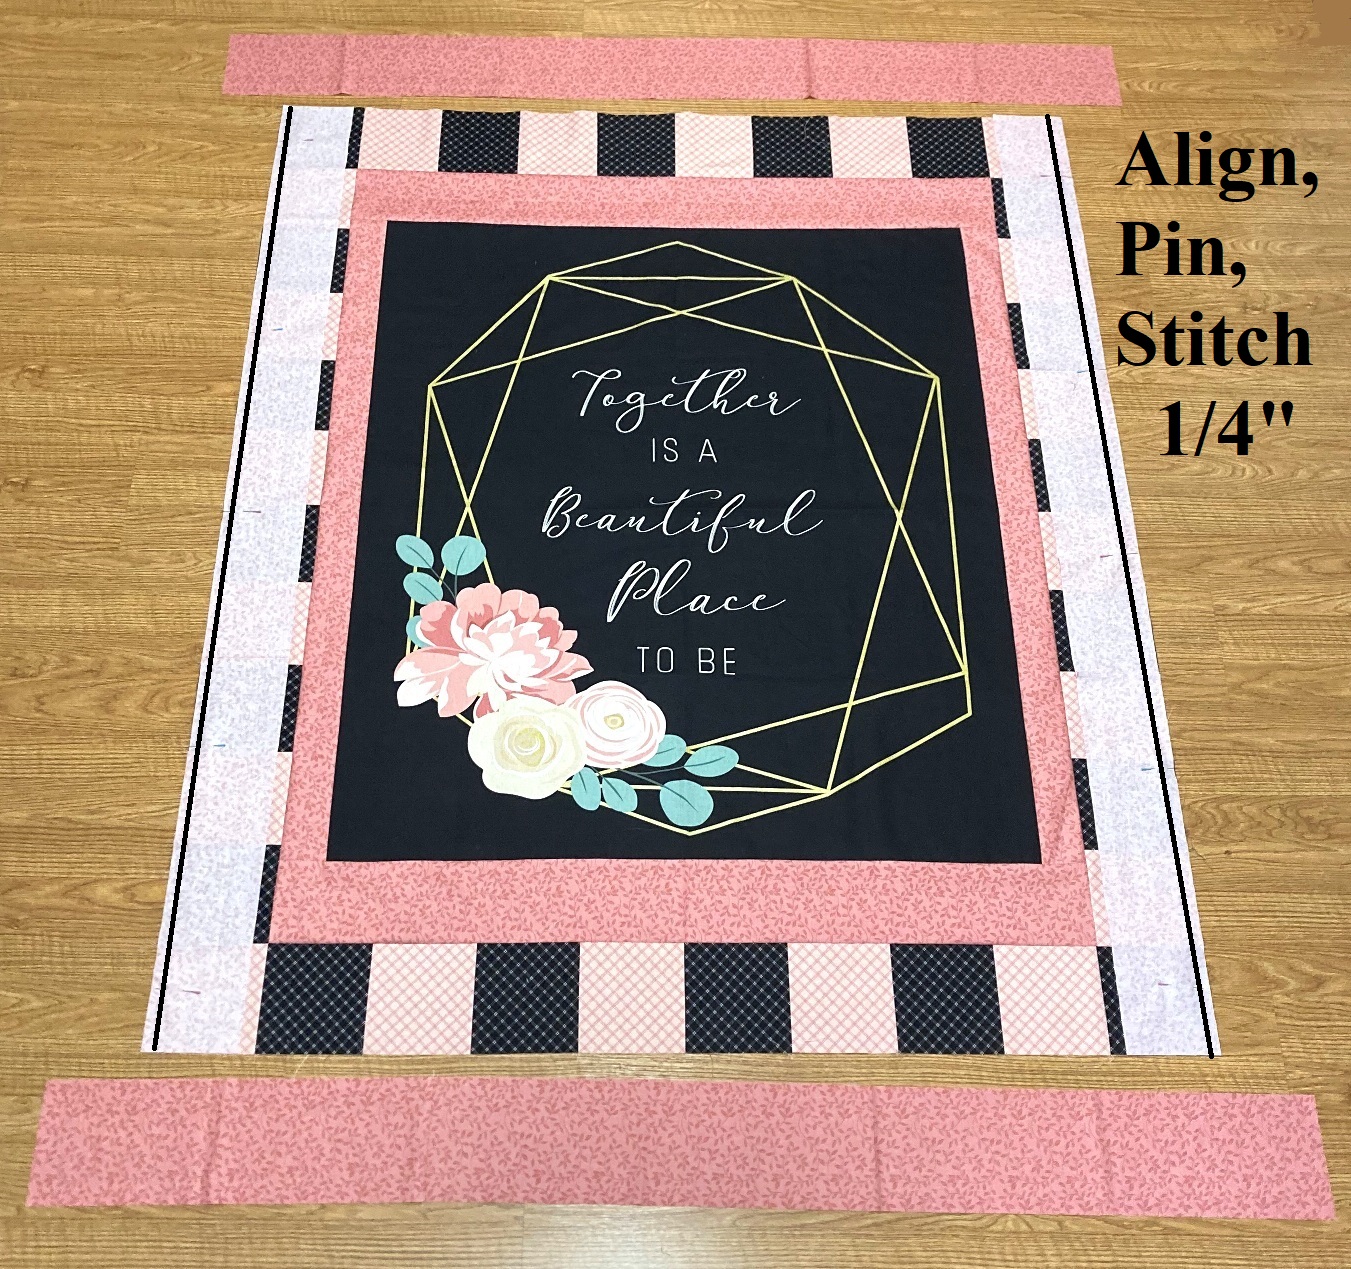
Press the seams out towards the Coral strips. Place the top and bottom strips onto the top and bottom of the Panel with right sides together. Align and pin the strips, and then stitch a 1/4″ seam along the two edges. Once again, press the seams out towards the Coral strips.

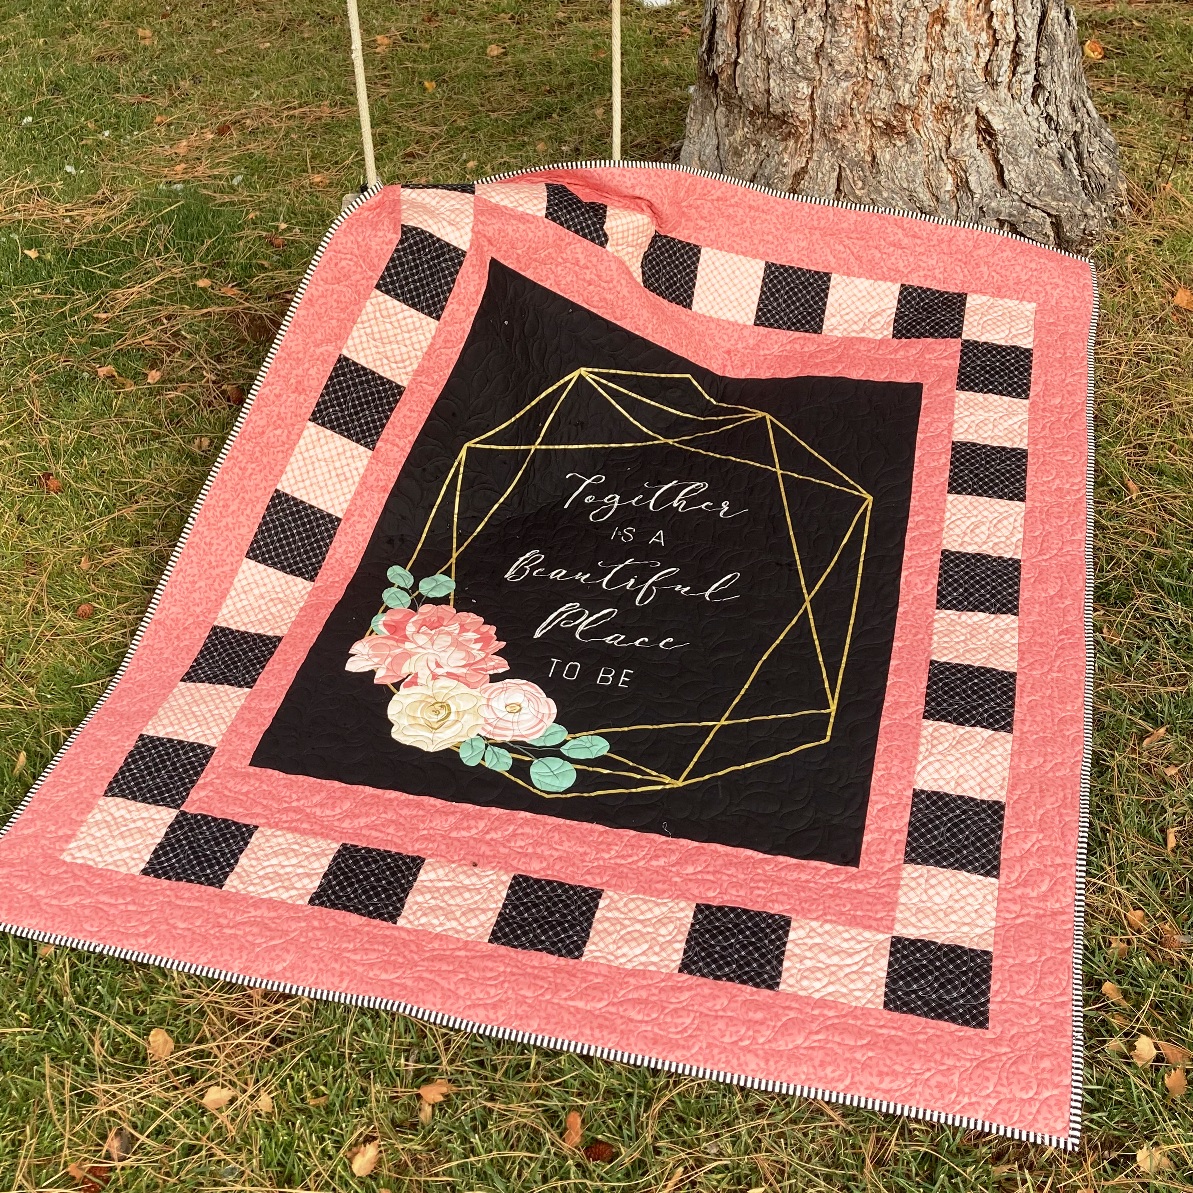
And just like that, you have a beautiful 58 1/2″ x 70 1/2″ finished Simple Wedding Quilt Top!!!! So fun!!!!
Isn’t it just so great how you can just add a few borders to a gorgeous panel and make such a striking quilt!!! Just so fast and so fun!!!

STEP 5 – FINISHING THE QUILT
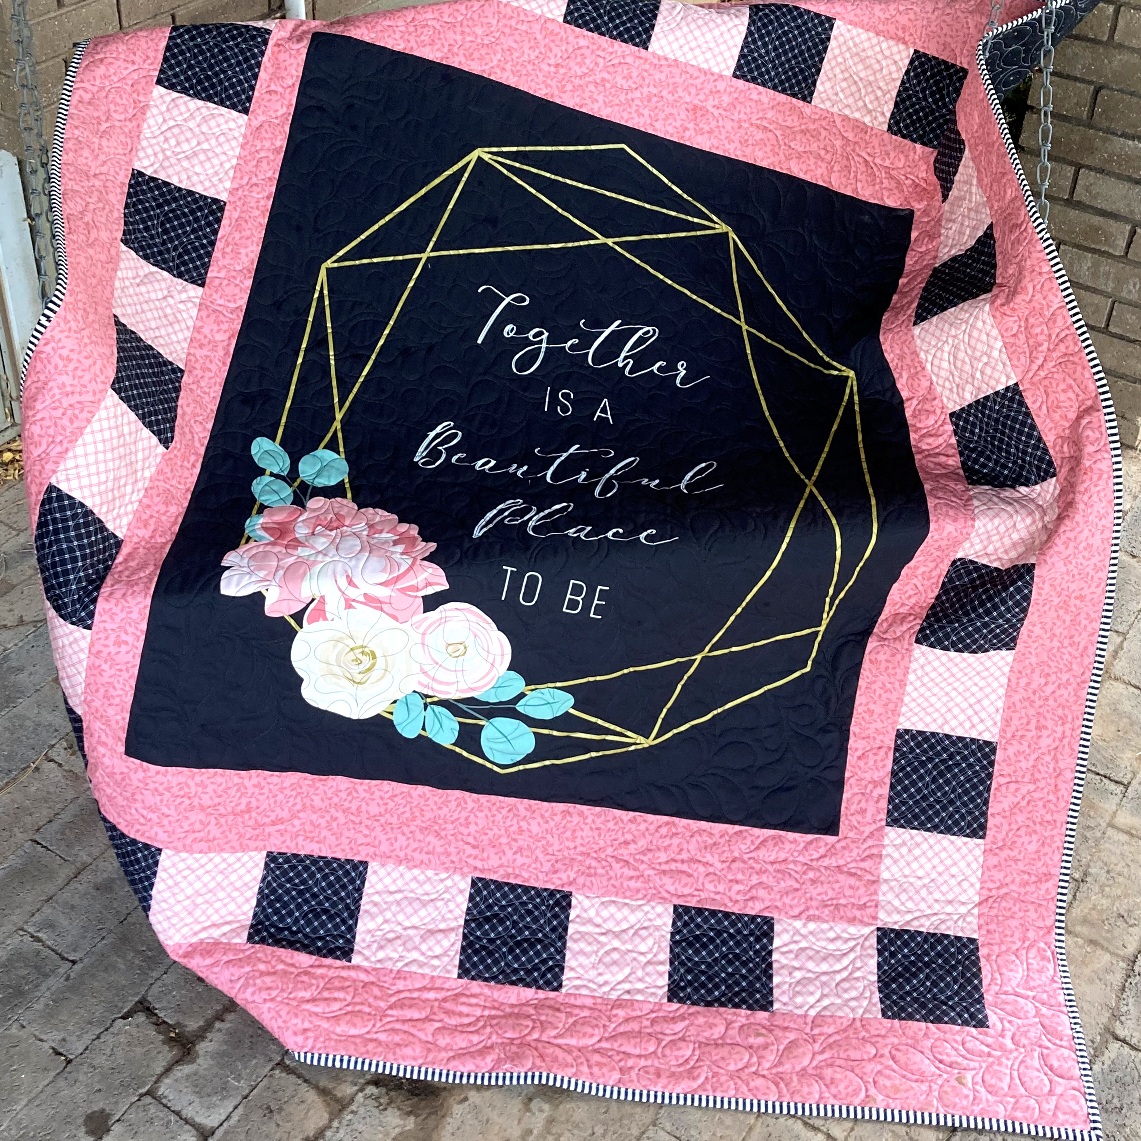
Now all that is left is to finish the quilt!! Just Baste It, Quilt It, and Bind it!!!! Yup, three big things in one little sentence. If you are new to quilting and need some tips on how to Baste It, Quilt It, and Bind It, you can check out my Finishing Your Quilt Video Series. It will walk you through it all in step by step detail.

I quilted mine with an all over loose feather design that I just love to stitch. It is so relaxing and fun, and also very fast, perfect for this fast, go-to, quilt!!! I did change my threads for the Panel and the Borders. I used a Black thread on the panel and my favorite Pearl thread on the borders.

I hope you have enjoyed this tutorial and if you make your own Simple Wedding Panel Quilt I would love to see it!! You can email me a picture at happyquiltingmelissa@gmail.com, or post it to social media with #happyquiltingwithmc 🙂 I can’t wait to see your Simple Wedding Panel Quilts!!!

Thank you so much to Riley Blake Designs for having me here on their blog. And to see more of my Happy Quilting adventures, you can stop by my Happy Quilting Blog for a visit, follow me on Instagram @happyquiltingmc or visit my Happy Quilting Facebook Page. I just love being able to share lots of quilting goodness on a daily basis and would love to share it with you.
I hope you have a very Happy Quilting Day!!!