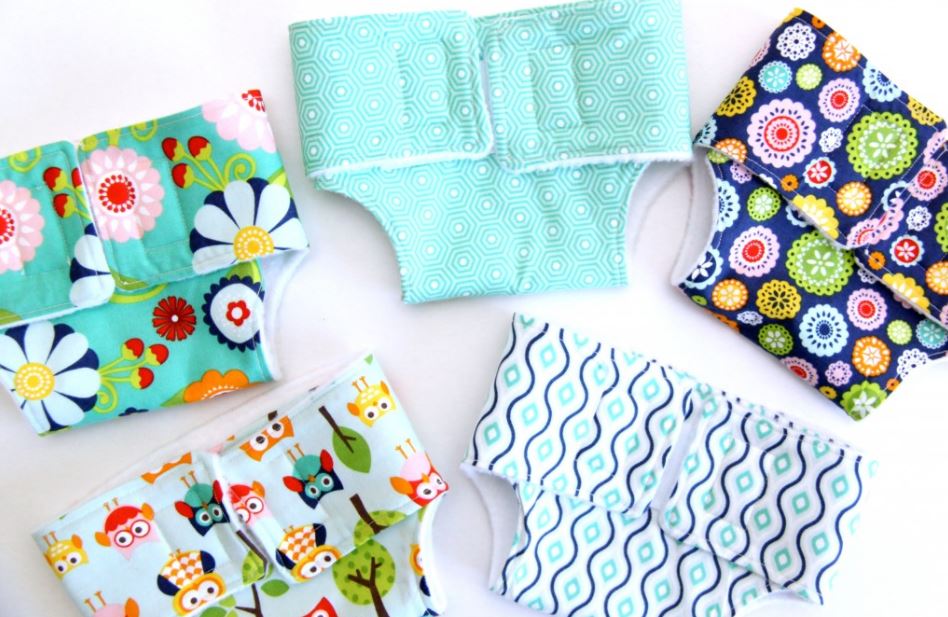
Hello! It’s Maggie from Smashed Peas and Carrots (www.SmashedPeasandCarrots.com) I am so excited to be here today working on the Riley Blake Design Team! I am a mommy to four little ones ages 1, 3, 5, and 7 and if your kids are anything like mine they enjoy playing with their stuffed animals and dollies while pretending to be mommy (and daddy!) My girls especially have enjoyed “diapering” their dollies and I thought it was about time I added to our stash of doll diapers since it had been a while since I made the first set and they have seen better days!
I just fell in love with Riley Blake’s Lazy Days collection…so cute! I love the bright pops of color and that the prints in this line can work well for either girls or boys…cause boys like to pretend play too!


These Dolly Diapers fit most stuffed animals really well and can be made to fit a smaller doll by using the velcro strip on the front. They also fit Build-A-Bear dolls and American Girl dolls hooray! So who wants to make a stack? Let’s get started then…
I created a PDF pattern for you to use. Just print it on from your computer using a printer paper size of US Letter (8.5 x 11 inches) and set the scale to 100%.You can find the PDF here: Dolly Diaper PDF
Dolly Diaper Tutorial
by Maggie Brereton
Fat Quarters of your choice (you should be able to make two Dolly Diapers from one fat quarter) 1/2 yard white fleece (will make 5 Dolly Diapers) Dolly Diaper PDF 1/2 to 1 inch wide velcro coordinating thread Rotary cutter and mat or scissors

First, print off the pattern PDF and cut out. Fold your fabric in half and cut out the pattern on the fold, do this once per piece of fabric and fleece (you will need one fabric outer piece and one fleece inner piece per diaper). You should now have one diaper outer piece cut out in your fabric and one diaper inner piece cut out in your fleece.
1. Pin the fabric outer diaper to the fleece (inner part of diaper) with right sides together. Make sure to designate an opening with your pins to turn this right sides our after it is sewn together (I tend to use a bigger set of pins for this so I don’t forget!) Using a 1/2 inch seam allowance, sew around the entire diaper minus the opening we designated for turning! 2. Take pinking shears and clip the rounded edges of the leg holes so that they will lay flat once you turn the diaper right side out. Be careful not to clip the seam you just sewed! 3. Next, turn the diaper right side out using the opening we did not sew shut. You may need a chopstick or pencil to push out the corners. Now, using a 1/4 inch seam allowance sew around the entire diaper making sure to sew the opening we used for turning the diaper right side out closed. Press the diaper with an iron. 4. Cut two 1-inch pieces of velcro for the closure tabs on each side and one 4-inch piece of velcro for the front of the diaper. Place like shown in picture 4 and sew onto the diaper.
And there you go, you are done. Diapers for everyone well, every doll anyways! Now off you go to make diapers for your littles to pretend play with hours of fun I tell you!
Thank you so much for having me today, it was so fun to be here! Please make sure to stop by Smashed Peas and Carrots to find more inspiring sewing tutorials, DIY crafts, and delicious recipes for you and your family!
Love, Maggie


