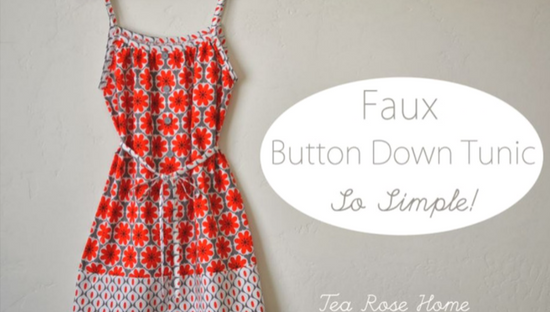
Hello everyone, this is my first time here as a member of the design Team and I am very excited! I am Sachiko from Tea Rose Home, where I share my sewing/craft tutorials and ideas.
I had so much fun working with the fabrics by Mod Studio designed by Holli Zollinger. I went back and forth on what to make… then I finally decided to create a tunic for myself. This is a very simple-to-make tunic and no major pattern is required. Are you ready?
This particular tunic I made is for size XS and S, but if you need to make it larger, you can always add fabrics on the sides or join two pieces of fabrics at the front and back to create the same look. 🙂 * You will need 1 yard of main fabric 2/3 yard of contrast fabric 1 Strip of interfacing 8 3/4″ Buttons Matching thread * How to * I soaked the fabrics in the washer over night without detergent and lightly washed them the next day. After I let the fabrics air dry, I ironed them to prepare them for sewing. 1. Cut the main fabric 25″ by the width of the fabric, and cut the bottom trim fabric 7″ by the width of the fabric. I am short and have a short torso, so if you are a tall girl you might want to add an inch or two to the measurements.
2. Put two fabrics right sides together and sew on the width length. Treat the edge with your preferred method to prevent fraying. Fold the seam toward the bottom trim and press with an iron. 3. Add 1″ wide x length of the fusible interfacing on one side of the side seam and fold.
4.Lay the fabric flat; wrong side of the fabric up. Bring both sides to the middle to fold. Over Wrap the seams by about 1″ and match up the design and pin in several places. Make sure that you don’t pin the other layer of the fabric.
5. Sew the edge with 1/8″ seam then sew 1″ in parallel to that line. Now, you have created a faux button down front. Again, make sure not to sew the fabric in the back with it!! ( I do stuff like that when I am not thinking…)
6. Now you have a giant “tube”. Lay it down on the table flat to determine the center of the tunic. Make sure that what you have created in step 5 comes right in the middle of the fabric and both sides of the fabrics are equal width from the center. You can download the PDF template I have created for the top edges for the tunic. Print, cut then you can trace the outline onto the fabric and cut to create a curved line. You can use same template for the front and back, the back is 1″ higher than the front.
7. Use the largest stitch length and sew 1/4″ and 3/4″ from the top edges. Pull the threads to gather the fabric. I shrunk mine to about 9″ wide, you could do slightly more or less. Press with an iron.
8. Make bias tape. Cut the rest of the contrast fabric diagonally 2″ wide. Sew them together, open the seam, press with an iron. Fold both seams to the middle and press with an iron. You will need this for the seams for the tunic and to use it as a belt, so you will need at least close to 4 yards.
9. Sew the bias tape to the front and back gathered seams. Open the bias tape and pin the bias tape, sew on the folded line.
Fold the bias tape to the back, pin and top stitch to finish it.
10. Sew the bias tape to create armholes with same manner as step 9. Mine is 23″ circular, but it is best for you to try it on and find out what is the best fit for you.
11. Sew the bottom edge. First, fold 1/4″ from the edge and fold at 1″ then sew.
12. Sew ribbon belt with rest of the bias tape. Mine is 32″ long.
13. I sewed the ribbon belt in the back of the tunic. I think the best position to sew this on is about 1″ or 1 1/2″ above the waist line. If you prefer not to, you can skip this step.
14. Sew buttons. Mark 1″ from the top edge for the first button, mark 3″ apart each for rest of 7 buttons. Sew them on.
15. Guess what? You just completed the tunic, hooray!
I had to try it on and do a test run. The fun and cheerful design of the fabric really made me long for the arrival for the Spring. 🙂
I hope you enjoyed my tutorial today, I will see you next time!


