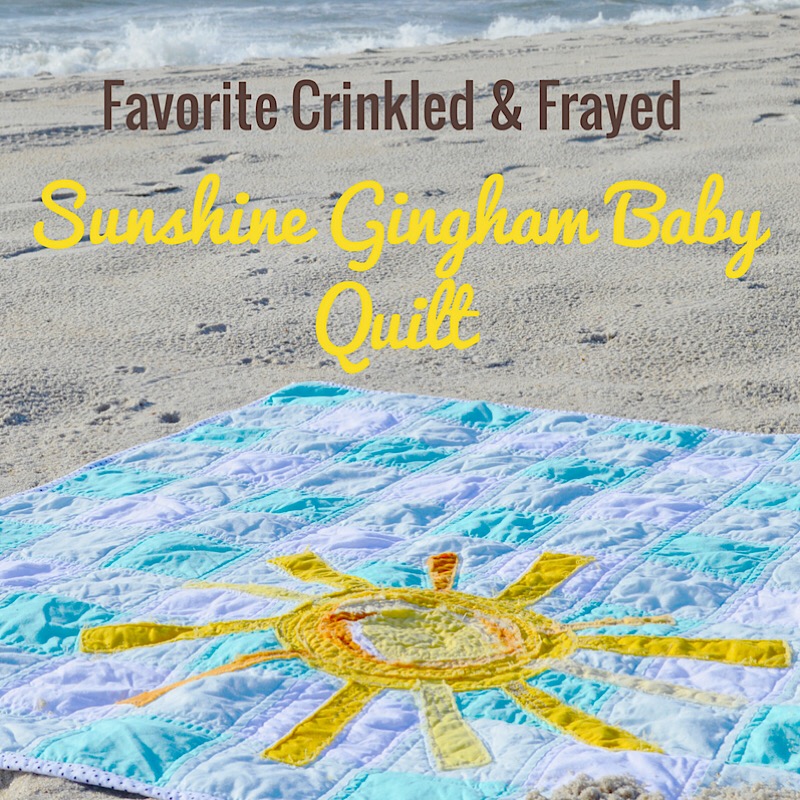
We’re clinging to these last days of summer in the form of fabric sunshiny goodness that we can carry around with us year round! I’m talking about this totally lovable Crinkled & Frayed Sunshine Baby Quilt.
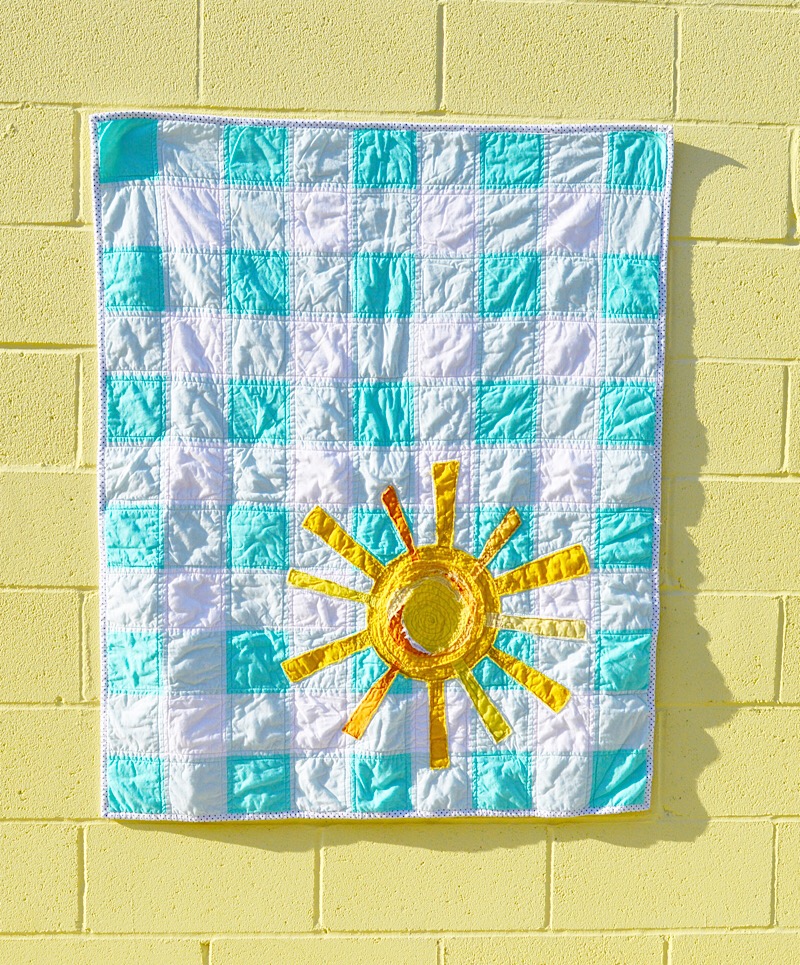
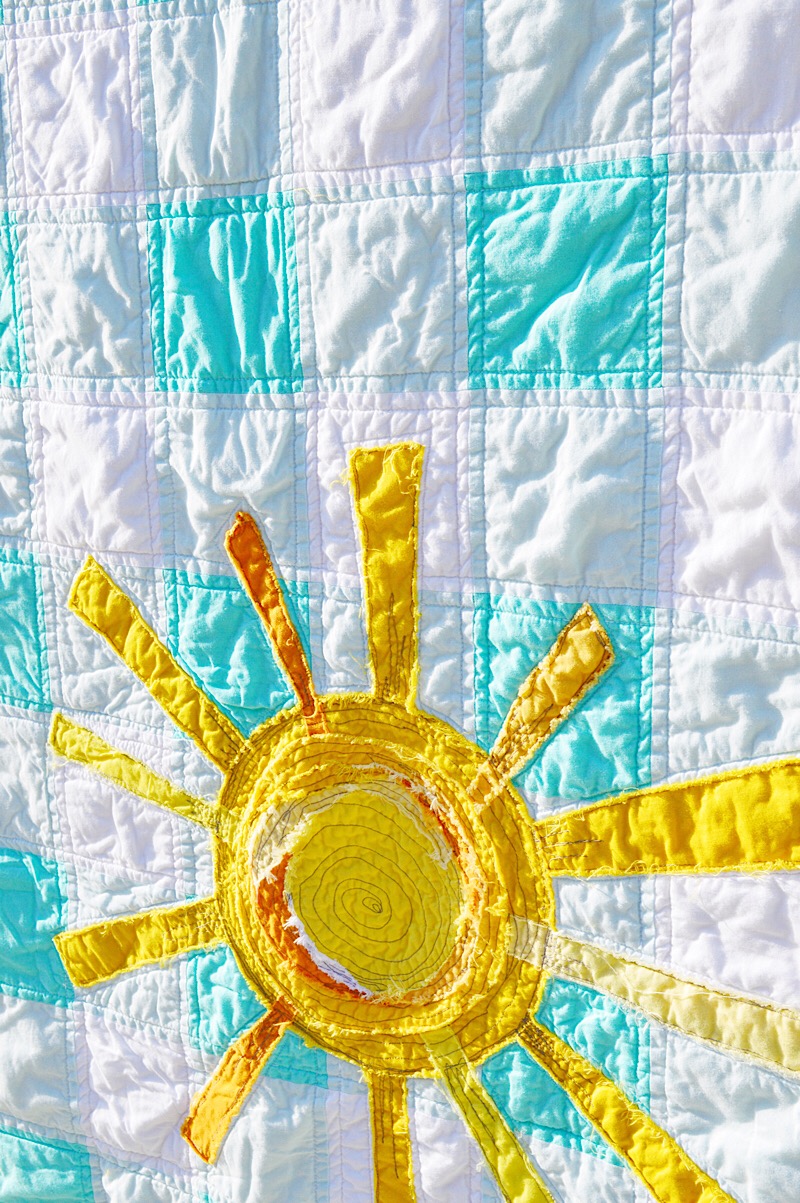
For the gingham quilt background, I used Simple Simon’s GINGHAM BABY QUILT TUTORIAL. This is a simple, straightforward tutorial. The only thing I changed was to add 2 additional rows. This is just my personal preference; I prefer a rectangular quilt rather than a square.

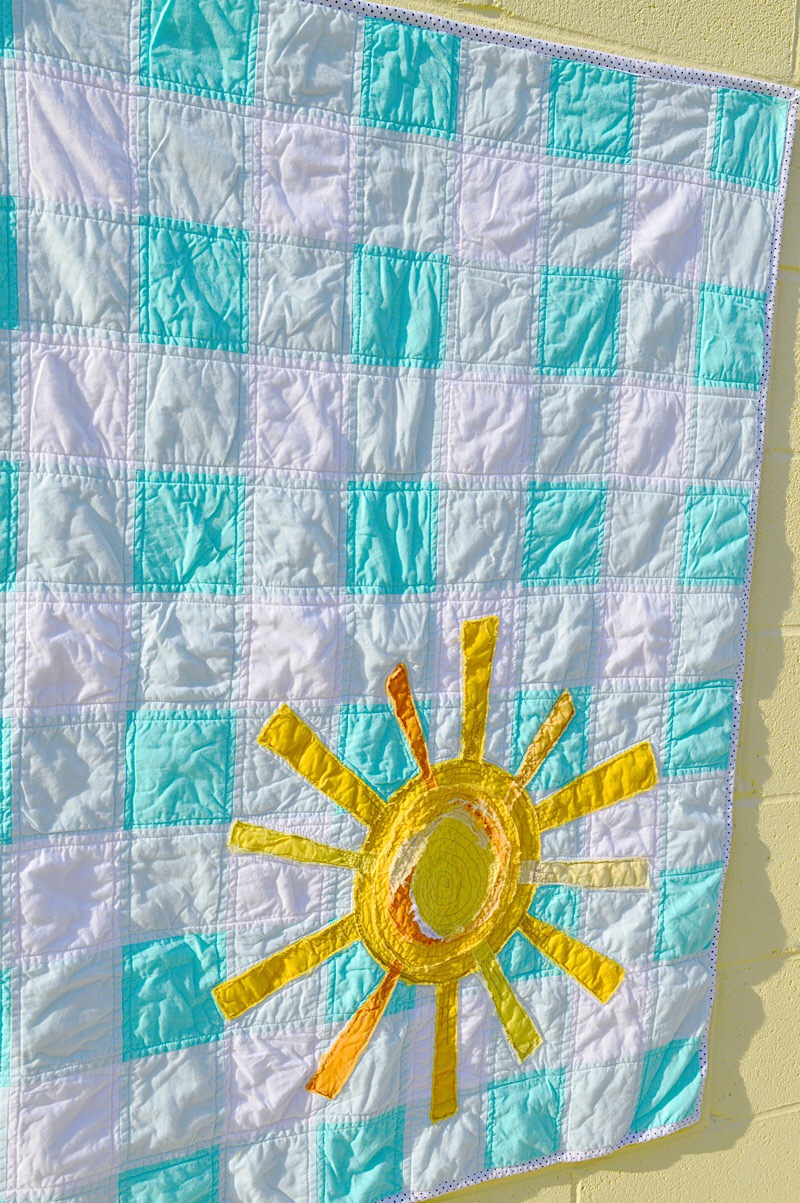
I used Riley Blake Confetti Cottons in Suba, Bleached Denim and Riley White.

For the yellows, I used Confetti Cotton scraps in Daffodil, Riley Yellow, Riley Mustard, Harvest and Sunshine
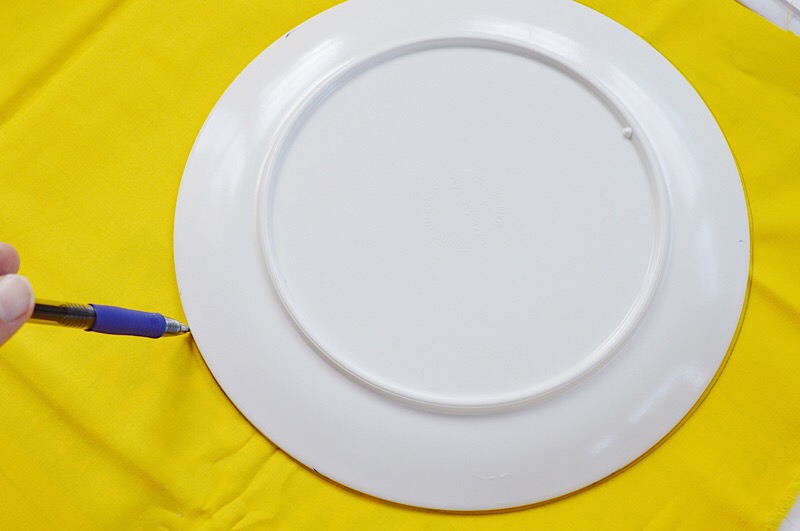
After you have finished the quilt background using Simple Simon’s Gingham Quilt Tutorial found HERE, you can begin assembling your sun. I took a dinner plate, traced around it, and cut it out, for the sun foundation. I also cut out strips in the same yellow color for the sun’s rays. I cut them in random lengths and thicknesses.
An easy way to set the foundation for the sun, is to use double sided fusible adhesive, such as Heat ‘n Bond. I cut a piece of the adhesive the same size as my sun circle and, following the instructions, positioned the sun circle where I wanted it on the quilt, and pressed into place. *I made sure to position the sun rays at the same time so that one edge of the strip went behind my sun circle. I also used a small piece of the fusible adhesive on the back of each strip just to help keep all of the rays in place. You could use pins to achieve the same purpose,which is what I did for the remaining layers.
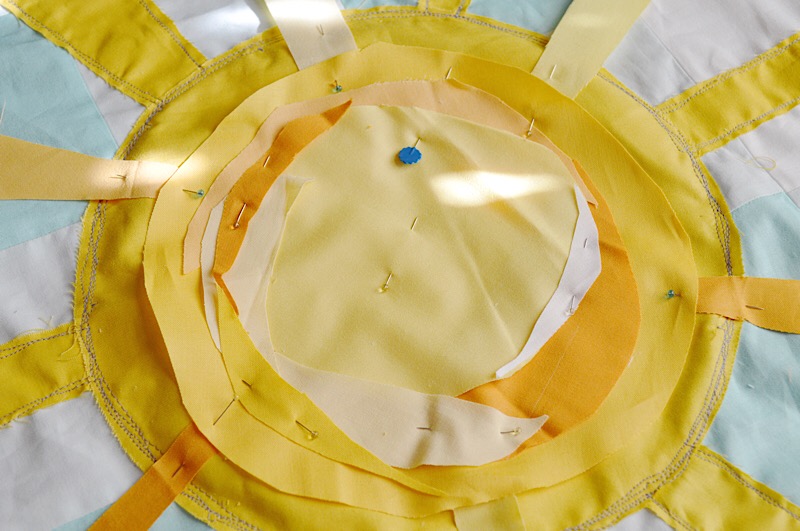
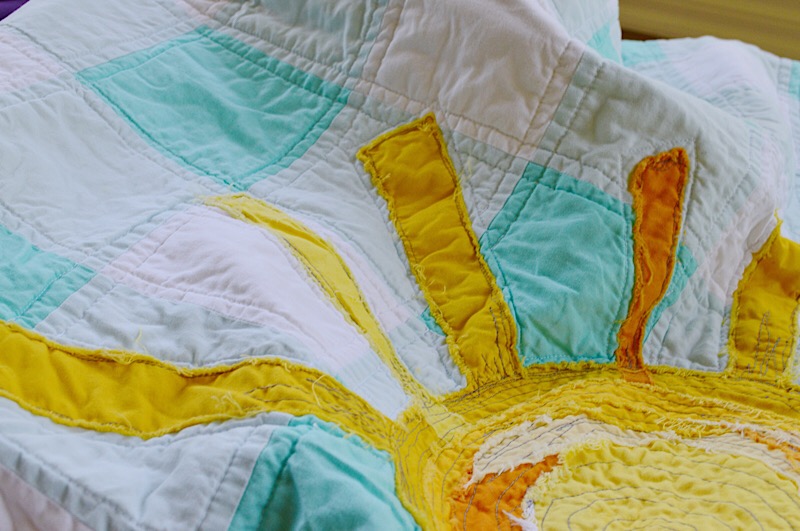
Next, I cut out more strips, in various shades of yellow, for additional sun rays. I cut out a smaller circle (the edges can be uneven), and then I cut another even smaller circle and used crescent shaped scraps to add dimension and additional color. You can really play around with these – there is no right or wrong way to arrange them.
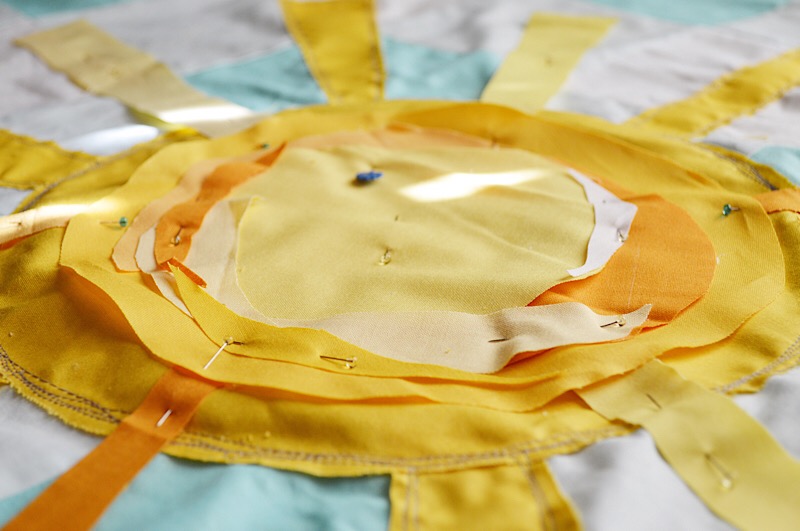
Once you have the pieces arranged how you like, pin them all in place.
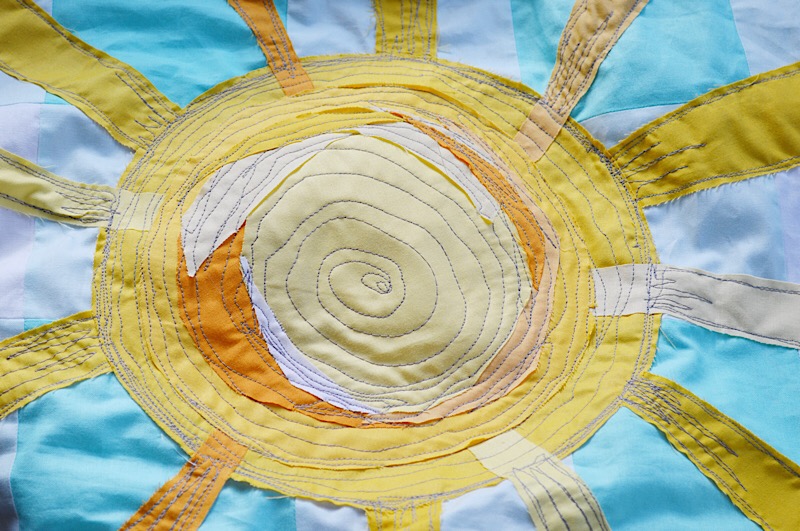
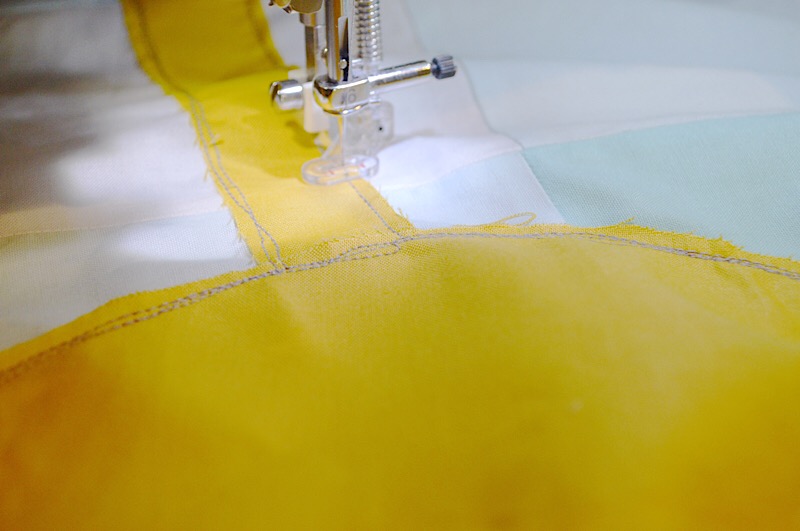
Now, this is where the fun really happens! Using a contrasting thread (I used a medium gray), we will use a scribble applique technique to attach the sun to the quilt. Beginning in the center, start stitching in a circular pattern toward the outside edge of the sun. *It is easiest to use a “Free-Motion Presser Foot” here because it really gives you the freedom to move the fabric around freely for a random, “scribble” effect.
As you stitch, allow your lines to be crooked, and be sure to go back-and-forth in areas that need extra stitching. Smaller scraps of fabric especially will need some extra stitching so they don’t fray too much when you wash the quilt. We do want frayed edges, but we also want the applique to last wash after wash. Another tip — be sure to go around the edges of the sun and sun rays at lest twice. This will also ensure they don’t “over fray” and that your applique work lasts the life of the blanket.
And that’s all there is to it! Once you have the sun stitched in place, make your quilt sandwich (fabric backing + batting + quilt top). Baste. From here, you can choose to have the quilt professionally quilted, or machine quilt it yourself.
I machine quilted this myself. If you want to machine quilt it yourself, I STRONGLY recommend using a “Walking Foot.” This strange looking foot feeds the top and bottom fabrics evenly through the machine so you minimize or even completely eliminate puckering. It will drastically improve the look of your finished quilt.
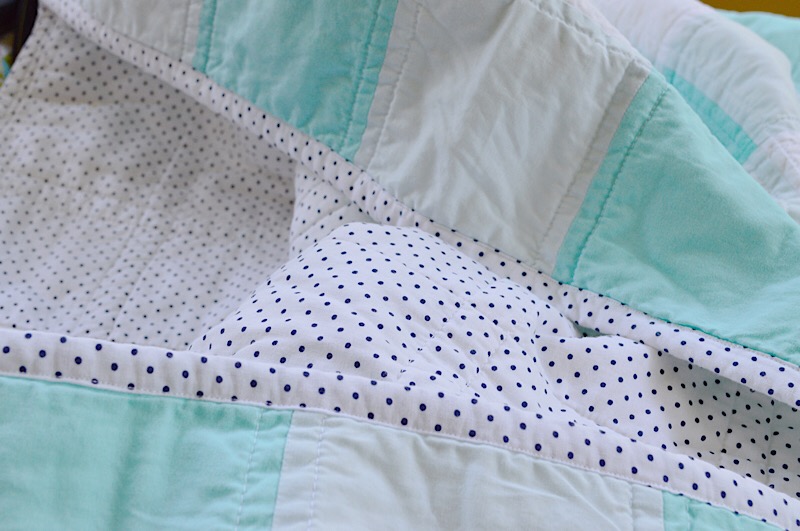
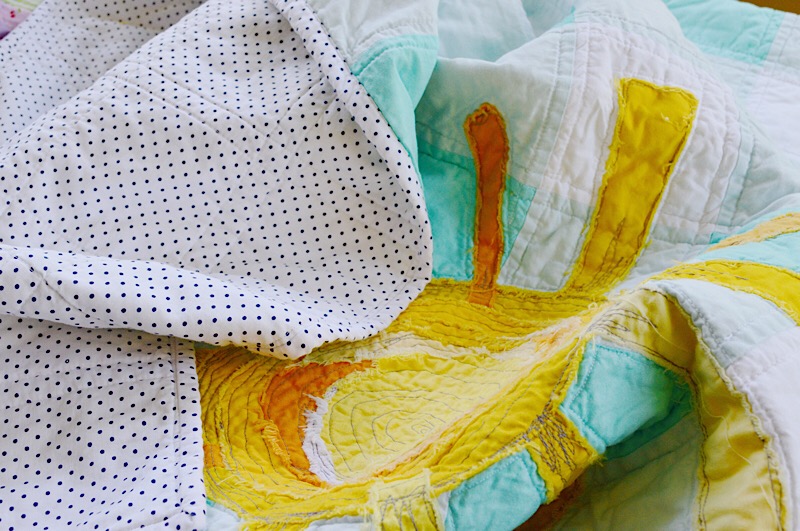
For my quilt back and binding, I used Riley Blake Black Swiss Dot Reversed. There is something about a simple Swiss Dot that I absolutely love. It’s fresh, crisp, simple and timeless. HERE is a fast & easy machine binding tutorial by Riley Blake designer Amy Smart.
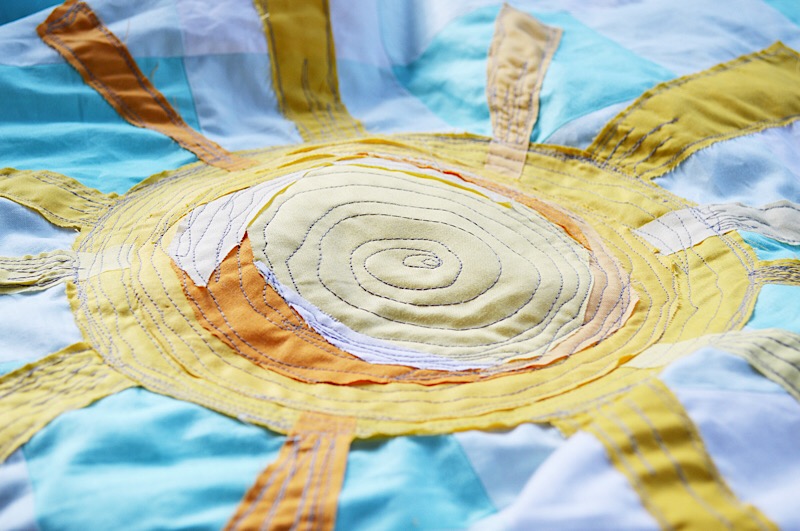
My absolute favorite part of making a quilt is washing it. I LOVE the crinkled, “snuggle me” look of a freshly washed quilt. Notice how the edges of the sun frayed in the wash. So fun and beachy! After the first wash, there were quite a bit of frayed edges I had to trim, but this will lesson over time.
LOVE this! Thank you to Simple Simon for your easy and fabulous Gingham Quilt Tutorial! Get the tutorial HERE.
You can view Riley Blake Designs’ beautiful selections of Confetti Cotton fabrics HERE.
Happy Sewing!