I am so excited to be here with Penny Rose! And I am even more excited to share this quilt with you. When I first saw this fabric it was instant LOVE. I love the cheddar so much. And mixed with the navy it is pure amazingness.

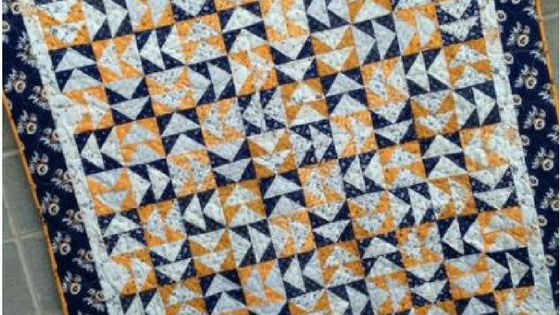
It took me a long time to decide what I wanted to make using this fabric. Actually it was easy to come up with an idea. My problem was I had too many idea so it took me a little bit to narrow it down. I decided on a flying geese quilt. I love the look of traditional quilts and this fabric was perfect for a traditional quilt. But I also really wanted to make Hailey a dress so that is also on my list.

I looked up all the ways to make Flying Geese blocks and I decided to try out the Quilt In A Day ruler/template. This made putting these blocks together super easy. It helped my points line up nicely. Since I wasn’t sewing on a bias I didn’t have a high risk of stretching my blocks.

I love how this quilt turned out. It was one of my favorites. I am currently trying to decide what room in home will become its new home.

Finished Quilt Size: 51″x60″
Here is a quick tutorial on how I made this.
What You’ll Need:
1/4 yard of 4 navy and 4 cheddar
1/3 yard of 4 cream
1 yard border
1/3 yard inner border
1/2 binding
Following the instructions that are with your template cut your blocks. We are making 240 flying geese. 120 navy blue and 120 cheddar. You will need 120 cream squares at 5.5″ and 60 cheddar and 60 navy blue squares at 7″.

The instructions on your template explain how to make the flying geese unit. I laid them out into 2 different blocks. You should have 4 cheddar and 4 navy in each block. I laid them out in a 5 by 6 quilt. So you should have 30 blocks.


Sew your blocks into rows and sew the rows together.

For the inner or stop border cut 6 strips at 2″ and sew end to end. Sew the border to the sides first and then the top and bottom.
For the outer border cut 7 strips 4.5″ by wof and sew end to end. measure the length of the quilt through the middle and cut 2 border strips to that measurement. Sew on to the sides and press flat. Then measure the width of your quilt and cut 2 more border strips to that measurement. Sew to top and bottom and press flat.
Quilt your beautiful quilt and then bind. I have a great bias binding tutorial on the blog. I prefer bias binding. I feel that it lays flatter and sews on better.

Now enjoy. Thanks so much for stopping by! Please come check out my blog for more fun projects and tutorials.