
Happy Friday and welcome back to the Pixelated Rose Sew Along! Thanks for following along as I put together Riley Blake Designs’ FREE Pixelated Rose Quilt Pattern! You can download this pattern HERE.
Today, I will be assembling the first three rows, which is seriously fun because these blocks will finally start to look like something!
LAST TIME, I assembled the first row, and talked about tips for matching up seams, pressing, etc. As far as basic technique goes, you will find everything you need to know in that POST.

Today, let’s talk a little more about these amazing Lori Holt DESIGN BOARDS. I have two of these in the 18″ size, and let me tell you, I use these ALL. OF. THE. TIME. The boards are a simple lightweight foam core with a fleece type surface, and bound with super cute Lori Holt fabric. These boards seriously hold all of the little squares perfectly in place. I can lay out 2 quilt blocks at a time on these boards, and then carry the boards from the cutting table to the sewing machine to the ironing board, and back to the sewing machine without losing a single piece of fabric. Trust me. You want to get yours. TODAY.

Working 2 blocks at a time helps me make quick work of these blocks. I prefer to get a good amount of blocks done before I start piecing rows together, but I recommend only doing this two rows at a time. Because of the abstract nature of these blocks, keeping them organized in your mind can be challenging. After finishing the blocks for rows 2 & 3, it was clear to me that I needed to stop and assemble the rows just to keep things neat and tidy in my mind.

Another thing that helped me stay organized was marking off each block as I finished them.

Once you have your blocks finished, you can assemble rows 2 & 3 the same way we assembled row 1. Make sure you are pressing seams each step of the way. Pressing is not only important for appearance, but it helps keep the measurements accurate, ensuring a beautiful finished product.

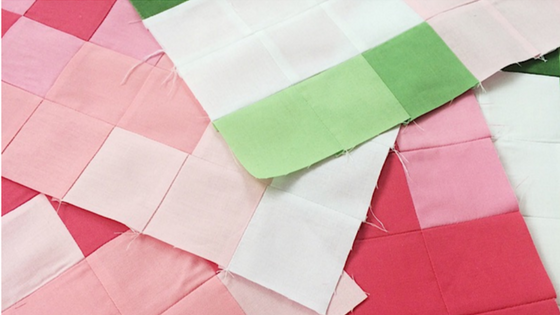
Here is what the first three rows will look like. Now it is time to sew the rows together. This is the fun part!

And look at that! All of those dizzying blocks come together and we can see the beginnings of the beautiful rose!

Isn’t it exciting? I love this quilt because I think it appeals to such a broad range of people. My teenage daughter doesn’t love “girly” things, but absolutely adores this quilt because of its very modern edge. My son thinks the pixels are totally cool – definitely appealing to the computer crowd. And I absolutely LOVE all of the gorgeous colors!

The subtle variations of pinks and greens come together beautifully to create a work of art.

I mentioned this before, but I’ll say it again…this is a fantastic beginner quilt. It is made up completely of simple squares — no difficult angles or curves to navigate — and yet, even a beginner can come away feeling like they made something beautiful that would be cherished forever.
Be sure to join me next time as we tackle the next two rows, and have fun watching this beauty come together!
