Instructor: Lindsey Weight

Hi there! My name is Lindsey and I blog over at Fort Worth Fabric Studio! I am excited to be here today to share this fun Beach Tote with you. About a year ago, I made my first bag, and I was hooked! I love making simple totes, they are so easy and come together quickly-which let’s be honest, we all like quick projects! The best part of all is that you don’t have to cut out a pattern for this, so it makes it that much easier!

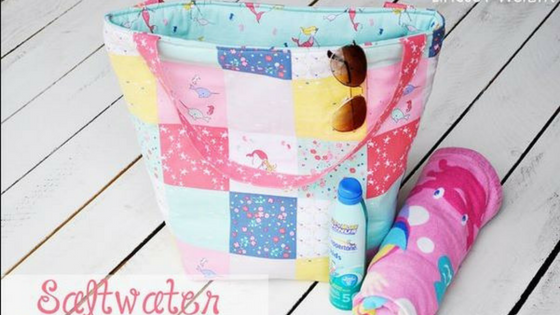
When I saw this darling Saltwater fabric, I knew I wanted to make a beach tote with it! I am so smitten with this line of fabric. The charming mermaids and sea turtles make this tote completely delightful in every way! 🙂 I can’t wait to use this for our many pool trips this summer!

This is a fully lined tote with a simple pocket in the lining. This is about as easy as it gets when making a tote. So what do you say, let’s get started!
Supplies:
1 yard of exterior fabric
1 yard of lining fabric
1 yard for pocket and handles
1 yard of fusible fleece
1 yard of SF101 interfacing
Coordinating thread
Step 1: Cut out your tote pieces:
** I prefer my handles on the short side, if you prefer your handles longer, cut them to your preferred size.

Step 2:
Line your exterior pieces with SF101 interfacing. (iron on according to package directions)
Line your interior pieces with fusible fleece iron on according to package directions)
I do not line my pocket piece or handles, but if you prefer to do so, you can.
Step 3: Make your pocket:

Step 4: Attach pocket to lining:

Step 5: Sew your exterior pieces together:

Step 6: Make your gussets (boxed corners)
With your bag exterior wrong sides out, open up your bottom corner. Match the sides seams with the bottom seam of your bag, so that you form a triangle. Press it flat.
With a ruler mark 6″ from the corner and mark a line straight across. Sew along this marked line, making sure you back stitch.
*Do this to both corners of the exterior piece of your bag.

Step 7: Carefully cut the excess fabric off, leaving a 1/4″ of fabric from the seam.

Step 8: Make gussets in your lining piece as well, following steps 6-7.
Step 9: Making the handles:
Take your handle strip, and fold it in fourths and press
Fold again
Sew along the very edge of each side of the strip

Step 10: Attaching the handles:
Place your handle 2″ from each side seam of your exterior piece. Make sure your handle isn’t twisted. Pin into place, then sew on using 1/4″ seam allowance. *Do this to both sides of your exterior.

Step 11: Assembling the bag:
With your exterior RIGHT SIDE OUT, and your lining WRONG SIDE OUT. Place your exterior piece inside the lining, so they are right sides together. Line up the side seams and make sure your handles are between the the lining and the exterior. Pin all the way around and then sew a 5/8″ seam allowance around the top of the bag.

Step 12: Turn everything right side out through the hole in the bottom of the lining piece. Sew the opening of your lining shut. You can hand stitch or machine stitch. I machine stitched mine, since you can’t see it anyways! 🙂
Step 13: Top stitch around the opening of your bag.
And that’s it! You have a darling tote for your beach and pool trips this summer!

I hope you enjoyed the tutorial! Please hop over to the FWFS blog where you will find all things sewing and quilting! 🙂
Talk to you soon,


