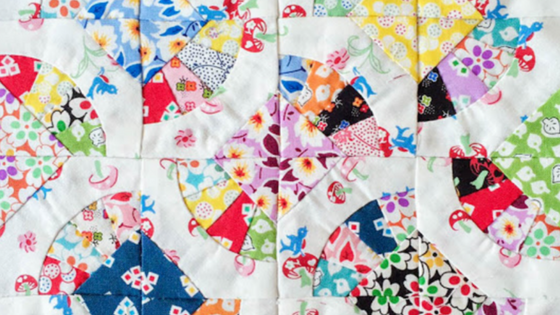


I tried to use all the prints in the bundle and I am happy it turned out great! The binding was an unexpected find from my stash and it’s from the previous collection of Hope Chest. Am I not lucky

The patchwork is not difficult to sew. But the drawing of the design is something I wish to show you how I did it.
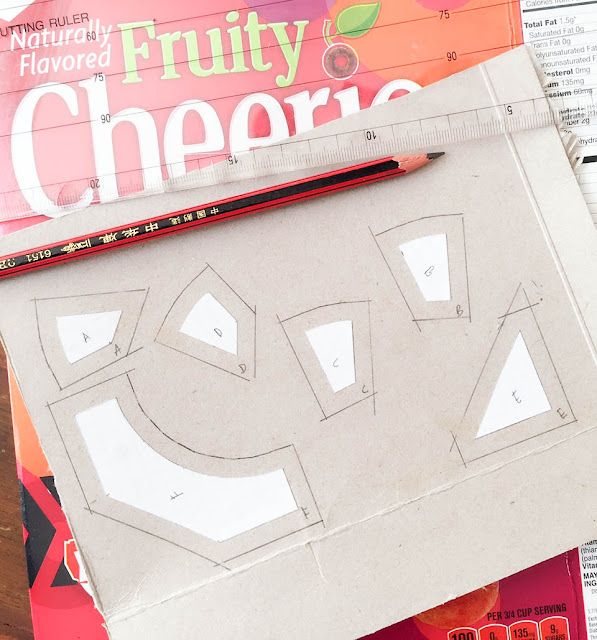
To draw the design, you need pencil, ruler, compass and graph paper. If you don’t have graph paper, you can draw your own grids.
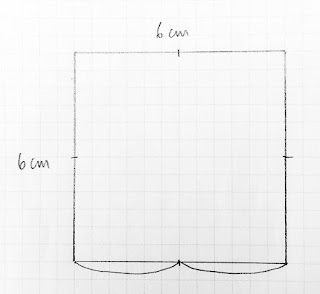
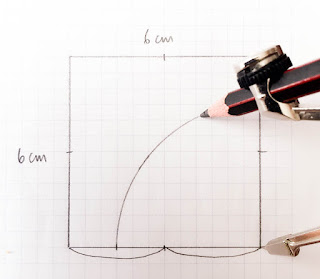
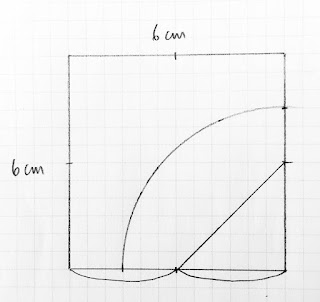
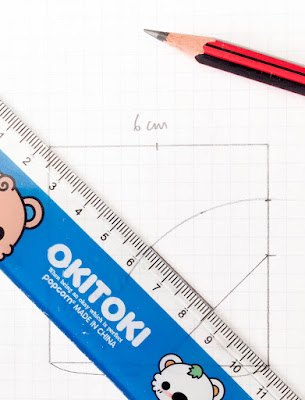
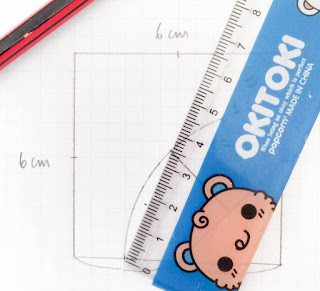
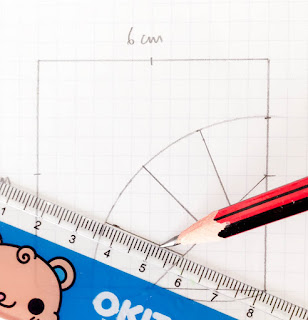

Each square measures 6cm. You can use inches for measurements. Feel free to expand or reduce the size. I would love to double the size to make a lap quilt soon!
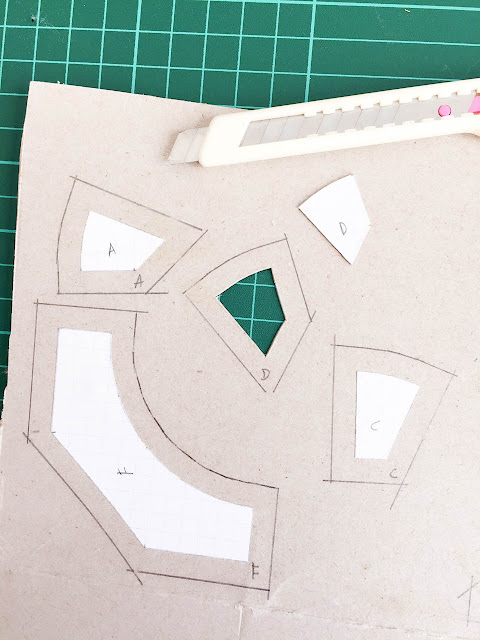
After drawing, cut out the labelled pieces and paste them on a cardboard (keep those cereal boxes for recycling!). Draw a 0.6cm (or 1/4″) seam allowance around the pieces. Then use a pen-knife to cut the pieces out. Remember to label the templates as well to avoid confusion.
*for this patchwork, you will realise that A is the mirror reflection for D and B for C.
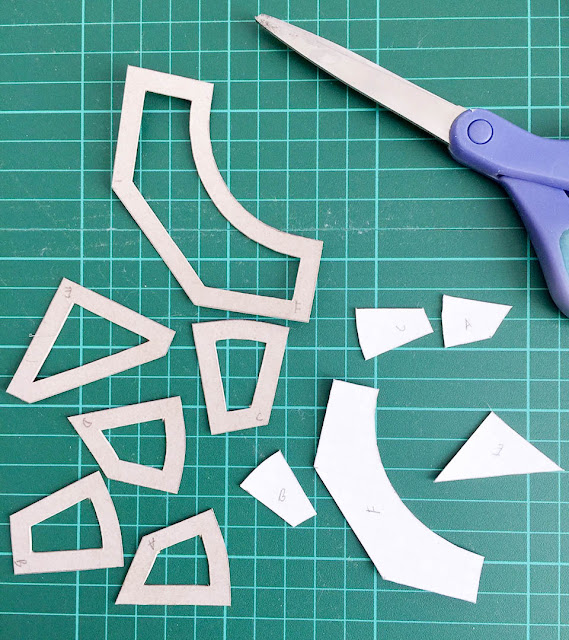
Cut out the templates with seam allowance. I use this method of template drawing very often because I need to reuse the templates and it would be a waste of time to keep drawing seam allowances on the fabrics.
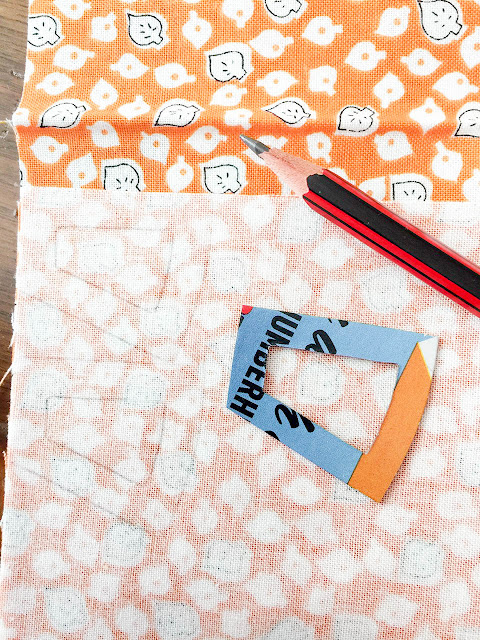
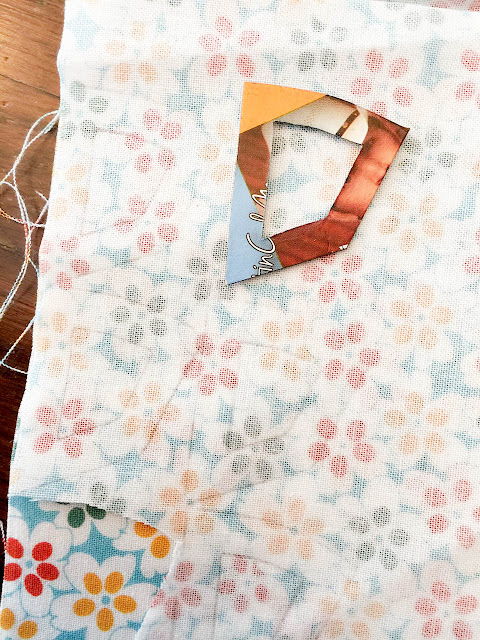
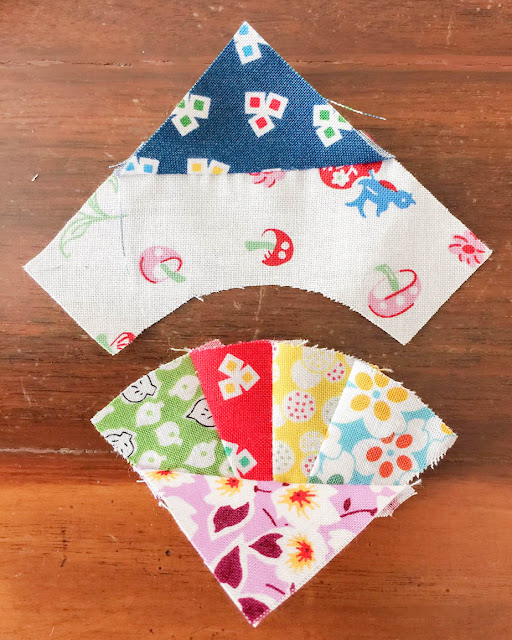
Place the templates on the fabrics and start drawing. Fussy cut if you wish to. Then cut.

When you are ready to sew, choose the fabric templates and arrange them. I did random choosing and arranging.

First part
With right sides together, pin A and B in place. Do a backstitch as a first stitch and pick up as many stitches as you can (4 to 6 stitches is good) before another backstitch. Continue sewing till the end and do a back stitch for the last stitch. This is end-to-end sewing and it applies to all the sewing in this pattern.

Repeat for C and D.
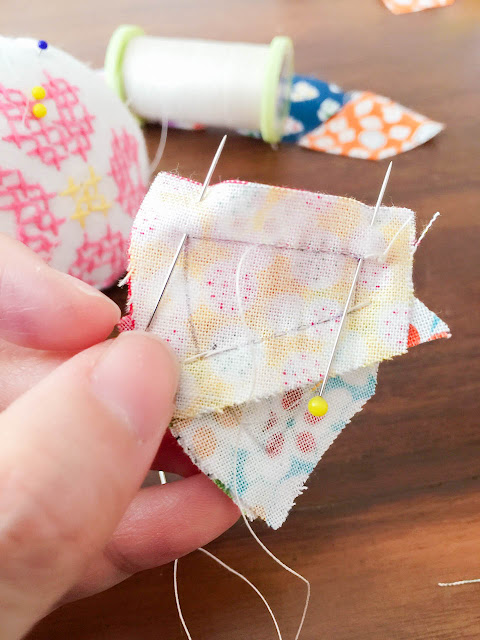
Sew the couple patchworks AB and CD together in the same way right sides together. Press seams in the same direction.


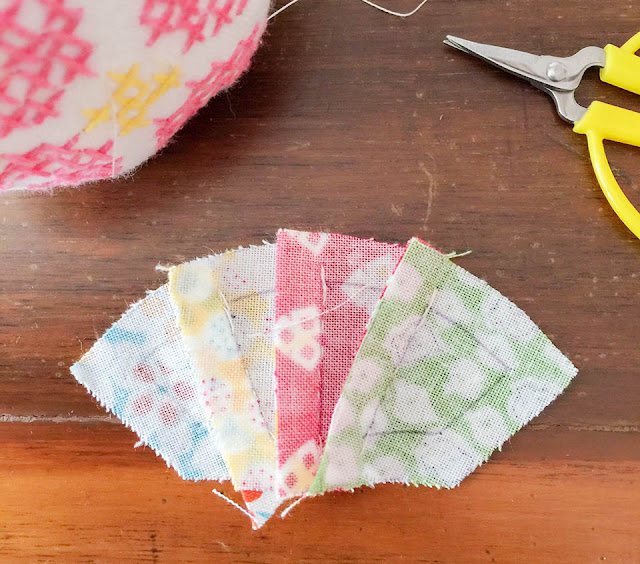
Pin triangle E in place and sew. Press seam towards the triangle.
Second part
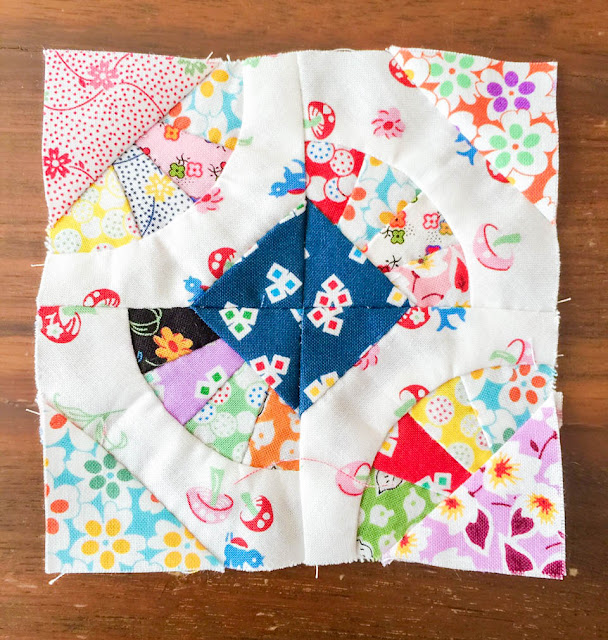
Next sew a new triangle E to background G. Press seam towards the triangle too.


Now you can sew the two parts together. It’s always easier to do a few snips on the outer curve and place it facing you. First mark the centre on both parts by matching the points with a needle and folding into half. Start pinning from centre, then the end points and lastly the middle sections. Sew but be sure to check that the stitches on the other side matches your pencil line.

I press the seams this way. But you can choose to do it in your own way too.
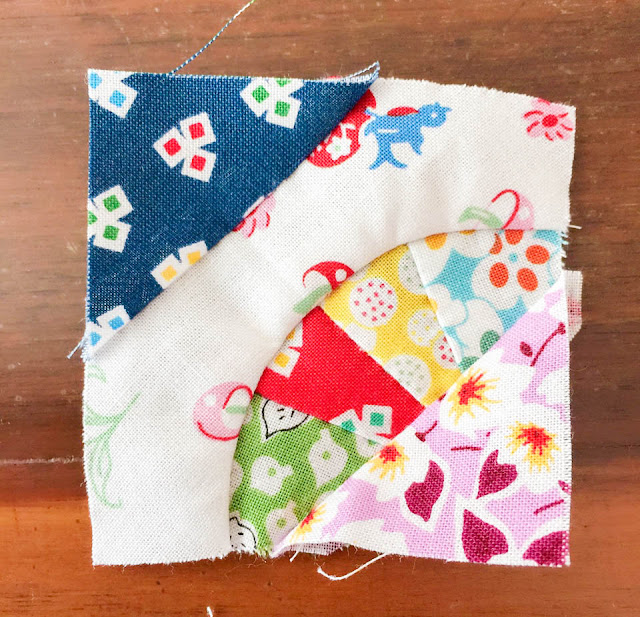
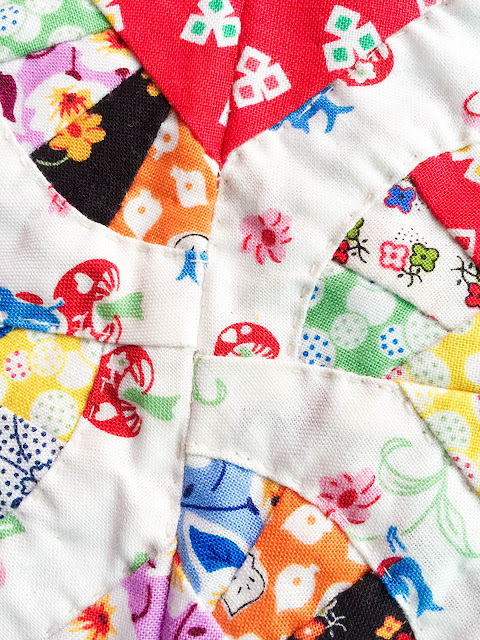
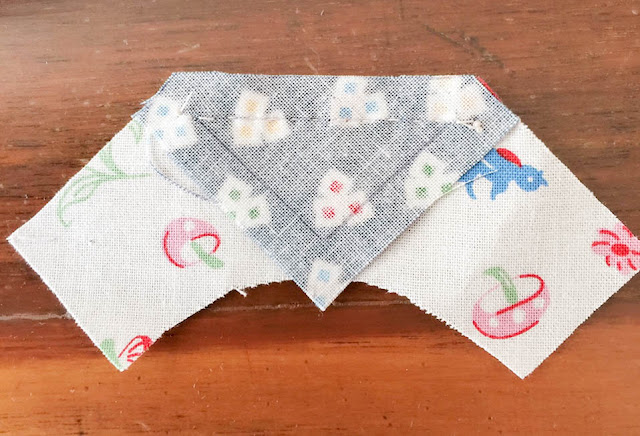
Here you go, your first patchwork fan is done! It may look a little wonky but don’t worry. It’s not necessary to square up now because they will eventually match when the whole piece of work comes together.
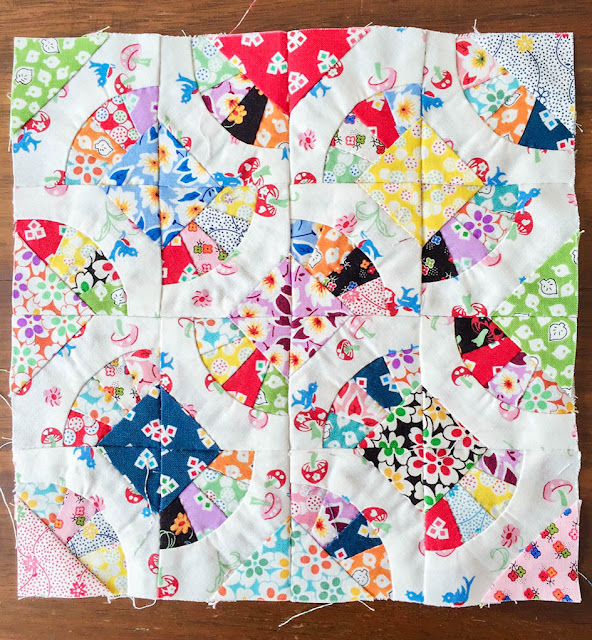
Sew 16 Sensu patchwork squares. Arrange them to your liking. You may choose to give a quick iron to make sure the seams stay flat.

Sew all the patchwork together by columns or lines or squares. It’s up to you. I sew them in squares of four.


Handquilting is the best part! Place the three layers (quilt top, soft batting, backing fabric) as in the picture. Always cut your batting and back fabric 1/2″ bigger all around to make sure you have enough allowance for squaring up later.

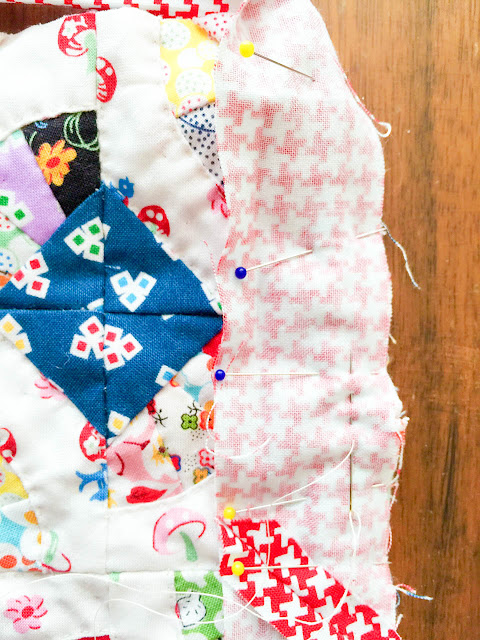
Lastly is the binding! You can definitely handsew binding by using back stitches or short continuous stitches. I used the latter (because I’m lazy) but I diligently did a back stitch after 3 to 4 stitches. Finish the binding with ladder stitches.
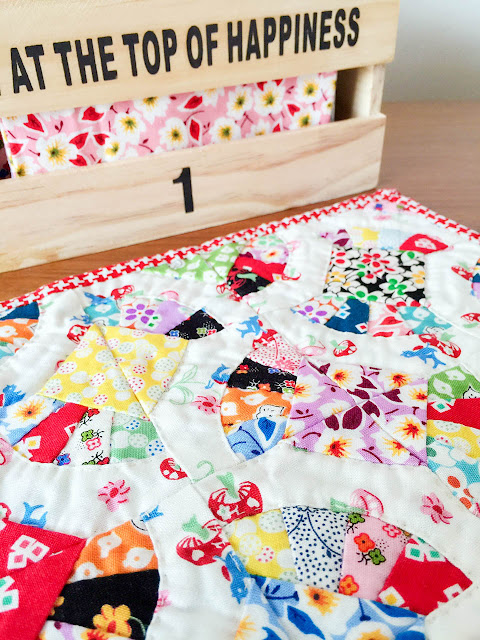
And you are done with your (first) handsewing Sensu Patchwork Placemat in zakka style!
Hope you enjoyed this tutorial! xx Wynn