
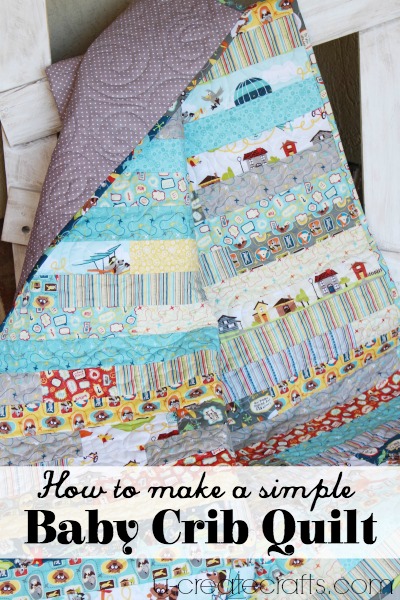
Okay, so I am going to admit that quilting scares me…well, it used to. My mom showed me this most simple and adorable way to make a baby crib quilt without having to sew intricate blocks together. So I have to share it with you.
Supplies Needed:
2 Riley Blake Designs Rolie Polies (Little Flyers is the one we used)
2.5 yards of coordinating fabric for the back
warm and natural batting for the inside
other sewing essentials (ruler, cutting mat and blade, etc)

Seriously, this is such an easy quilt to make; all you do is sew the strips together in random order.
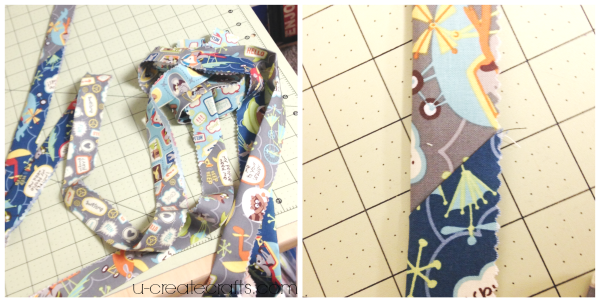
Step #1: Lay all your rolie polie strips out and iron out the fold. We laid them out in color groups and cut the strips in varying lengths. This part drove my perfectionist mind crazy. I like rhyme and reason, so when asked to throw caution to the wind and cut various lengths I must’ve looked like a lost puppy.

Step #2: Next we are going to create long strips. I call this the Grab and Go Method: you are going to randomly grab a cut strip and sew it to the end of another cut strip. Do this until you have a long strip 33″ long. You want 26 of these 33″ strips completed.

Step #3: Next sew the 33″ strips together to create the length of the baby quilt. This, again, includes a grab and go method; there is no laying it out to make sure everything looks perfect. The only thing we paid special attention to was the directional fabric. We made sure all the words, houses, etc. were headed the same direction. When you’ve sewn on the last fabric strip, make sure the length of the quilt measures 53″.
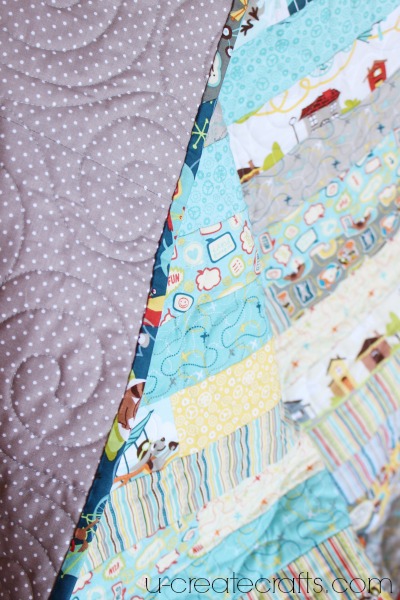
Step #4: Measure the quilt top to 33″W x 53″L and cut off any excess. Once that was complete, we took the quilt top, Warm&Natural batting, and the fabric we choose for the backing to our favorite quilter in town. She quilted it all together with big, fun swirls. Â However, if you have the patience and the know-how, you can totally quilt the whole thing yourself…and then I will be totally jealous of you. 😉

Step #5: We got the quilt back from the quilter and cut off the excess batting and backing. Measure the whole thing again to 33″W x 53″L.
Step #6: Then using the extra rolie polie strips create a binding! Sew the ends of the strips together and lay it around your quilt to make sure you have enough to go all the way around and more. Once you know you have enough strips sewn together, lay it across your ironing board. Starting at the very end of your looooong binding strip, fold the sides together and press it with a hot iron. So basically this long binding strip with be folded in half and pressed all the way to the end. Now you have a custom binding.
Step #7: Sew the binding on and bind the quilt…For a video tutorial on this process Riley Blake Designs has one here. It is much better than I could explain in type.
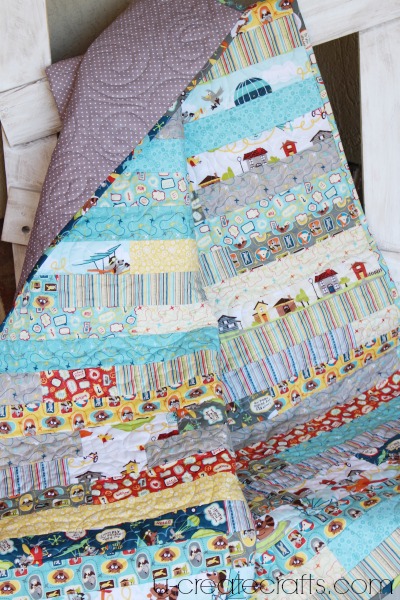
I LOVE the finished project. This simple baby quilt was fun to make with my mom and learn some new techniques. There is no need to fear quilting or think it’s too hard. Start off with beginner projects like this one and you’ll want to do more.
For more fun sewing tutorials, visit me at U Create.
Post by Becky @ U Create