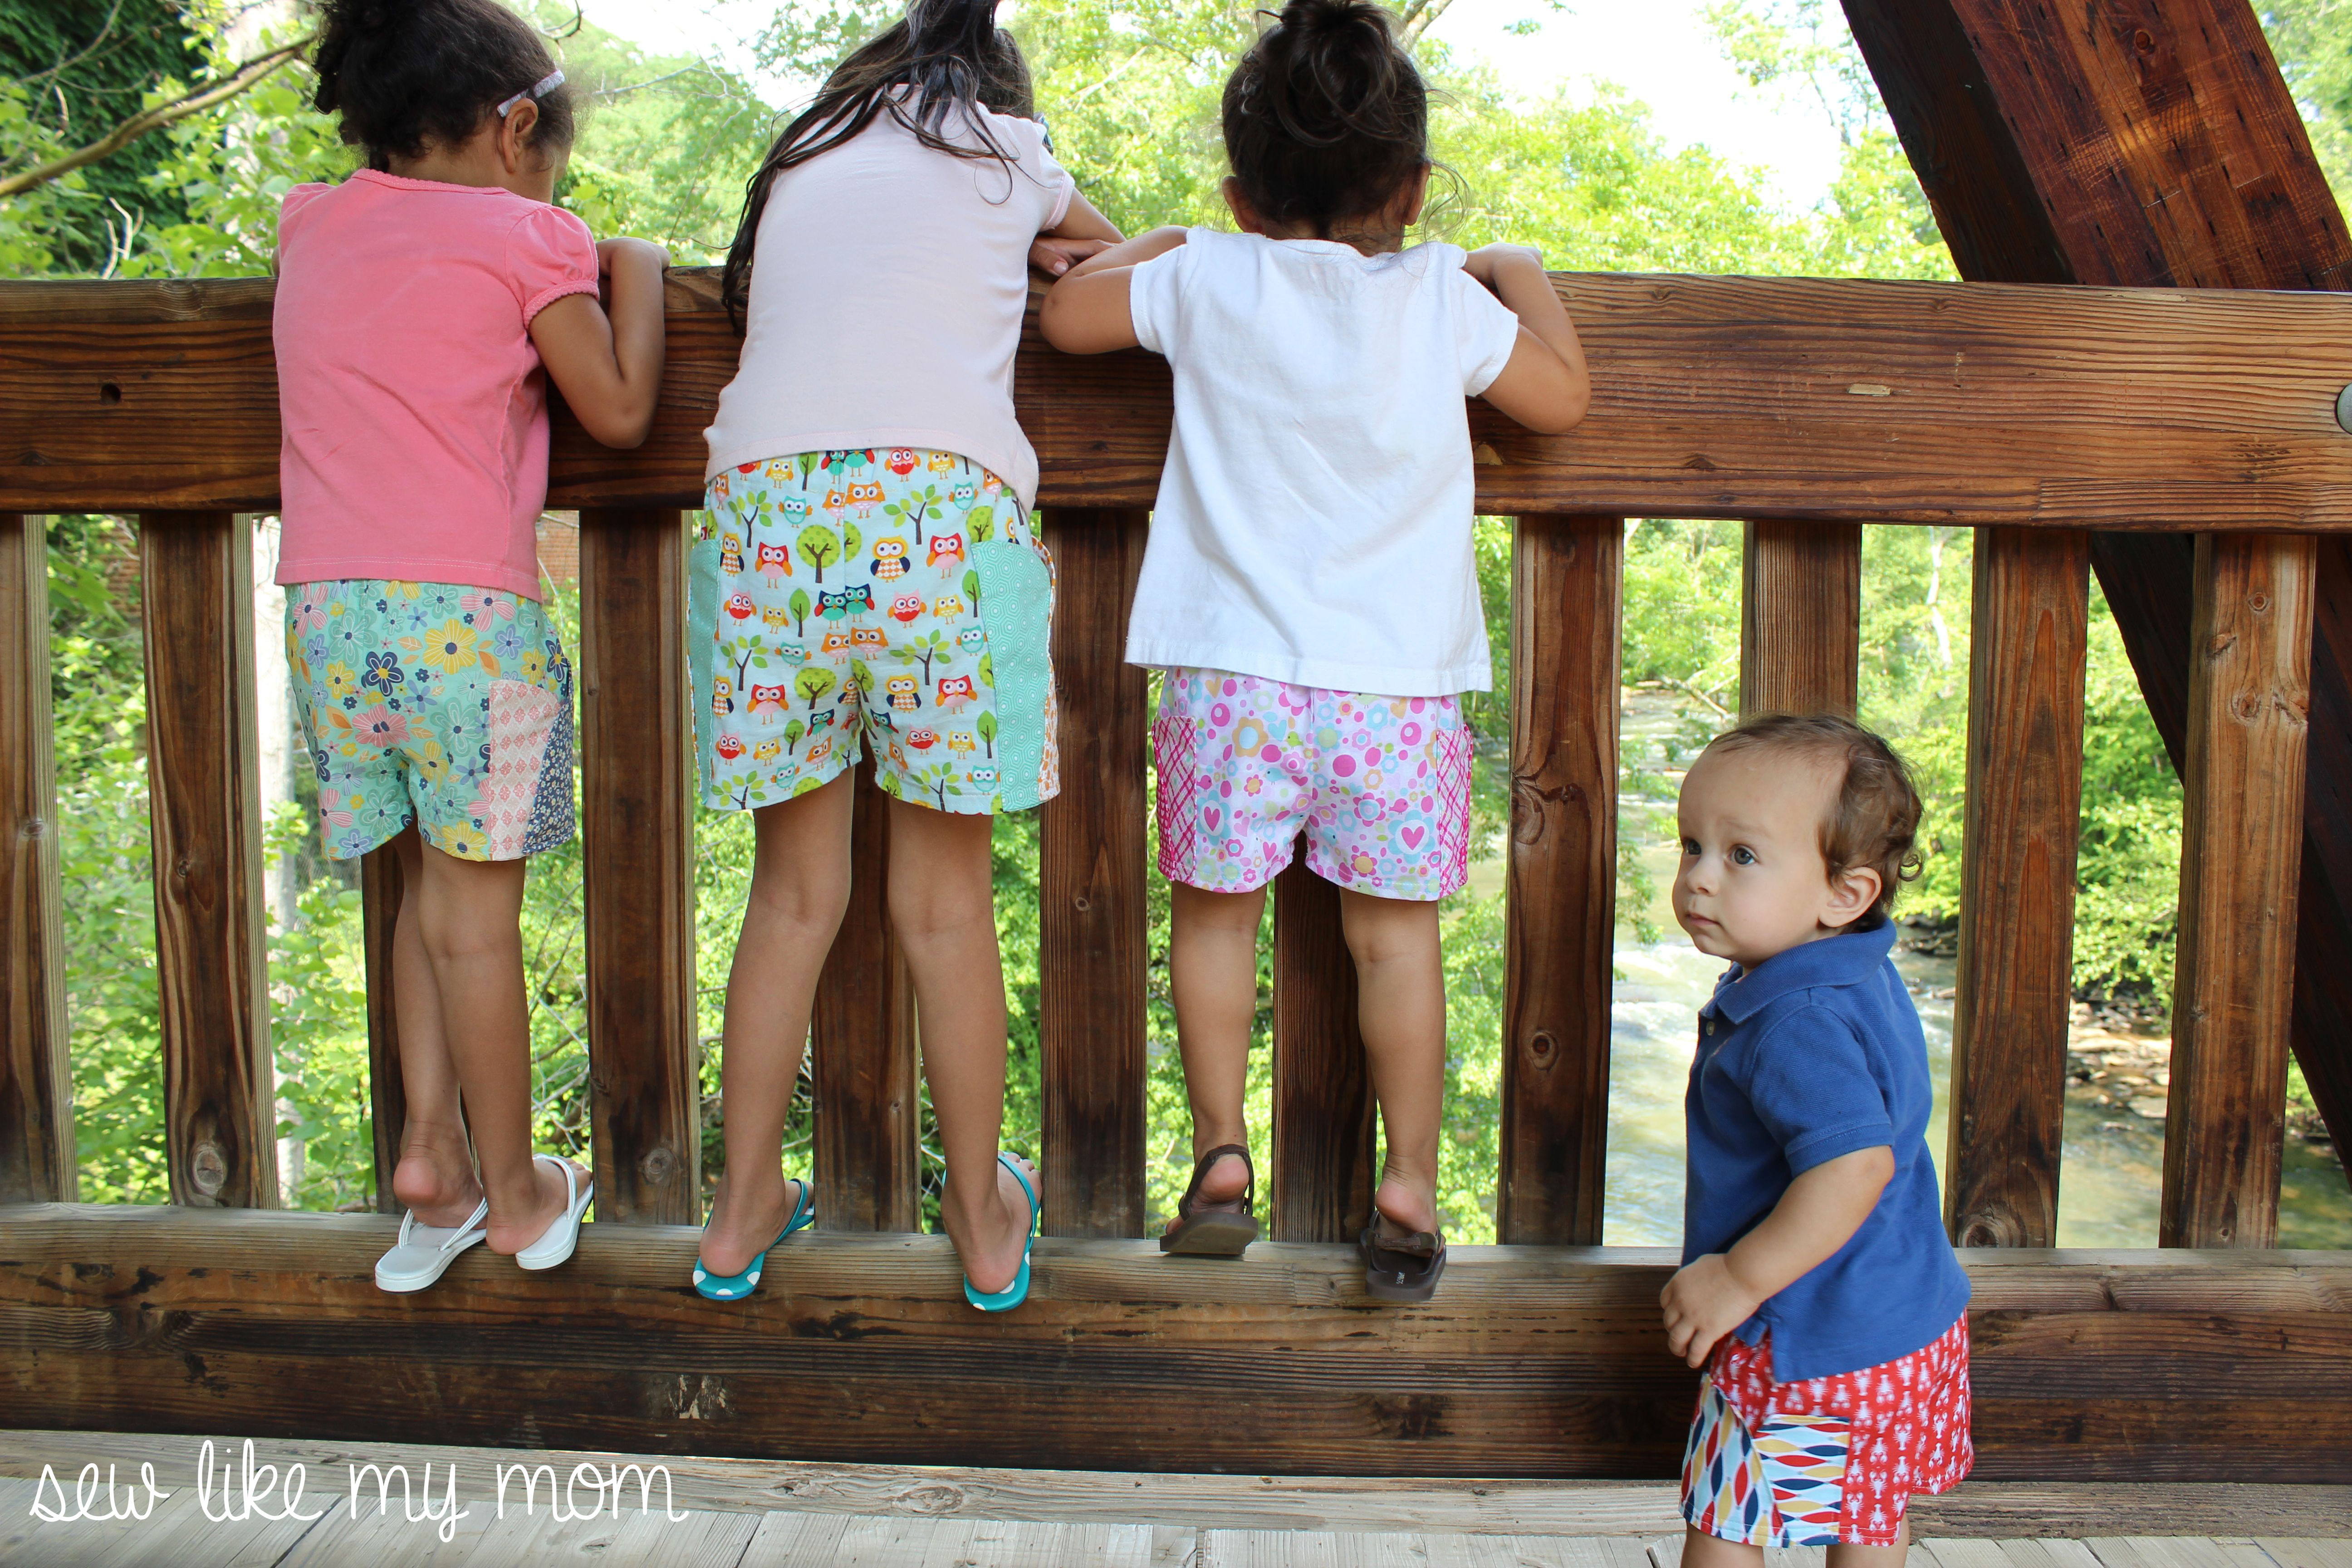
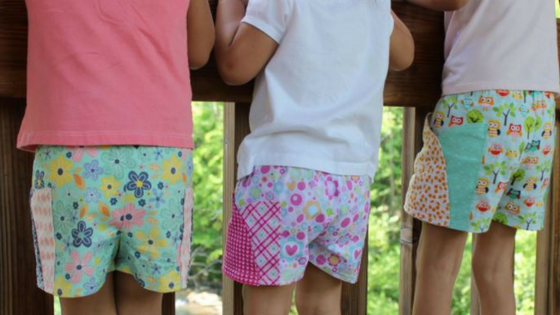
Hello Riley Blake readers! I’m Melissa at Sew Like My Mom and I’m so excited to share a free shorts pattern with you all today!

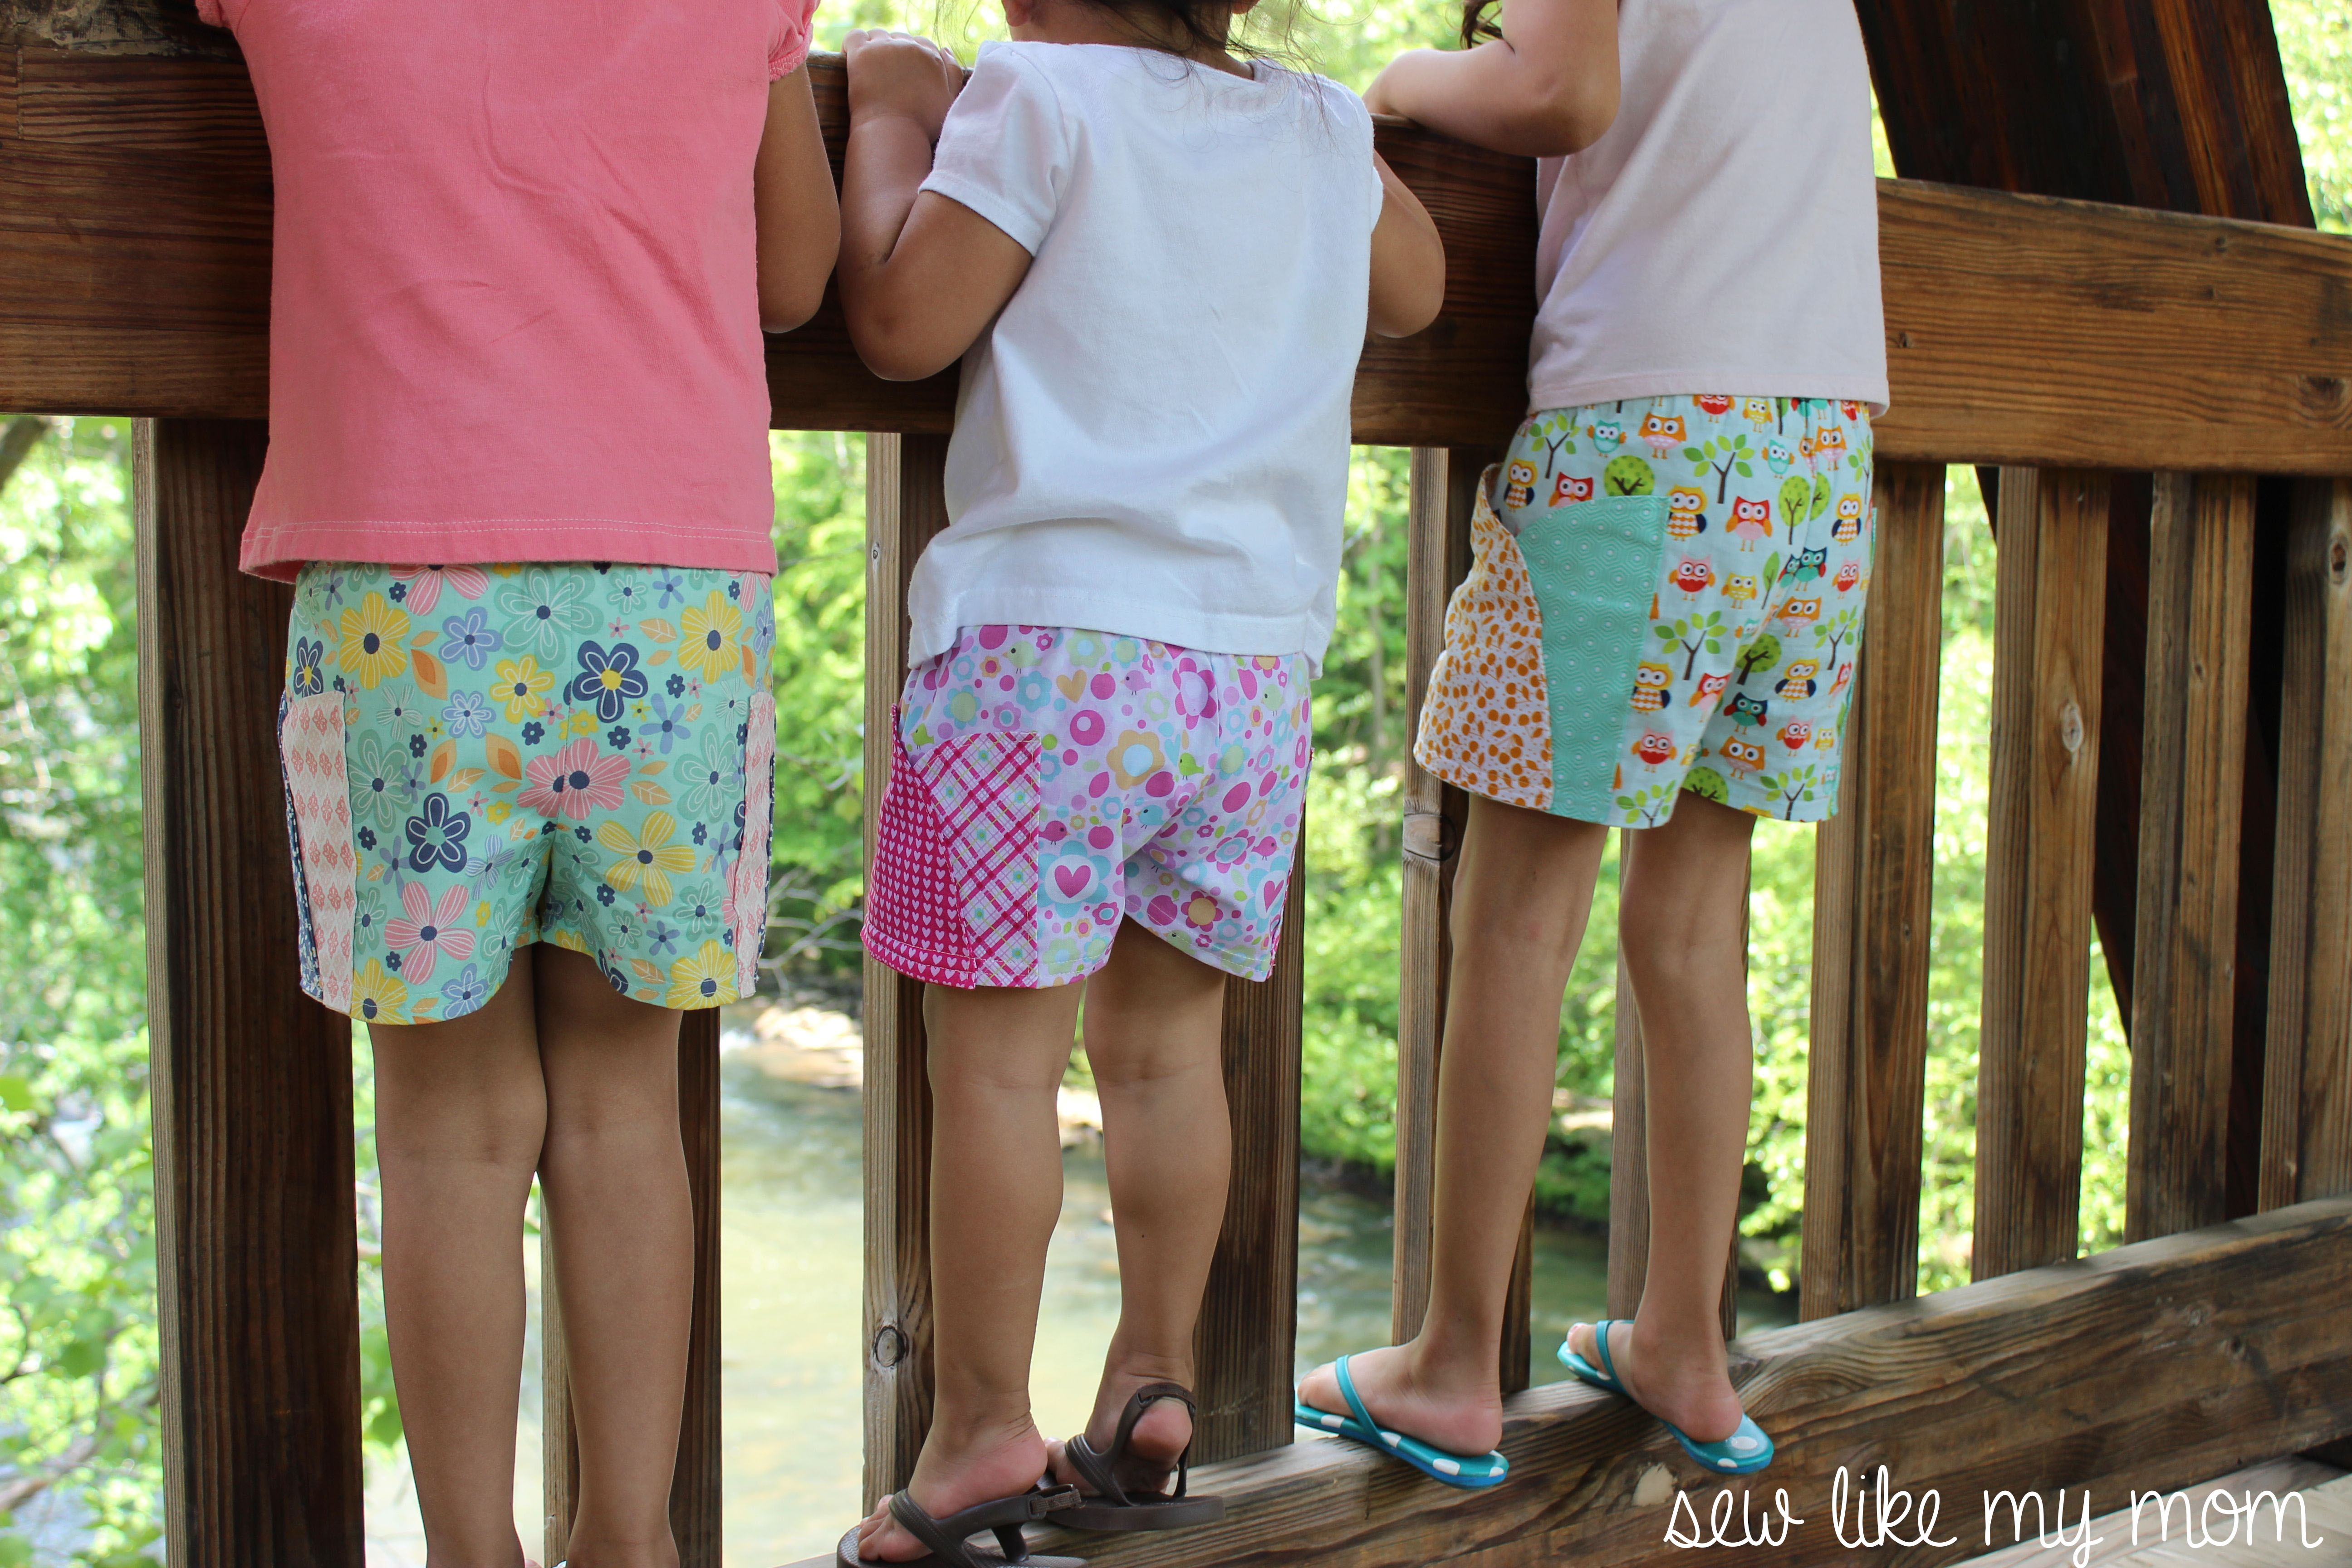
I love shorts! They’re so easy and fun and are such a fun way to show off a great print. My kids are really into treasures these days and have been begging me for bigger pockets. The Sycamore Short was born from their desire to hide rocks, candy, and every trinket they can find into their pockets.
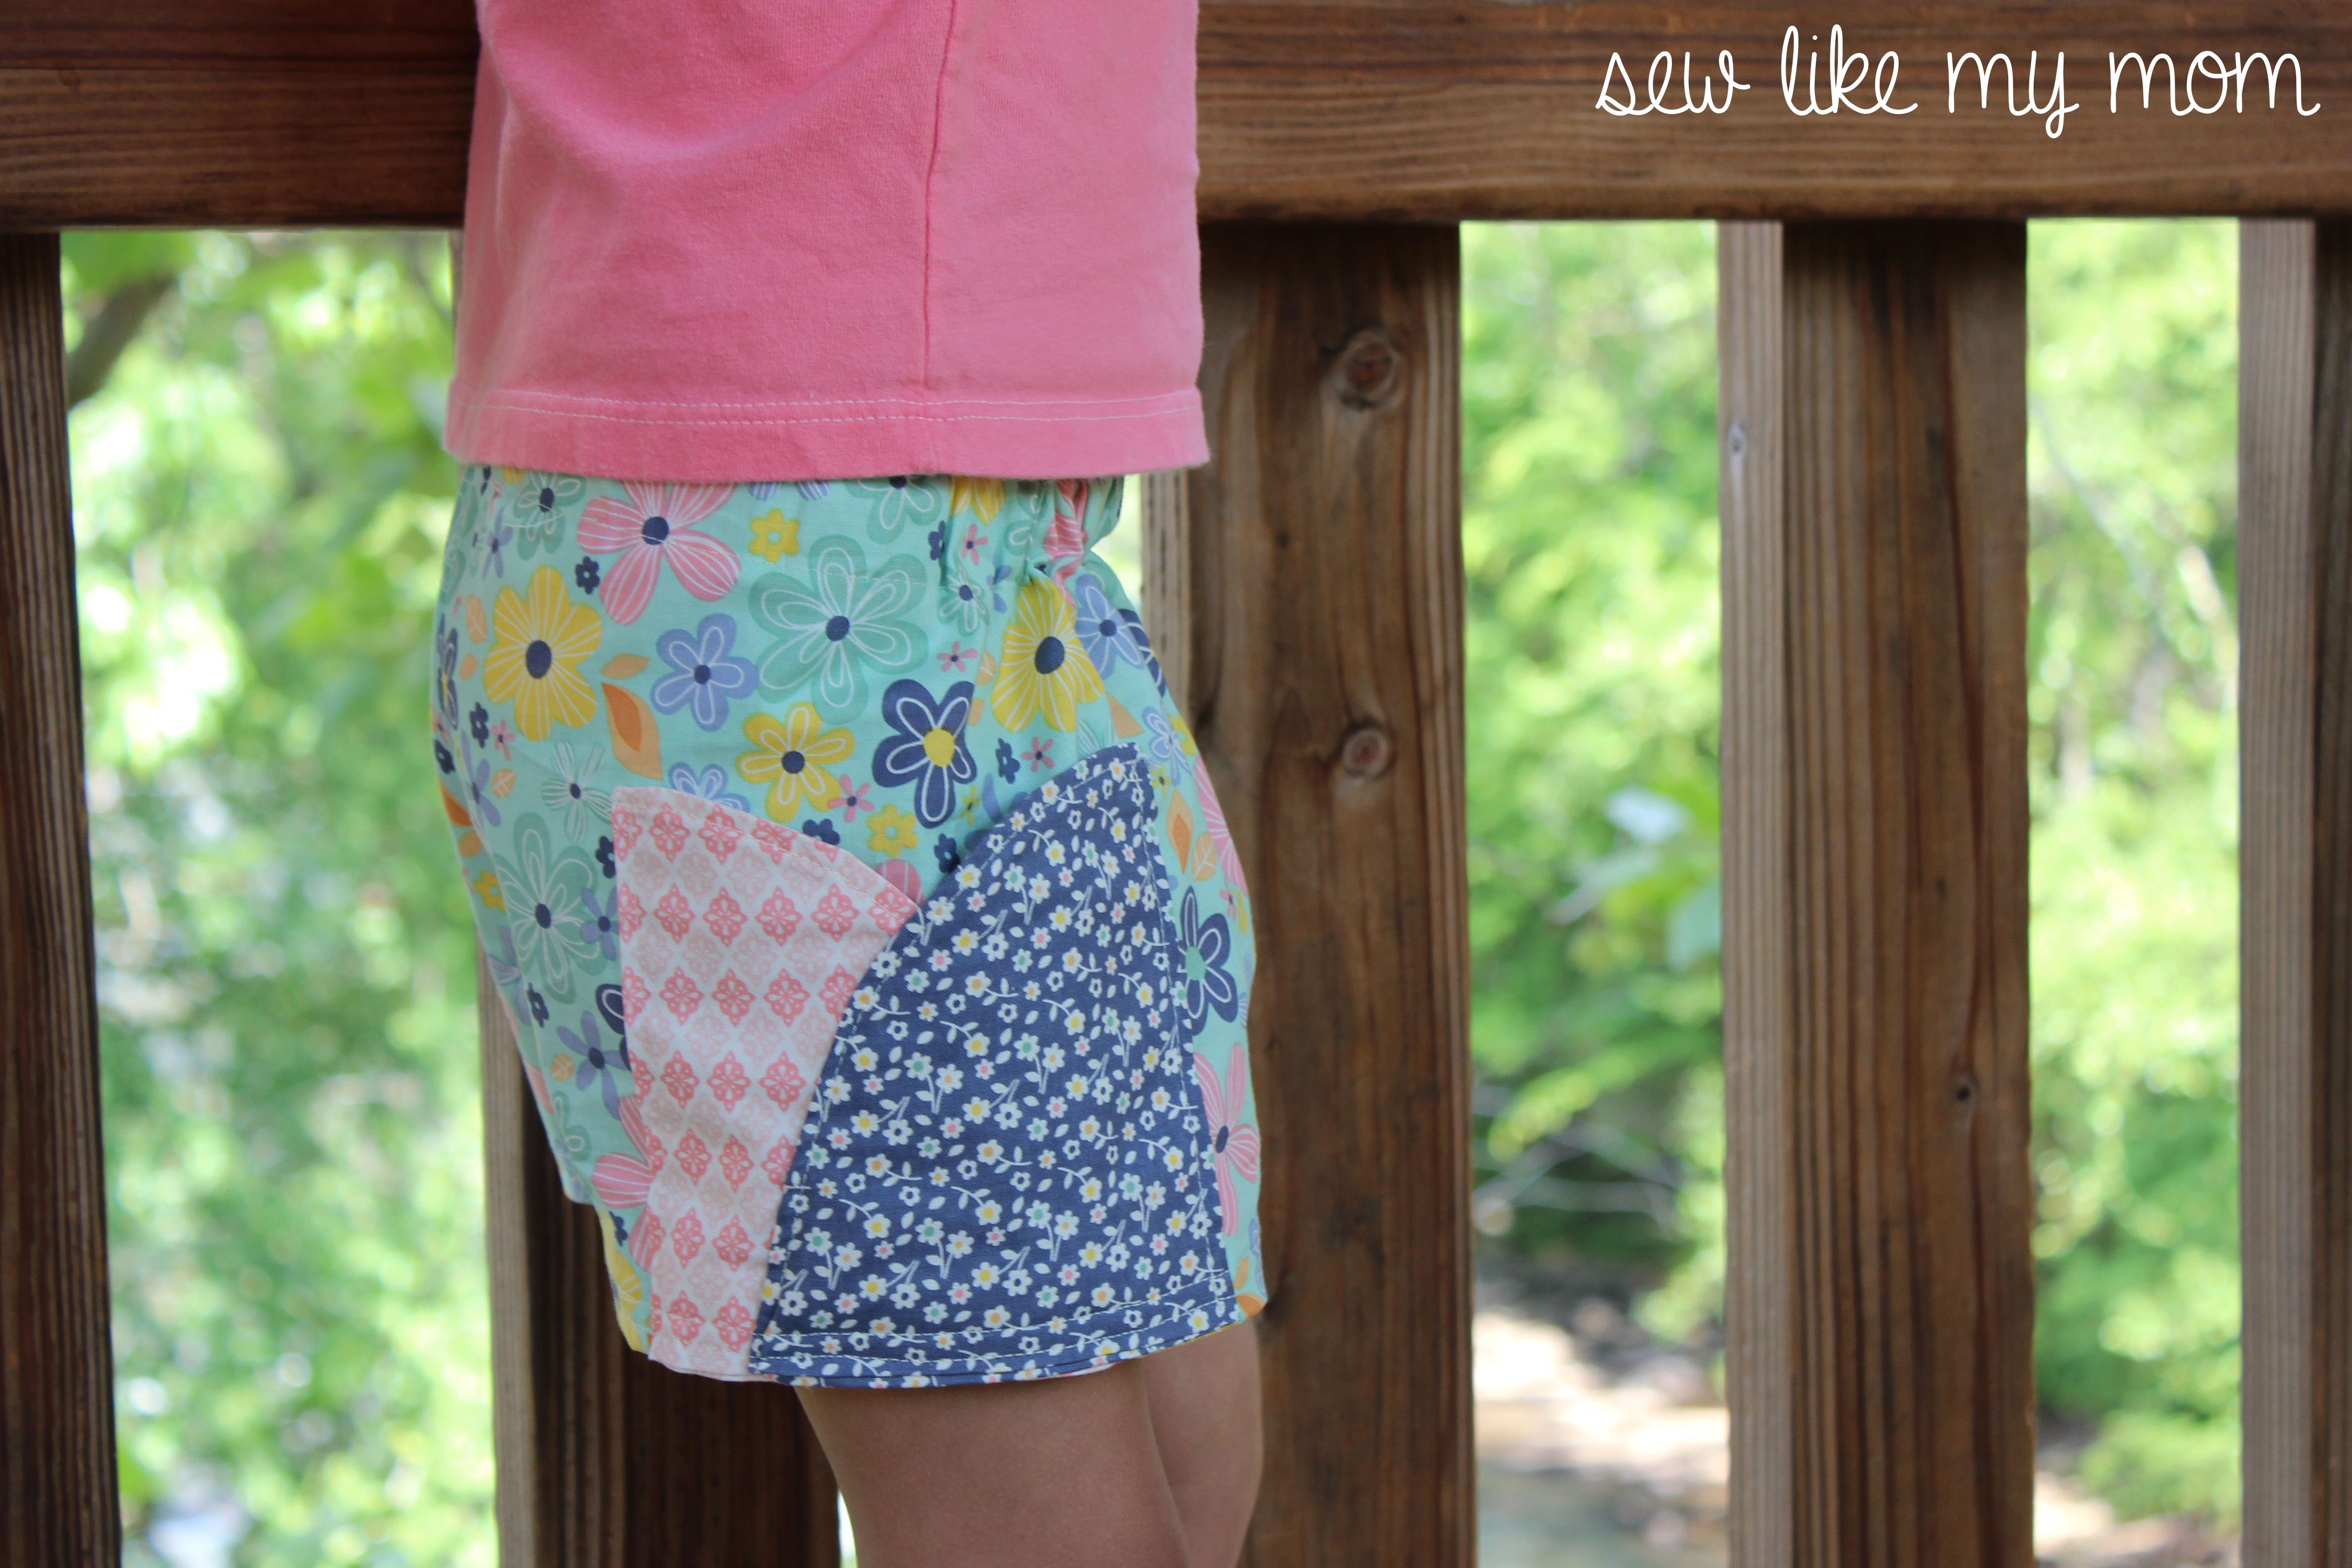
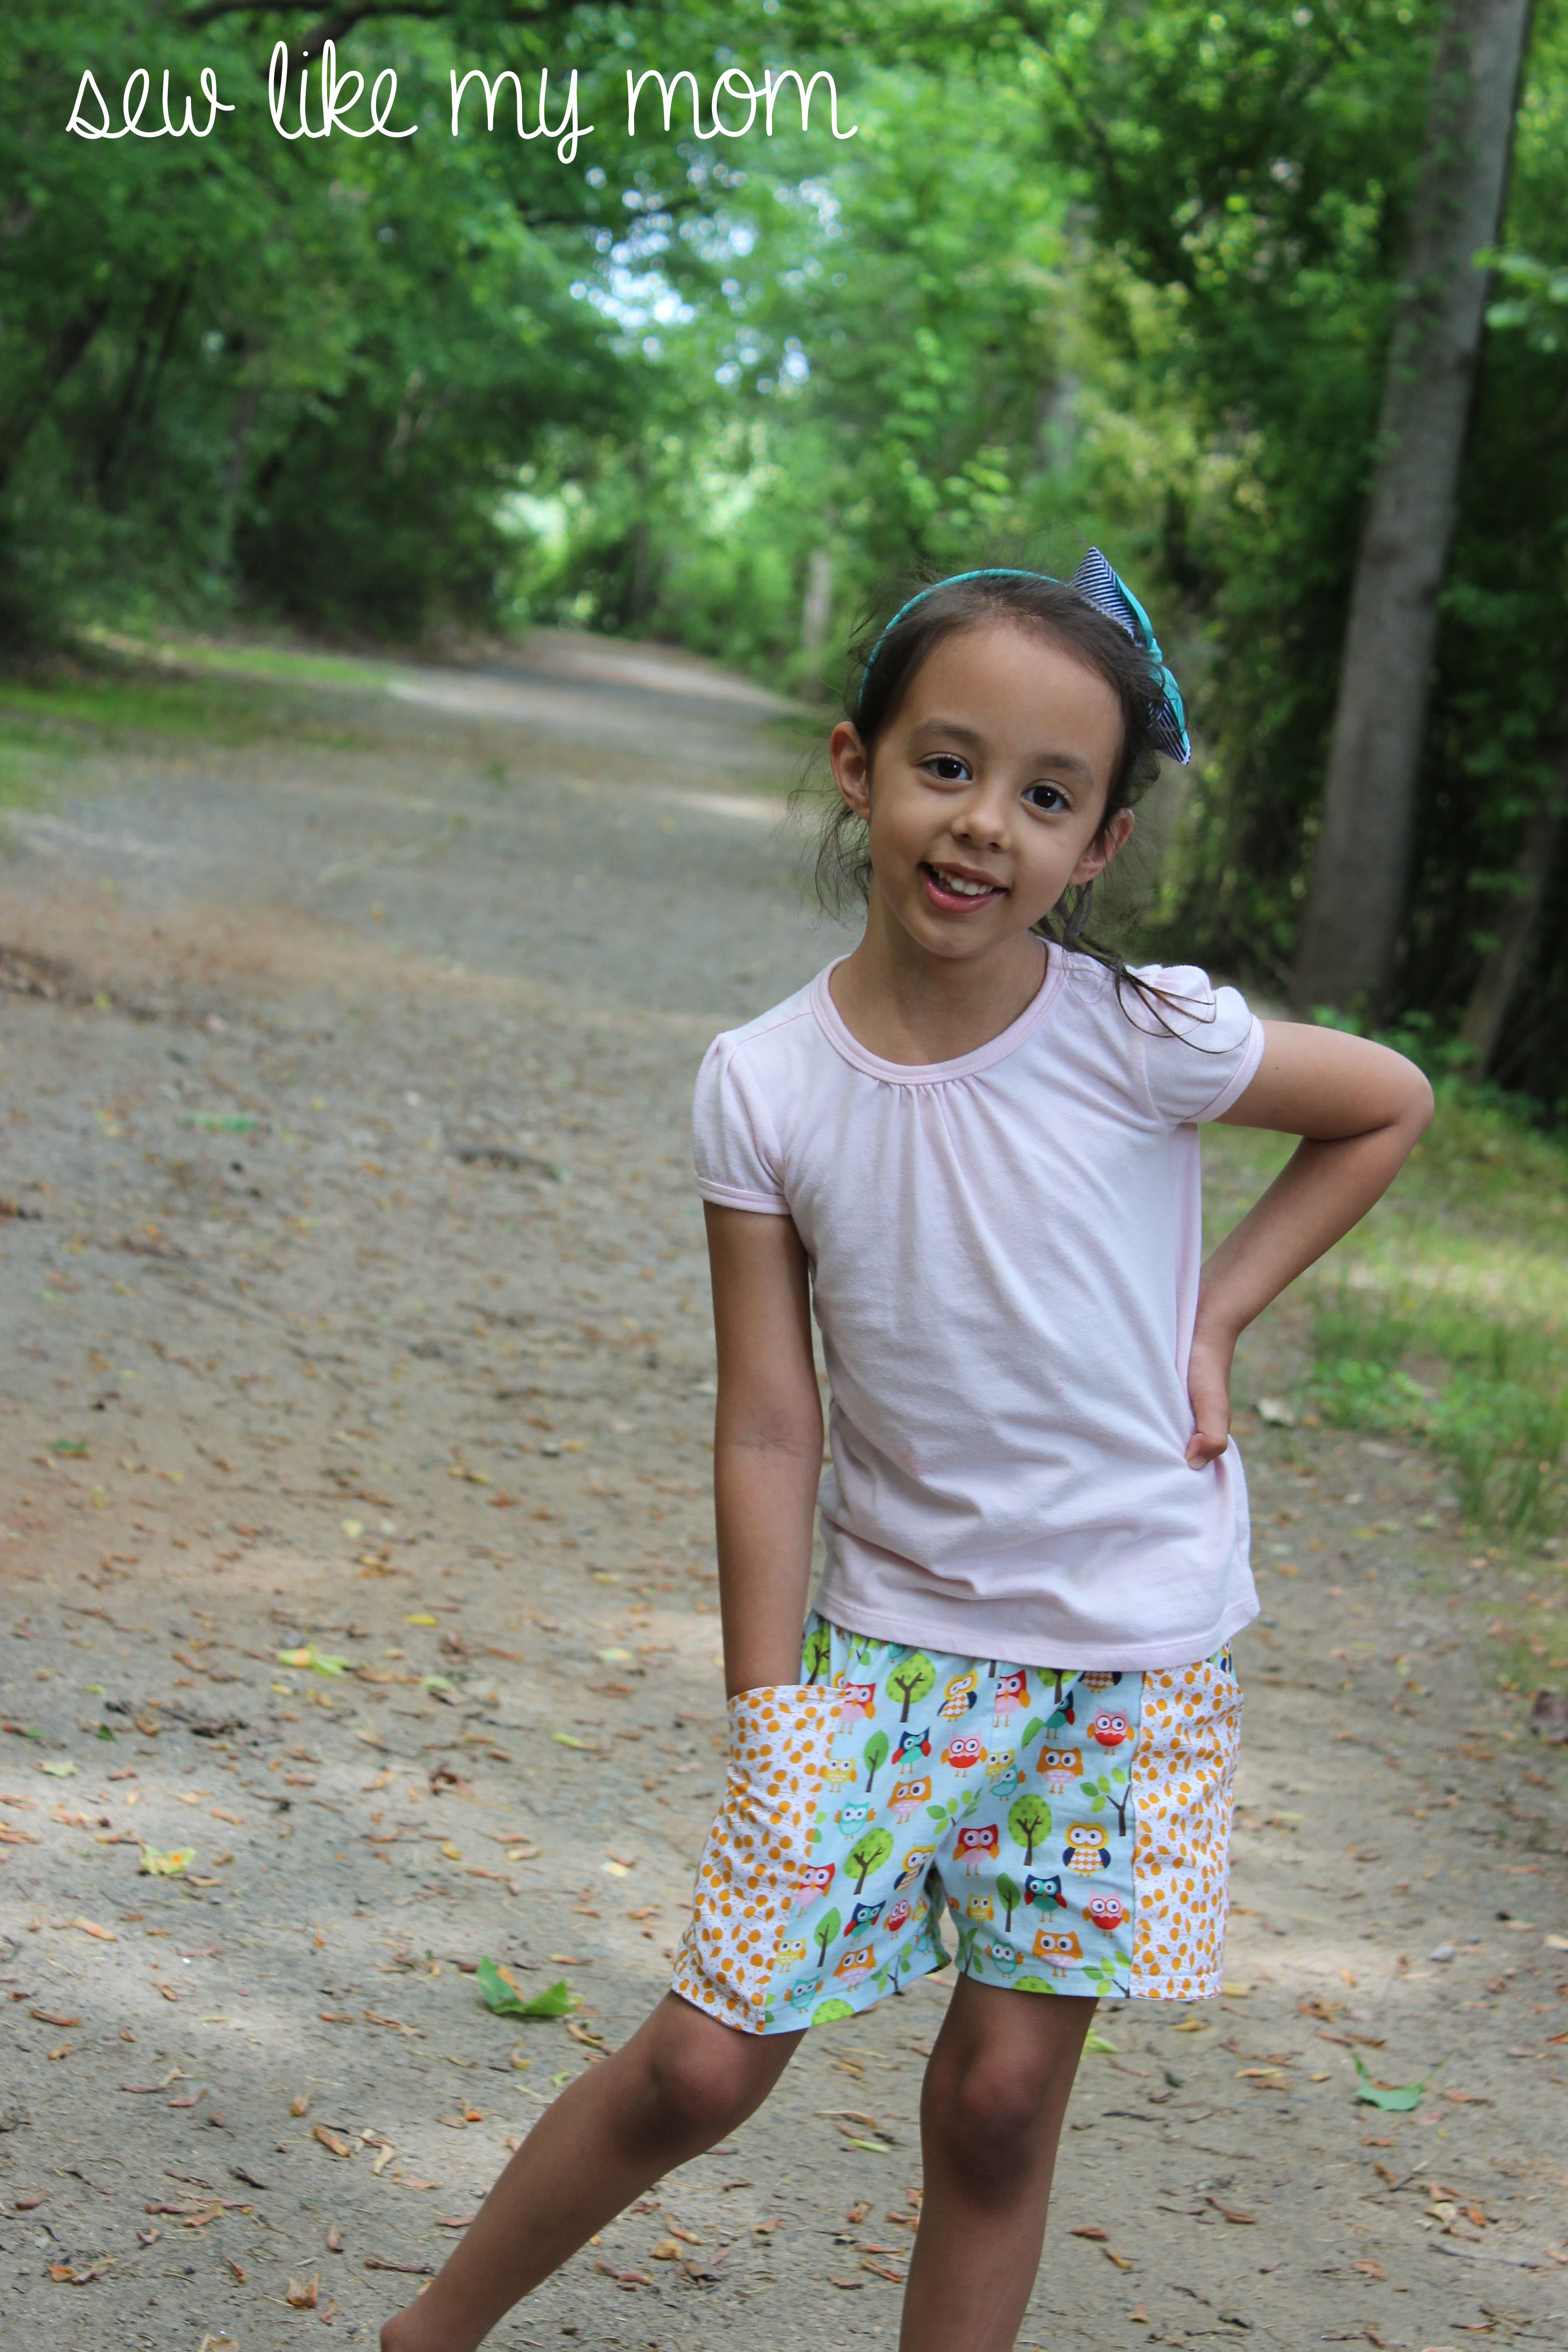
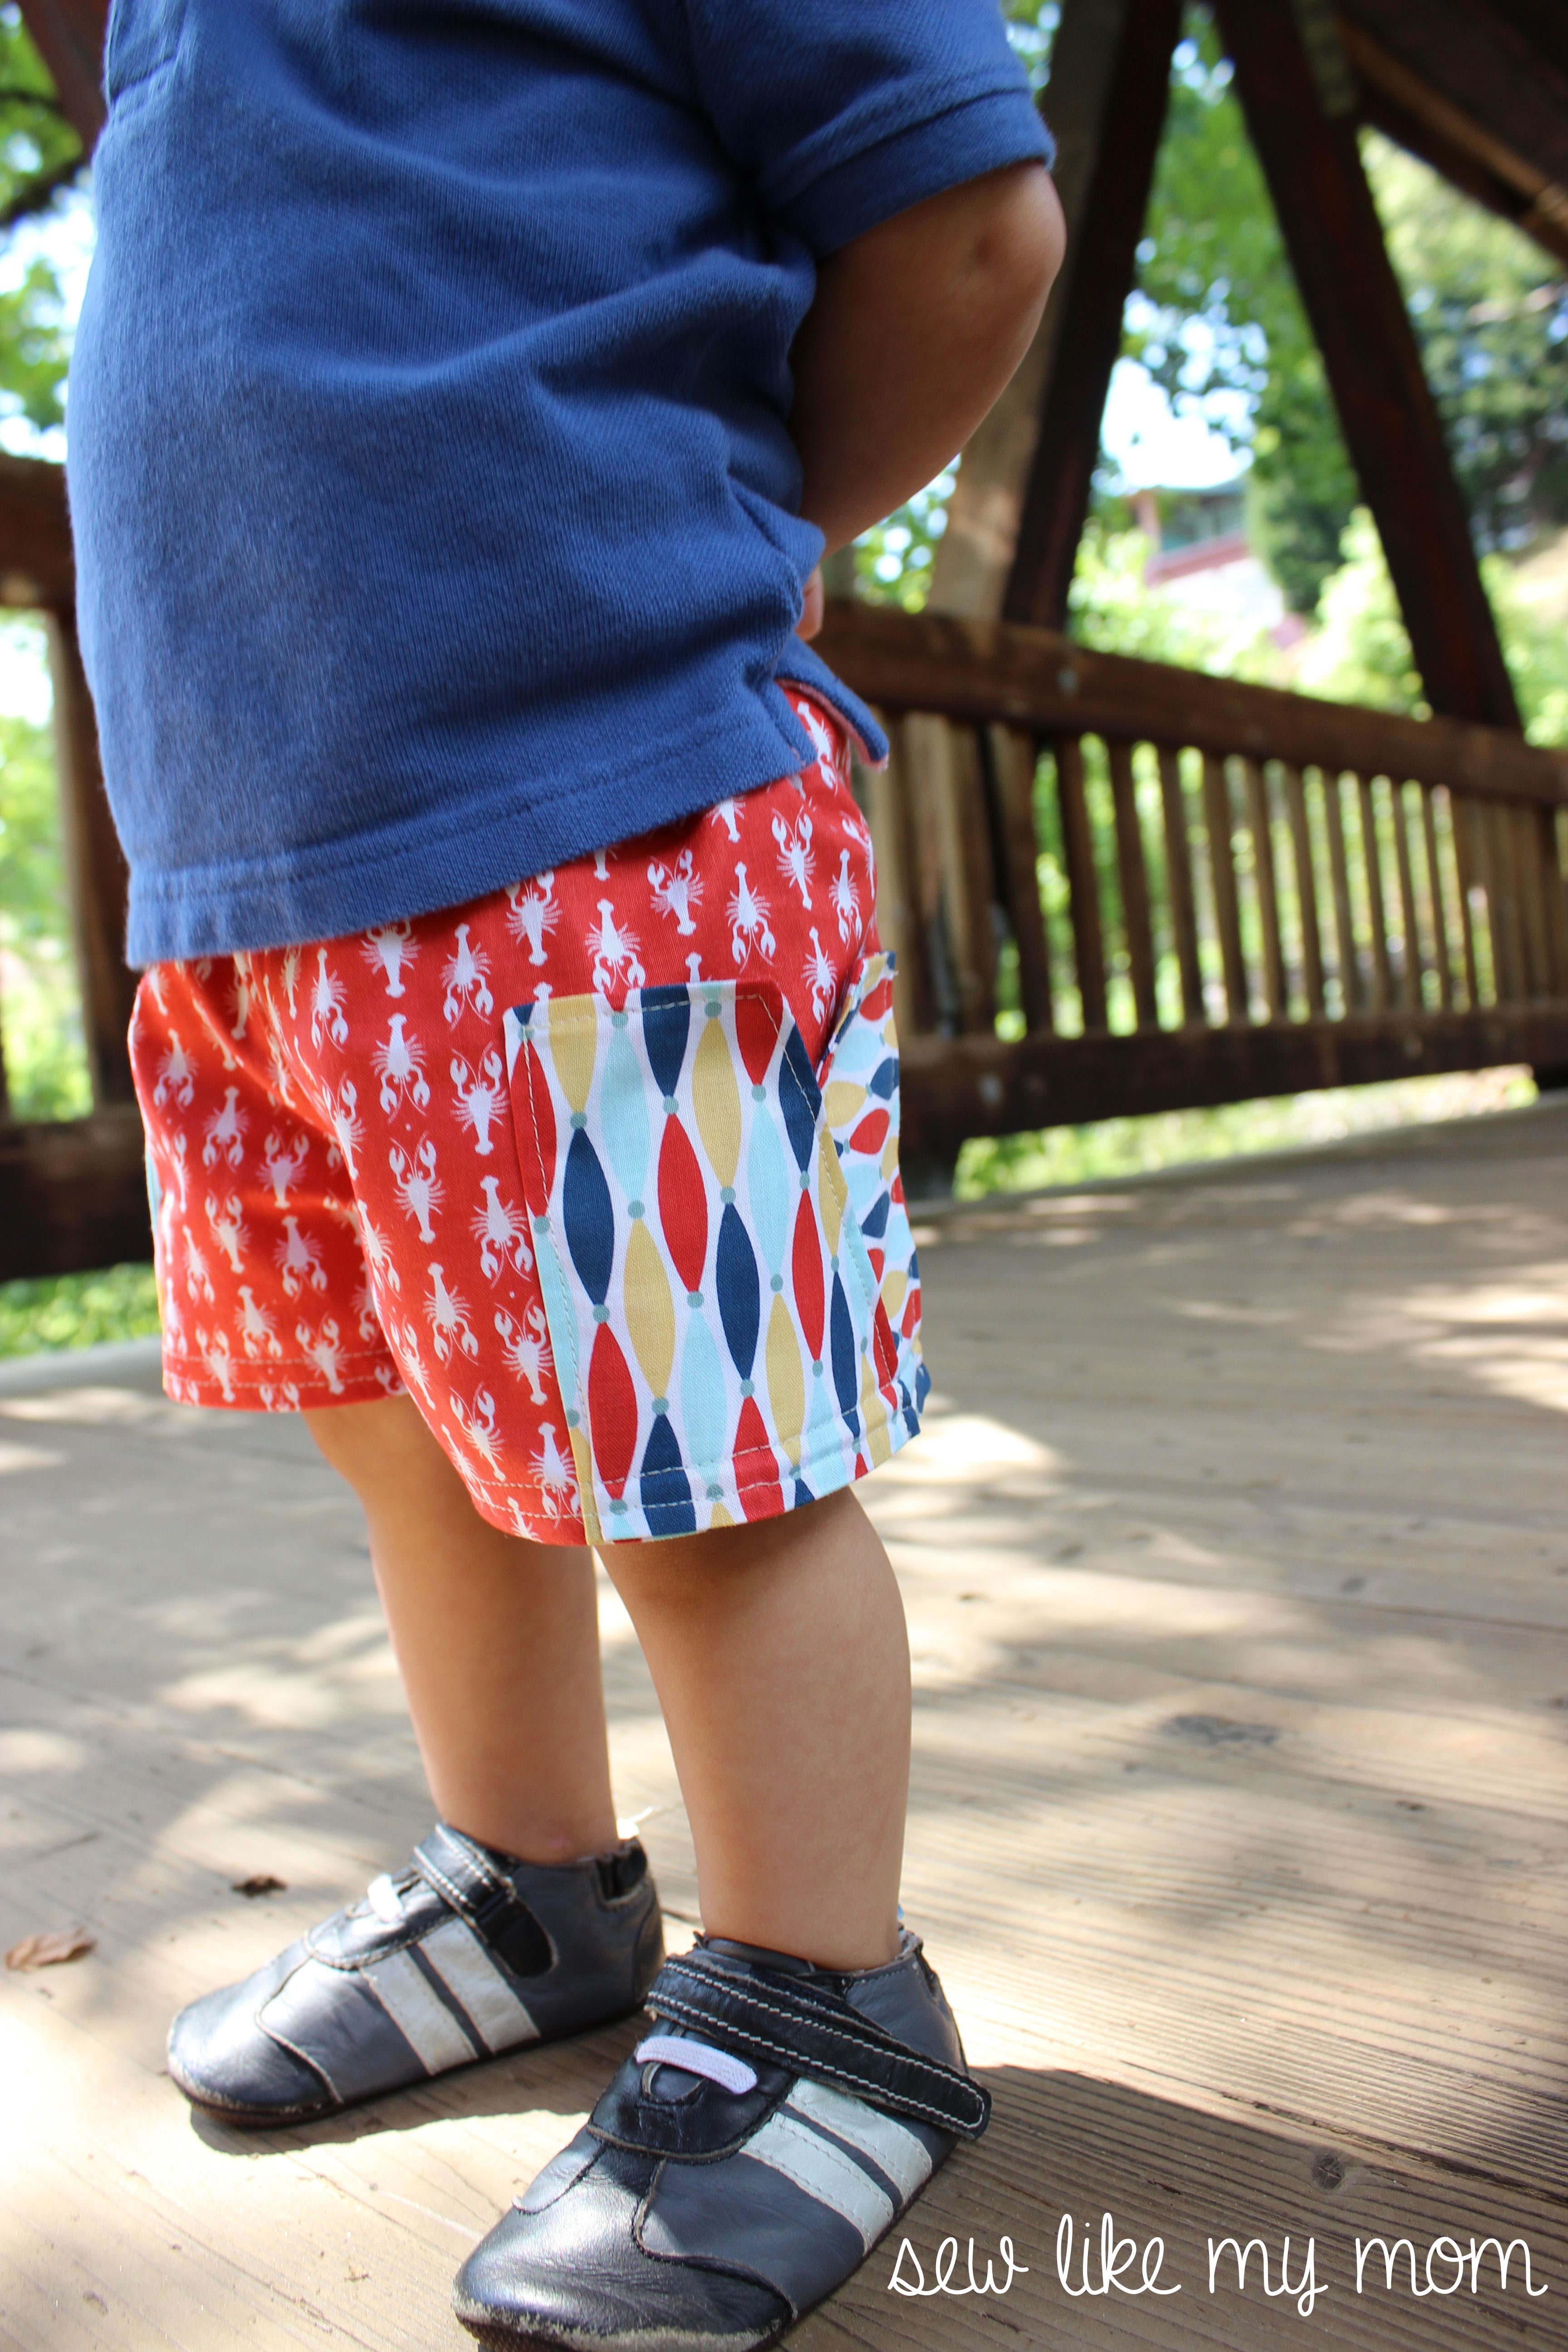
These shorts sew together like a dream. The sweet pockets are a great touch, for both the gals and the guys in your life. I’ve provided the pattern in 9 sizes, from 12m to an 8! 
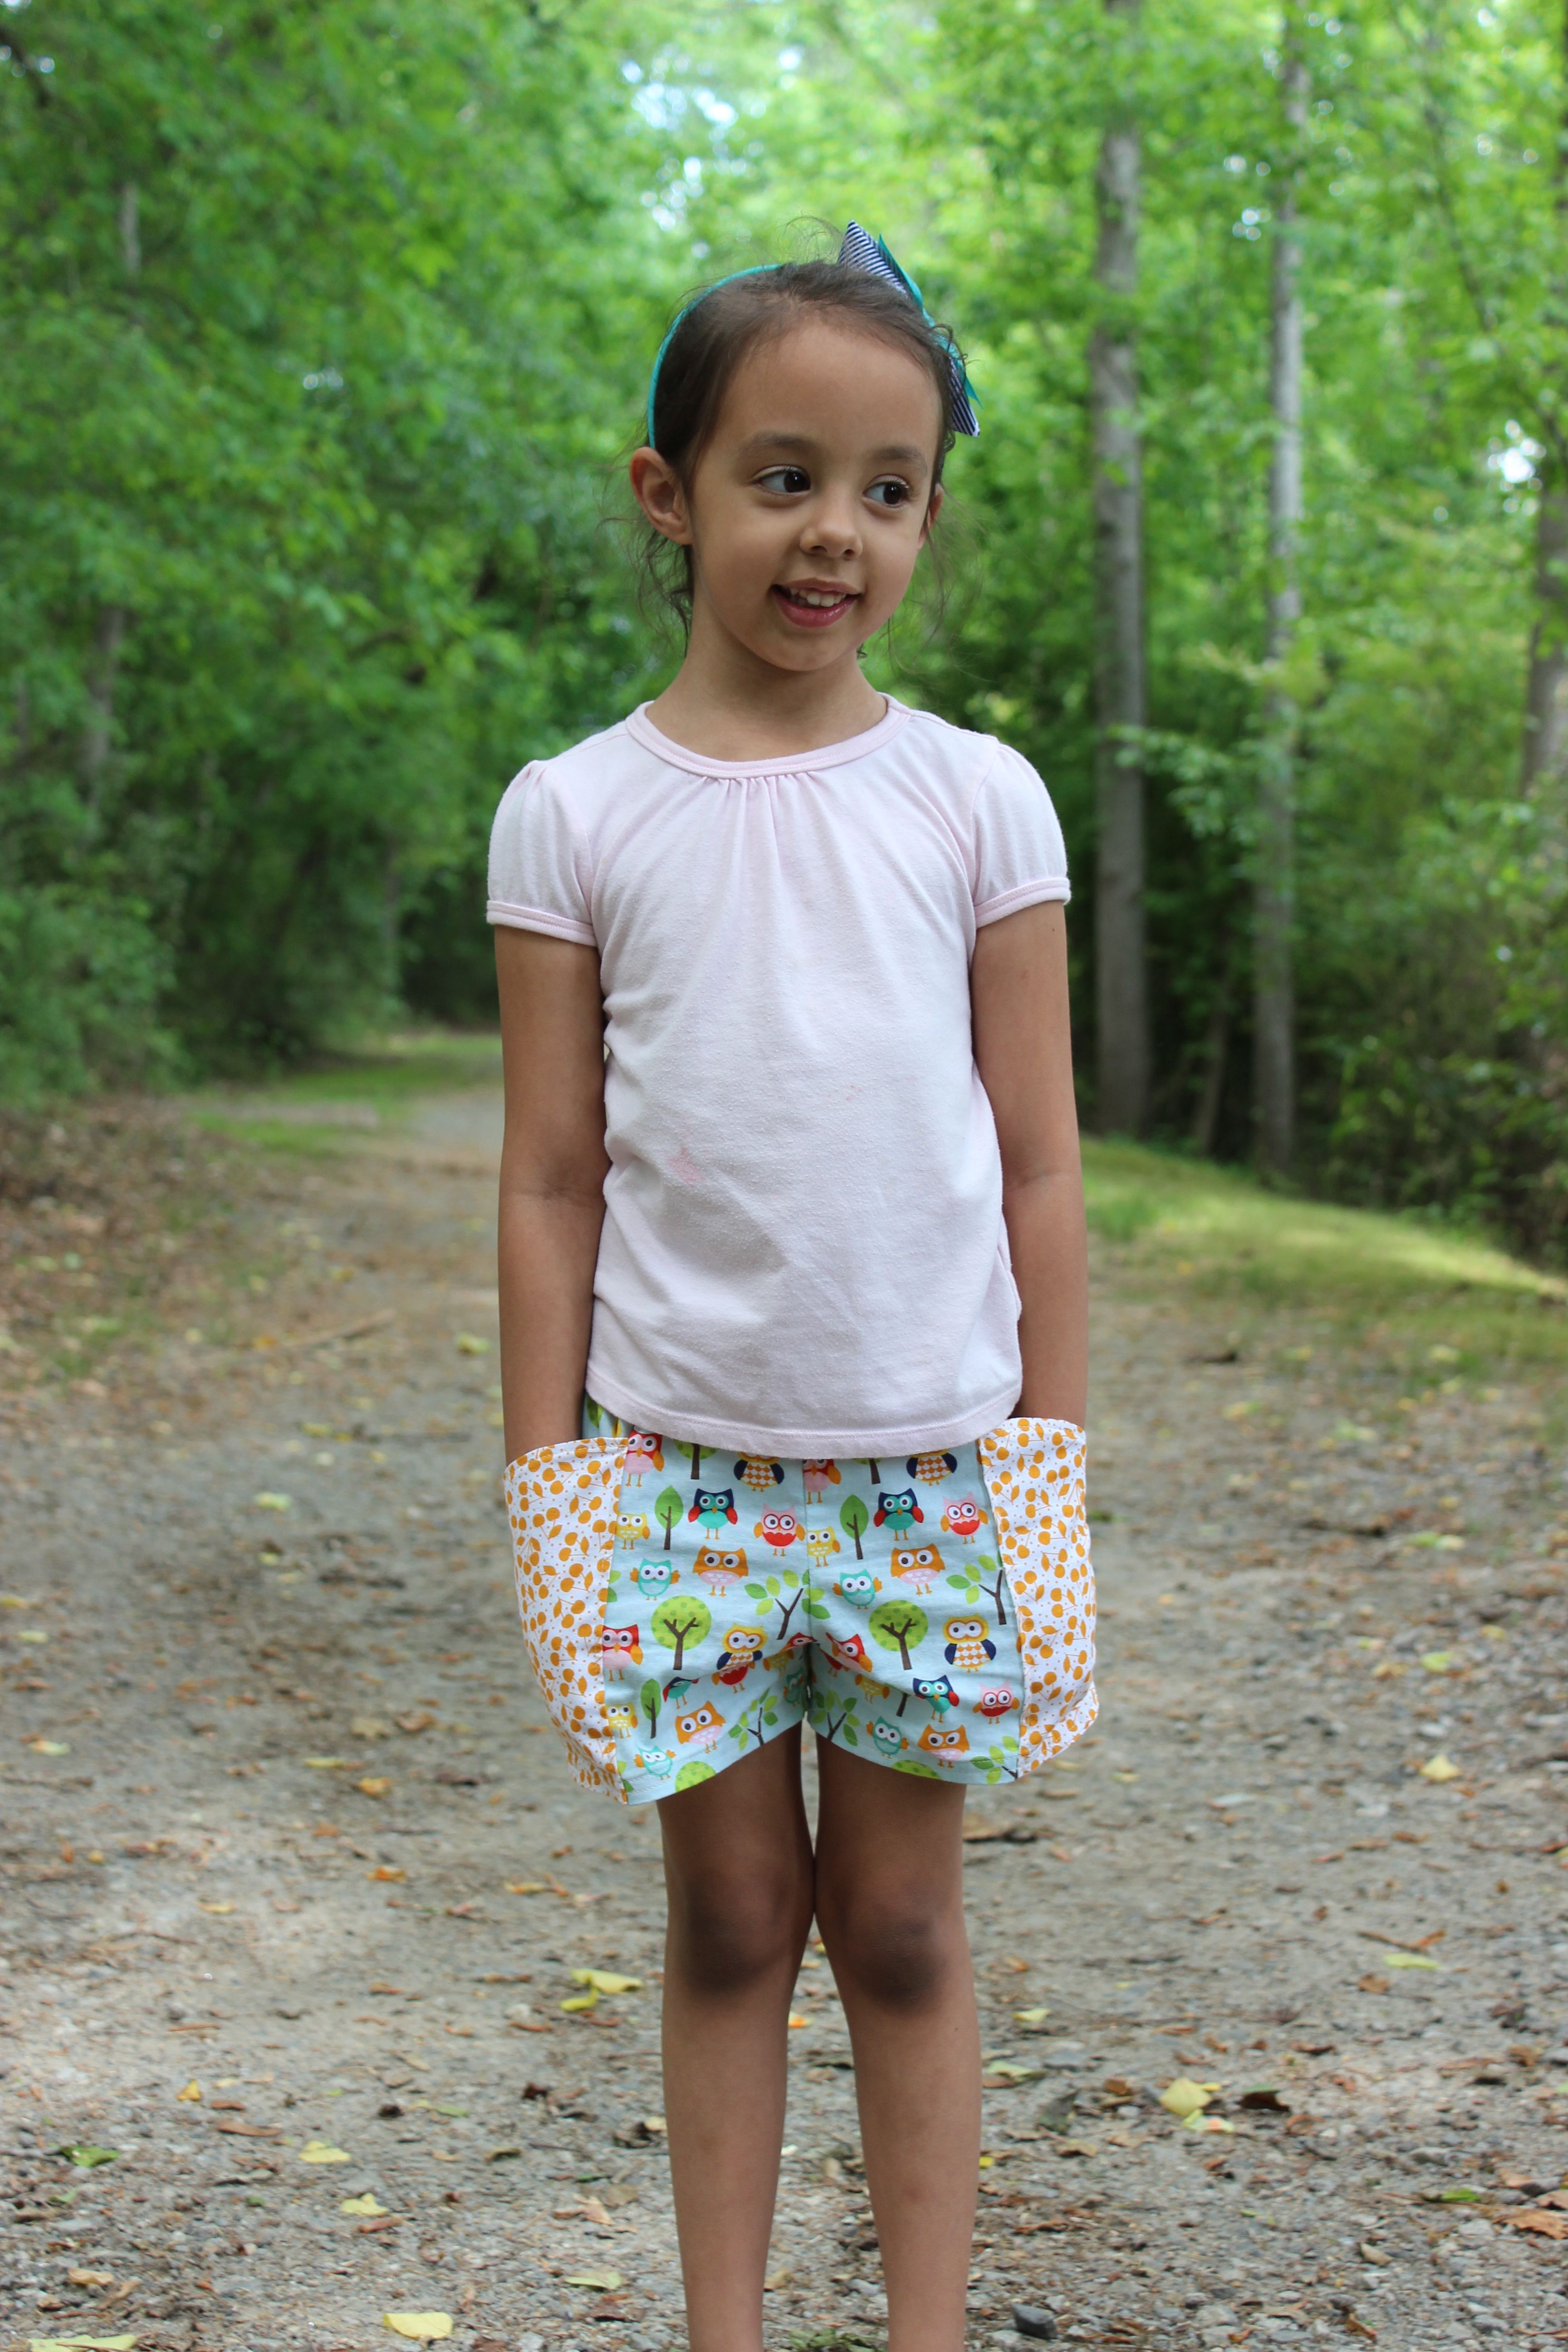
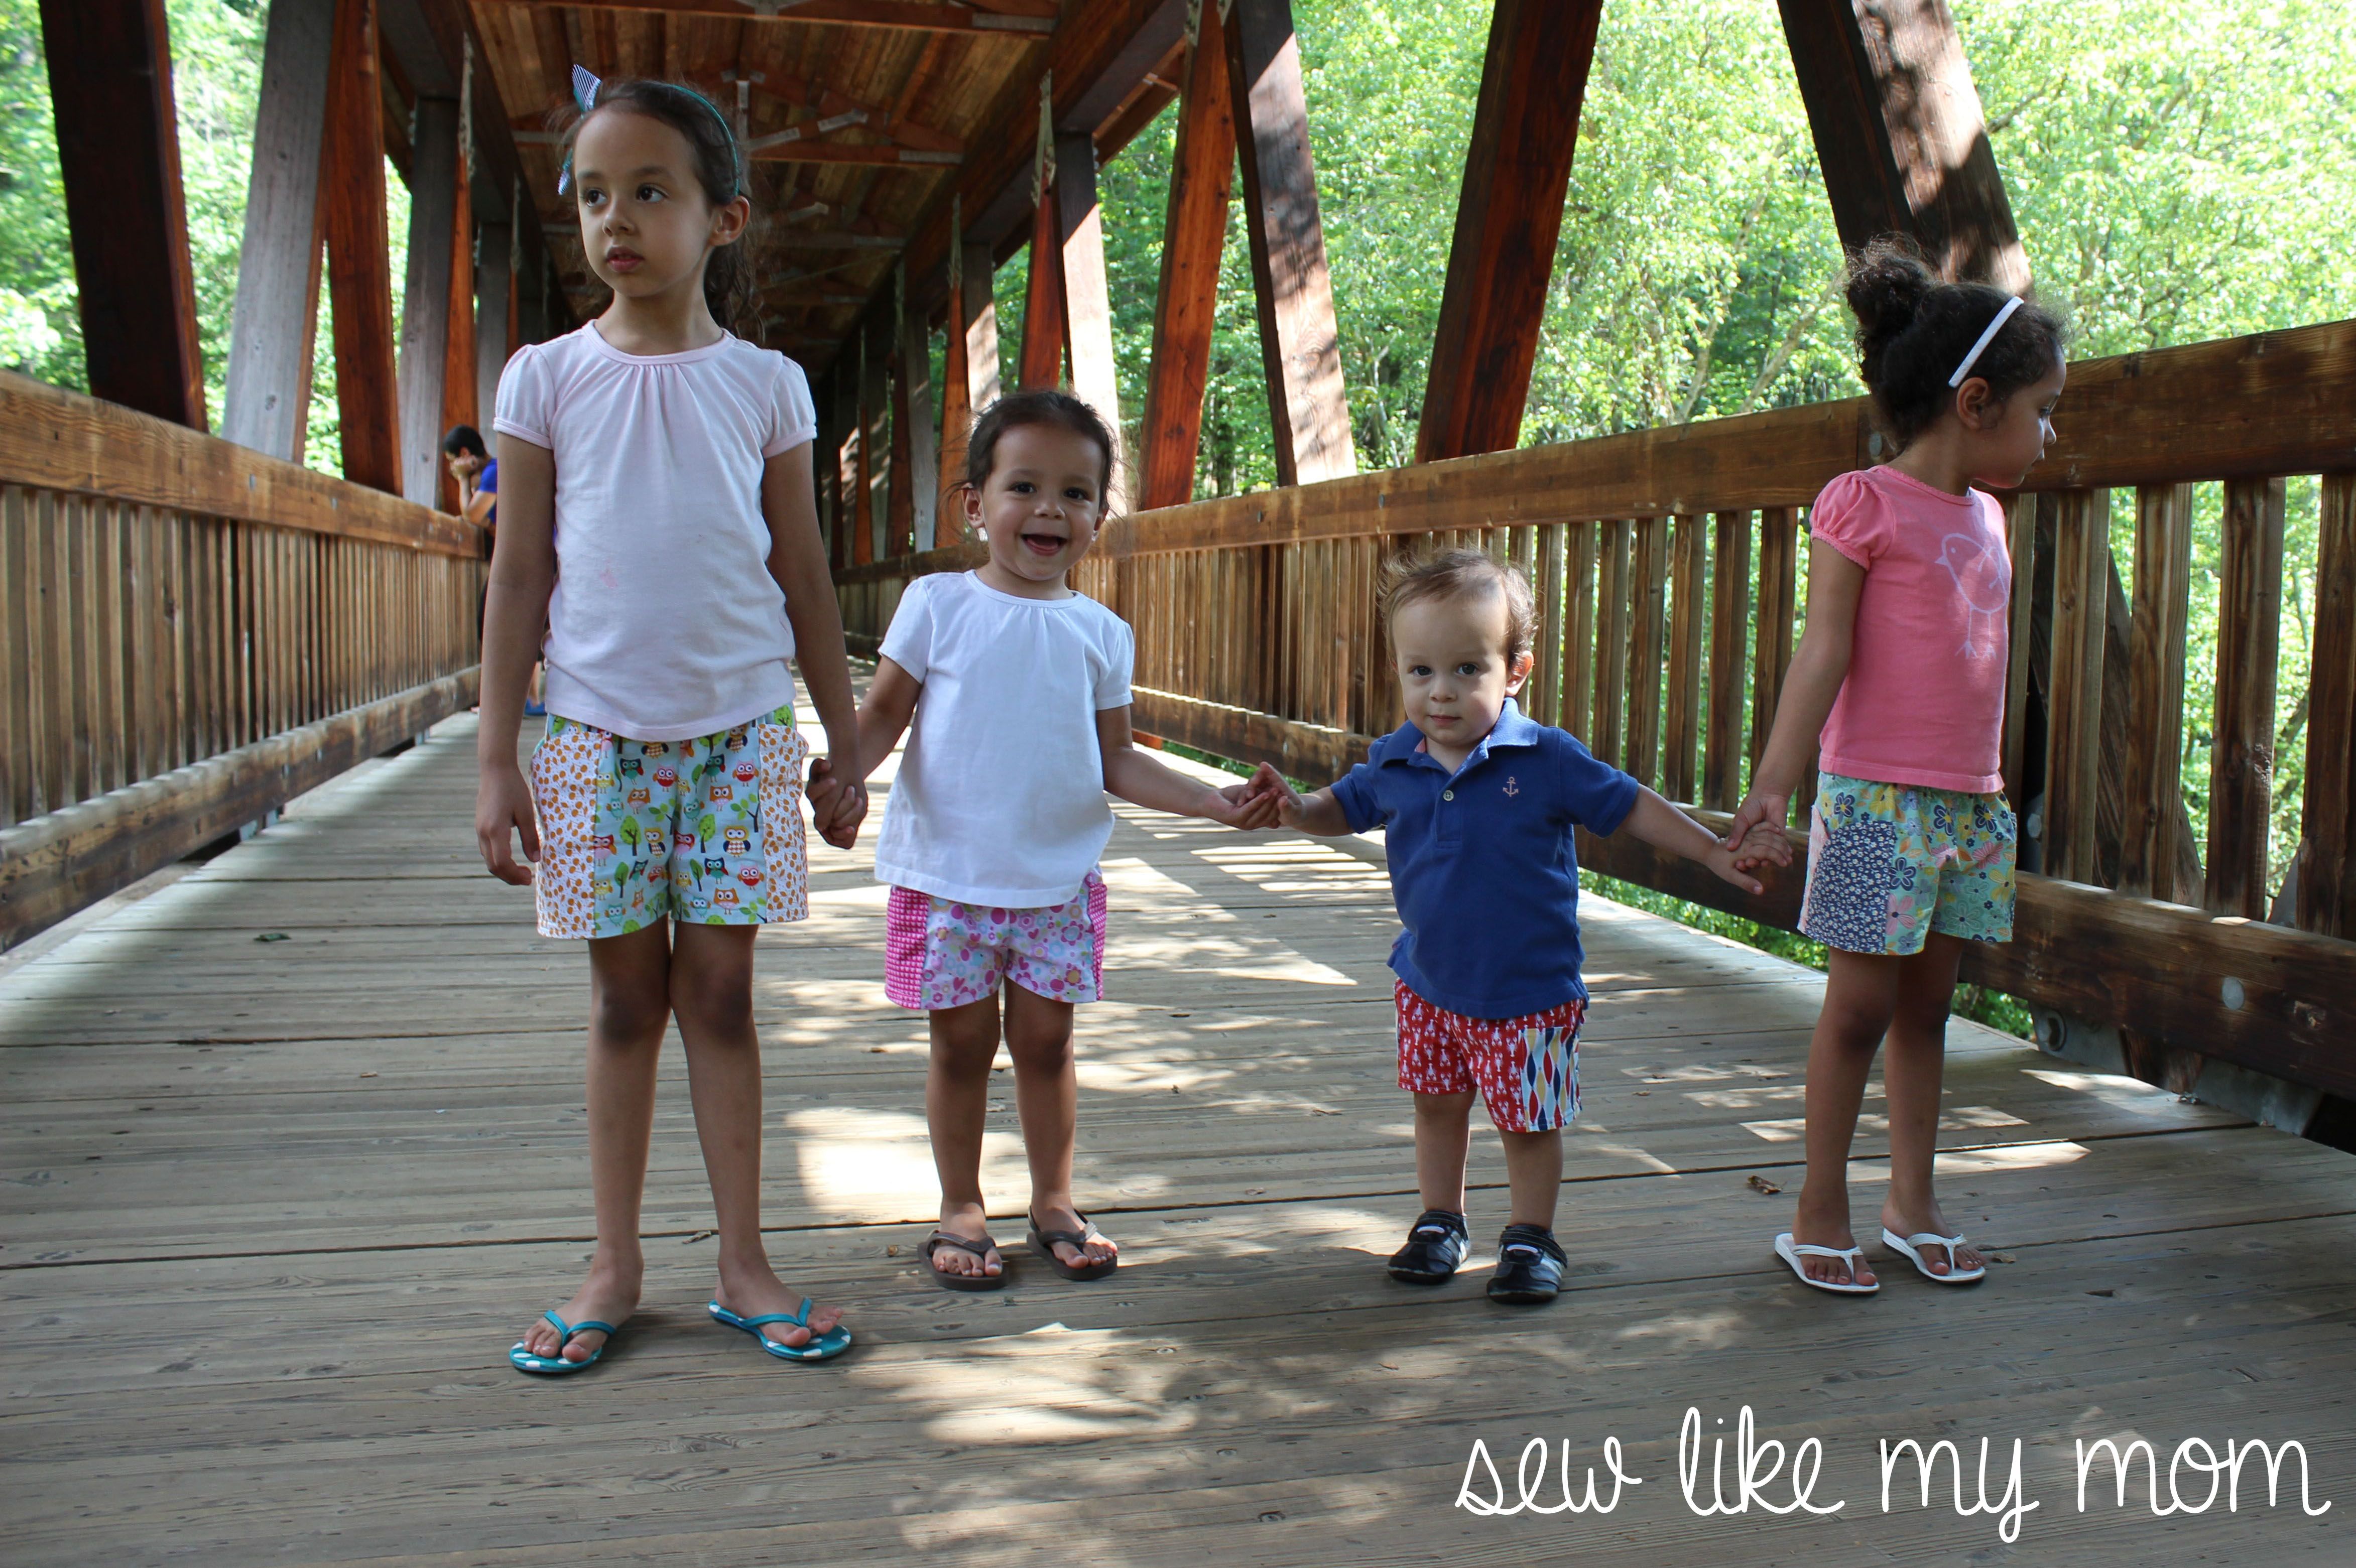
Are you ready to get started sewing your own? First you’ll need to download the pattern pieces. You can do that by clicking here —>  Remember, it’s a FREE pattern, you won’t be charged anything or asked to put in any card information!
UPDATE! Melissa has had SO MANY downloads that she had to add this link:
http://www.craftsy.com/pattern/sewing/clothing/sycamore-shorts/96702
So let’s get started!
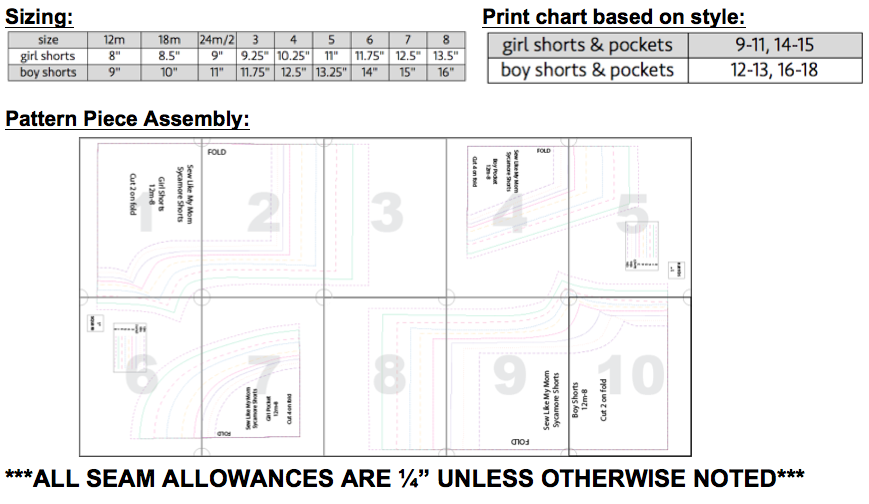
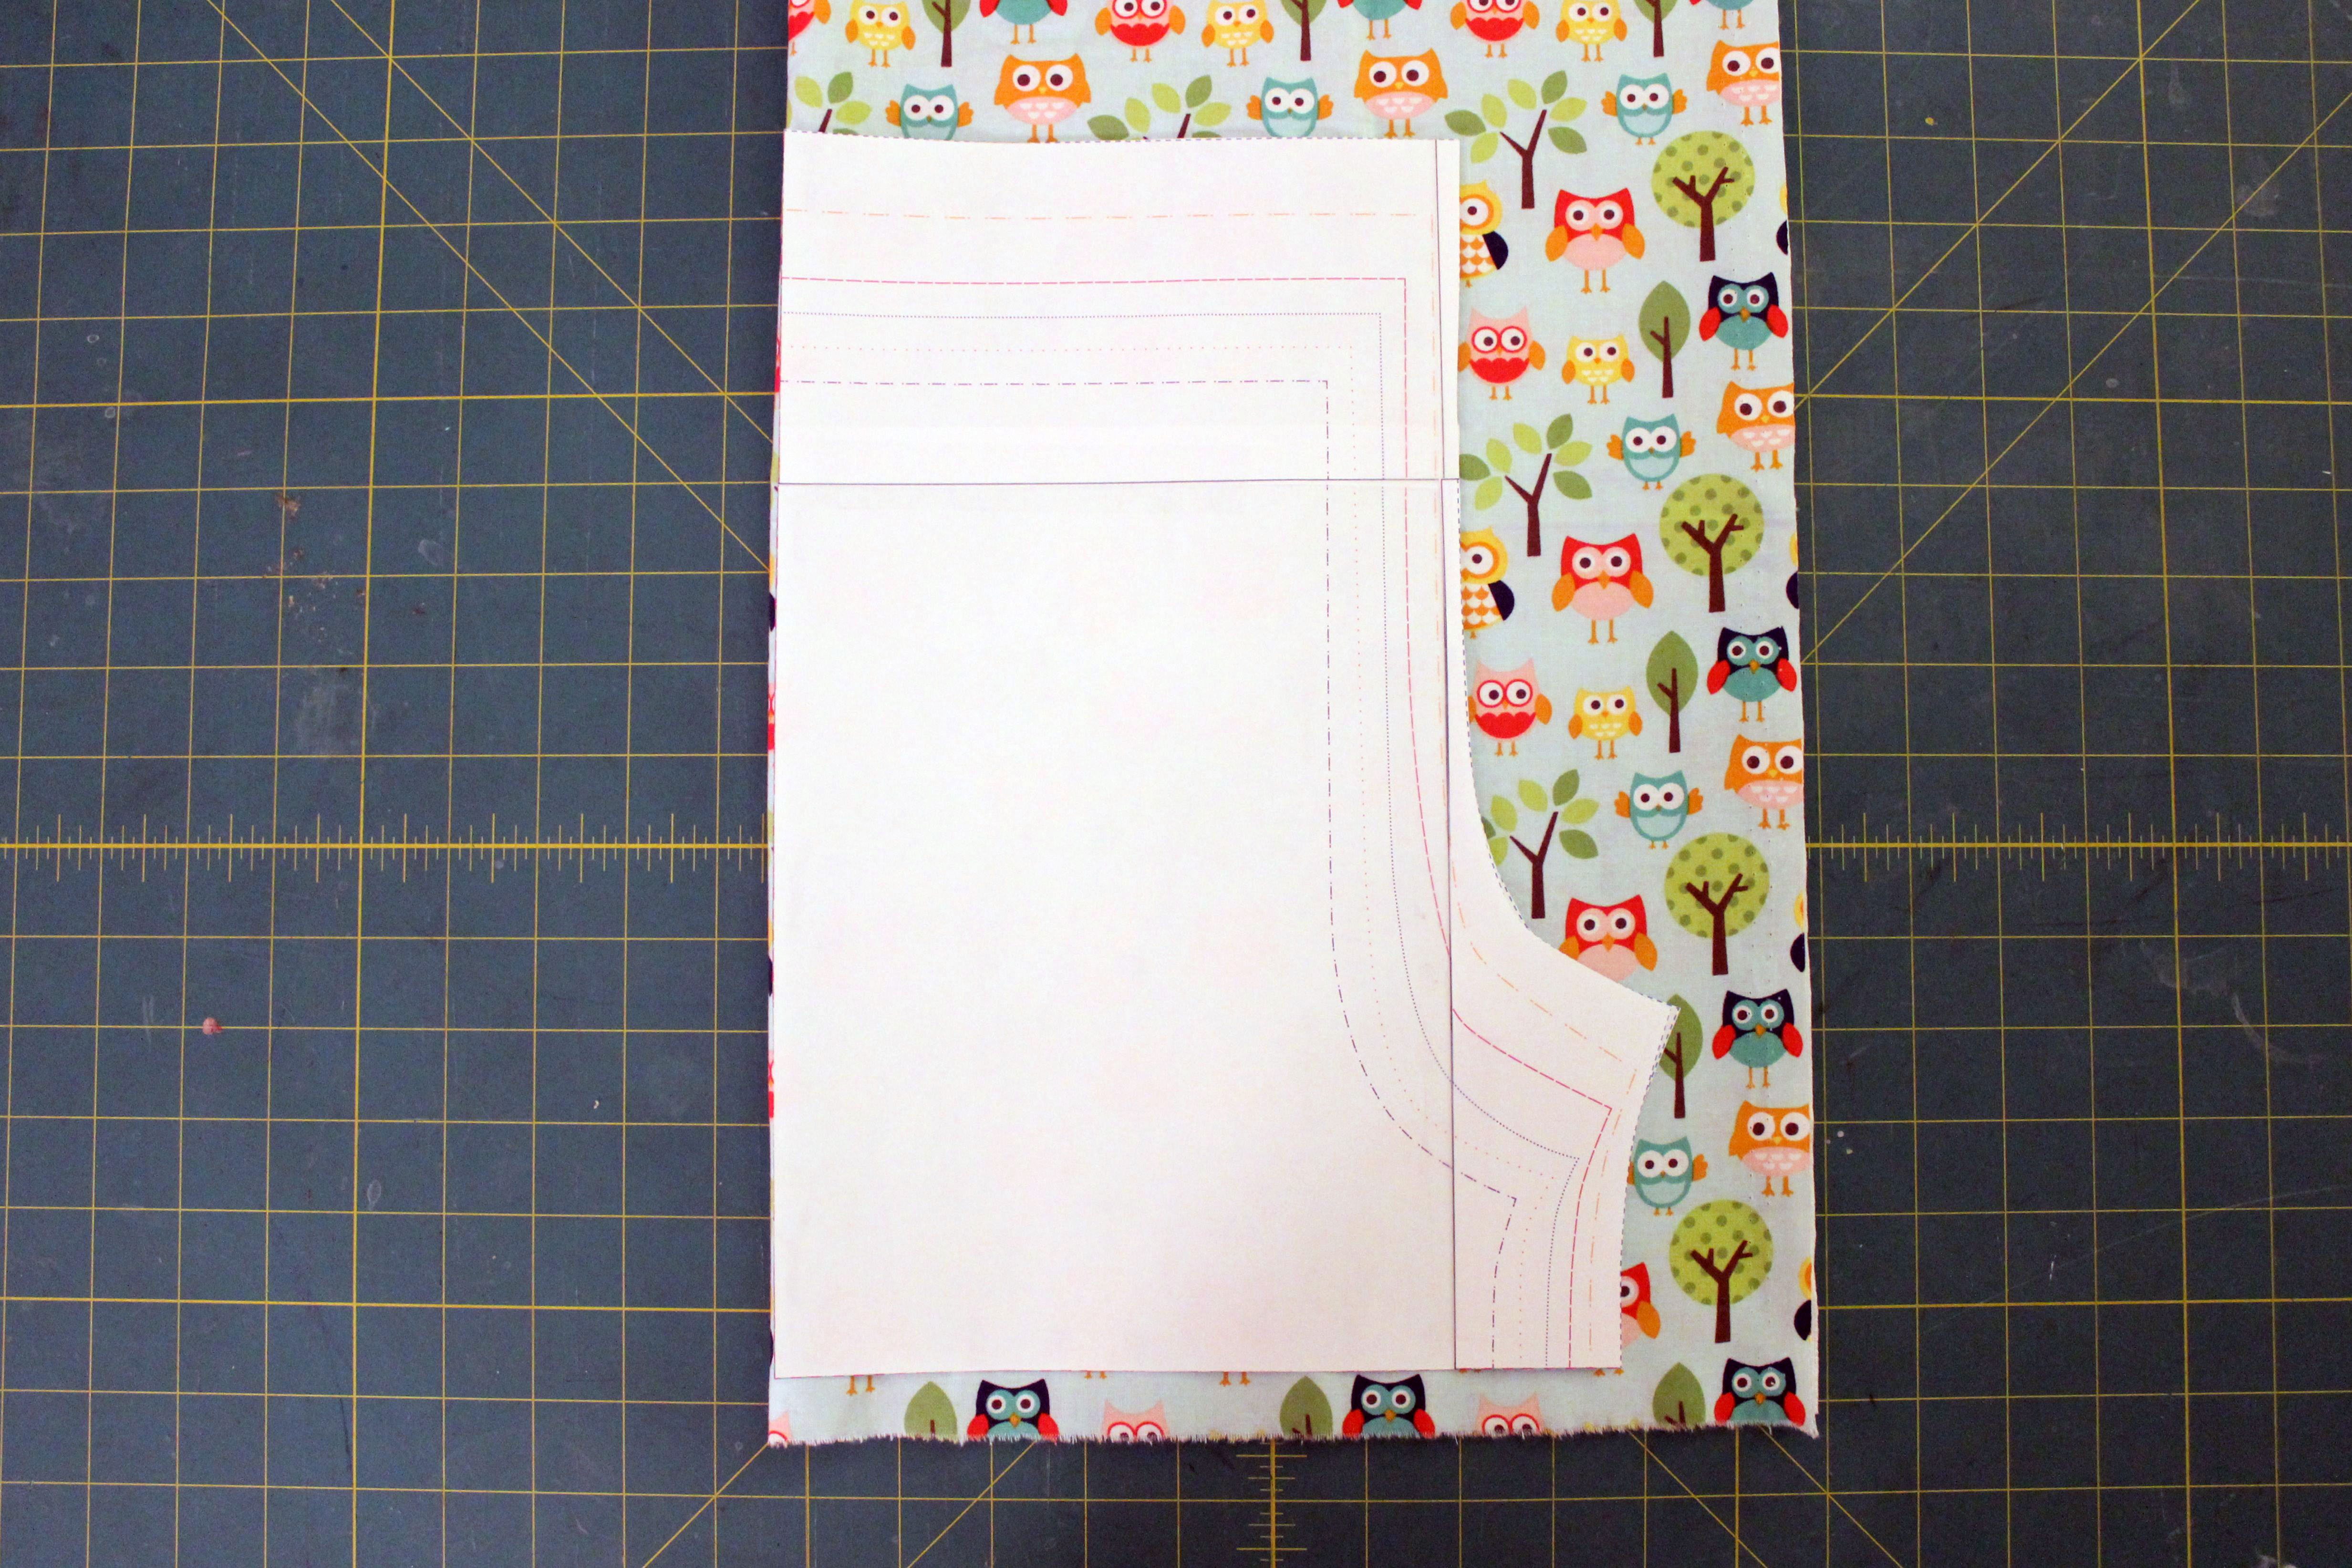
Step 1: Fold fabric in half and cut 2 pieces simultaneously on the fold. This will give you 2 mirror pieces.
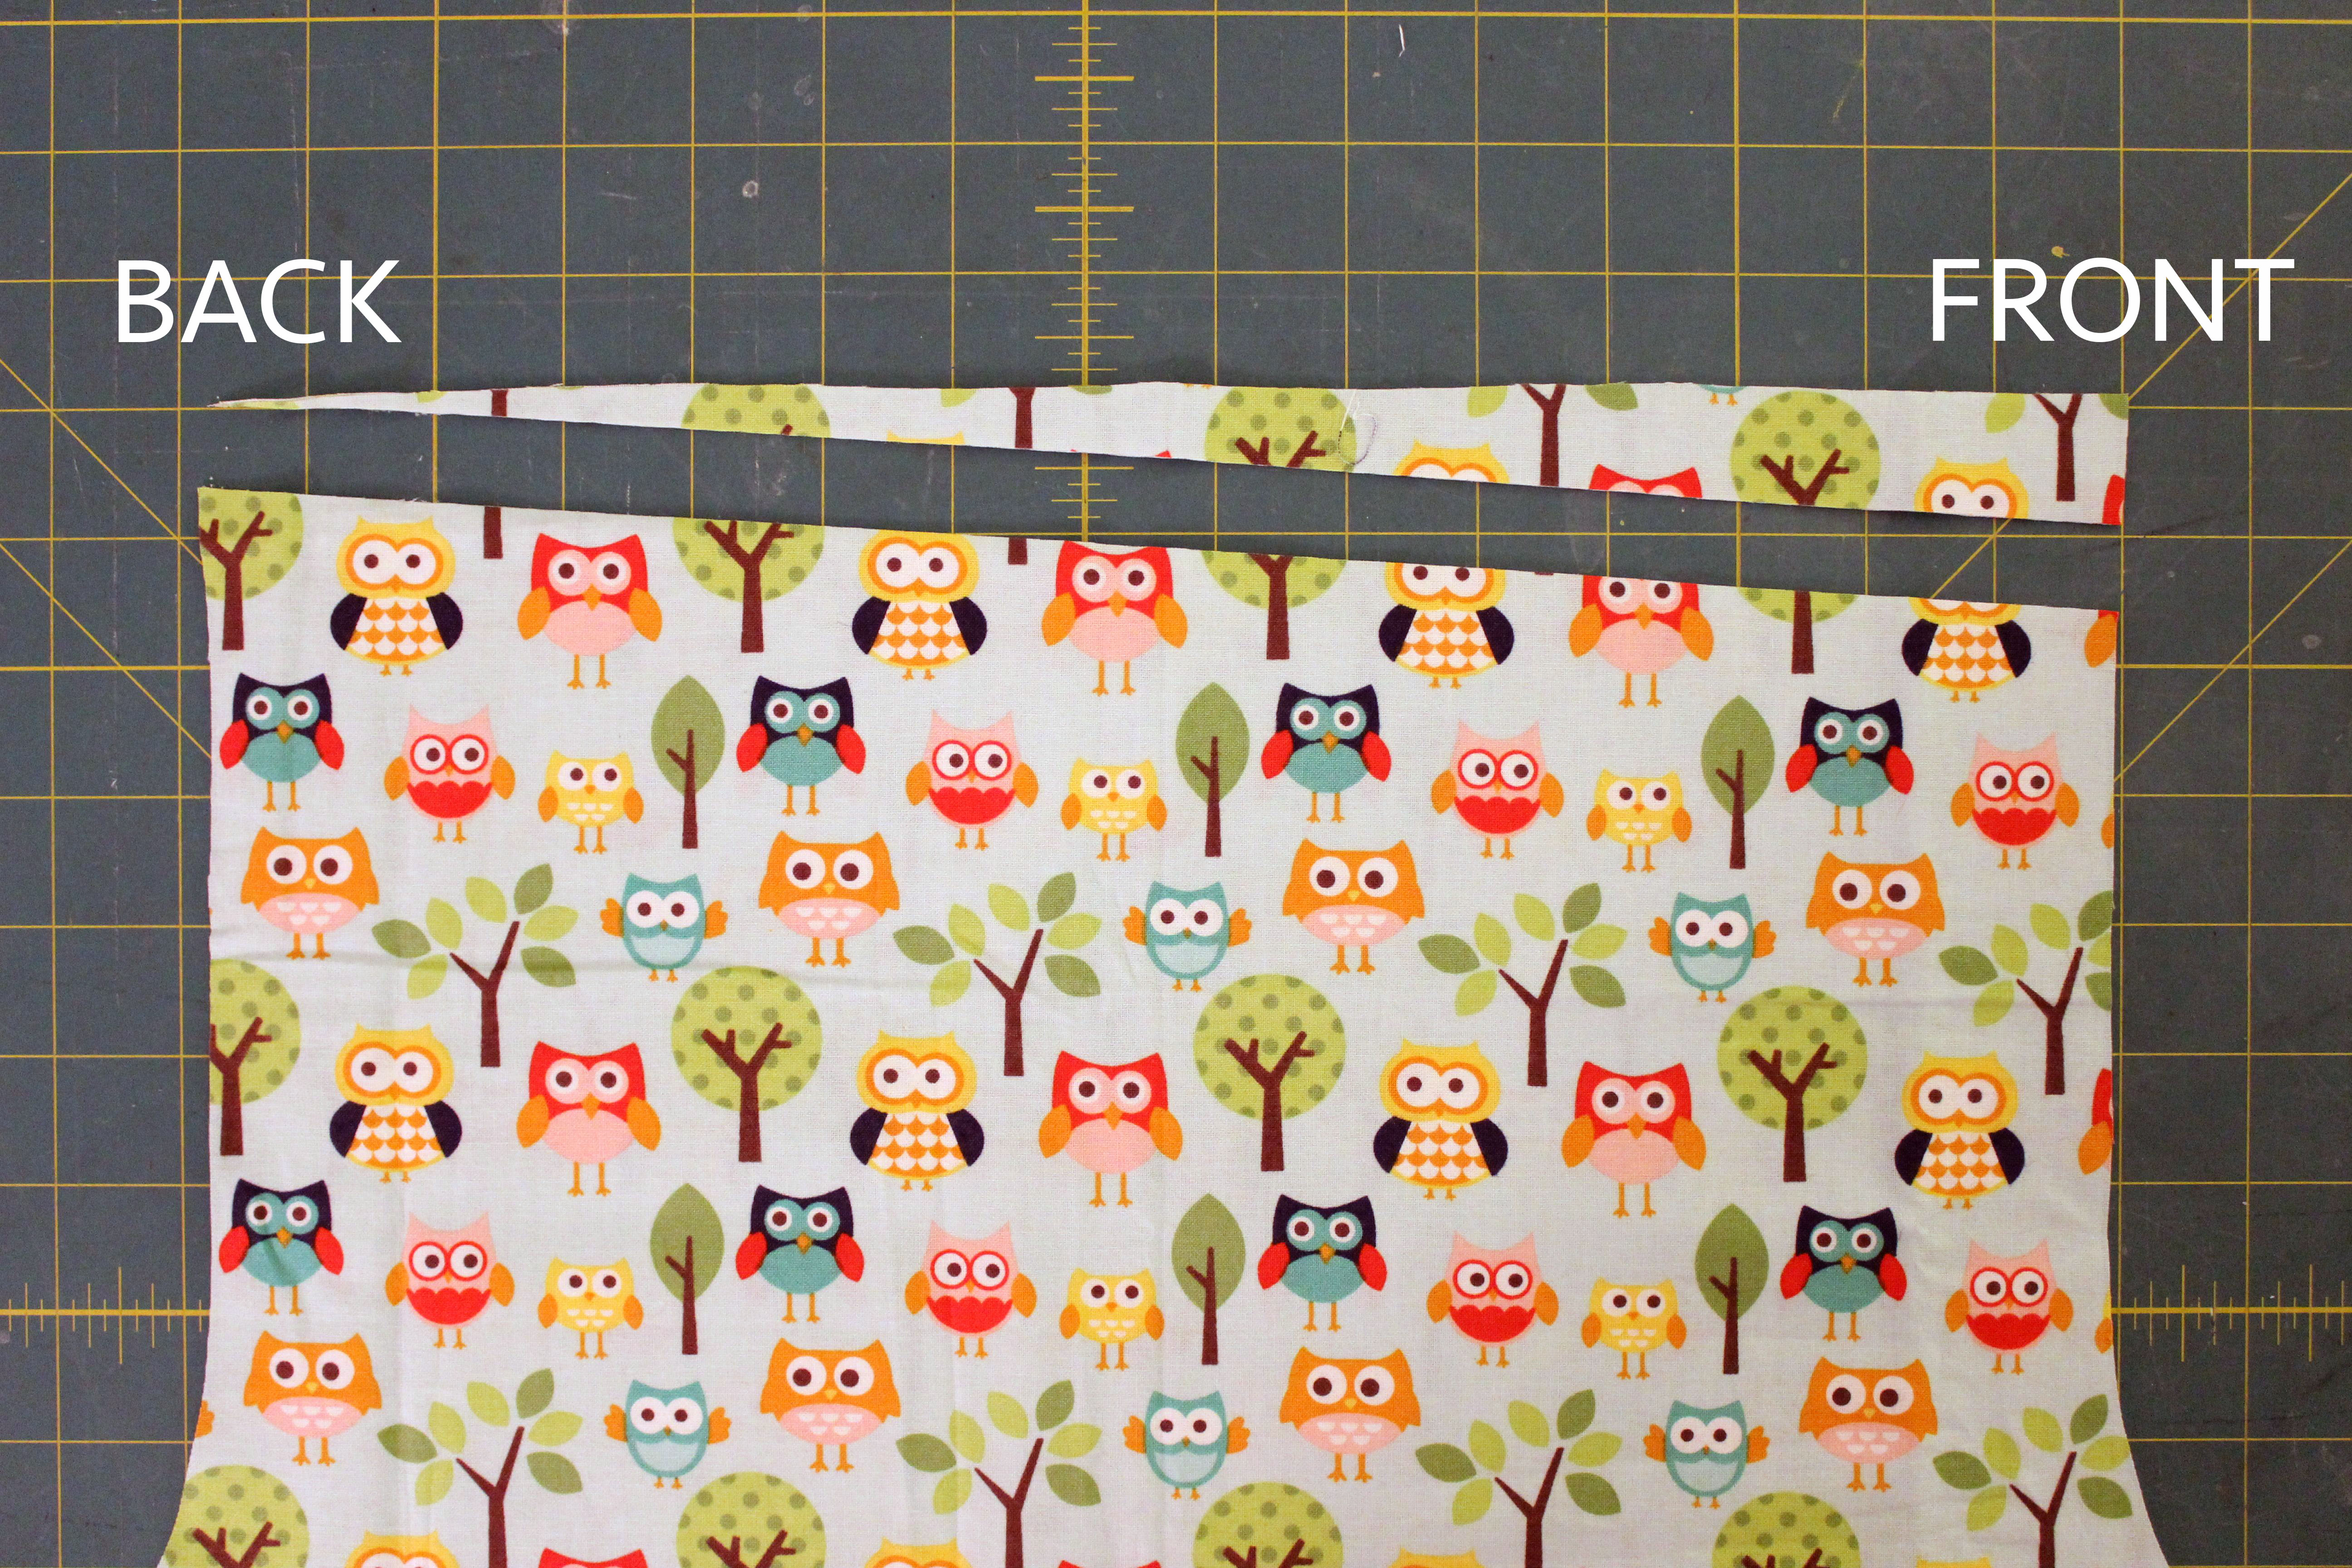
Step 2: We’re now going to cut the top of the fabric to make the rise come up higher in the back than in the front to keep little tushies covered.
Keep your 2 pieces together from the step above. You should have either wrong sides together or right sides together, but do NOT lay both pieces facing up or down. Using a ruler, measure down 1†on one side, but keep the ruler even with the top corner on the other side. Use a rotary cutter or mark the line with a pen and cut the fabric at the angle marked.
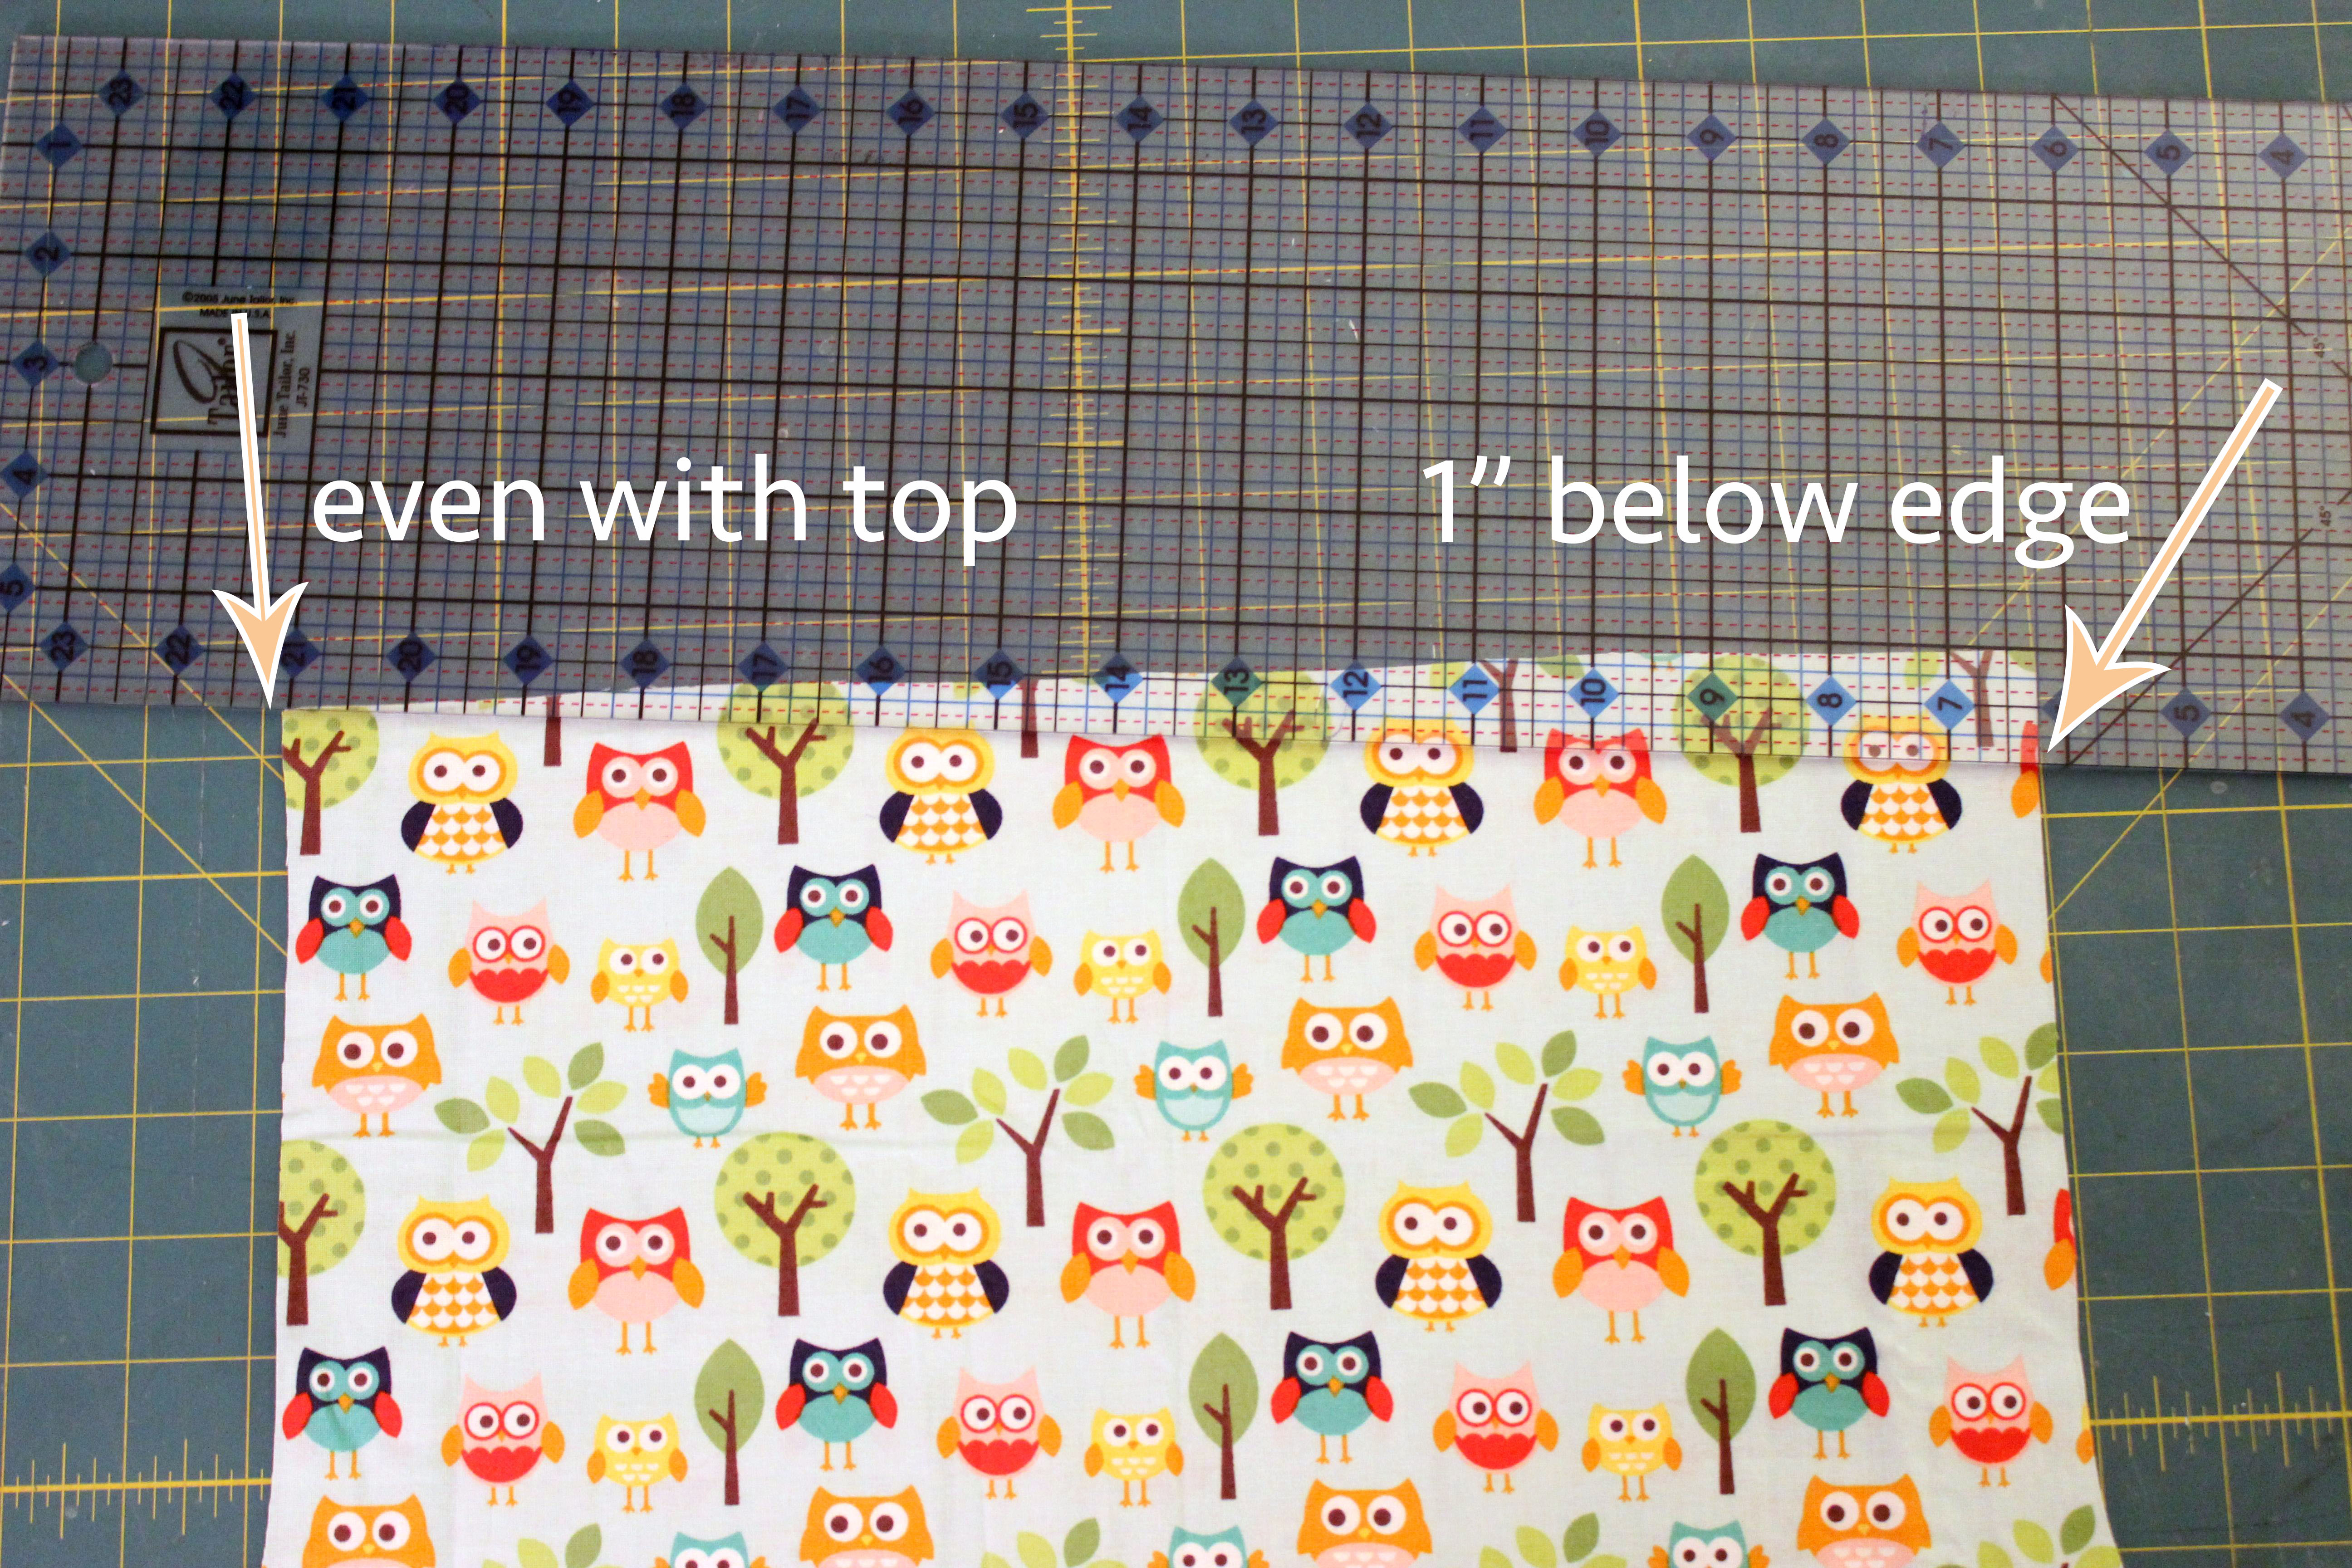
The lower side will now be your front and the higher side will be the back.
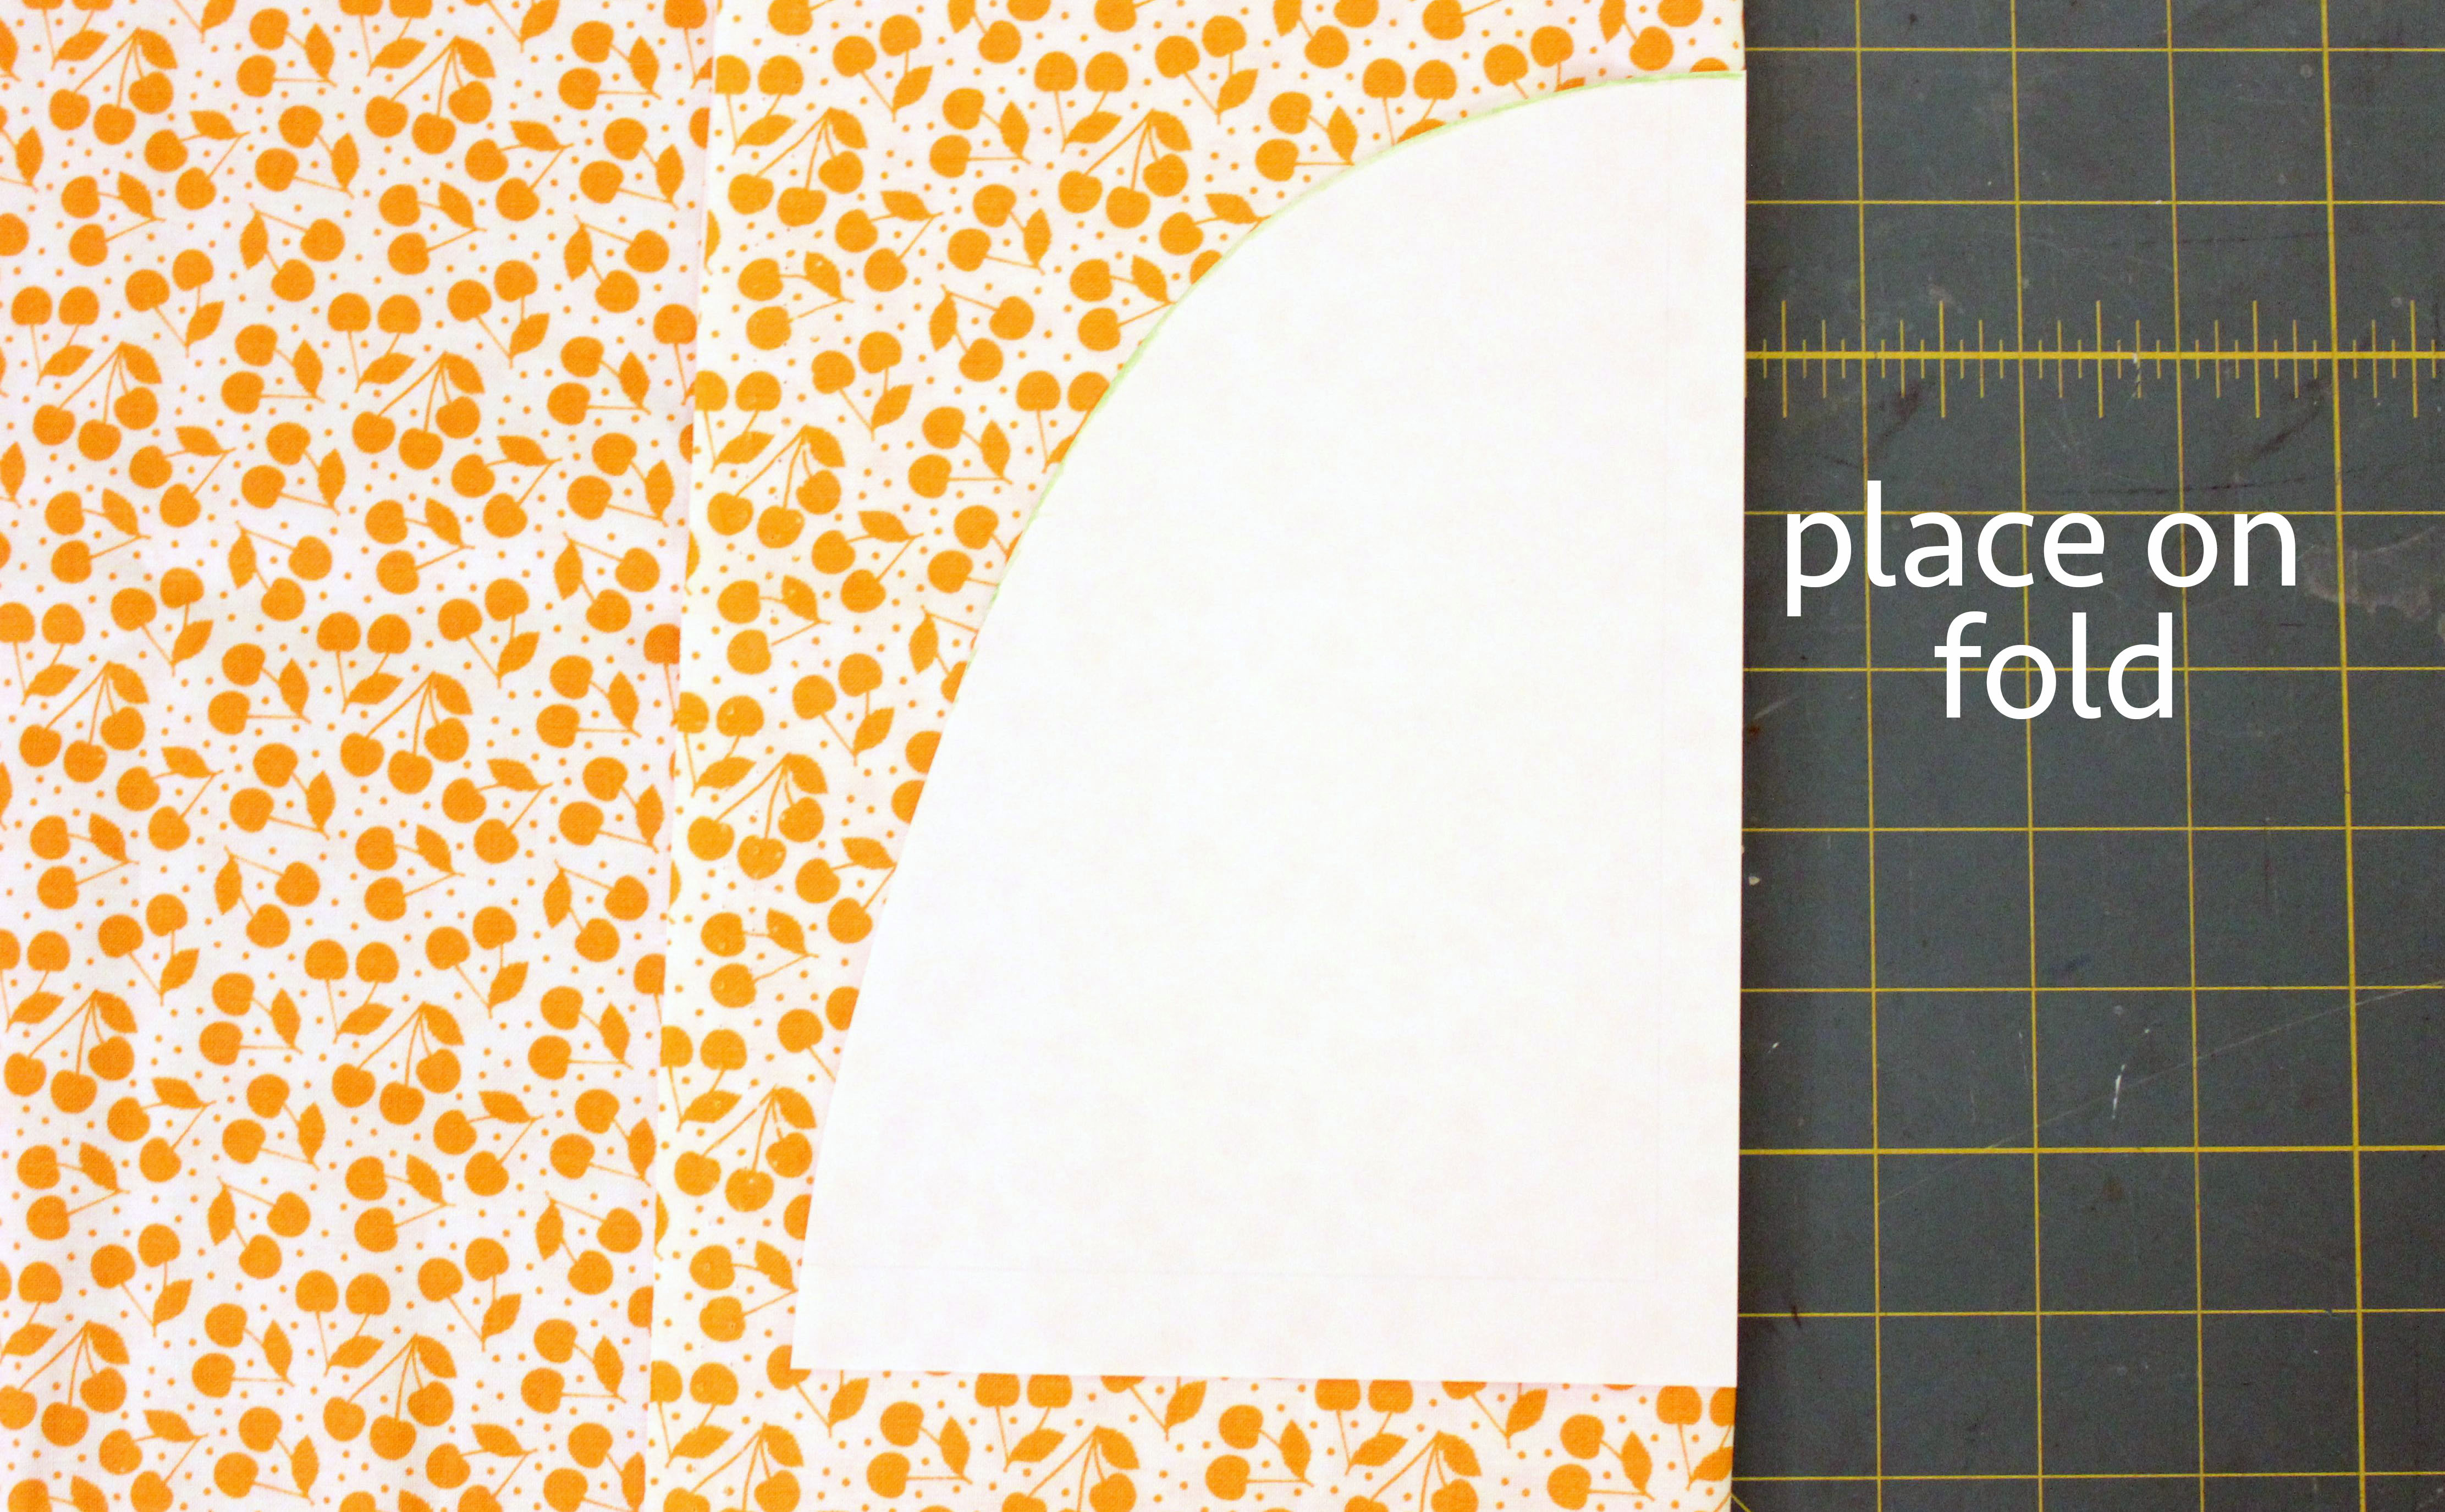
Step 3: Just like the body of the shorts, keep your fabric together and fold it over. Place the pocket piece on the fold and cut 2 pieces simultaneously.
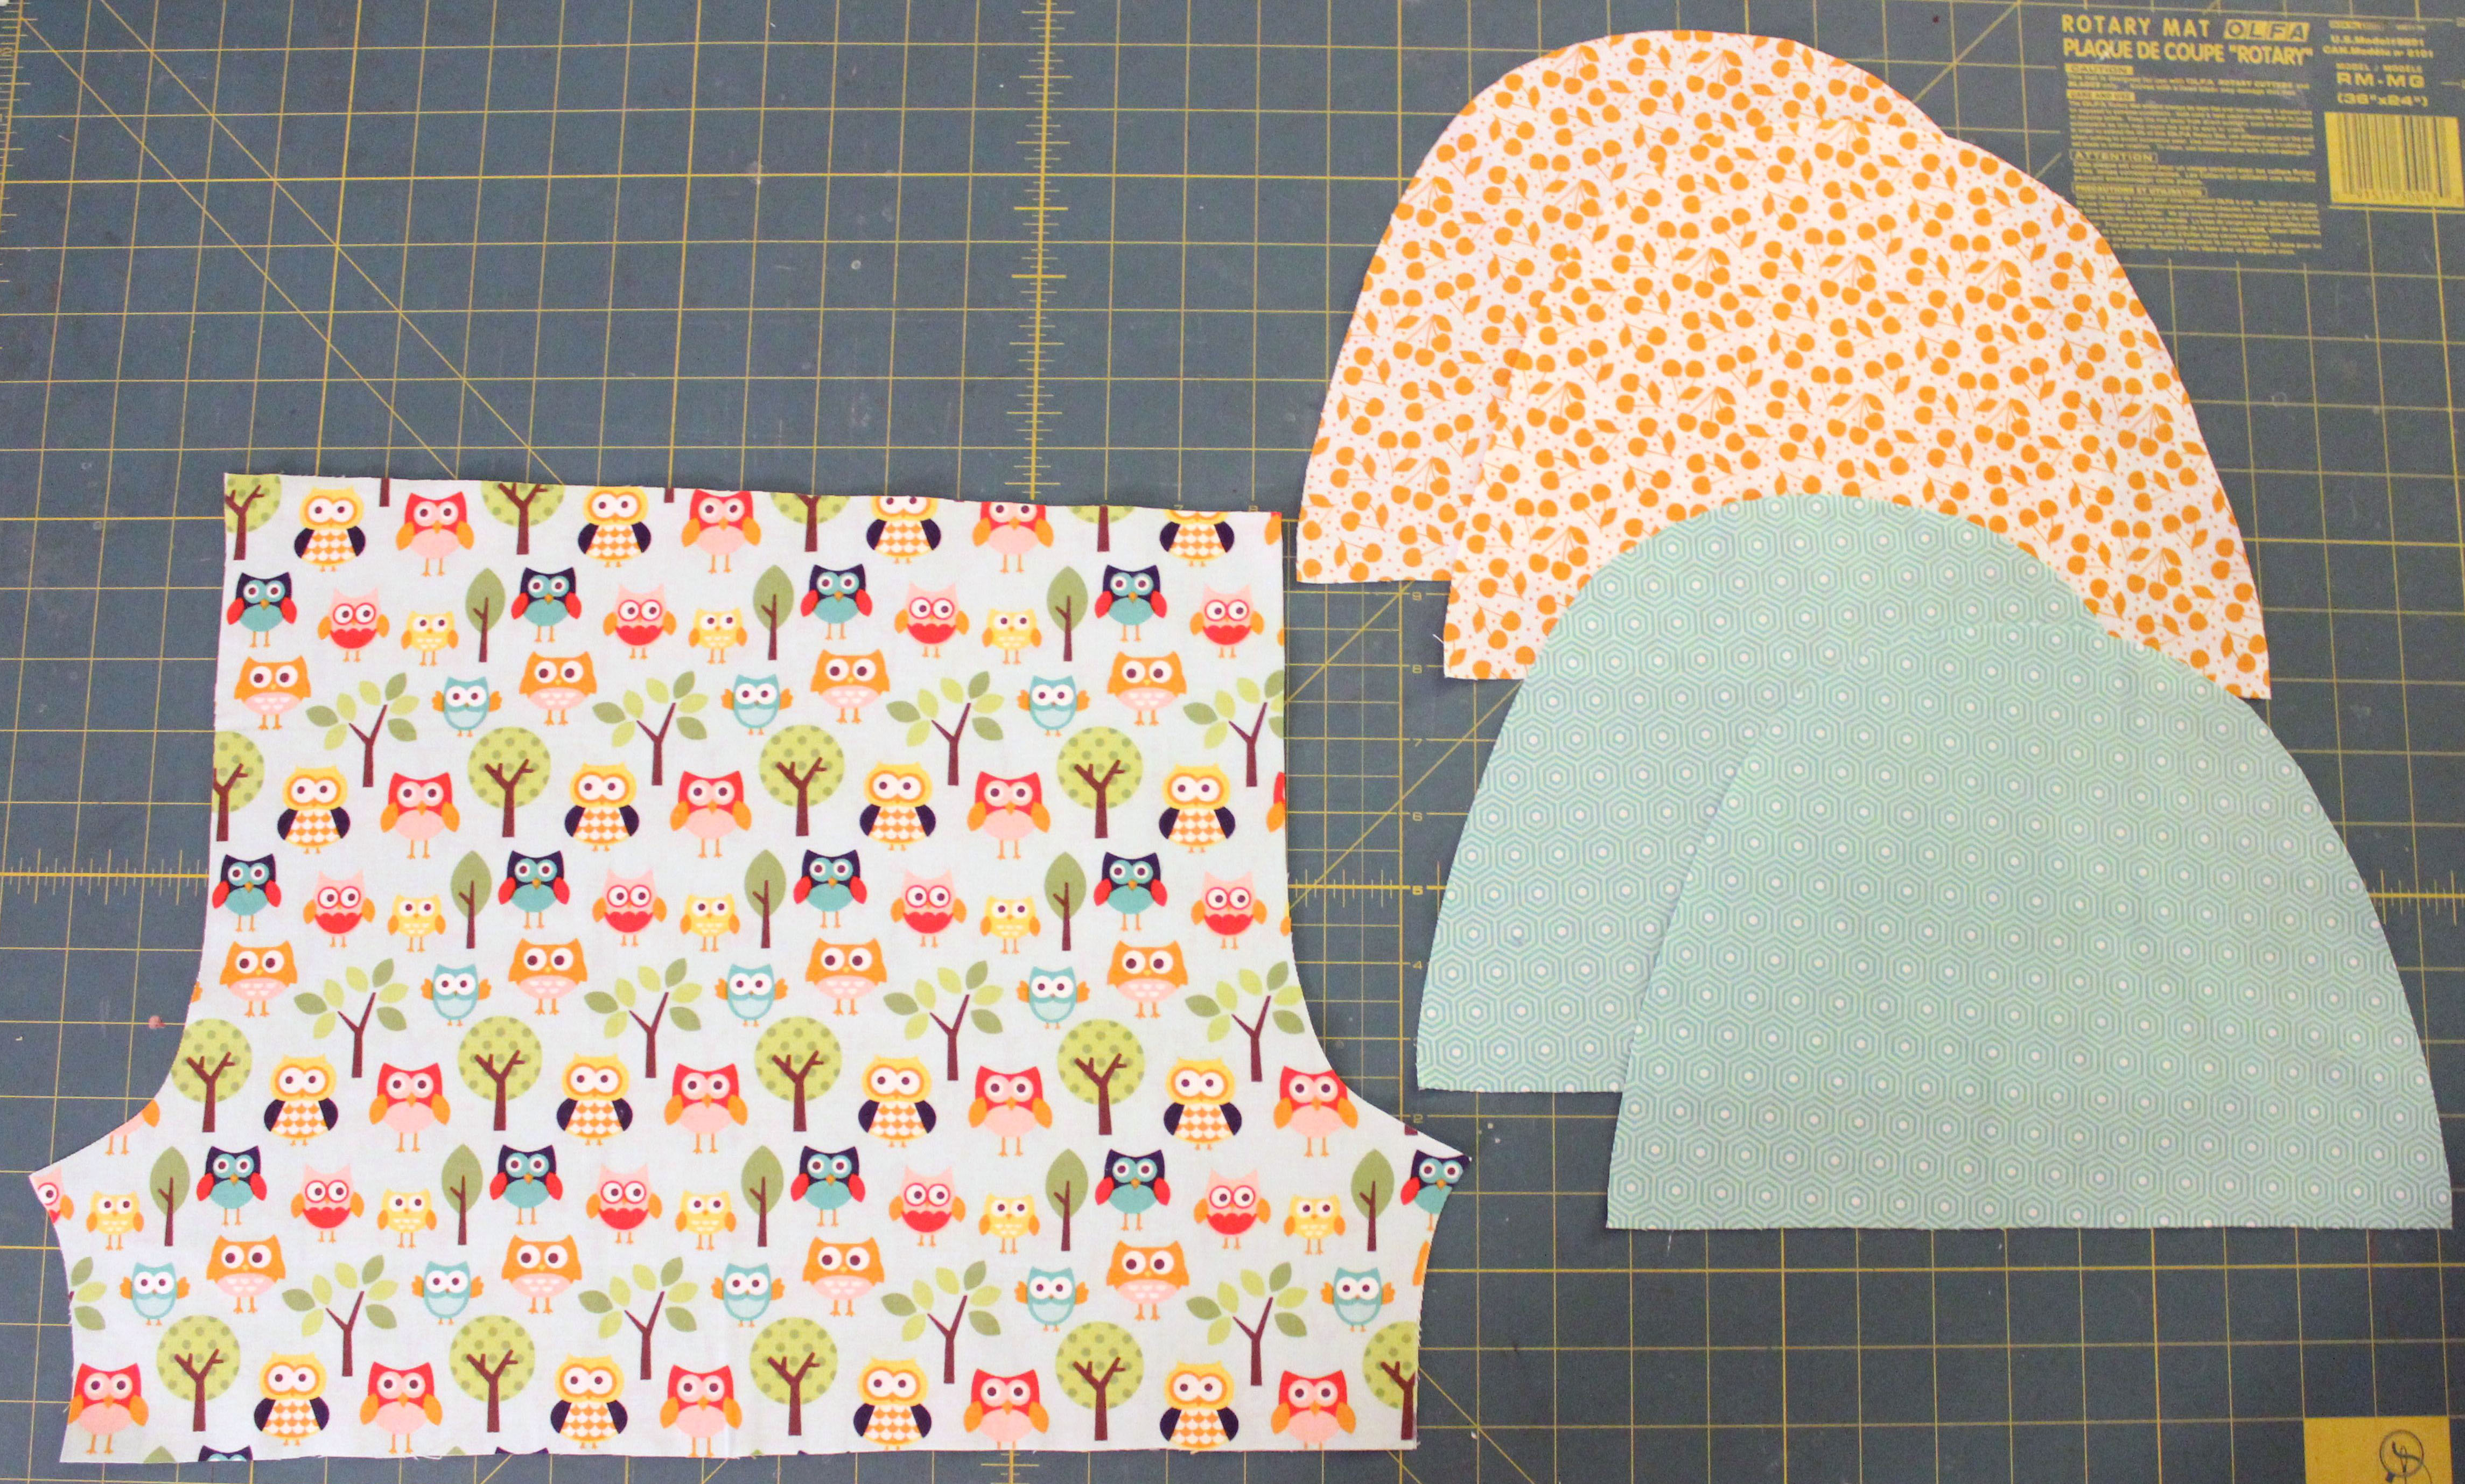
You’ll need 4 pocket pieces total, either all from the same fabric (so fold again and cut 2 more), or 2 more from a contrasting print.
So with your shorts body pieces and your pocket pieces all cut and ready to go, let’s get started!
***BOY POCKETS are made in the exact same manner, they just have a straight edge instead of a curved edge. Follow the lines of the pieces for proper pocket construction.
Step 4: This pattern will teach one of my favorite short cut tricks to making pants. It’s also going to work on the pockets to ensure enclosed ends and a beautiful finish.
Lay the pocket pieces right side down, fold up ½†and press. Then fold the pocket in half with wrong sides together and press the middle fold. Repeat for all 4 pocket pieces.
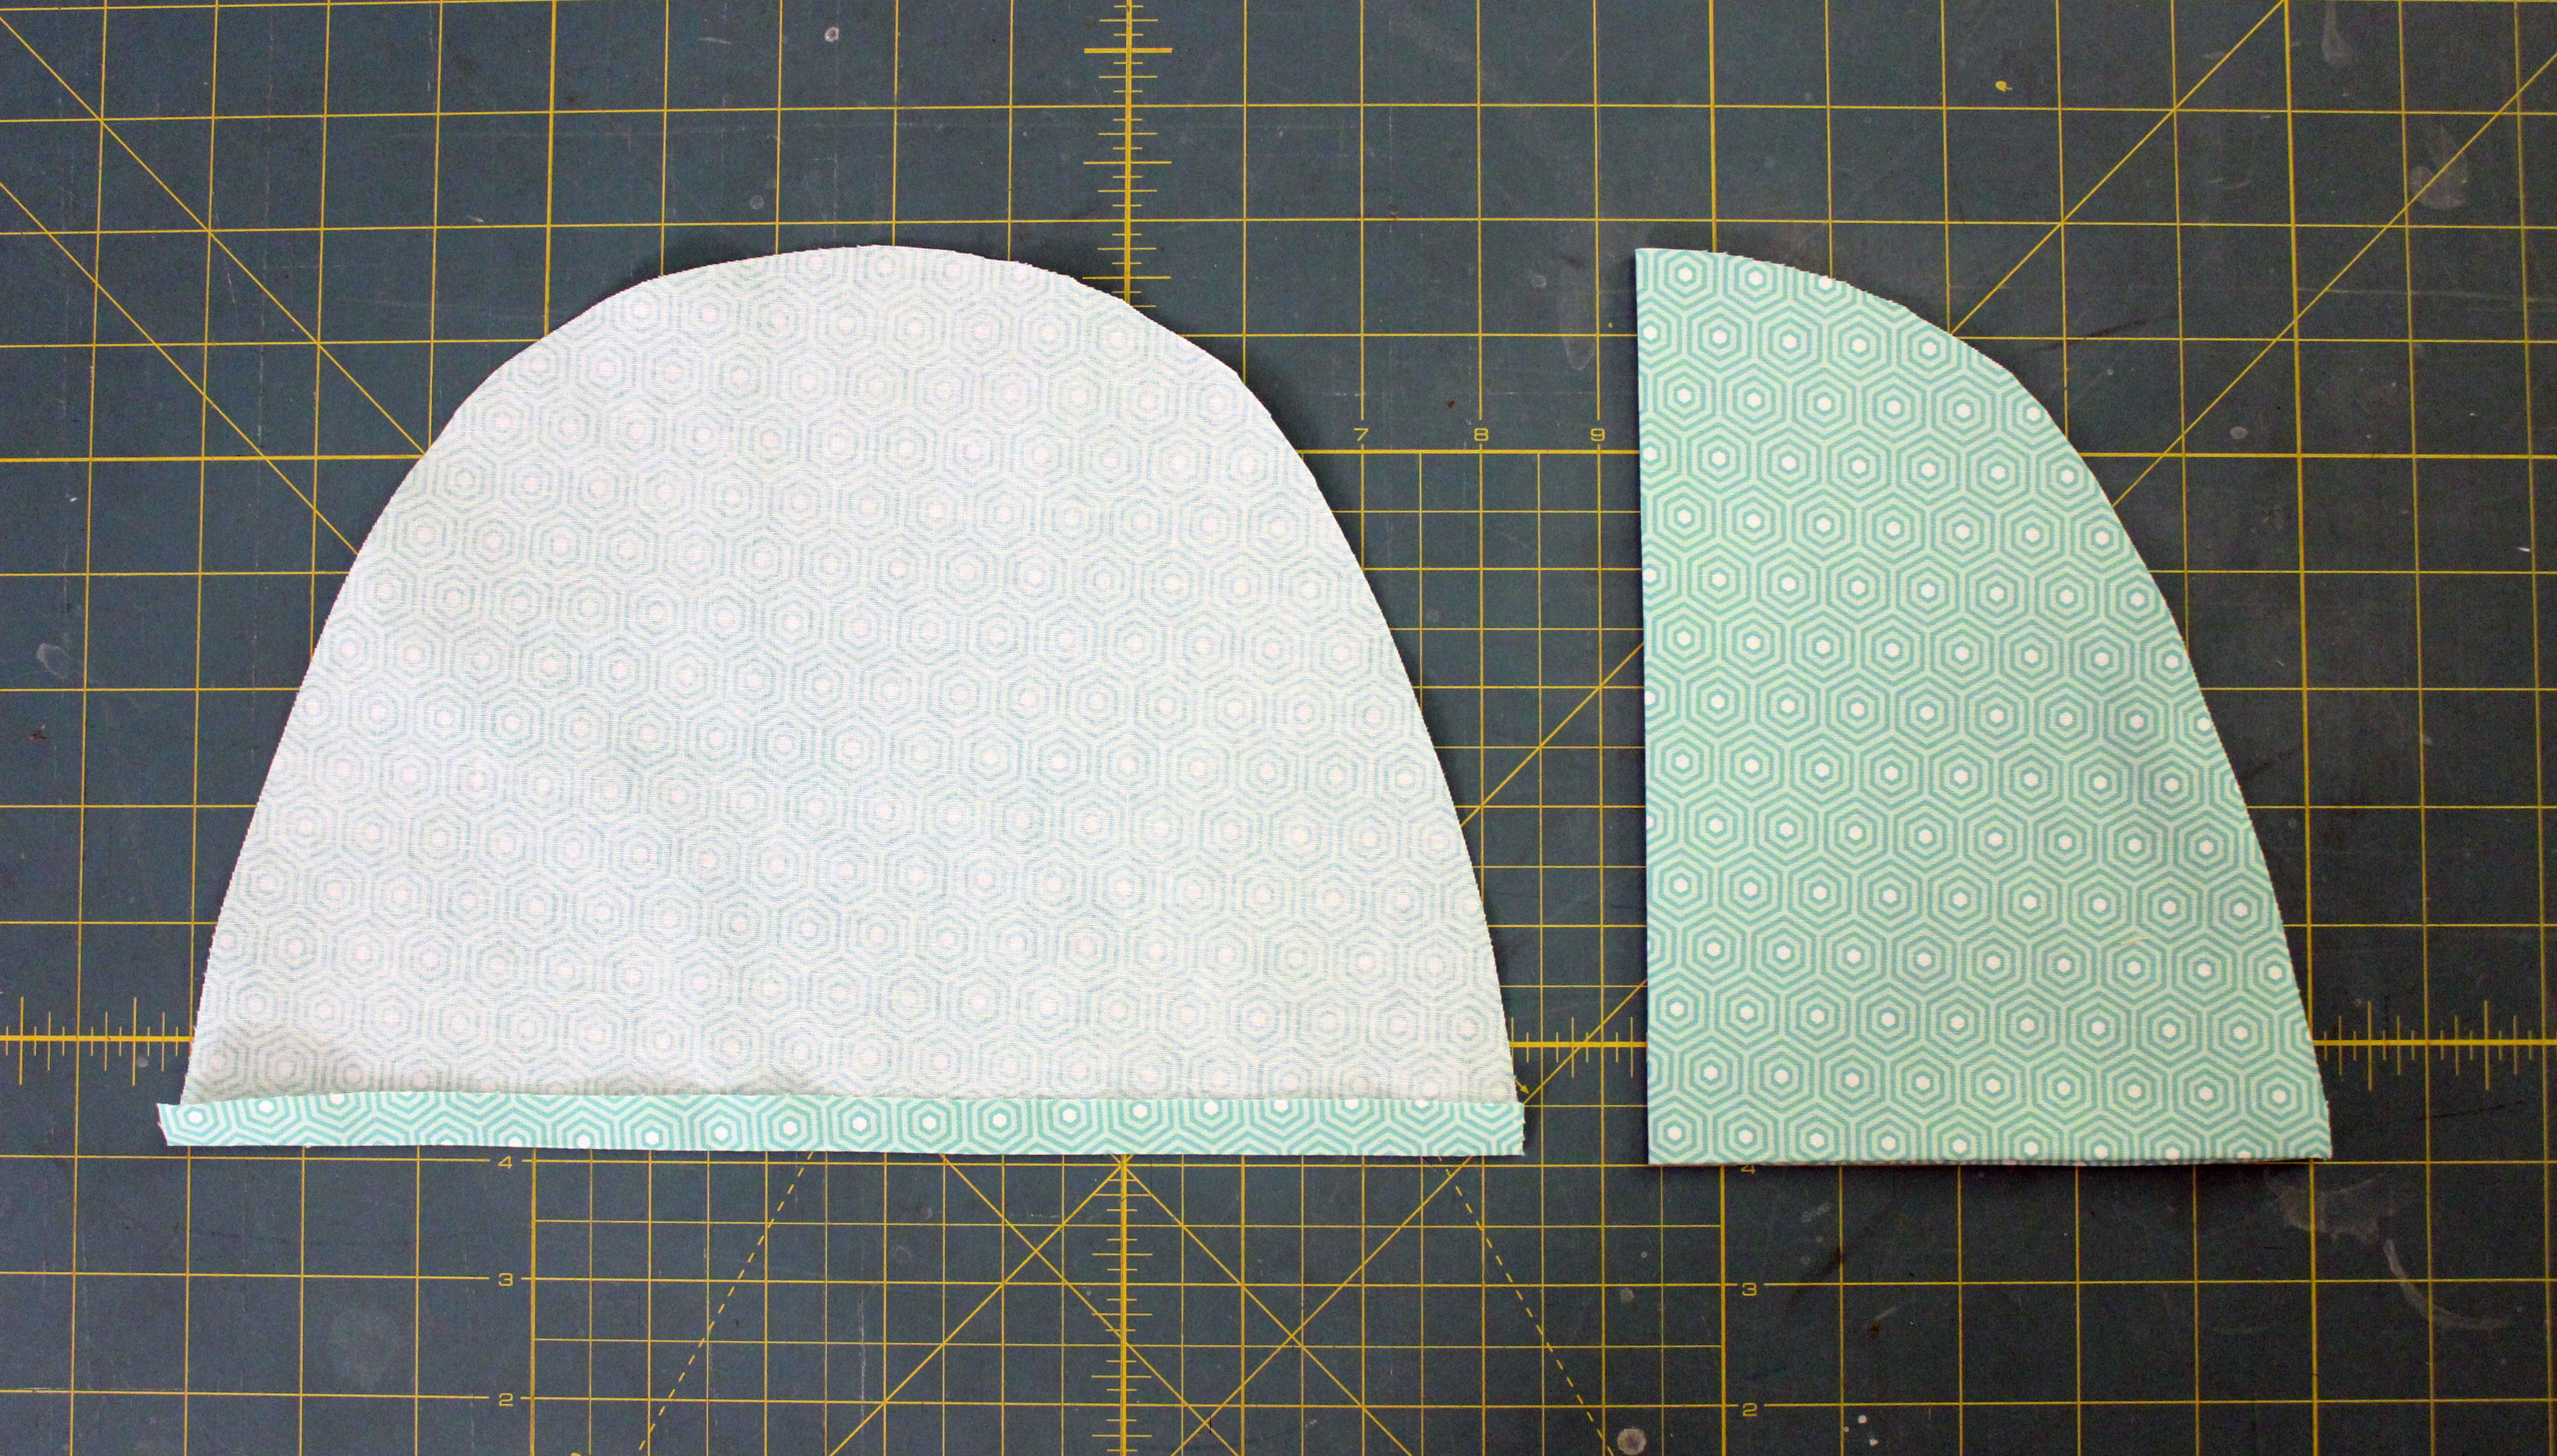
Step 5: Unfold the pressed seam at the bottom, place right sides together, and stitch down ONLY the curved seam (straight top and edge for boys). Clip the top corner(s) at an angle and clip the seam allowance along the curve to allow it to lay smoothly when turned.
Repeat for all 4 pocket pieces.
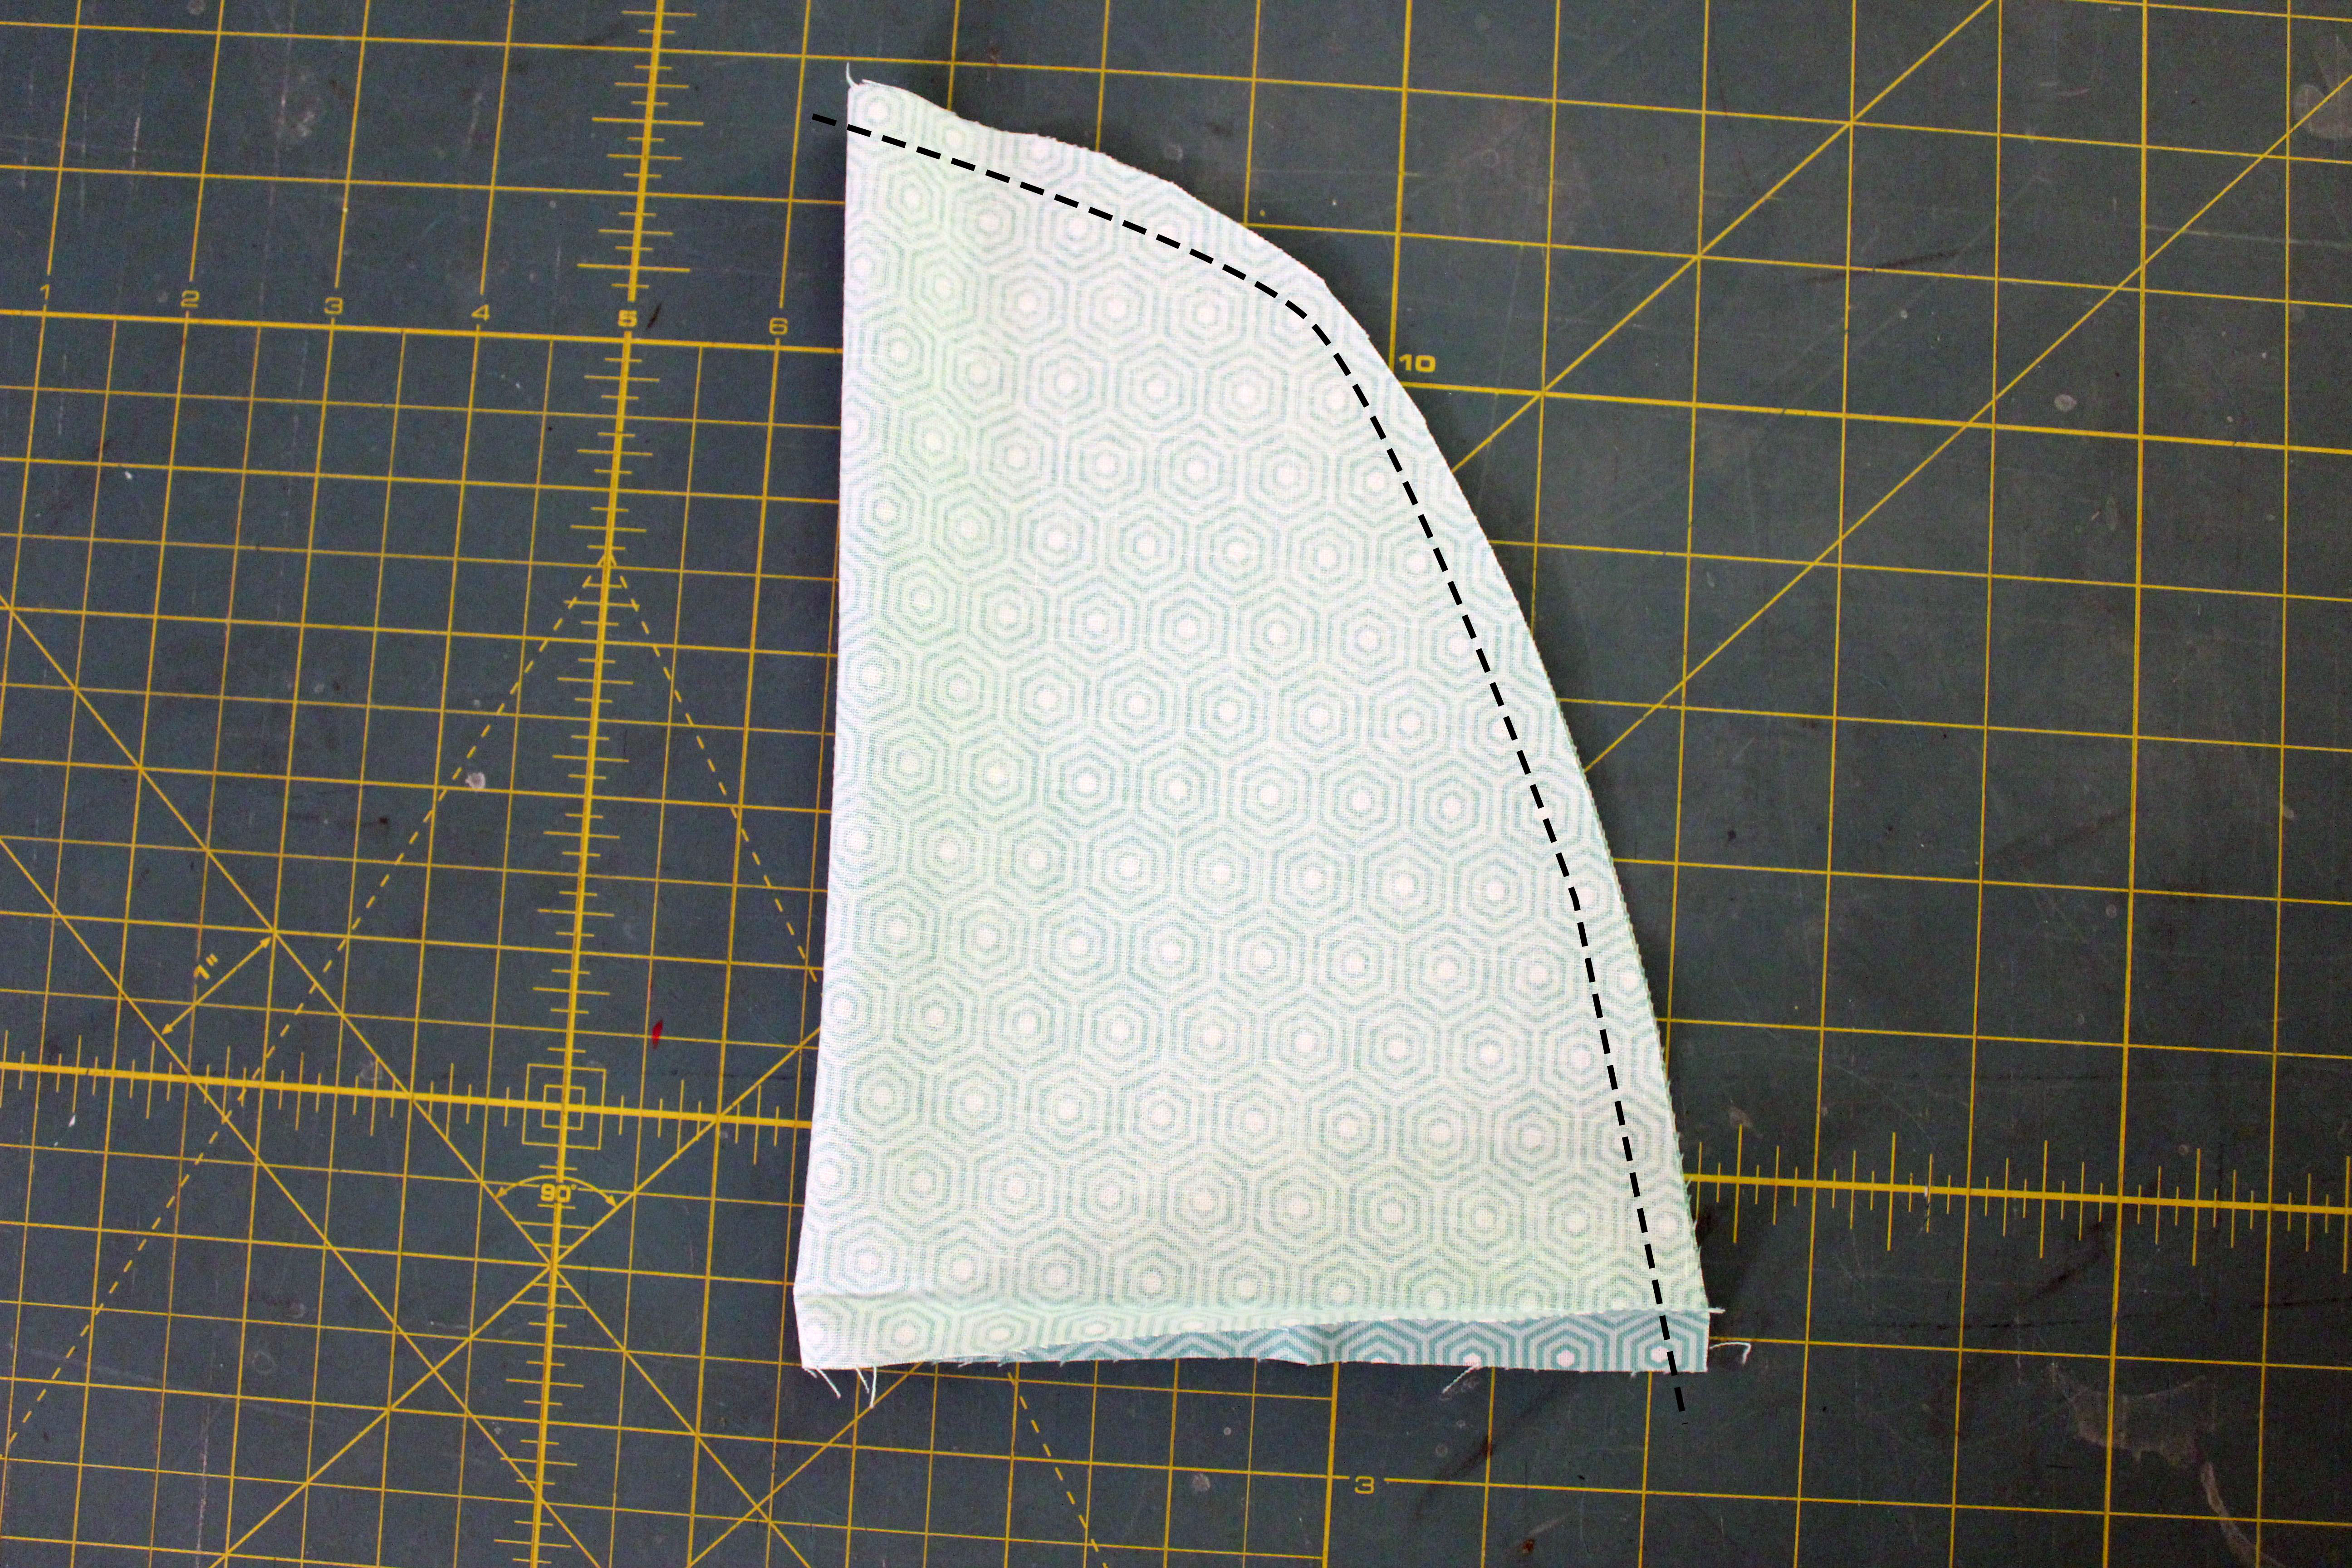
Step 6: Turn the piece right side out and press well, making sure your seam is flat and smooth. Fold the bottom in on itself along your previous press marks and you’ll find a perfectly hemmed.
Repeat for all 4 pocket pieces.
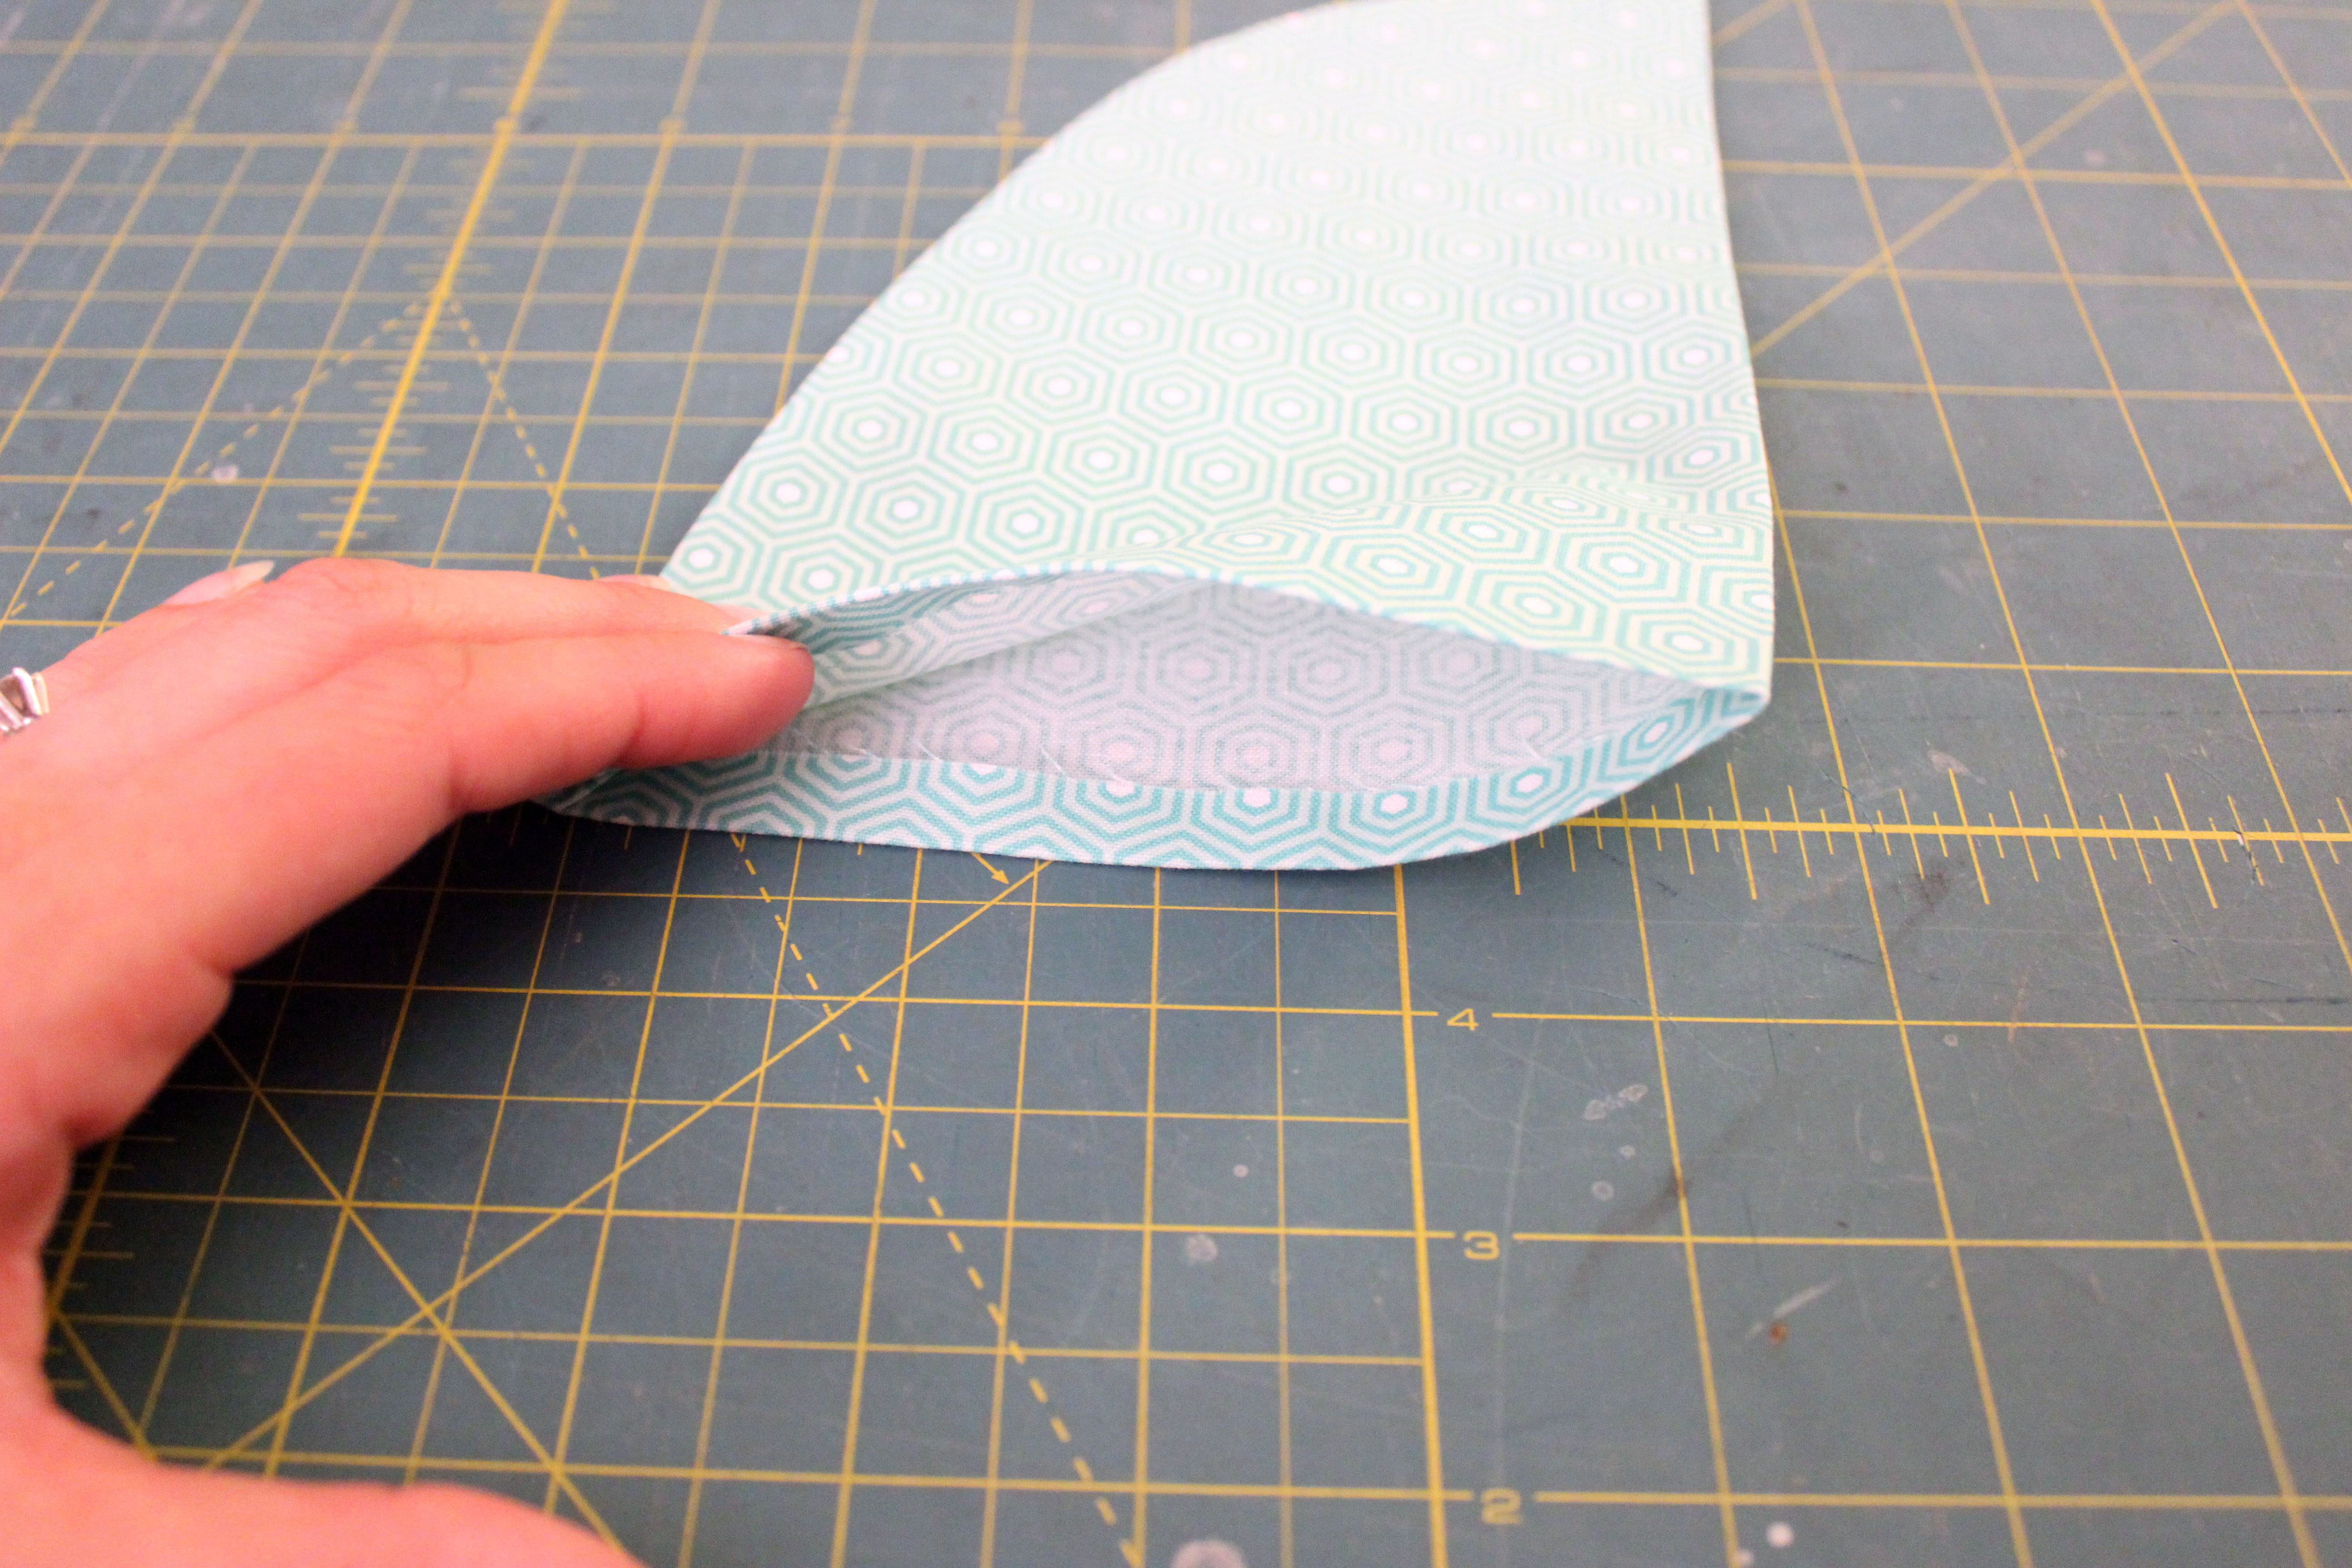
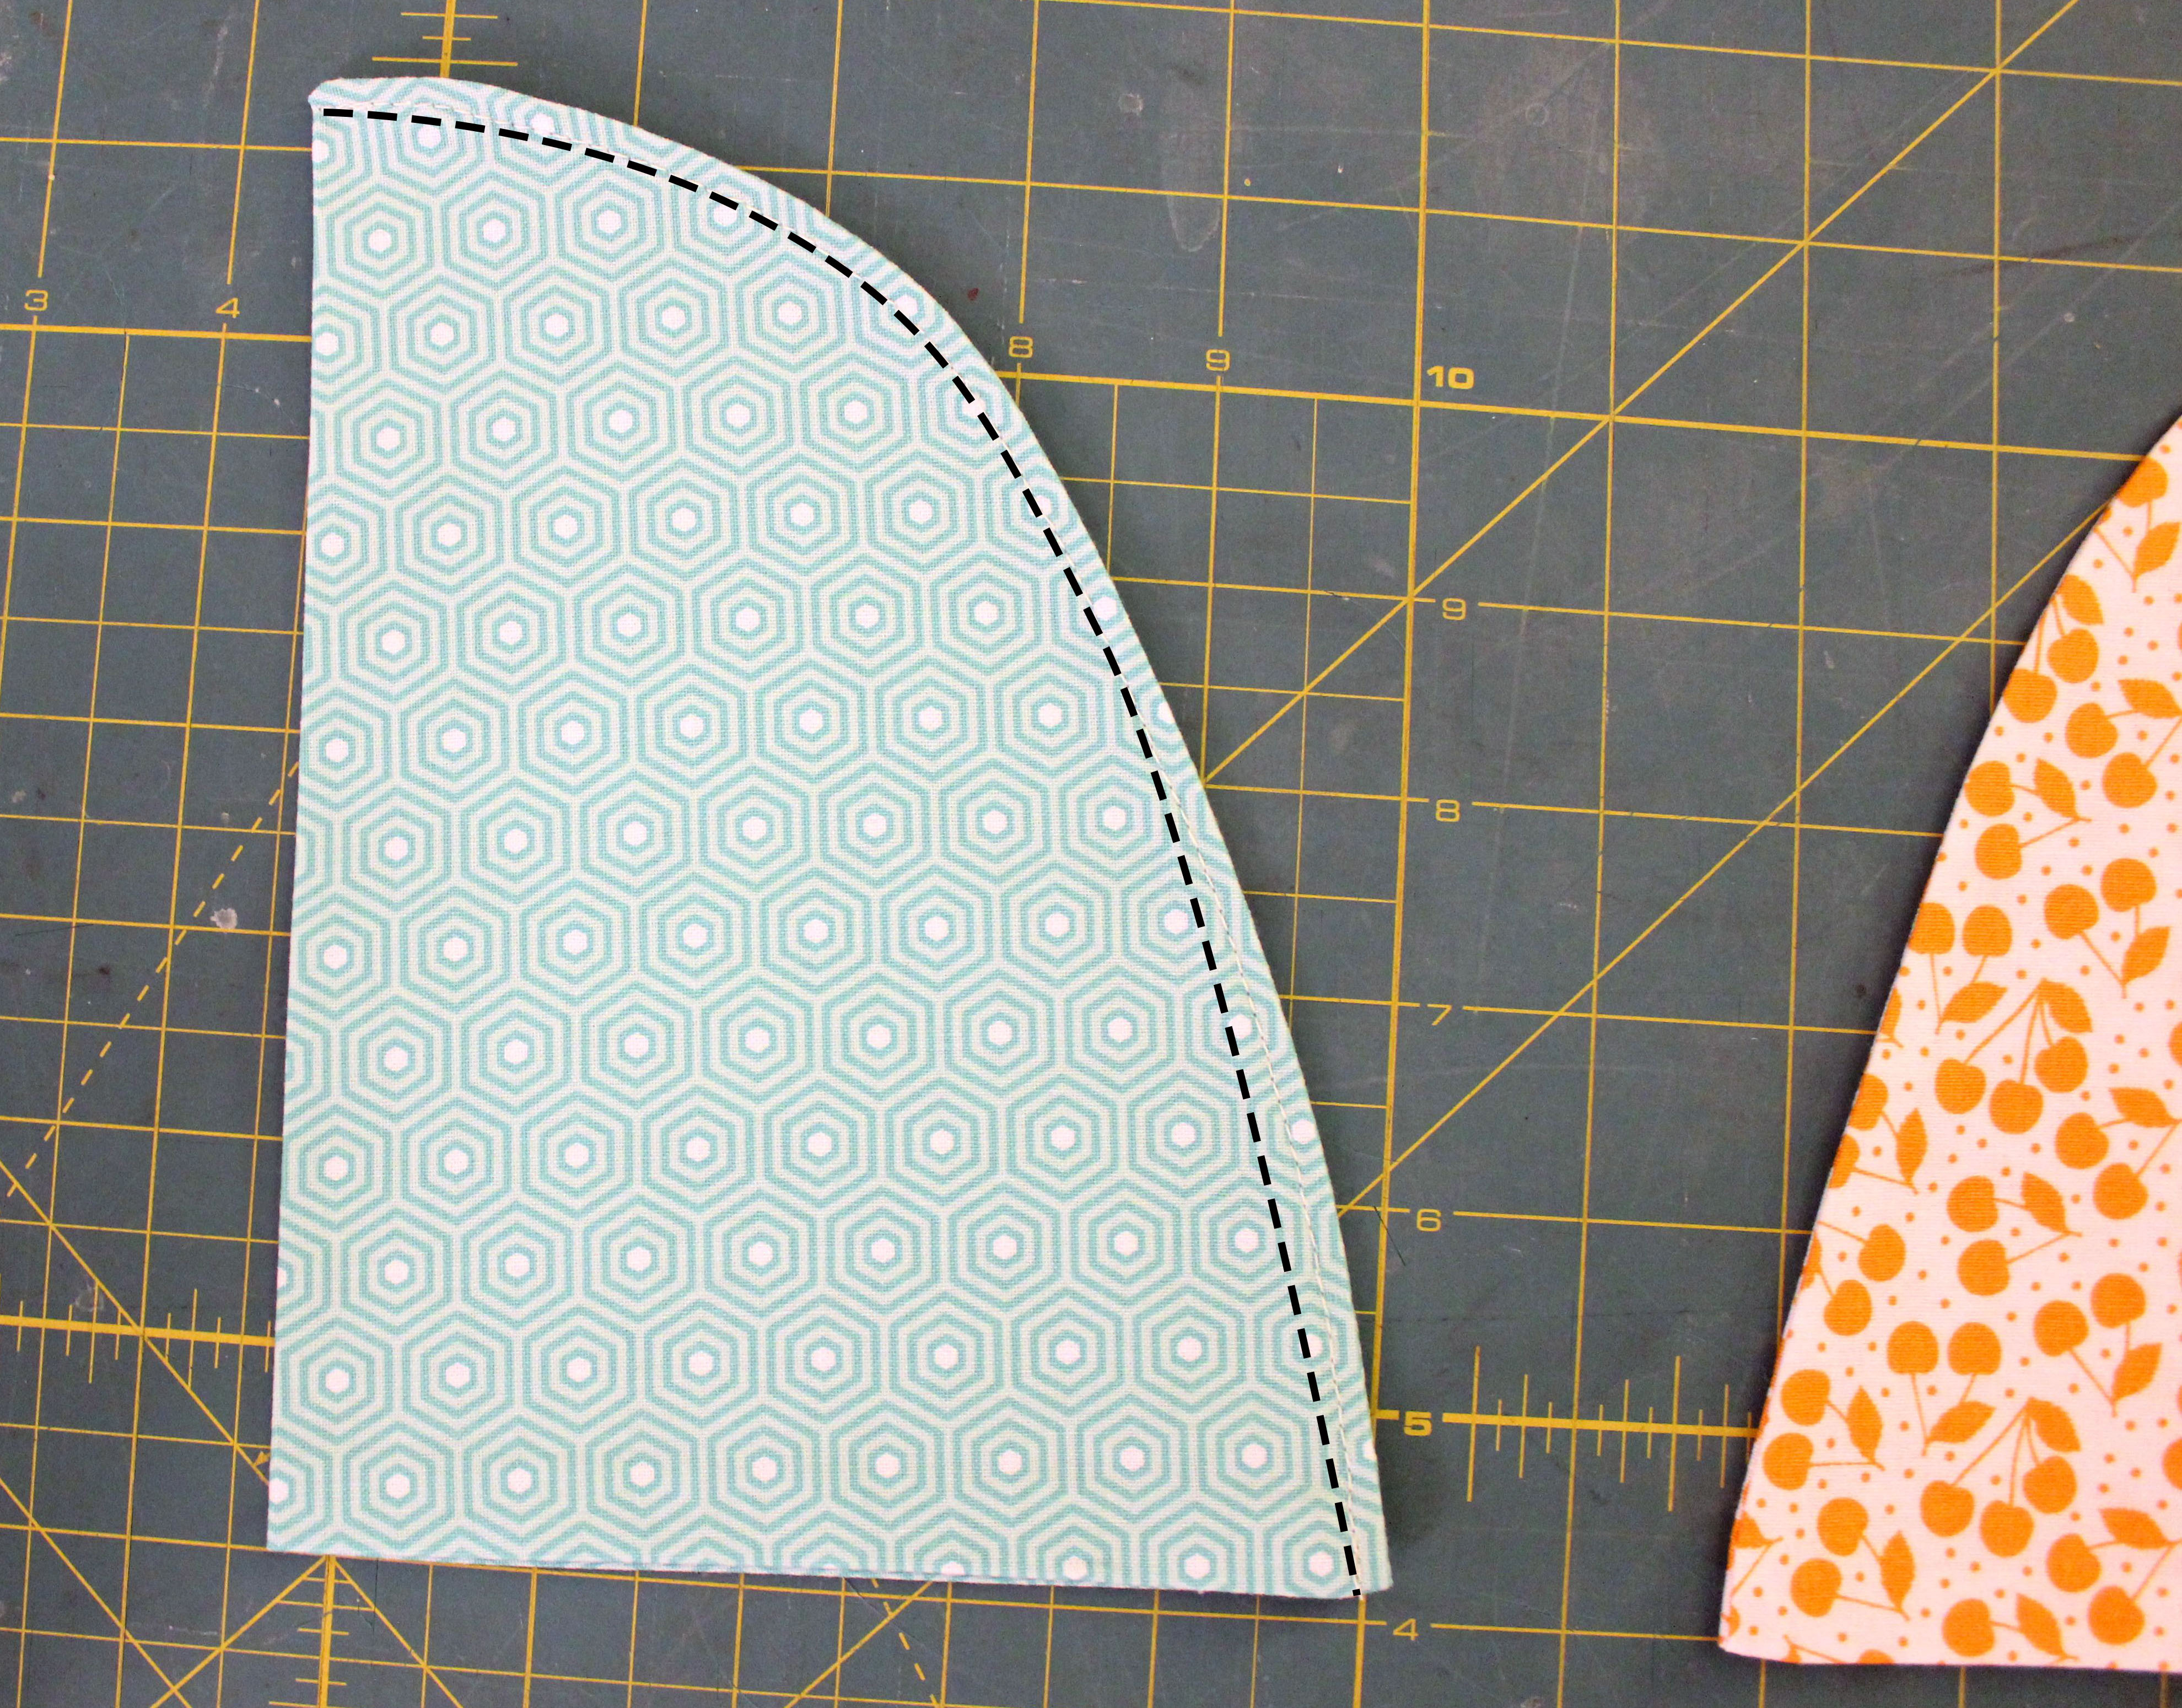
Step 7: If using 2 different prints for the pockets, decide which will go on the back half. Take the back pocket piece and top stitch the curved edge 1/8†from the edge of the fabric.
Repeat for the other back pocket piece, but remember it’ll be the mirror of this piece since they’re on opposite sides of the shorts.
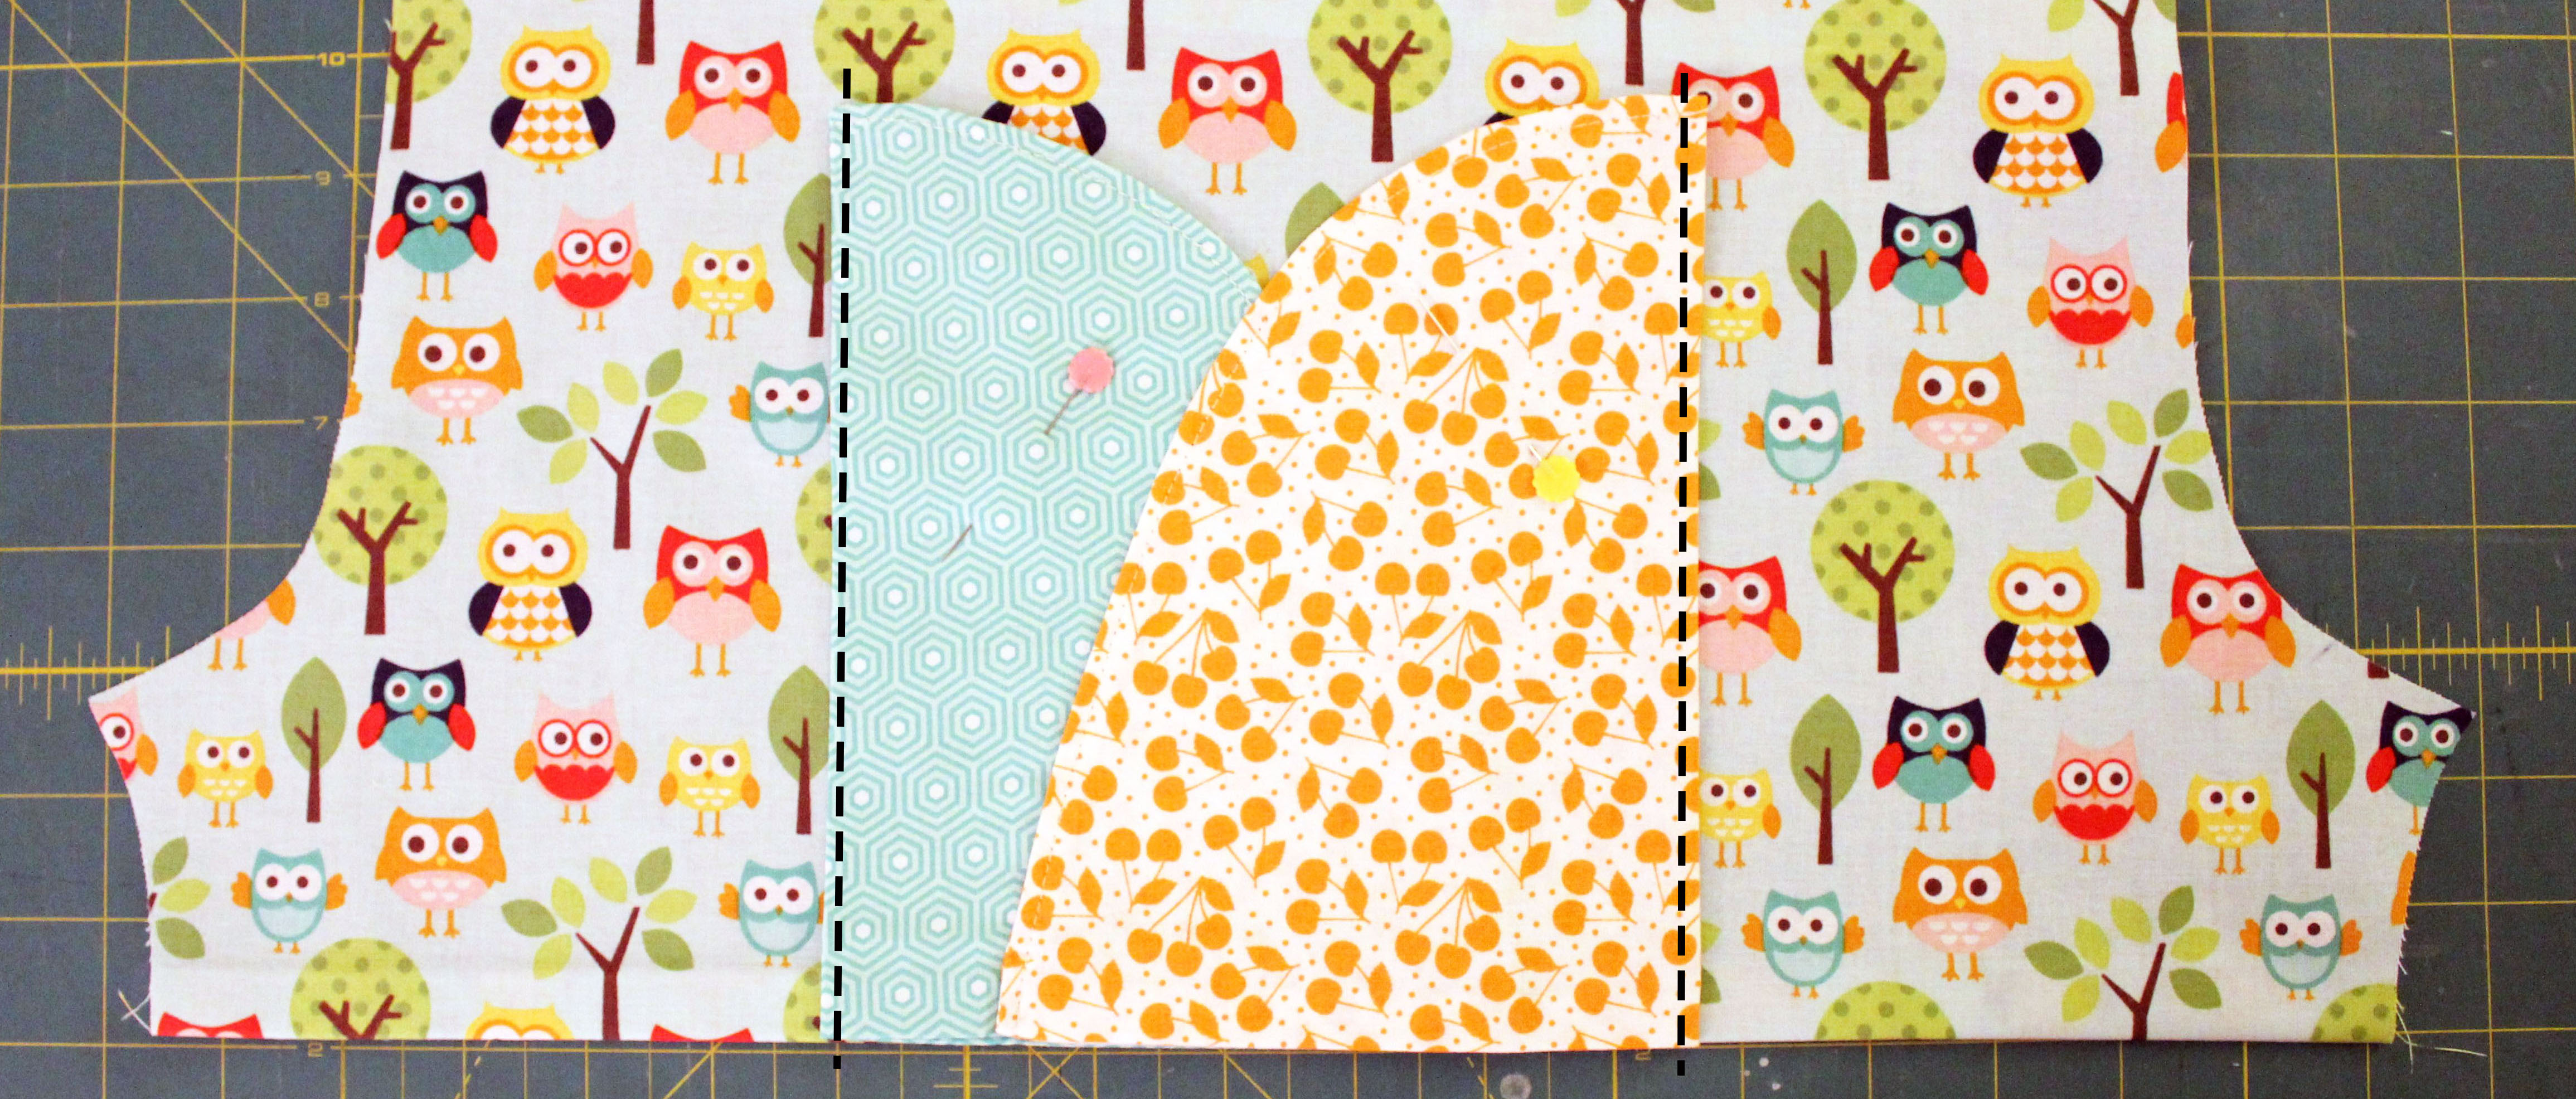
Step 8: Overlap by the measurements below: 
Pin the pieces together and top stitch the curved seam of the front pocket piece, catching the back piece under it so they’re now sewn together.
Repeat for the other pocket, and remember to make them the mirror image of this set because they’re on the opposite side of the shorts.

You’ll now have a matching pair of pockets!
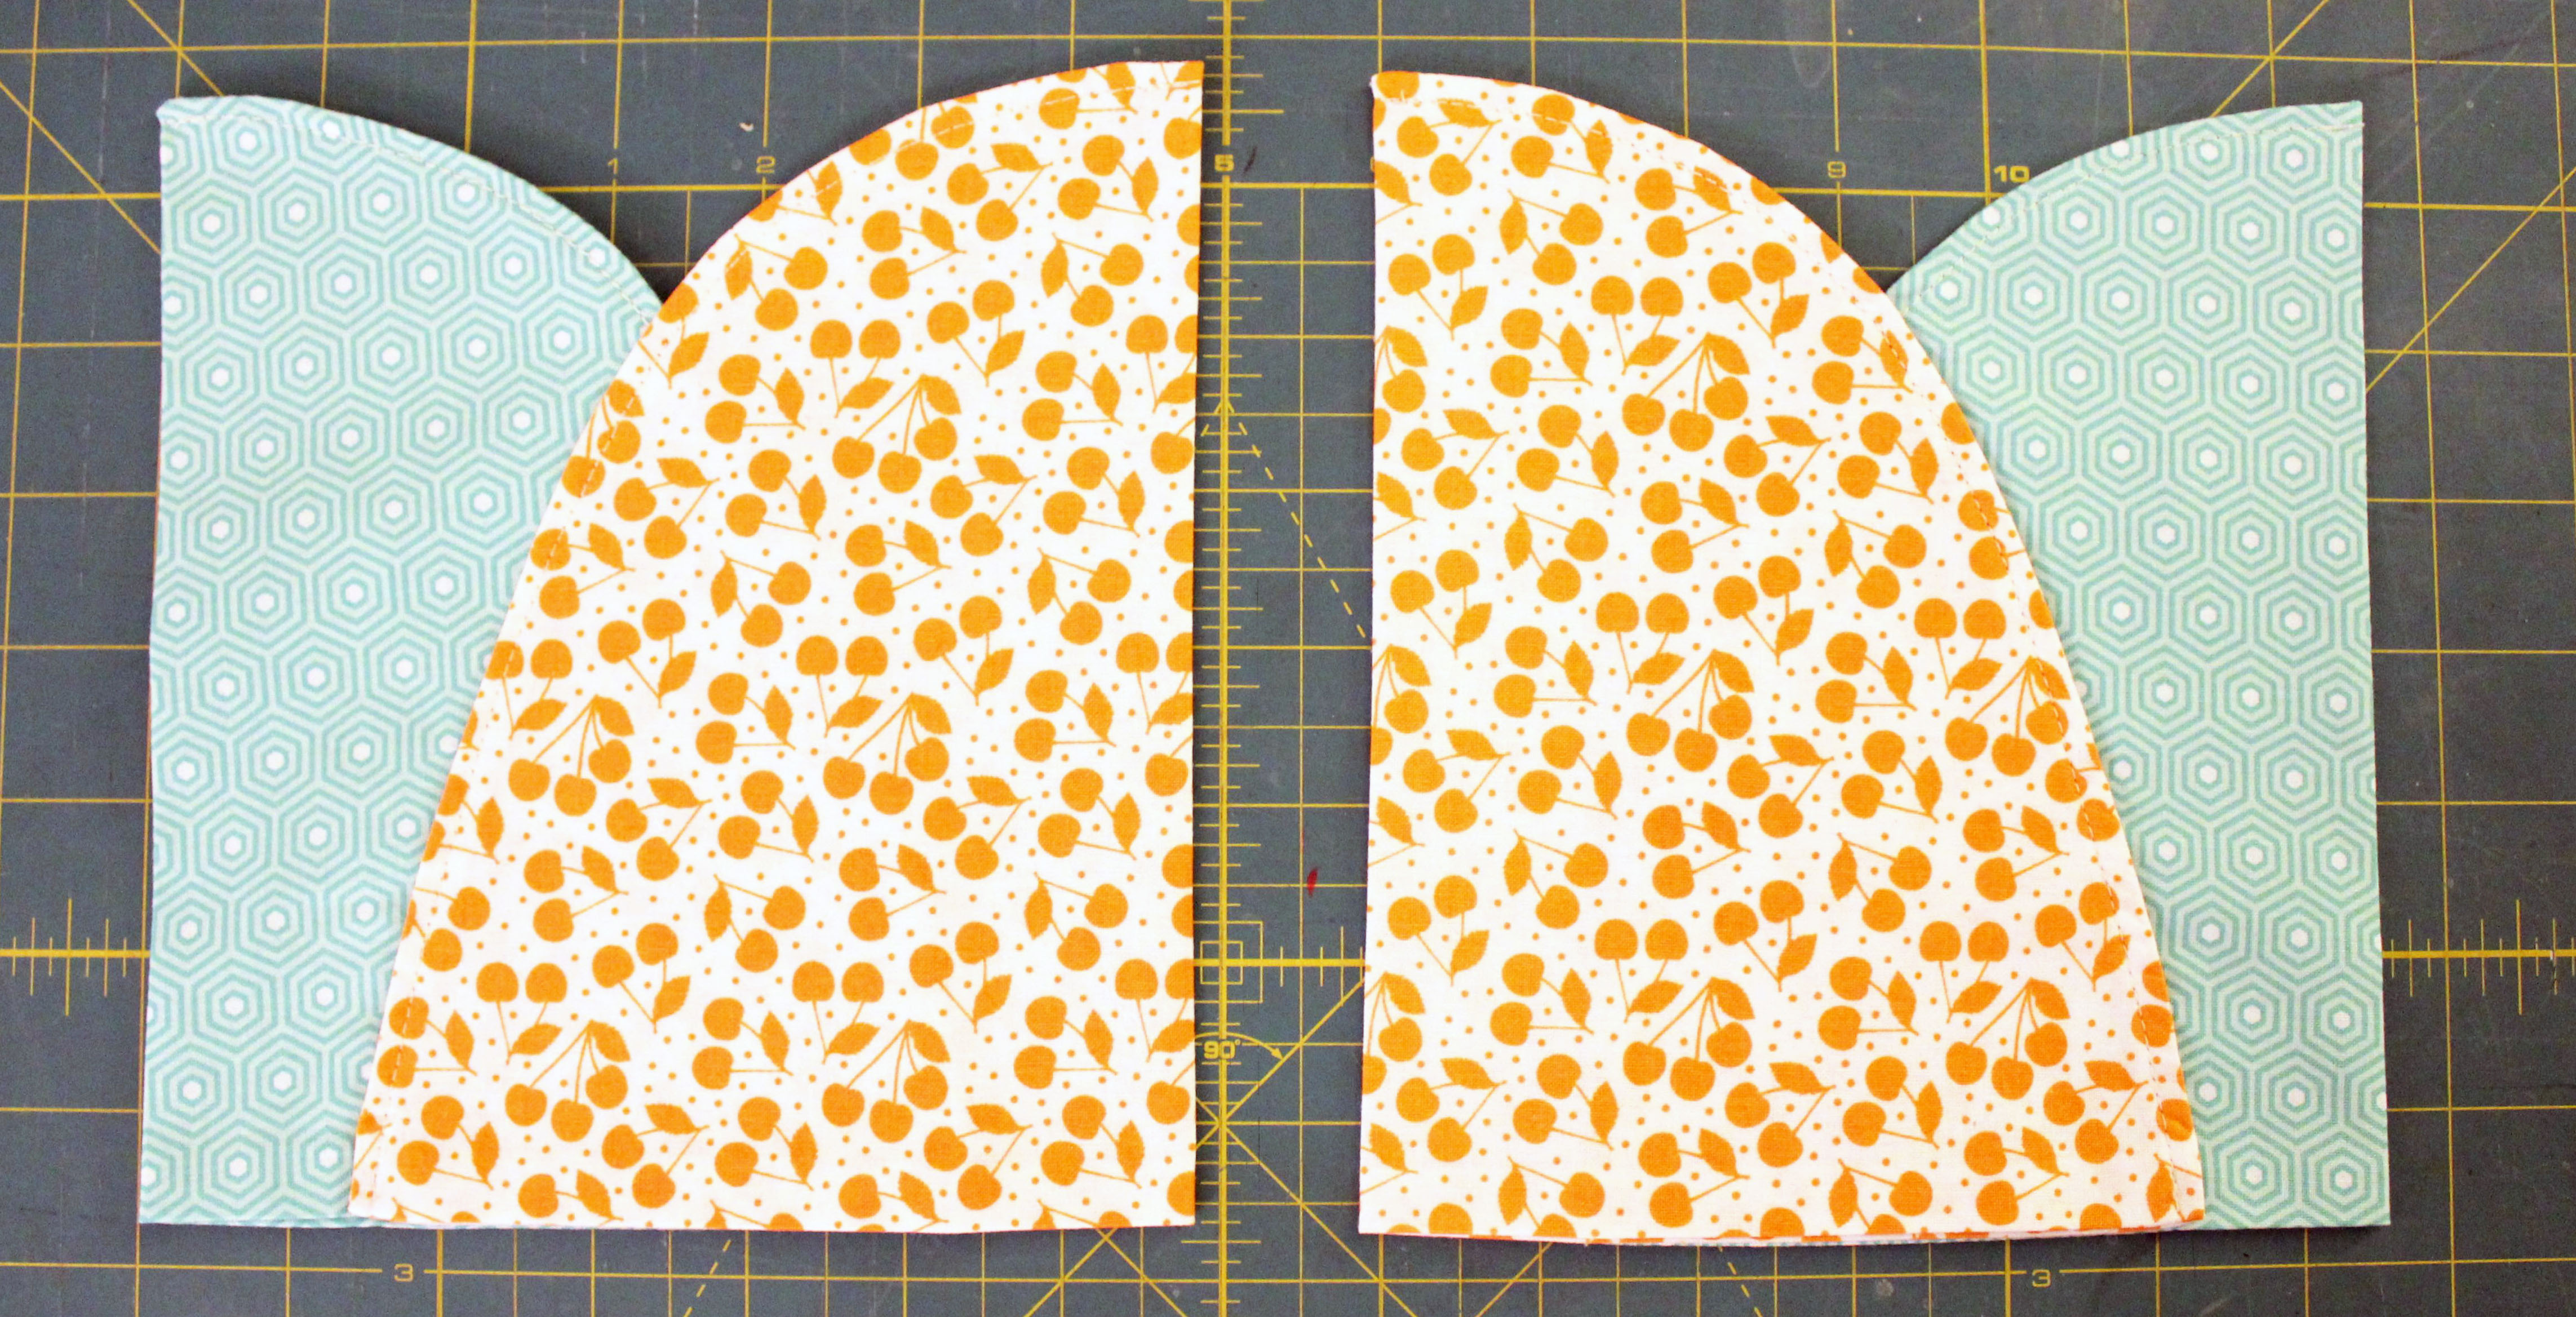
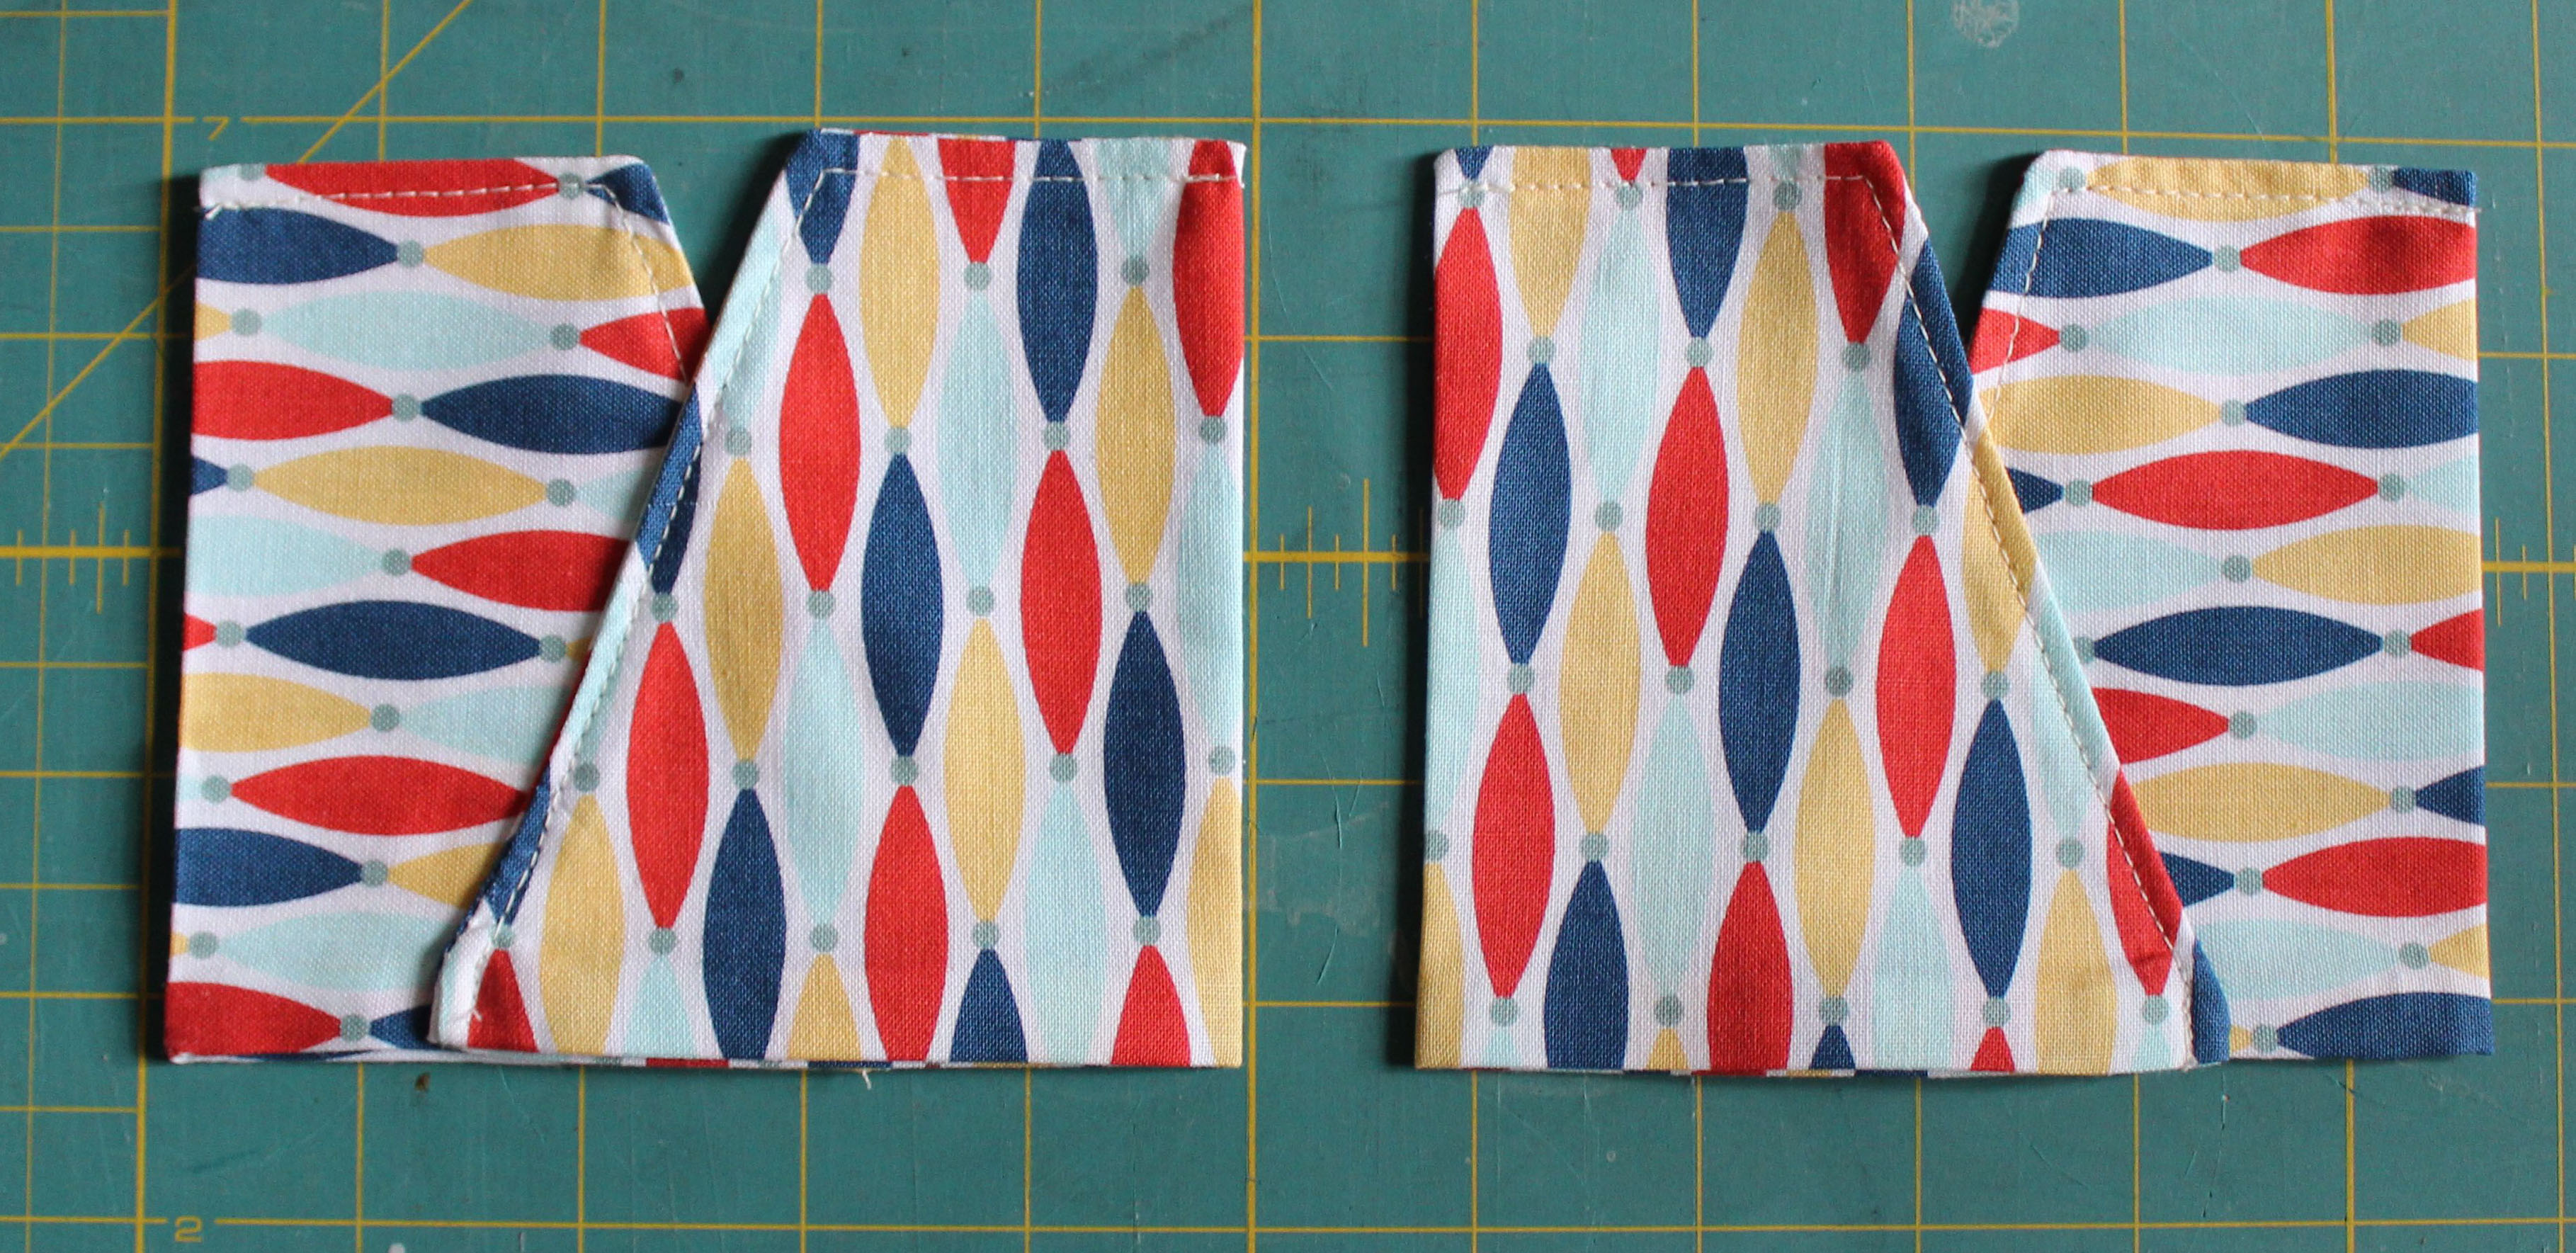
Step 9: Both boy and girl pockets should now be prepped and ready to go.
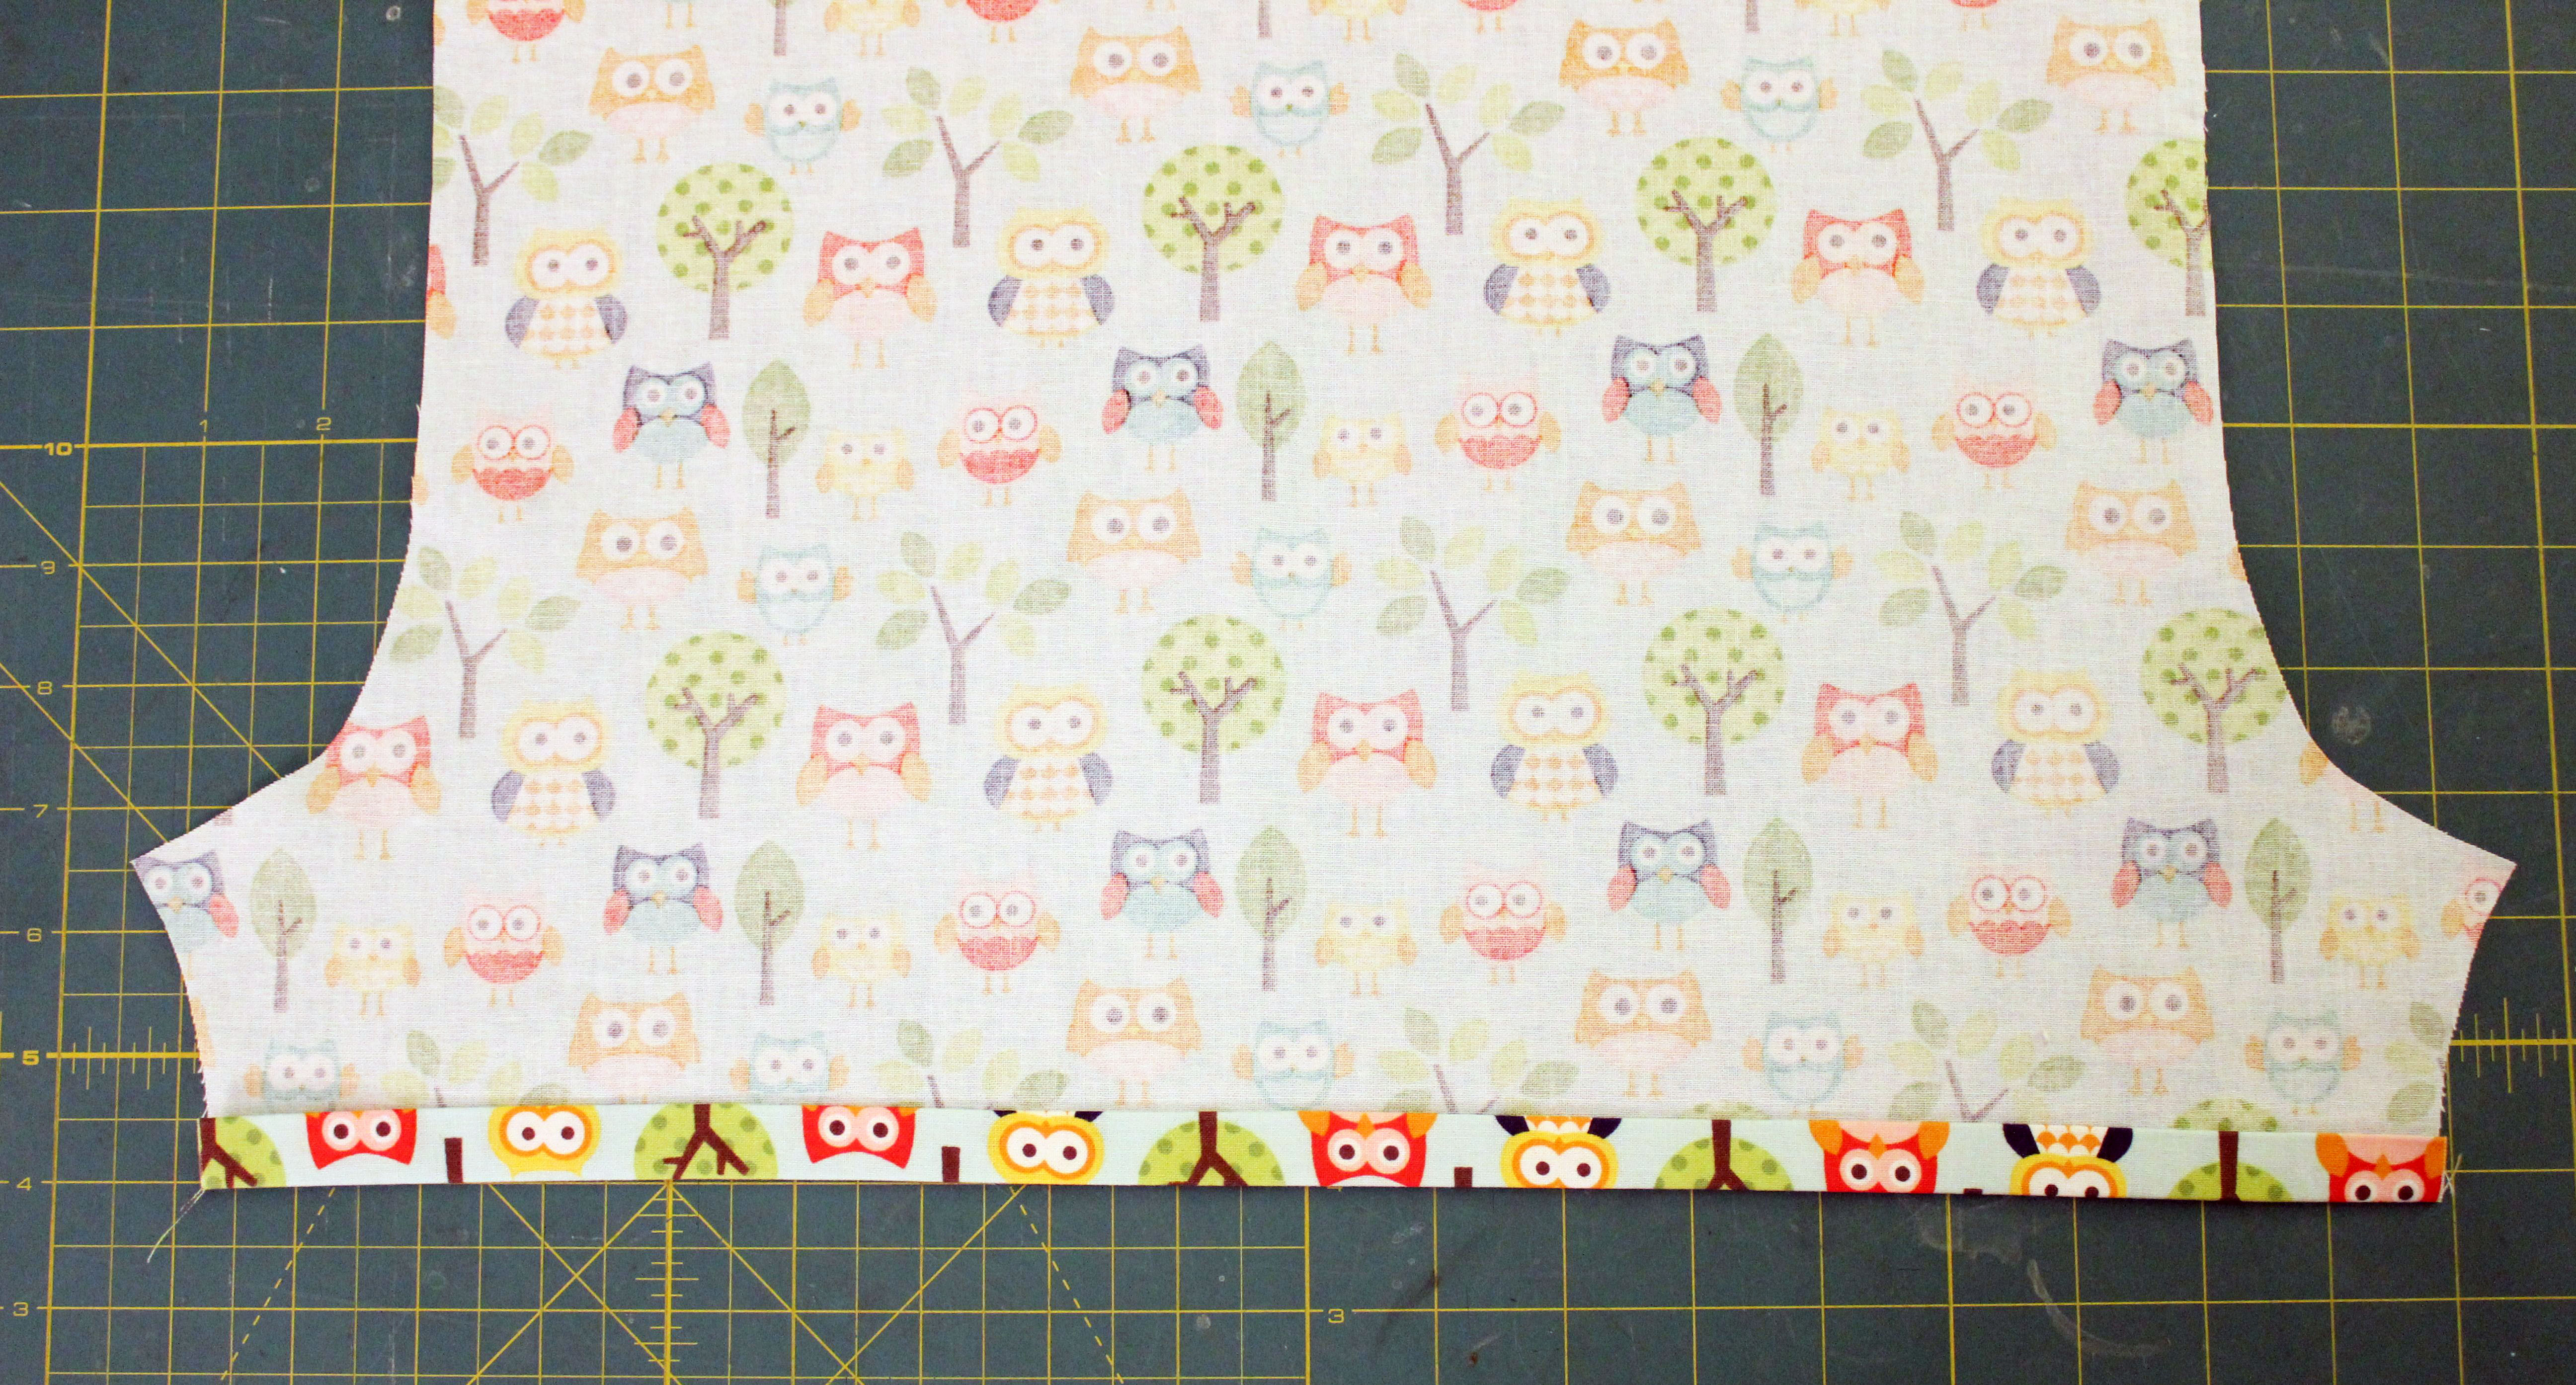
Grab one shorts body piece and lay the right side down. Fold them bottom hem up ½†and press, then ½†and press again.
Repeat for the other shorts body piece.
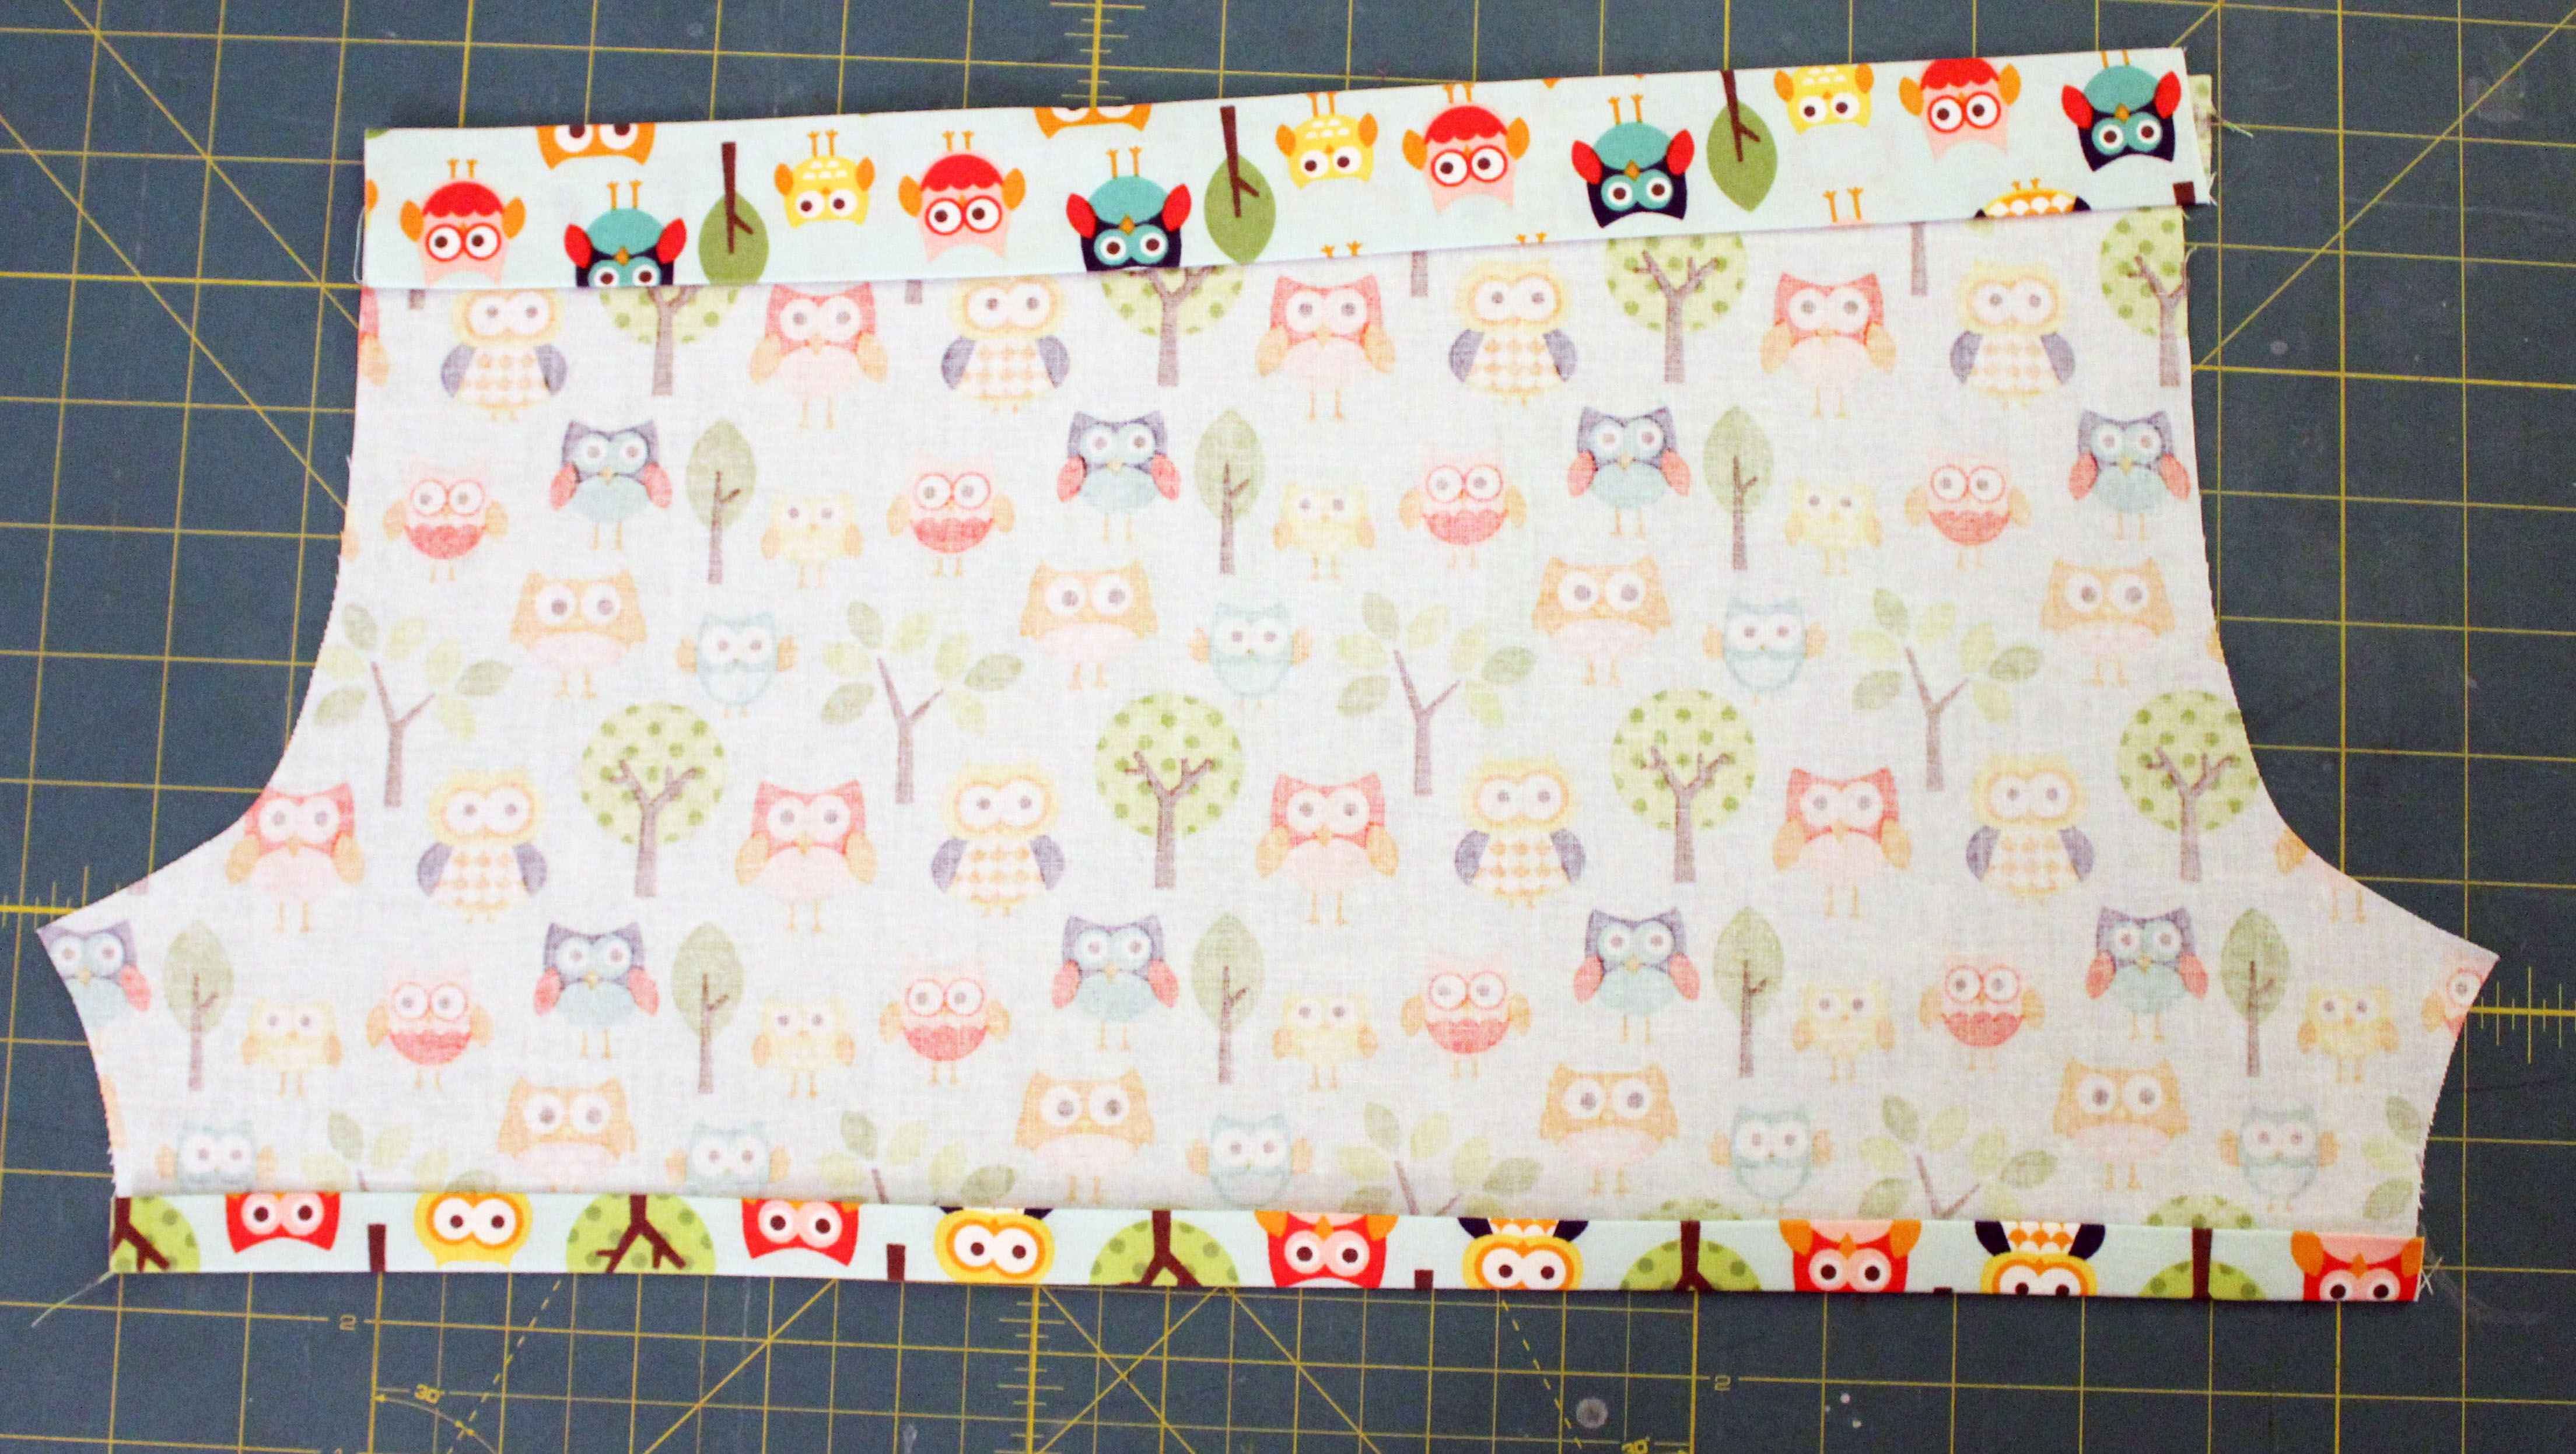
Step 10: Fold the top casing down ¼†and press, then 1¼†and press again.
Repeat for the other shorts body piece. Remember your tops will angle in opposite directions.
Step 11: Lay the shorts body piece right side up and place pocket even with the pressed bottom edge, centering it on the shorts. Pin in place.
Don’t forget to make sure the front pocket piece is the one you use on the lower front side of the shorts body piece.
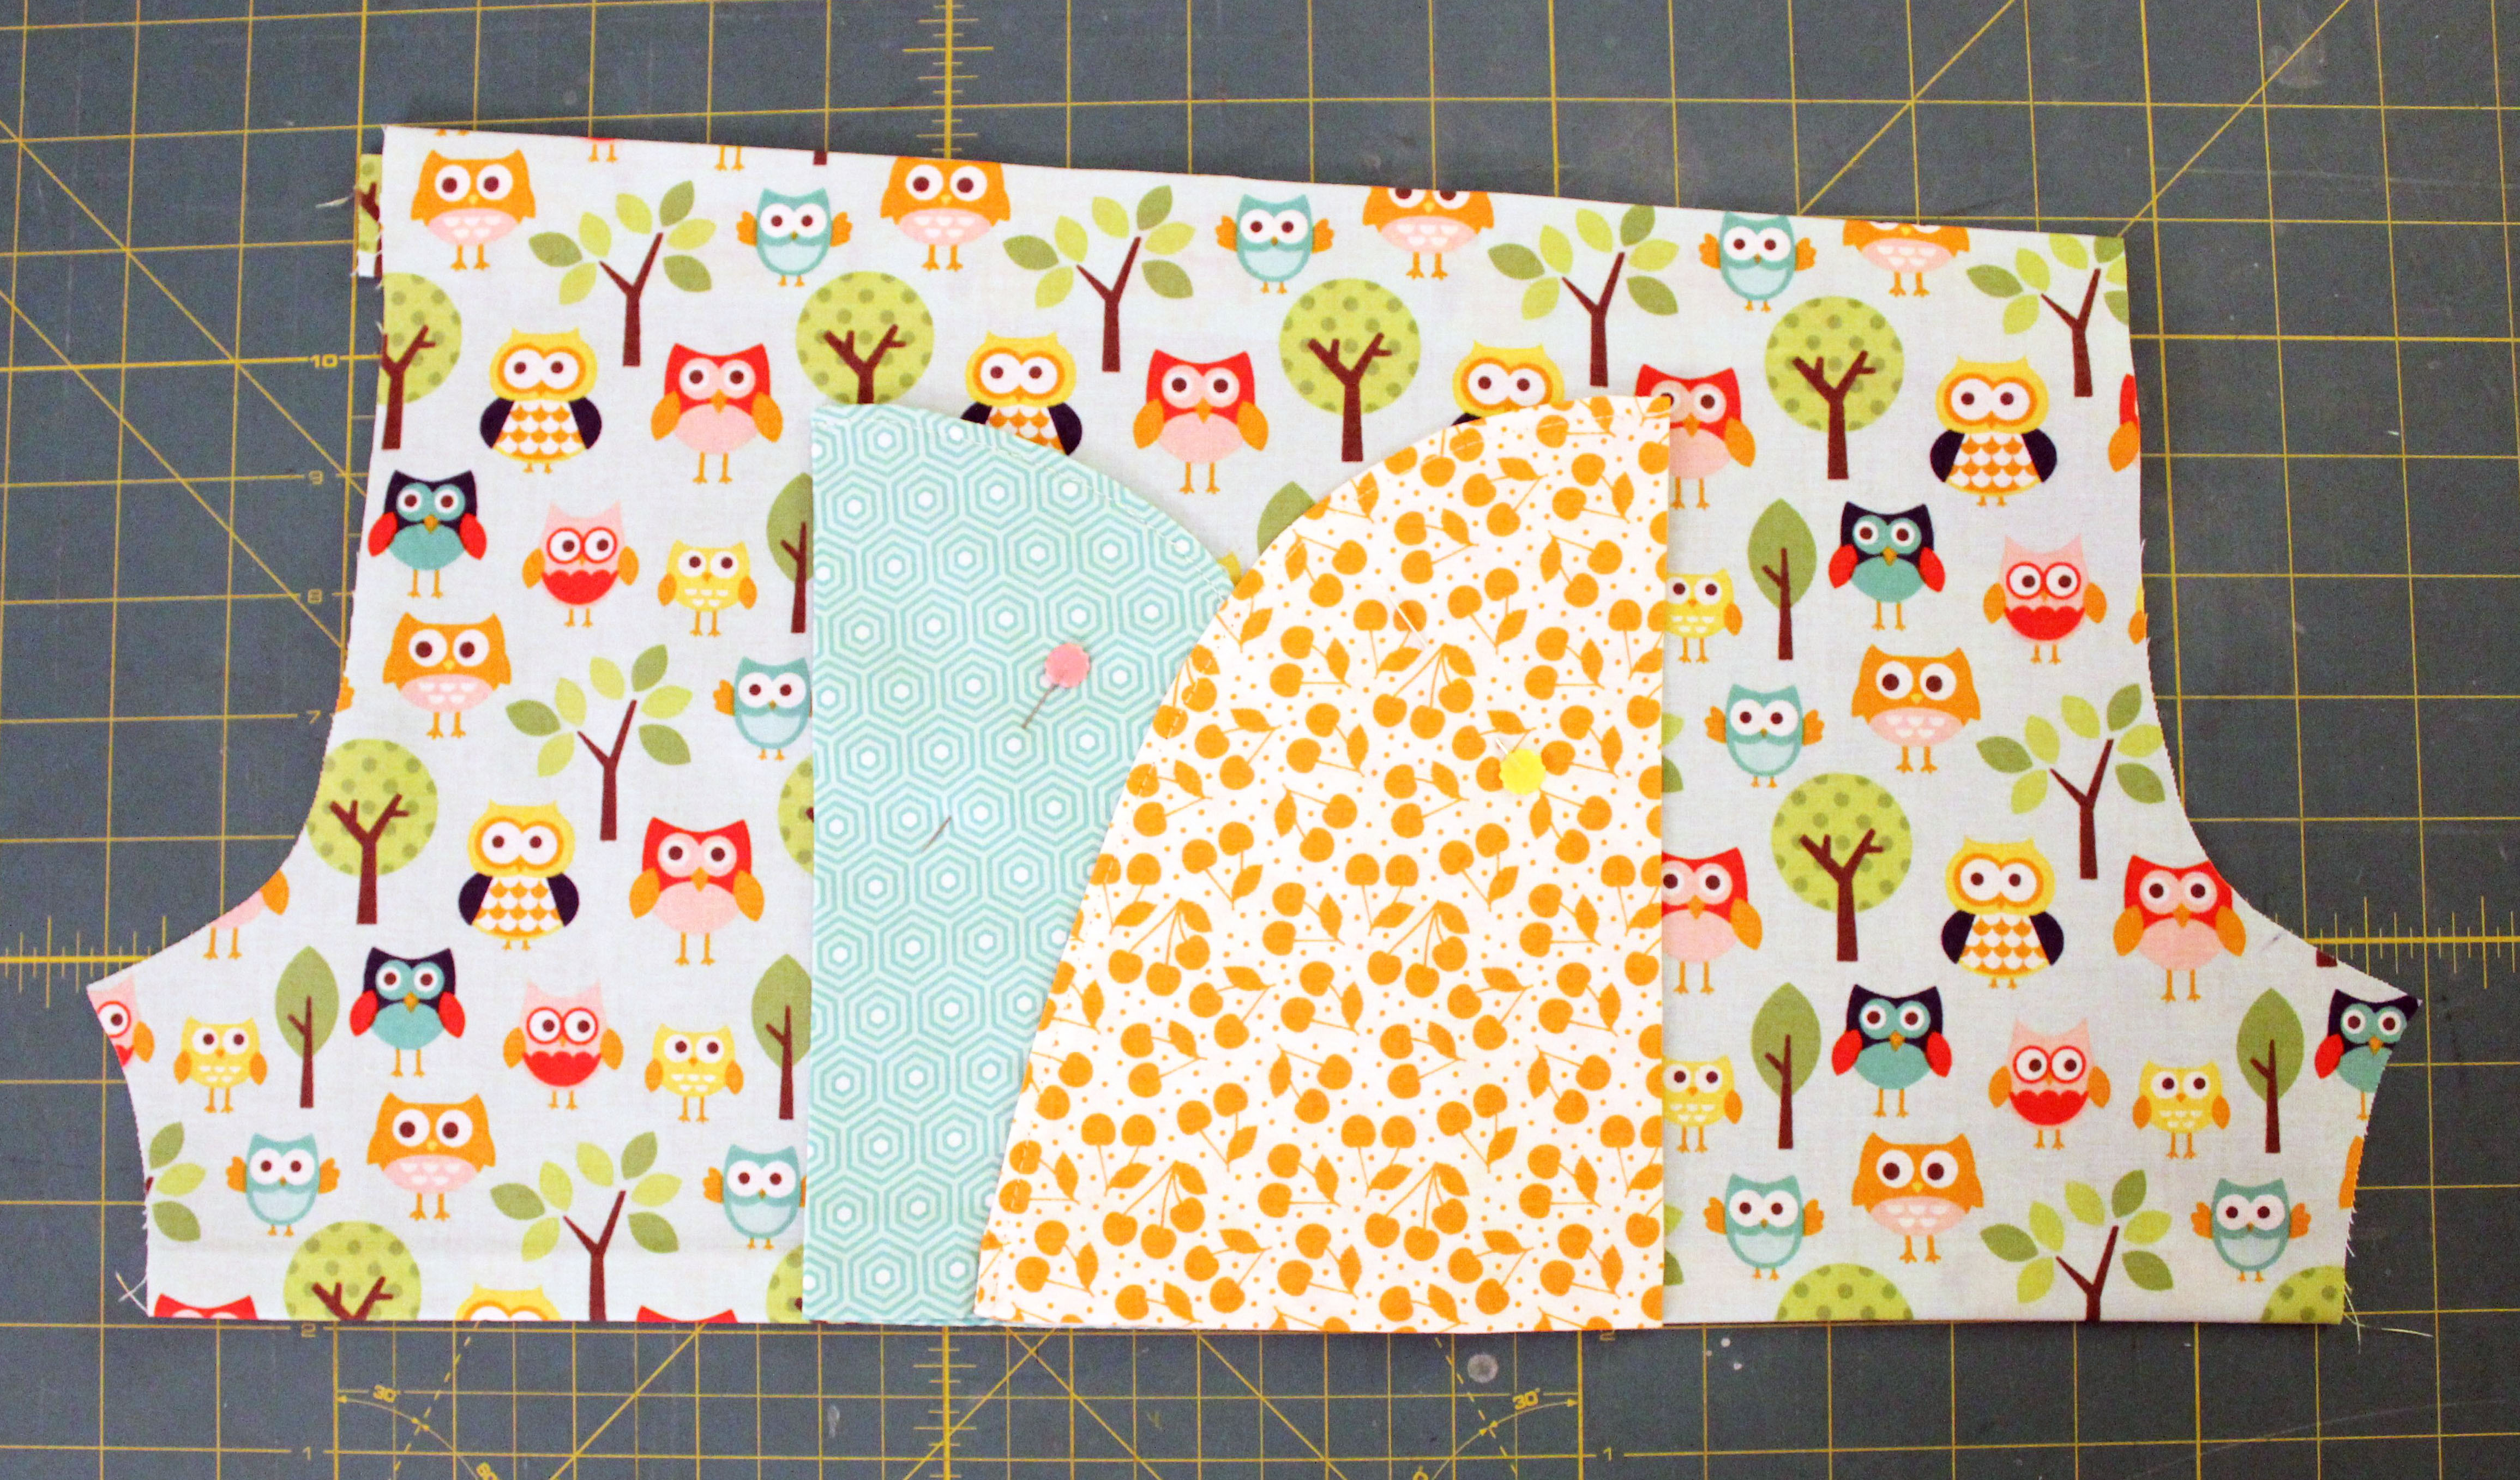
Make sure you unroll your hem so it doesn’t get caught in the stitching.
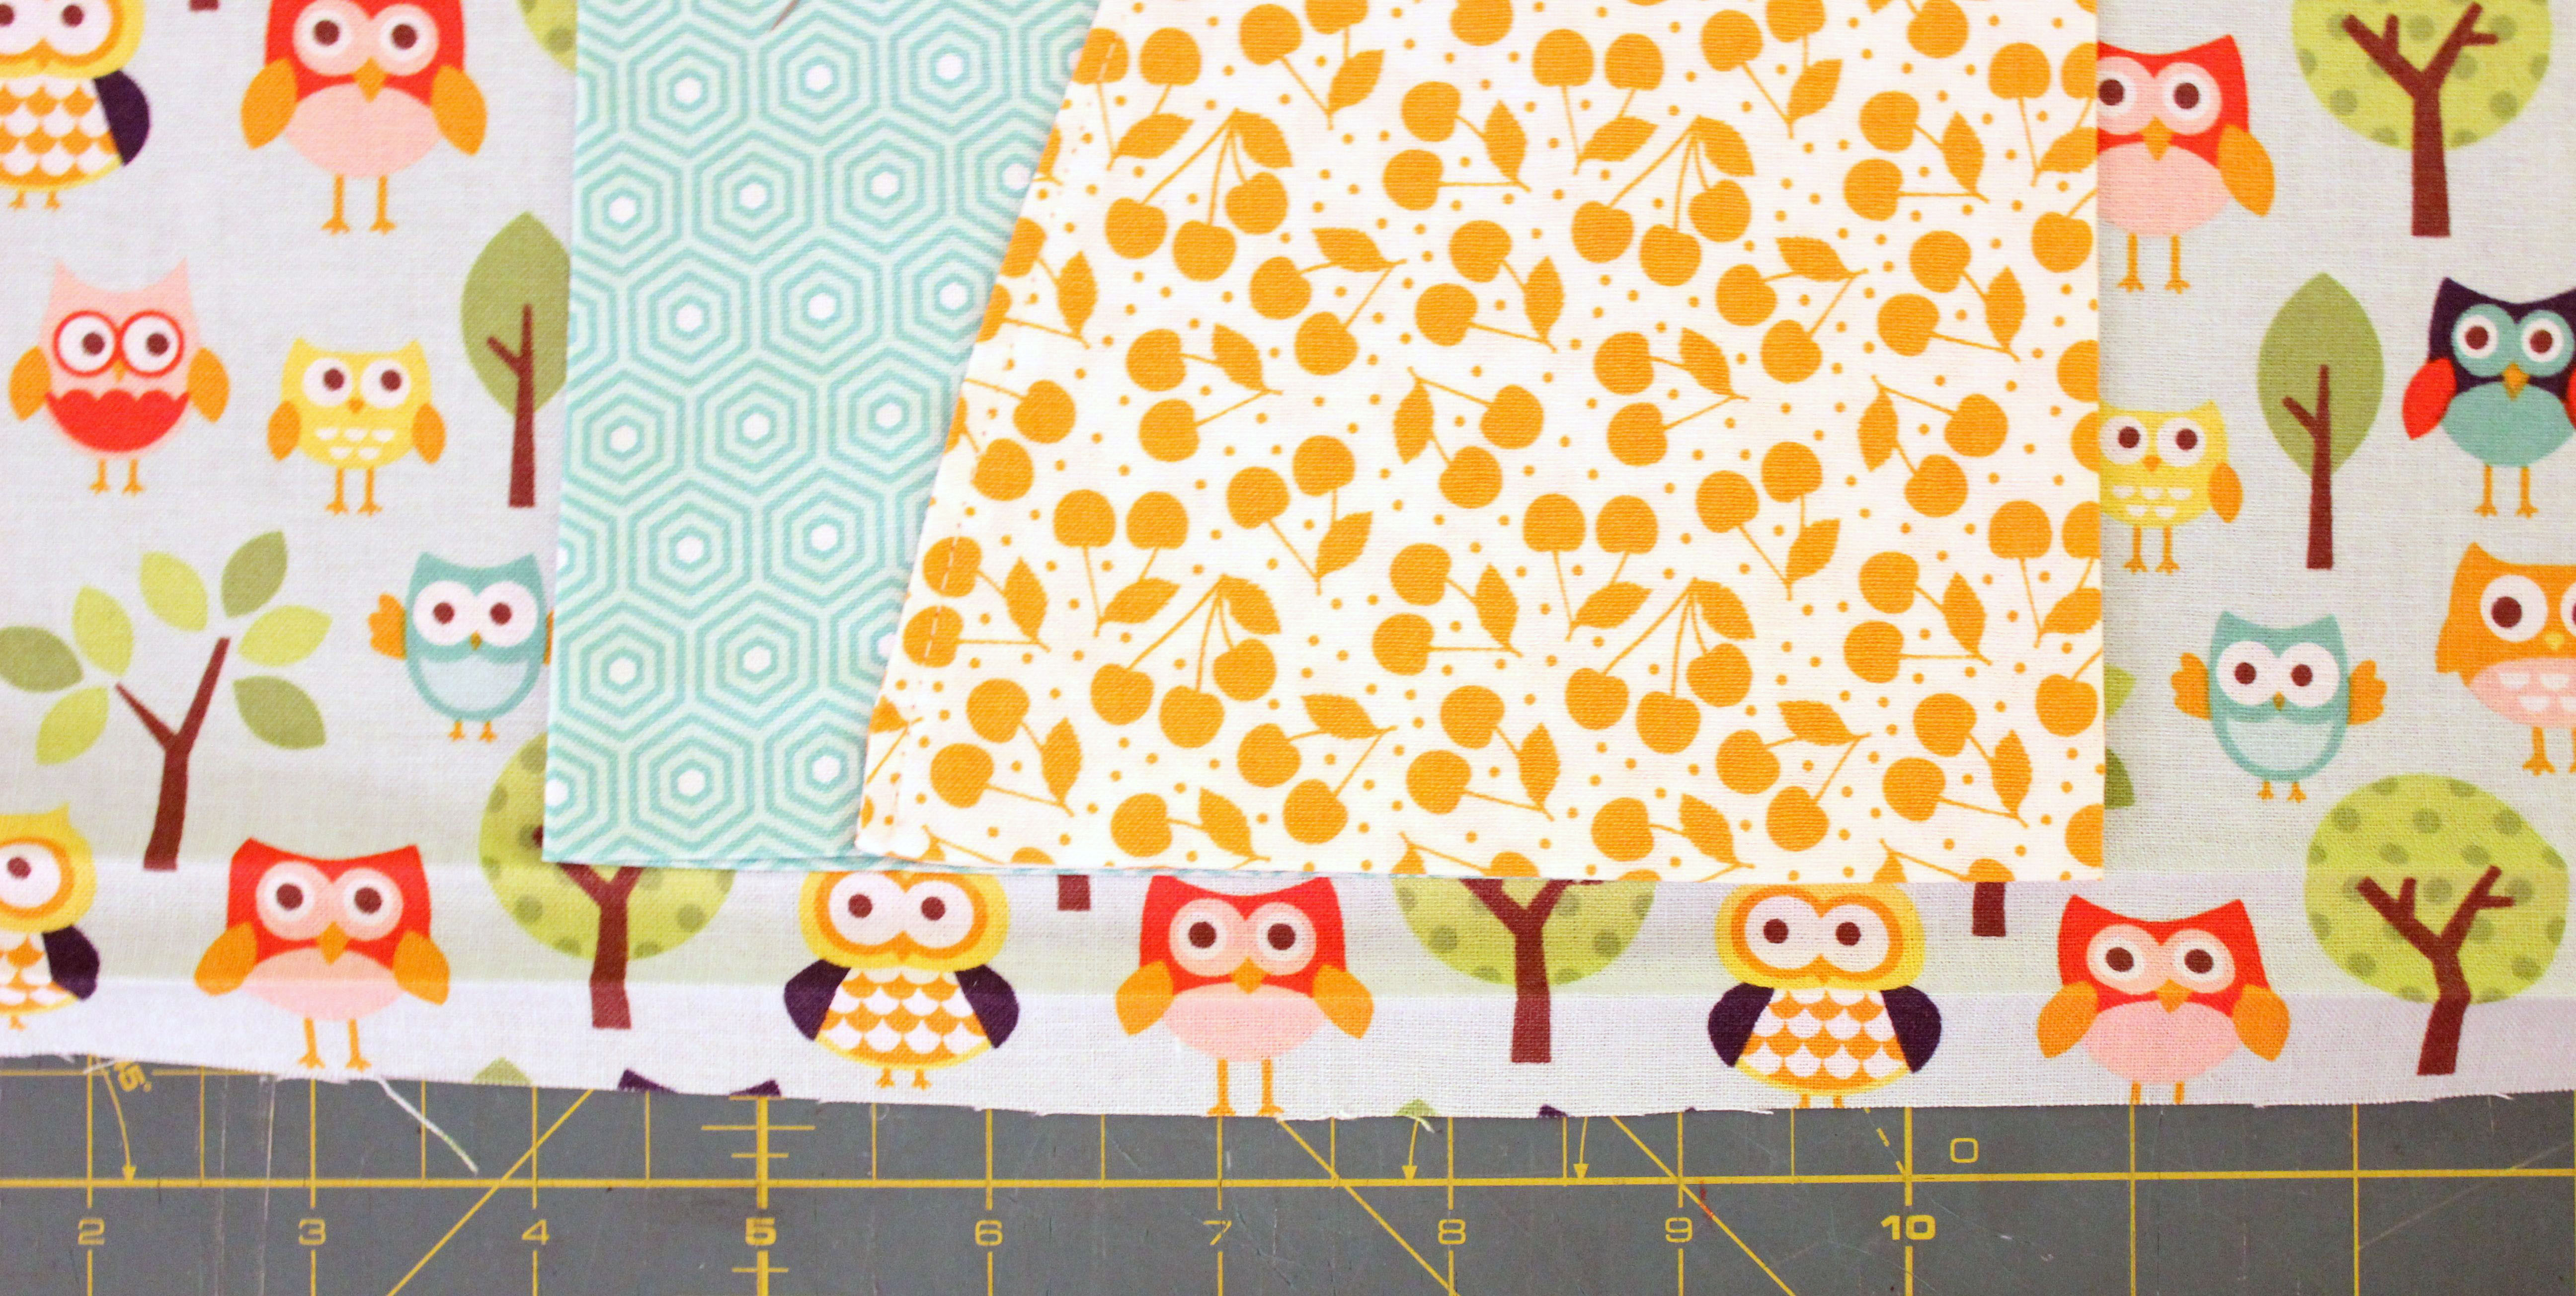
Step 12: Top stitch the pocket on the front and back sides 1/8†from the pocket edge.
Repeat for the other side.
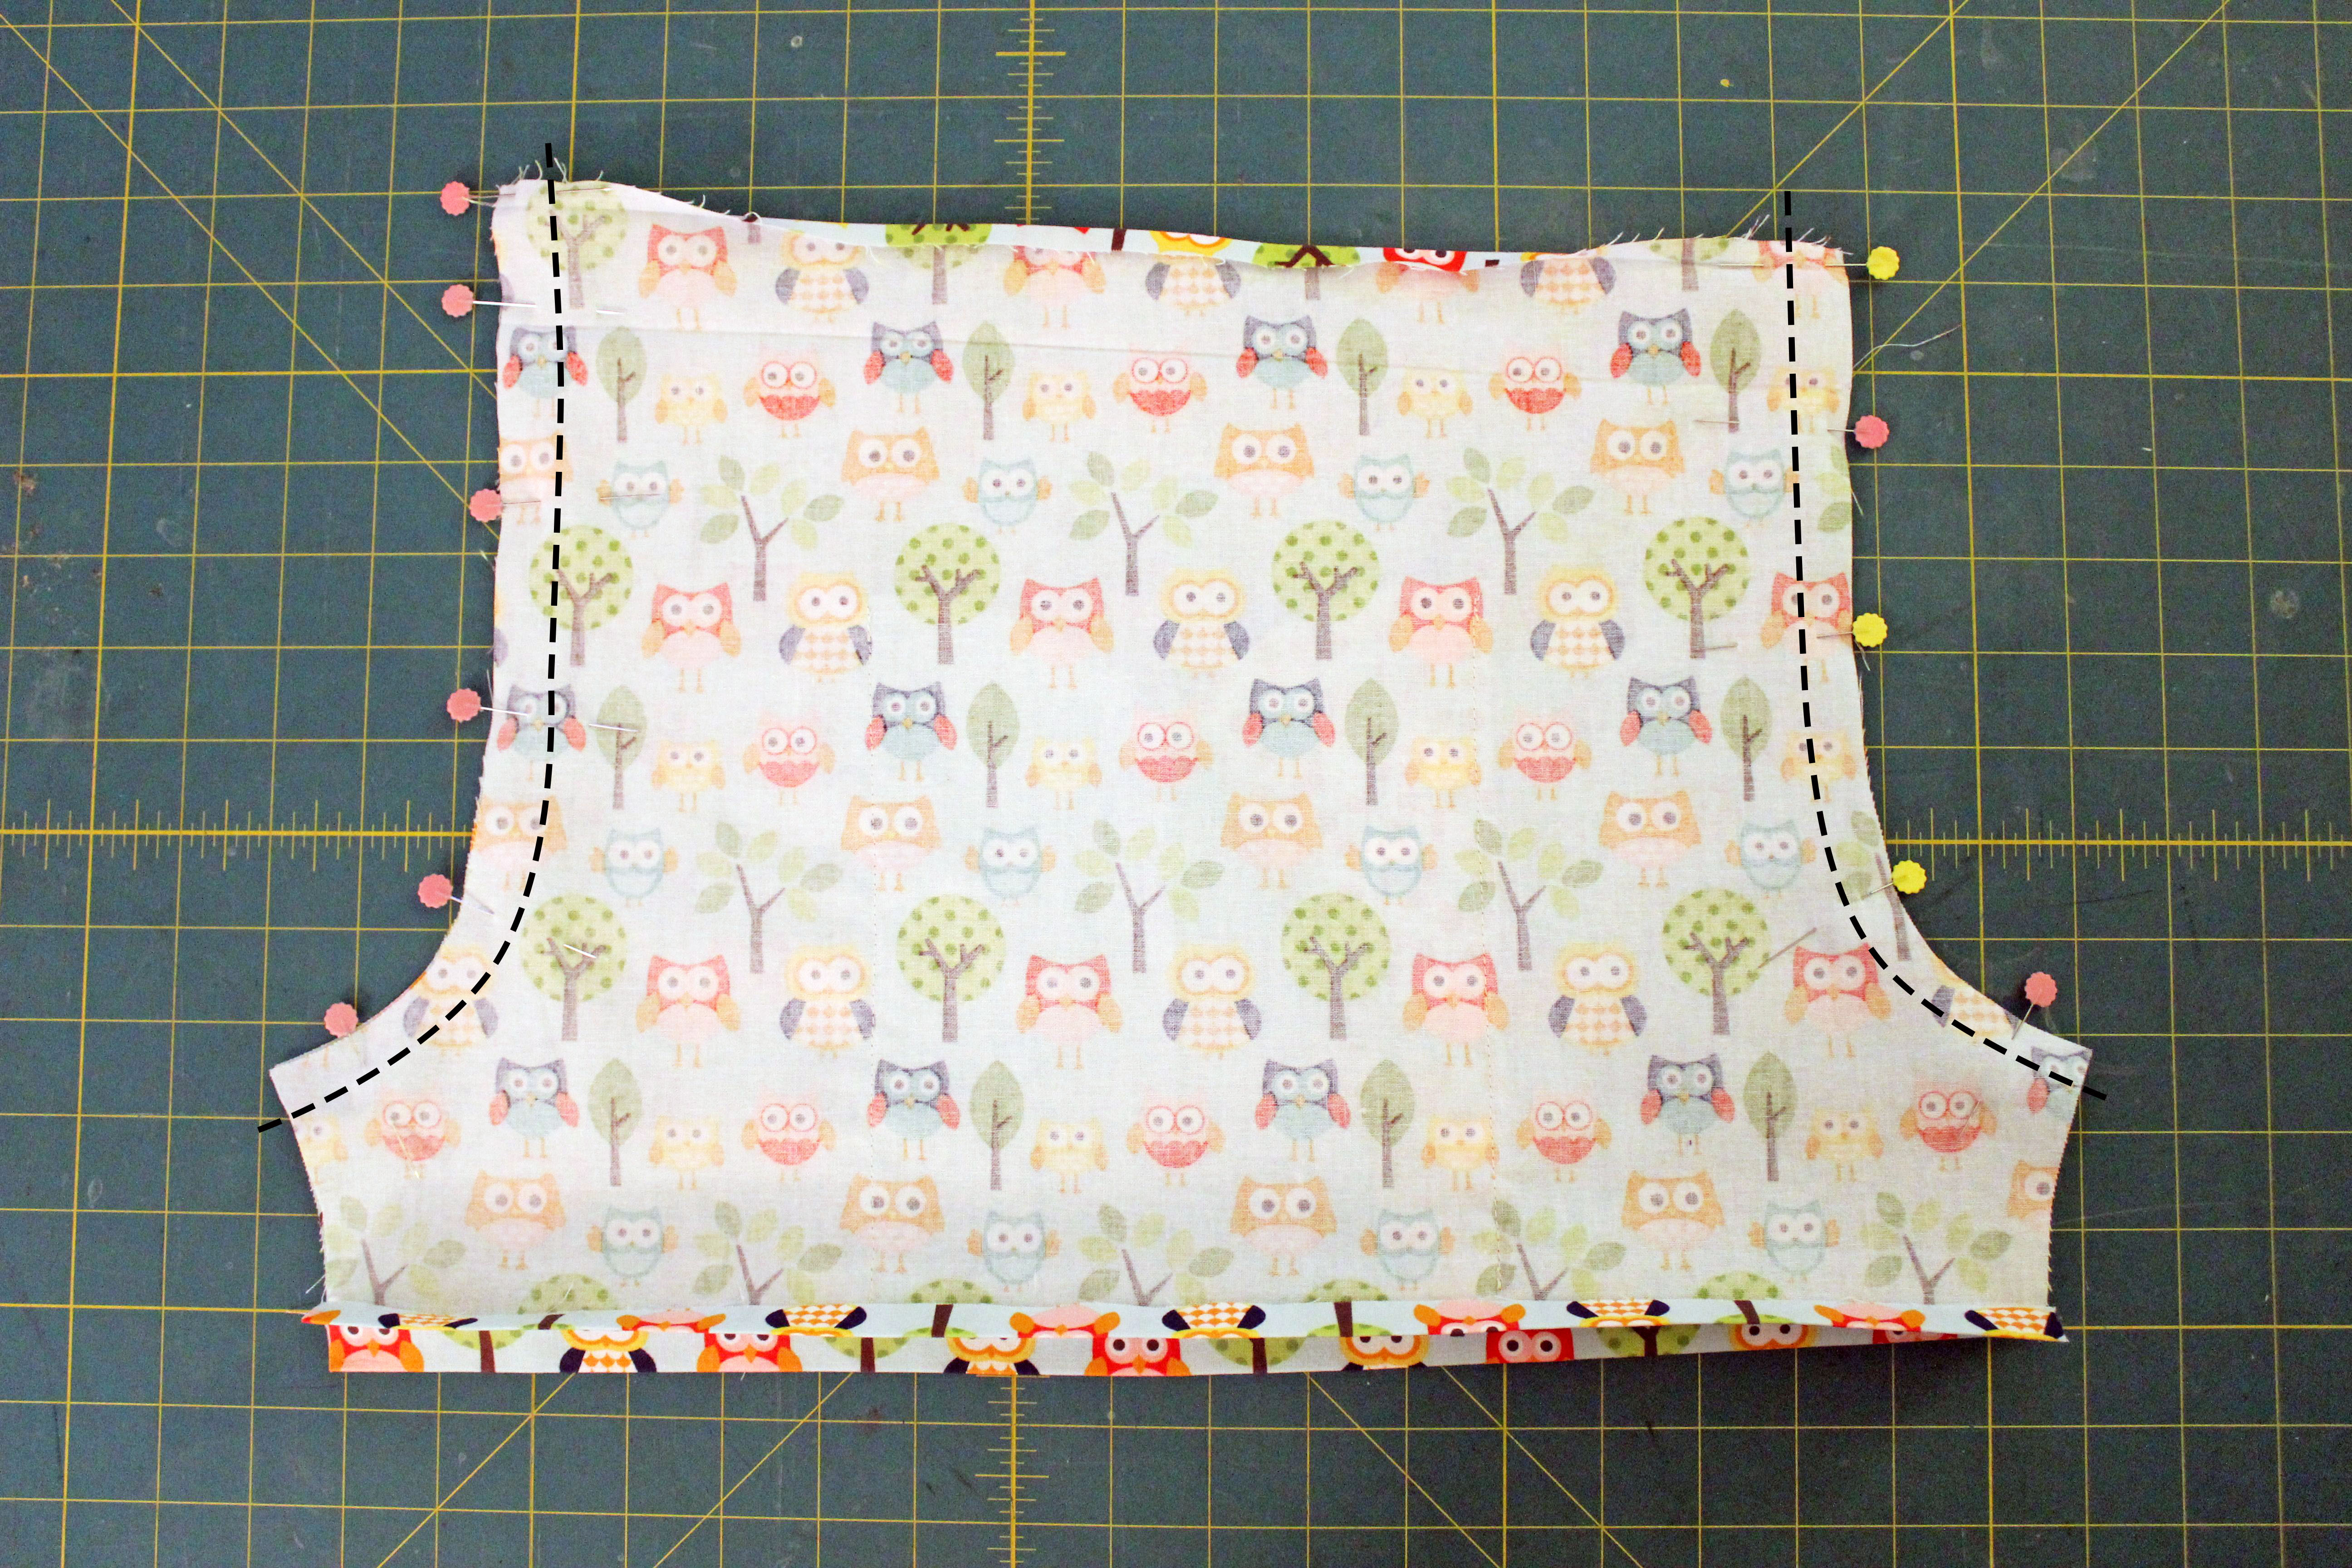
Step 13: Now lay your shorts right sides together and unfold the pressed casing, matching up the press lines, and pin the front and back rise. Sew and serge or zigzag the edges to finish.
Step 14: Unfold the pressed hem, matching up the press marks, and pin and sew the inseam. Serge or zigzag the edges to finish.
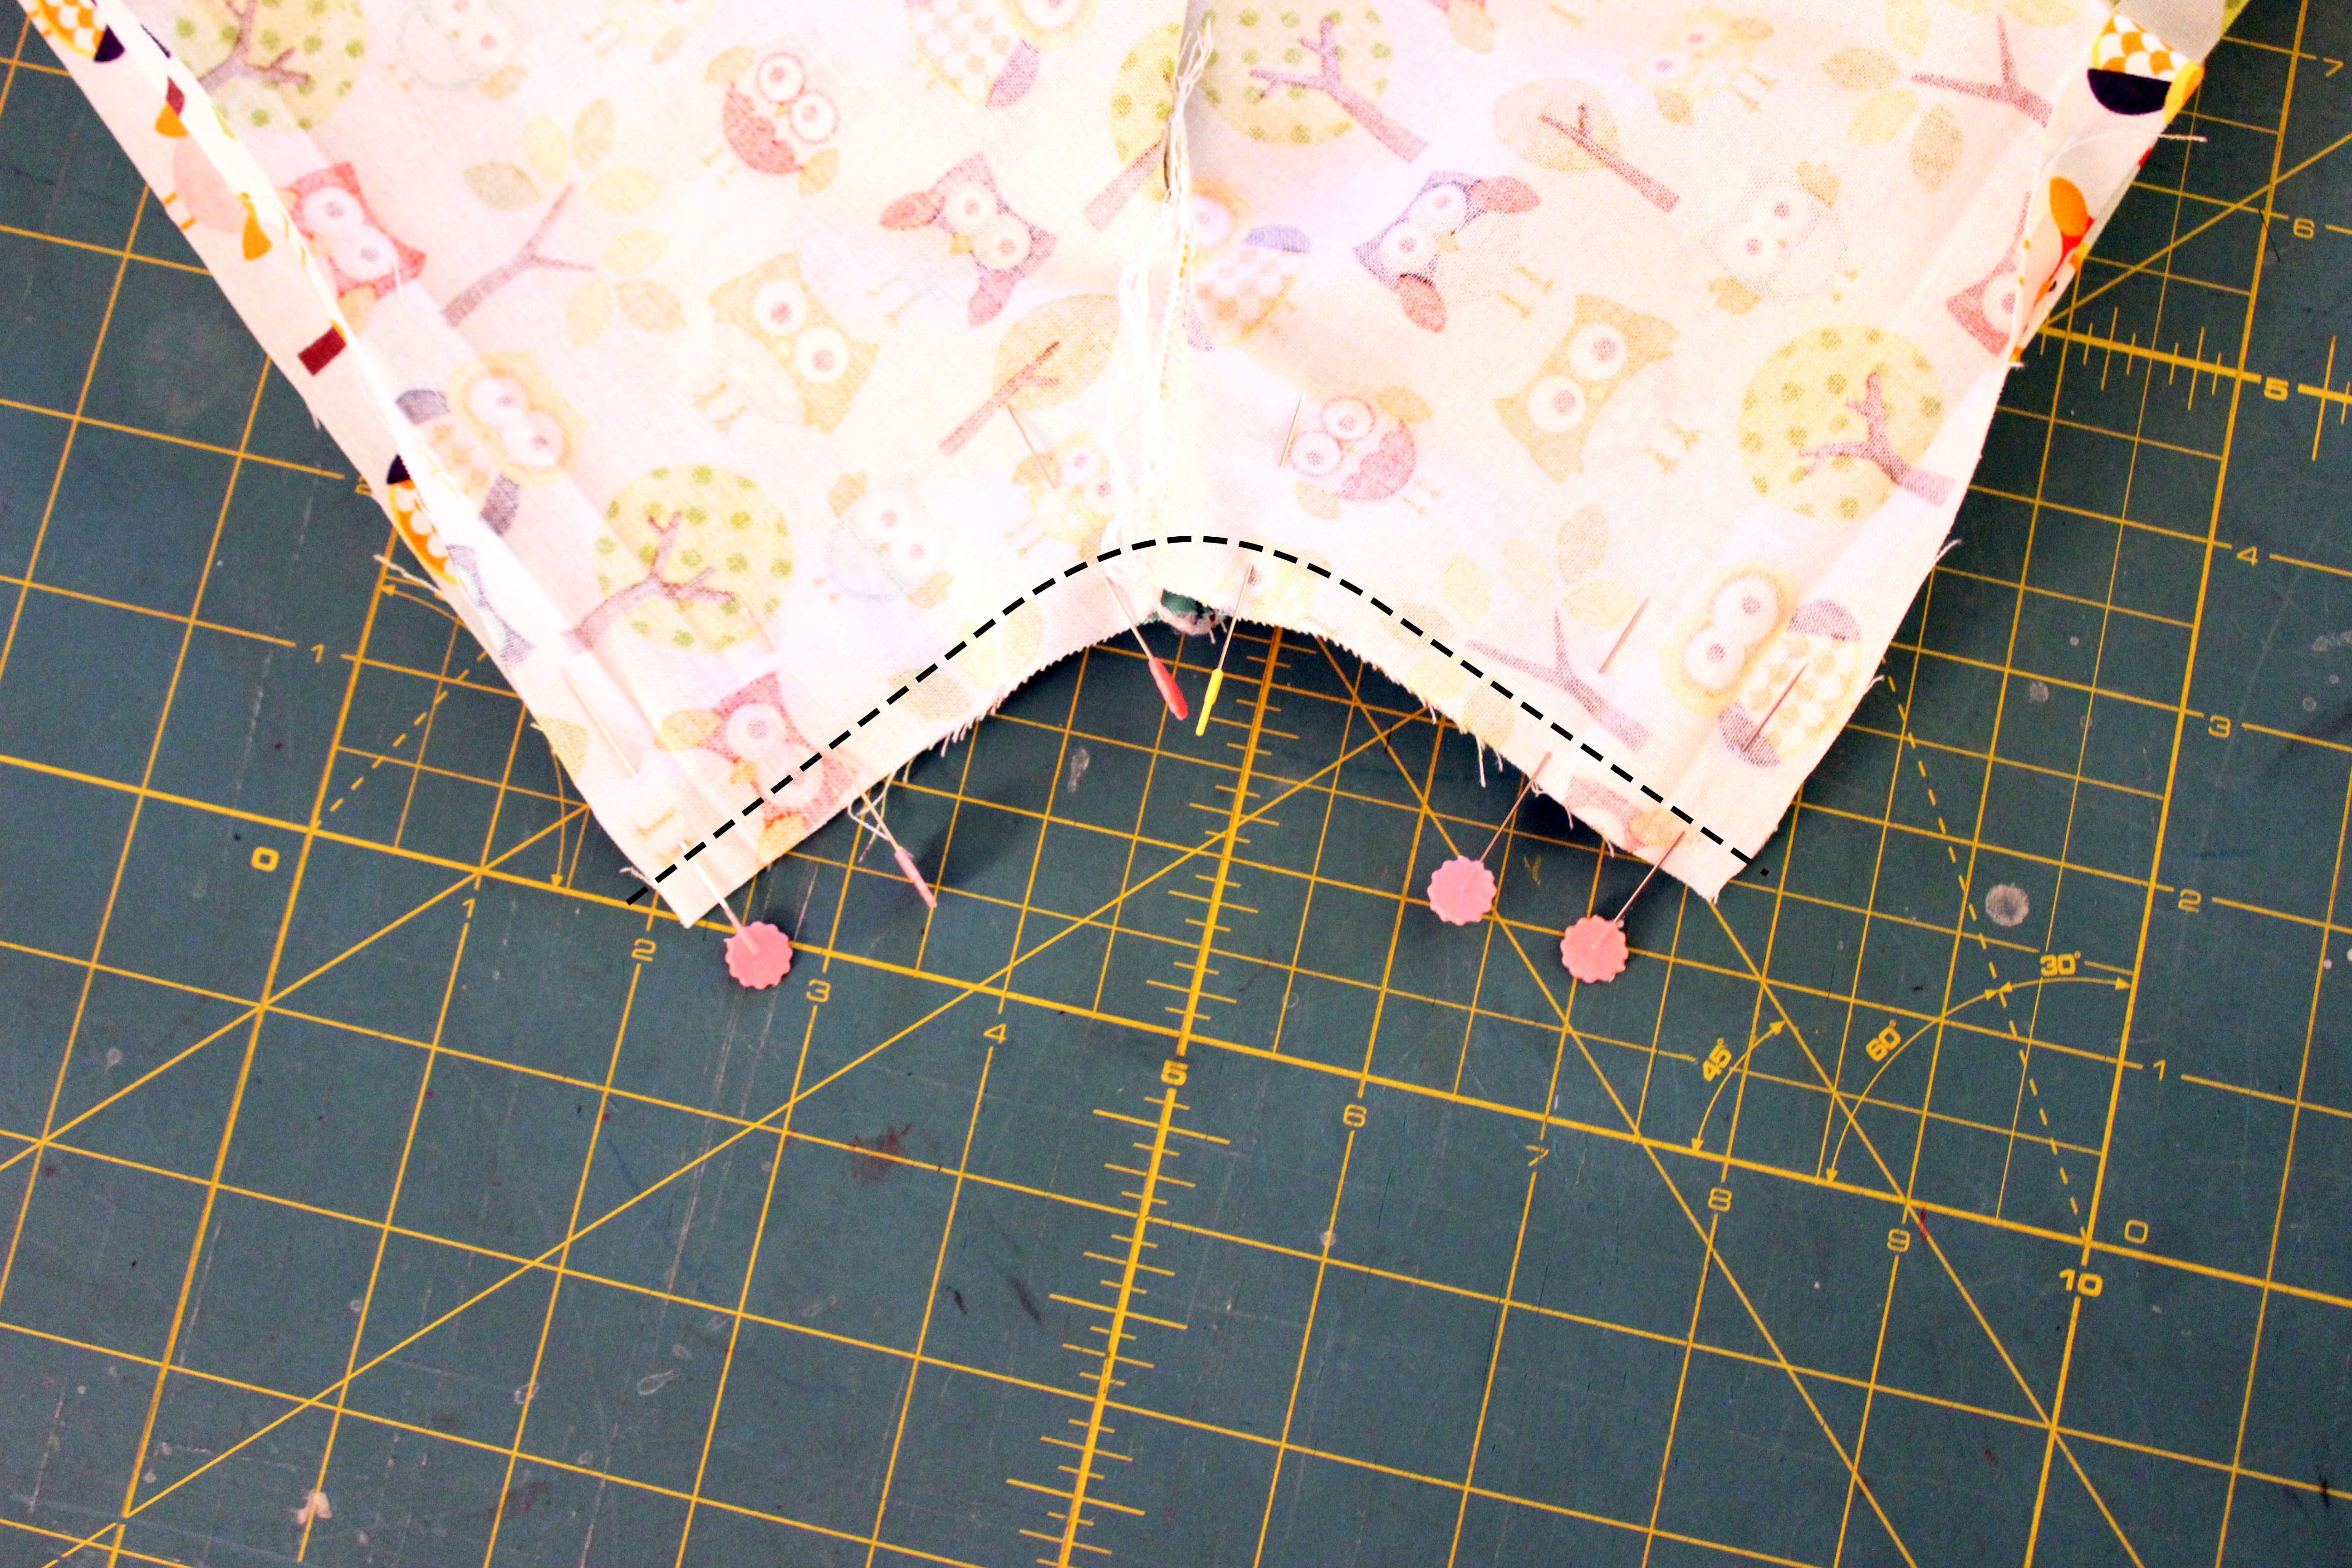
Look at that! Your casing and hems are all ready to sew! No more turning the shorts on the ironing board, trying to press tiny openings into perfectly straight lines!
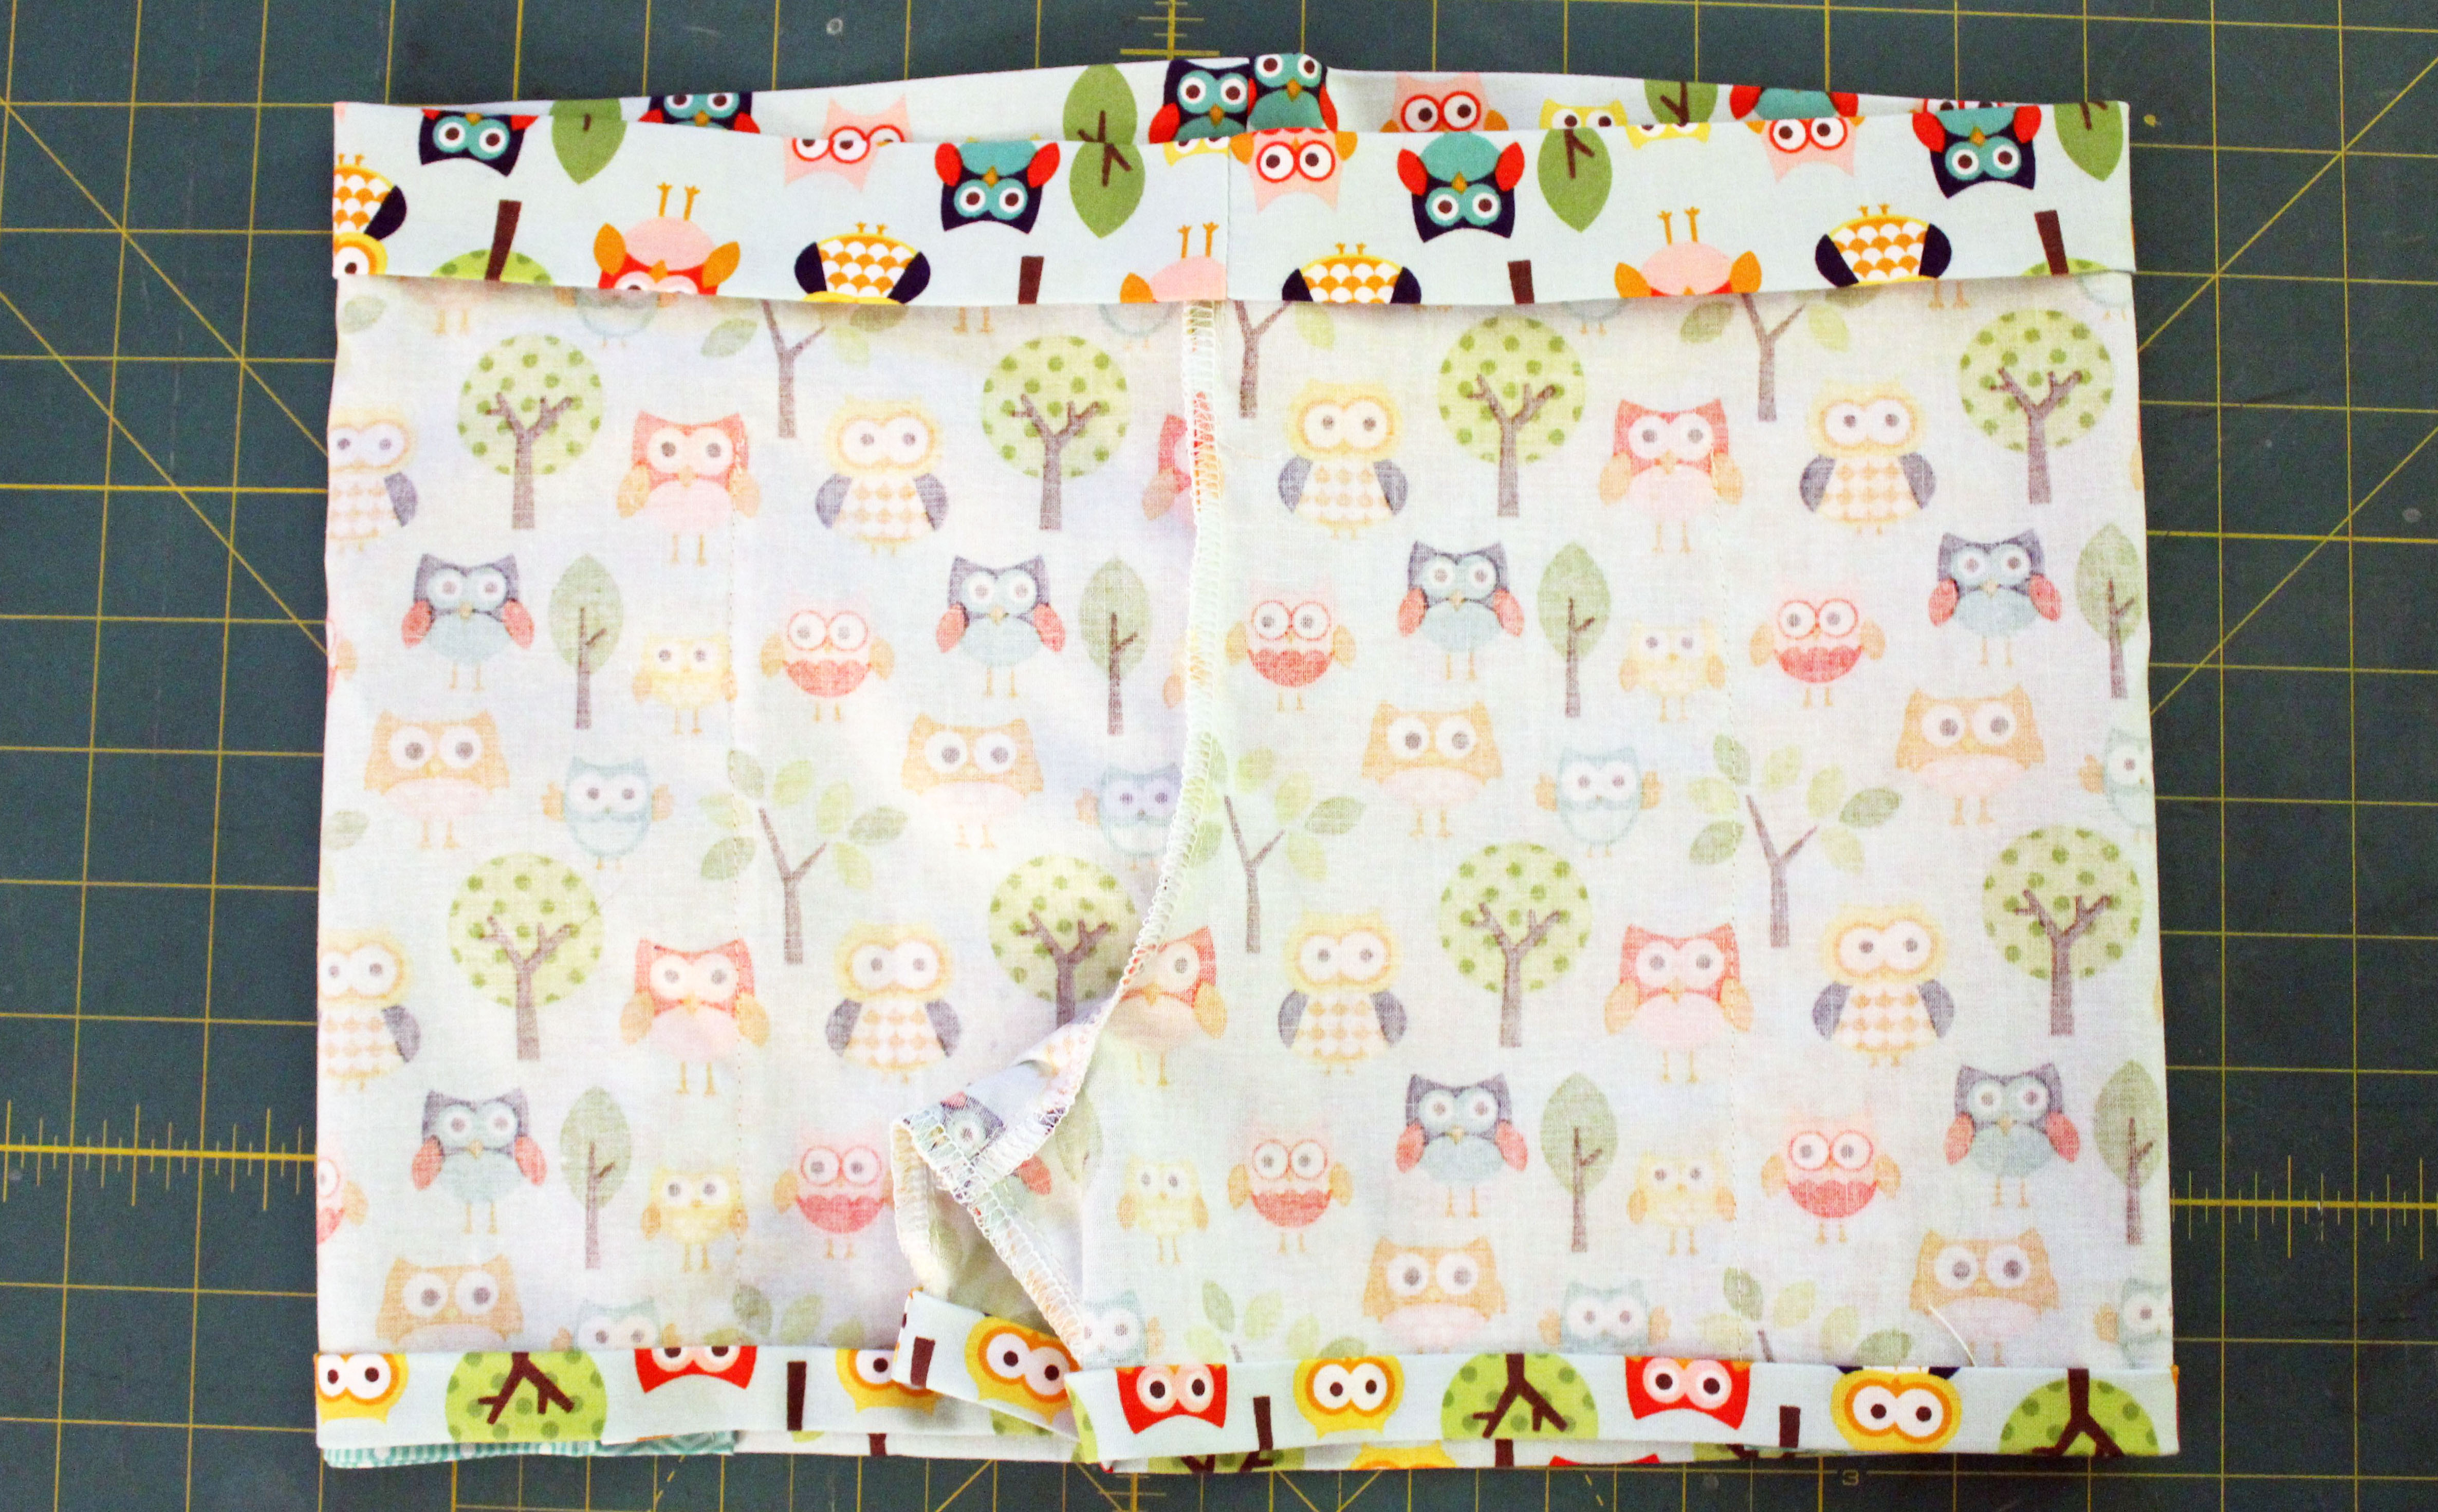
Step 15: Sew the casing closed from the inside, making sure you stay about 1/8†from the edge of the casing to ensure proper room for the elastic. Leave a hole 2â€-3†to feed elastic through.
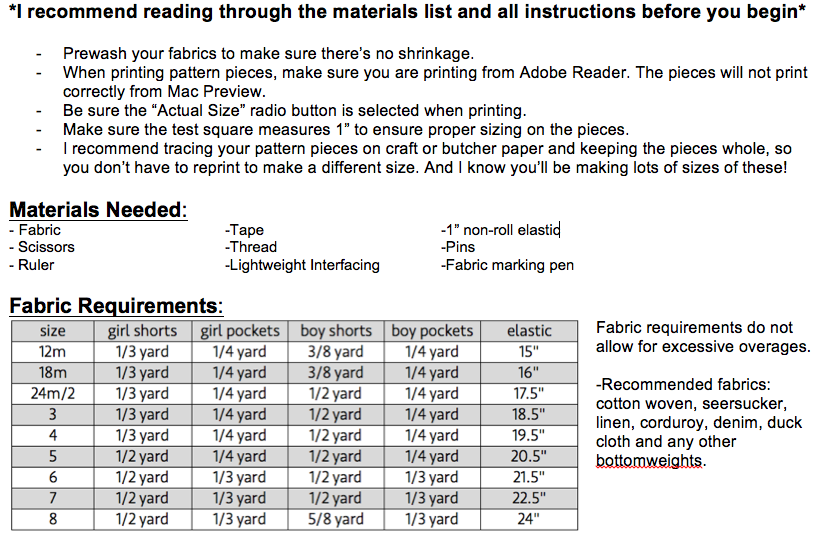
Elastic requirements are listed per size in the fabric requirements chart on page 2.
Once elastic is in place, sew the hole closed and your casing is complete!
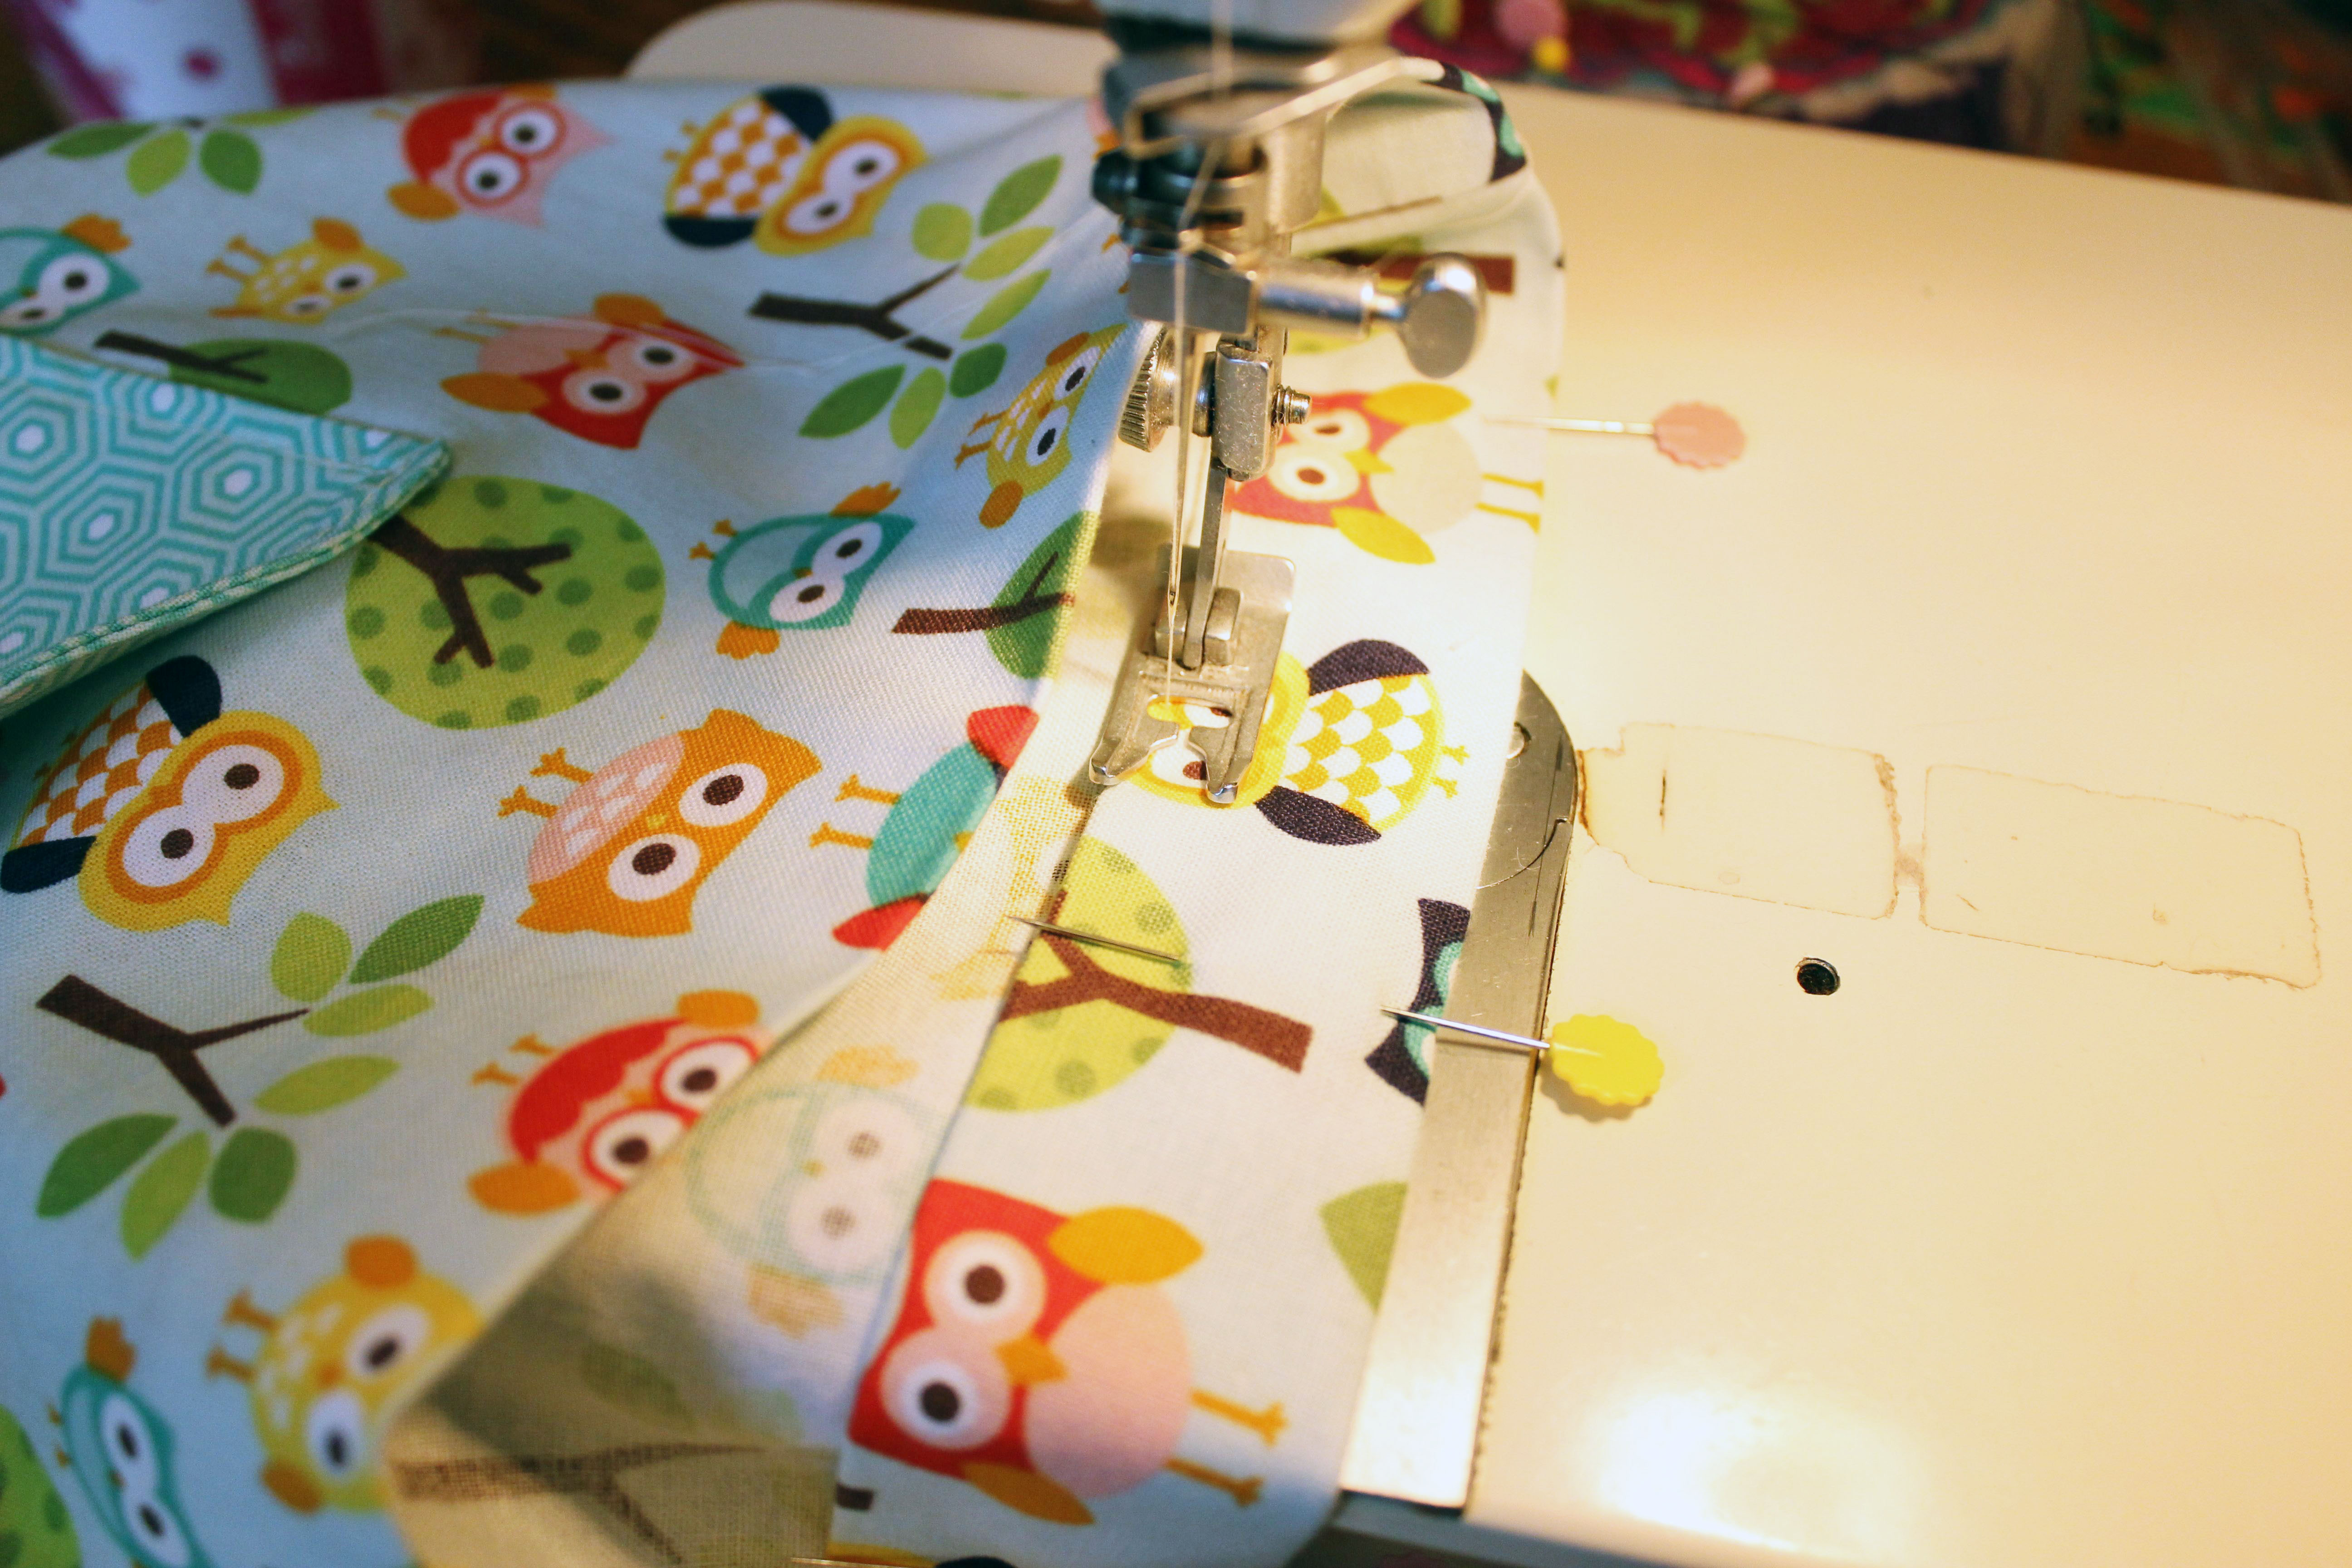
Step 16: To hem the bottom, sew ¼†from the bottom edge, going slowly over the pockets where it’s thicker.
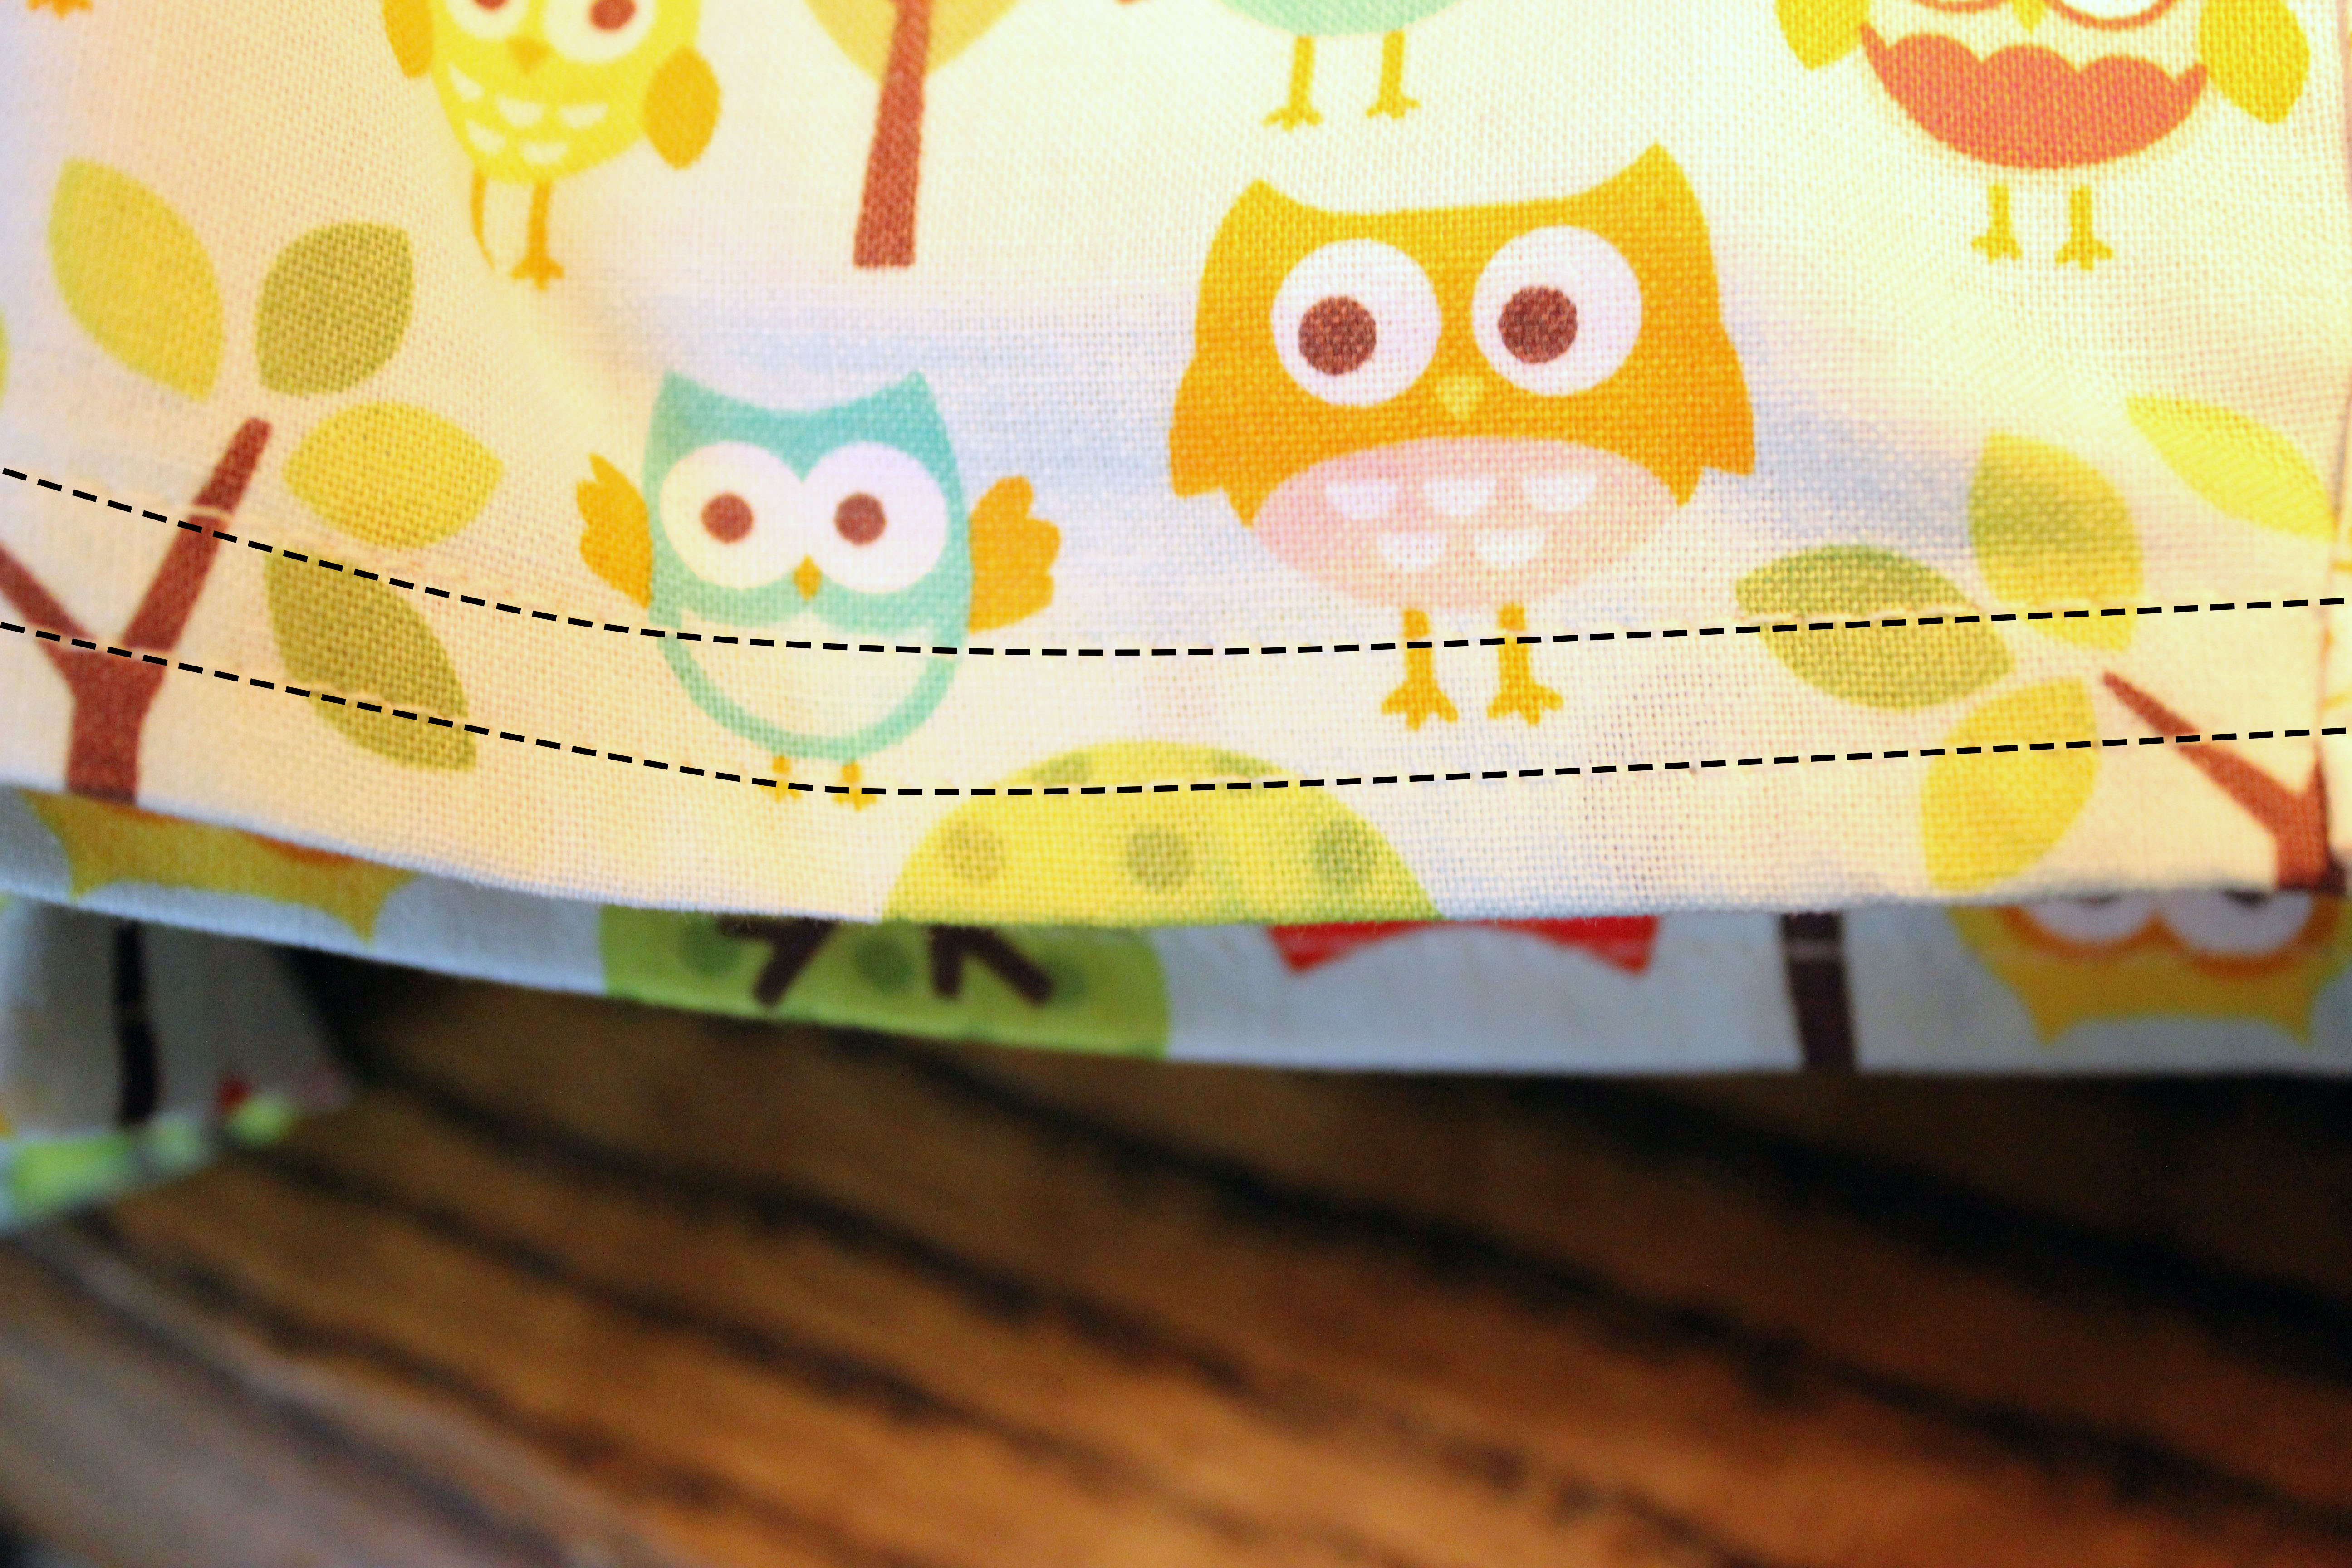
Then sew another line ¼†above that, which will land right at the top of the fold inside, keeping the fabric laying flat, while simultaneously giving a double-stitched, professional-looking short.
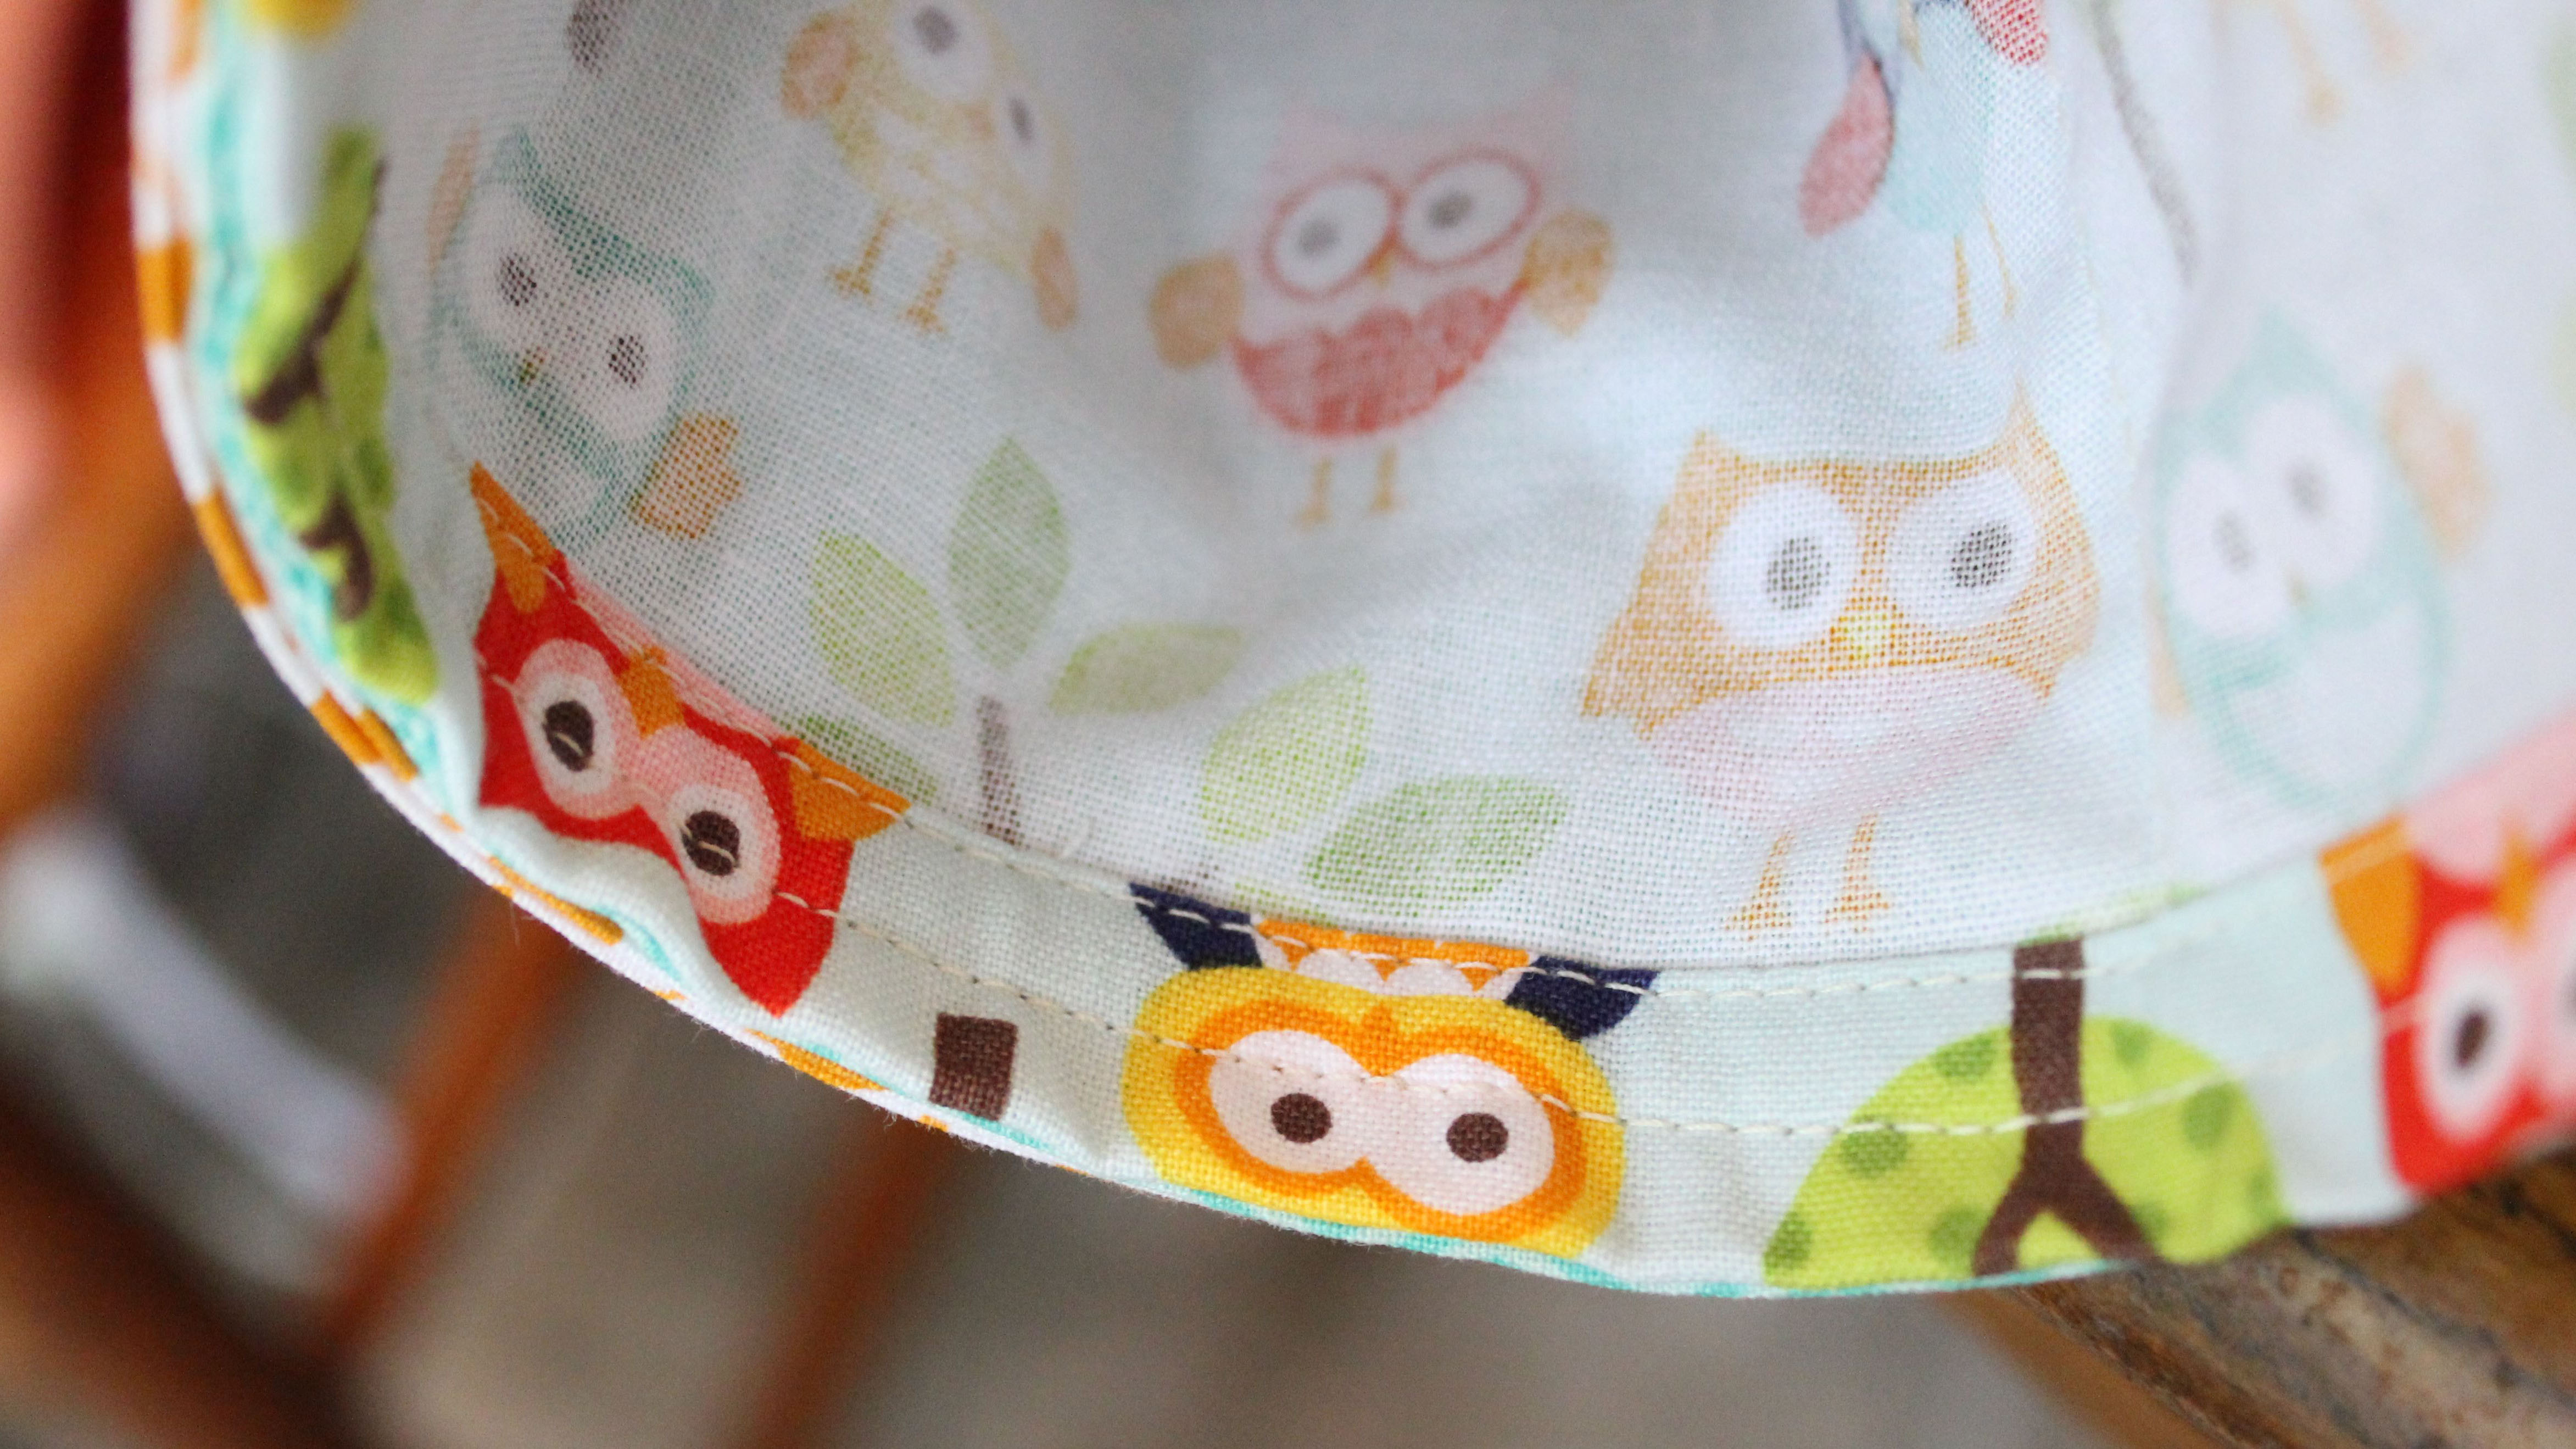
Thank you so much for having me, Riley Blake! We all adore these shorts and hope all of you will, too!!
