
We will be focusing again on Flying Geese in this week’s tutorial. There are other methods to making flying geese, but we will stick with the same method we used last week – it is easy for a beginner.

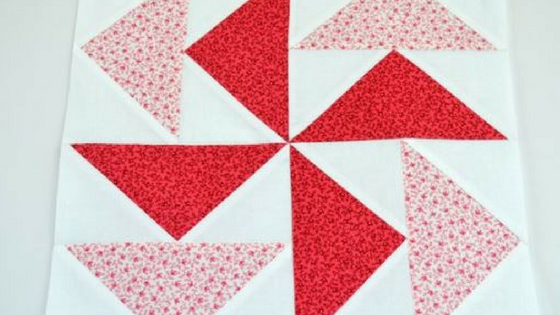
The Dutchman’s Puzzle pattern is a simple block constructed of pairs of flying geese blocks. It is a very old design, originating in the late 1800’s. It is also commonly known as a Windmill Block or Spinning Windmill Block because the triangles are reminiscent of the famous Dutch windmills.

I used beautiful pinks from Penny Rose’s Samantha Collection to make my Dutchman’s Puzzle Block.
Fabric needed:
Geese:
Color 1: Four 3 1/2″ x 6 1/2″
Color 2: Four 3 1/2″ x 6 1/2″
Sky: Sixteen 3 1/2″ x 3 1/2″

Mark diagonal lines on the back of all sixteen 3 1/2″ x 3 1/2″ background pieces.

With right sides together (RST), place the marked square on one corner of a 3 1/2″ x 6 1/2″ goose piece. Stitch ON the line. *Remember: If you stitch just one thread width off the line (toward the corner), it will give you just a teeny bit extra room for when you flip and press the piece back.

Trim corner off 1/4″ from stitching line.

Press toward the corner.

Place another 3 1/2″ marked sky square on the opposite side of the goose piece. Stitch on the line (or a thread off toward the corner).

Trim the other corner off 1/4″ from the stitching line.

Press toward the corner.

Repeat to make 8 flying geese. Layout flying geese as shown.

Stitch together in pairs (one light pink, one dark pink).

Press. You will probably find it easier to press to the side that has no seams in the middle.

Lay out your pairs and make sure everything is going the right direction.

Stitch two pairs together. Repeat for the other two pairs.

Press. Again, it’s going to be easier to press to the side that has no seams in the middle.

One last seam. (You can pin the center, if desired, to make sure that you’ll have awesome points – or you can just butt them up against each other.)

Voila!

Here is what my finished quilt might look like if I stuck with this color palette.

Of course, I have to show you what a two-color block might look like as a quilt. I added sashing to this one.

But wait! What if you change just four of the sky pieces to a different fabric? Another pinwheel inside of the pinwheels?! Wow! Experiment with your fabrics and see what other variations you might like!


A special thank you to our sponsor, Baby Lock, makers of our very favorite sewing machines!