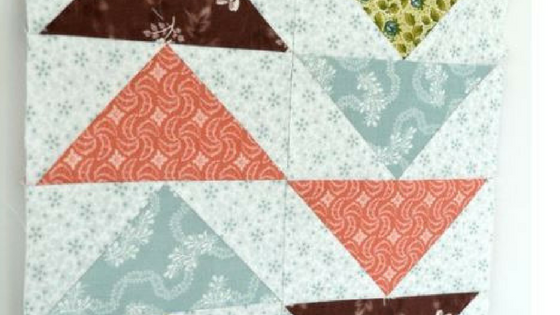
We are on to another technique here at #tbt Traditional Block Thursday. I am using the lovely Isabella collection from Penny Rose Fabrics to create these flying geese today.

A little background about the flying goose block: the “goose” is the big triangle in the middle. They “sky” pieces are the two little triangles on the sides of the goose. When you put them all in a line, you can see how this traditional block got it’s name, can’t you?

Fabrics you will need for the block:
Geese: Eight 3 1/2″ x 6 1/2″
Sky: Sixteen 3 1/2″ x 3 1/2″

Start by drawing diagonal lines on the wrong sides of the sixteen 3 1/2″ squares.

With right sides together (RST), place the marked square on one corner of a 3 1/2″ x 6 1/2″ goose piece. Stitch ON the line. *Note here: Actually, if you stitch just one thread width off the line (toward the corner), it will give you just a teeny bit extra room for when we flip and press the piece back.

Trim corner off 1/4″ from the stitching line.

Press toward the center.

Place another 3 1/2″ marked sky square on the opposite side of the goose piece. Stitch on the line (or a thread off toward the corner.)

Trim the other corner off 1/4″ from the stitching line.

Press toward the corner.

Repeat to make 8 flying geese. Aren’t they pretty? Arrange the geese as desired in two columns of 4.

Stitch 4 blocks together to make 2 columns.

Press both columns. *You will probably find it easiest to press to the side that has no seams in the middle. It will reduce bulk.

Stitch columns together making sure that seams butt-up against each other.

Final press. Doesn’t matter which side you press it to at this point.

And you are done! There are other methods to make flying geese, but this is the easiest, most understandable method for a beginner quilter.

What if you change the “geese” to light fabrics and the sky to dark?

What if we just make long columns of flying geese? Pretty awesome!

Scrappy Version!
Have fun! See you next time!


A special thank you to our sponsor, Baby Lock, makers of our very favorite sewing machines!

