I am super excited to share a fun, fast, and seriously easy baby quilt tutorial with you today, featuring Riley Blake Gingham Basics!
When I think of Gingham, I think of summertime, and thinking of summer sends my thoughts straight to the beach!
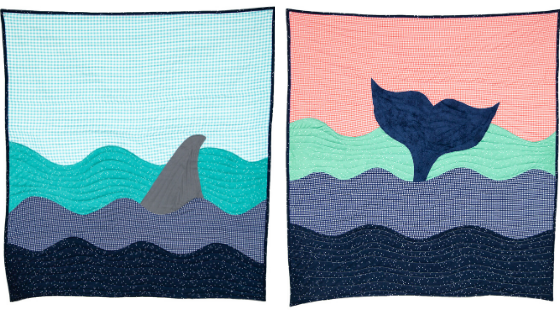
So when I was coming up with a project featuring our Gingham Basics, I knew immediately I wanted to do something with waves and whales. This quilt happened completely on the fly – almost stream of consciousness style, and I am loving the result!
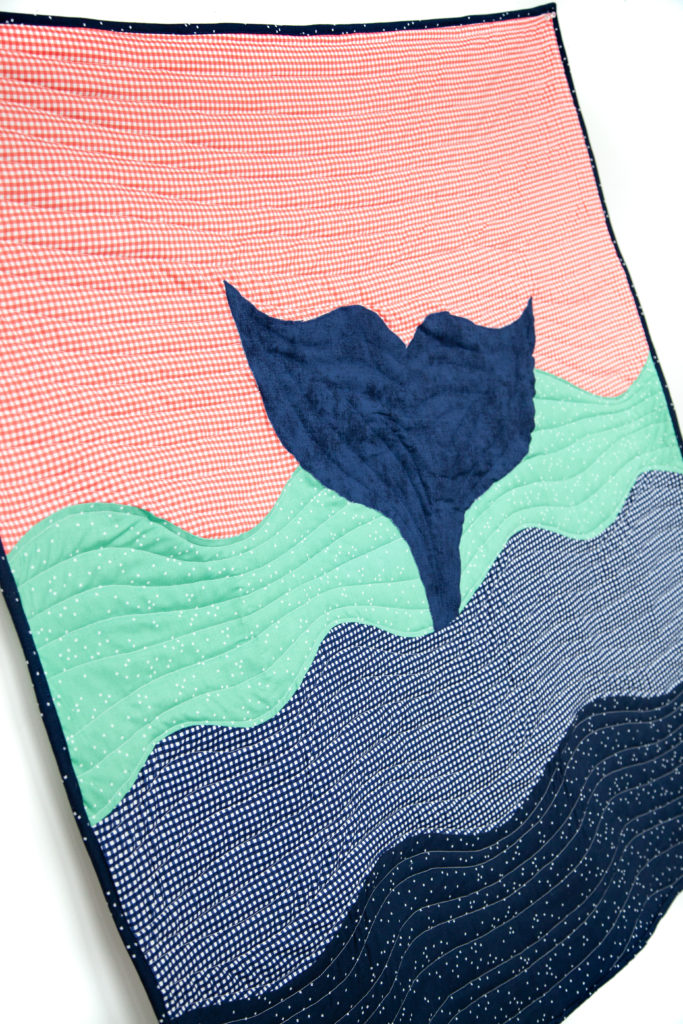
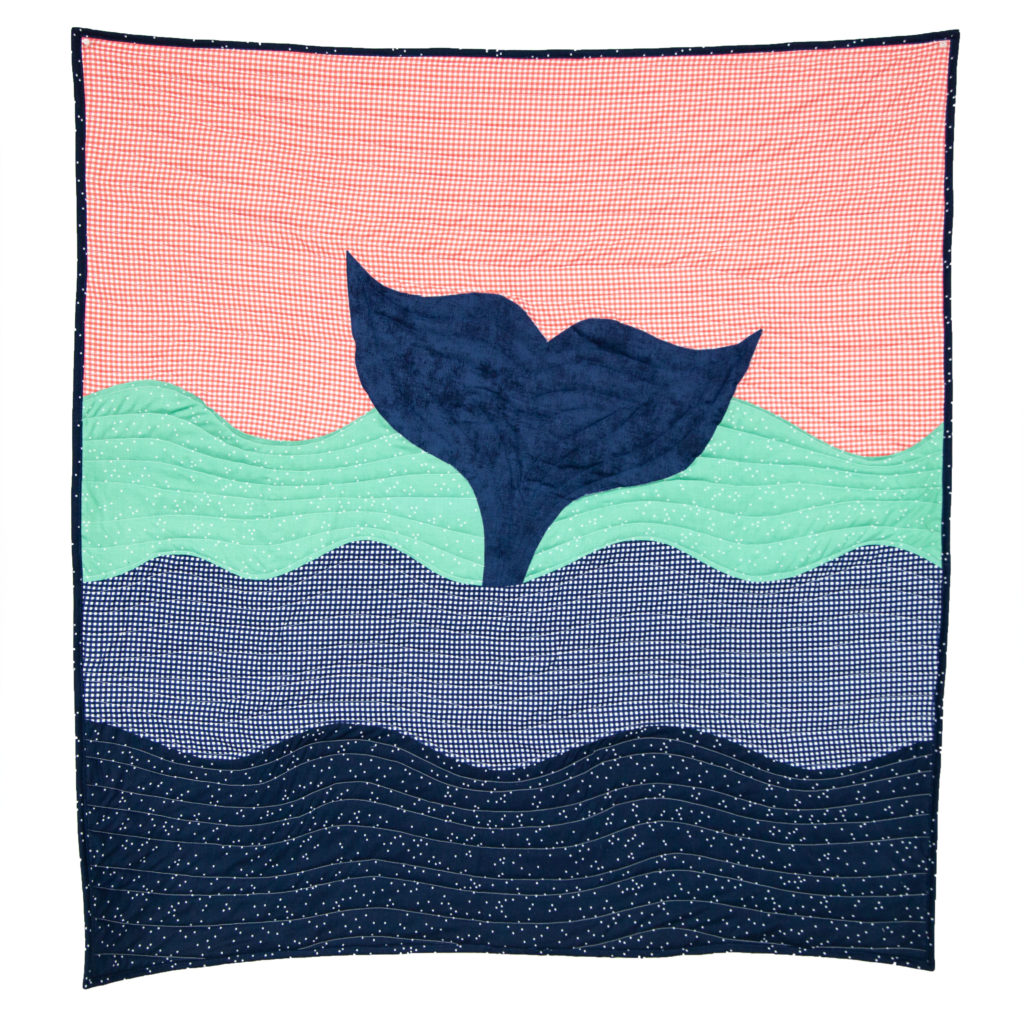
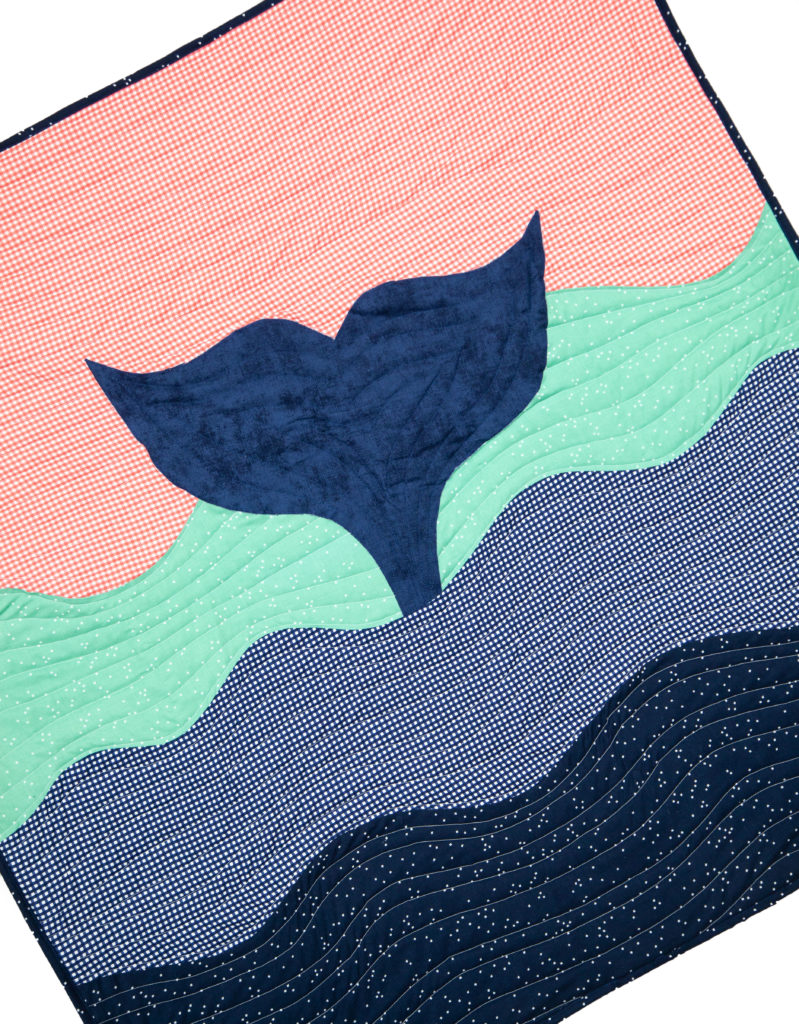
I made two different quilts. The first was inspired by a coastal sunrise, with Coral Gingham for the sky, and Mint Blossom, Navy Gingham, and Navy Blossom for the water. It also features a Whale Tail applique in Riley Blake Navy Shades Basics. If you would rather have a Mermaid Tail, swap out the Navy Shades fabric for a Pink, Purple, Teal, or any other bright color. Easy!
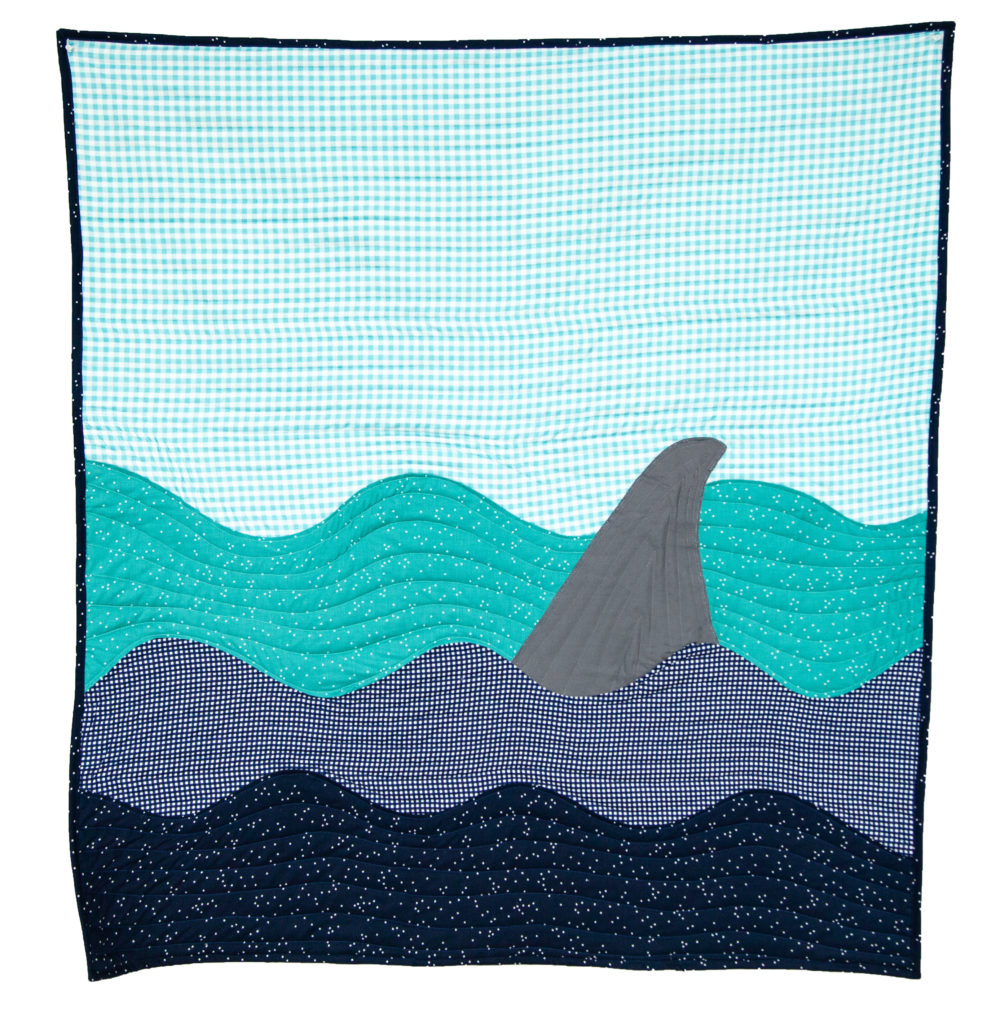
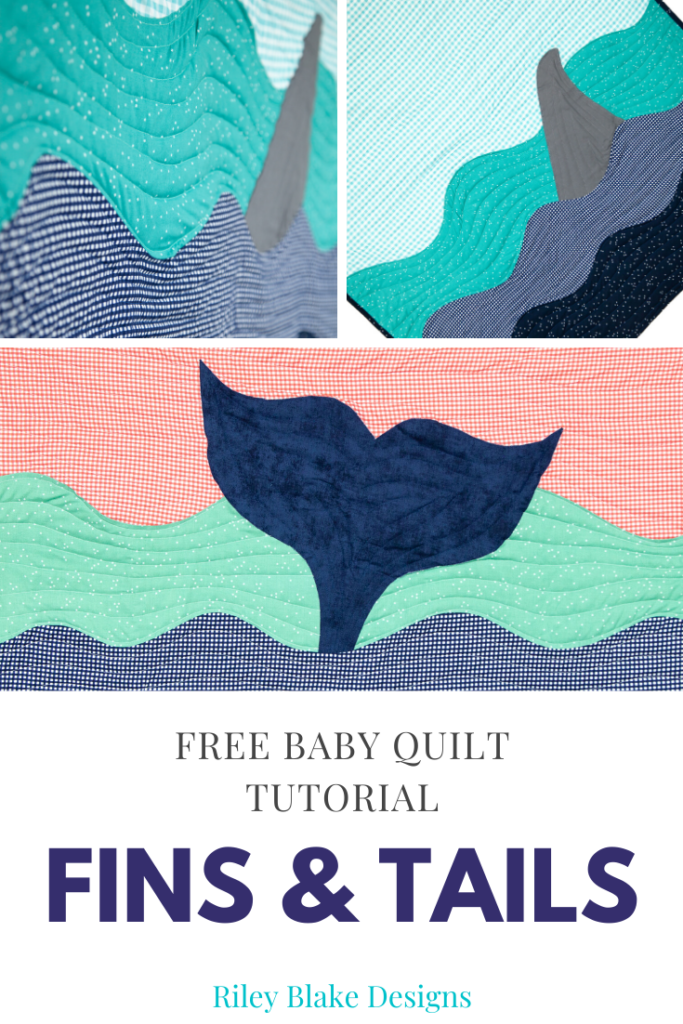
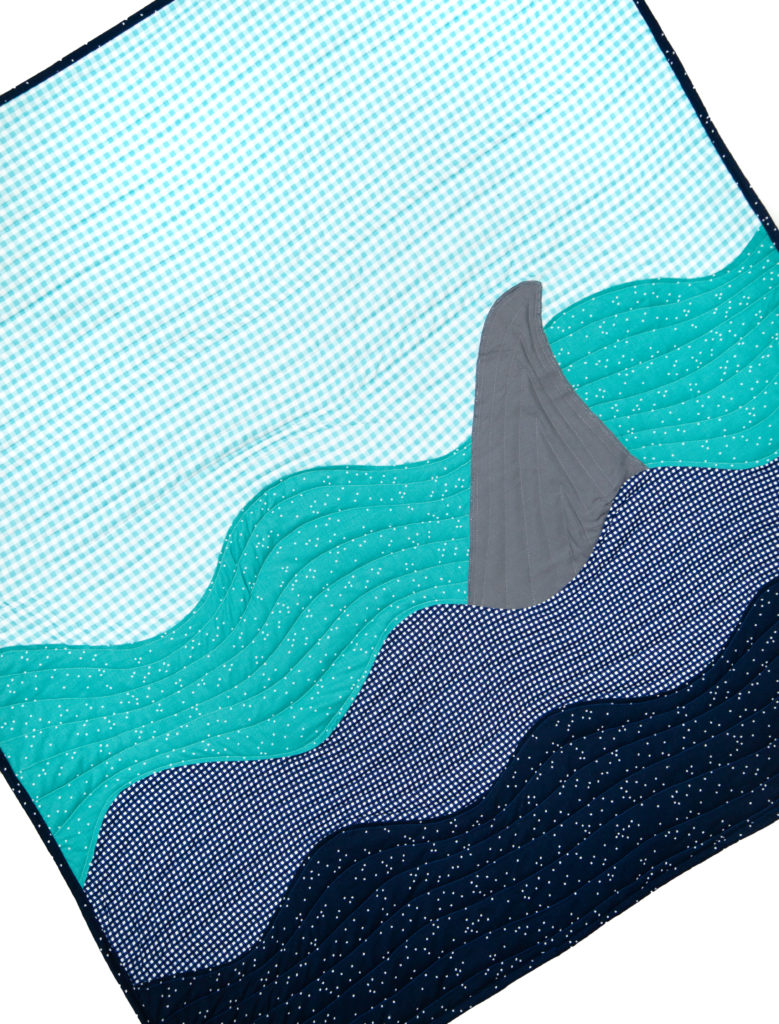
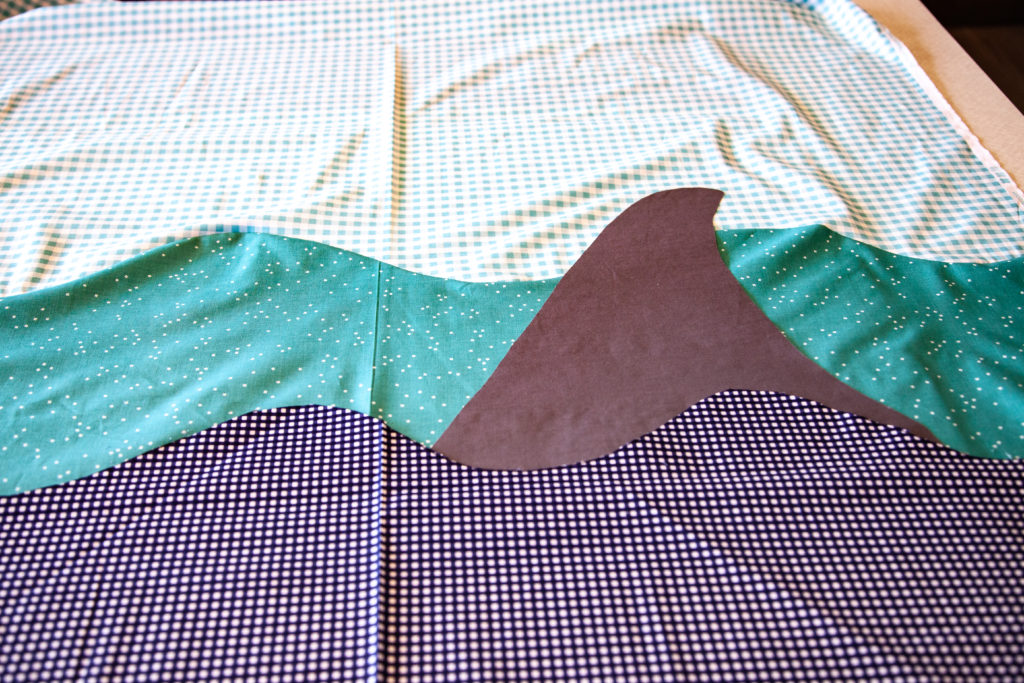
The second quilt features a Shark Fin in Steel Confetti Cotton, an Aqua Gingham for the sky, Rainforest Blossom, Navy Gingham, and Navy Blossom for the water.
The finished quilt measures approximately 42″ x 45″.
To make this quilt, you will need:
- 2/3 yard x WOF Aqua (or Coral) Gingham for the sky
- 15″ x WOF Rainforest (or Mint) Blossom
- 1/2 yard x WOF Navy Gingham
- 1/2 yard x WOF Navy Blossom
- 21″ Heat N Bond
- 22″ x 22″ Navy Shades for Whale Tale or Steel Confetti Cotton for Shark Fin
- Batting
- Fabric for quilt back
- Whale Tale/Shark Fin PATTERN TEMPLATE
All of the fabric widths above are approximate. This quilt is very freeform. If you want more water, add more water. If you want more sky, increase the sky.

To sew my curves, I used this fantastic TUTORIAL from Red Pepper Quilts. If you are new to sewing curves, check out the tutorial and practice on a few small pieces. Curves are not scary, and they are actually fun once you get a hang of the technique, but it’s always a good idea to build confidence by practicing on something small before diving into a big project.
Step 1: Lay out the Gingham sky fabric. Then lay out the first Blossom fabric (in this case I used Rainforest Blossom) so that it overlaps the Gingham by about 6″. You want enough overlap that when you draw your curvy line, it will all be contained in the overlapping section.
Take a marker or pencil and draw your curve. *The more “shallow” your curve, the less puckering you’ll end up with later.
Cut along the curved line. Remove the scrappy top of the Blossom and the scrappy bottom of the gingham. Again, refer to the TUTORIAL for more pictures walking you through this step.
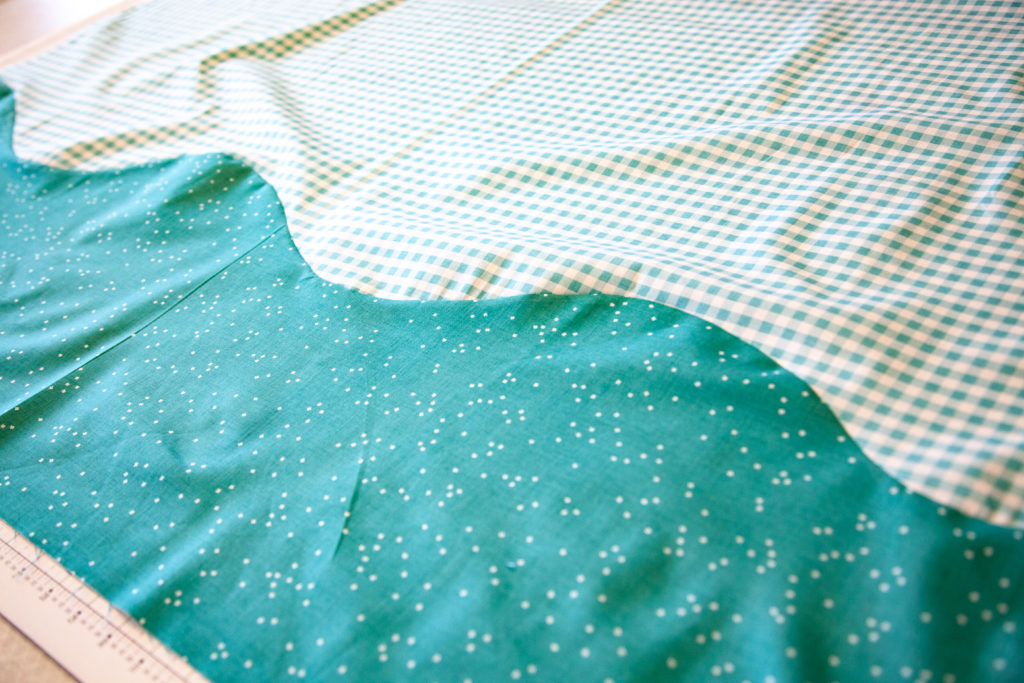
Press the seam in one direction.
Step 2: Print out and then trace your Whale Tail or Shark Fin template onto the paper side of your Heat N Bond. Press the Heat N Bond to the back of your Tail/Fin fabric. Cut out the Tail/Fin shape and peel off the paper Heat N Bond backing, leaving a glue residue on the fabric. Set aside.
Step 3: Lay the Navy Gingham over the Blossom fabric, again, overlapping about 6″. Draw a curvy line across the width of the fabric. Cut along the curved line and remove the scrappy top portion of the Gingham, and the scrappy bottom portion of the Blossom. Set the Navy Gingham aside while you complete Step 4.
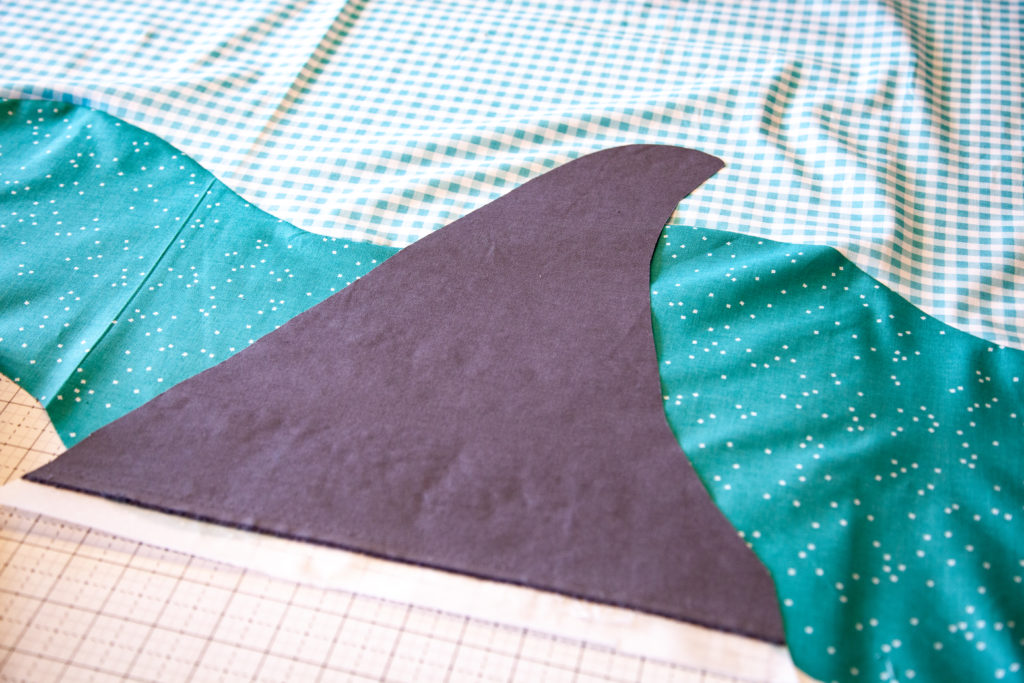
Step 4: We will be adding our Tail or Fin in-between these layers. Position the Tail/Fin where you think you’ll want it so that the bottom of the Tail/Fin goes past the bottom edge of the curve. Once you have it exactly where you want it, press in place.
At this point, I took a minute to run a tight zig-zag stitch around the tail/fin.
Sew the Gingham layer to the Blossom layer the same way you did in Step 1.
Step 5: Add the final Navy Blossom section to the Navy Gingham section, repeating the same curve technique in Step 1.
Your quilt top is done! Trim the top, bottom, and sides so the quilt is the length and width you desire.

I machine quilted these using wavy lines spaced unevenly, about 1″ – 2″ apart.
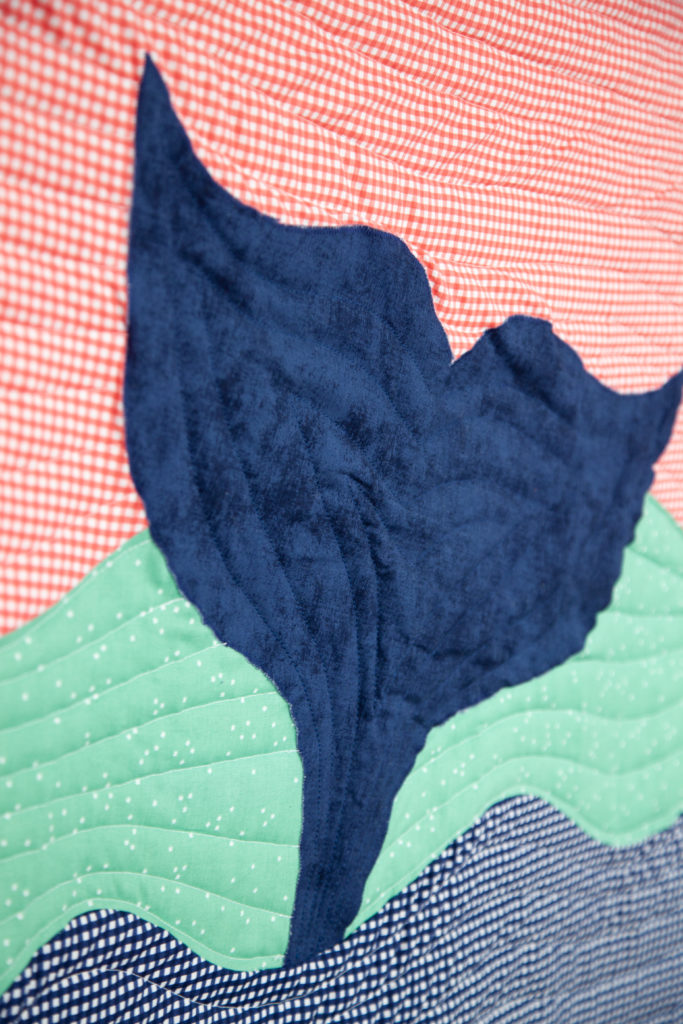
The fin and tail were quilted free motion, roughly following the shape of the tail.
That’s all there is to it! You can whip up in an afternoon for a last minute, no-pattern, completely one-of-a-kind project.
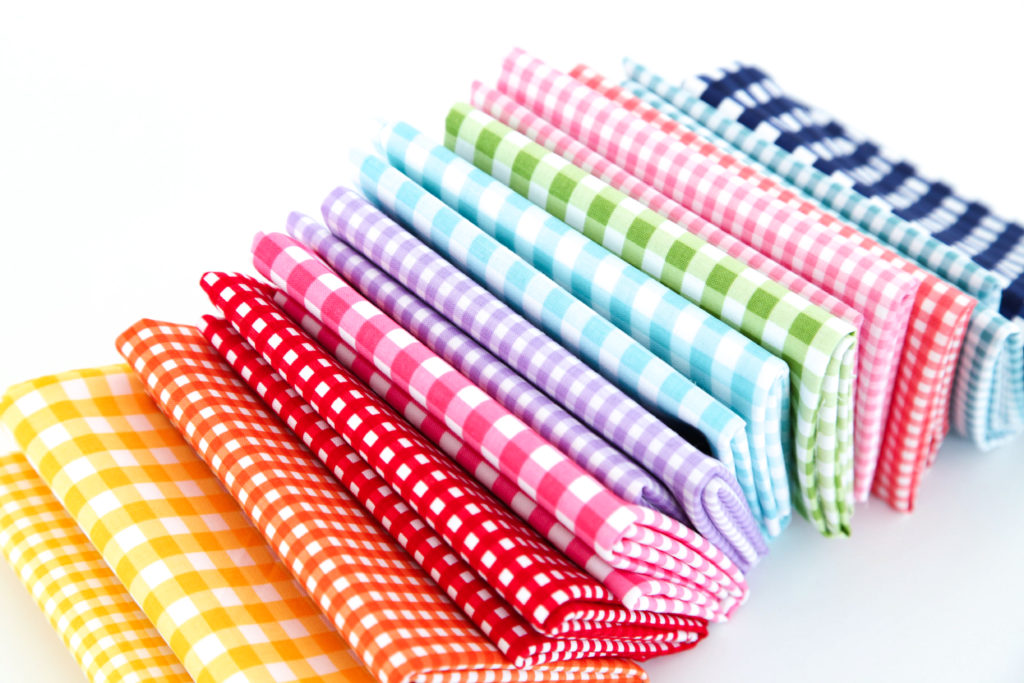
Riley Blake Gingham Basics are available now at your favorite local and online quilt shops. Pick up yours today and share your makes with us on Instagram using #rbdgingham, #rileyblakedesigns, #iloverileyblake, and tag us @rileyblakedesigns.
Happy Quilting!