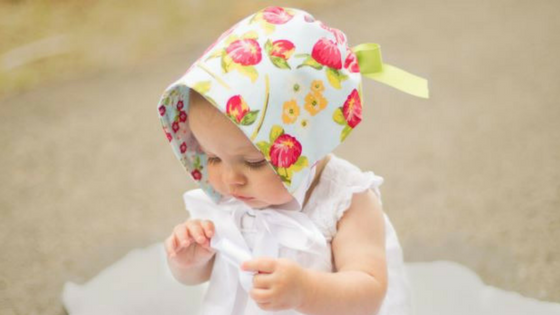
One of my very first sewing projects after my little girl (almost 10 years ago…sniff…sniff) was born was making some little baby bonnets for her…they were always a simple sew and they were so cute for a special occasion. They are still a favorite sew of mine for baby gifts, since they are handmade and not something that most mamas would make for themselves. And the best part? THEY ONLY TAKE TWO FAT QUARTERS to make! Yep, 2 fat quarters and some ribbon and you have a darling little bonnet.
This size that I am giving the tutorial for today fits a baby about 3-12 months so they can get a lot of wear out of them. Here’s what you need if you want to make one too:
*2 coordinating Fat Quarters cut to 9″ x 14″
*1.5 yards of ribbon cut into three 18 inch pieces
Step 1: Cut your fat quarters into two rectangles measuring 9 inches by 14 inches. Take the outside fabric for your bonnet and pin 2 of your 18″ pieces of ribbon to the bottom two corners about 1/2 inches off the bottom like the picture below.
Step 2: Place your lining rectangle on top of your main bonnet fabric with right sides together. Pin and stitch around three sides using a 1/2 inch seam allowance. The top (back of the bonnet) should be left open…we will use this open part to form the casing for the back ribbon later.
Step 3: Turn and press your bonnet right sides out. Then fold over the top 1/2 inch (towards the lining side) and stitch a casing for the back ribbon.
Step 4: Using your last 18 inch piece of ribbon and a large safety pin, thread your ribbon through the casing and pull tight to form the back half-circle of the baby bonnet.
And you are done! Happy sewing and happy baby bonnet making! Over at Simple Simon and Companywe also have a ton more BABY TUTORIALS….everything from easy baby blankets, to baby quilts made from scraps to onesies and dolls….see you THERE!


