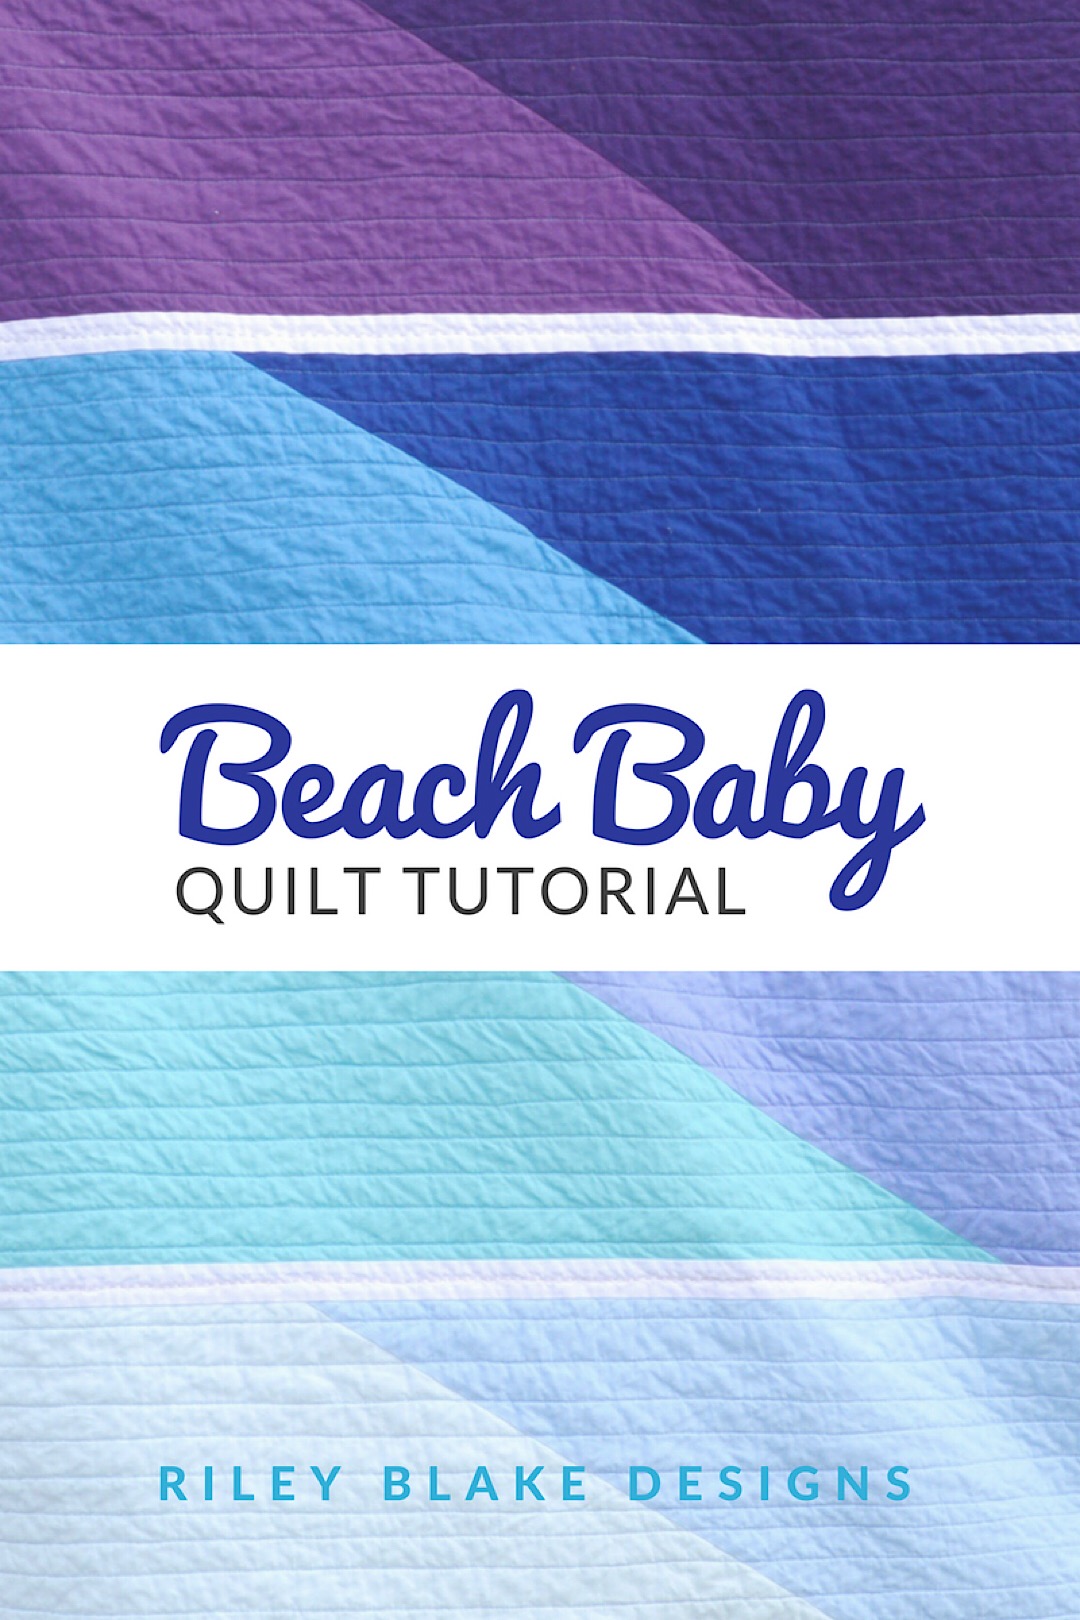
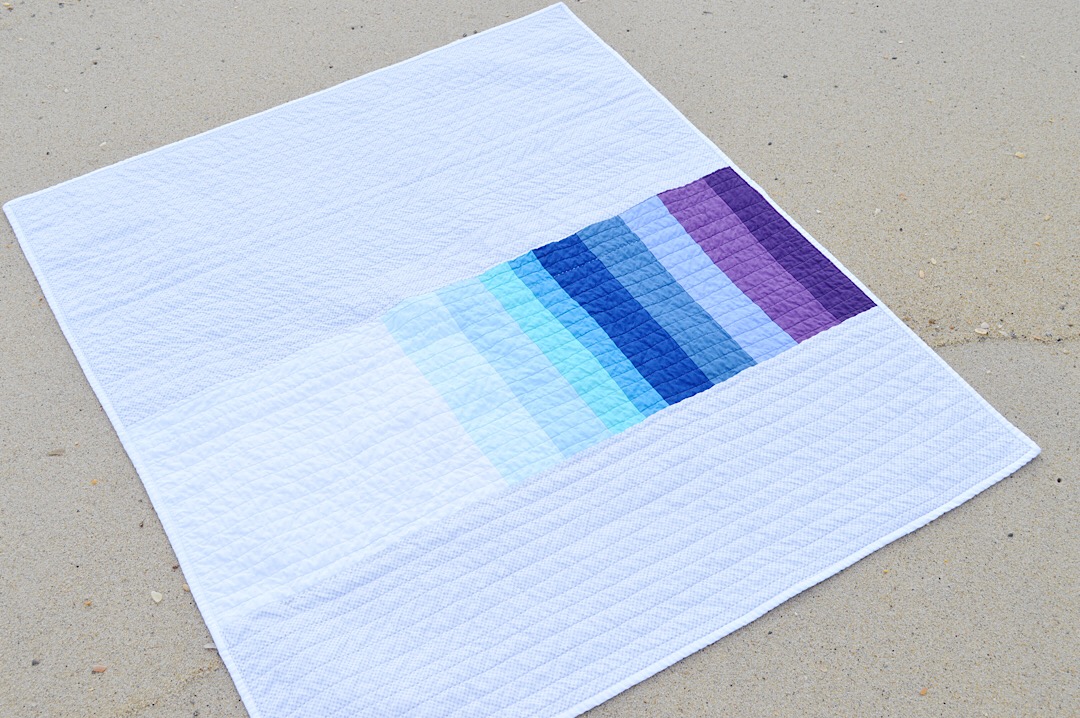
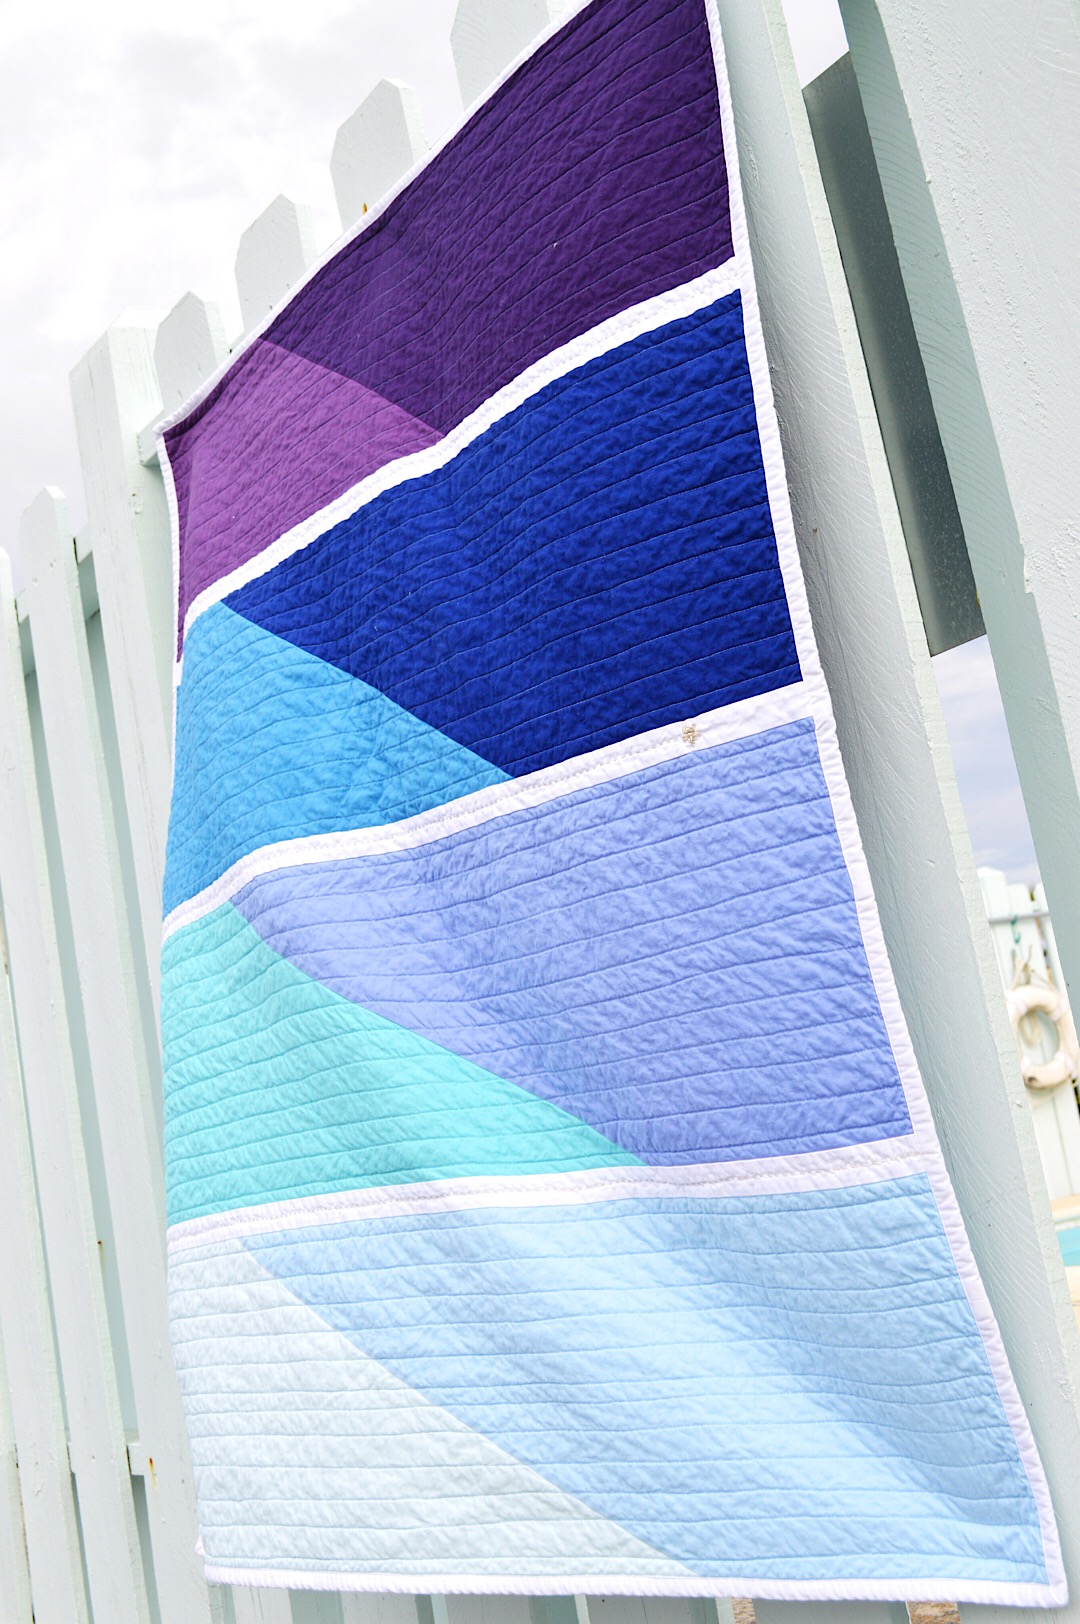
Once in awhile we find ourselves looking for a simple, beginner friendly quilt idea, or something that sews up quickly for a last minute gift, but doesn’t skimp on the “wow factor.” The Beach Baby quilt is all that and more! Modern, fresh, and fun, this quilt could not be easier to make while celebrating the beauty of line and color.
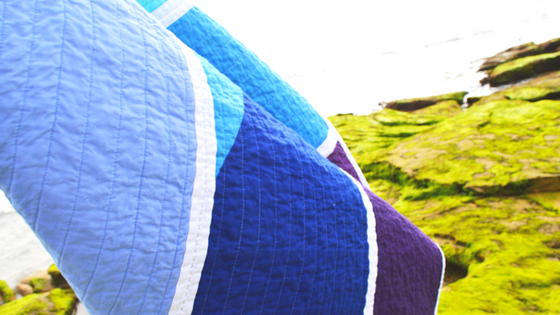
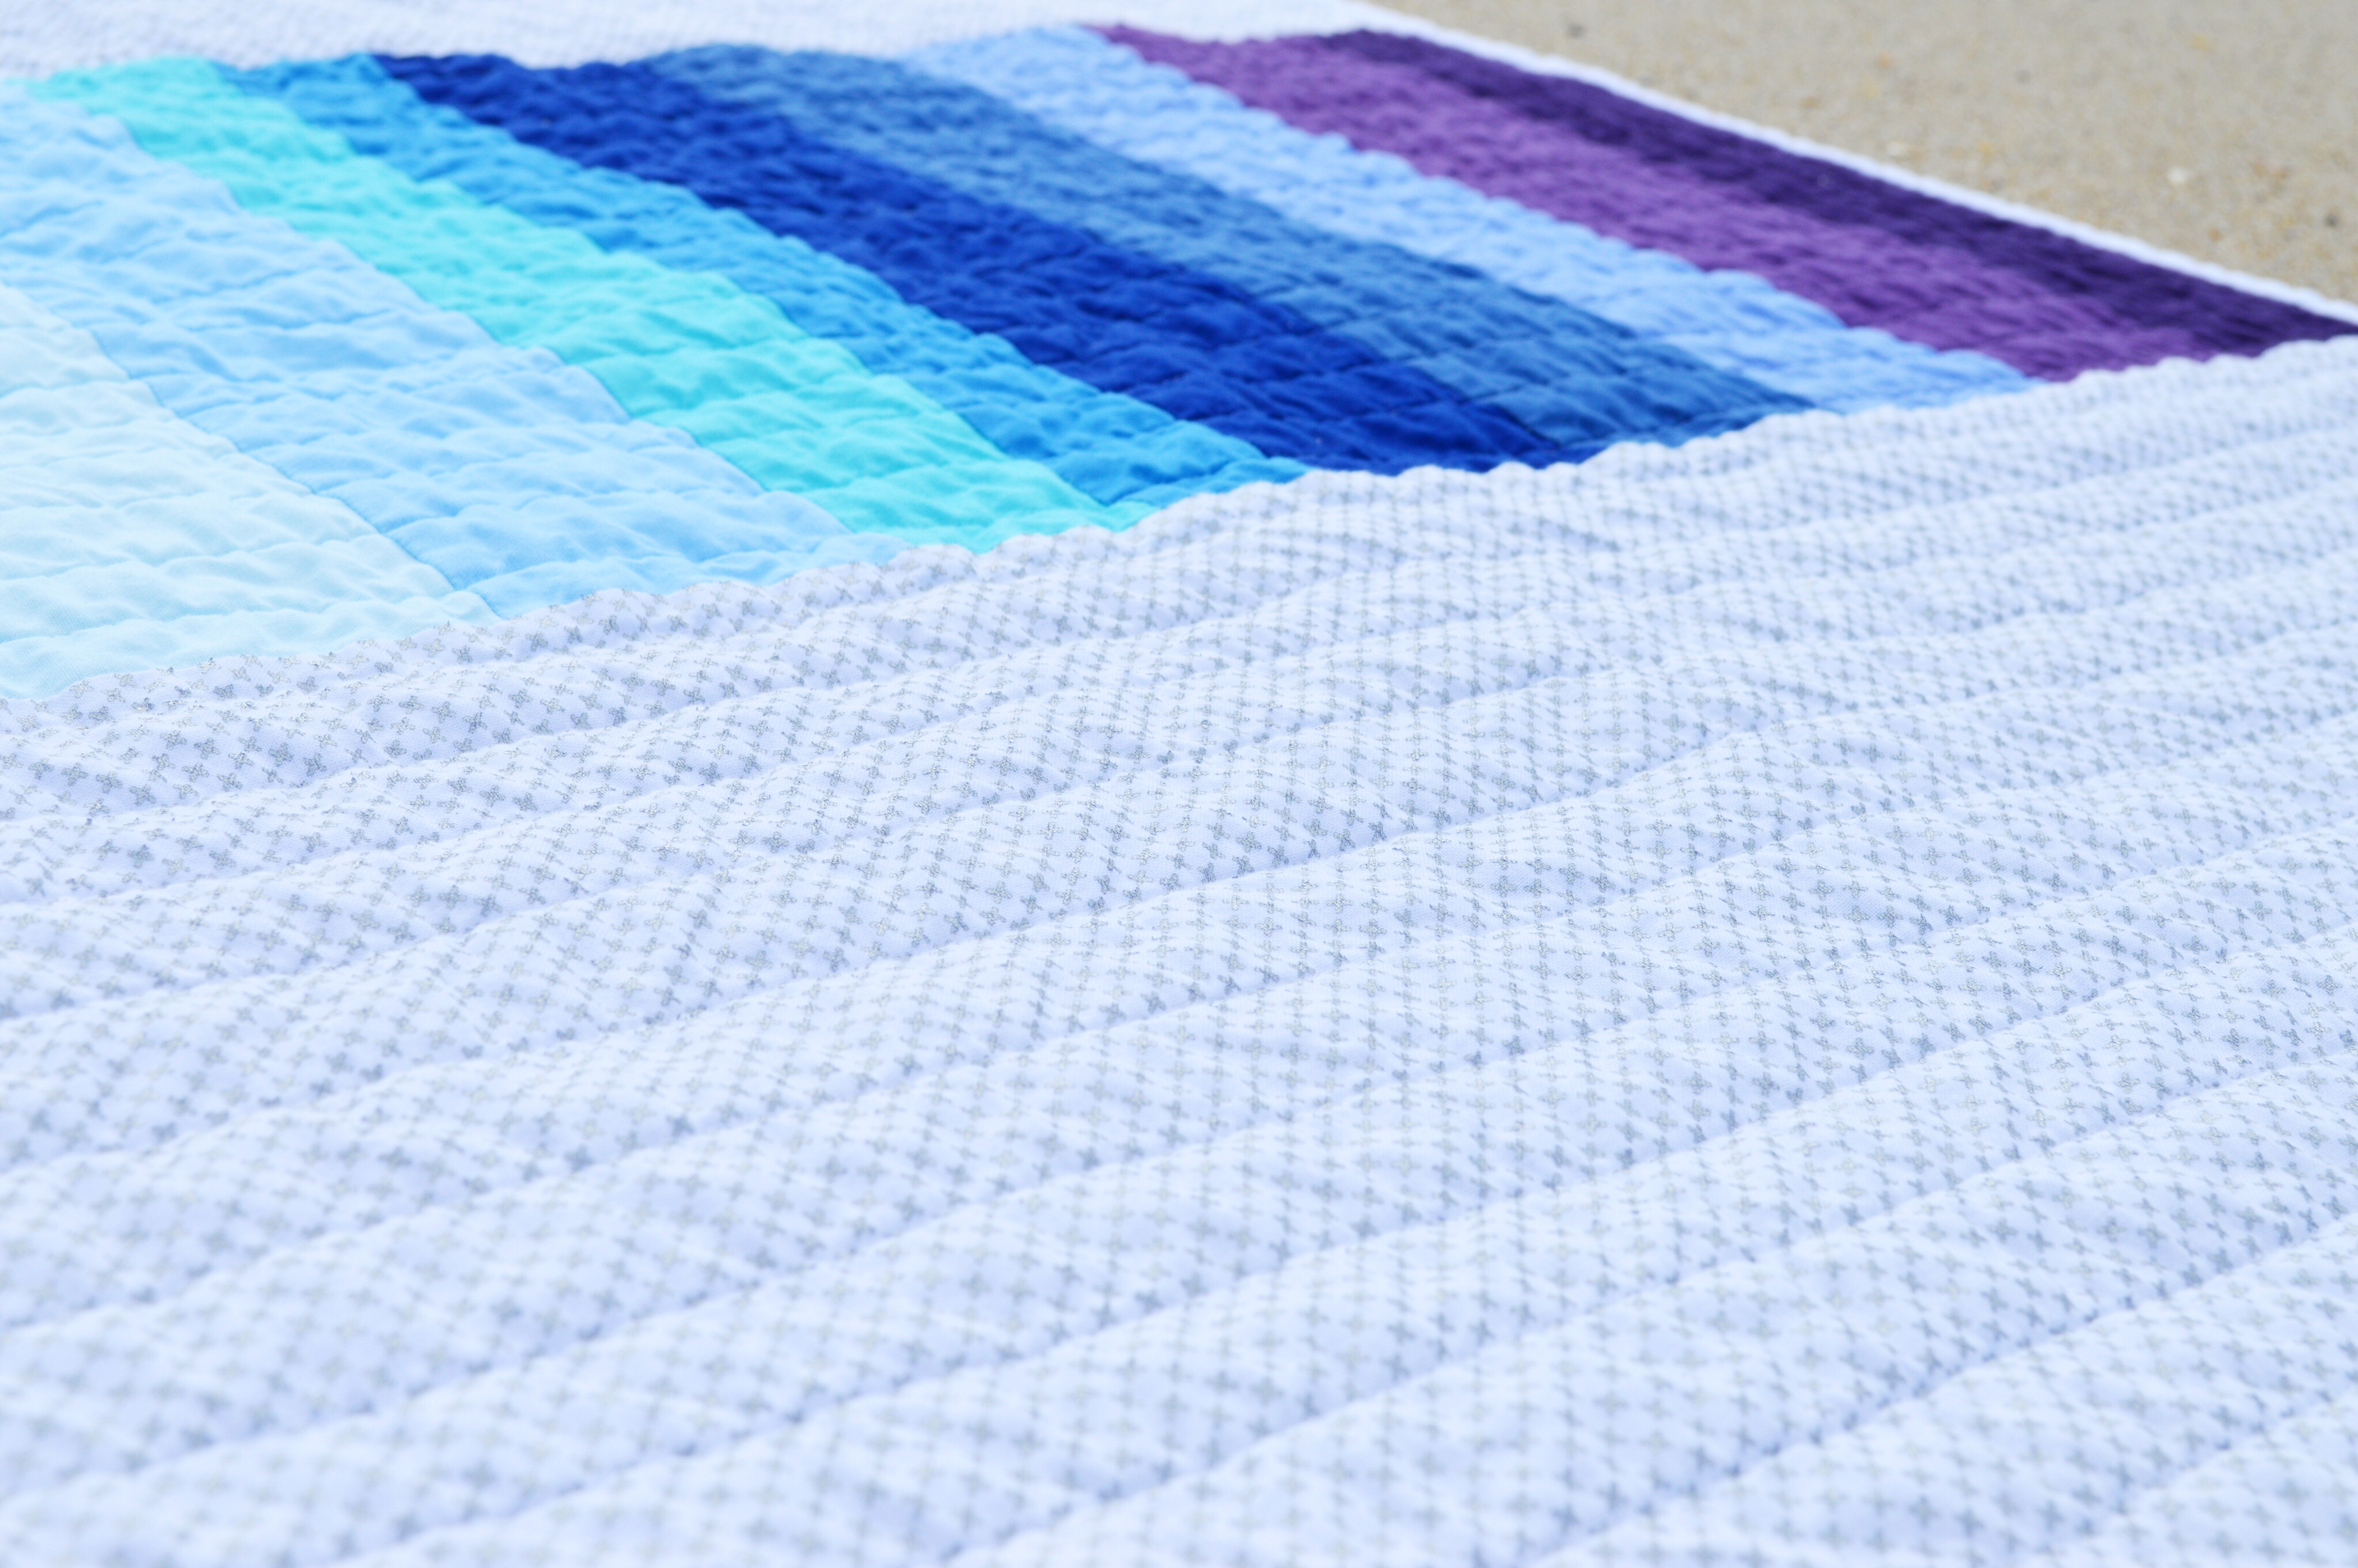
The design for this baby quilt was inspired by ocean waves, which seem to vary in their depth of color – from silvery white to deep purple – depending on the season and time of day.
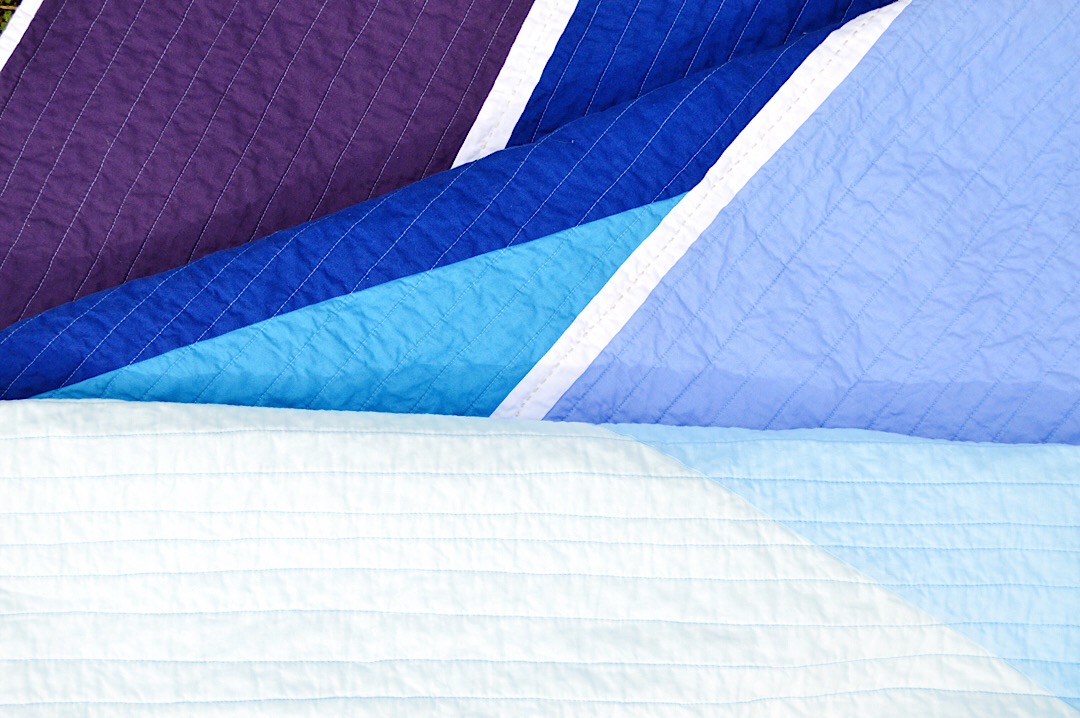
The quilt is made up of fabric strips cut on a diagonal, then paired with another color and sewn back together into a strip. The process is very much like making binding, but on a larger scale.
The result is bold and dramatic! The best part about this quilt is that in the process of cutting your strips, you actually end up with enough to make a second quilt. Bam!
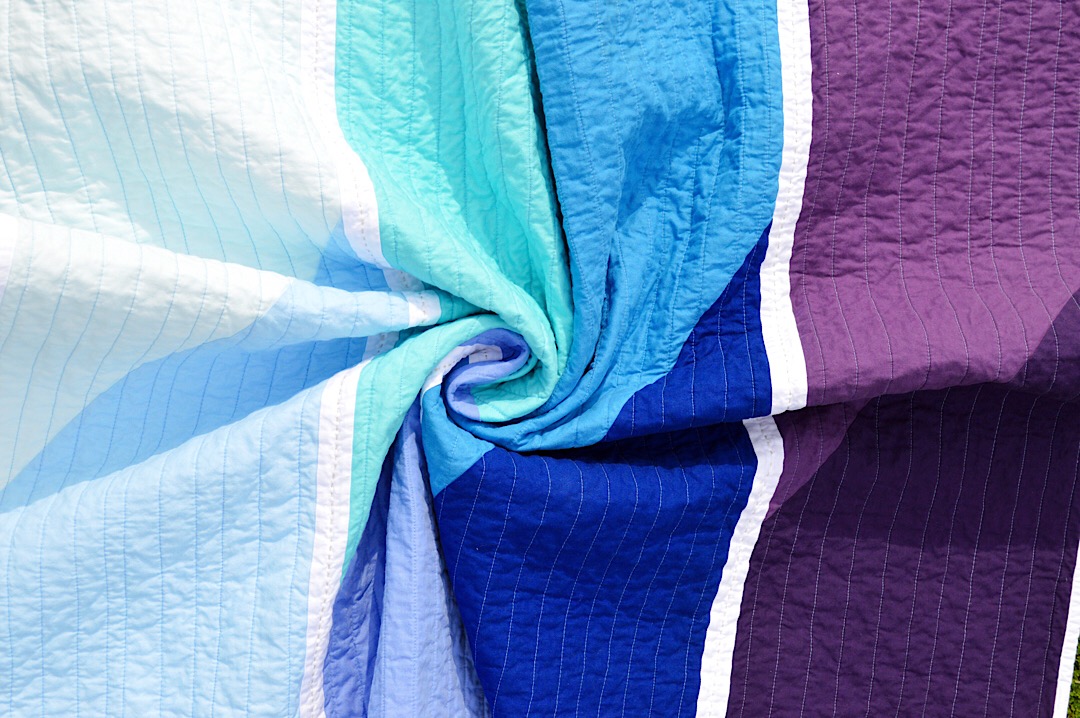
The quilt front is made entirely using Riley Blake Designs Confetti Cottons. Confetti Cottons are perfect quilting solids — so many colors to choose from and the quality can’t be beat!
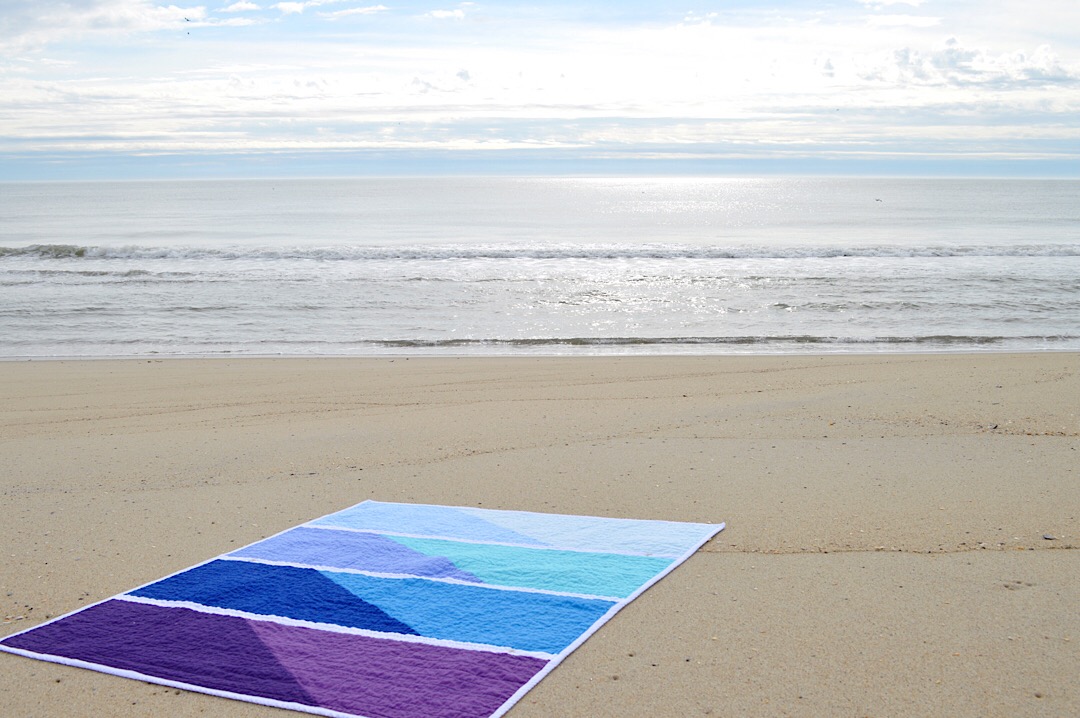
Finished quilt measures approximately 39” x 46”
To make this quilt, you will need:
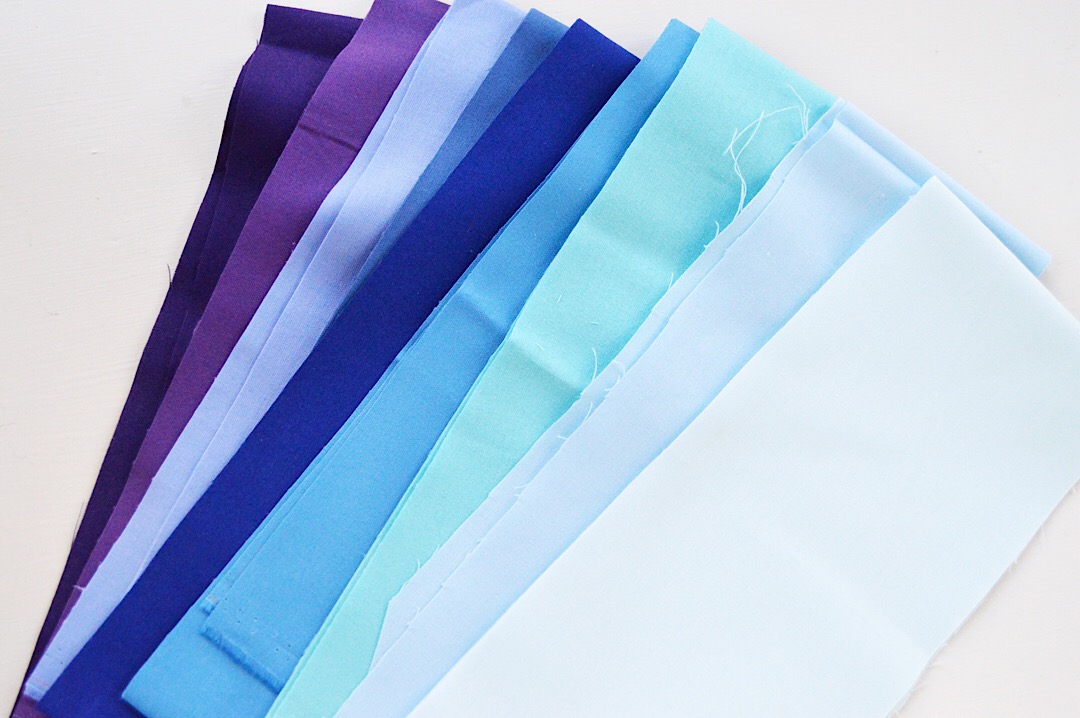
- 12” x WOF Riley Blake Confetti Cotton in Bleached Denim, Boy Blue, Scuba, Crayola Midnight Blue, Deep Water, Crayola Periwinkle, Purple, and Crayola Purple Mountains’ Majesty
- 1/2 yard Riley White for strips and binding
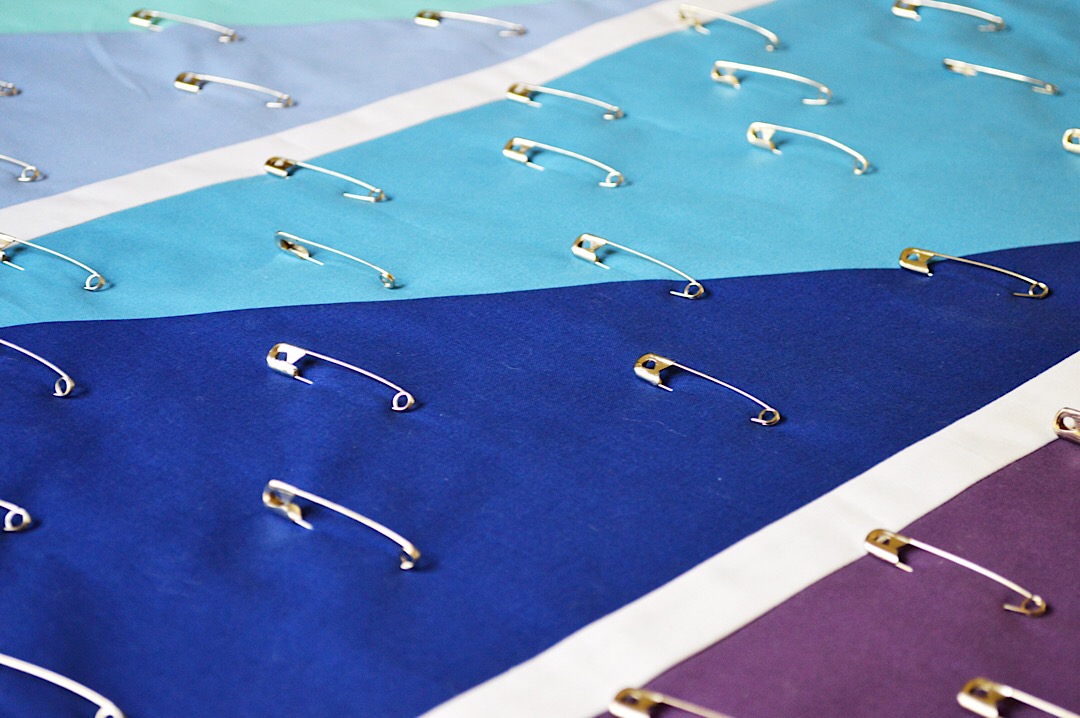
- Silver metallic embroidery floss
- Batting
- Enough fabric for quilt back.
Begin by cutting three 1.5” strips x WOF of Riley White. Set aside. After the strips have been cut, you will have leftover Riley White fabric. Use this for your binding later on.
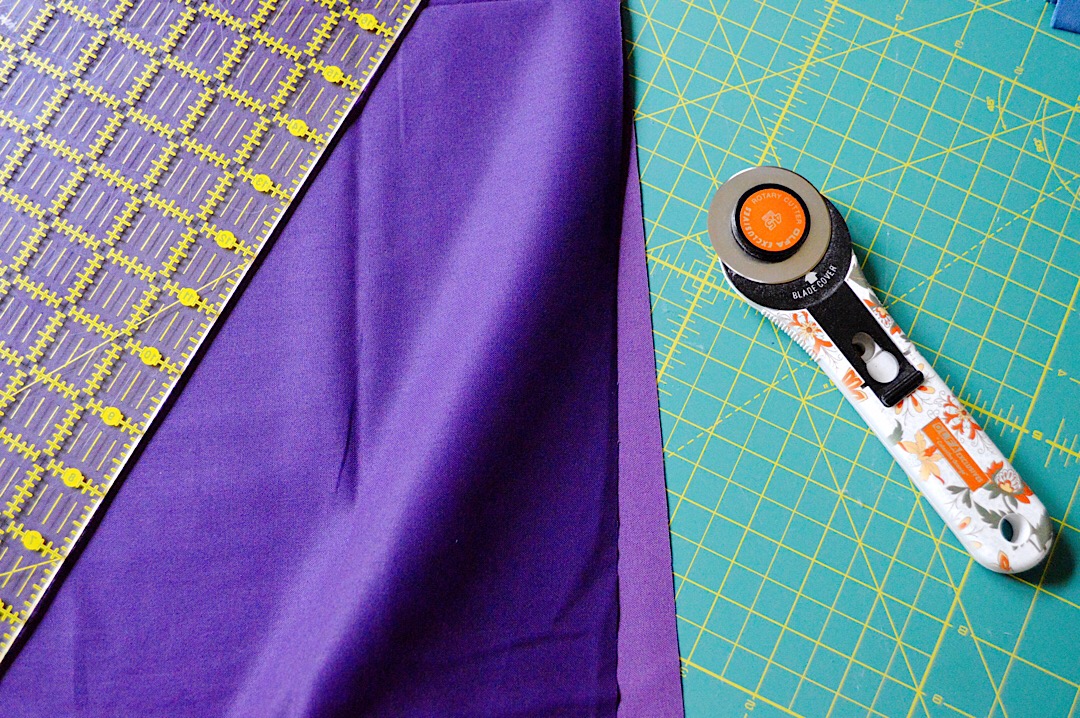
Lay the two 12” x WOF purple fabrics on top of each other. Make sure edges are all lined up evenly.
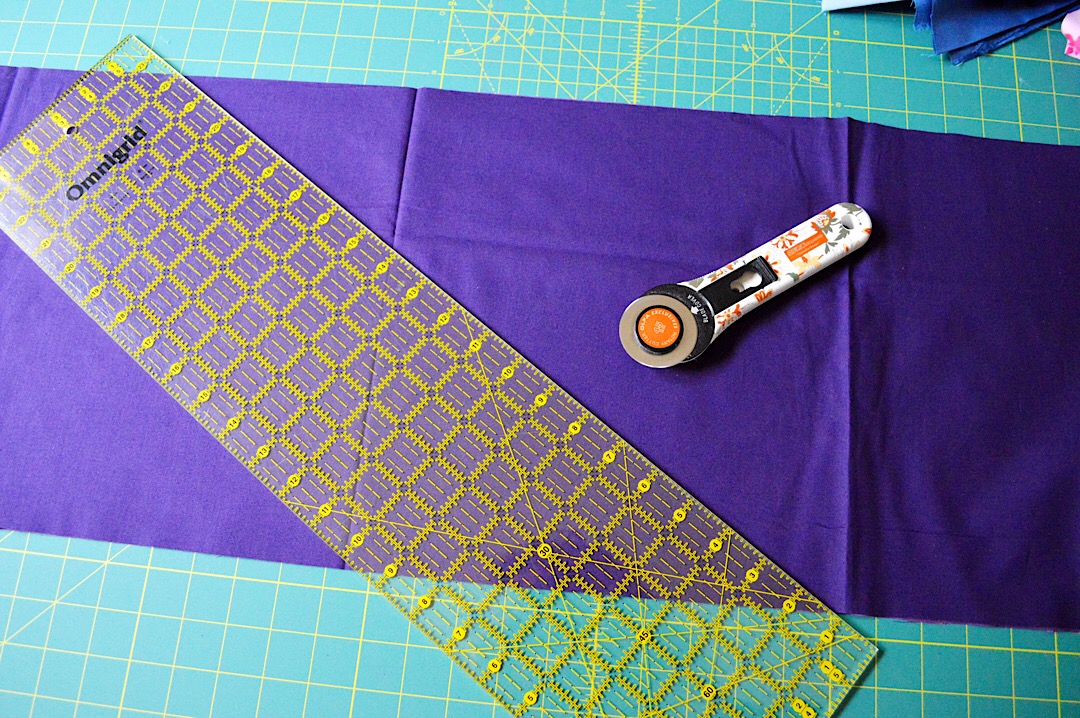
Position your cutting ruler on a diagonal in the center area of the fabric strips. I completely eyeballed this because I actually wanted a bit of an uneven look. The strips ended up being pretty uniform looking, but that wasn’t my intent. This just illustrates how hard it is to mess this up!
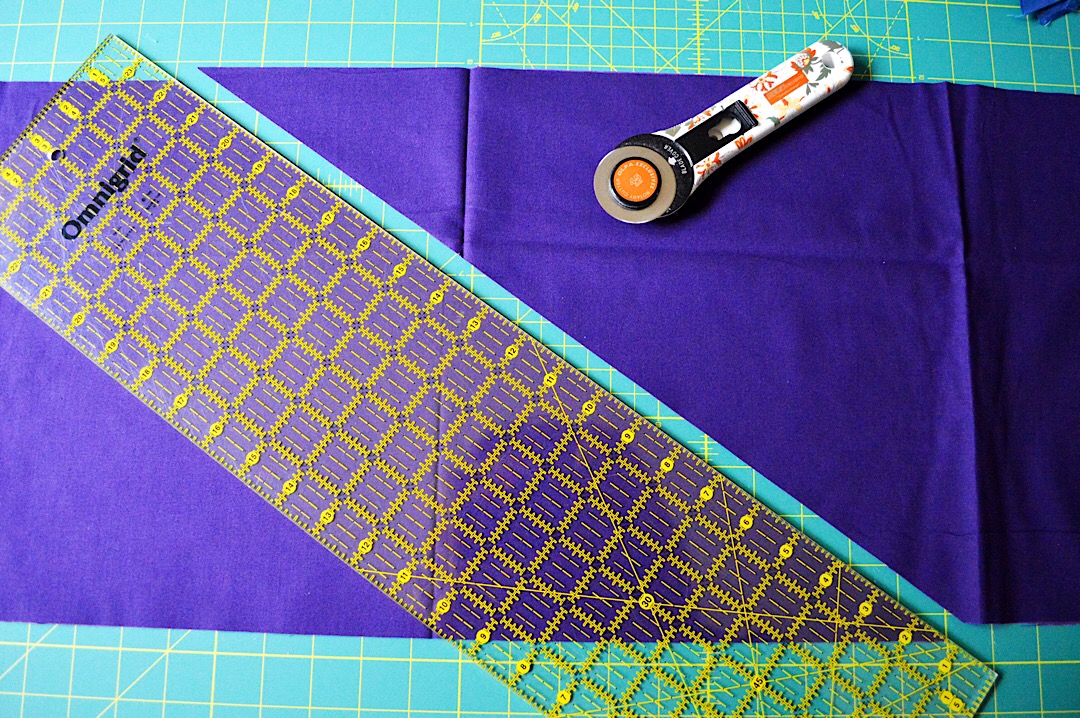
Cut through both layers.
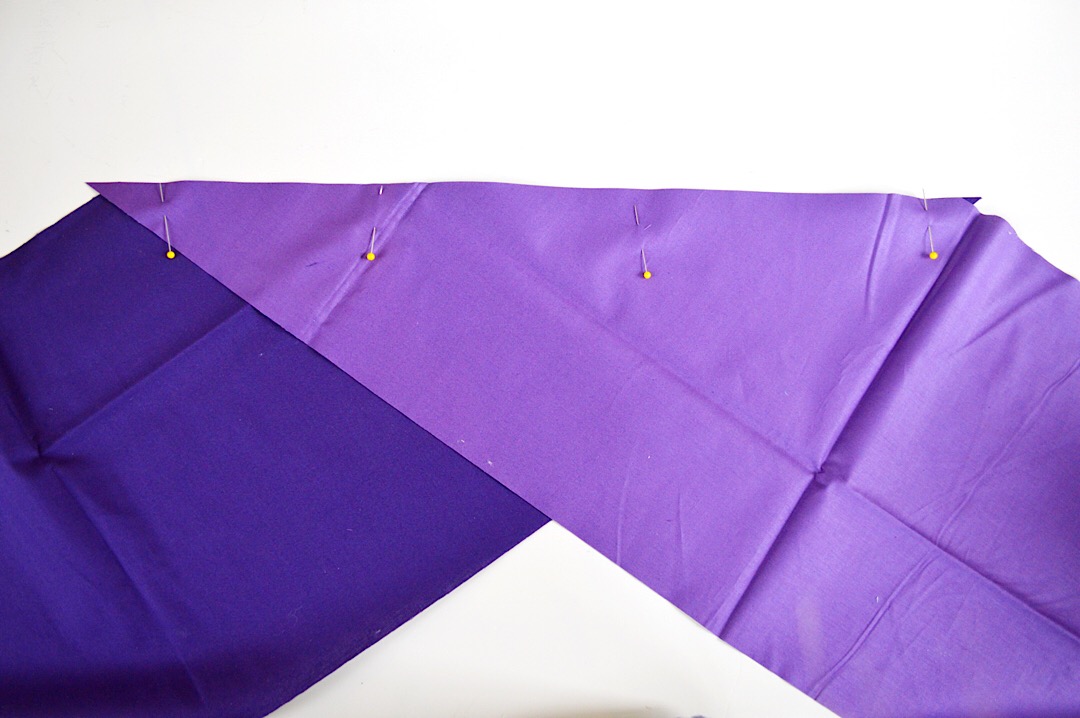
Take the darker piece of fabric from the left side, and the lighter fabric from the right. Pin the diagonal edges so that the pointy angle ends are paired with the wide angles, allowing 1/4” of the point to to past the end, as shown above. **You will end up with an extra dark and light purple piece. These can be sewn together in the same way to create a strip for a second quilt.
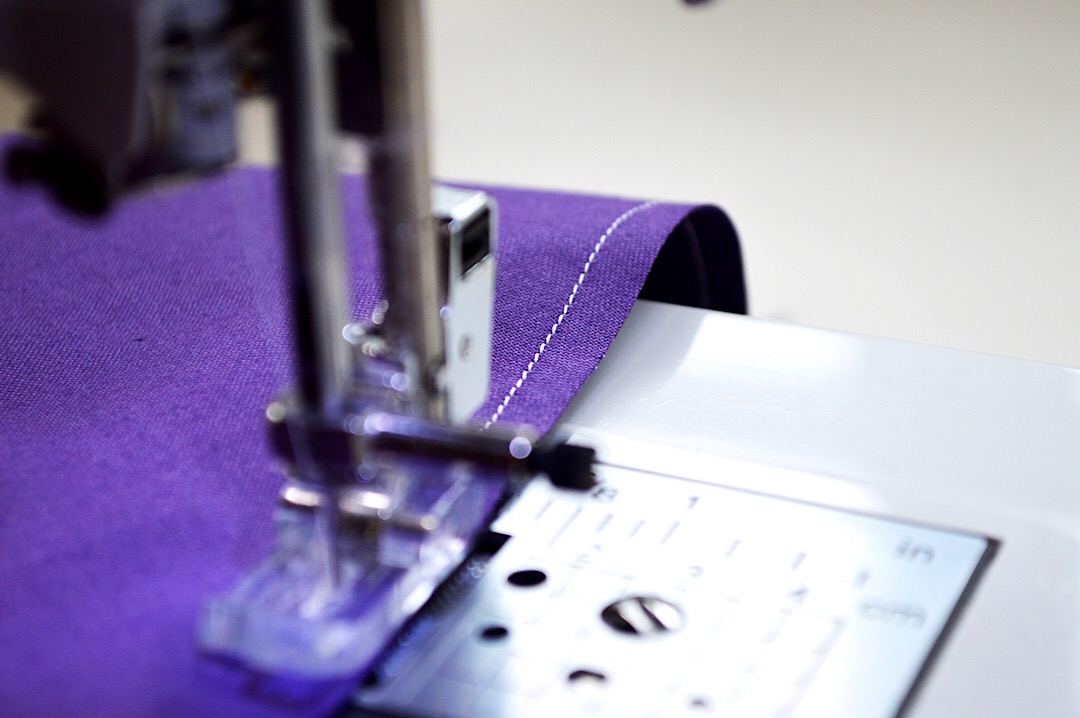
Stitch along this pinned edge using a 1/4” seam allowance.
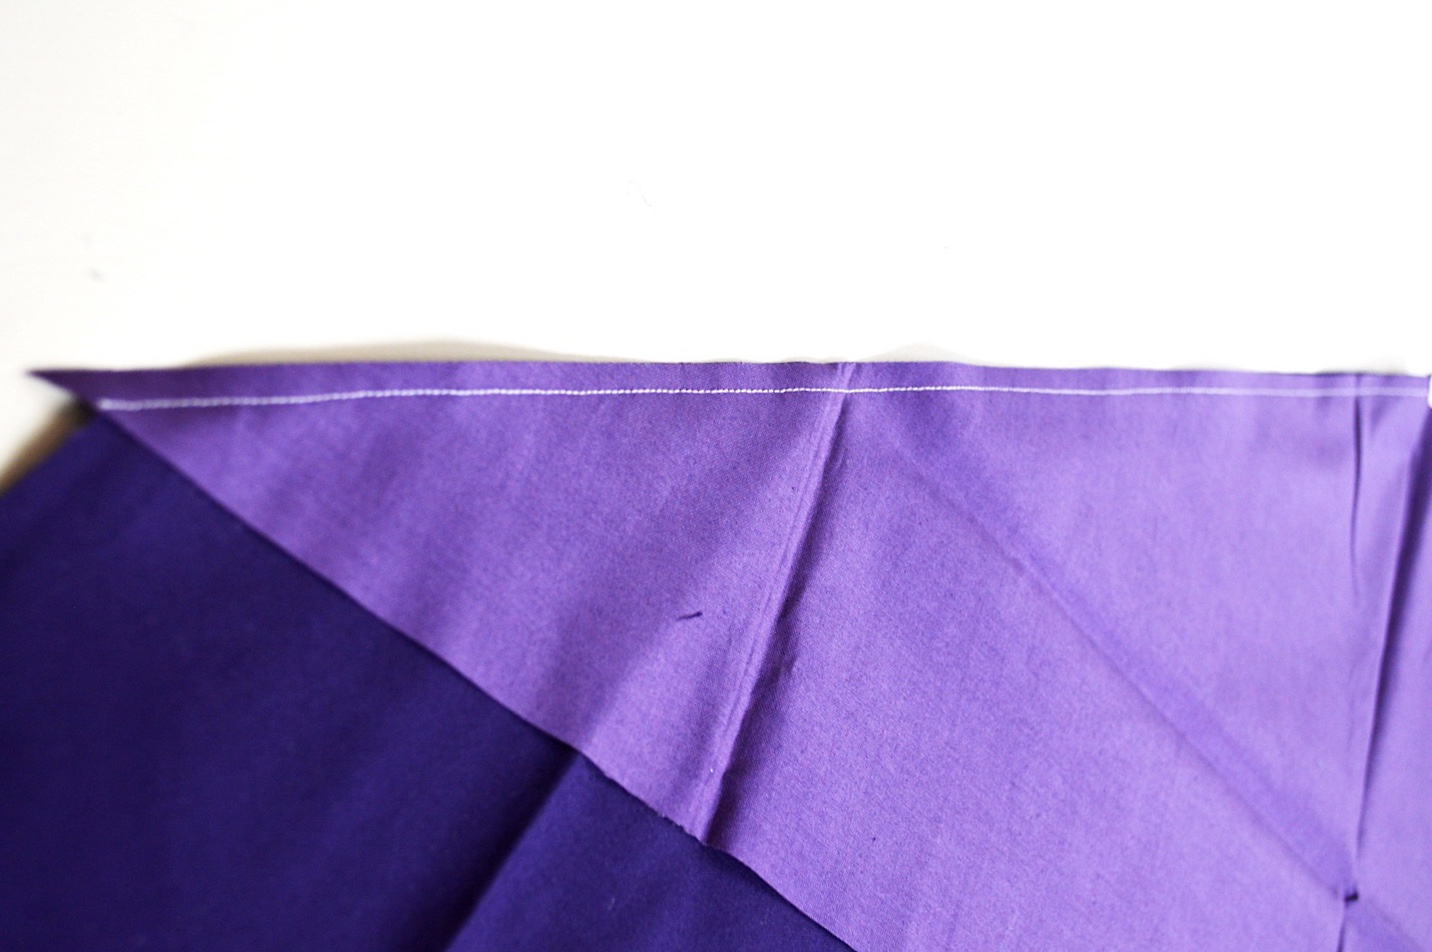
This is the finished seam. Now it’s time to press. To help “bury” your stitches into the fabric, which creates a flatter finished seam, keep the fabric just as it is shown above and press on top of the stitches across the entire length of the seam.

Next, open the fabric and press toward the darker color.
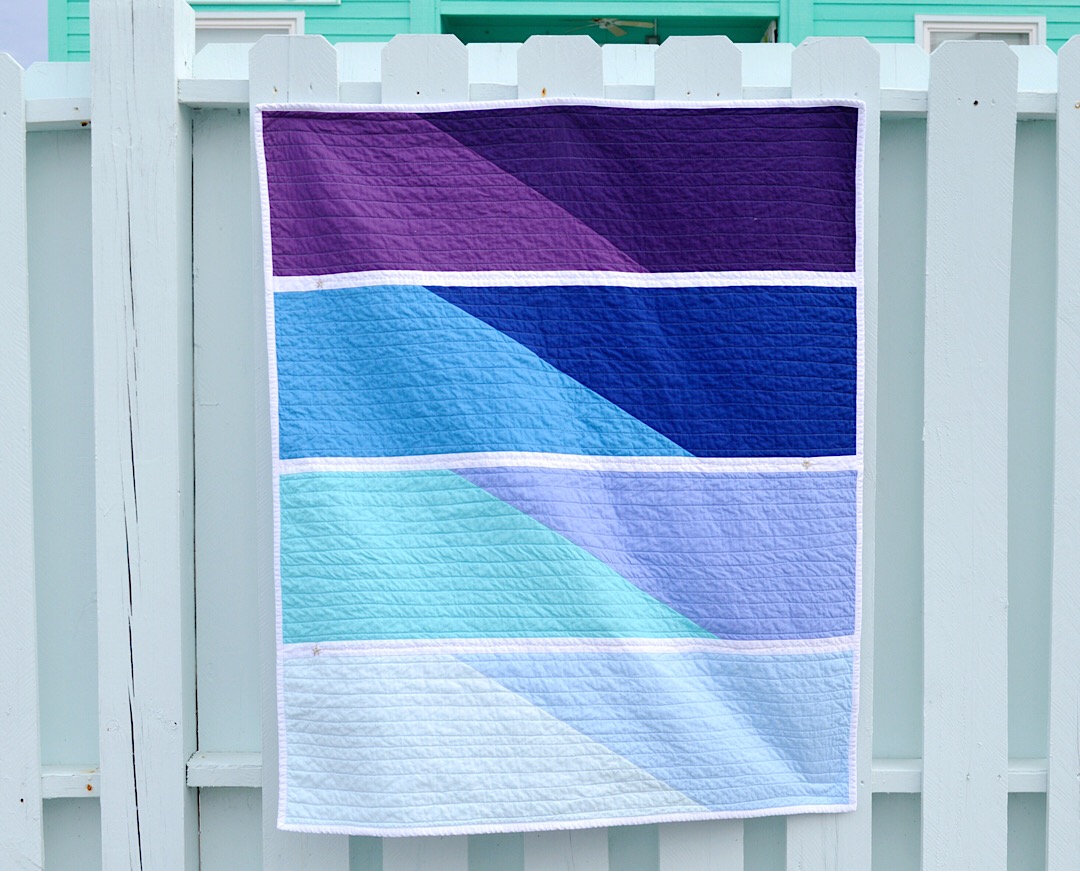
Follow these instructions for each strip. The color pairings are as follows: Purple/Purple Mountains’ Majesty, Crayola Midnight Blue/Deep Water, Scuba/Crayola Periwinkle, Bleached Denim/Boy Blue.
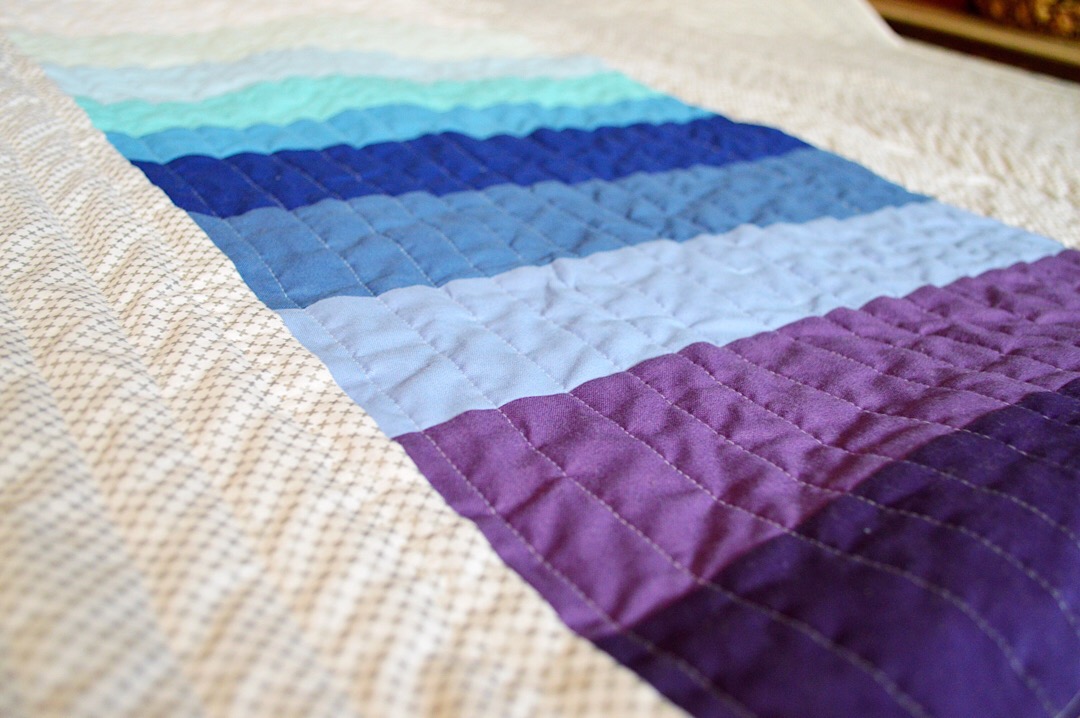
Once you have all of your strips cut and sewn, it’s time to assemble the quilt top.
Pin a long raw edge of one of your 1.5” Riley White strips to a long edge of the purple strip. Press the seam. In this case, I press toward the white fabric because it doesn’t have any seams, so I get less bulk. Either way is fine.
Next, pin the remaining raw edge of the white strip to a long edge of the Crayola Midnight Blue/Deep Water strip. Press seam. Again, here I pressed toward the white fabric.
At this point, you have strips sewn in the following order: Purple – White – Dark Blues. Continue alternating this same way, sewing the white strip next, then the Scuba/Periwinkle strip, then white, and finally, the Bleached Denim/Boy Blue combo.
Press all of your seams. Trim the sides of the quilt top just enough to clean up any uneven edges. And that’s your quilt top!
Assemble your quilt by making a typical quilt sandwich (quilt back + batting + quilt top).
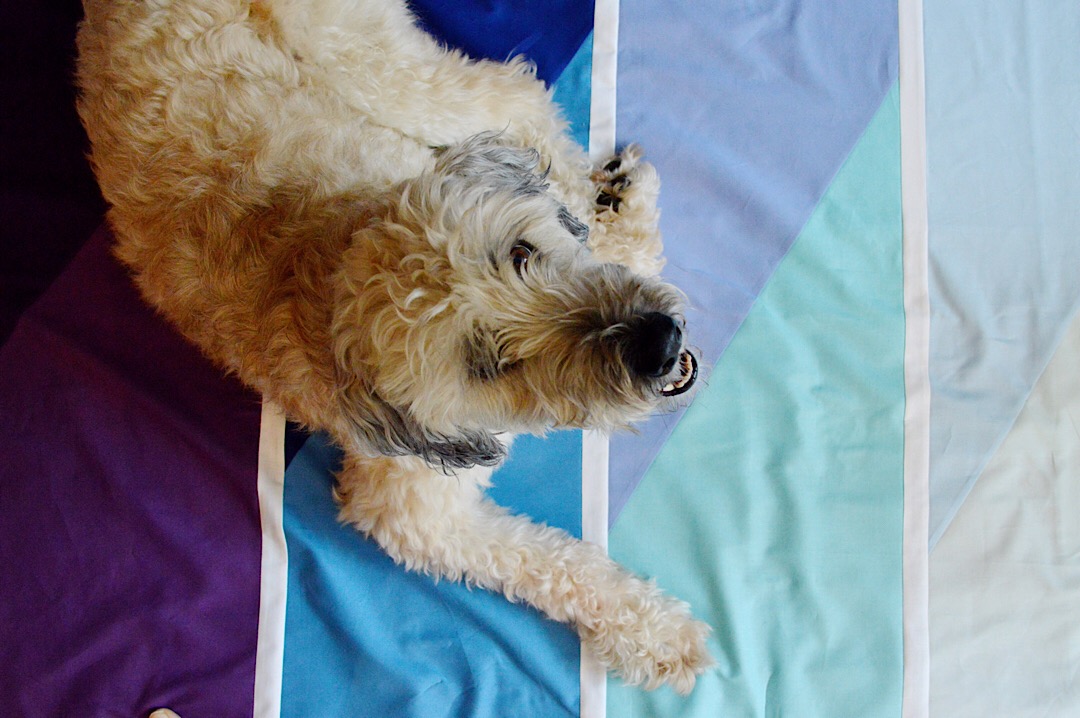
Why is it that each time I lay out my quilt in preparation for basting, the dog magically appears and makes herself comfortable?
Now it’s time to baste! You can spray baste or pin baste. I have done both, but decided to pin baste this time. I knew I would be straight line quilting, and my goal is to figure out how to get rid of the pinched fabric that happens so often with straight line quilting. I read somewhere that pin basting very close together is one way to help the problem. The other trick is to sew at a slow speed. I tend to go heavy on the foot pedal, so this time around I set my machine to a slower speed and it worked wonders! I didn’t end up with any pinching whatsoever. There are a few areas where I can see some slight pulling, but it’s a great start!
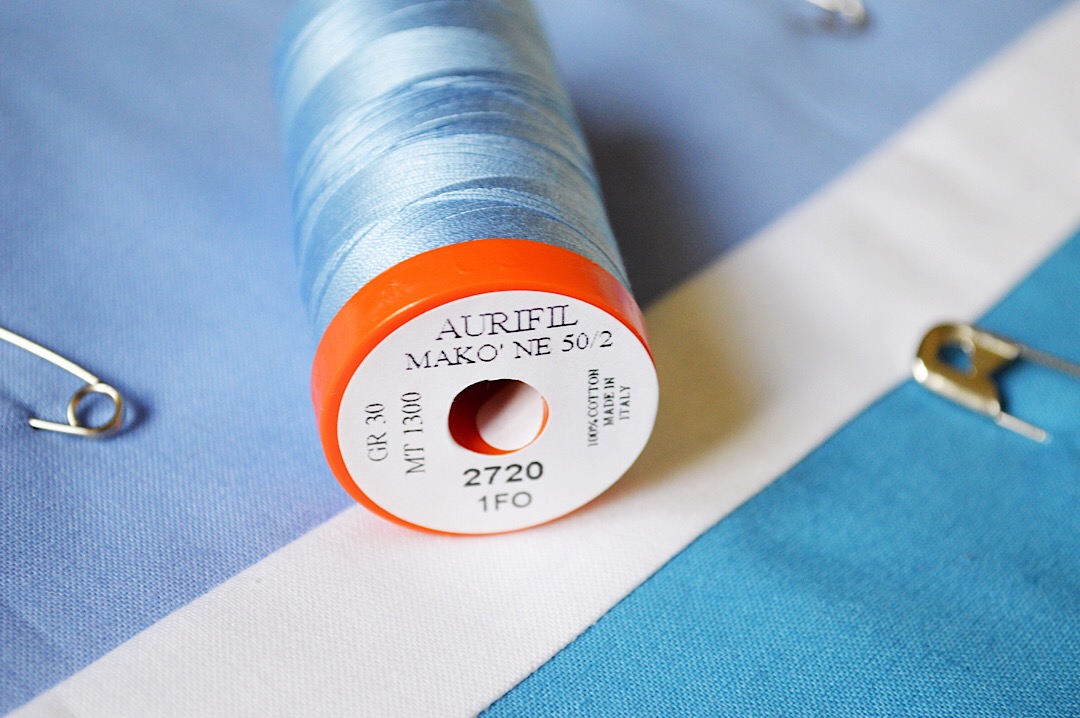
I used this gorgeous Periwinkle Aurifil thread for the entire quilt top. It matches the Crayola Periwinkle cotton and complimented all of the other colors beautifully.
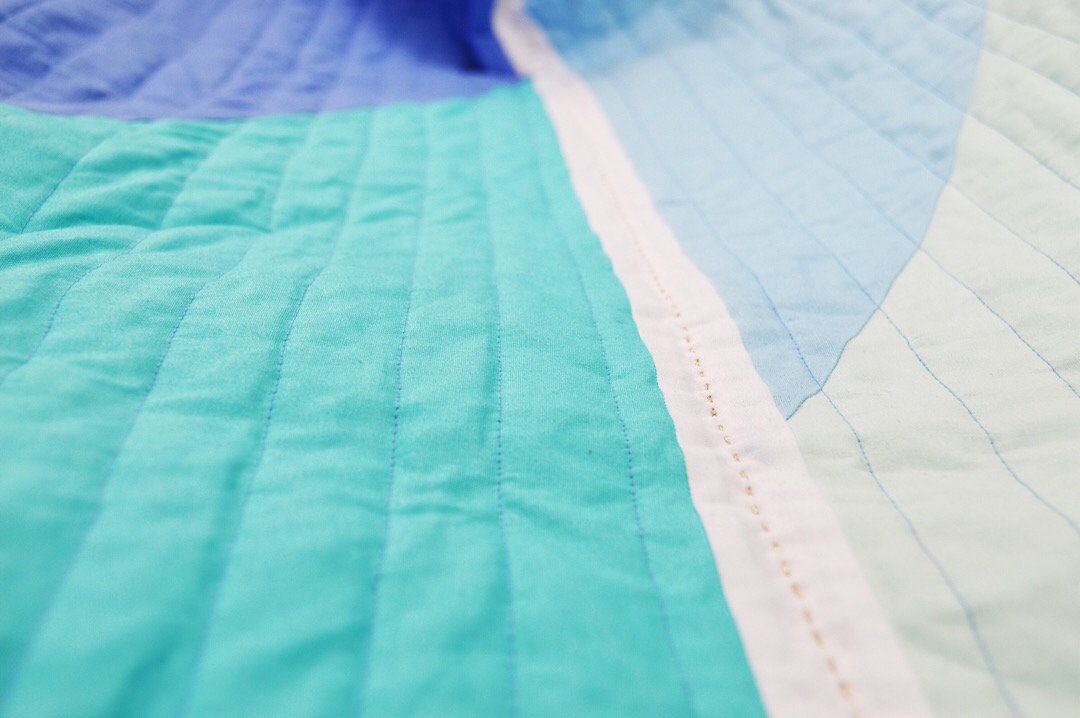
I didn’t measure my rows as I quilted, but it appears that my not-so-straight rows ended up being about 1.5” apart. After all of the machine quilting was done, I decided to hand quilt a straight line through the center of the white strips just to add a bit of sparkle to the front.
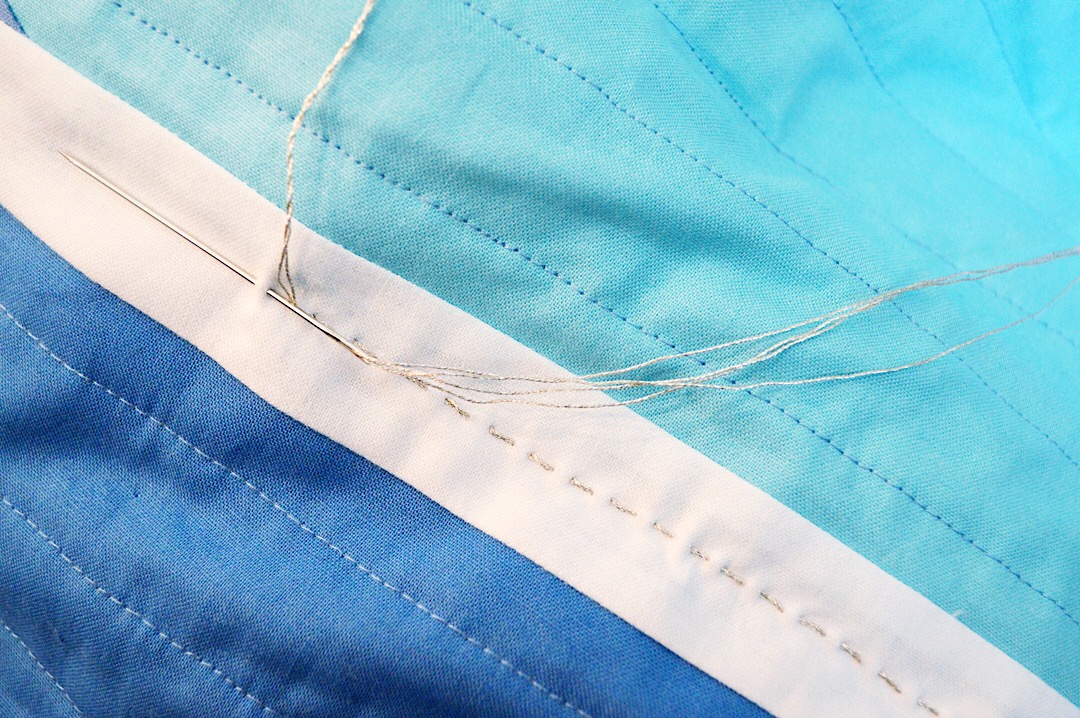
The metallic embroidery floss was not your normal soft embroidery floss. It was stiff and unraveled easily. Not so fun!
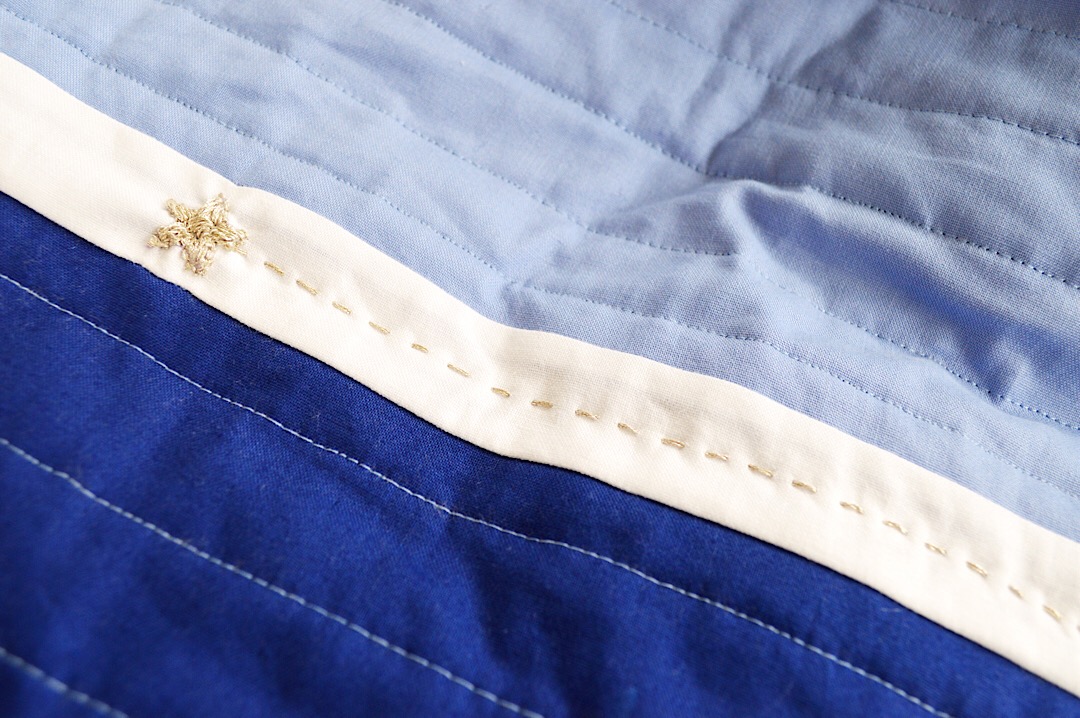
I perservered and it was worth it. Toward the end of each row, I added a little star. The stars turned out cute, but I’ll be honest, I’m not sure I would add them if I had it to do over again. The floss is coarse and stiff, which isn’t really noticeable in the running stitch, but definitely can be felt in the embroidered star. Also, the stars are tiny and I’m not sure they make enough of an impact to offset the negative qualities of the metallic floss. Next time, I would probably stick to the simple running stitch.

The back looked like this. I intentionally kept the stitch on the back tiny – like a pick stitch – because I wanted to keep it very subtle. I probably could even have stitched through just the layers of quilt top and batting so it wouldn’t have to show up at all on the back.
I had some small strips of blues and purples left over from this and other projects, so I decided to use them as a filler, since I didn’t have quite enough fabric for my quilt back.
I simply sewed the strips together and used Riley White to finish off the very end of the row.
Here is the finished quilt back.
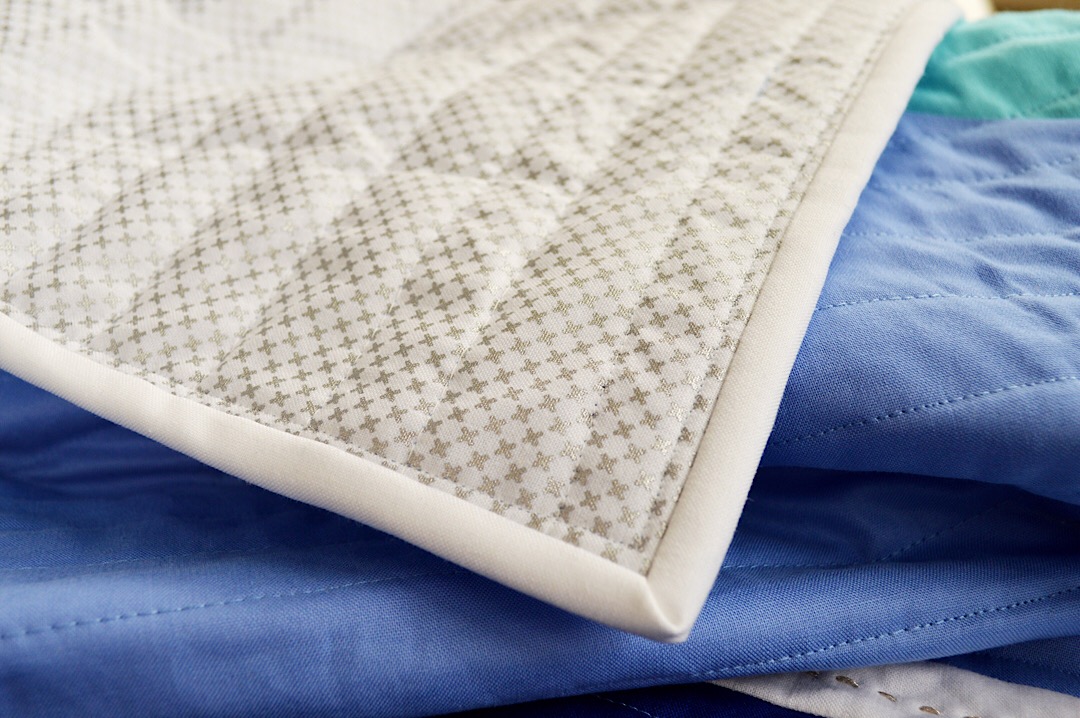
The main fabric for the quilt back is Riley Blake Designs Silver Kisses. I love the punch of glam it gives to this simple quilt! The binding is Riley White. Simple and very modern. If you need an easy machine binding tutorial, I recommend this one at Diary of a Quilter.

I love how crinkly and soft quilts become after being washed and dried!
The colors are just dreamy!
You could make this same design using other colors such as yellows and oranges to mimick a sunrise, or shades of pink. Use your imagination and have fun with it!
Happy Sewing!