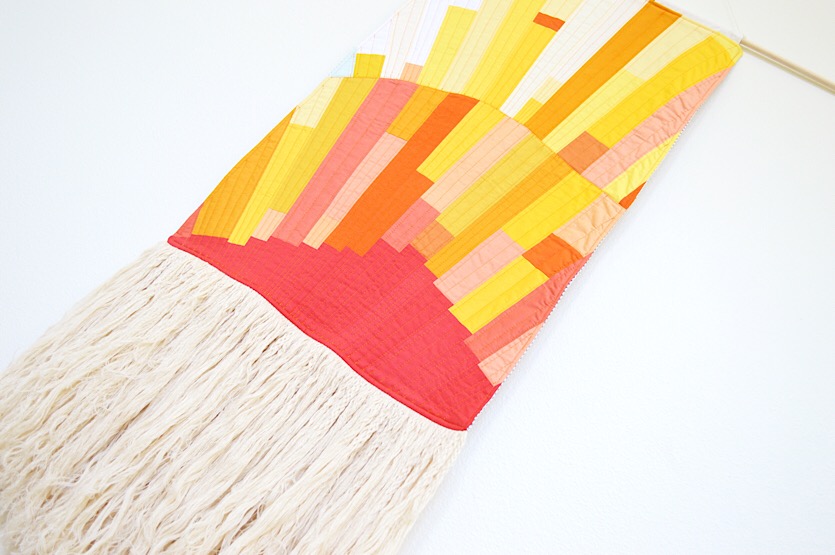
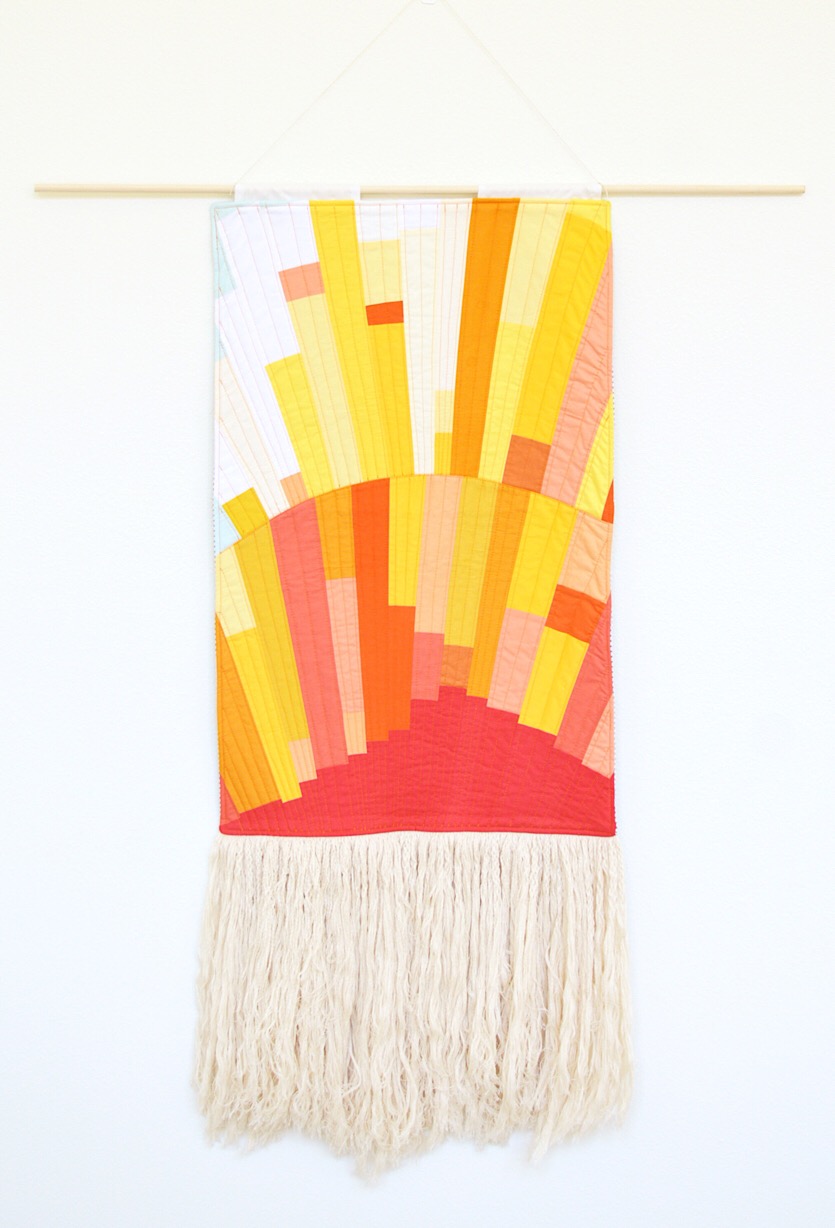
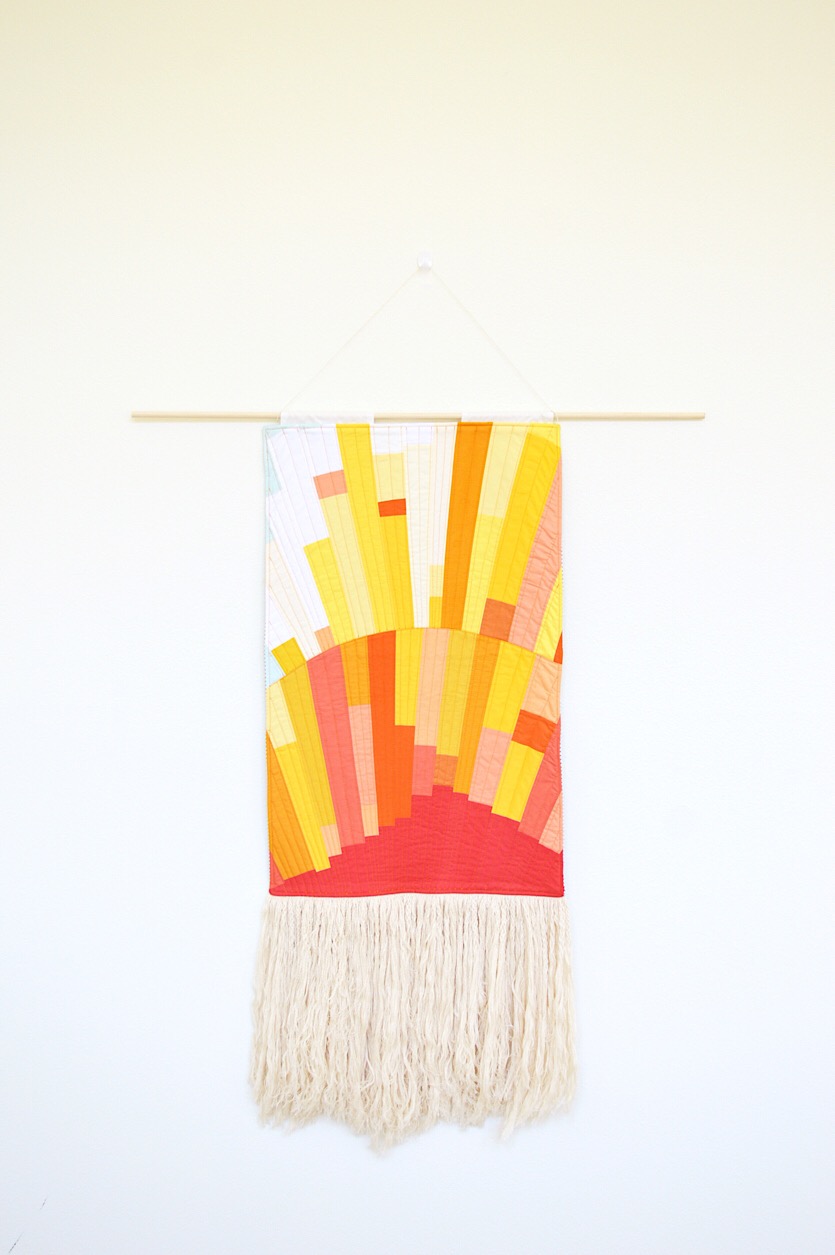
Catching a sunset doesn’t typically happen everyday, but when I do happen to see one, I just want to stop everything and soak it all in. Recently I found myself looking through photos of sunrises and sunsets I’ve tried to capture over the past few years, and I decided it was time to pull out some fabric and make an quilty version to hang on the wall.
Riley Blake Designs CONFETTI COTTONS are perfect for a project like this. With a wide variety of colors to choose from, I had no problem creating the vibrant, modern look I was hoping for.
This tapestry is completely improv, which may stretch your brain just a little at first. Going from detailed, planned out patterns to free form can cause a bit of a headache, but the exercise is so worth it! Once you do this, I guarantee you’ll be dreaming up many more improv ideas. The best thing about improv is that each project is completely unique. You may be following my directions below, but I can tell you, your final result will have a completely different look and feel that is entirely yours!
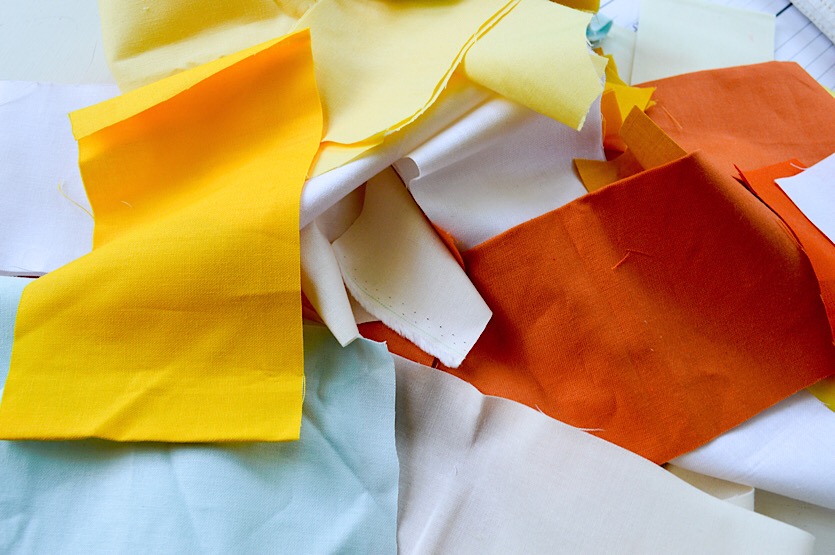
I used scraps of Riley Blake Designs Confetti Cottons for this project. I pulled coral, salmon, raspberry, various oranges and yellows and some shades of white along with just a little bit of bleached denim.
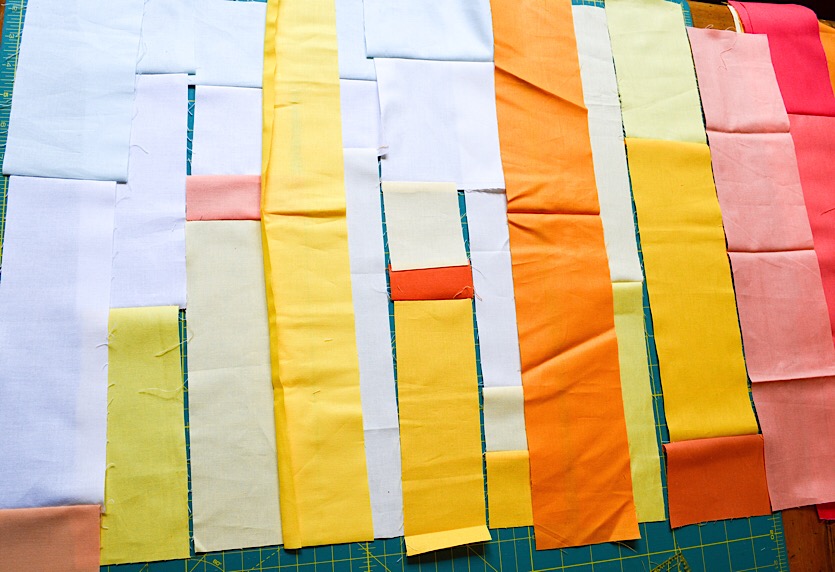
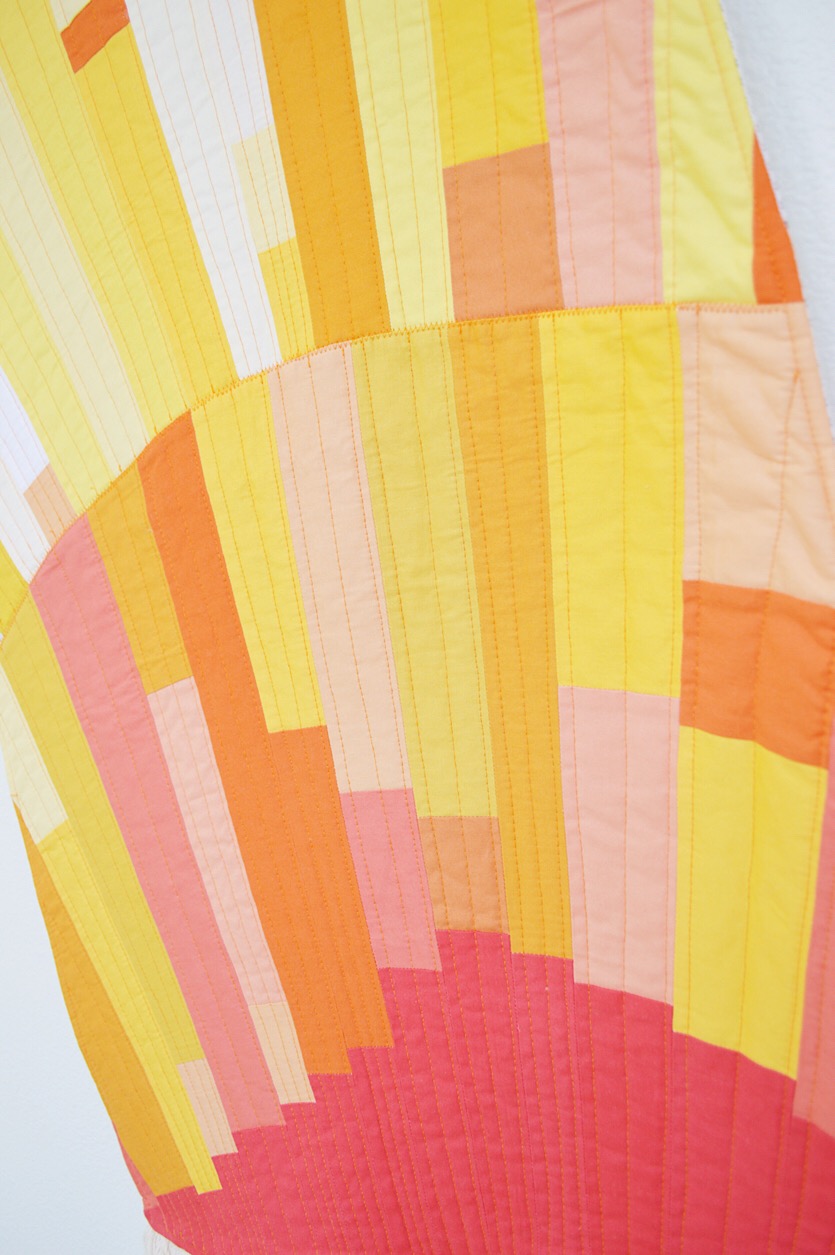
We’ll begin with the upper half. I decided I wanted the color scheme for the upper half to be much lighter than the bottom half, especially in one corner to give it a slightly asymmetrical look. This represents the rays of light getting lighter as they get farther from the sun. I added white for the clouds and a tiny bit of Bleached Denim for some sky.
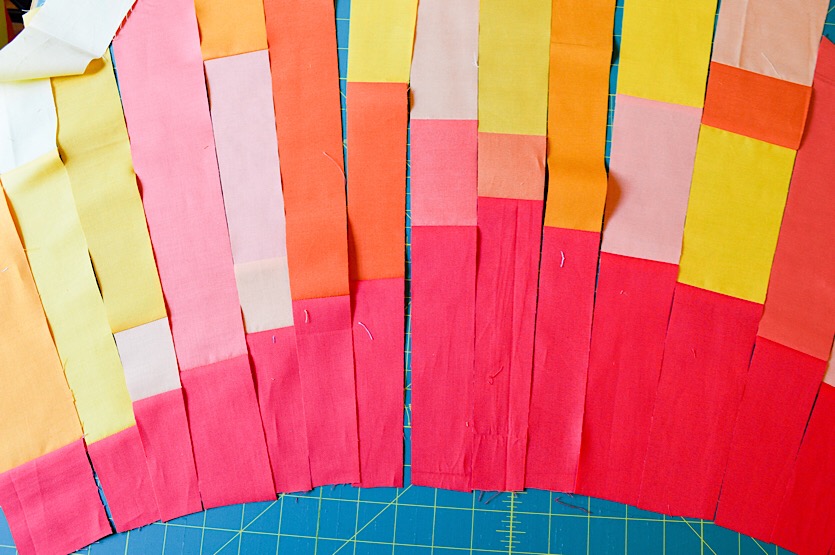
Start sewing your scraps into strips. I kept my strips about 18” long. Longer is better because it gives you more room to shape your final piece, however, one thing I learned is that it probably isn’t smart to sew tiny scraps onto the end, because more likely than not, they will be trimmed off later.
I laid my strips out in order to see where I needed to add pops of color or bits of white. After you have a good amount (you can always add more later), it’s time to trim the strips.
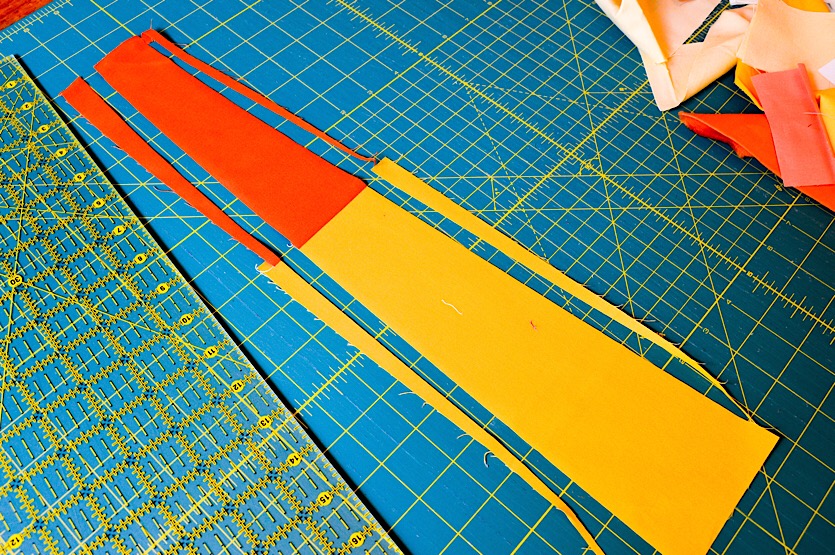
You want to cut them so they taper at one end. Just take your ruler, angle it from the top to the bottom, and trim.
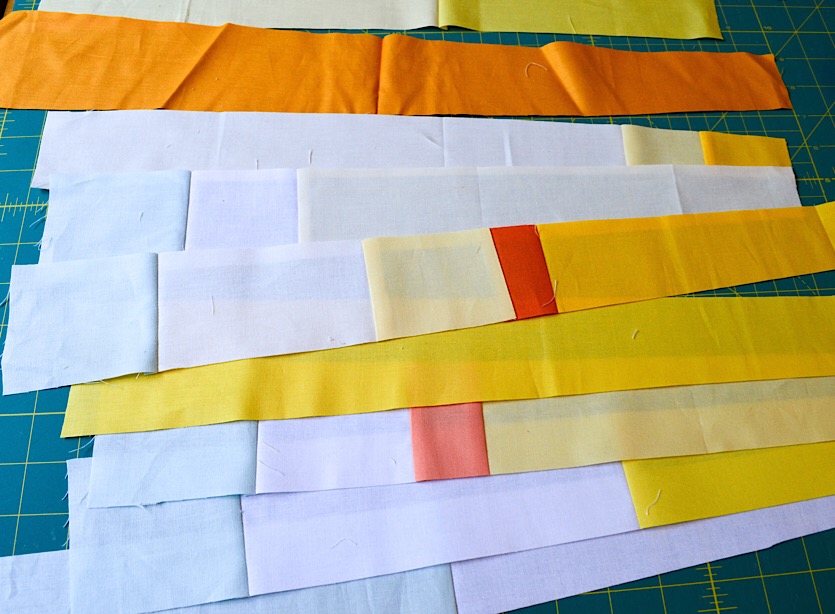
Here you can see have have a pretty decent stack of angled strips. Sew the strips together in the order you want. As you sew, you’ll notice the bottom will start to curve. This is what you want. Continue adding more strips until you get the desired width.

Press the seams open as you go.
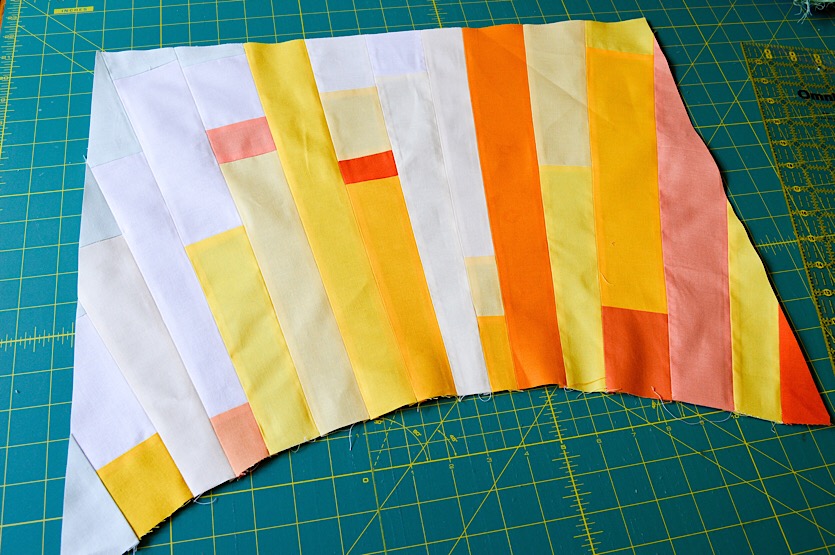
I decided I wanted my tapestry to measure about 21” wide, so I continued adding more strips until I had enough width. Because of the arch, your base will be much narrower than the upper portion, so be sure to measure along the entire width, making sure you have the width you want from the top end to the bottom end. Cut the sides to the width you desire. The bottom will already have an arch to it. Take your rotary cutter or scissors and trim the arch so it is nice and even.
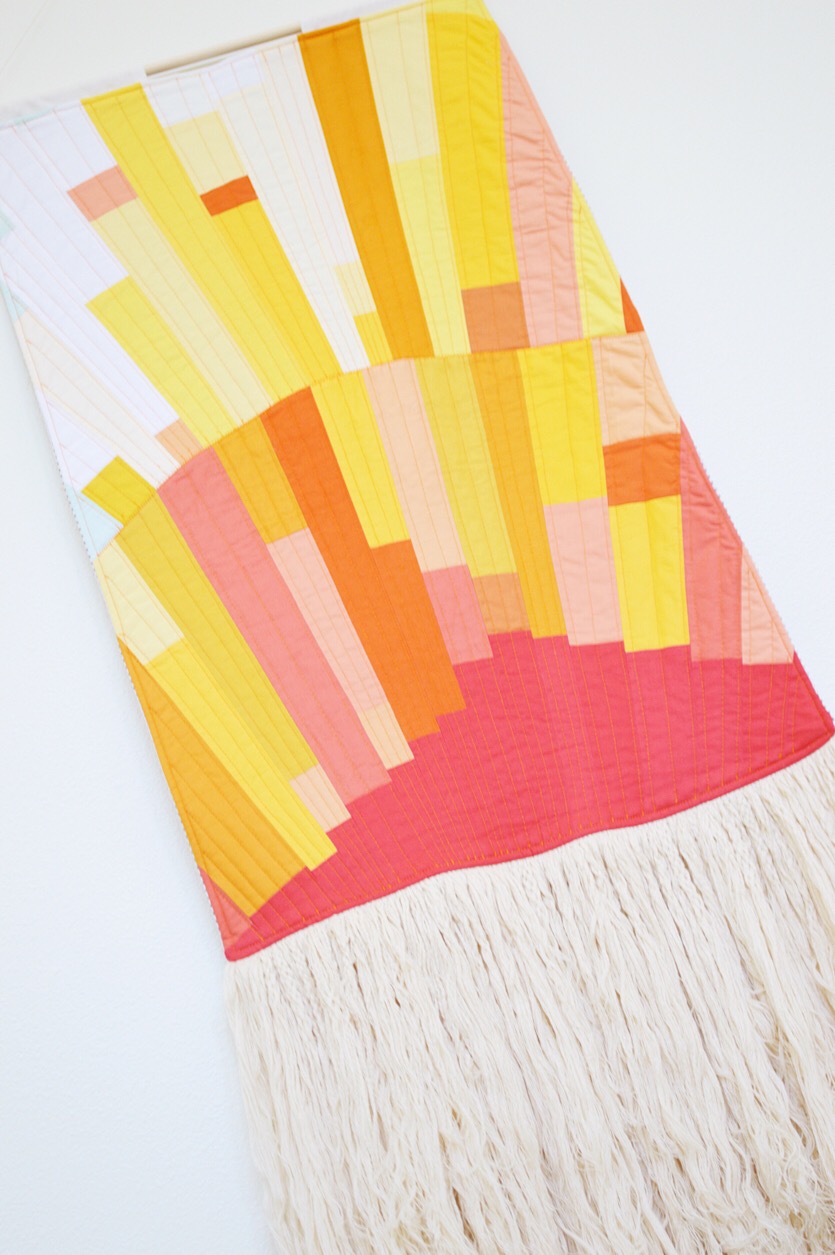
For the bottom half, I assembled strips in darker, more saturated colors. The base of each of the strips is Raspberry. Some of my very favorite sunrises and sunsets are when the sun is a deep, brilliant pink. It’s absolutely spectacular to see. Notice that I staggered the Raspberry strips to roughly imitate the shape of the sun. I wasn’t going for a perfect semi-circle so this choppy “sun” was perfect for the improvised look I was aiming for.
I didn’t want the large arch that occurred when sewing together the upper half, because I knew that if I did have the arch, then after trimming the base into a straight line, I would lose most of my sun. To counteract this, I stitched the first two strips together, pressed the seams, and laid them out on my cutting mat so that the base was on one of the grid lines. With your ruler and rotary cutter, trim the base along that grid line.
Next, arrange the 3rd strip in a way so you see where you need to sew it together to get a straight line. For me, this meant dropping the raspberry end down about 1/4” – 1/2” past the end of the two sewn strips. Once I had it lined up just right, I carefully pinned the 3rd strip to the 2nd strip, right sides facing, and stitched along the seam. Continue this until you have enough strips to make a 21” wide (or whatever width you want) piece.

Trim the base to make a straight line. Trim the sides to the width you want. You have end up with a bottom half that looks something like this.
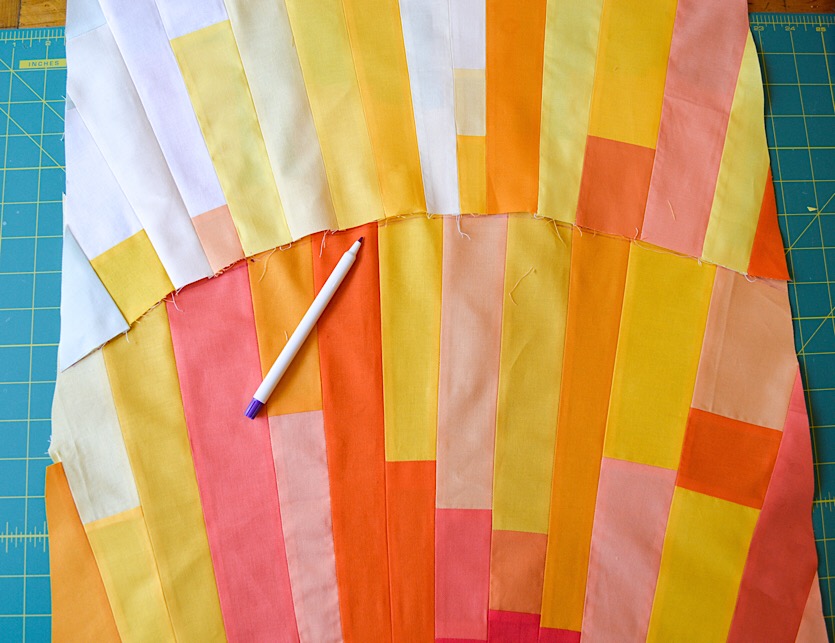
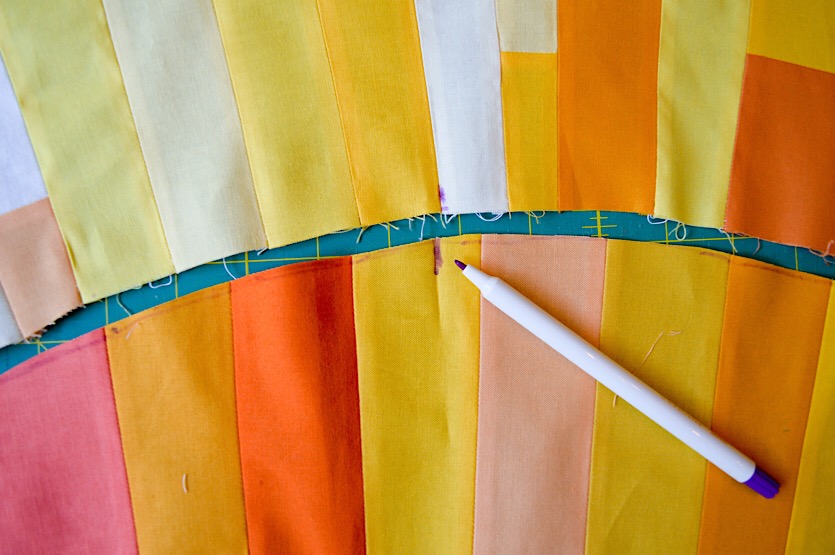
Now it’s time to join the top and bottom half together. To do this, lay out the top so that it overlaps the bottom half, covering all of the uneven edges. When have have it positioned right where you want it, take a fabric marker and mark the arch onto the bottom half.

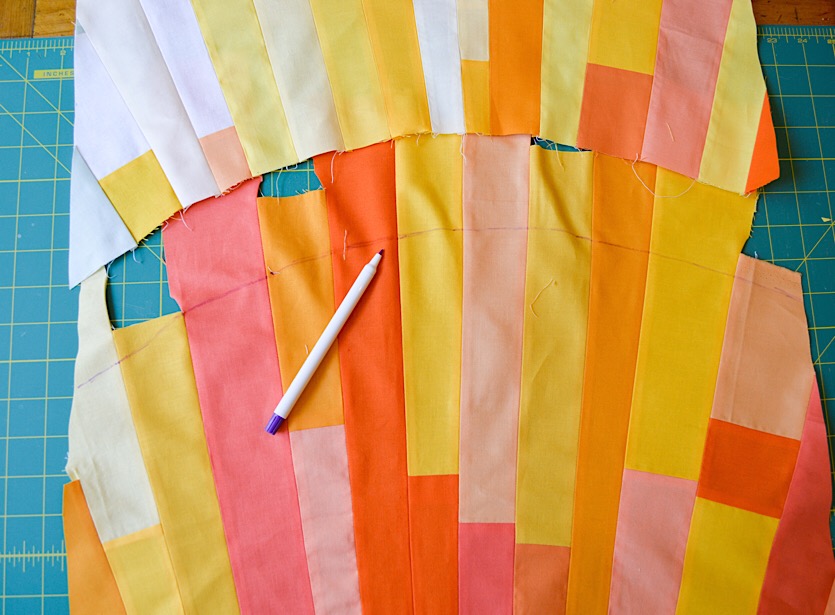
When you pull back the top half, you should have an arch that looks something like this.
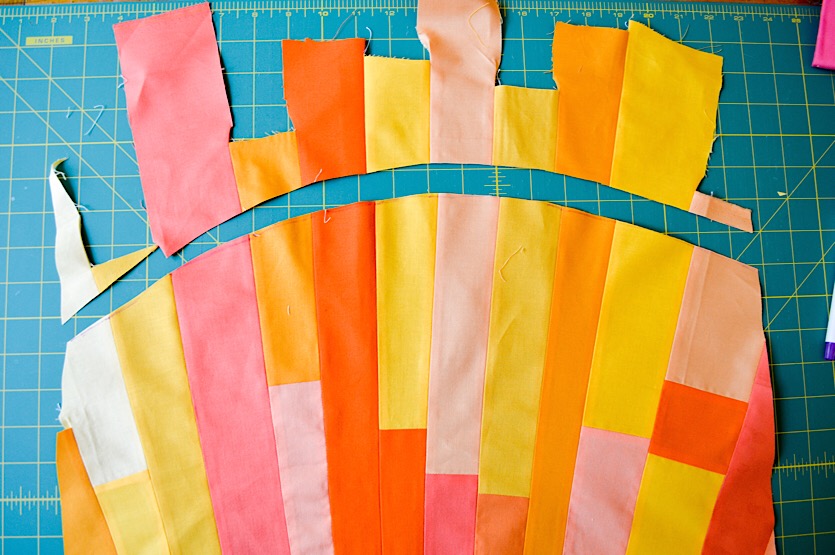
Now take your scissors and cut along the marked arch line.
Find the center of the top and bottom arch and mark with a erasable fabric marker.
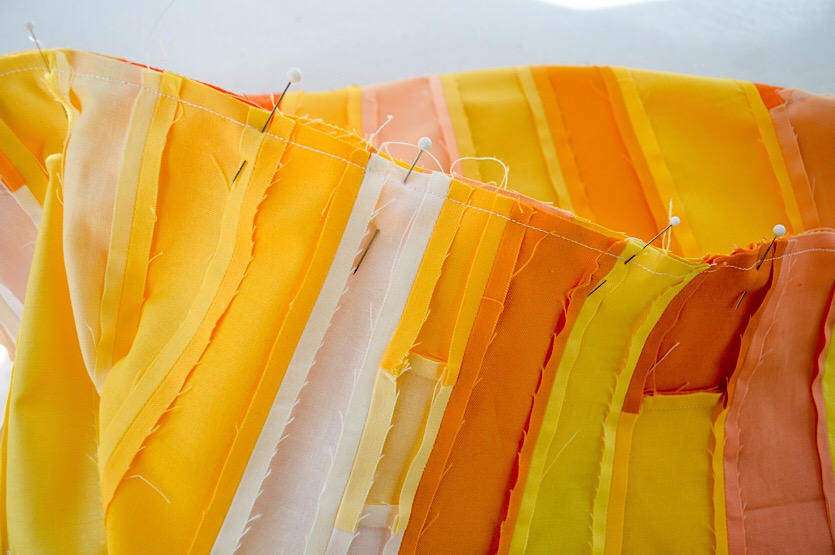
Match up the center marks and pin. Pin the sides. Then fill in the rest by pinning along the curve.
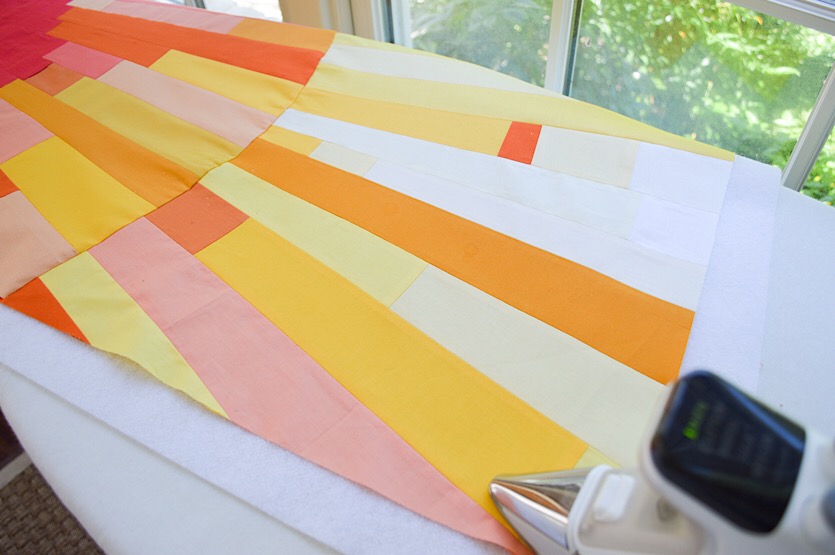
Press your entire piece, pressing the curved seam downward. For this project I decided to use fusible fleece instead of traditional quilt batting. Either will work fine. Cut your fleece or batting 1-2” larger than the quilt top. If you are using fusible fleece, press the quilt top to the fleece.

Trim away the extra fleece.
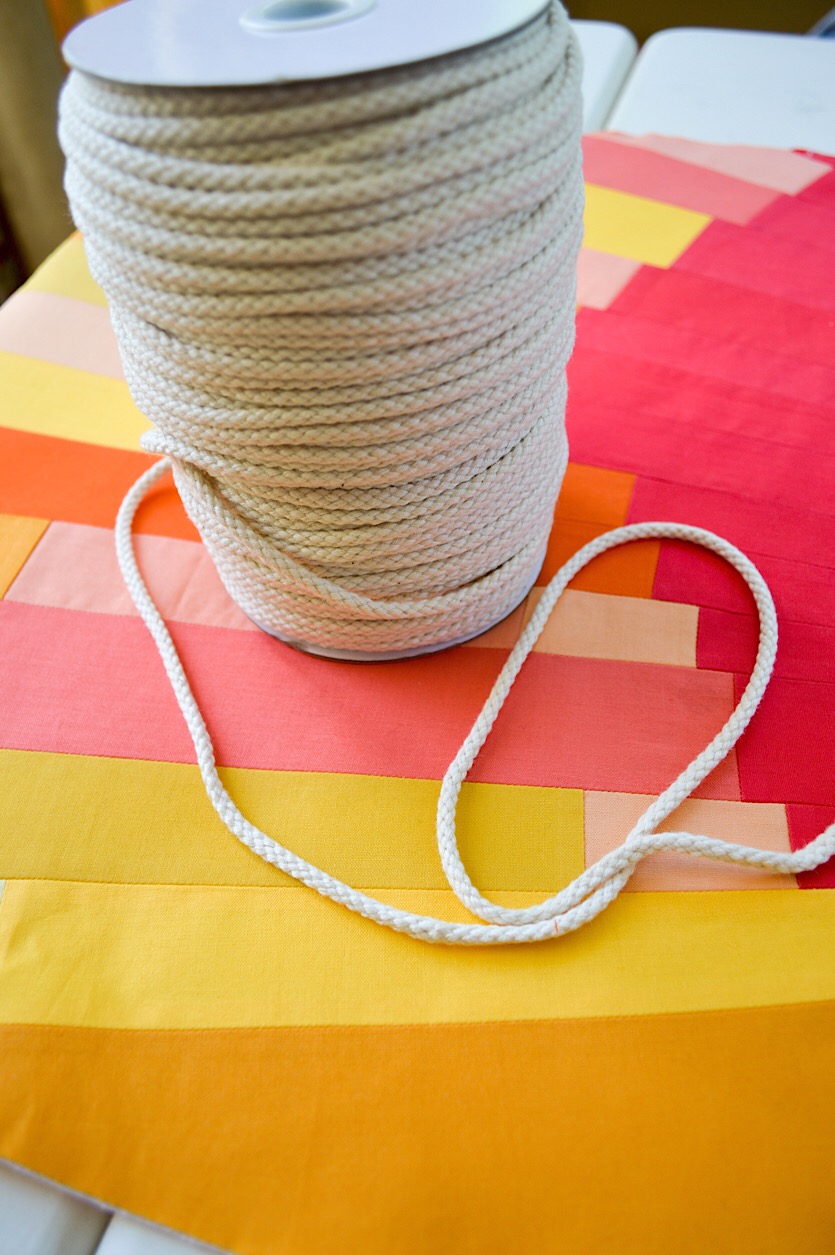
Now it’s time to add the fringe. I used this roll of Cotton Macrame Cord Rope. Cut the rope into 1 yard lengths. I lost count, but I’m guessing I cut 25-30 lengths of rope.
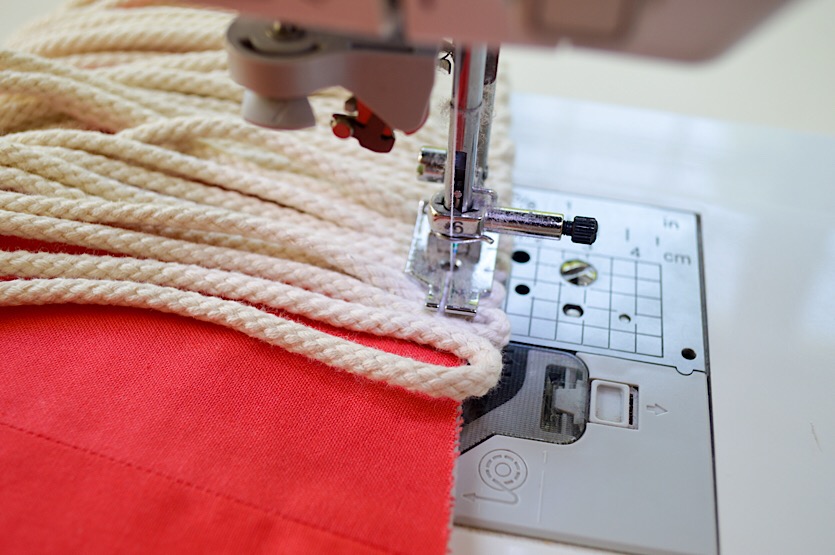
You are going to sew the rope to the “sun” or bottom width of the panel. Leaving about 1/2” at the edge (for the seam allowance), start by arranging a 1 yard length, folded in half, along the edge so that the folded part sits just slightly past the bottom edge. Your cord will drape toward the center of the panel. Stitch through the cord as shown above. Keep adding more as you go.
*If you want a full fringe, space the cords snugly together. For reference, I wanted a full fringe, so I really squished mine right up next to each other as I sewed. I love the look, but fair warning, doing it this way meant it took FOREVER to unravel the many cords in a later step.
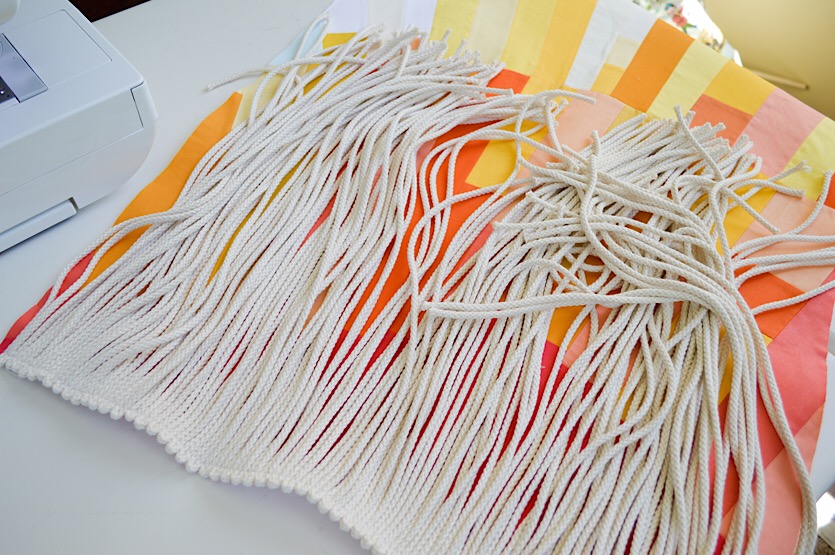
When you are finished sewing the cords, it should look like this.
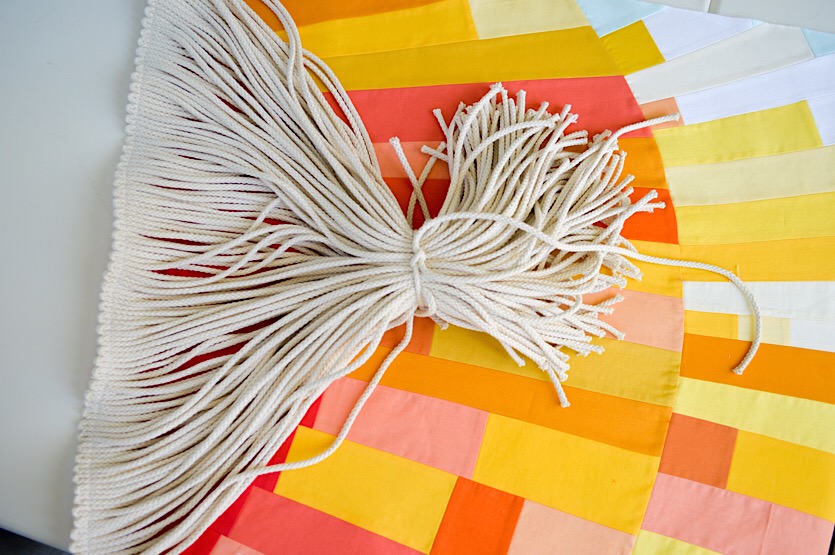
We don’t want the cords to get caught in the seams when we sew the quilt back, so take an extra piece of cording or string and tie all of the cords together.
Cut your quilt back the same size as your panel. To hang this tapestry, I decided to create simple fabric channels for the wooden dowel to slide through. If you want to hang it using a different method (such as sewing metal loops to the back where they can’t be seen) then skip this next step.
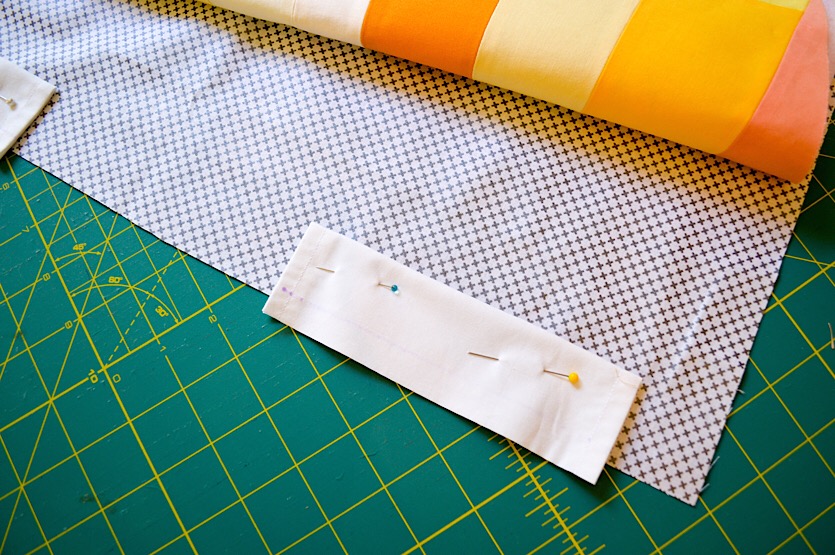
I decided to add these fabric channels at the very last minute, so, like the rest of this project, they were completely improvised. To make these, I took 2 scraps of Riley White fabric measuring about 3” x 4”, folded under the short ends, and stitched them in place.
I already had my wooden dowel, so I wrapped the fabric around the dowel to eyeball how well it fit. After making sure it would fit correctly, and allowing a little extra space, I kept them folded and marked the stitching line. Next, I pinned the folded fabric channels to the backing fabric and basted them in place with the folded edge facing the center of the panel.
Finally, sew the front and back together by placing right sides together, making sure your cords are all in the middle of this “sandwich.” Stitch around the edges using a 1/2” seam allowance. ***Leave a 5-6” opening on one of the sides to turn the project right side out.
Reach in through the opening and turn your project right side out.
Now it’s time to quilt! You can quilt this however you want, but I have just a couple of tips. I started out by top stitching 1/4” around the edges in order to close up the portion I had left open for turning. If I could start over, I would instead hand stitch the opening closed. The reason is that as I quilted, the fabric began to bunch at the top and I had to unpick my edge seam before continuing to quilt to allow for the fabric to move just a bit.
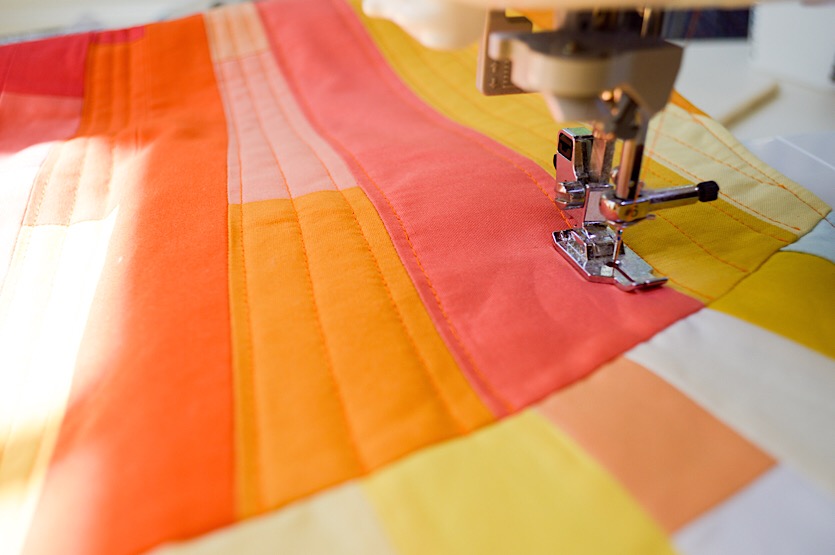
I wanted my quilting lines to follow the direction of the fabric strips to mimic the rays of the sun. Using a lovely orange Aurifil thread, I stitched 1/4” along each seam and then stitched another line through the center of the sun ray.
I opted to zig-zag stitch along the arch.
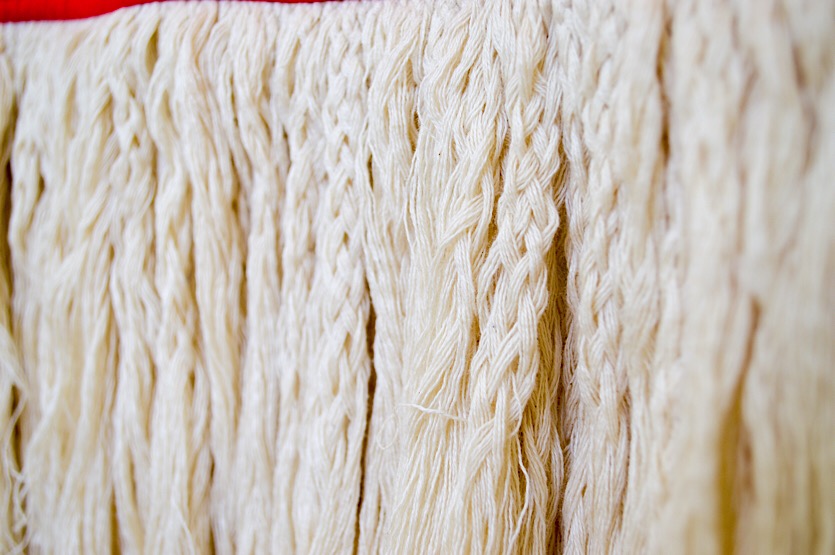
Now for the most time consuming part! You can leave your cords as they are, or if you want this very shaggy looking fringe, it’s time to unravel them! Grab an object with a small point. I used a pair of embroidery scissors. Starting at the bottom of the cord, I gently poked the tip of the scissors through a few strands of cording and guided it downwards to unravel the strands. Repeat this, slowly working your way up the cord. For added texture and interest, I left many (not all) of the cords loosely braided at the top. To achieve this look, when you reach about 1-2” from the top, poke the point of the scissors in between the strands like you did previously, but instead of unraveling it all the way, only pull down a few inches. Continue doing this as you work your way up. If the braid still looks too tight, just pull the sides gently to loosen it.
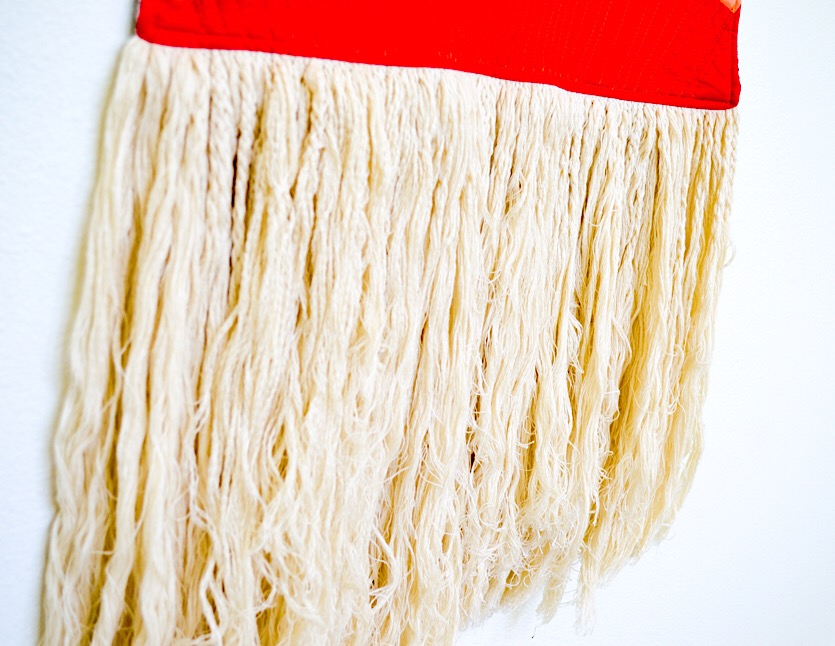
I love how this looks!

And that’s it! All that is left is to slide your down through the fabric loops and tie a length of string at the outside of each fabric loop. Hang it from a hook on the wall, and, voila!
I hope this tutorial inspires you to make your very own improv wall tapestry! Share your Riley Blake Designs projects with us on Instagram @rileyblakedesigns.
Happy Quilting!