
Hi guys! Melissa from Sew Like My Mom here with another amazing free pattern!!

The Clover Nightgown is an adorable knit nightgown for the little girls in your life! And it’s available in sizes 12m-8!!

With cute details like contrast along the neck and bottom, and cuffs, you’re sure to make something totally adorable!


My girls are nuts for their new nightgowns! They’re super quick to sew and make such adorable sleepwear.


And it’s so super easy! CLICK HERE to download the pattern pieces and cutting instructions. Are you ready to sew your Clover Nightgown?
Take one of the gown pieces and place it right side up.

Place the bottom band along the bottom of the gown with right sides together. Sew from one side seam to the other and trim the excess fabric.

Flip the piece over and iron the bottom band to the bottom of the gown.

Flip the bottom band around to the back of the gown piece, making sure it’s flat and straight. Pin well along the bottom length of the gown.

Turn back to the right side of the fabric and topstitch along the bottom band, near the edge, making sure to catch the band on the back side.

Repeat for the other piece.

Lay your gown front and back with right sides together and sew at the shoulder seam with a 3/8†seam allowance. Press the seams towards the back of the shirt.

Take your neckband and fold in half wrong sides together along the long edge. Press well.

Open the neckband and fold in half to match the two short ends. Sew at 1/4†seam allowance and press the seam open.

Place pins in the center front & back of the shirt, and the 2 marks on the neckline. Place pins in the neckband center front, back, and sides to divide it equally.

Place the neckband on the neck of the gown, matching raw edges, with the seam in the middle back. Sew the neckband to the gown at 1/4†seam allowance, stretching the neckband to fit, but NOT stretching the shirt. If desired, finish the seam. Press well.

Place the sleeve right side down, centered on the center seam of the shirt. Pin to hold in place. Pin the sleeve to the armscye. Sew and finish the seam if desired. Press seam allowance up towards shirt.

Sew the shirt down the side seam from the arm to the bottom of the straight edge of the gown side, catching the top of the bottom bands to close the side scallop. Serge or zigzag to finish.

Fold your seam allowance over to one side.

Sew the seam allowance down with a few stitches to hold it in place and make it look nicer.

Take your cuff pieces and fold in half lengthwise. Sew the long side together using a 1/4†seam allowance.

Flip the cuff over itself, folding it in half with the wrong sides together and raw edges matching.

Place a pin in your cuff directly opposite the seam and in each of the 4 corners. Place a pin directly opposite the seam at the bottom of your sleeve and in each of the 4 corners.

Place the cuff over the end of the sleeve, matching raw edges and pins. Match the seams together and the pins together and pin the cuff to the shirt.

The cuff will be much smaller than the shirt, so stretch the two and place 2 more pins to hold the cuff to the shirt. Sew them together, serge or zigzag to finish. Repeat for the other sleeve.

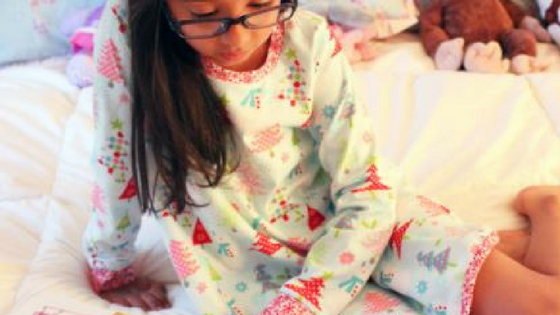
And that’s it! Your Clover Nightgown is done and ready for bedtime!