
Color! We eat, drink and sleep in color here at Riley Blake Designs, so when I saw the beautiful multi-colored quilt over at ENJOY IT, I knew had to make one someday.
The perfect day presented itself when Christopher Thompson’s Blossom basics arrived in our design office – a pile of brilliant color – with tiny Blossom flower dots that look almost like stars in the sky. Love!
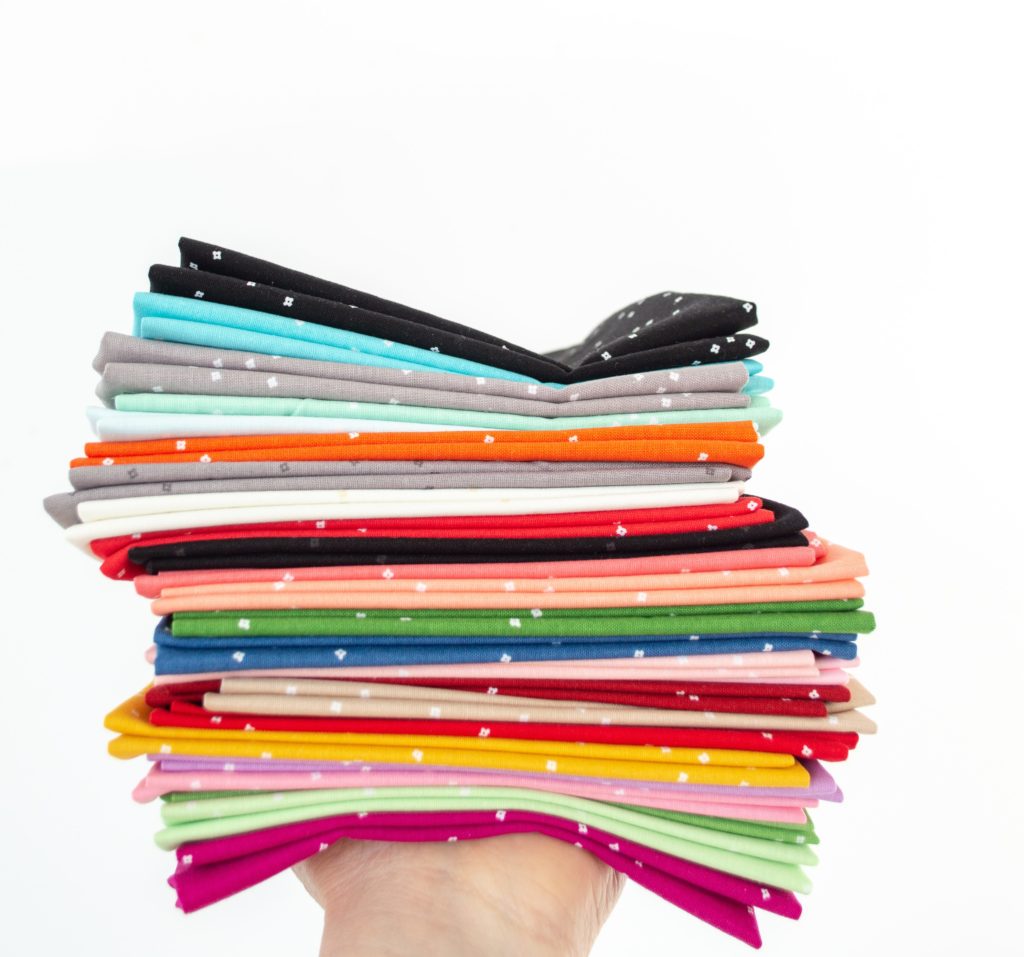
Blossom is available now in stores and comes in an array of colors with white Blossom dots on color backgrounds as you see here, and also in the reverse – colorful Blossom dots, including silver, gold, and rose gold sparkle on white backgrounds!
For this throw sized quilt, I combined squares of Blossom with Riley Blake Confetti Cottons for a totally awesome burst of color!
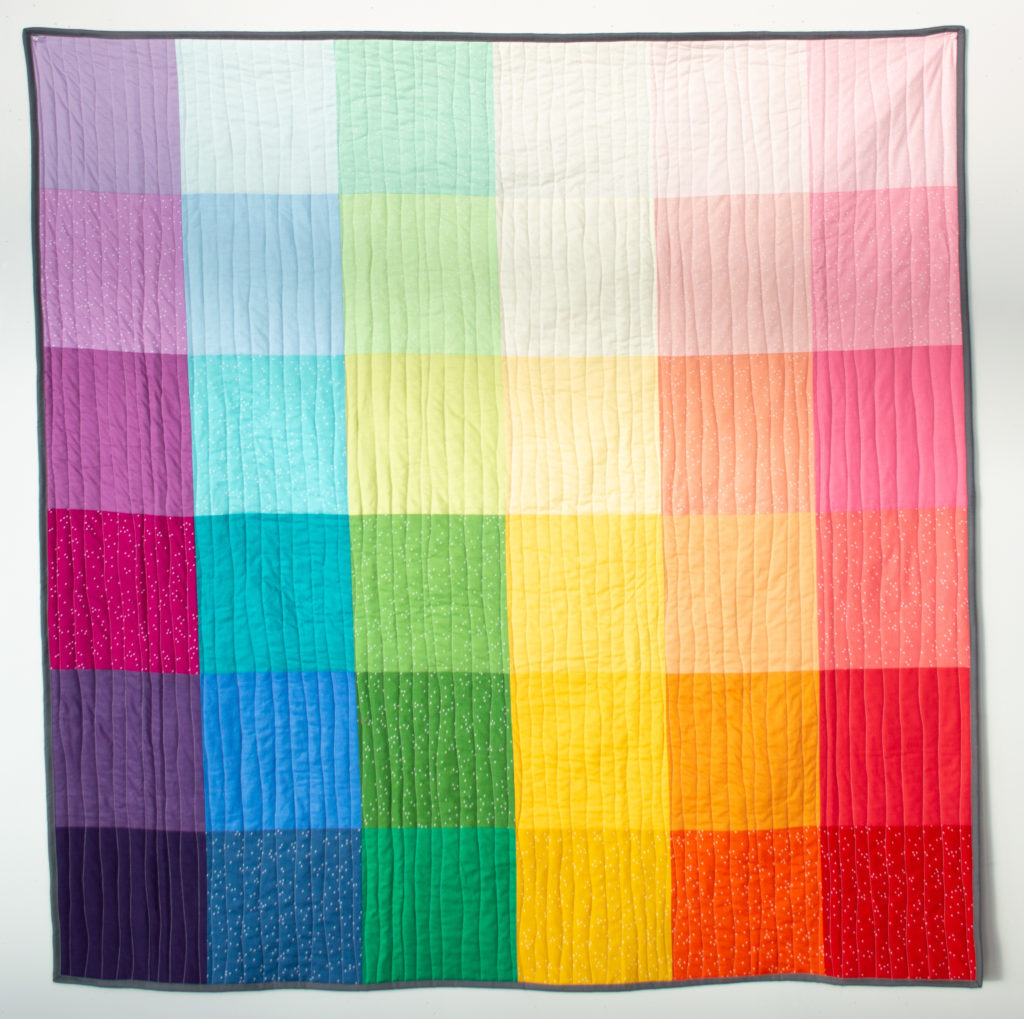
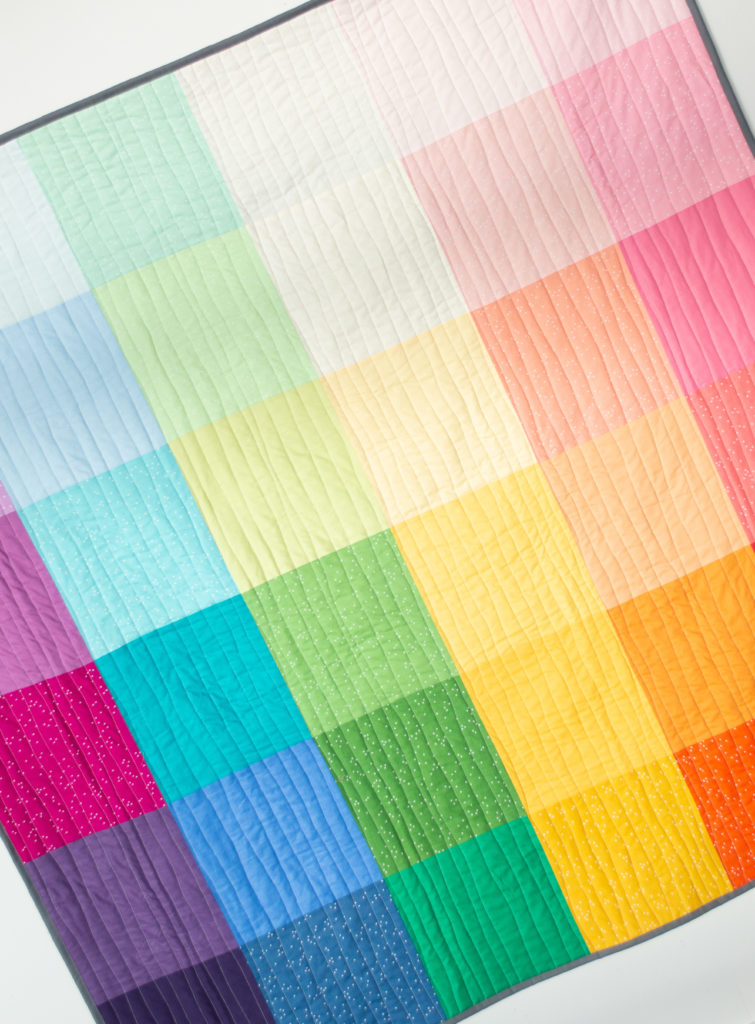
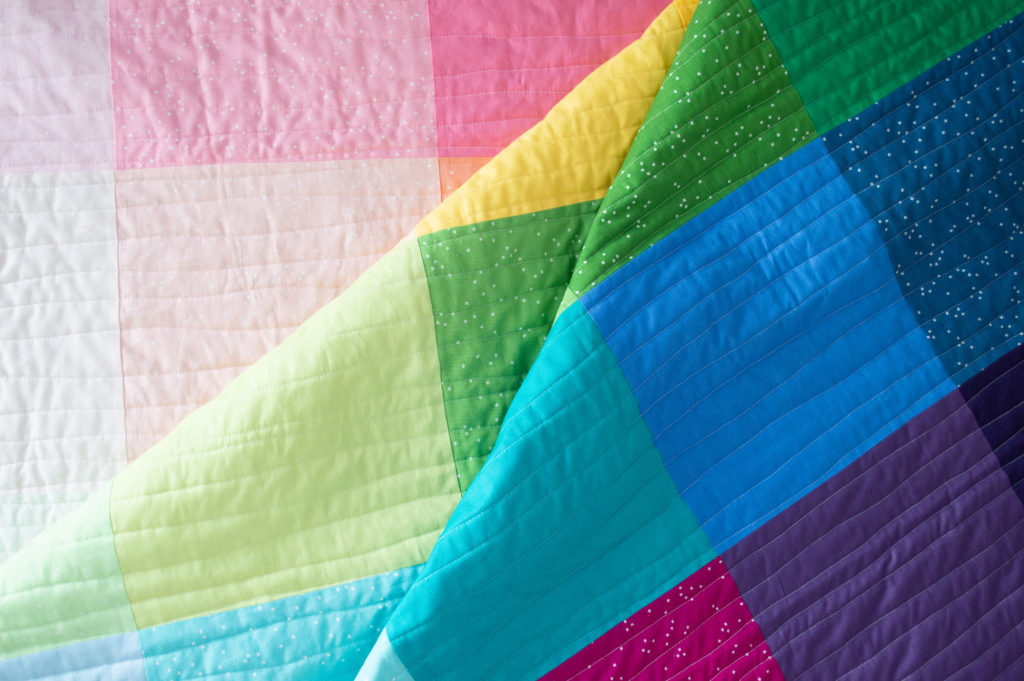
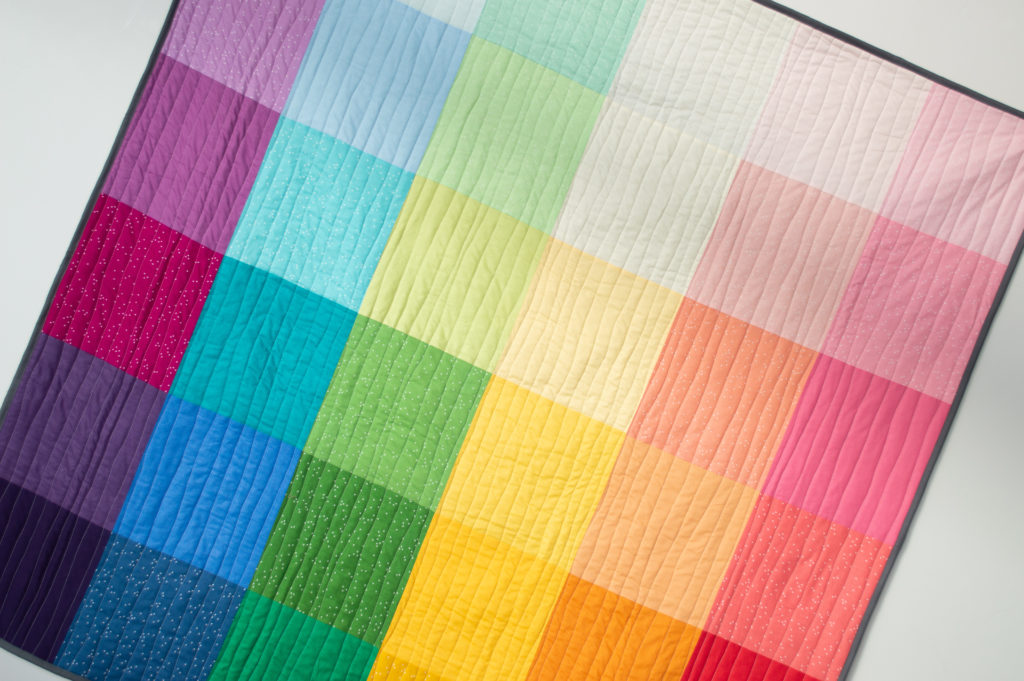
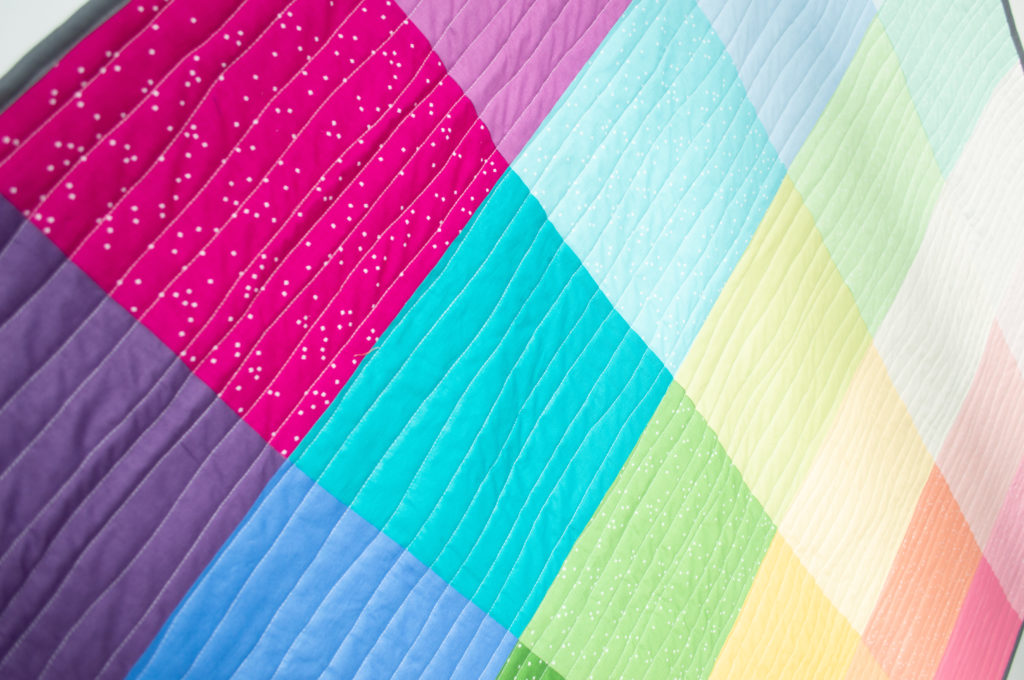
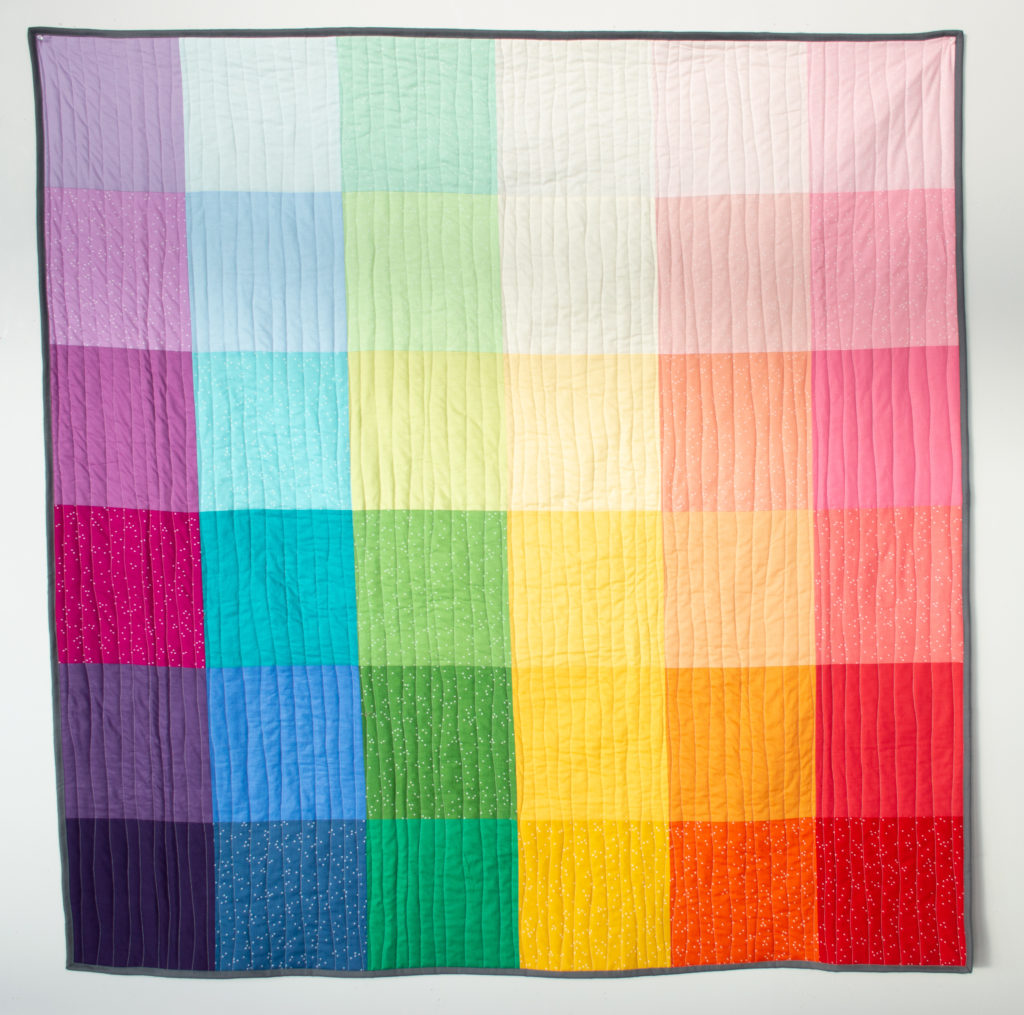
On one end, you have the soft, dreamy pastels, which gradually lead to the other end featuring bold, bright, saturated colors. Such a visual treat!
When Elise, from ENJOY IT, said this is the easiest quilt she has ever made, she wasn’t kidding! This quilt measures approximately 58″ x 58″, although you can easily follow the same method to create a larger or smaller quilt. You would simply need to make your squares smaller or larger, or increase/decrease the quantity of squares.
To make this quilt, you will need 36 – 10″ squares from Christopher Thompson’s Blossom basics and Riley Blake Confetti Cottons. You will want 6 squares from each colorway, with the colors ranging from bold/saturated, to very light/pastel. Honestly, the hardest part was choosing the colors. Once you have that done, the rest is a snap!
I picked out the Blossom colors first and filled in the rest with Confetti Cottons. I didn’t worry about alternating the Blossom and Confetti Cottons. Sometimes they alternate and sometimes they don’t. I focused on arranging by color, not by pattern.

To make the quilt top, take 6 squares (dark to light) and sew them to create the first row. Press all of the seams in the first row to toward the dark squares. Sew the second row, pressing all of the seams toward the pastel squares. Sew the third row, pressing all of the seams toward the dark squares, and so on.
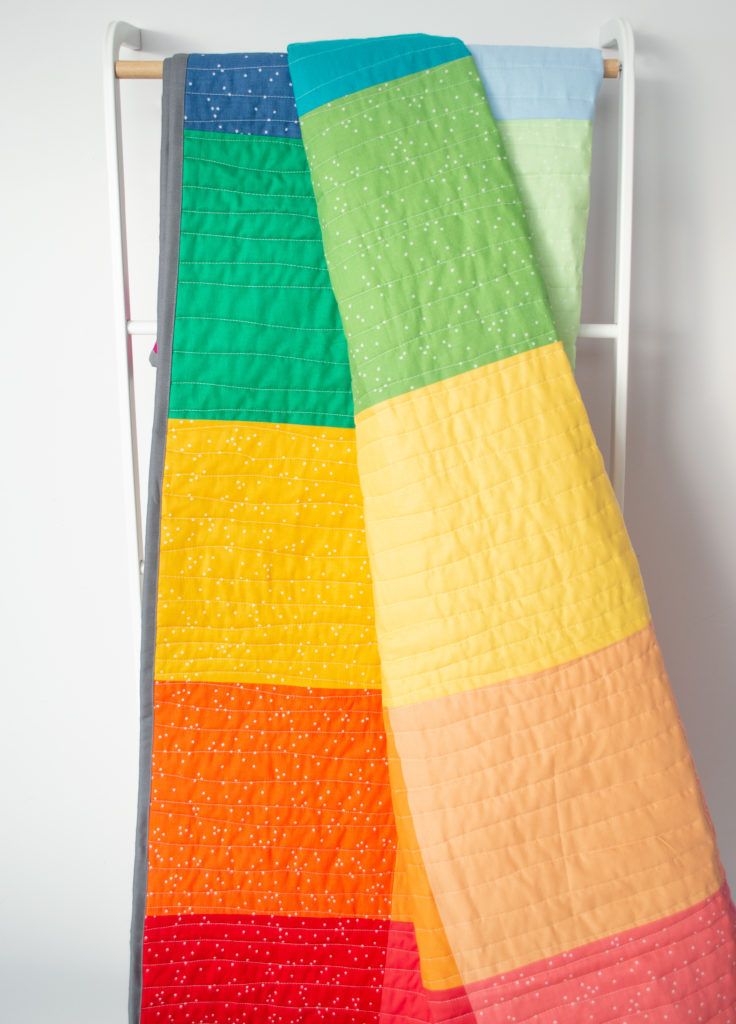
Repeat until you have completed all six rows. I arranged my rows in this order: Red, Orange, Yellow, Green, Blue and Purple.
I like to lay out my rows on the floor, but without fail, the minute I do, Sunny the dog here makes herself comfortable.
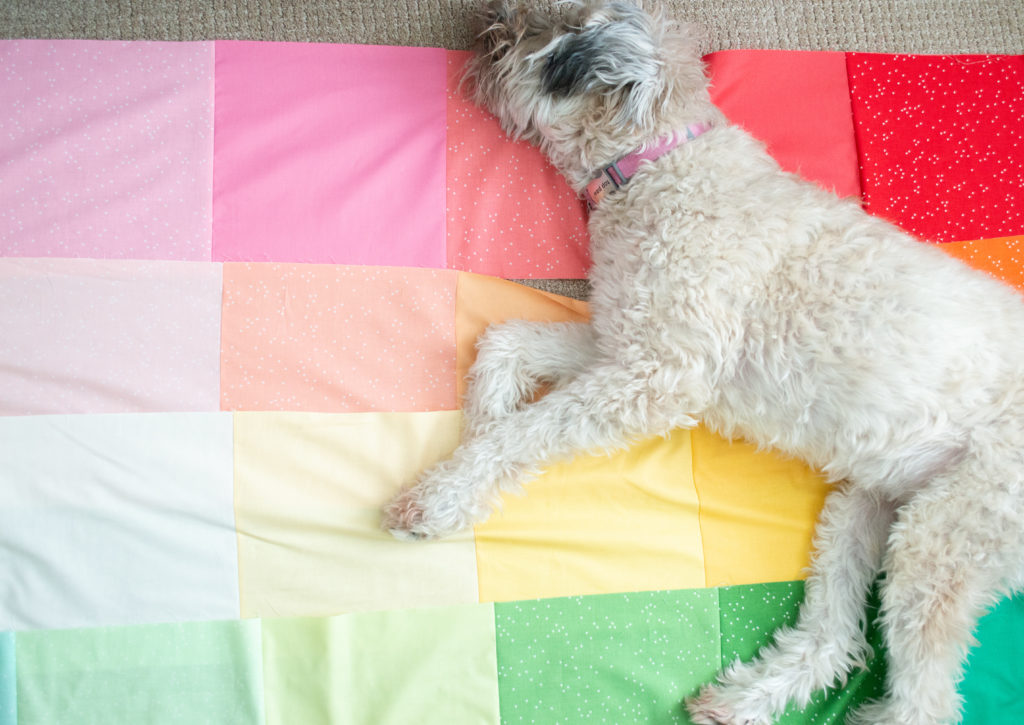
VERRRRY comfortable! This is your cue to take a nap before proceeding to the next step.
Now sew the rows together, lining up the squares at the seams (each seam should be facing opposite directions to reduce bulk). Press the seams of the rows open, and you have a quilt top! It’s that easy!
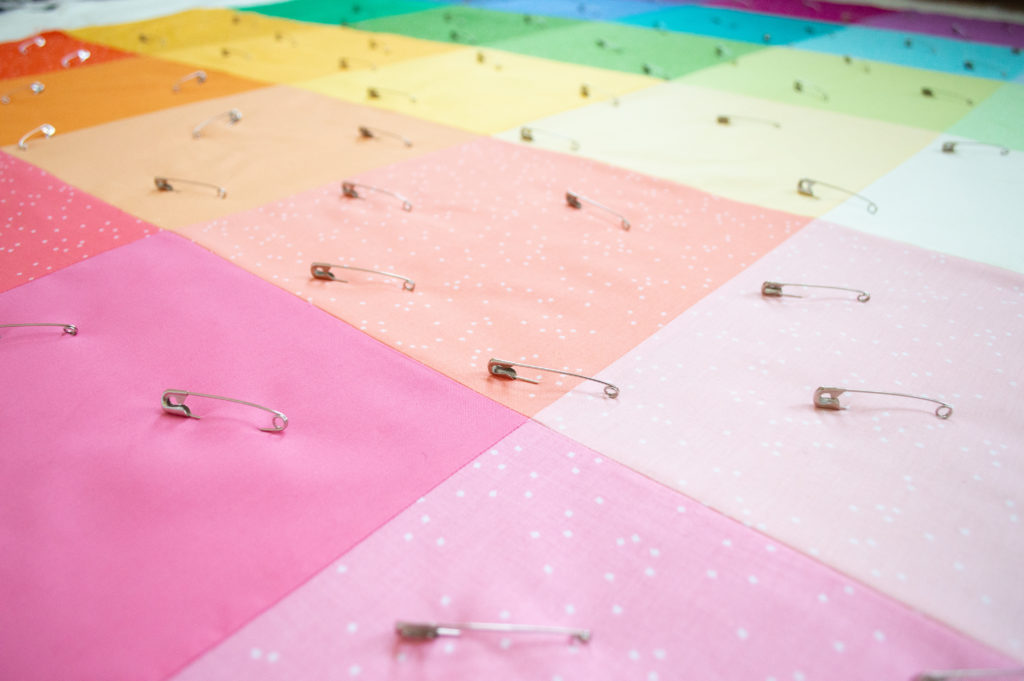
Make a quilt sandwich (quilt back + batting + quilt top). Next it’s time to baste. I chose to baste with large quilter’s safety pins, but you can use basting spray if you prefer.
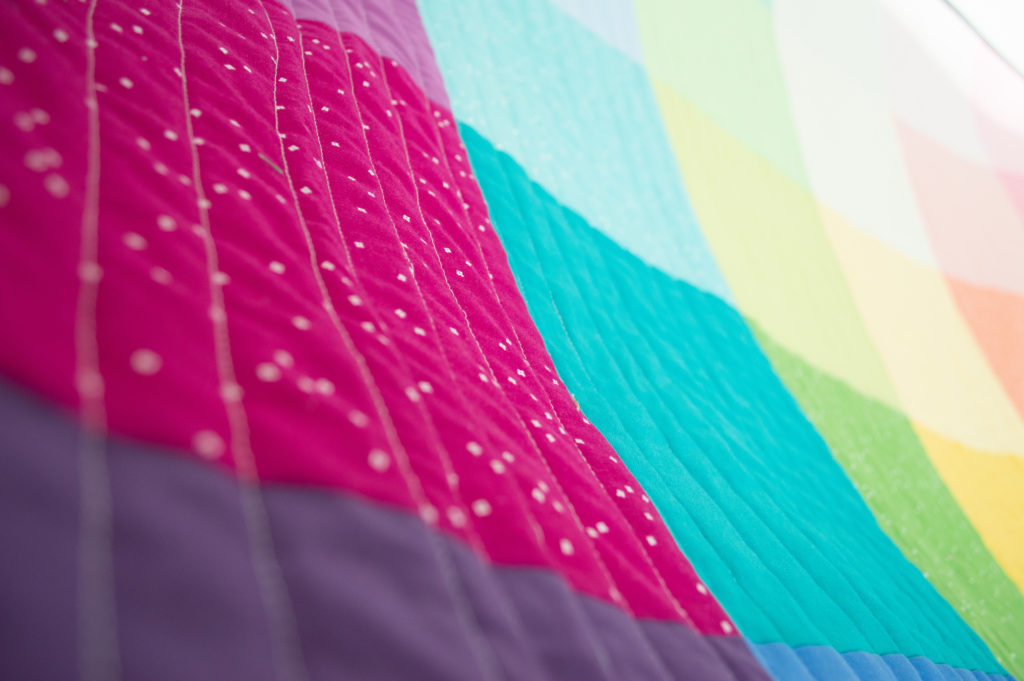
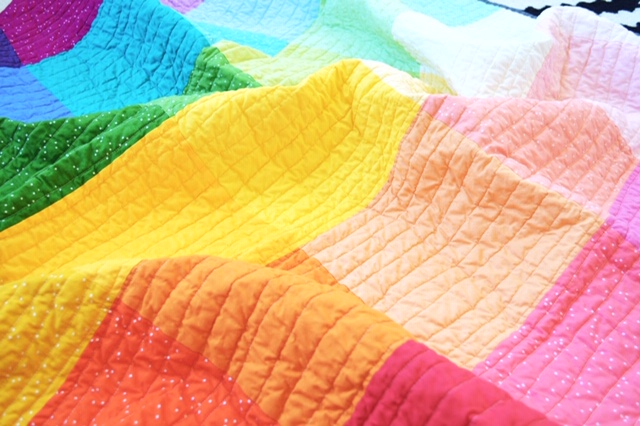
Now we get to quilt it! You can have it professionally quilted, or tackle the task on your home machine. For a throw size quilt, I choose to use my machine. I decided to sew simple rows. A great way to avoid having to worry about getting your lines perfectly straight is to intentionally sew wavy lines. They add visual interest and save a lot of time and headache!
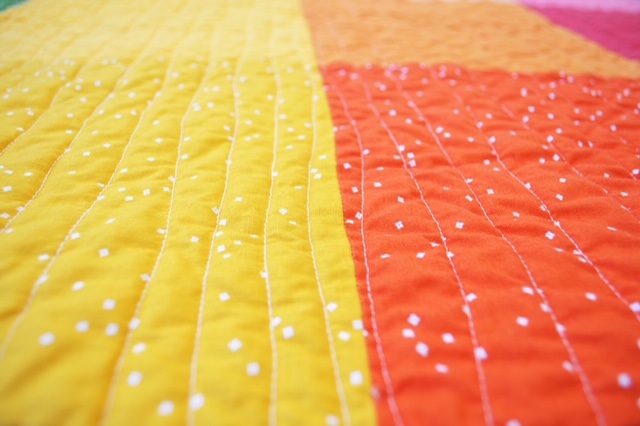
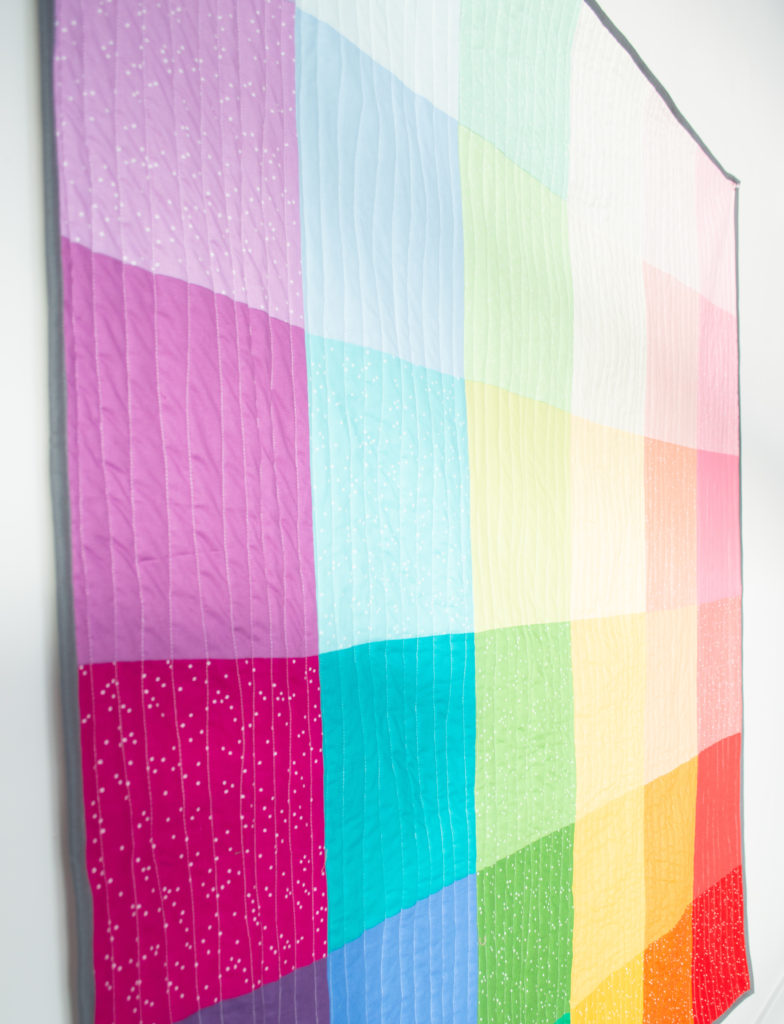
How cute is that itty bitty Blossom print?! And I love the contrast of the wavy lines against the very precise squares. I used a basic white thread for quilting, but it could be fun to use a colored thread (I considered quilting the entire thing with a bright orange or pink), or using a different coordinating thread for each row.
Instead of straight or wavy lines, you could try quilting on the diagonal. Really, any quilting design would look great! I love how the tiny Blossom print adds an additional pop of fun to this quilt!
For the binding, I used Riley Blake Confetti Cotton in “Iron” grey. I like how it frames the quilt, but I think any solid color would make a great binding.
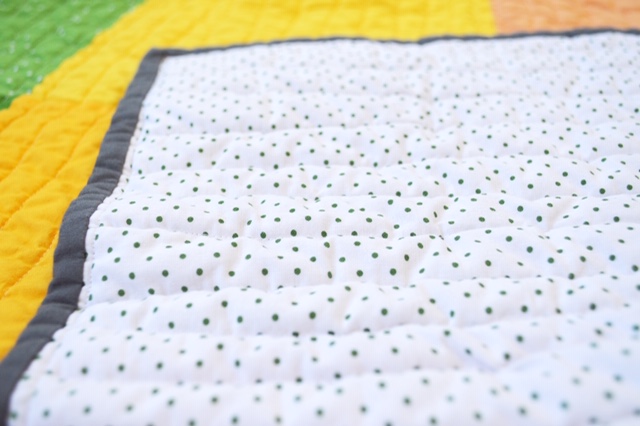
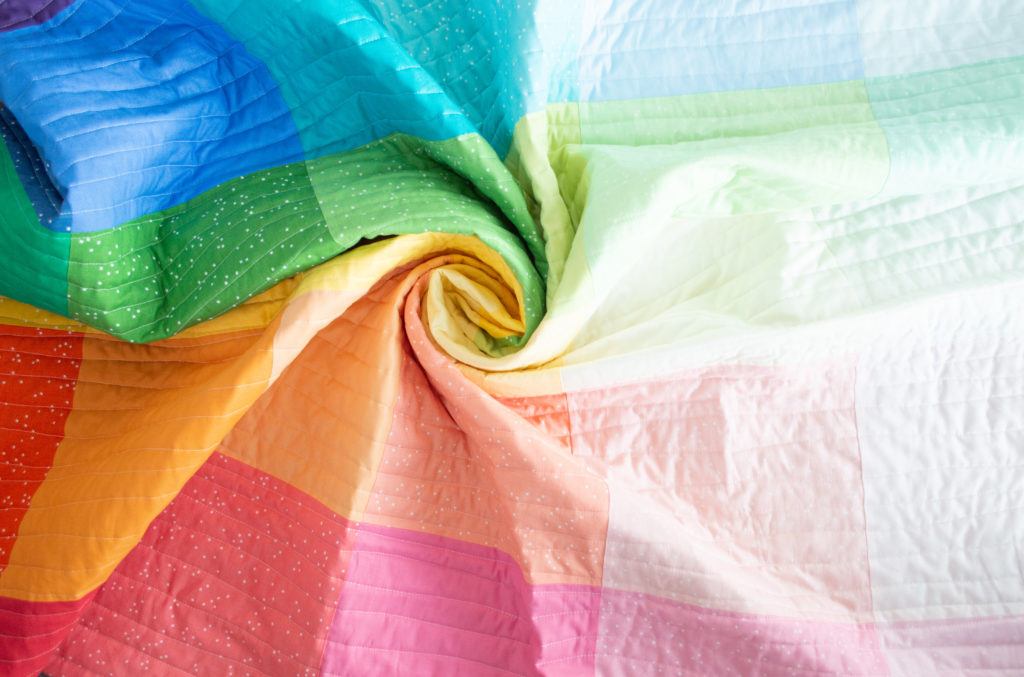
For the quilt back, I used Riley Blake Swiss Dot in Green. I love using the Swiss Dot as a quilt back. It is a sweet, timeless print, and doesn’t compete with the quilt top.
And the best part, in my opinion, of making a quilt is running it through the washer and dryer and watching it come out all soft and crinkled! Don’t all of those colors look delicious?
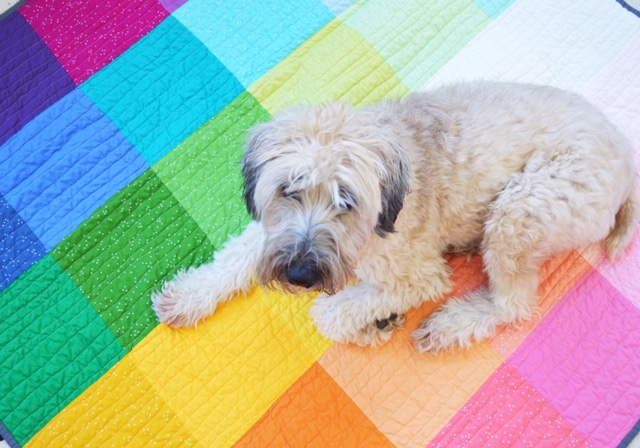
Sunny wasted no time giving it her stamp of approval!
This quilt would be beautiful done in two tones, such as pinks and greens, or blue and yellow? So many options to think about!
A big thank you to ENJOY IT for this fabulous quilt idea! Blossom is available now at your favorite local and online quilt shops.
Pick up your Blossom today and share your makes with us on Instagram @rileyblakedesigns #rileyblakedesigns #iloverileyblake #fabricismyfun.
Happy Quilting!