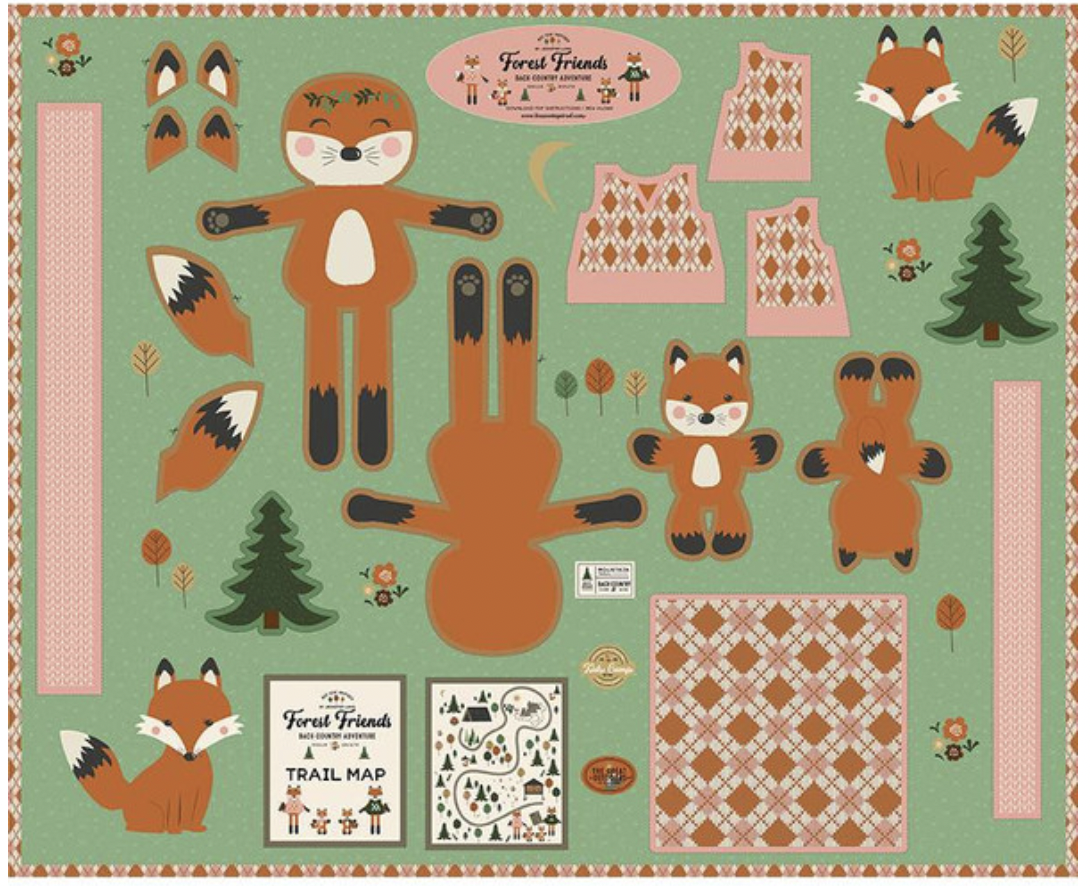
Hi friends! I am Alyssa from Hark Quilts. I’m so excited to share this new project with you! This collection, Forest Friends, is by Jennifer Long of Bee Sew Inspired. Each panel (36″ x 43 1/2″) creates beautiful, high-quality, modern rag dolls.
Each panel makes:
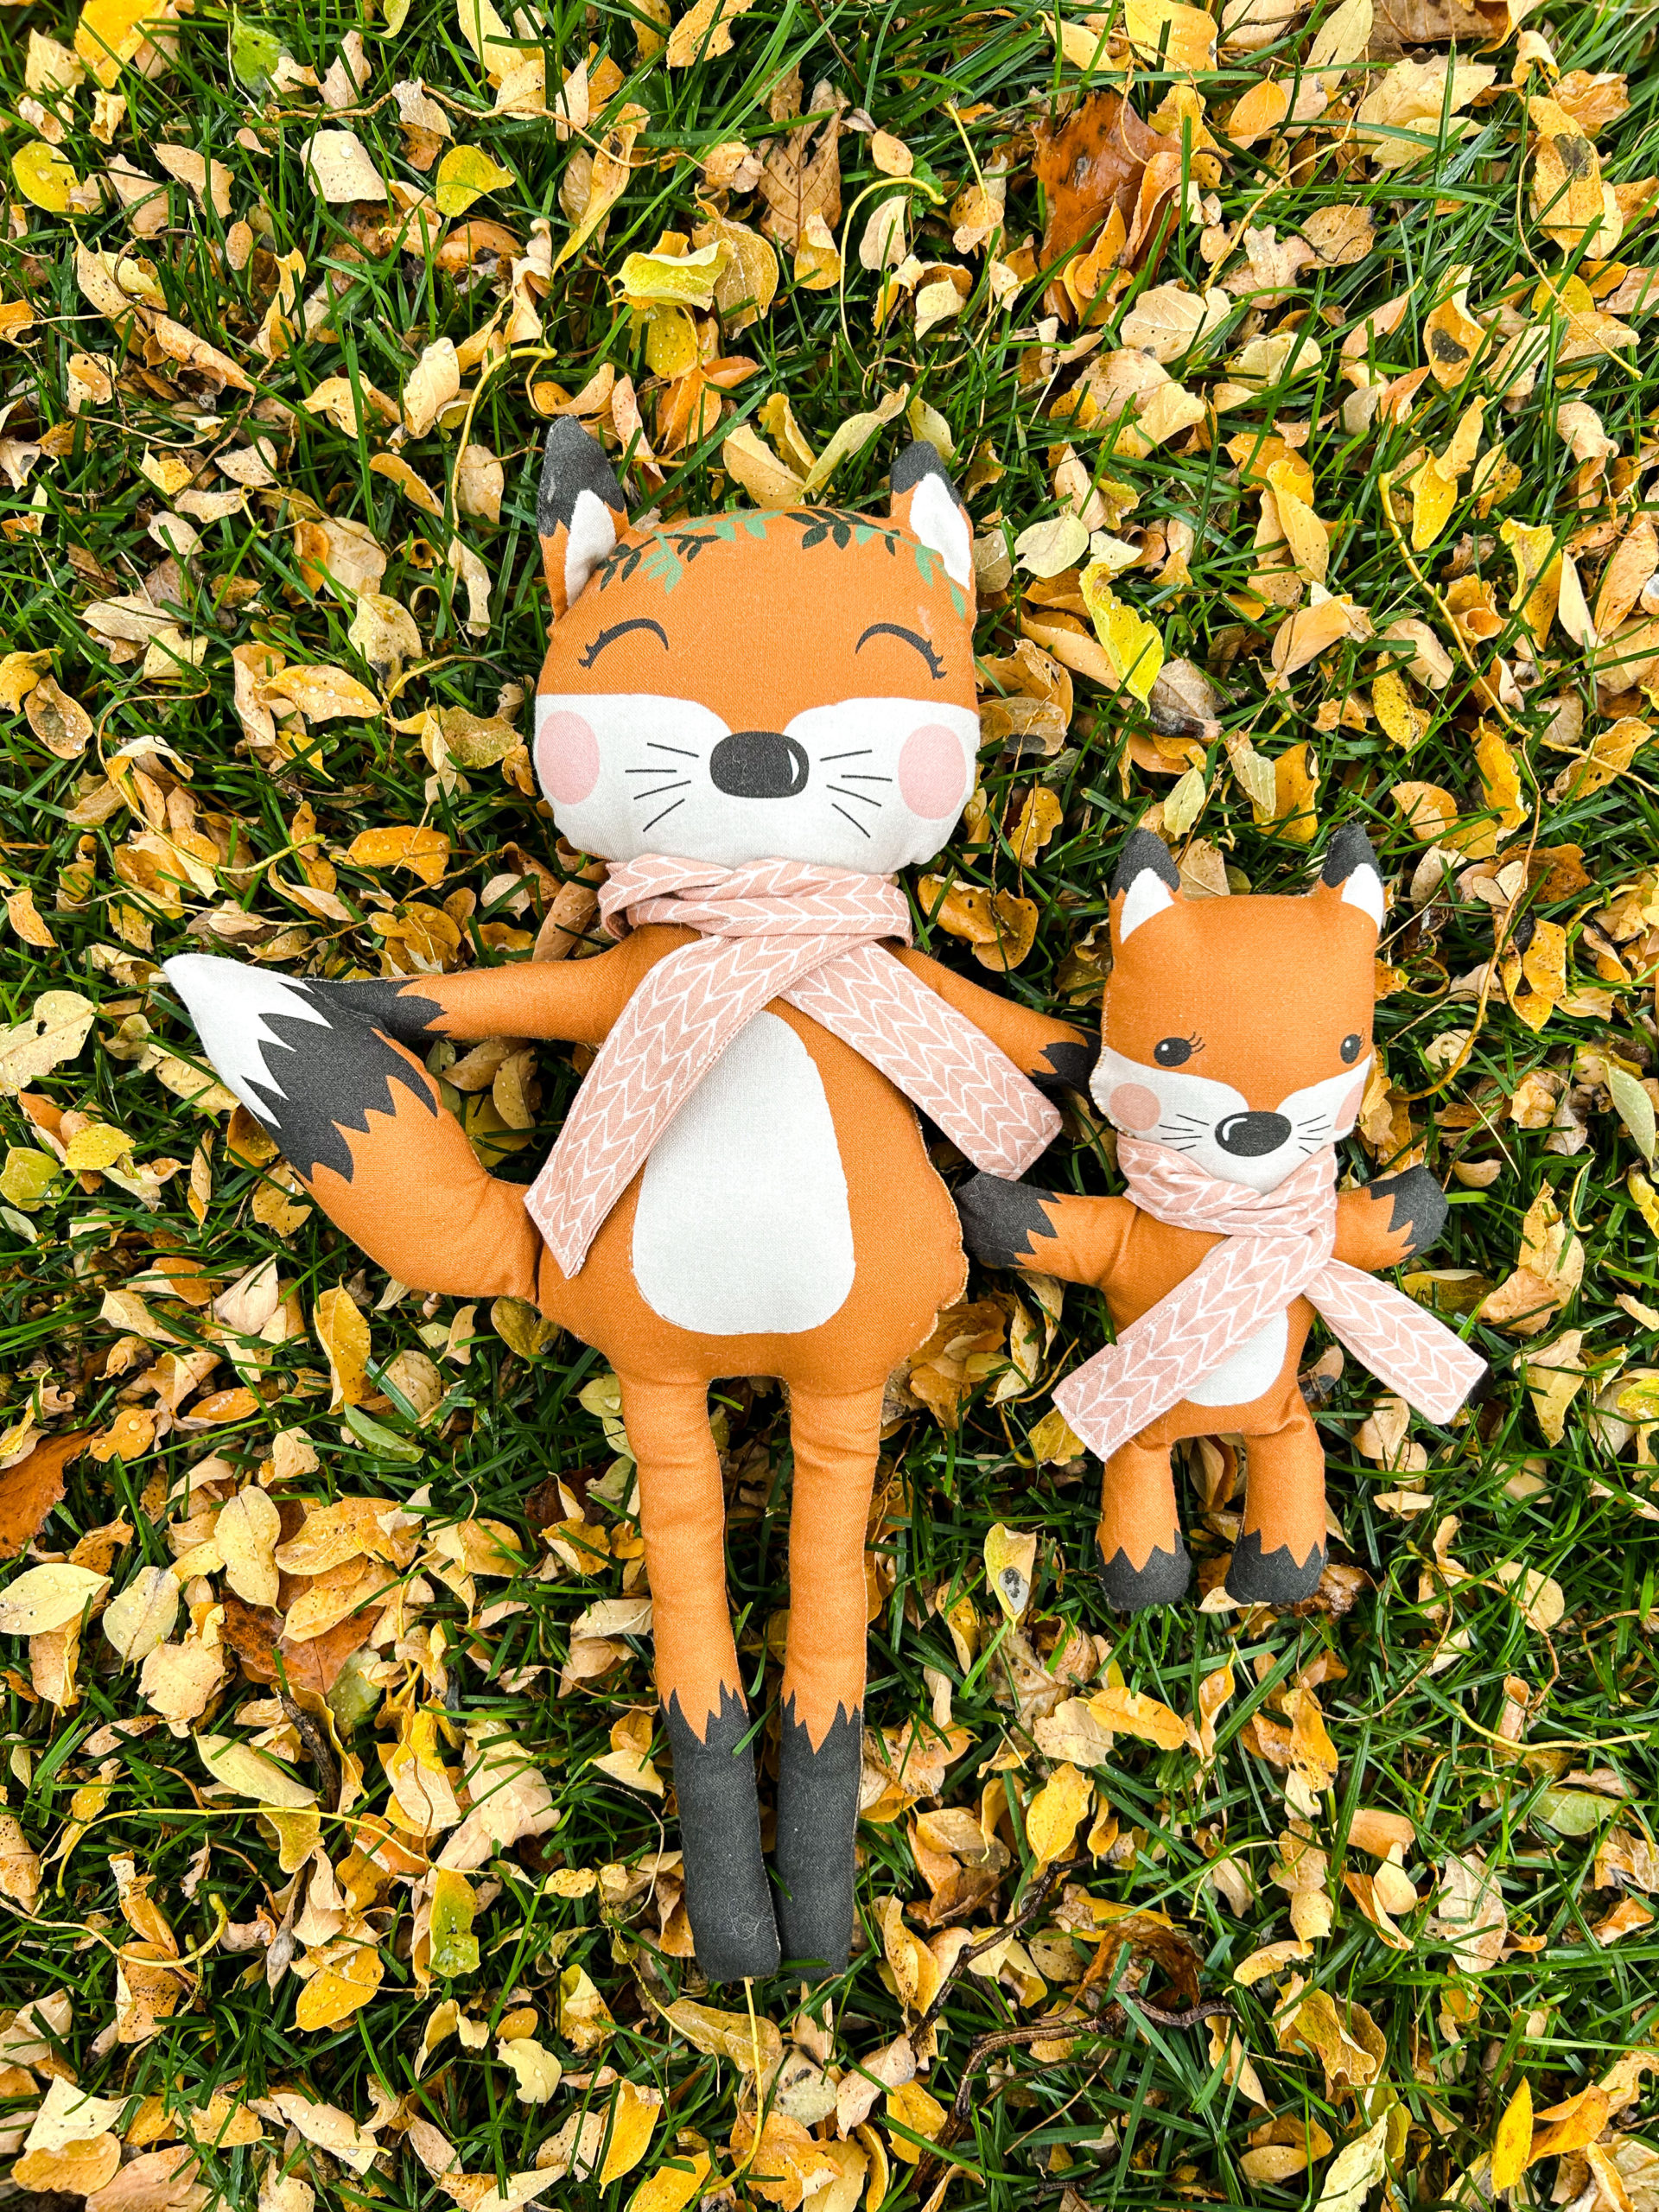
- 15″ fox doll and removable vest & scarf
- 8″ fox doll and scarf
- mini doll quilt
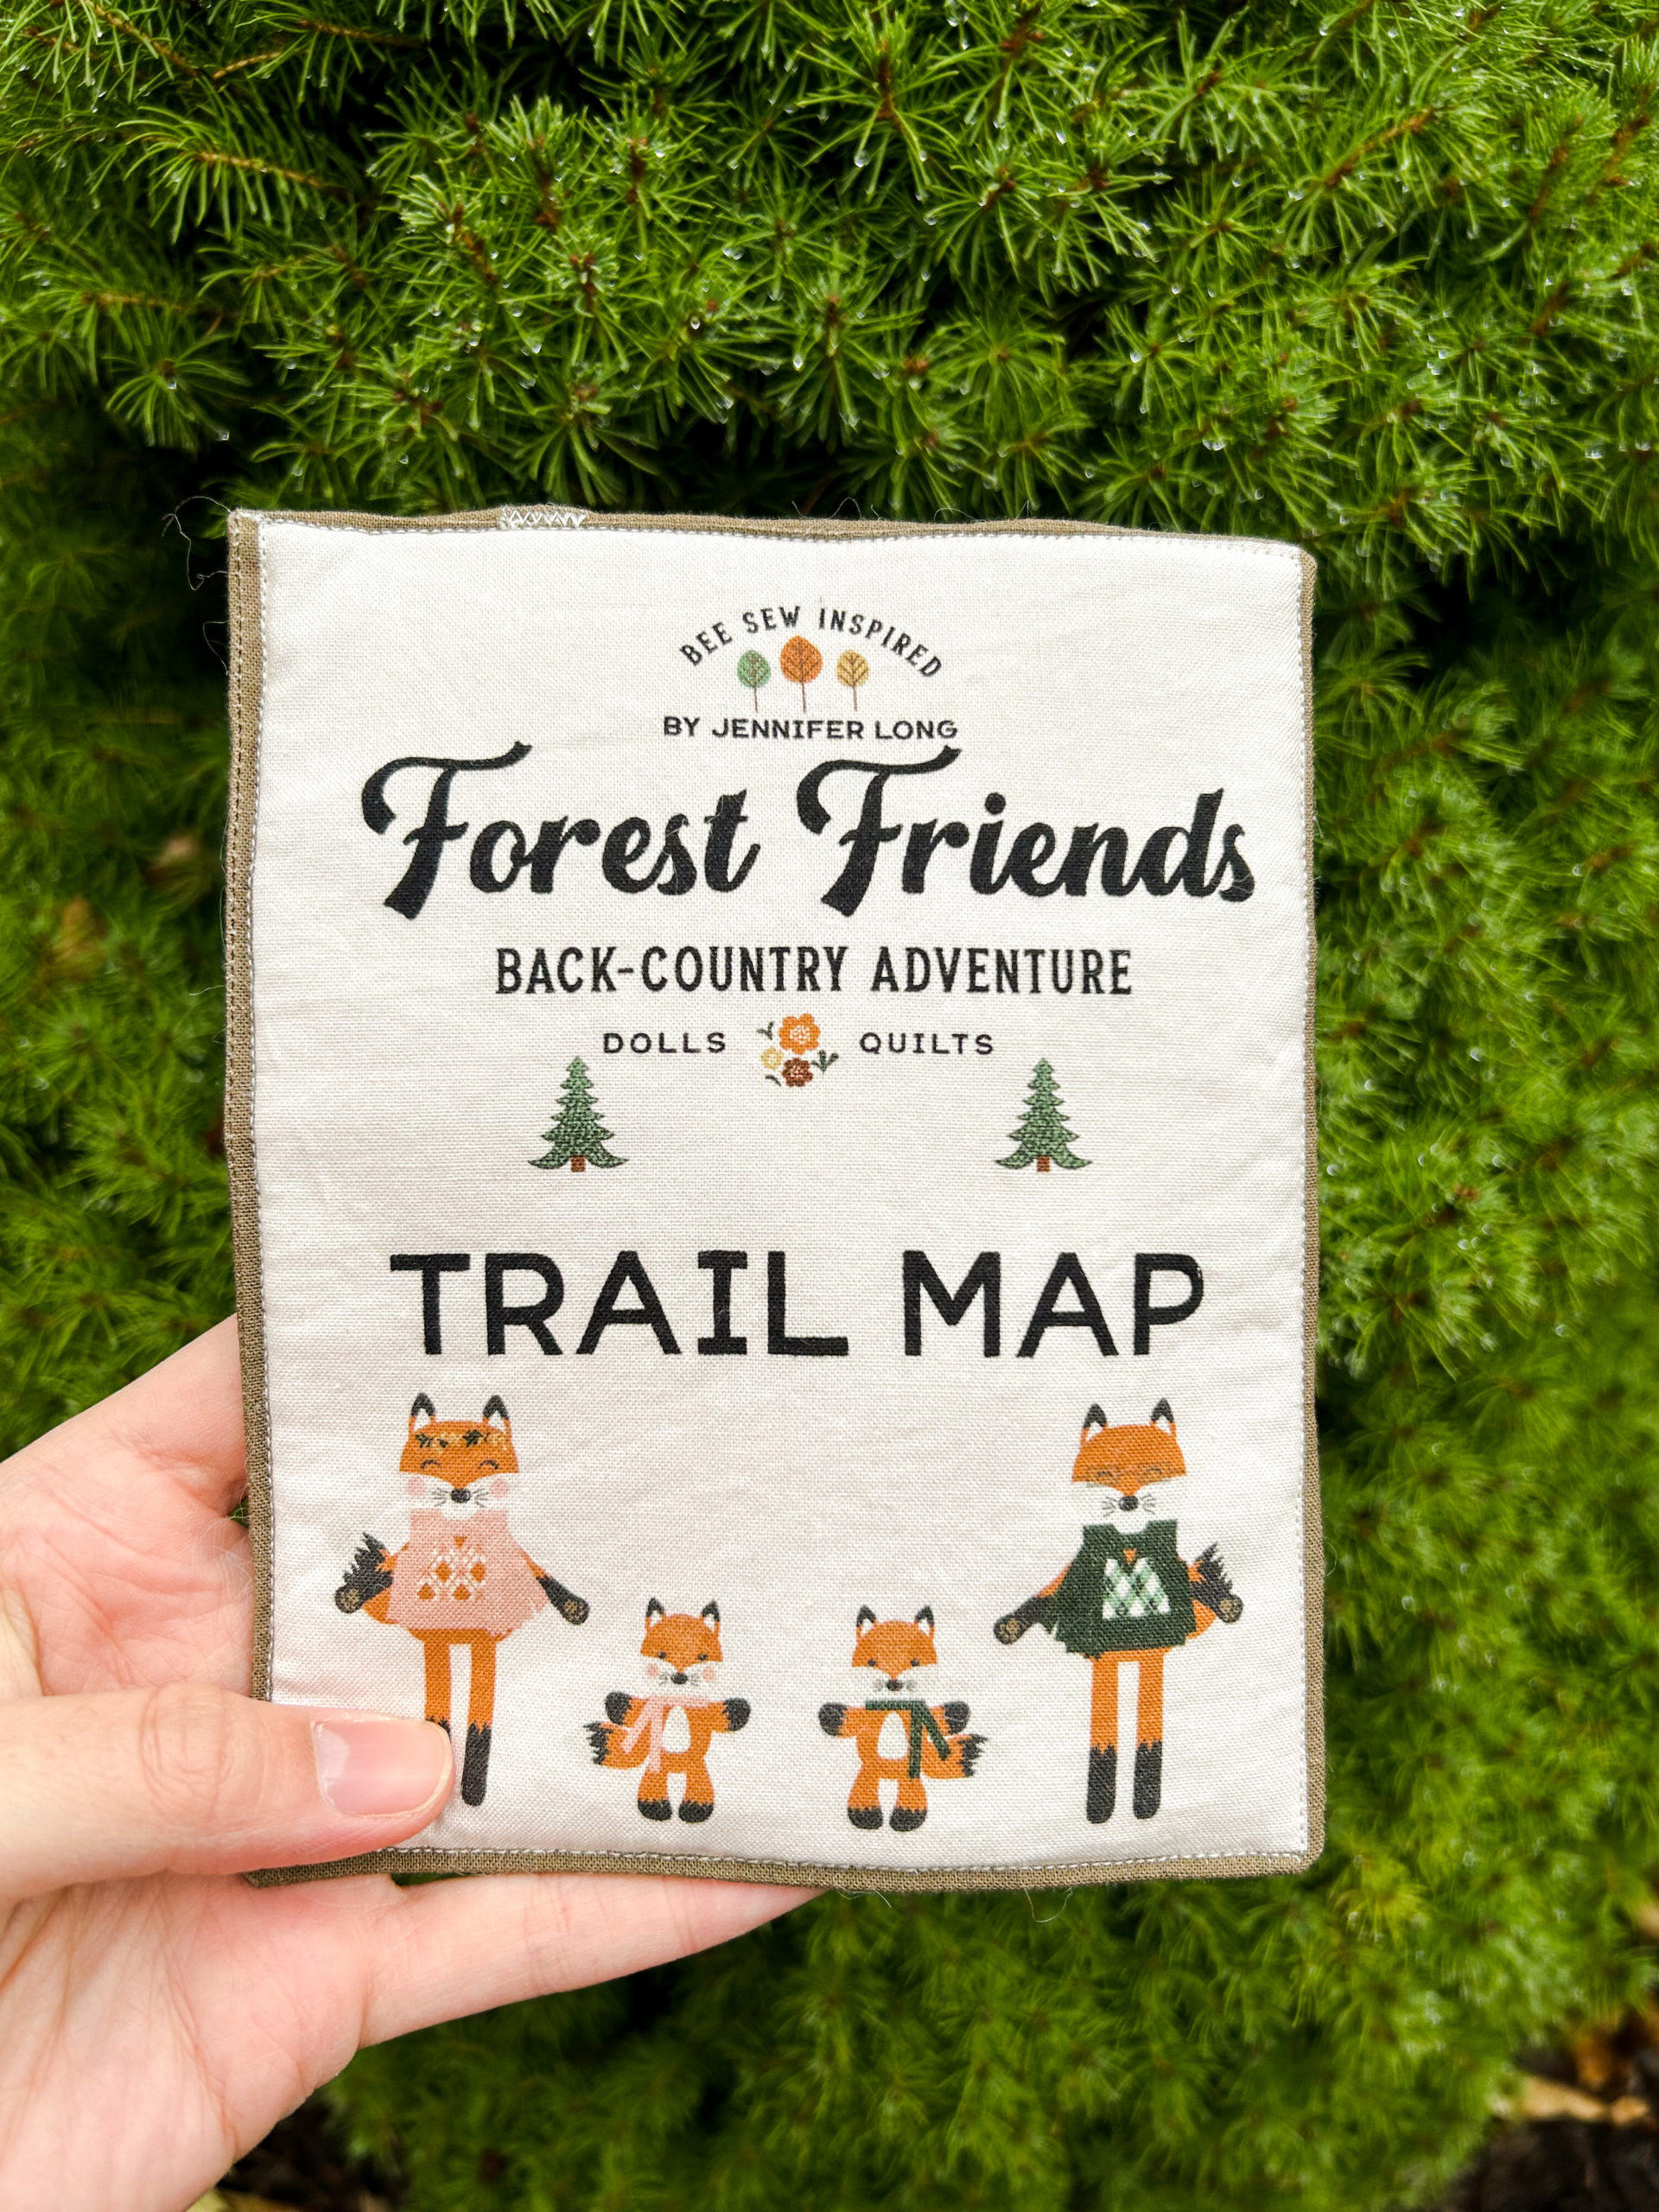
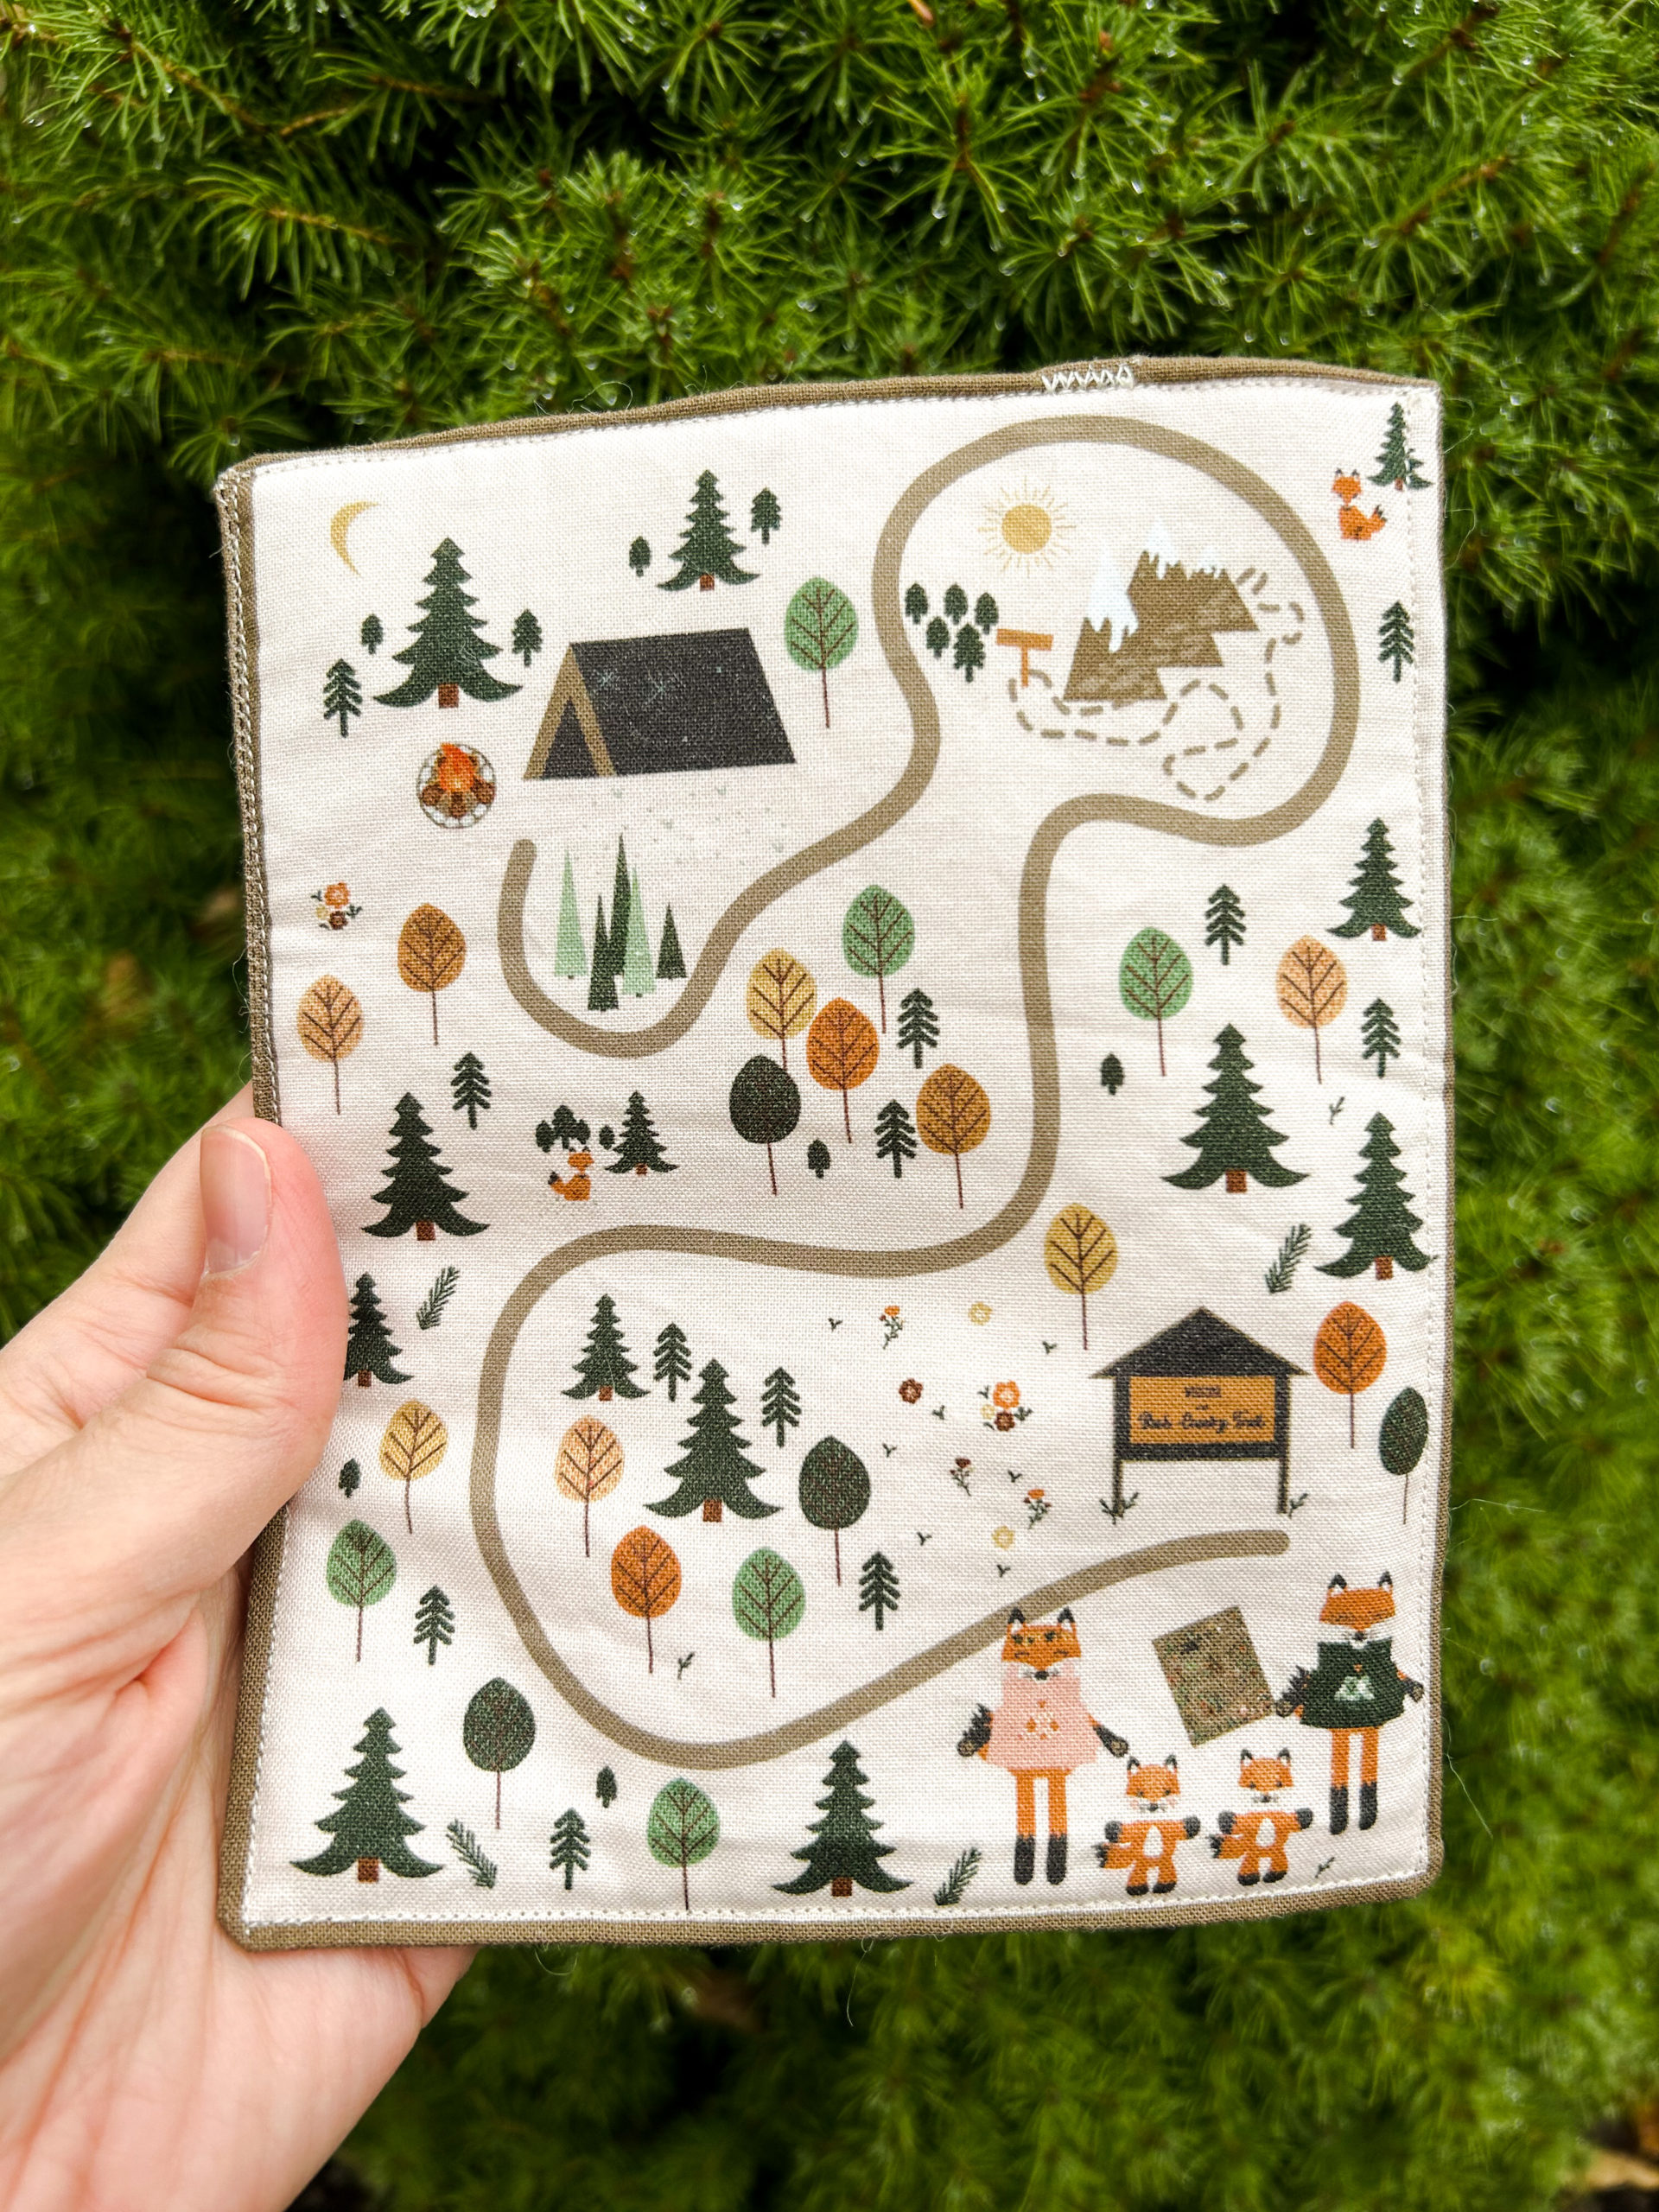
- trail map
- stuffed tree
- camp badges
Other materials needed:
- lining for vest
- backing, batting, and binding for mini quilt
- stuffing (I used poly-fil)
Jennifer has downloadable PDF Instructions available on her website and is also hosting a sew along in November. The instructions were simple and pretty straight-forward, although I did struggle with the vest. This was my first foray into doll-making (and mini clothes-making for that matter), and it was an overall lovely experience. I’d for sure do it again.
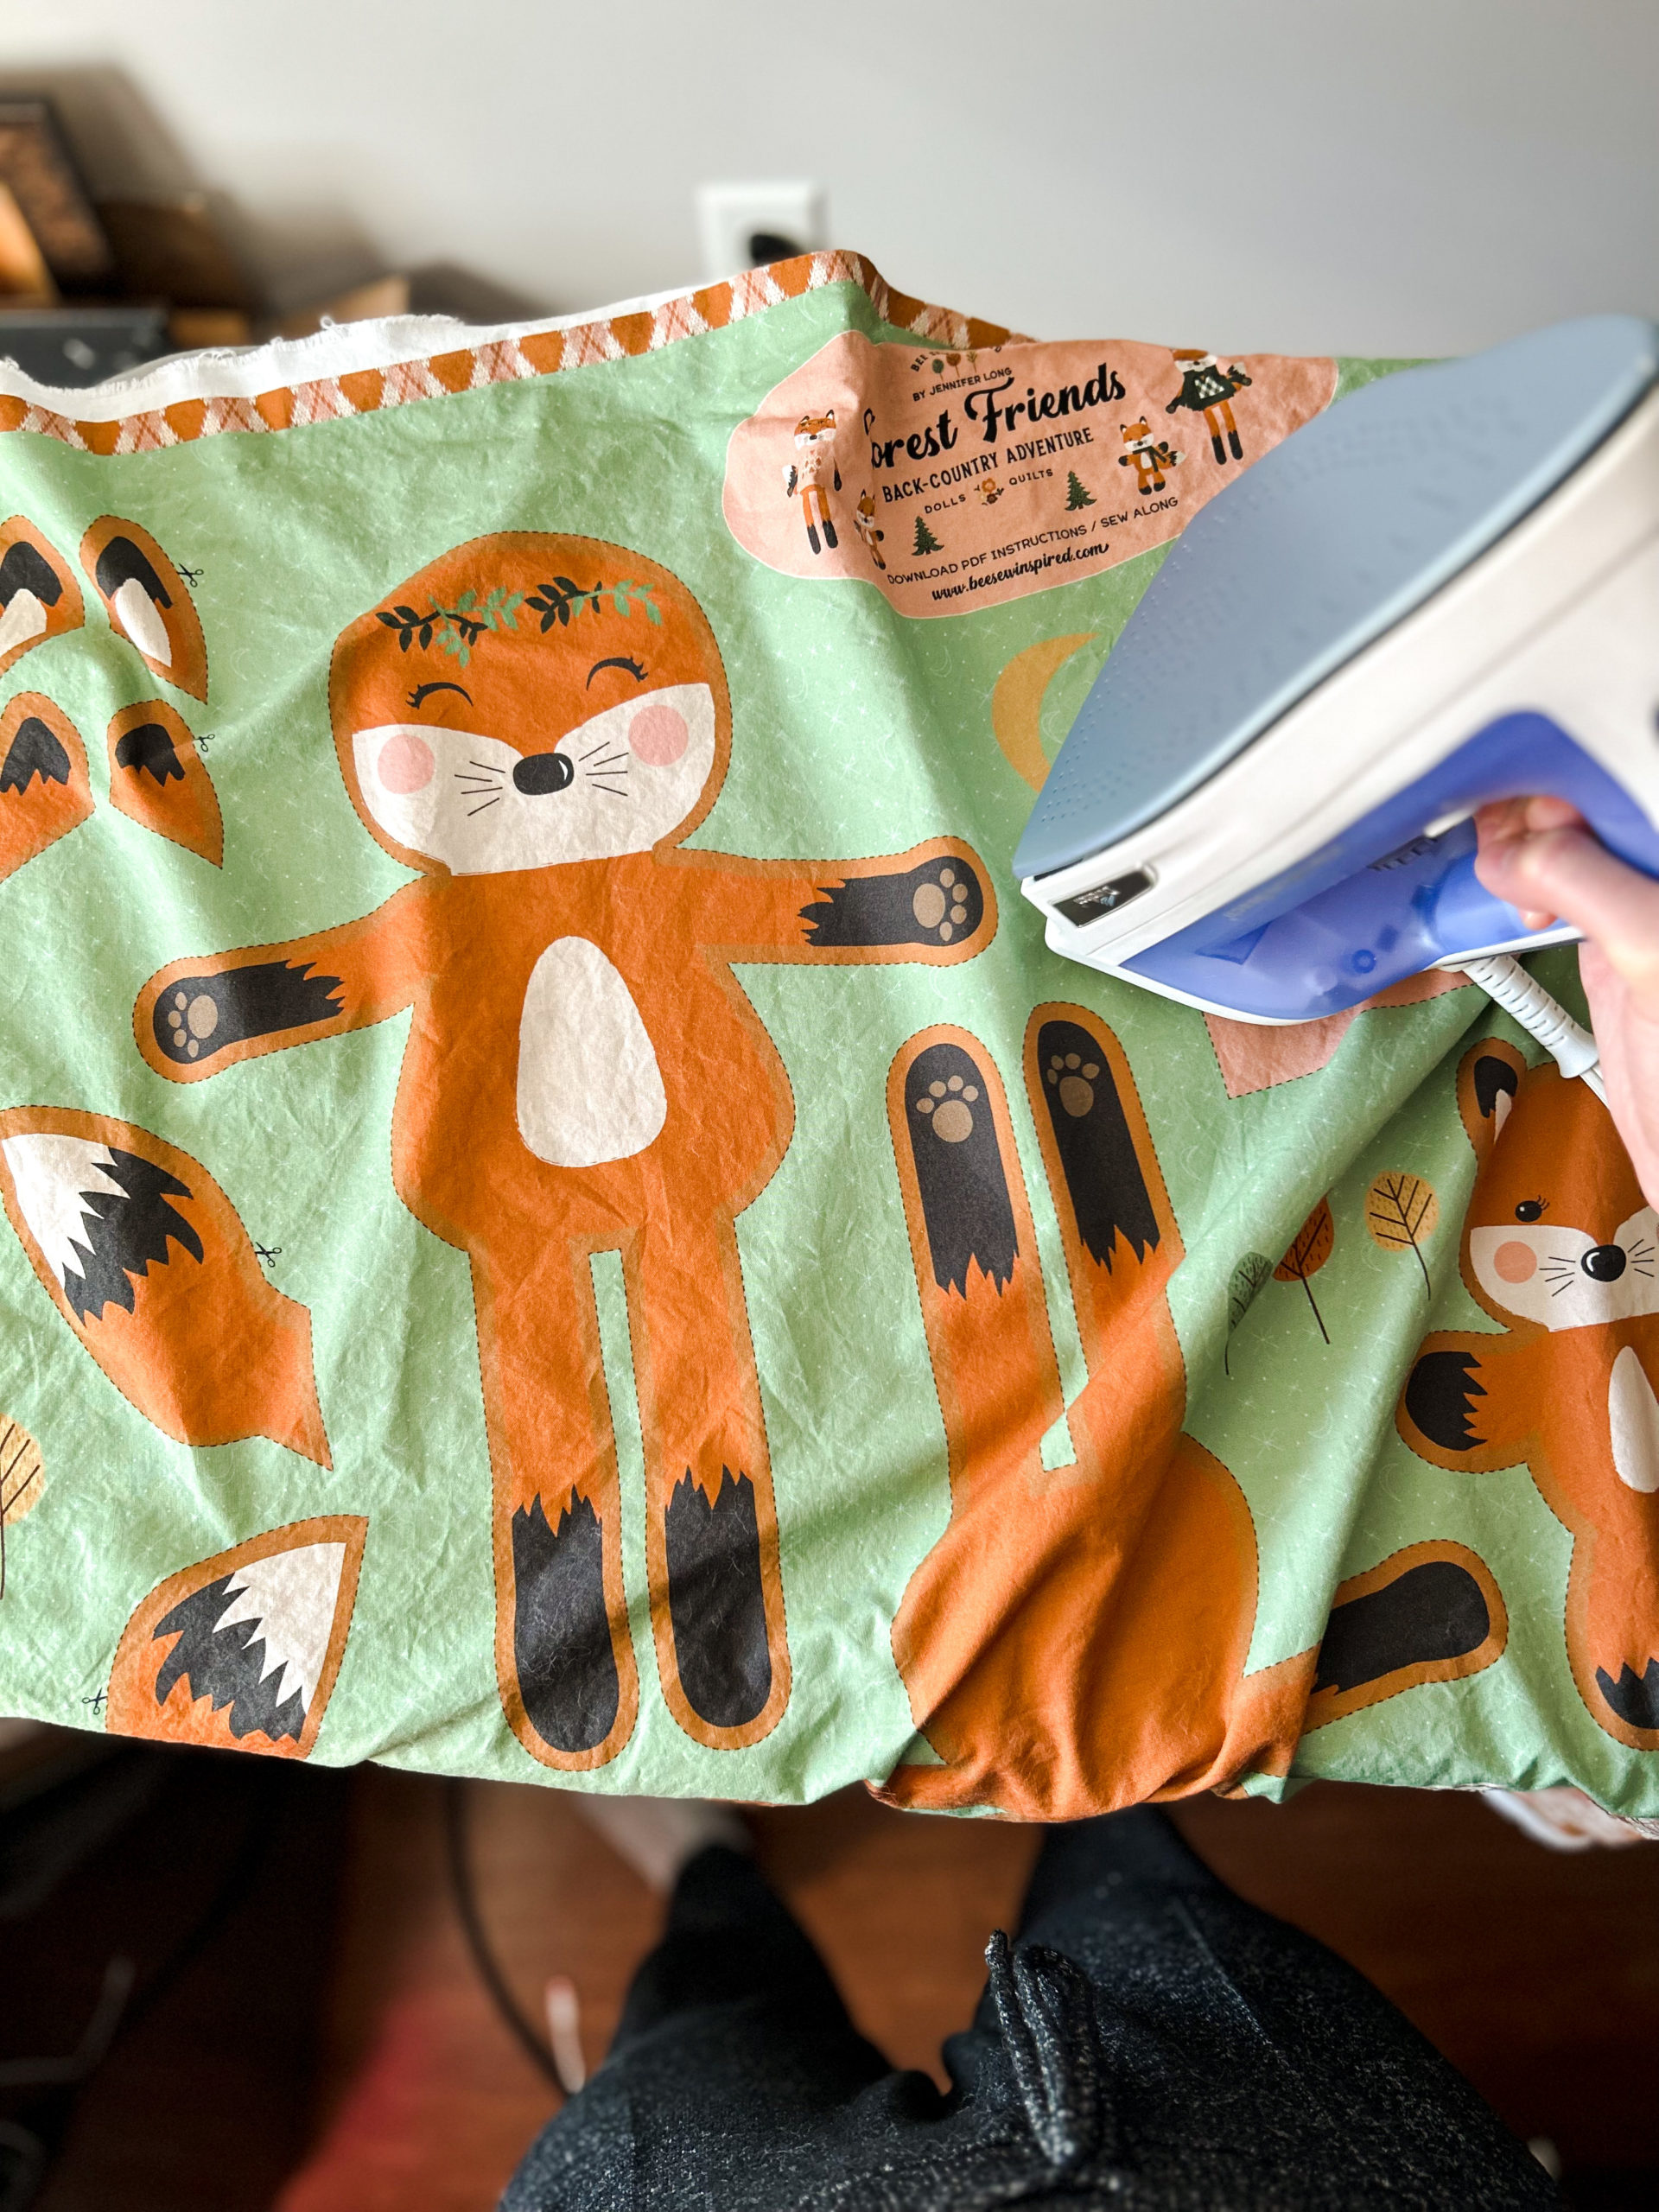
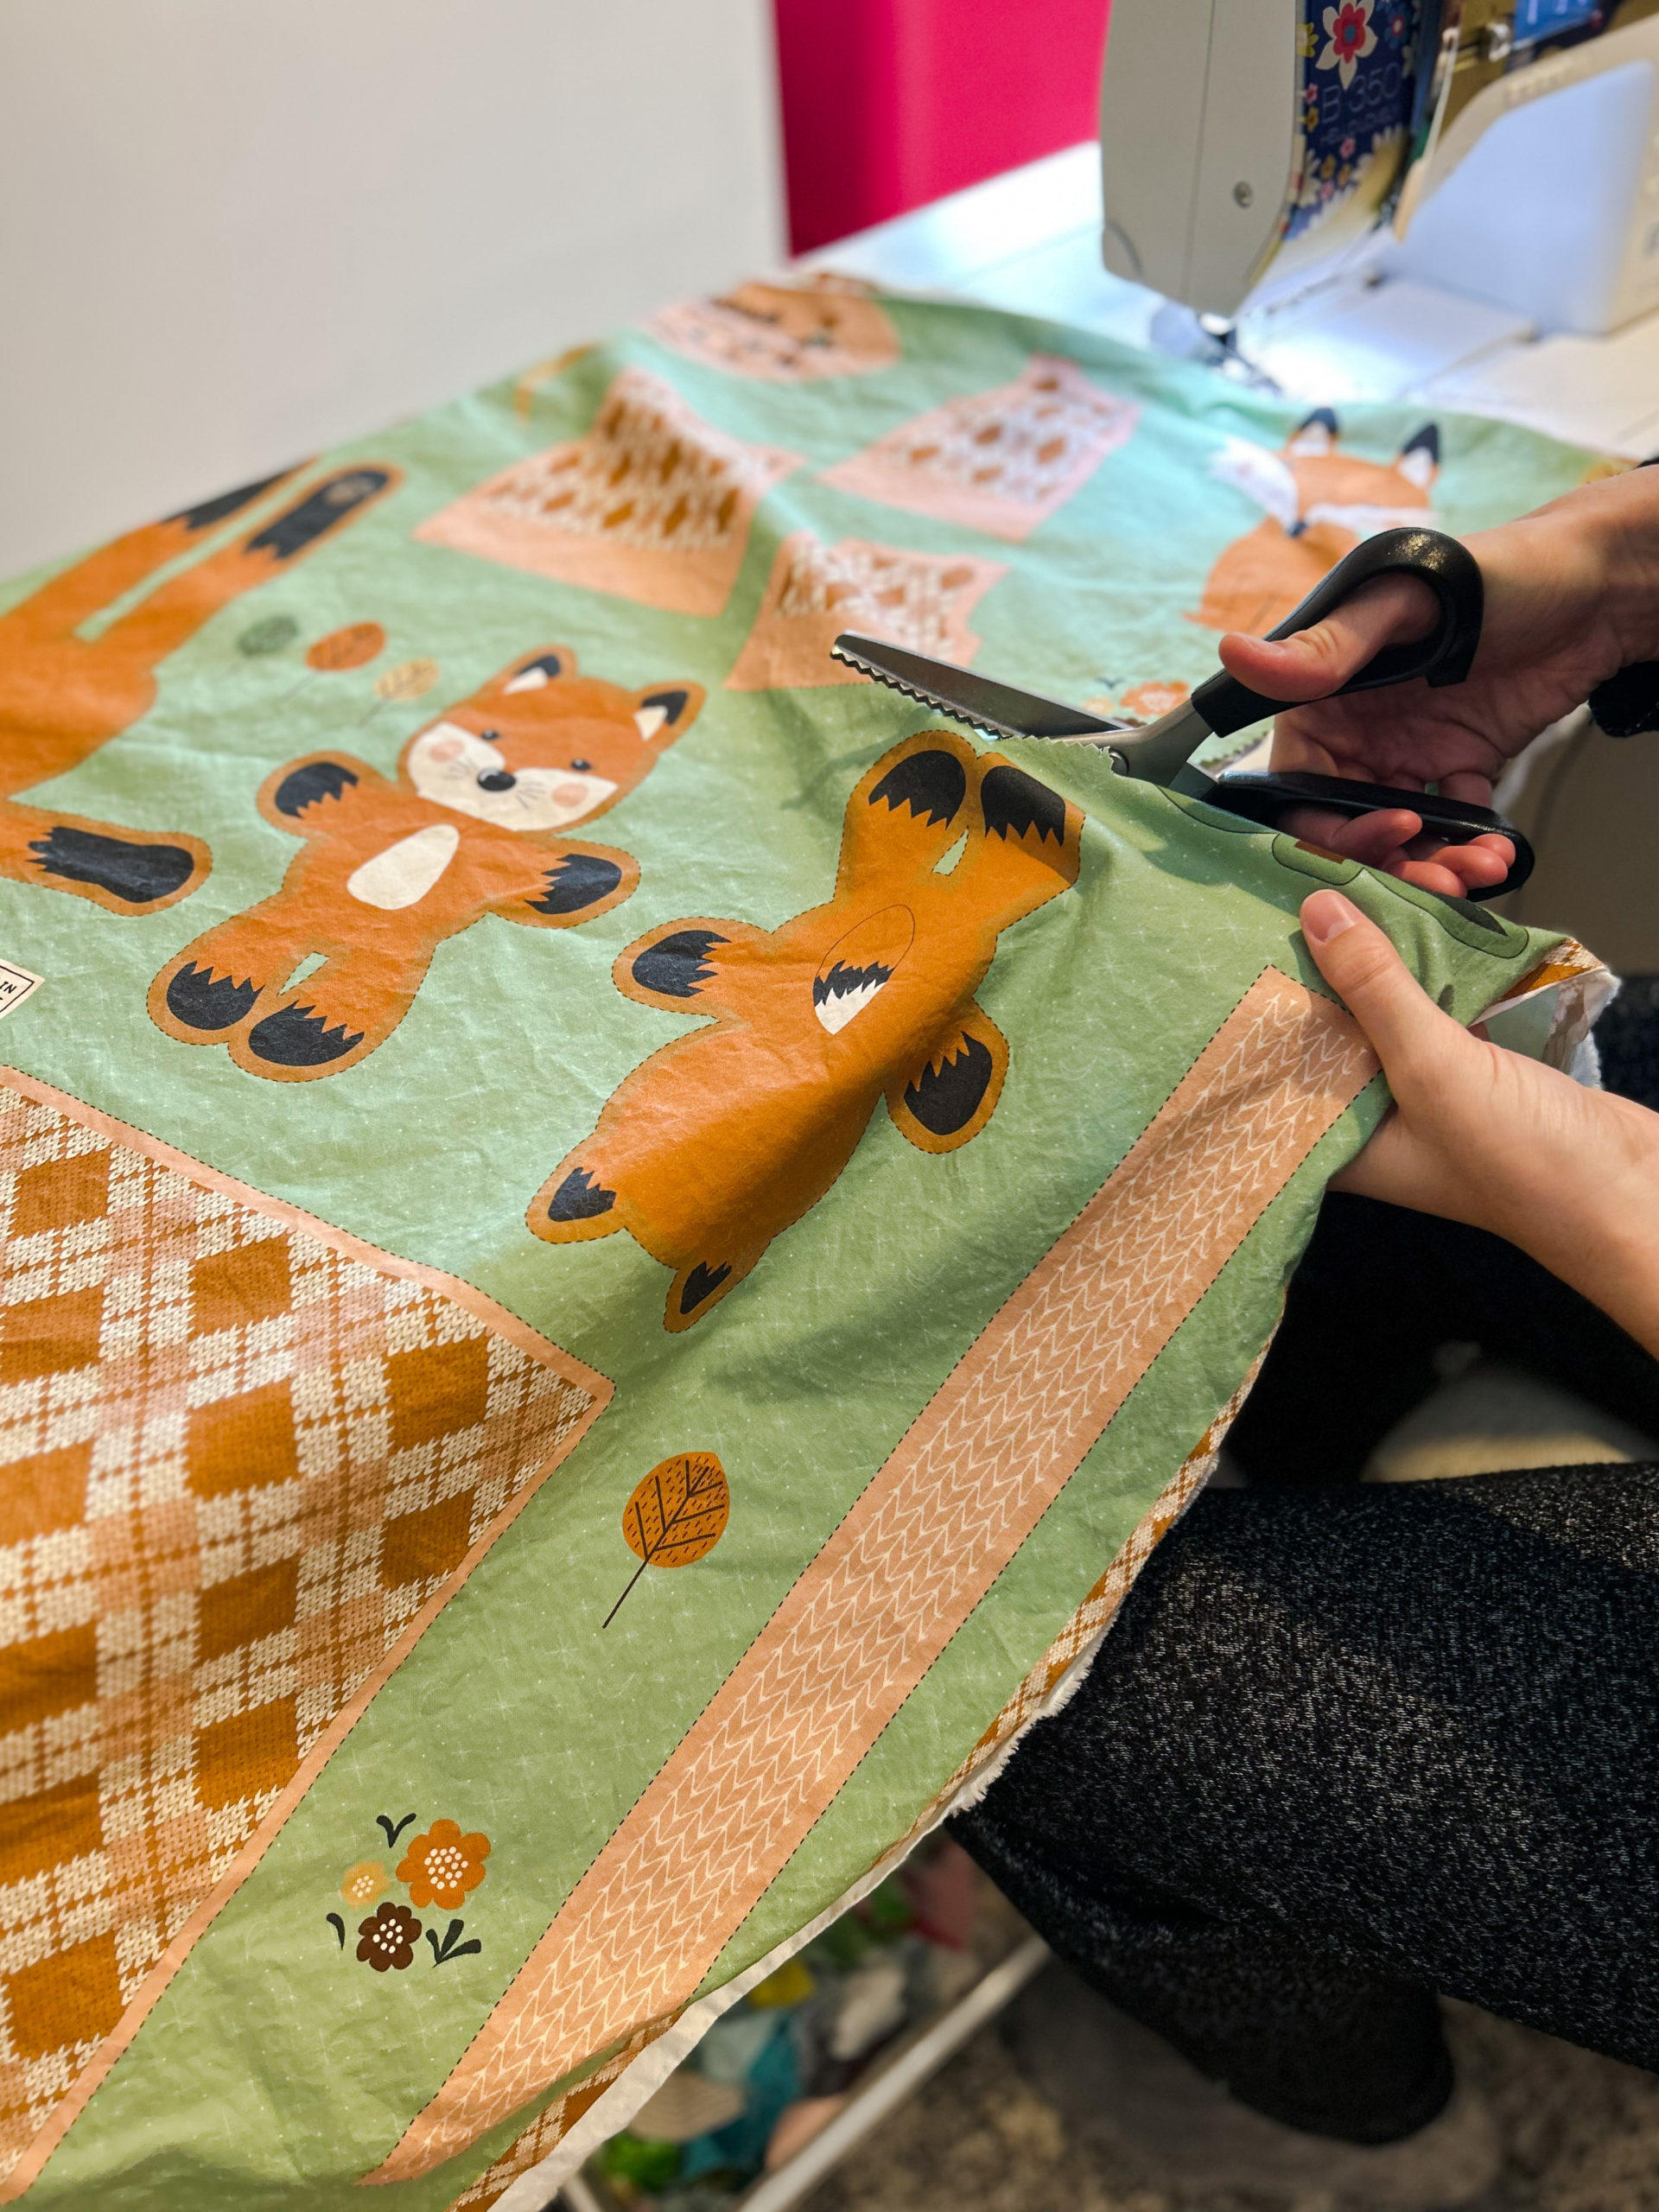
I started out by washing and ironing the panel. I cut out all the pieces and started with the scarves because they seemed the easiest. I quickly realized I had no idea how to turn them right side out and spent an embarrassing amount of time struggling. I eventually succeeded and I love them! The pattern on the scarves is adorable and I think they turned out so cute.
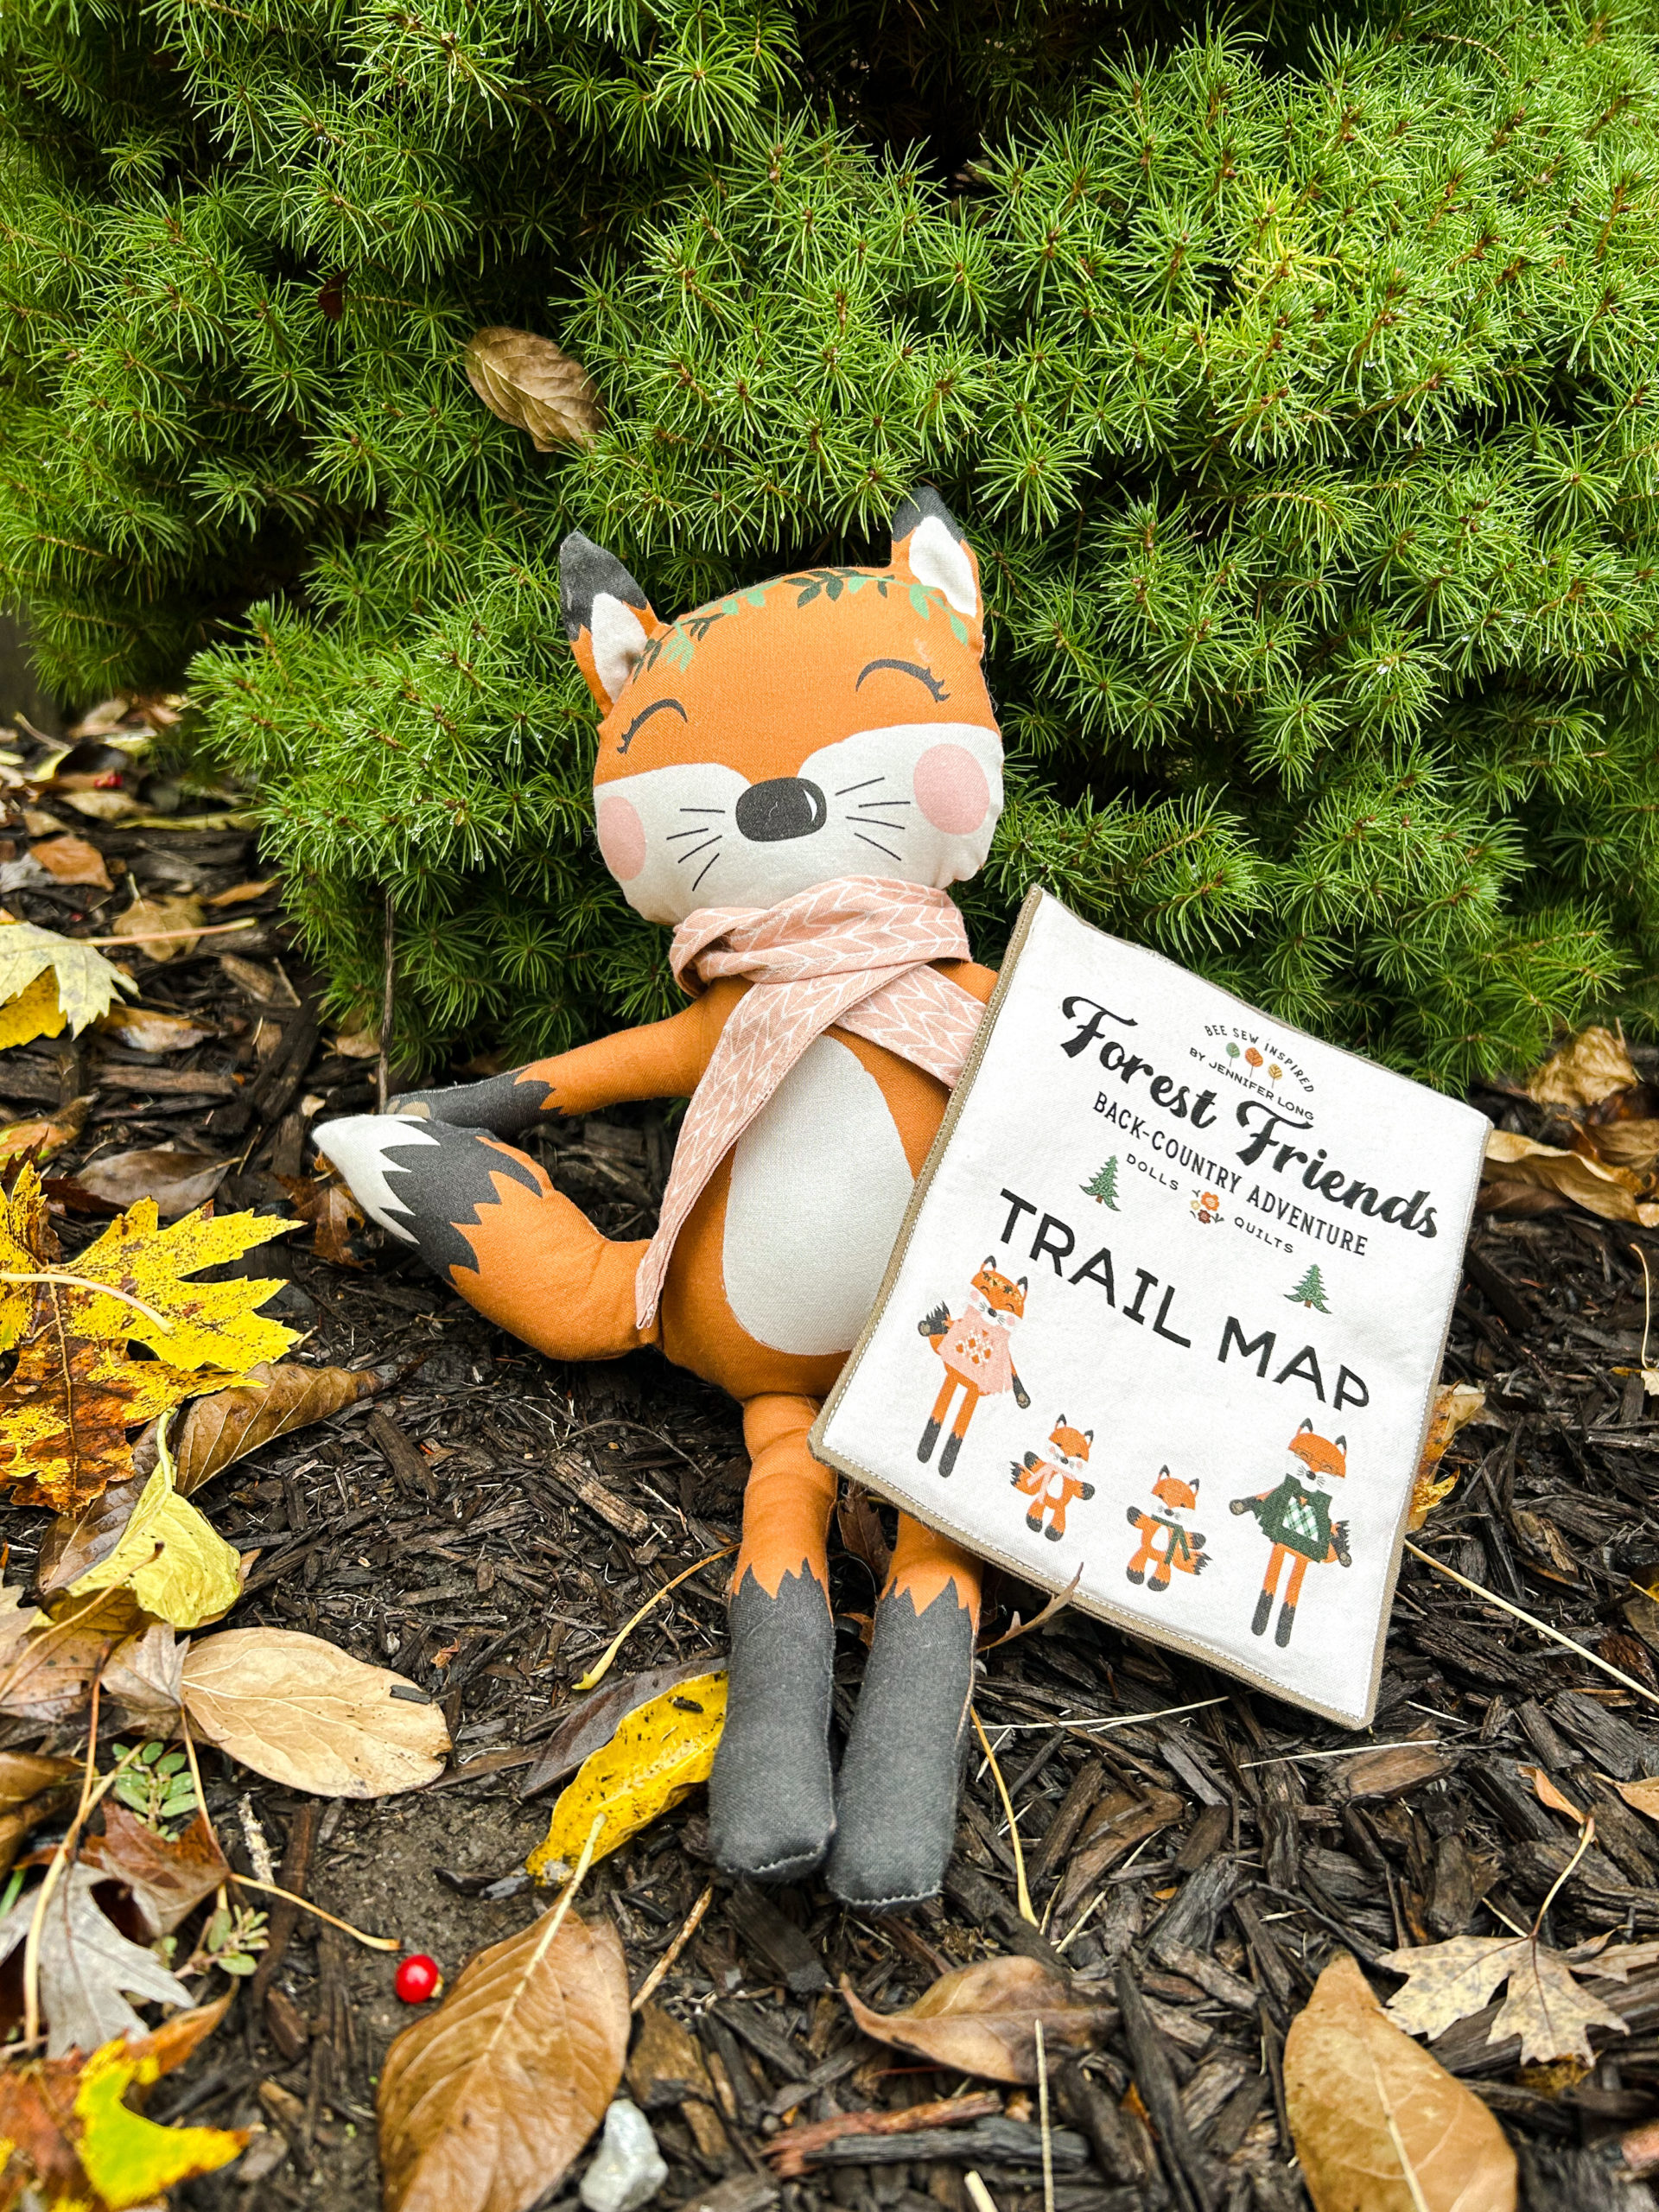
I love this little trail map and decided to stuff it with two layers of felt to provide some stiffness. I liked the look of just the border sewn around the edge so I opted not to quilt it. I foresee many fun back-country adventures with this map.
I initially thought the tree would be the easiest to stuff but mine got stuck in a tiny ball and after ten minutes of struggling I gave up. I might return to it this weekend while watching a movie.
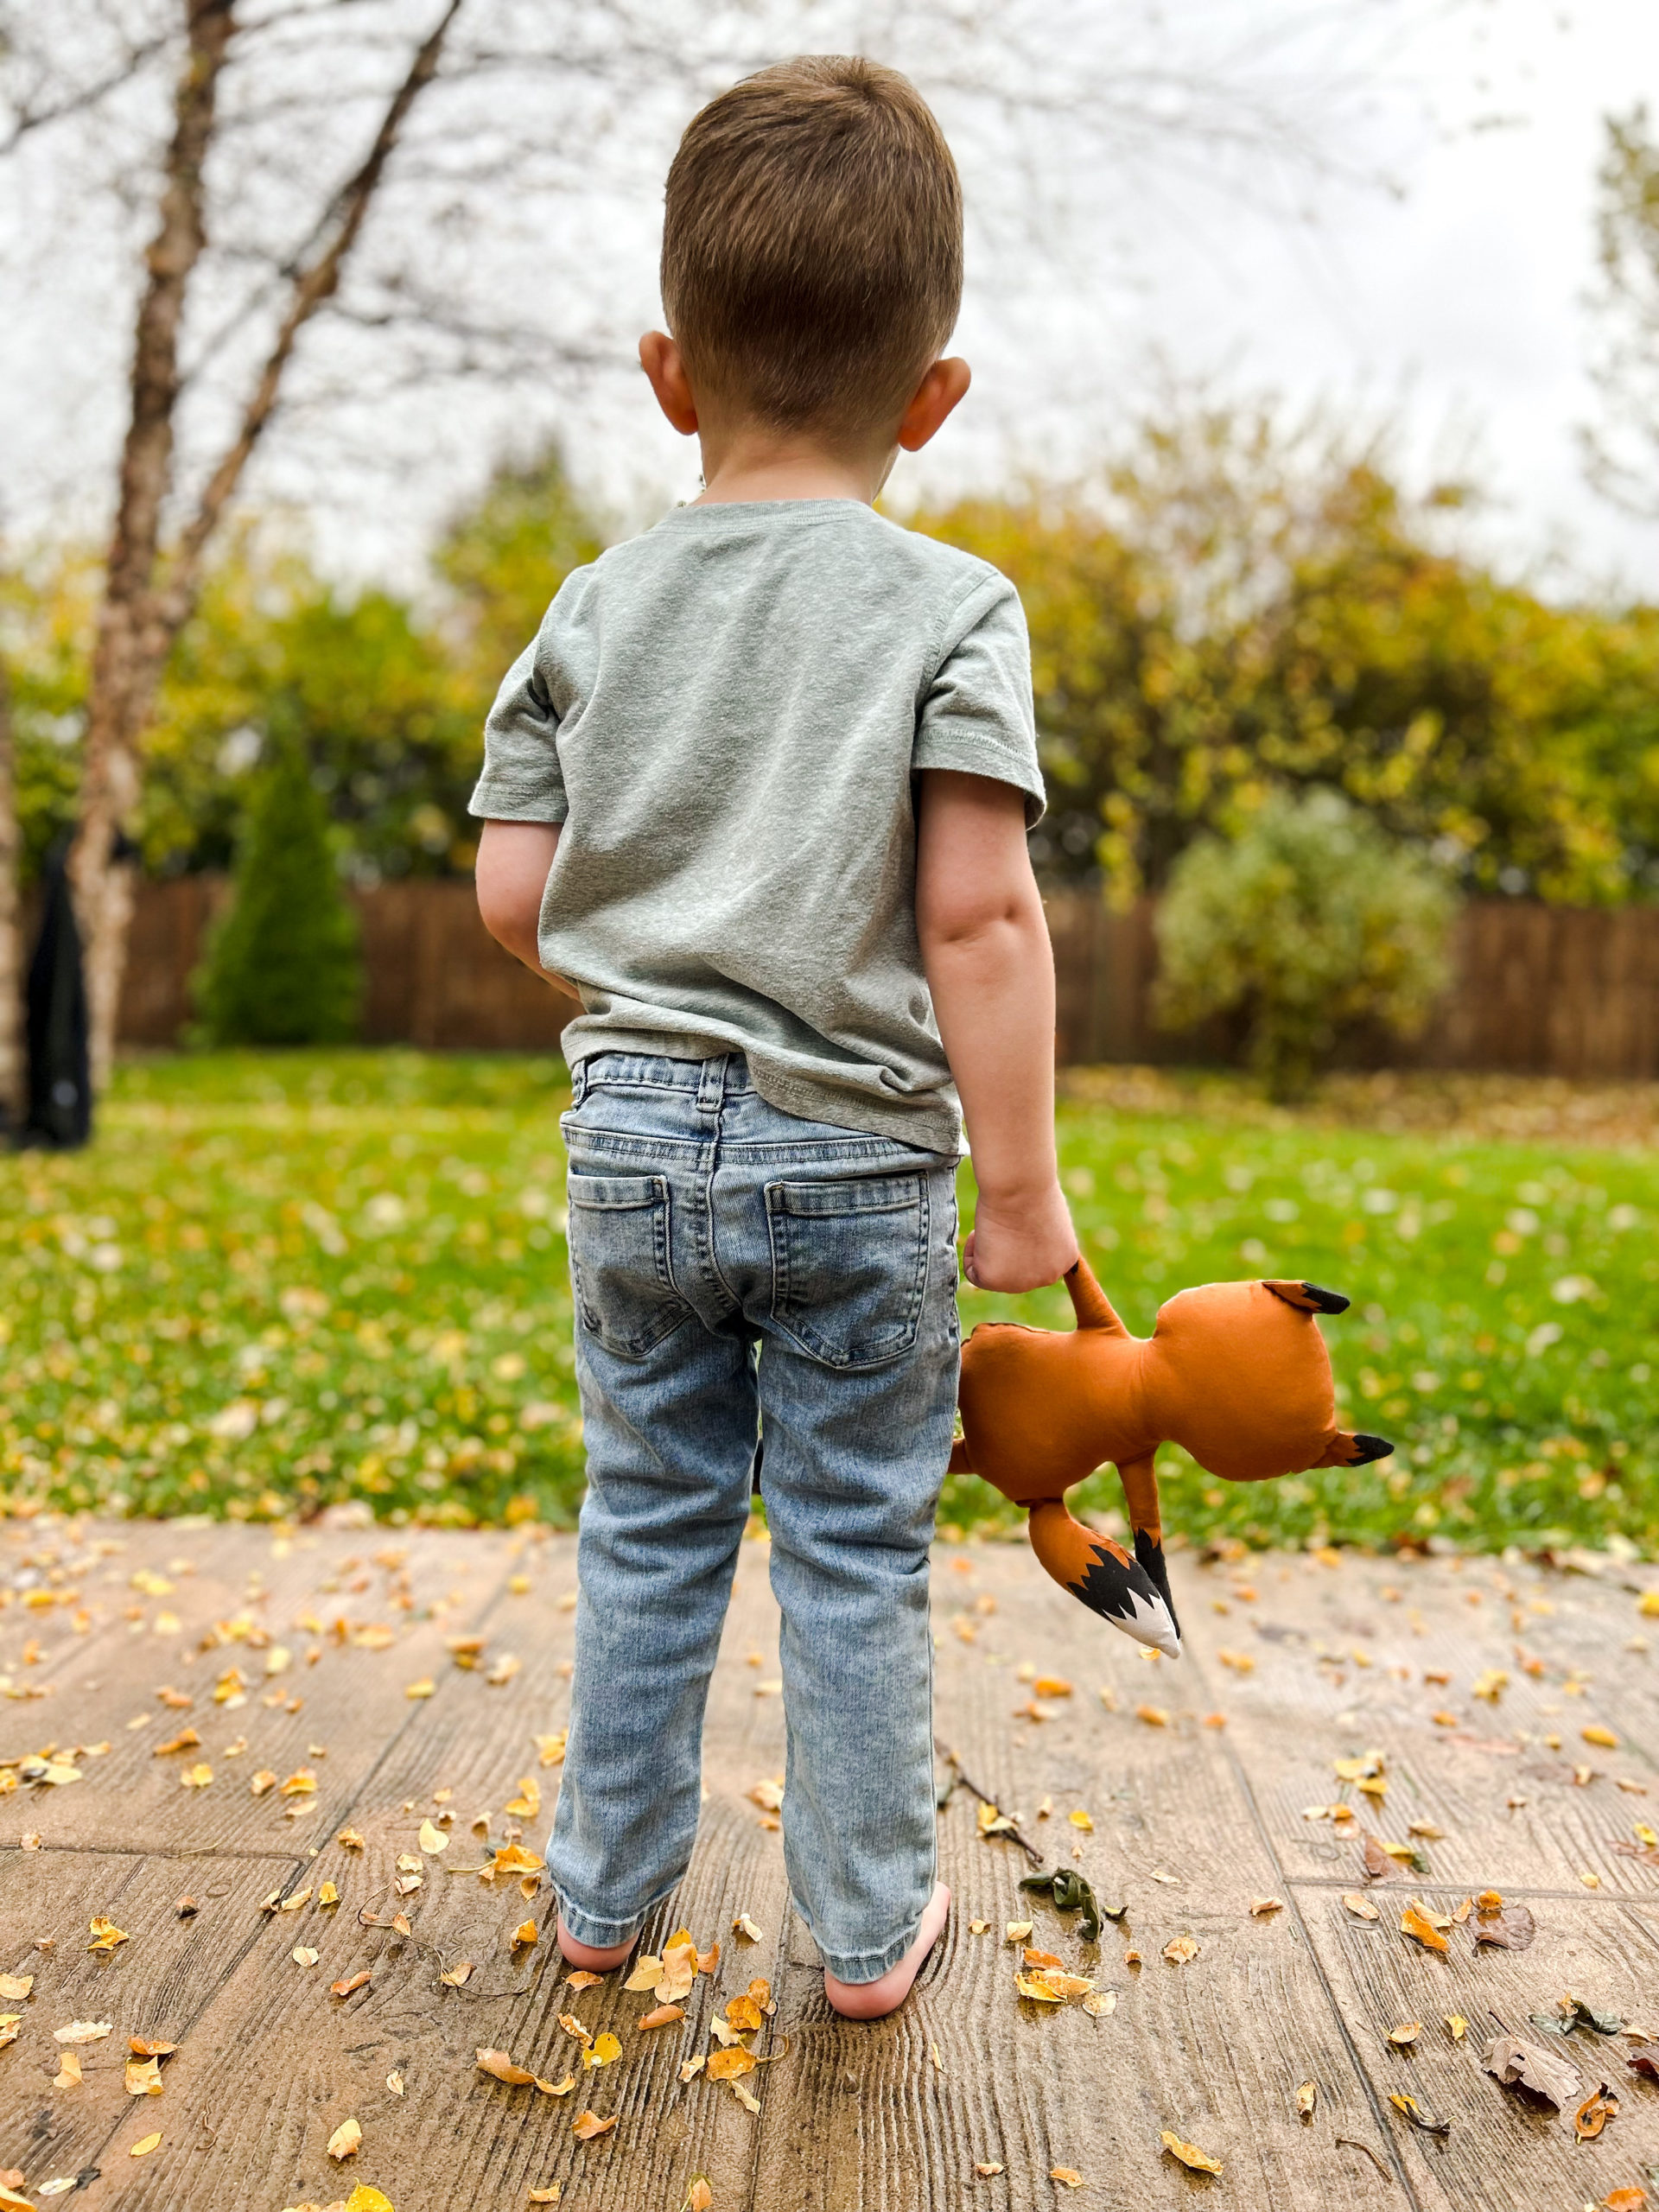
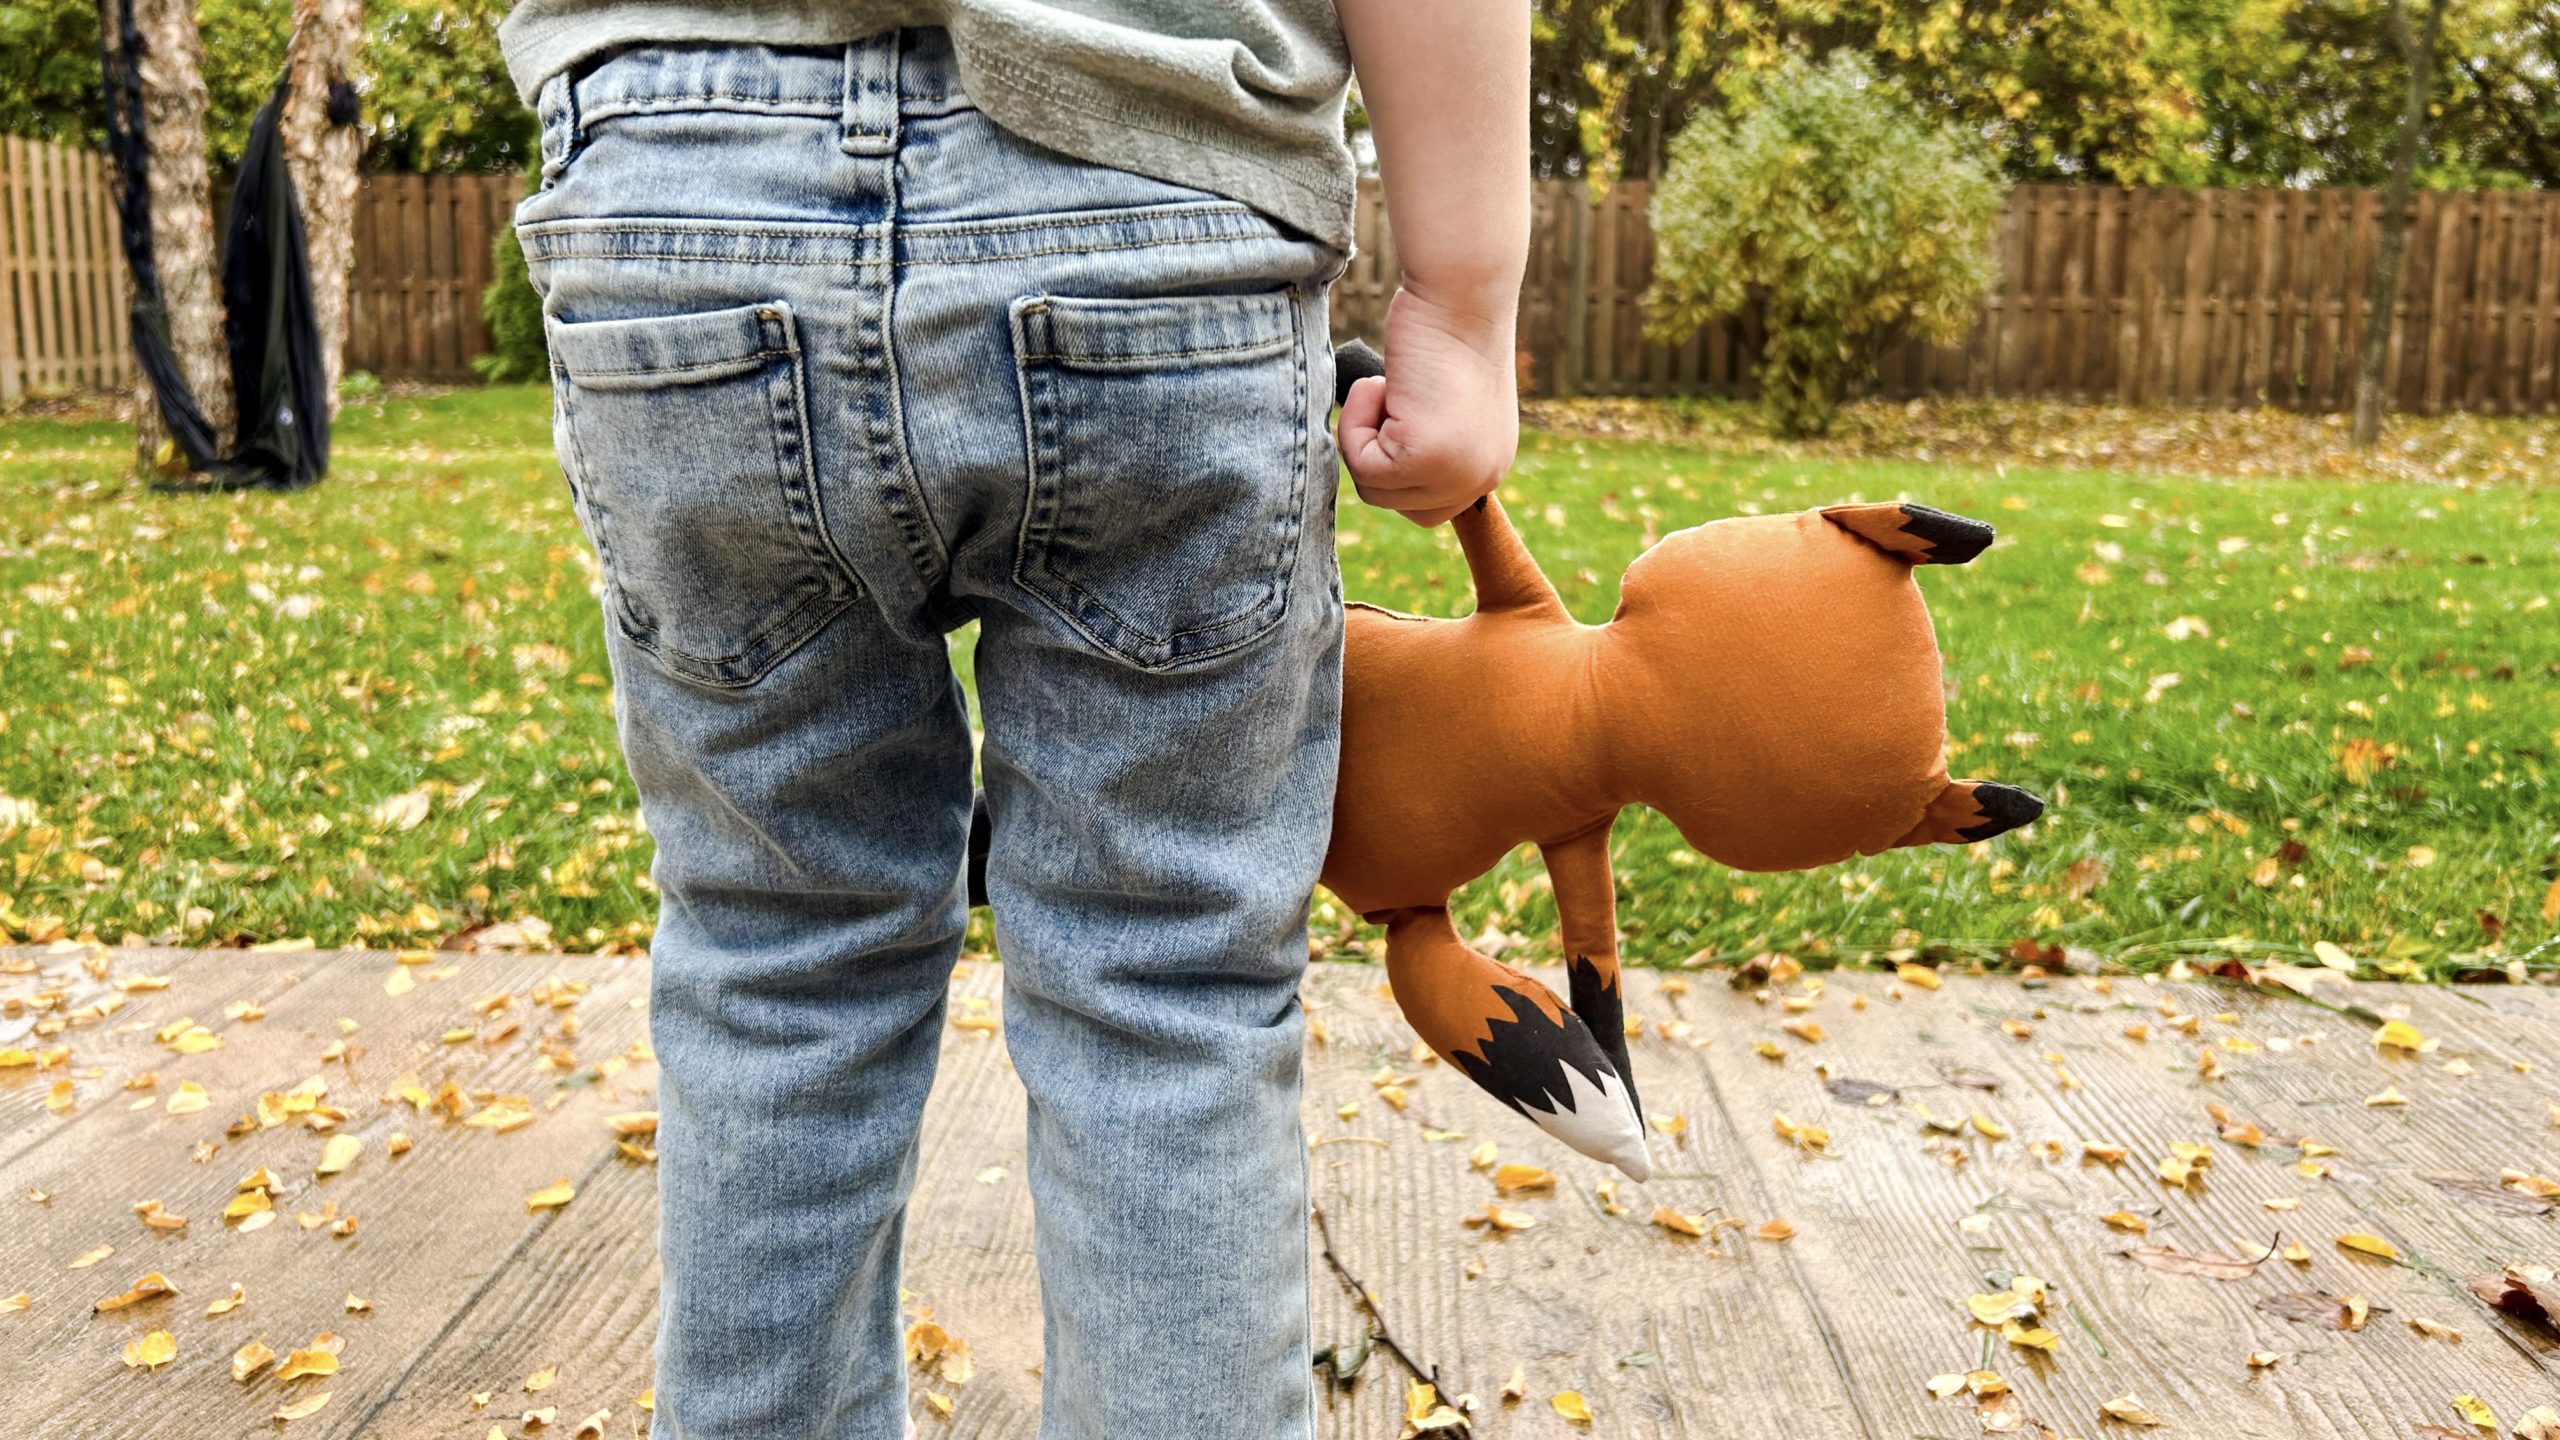
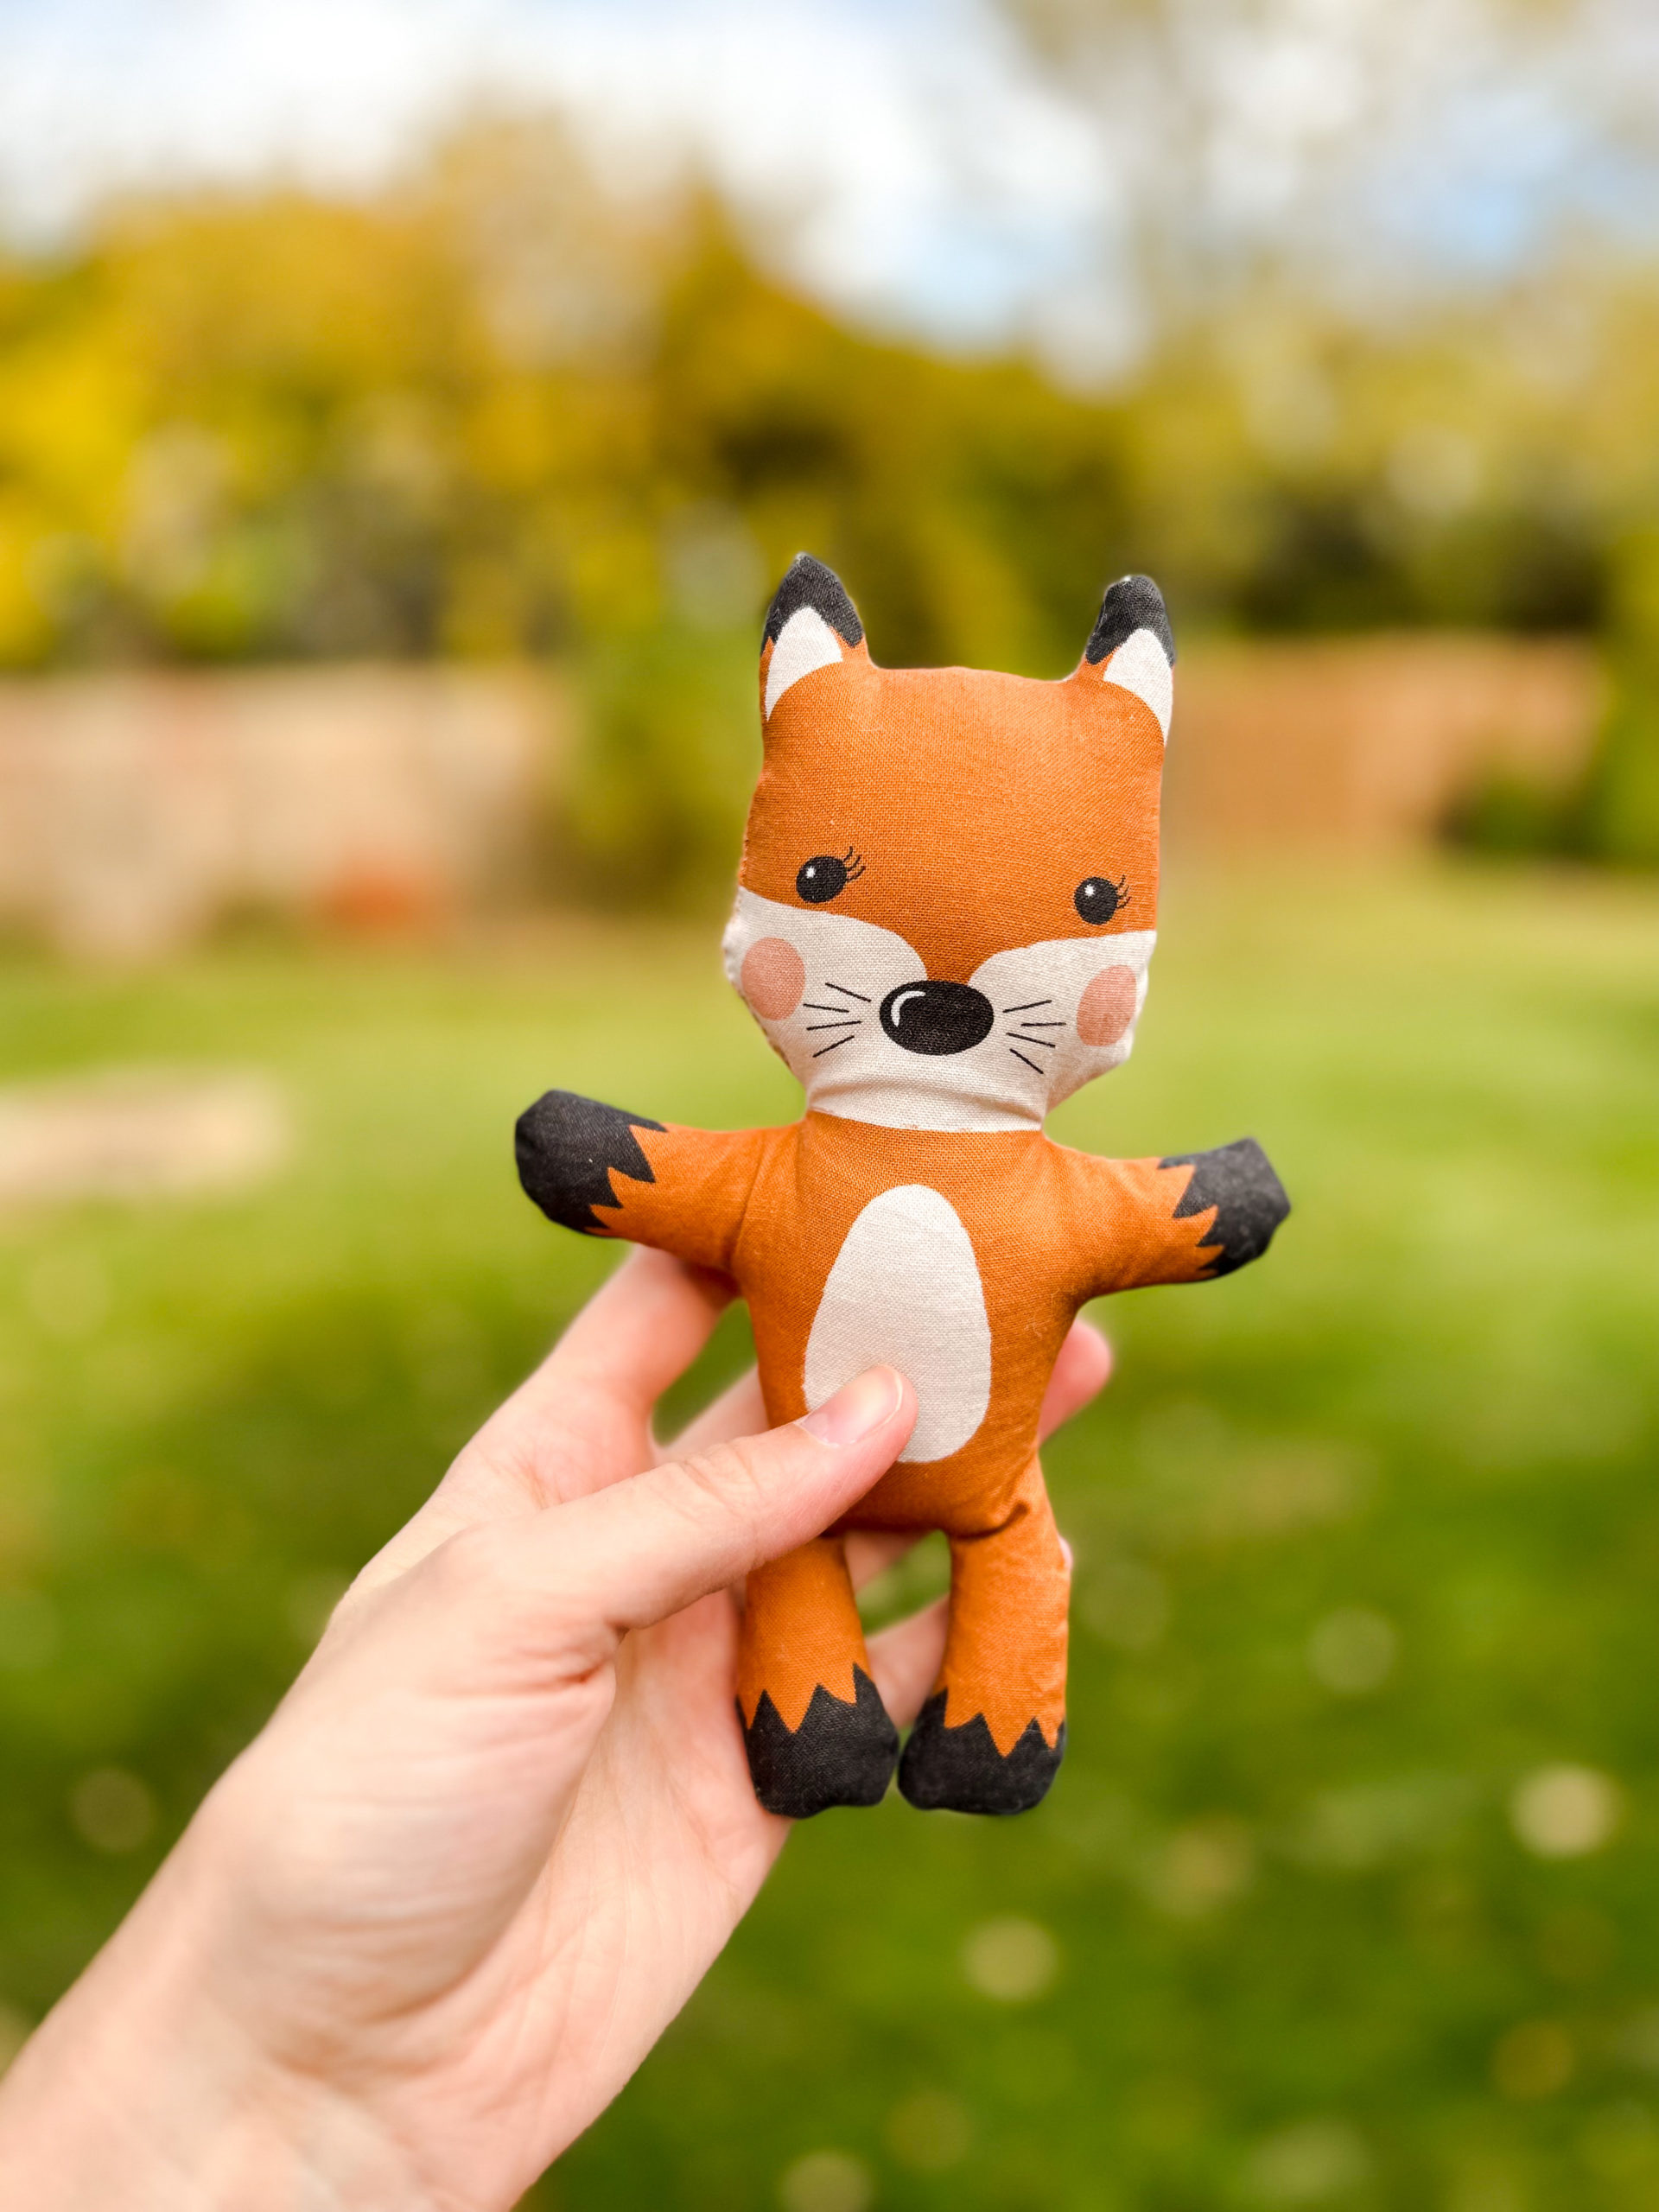
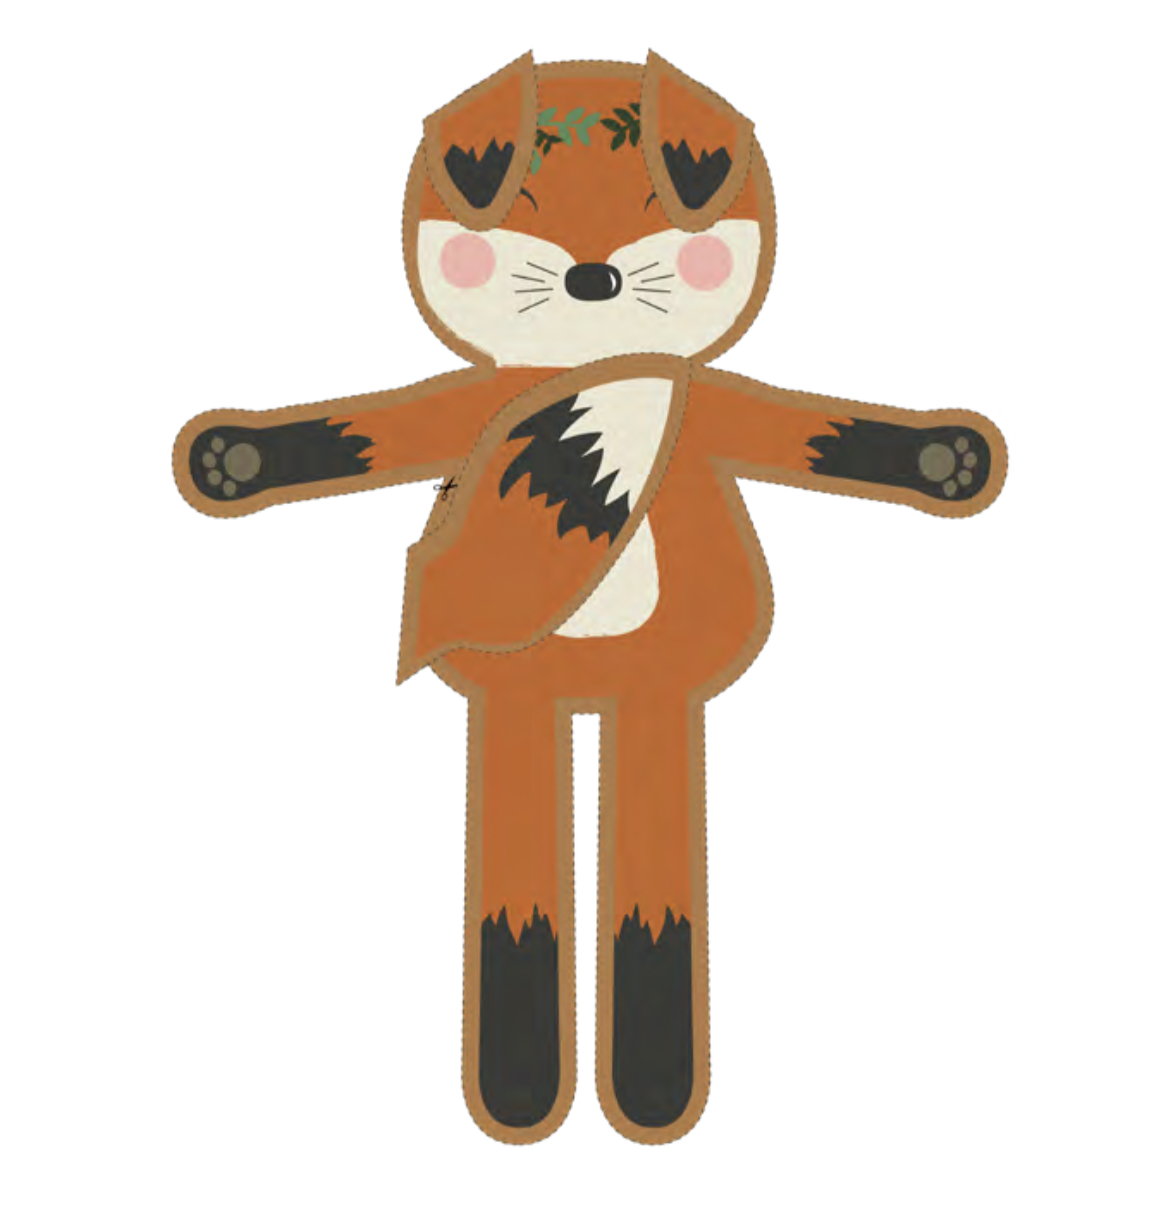
The little fox was so much fun to make. I did find that it was a little tricky to sew in the exact right spot while the pieces were right sides together. There isn’t much of a contrast between the fox and the seam allowance color, so I had to re-stitch some spots. My toddler waited not-so-patiently on the couch by me as I stitched its head shut and he happy named it “doe-fye”. I have no clue what that means haha.
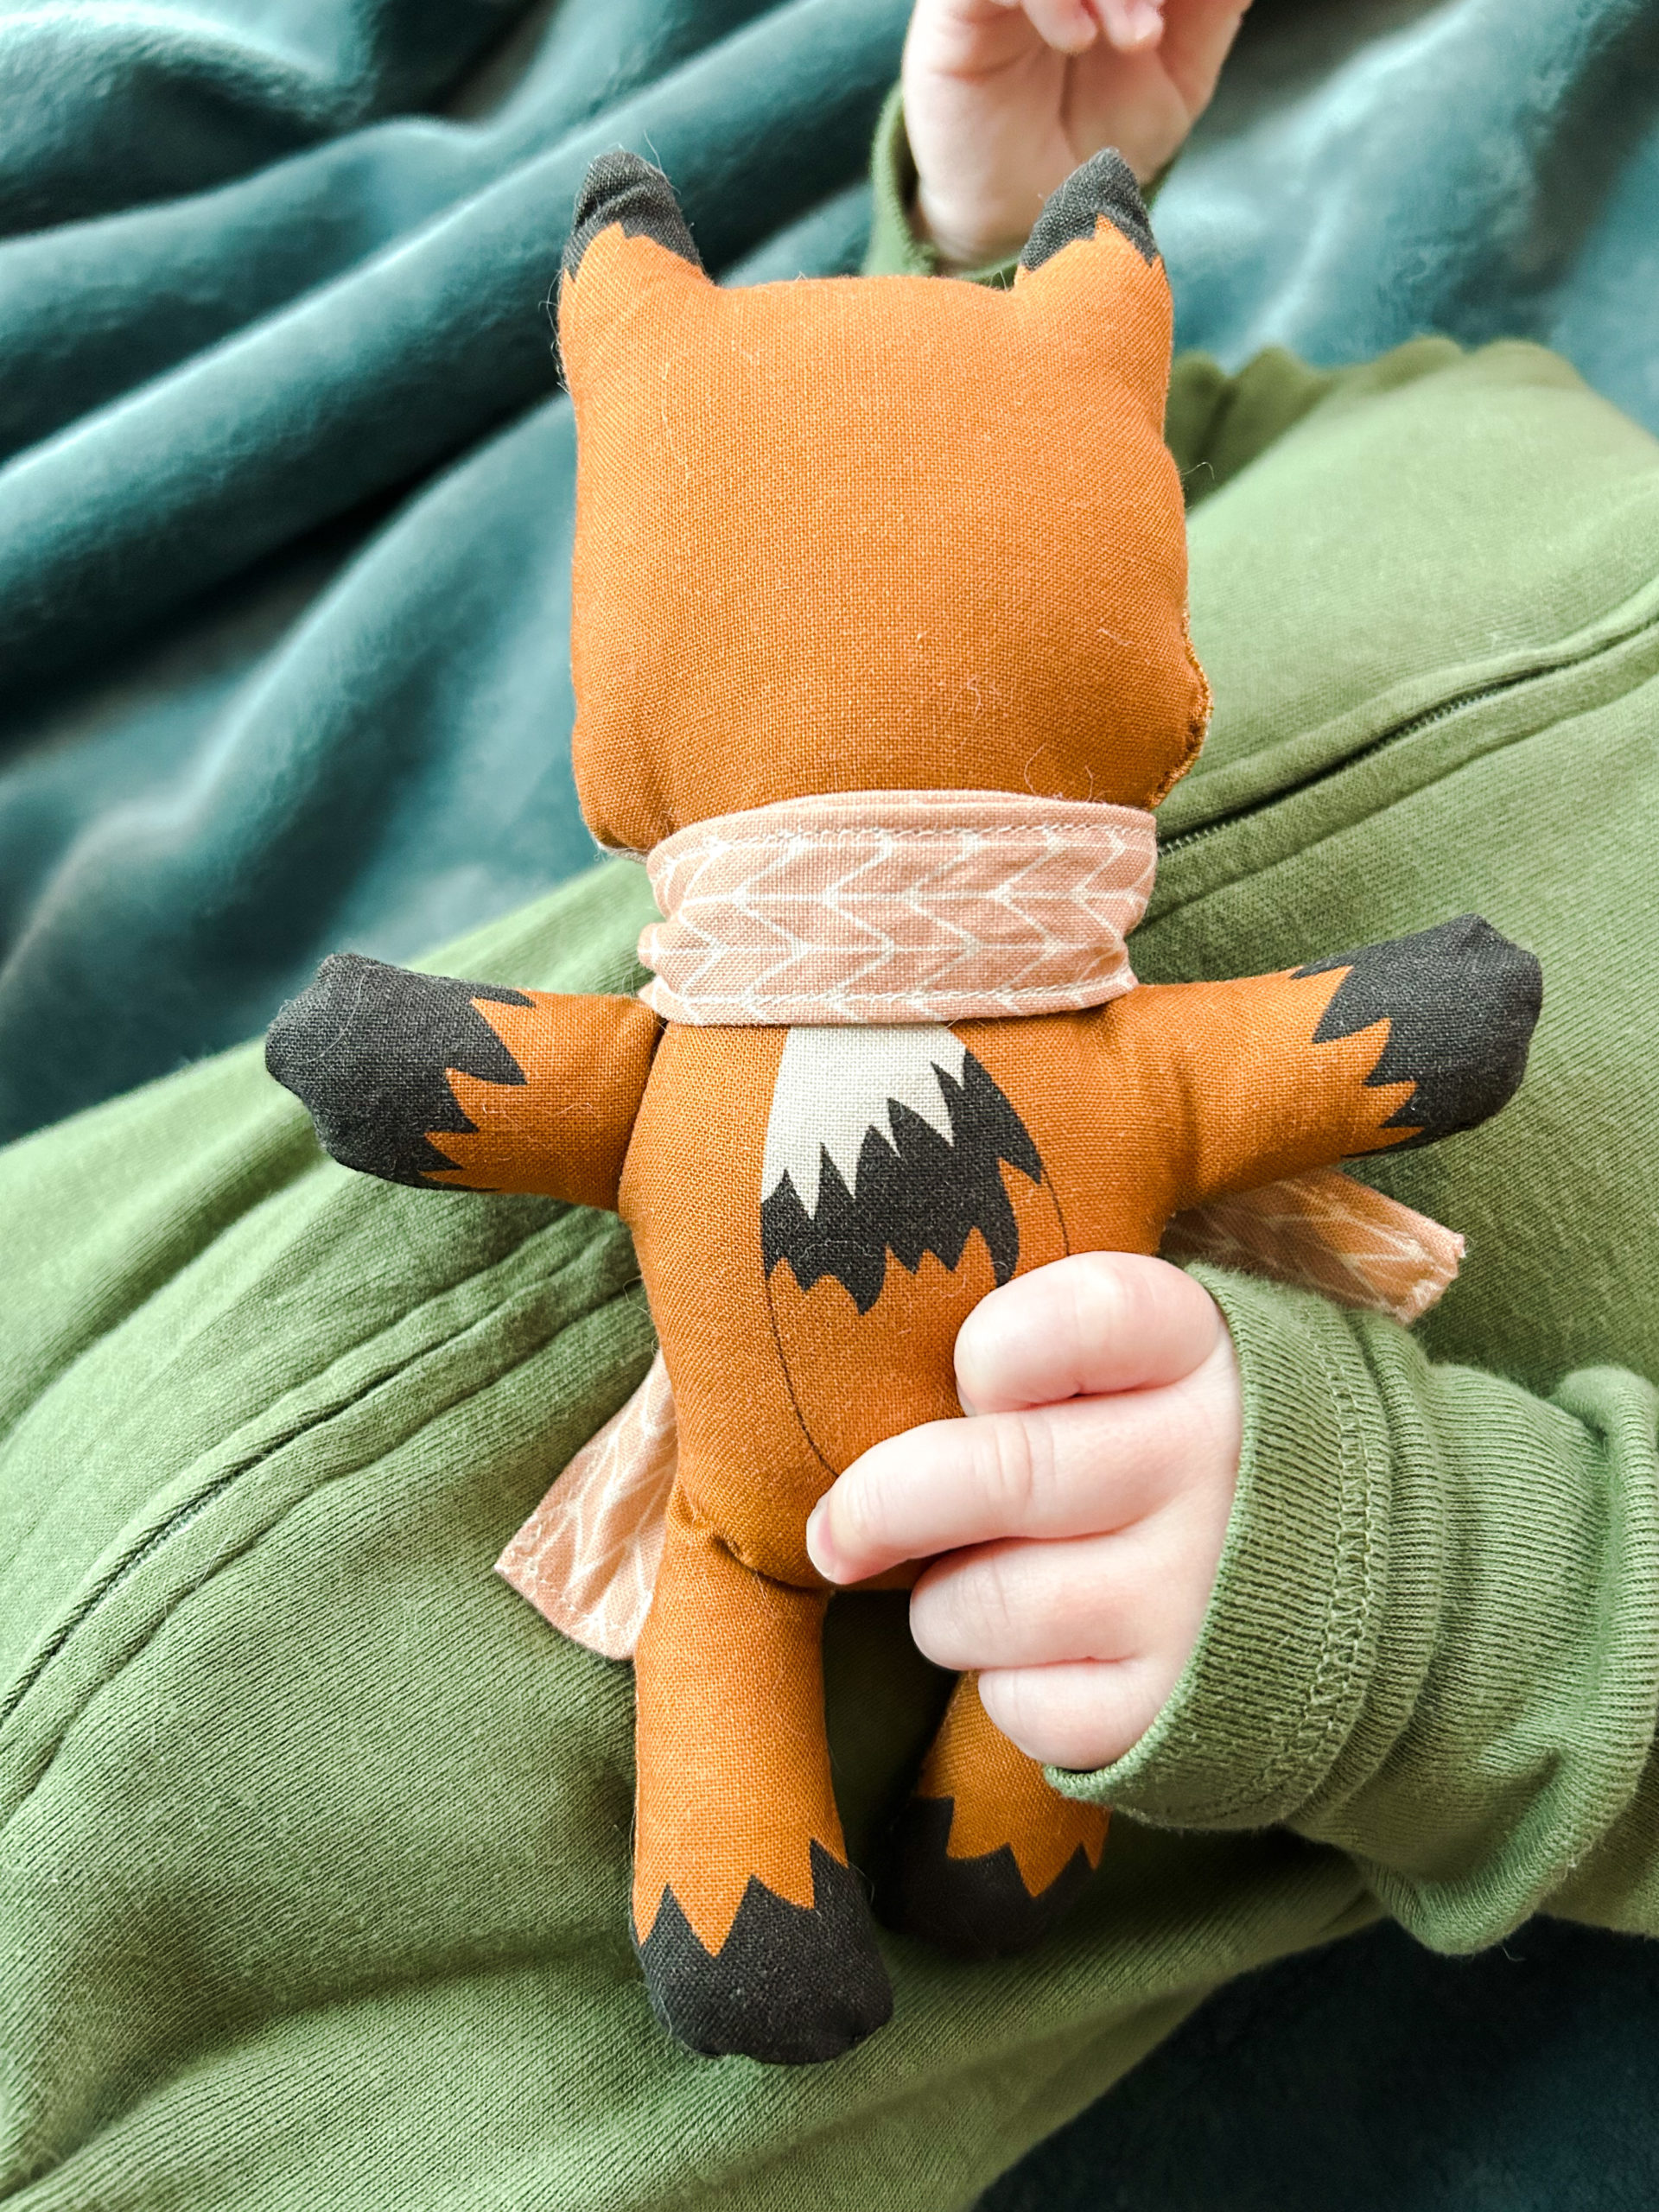
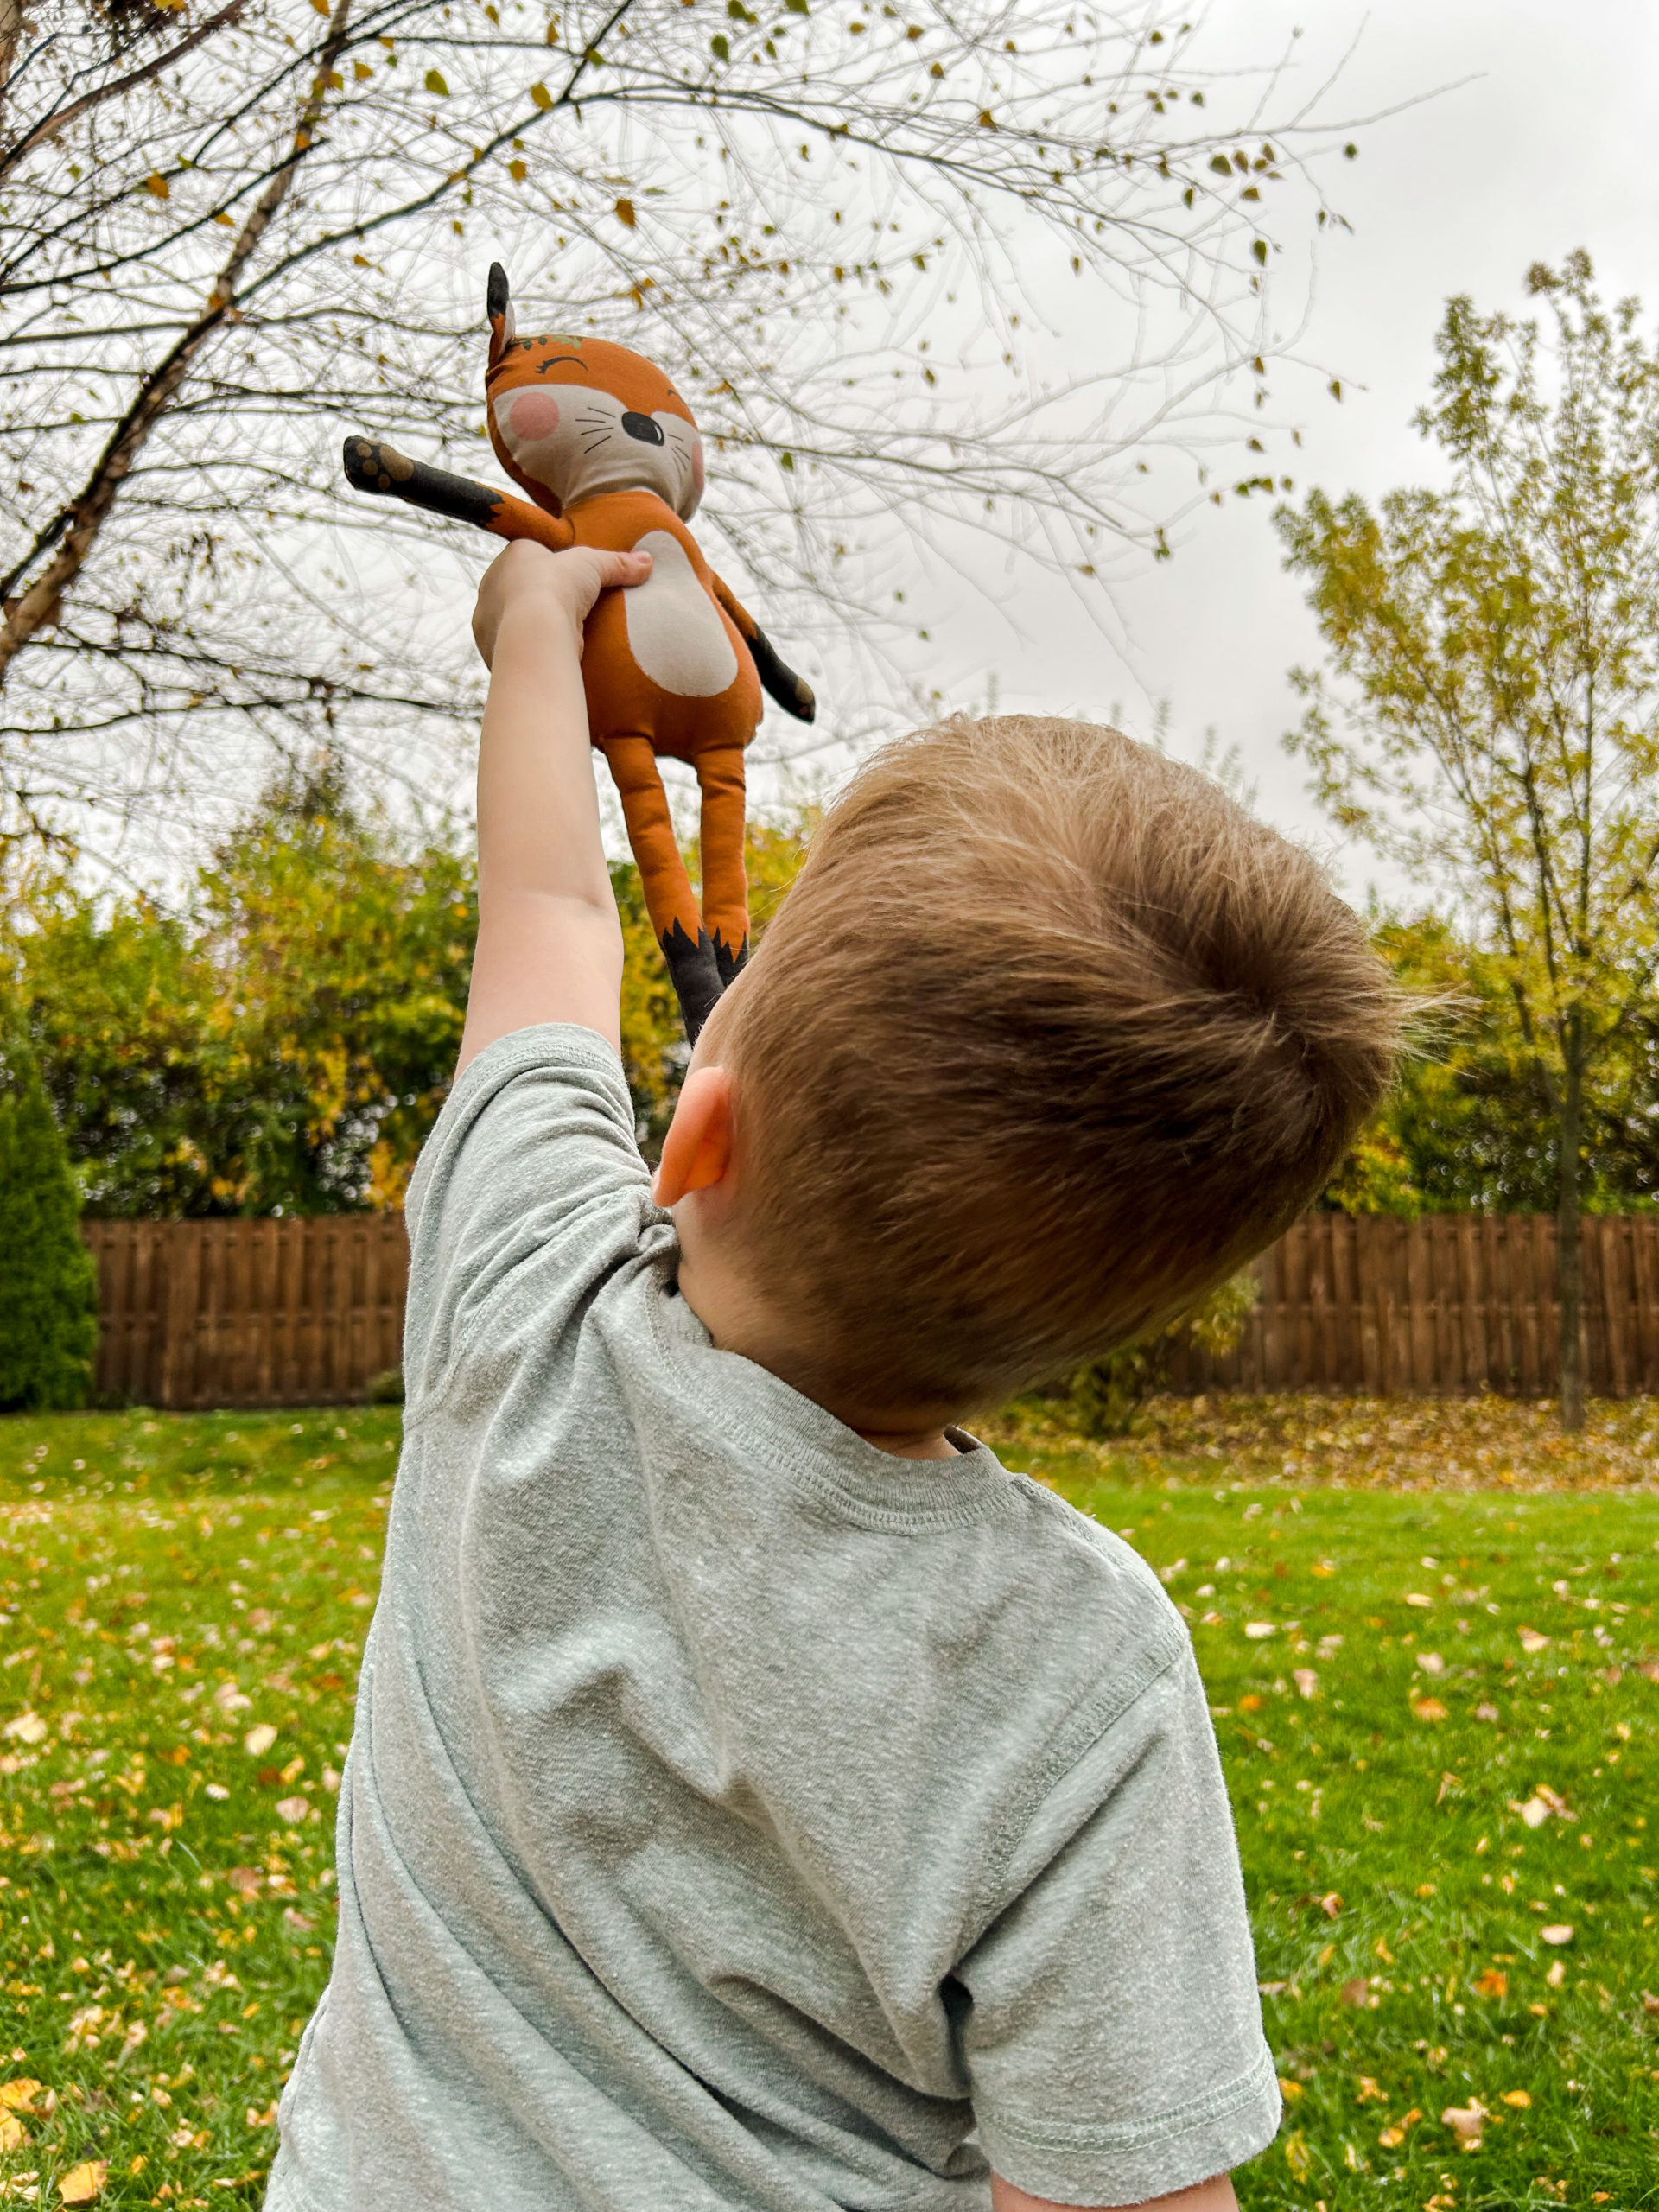
My toddler was thrilled when he woke up this morning and found that I’d finished his “big fox”. He kept exclaiming “my own fox!” and named it “toe-fye”. I have no idea where he gets these names haha. He’s so excited to have matching toys with his baby brother. It was tricky getting the stuffing into those long slender legs, but thanks to a helpful tip in the instructions, I found a chopstick in my kitchen that made the task a little bit easier.
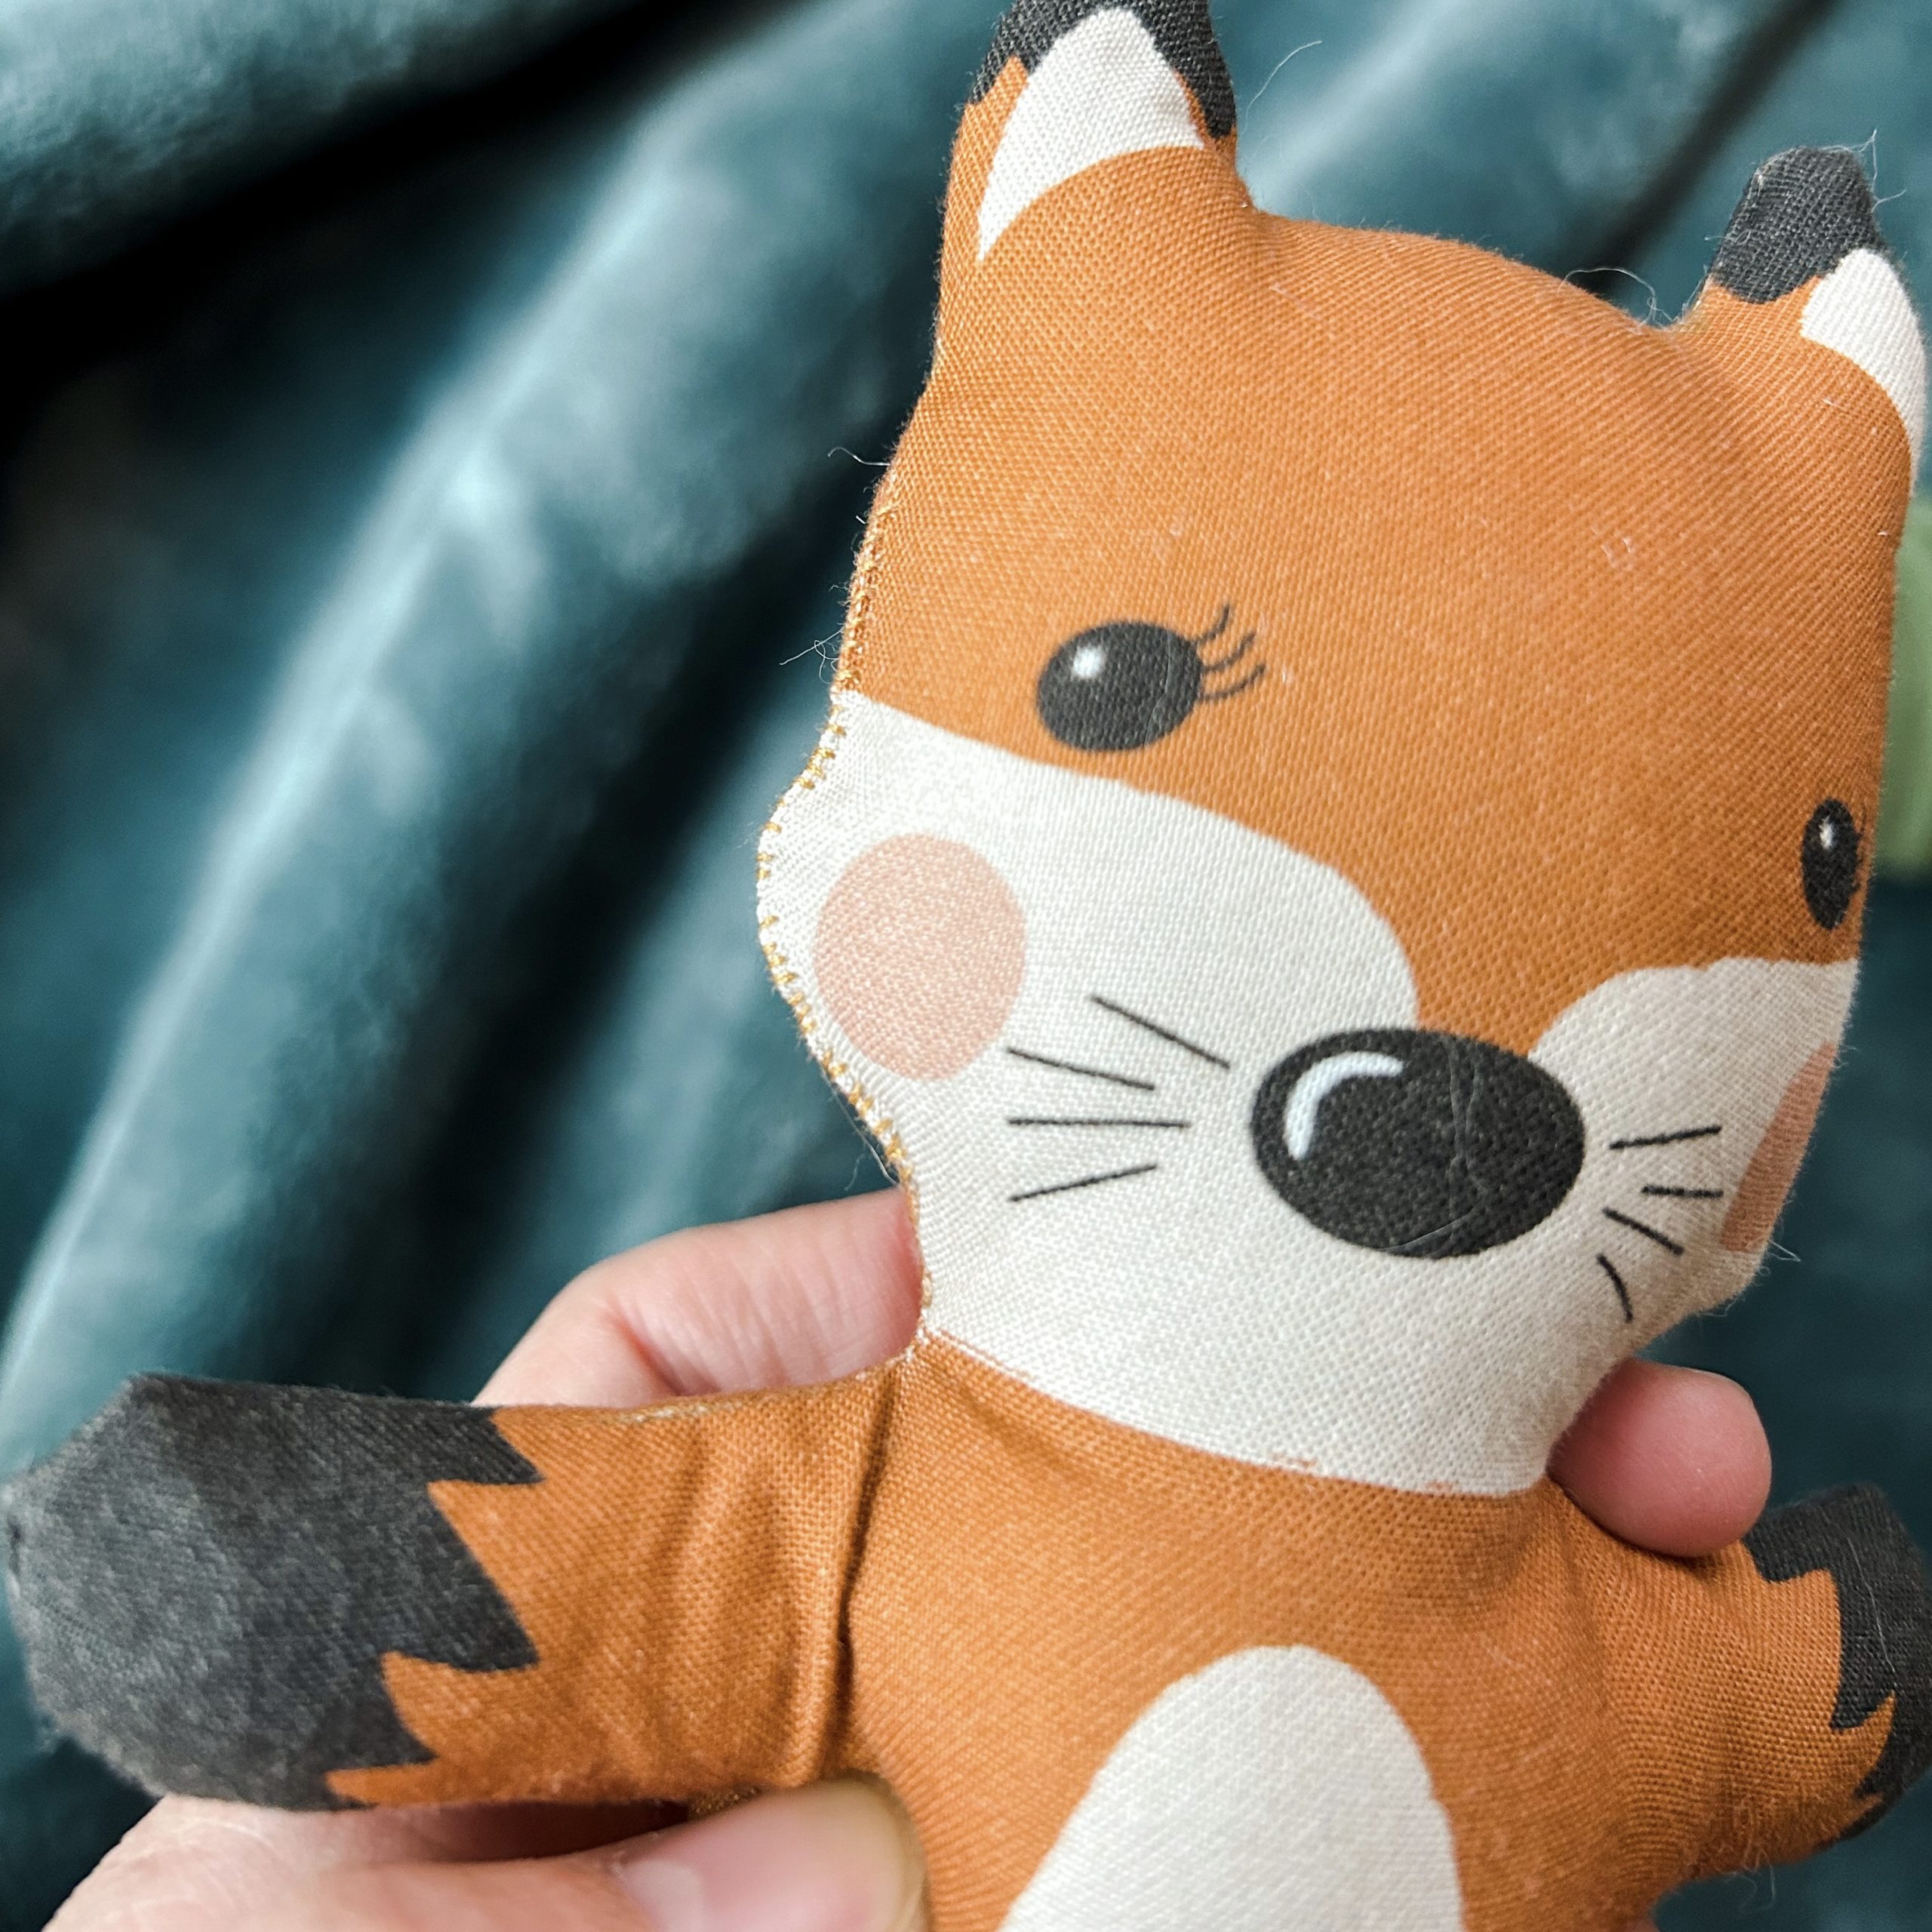
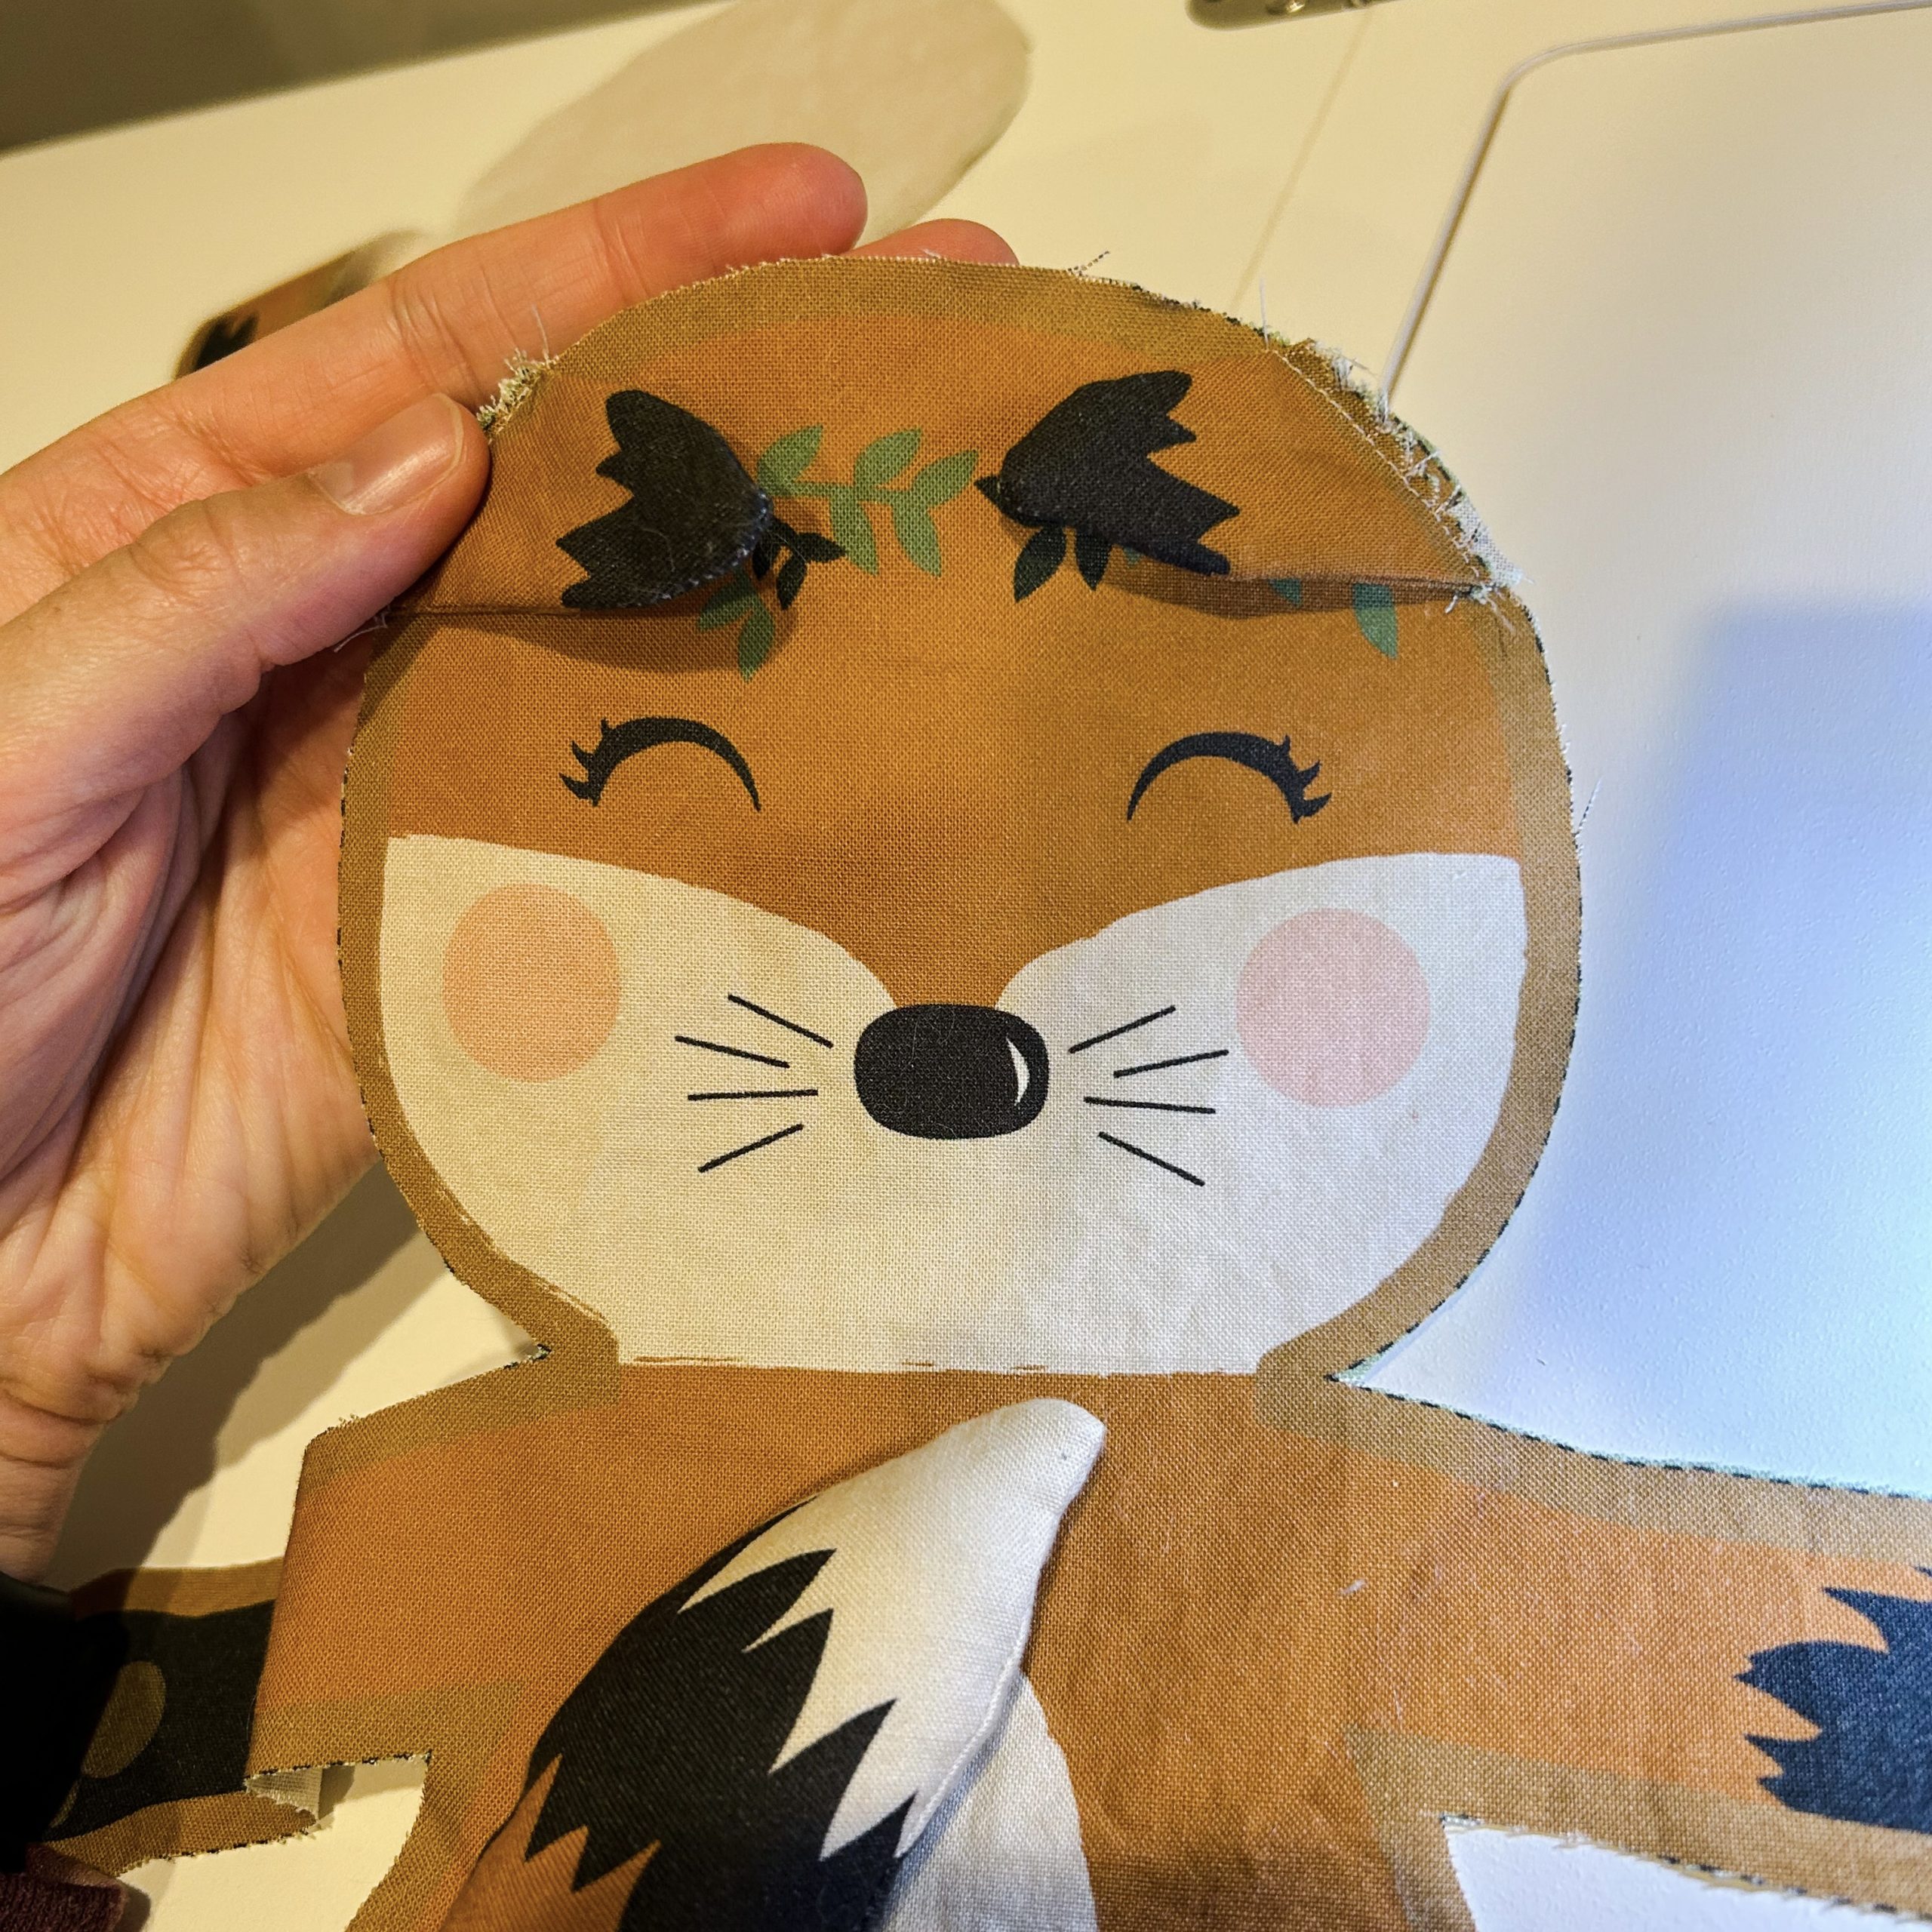
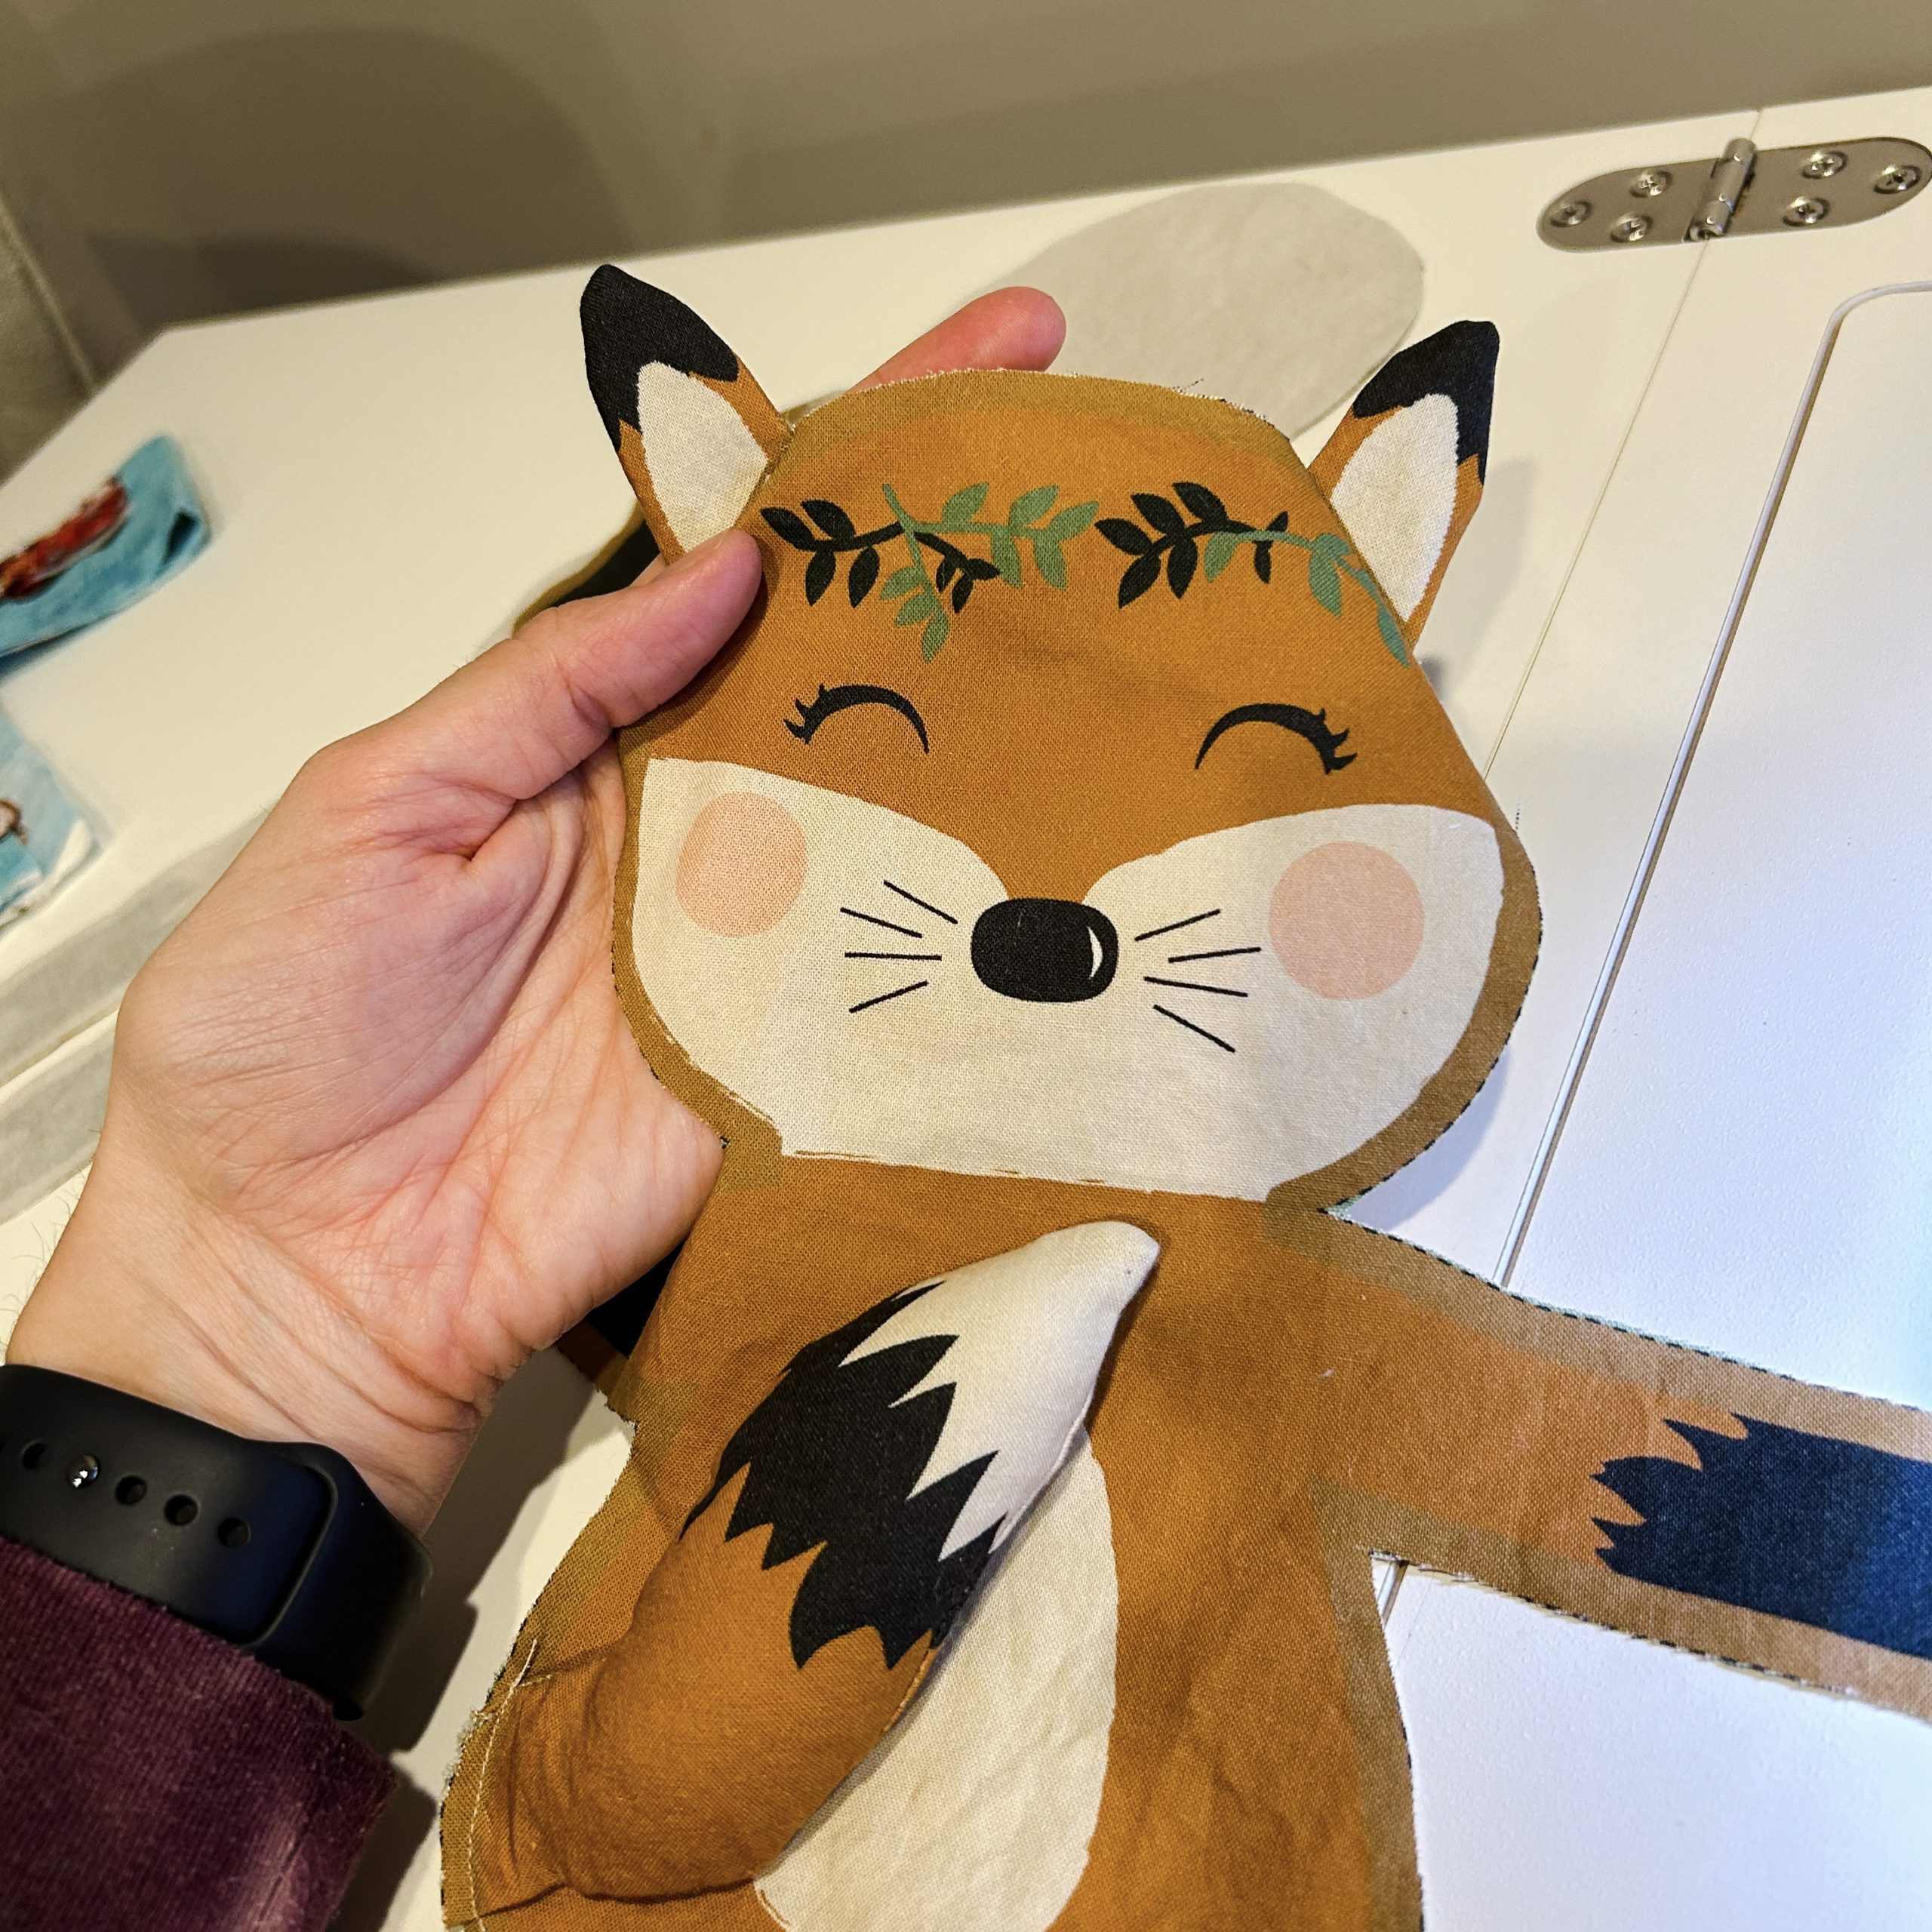
I had to attach the ears differently than described in the instructions because they were turning the wrong way when sewn. The instructions say to lay the ears over the eyes (see below on the left), but then my ears would’ve turned out instead of up. I had to swap the ears–put the L ear on the right side, and vice versa. They laid across the forehead instead of the eyes (see below in the middle) and turned up when sewn (see below on the right right).
Like I mentioned before, I struggled a bit with the vest. I didn’t quite understand the instructions and after reading a few times I just tried to do my best. I decided to put one of the badges on the chest and it turned out cute! It’s not perfect, but it gets the job done.

I loved making these dolls and would highly recommend getting these panels! It was so much fun and they make beautiful, wonderful gifts. Thanks for following along! Be sure to check out my website for other fun makes, free tutorials, and quilt patterns.
Follow Hark Quilts on Instagram
Follow Hark Quilts on Pinterest
Fabric:
- Forest Friends Doll Panel Vixen Woodland Fox (PD12699-WOODLAND)