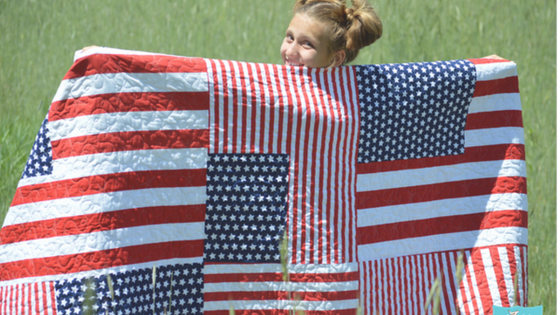
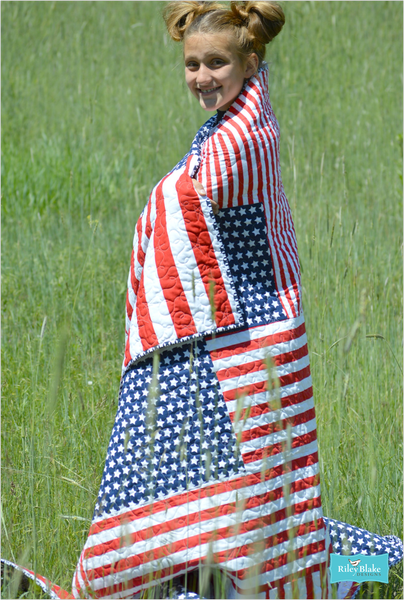
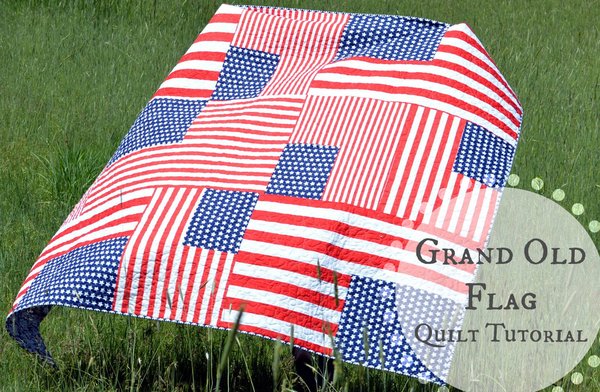
With local celebrations, family gatherings, barbeques and fireworks filling the month of July, this beautiful quilt is the perfect reminder of what it’s all about!

This is the perfect quilt for wrapping around yourself on cool summer evenings, and it’s twin size is just right for any kid; from a small child to a big-shot teen.
The large, 3-piece blocks mean this quilt can literally be whipped up in an afternoon!
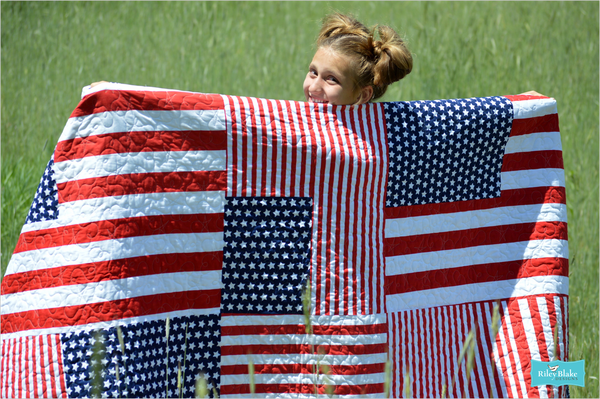
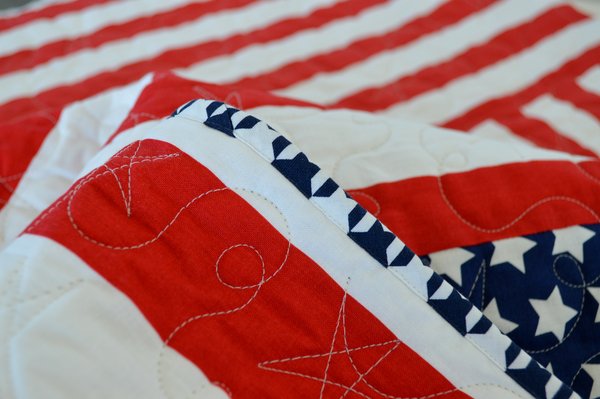
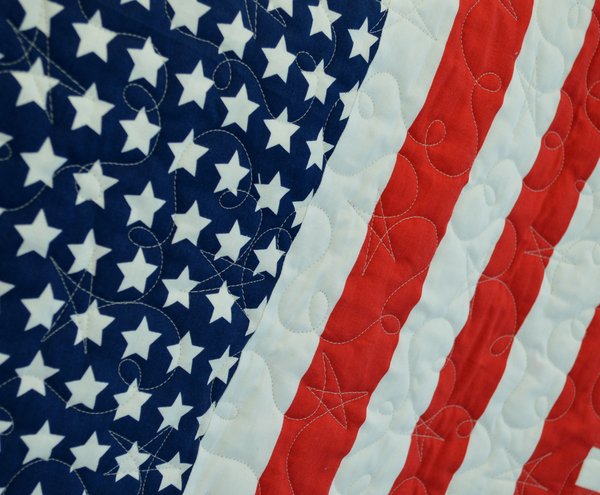
I used three different sized stripes to create visual interest. While it isn’t necessary, it really does break up the monotony of the stripe – especially where multiple flags meet.
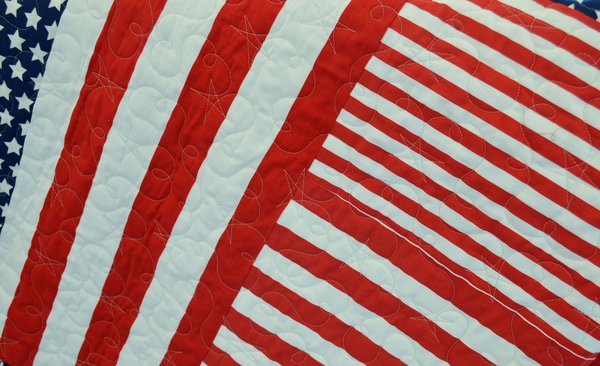
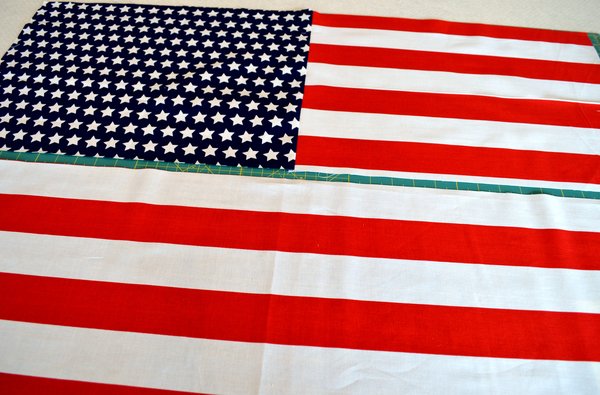
Here you can see where three flag blocks meet up. The use of varying sized stripes really sets them apart from each other.
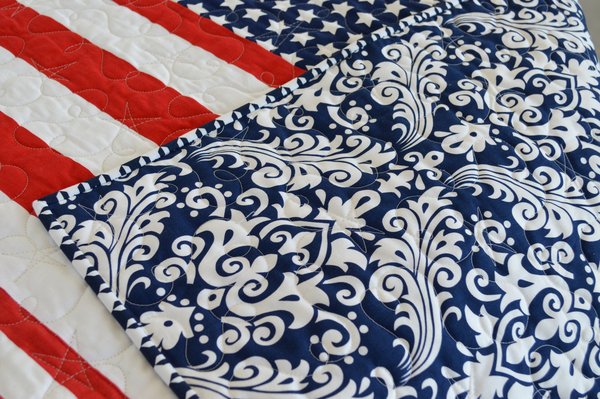
For the quilt back, I used the Large Navy Damask, which adds a traditional, sophisticated touch.
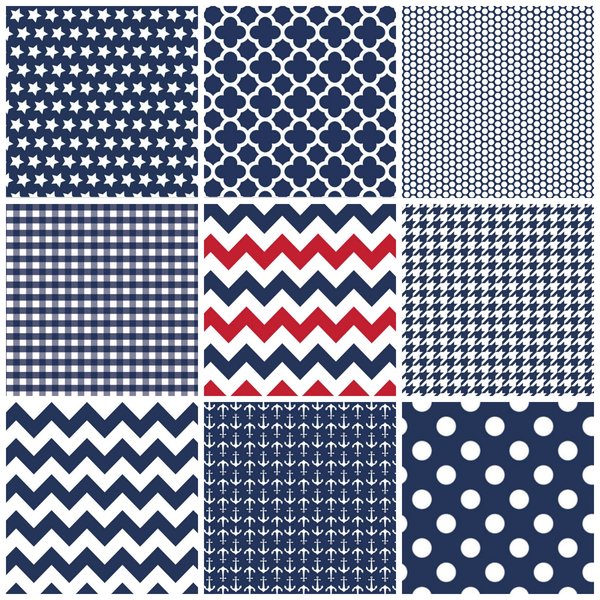
Any of our Navy basics would look great, and each would give the quilt a different character.
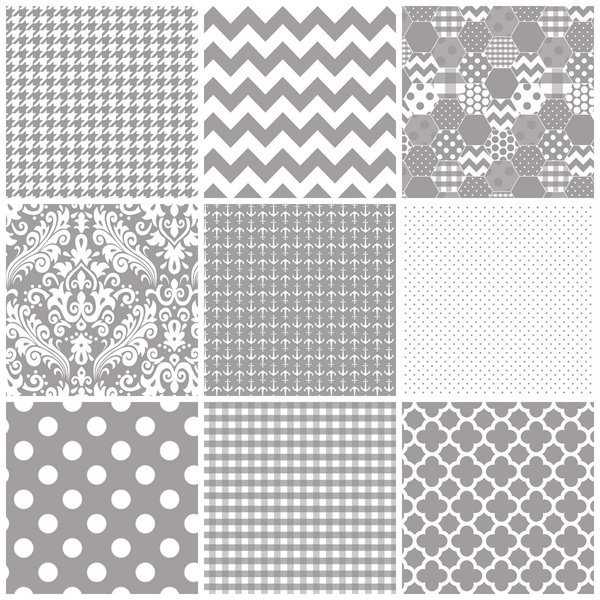
Or, if you prefer to use a different color altogether, Gray is a nice neutral that contrasts very nicely with both Red and Navy.
For the binding, we used our Navy Houndstooth.
Because it uses very large blocks, this quilt is a breeze to put together.
The only tricky part is learning to match up your stripes to get a seamless looking flag. I do recommend purchasing a little extra yardage to allow for some error while learning this. Once you get it figured out, though, you will have the pieces cut and sewn together in no time at all!

In this quick tutorial, I will show you how to make one flag panel. All of the remaining blocks are made the same way. At the end of the tutorial, you will find a diagram showing how all of the blocks come together to make the quilt.
For a twin sized quilt, you will be making:
- 4 Large flags with 2″ stripe fabric
- 1 Large flag with 1″ stripe fabric
- 2 Small flags with 1″ stripe fabric
- 3 Small flags with 1/2″ stripe fabric

You will need:
- 1 2/3 Yards Navy Stars
- 2 1/2 Yards Riley Blake 2″ Red Stripe fabric
- 2 Yards Riley Blake 1″ Red Stripe fabric
- 1 1/2 Yards Riley Blake 1/2″ Red Stripe fabric
- 6 Yards Riley Blake Navy Damask for the quilt back
- 3/4 Yard Navy Houndstooth for the binding
Cutting the fabric:
Begin by cutting out the star sections. Layout the Riley Blake Navy Star fabric, making sure the cut edges are straight. Below is a suggested cutting guide.
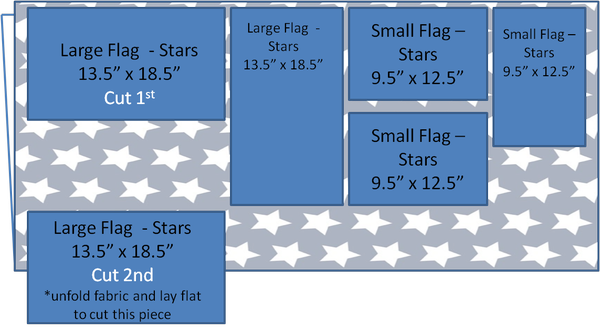
First, cut an 18.5″ x wof (width of fabric) piece. Cut off the selvedge edges. With the fabric still folded along the fold line, align the 18.5″ edge with the “0” on your cutting mat and cut along the 13.5″ mark. You will now have two 13.5″ x 18.5″ rectangles.
Unfold the remaining piece of the 18.5″ fabric section and cut another 13.5″ x 18.5″ rectangle. (See diagram.) From the remaining star fabric, cut the rest of the rectangles as shown in the diagram above.
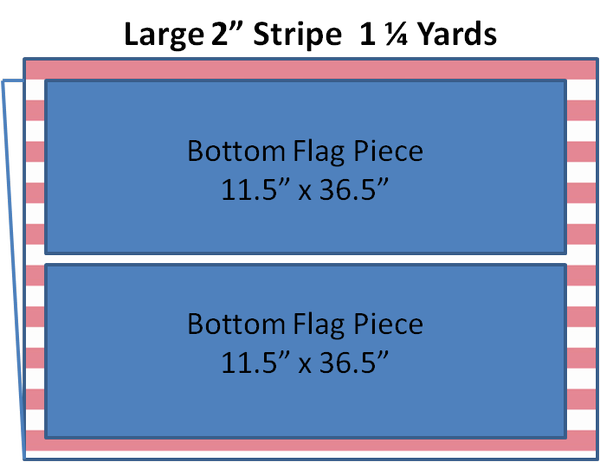
To cut the LARGE STRIPES, first cut your Bottom Flag Pieces, making sure the stripes run horizontal with the longer side as shown in the diagram above.
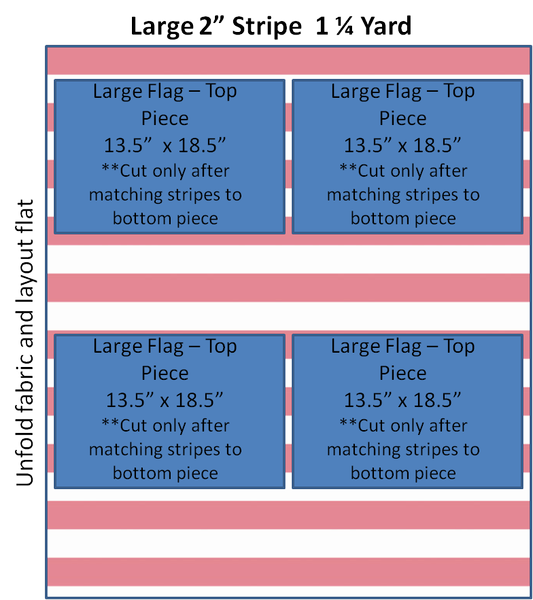
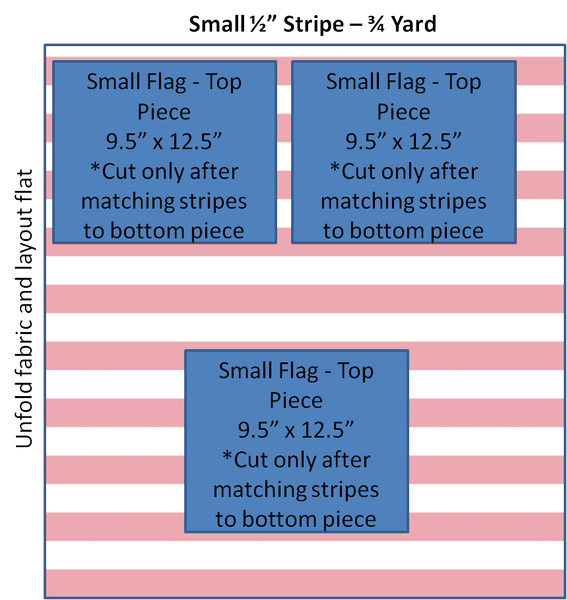
Above is a basic layout for the Top Flag Striped Pieces, however, DO NOT cut out the Top Flag Pieces before reading the following instructions on matching the stripes:

Before we cut the 13.5″ x 18.5″ Top Flag Piece, we need to match up our stripes. By taking the time to do this, the stripes will flow seamlessly from top to bottom, giving the illusion that it is one continuous piece of fabric.
Lay one of your Bottom Flag Pieces on the mat. Take your remaining fabric yardage and line up the stripes so that the 1st and 2nd stripes on the Bottom Flag Piece and the remaining yardage piece match up.
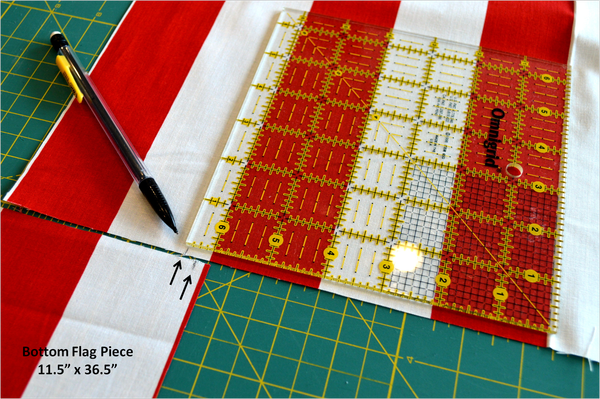
With a pen or pencil, mark 1/4″ from the raw edge of the Bottom Flag Piece (*This edge will be the ‘top’ of your Bottom Flag Piece, which will be sewn to the Top Flag Pieces. Your pencil mark here will help you not to forget which edge will face up).
On the right hand piece of fabric, mark 1/4″ above the mark you made on the Bottom Flag Piece. You can set the Bottom Flag Piece aside for now.
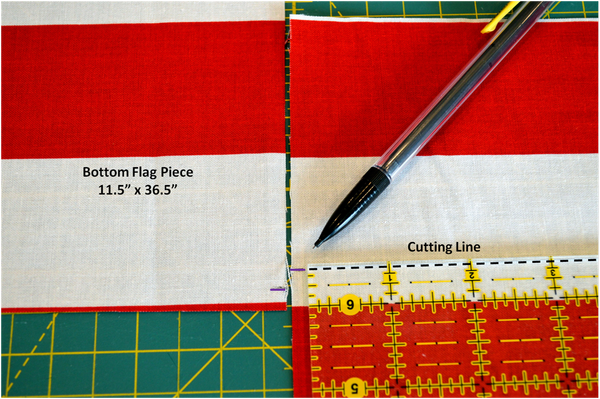
The mark you made on the right hand piece of fabric is your cutting line for the 18.5″ side of your Top Flag Piece. (*This is the edge you will pin and sew to the Bottom Flag Piece, so you may want to mark the edge somehow so you don’t forget.)
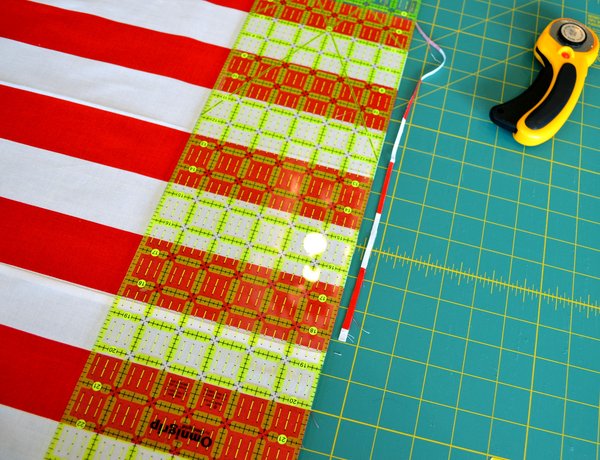
Use your ruler and rotary cutter to cut along this line. Cut out a 13.5″ x 18.5″ rectangle. Repeat this process for each of the Top Flag Pieces. By taking the time to follow these steps, your Top and Bottom stripes will line up perfectly.
You will now have 3 pieces that will look like this.

Pin the Navy Stars and Top Flag Piece together, right sides facing. Sew using a 1/4″ seam allowance.
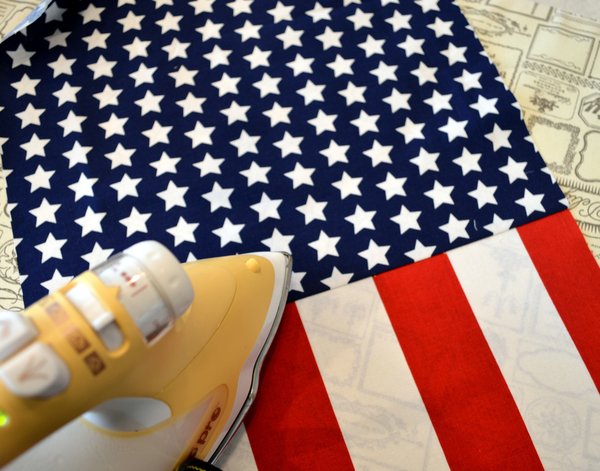
Press the seam toward the darker stars.
You should now have 2 sections looking like this.
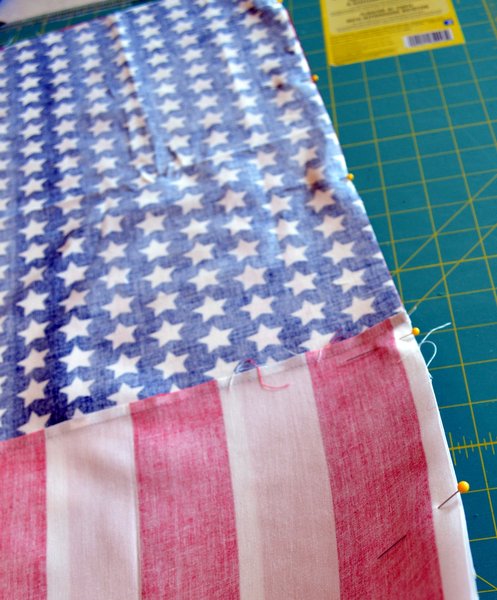
Pin the two sections together, right sides facing, and stitch using a 1/4″ seam allowance.

Here, I opted to press toward the bottom stripe section because the top section had a seam, and the bottom section had none. Pressing the seams toward the section with the fewest seams helps reduce bulk.
I prefer to use a light starch when pressing. It helps give the blocks a nice, crisp look. We love Mary Ellen’s Best Press starch.
If your edges are a little uneven like mine are, you can trim them off a little.
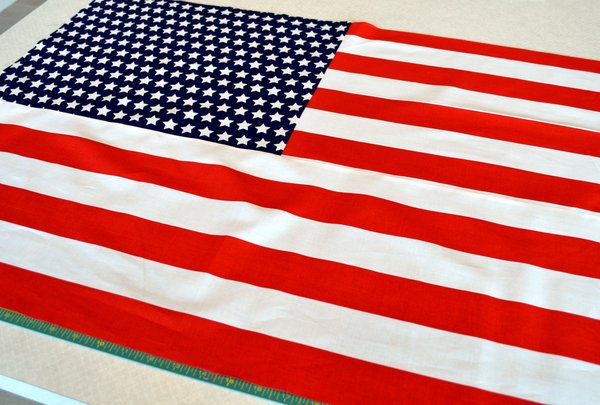
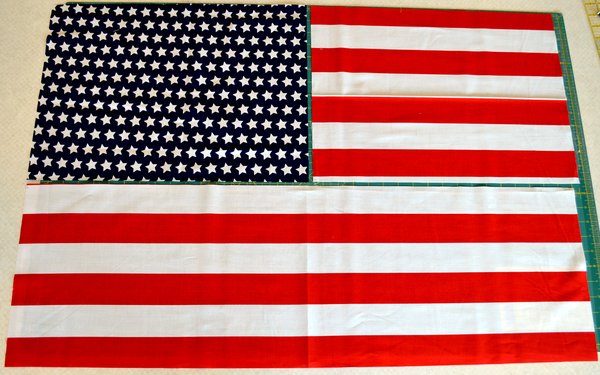
You now have one complete Large Flag block!
Repeat this process of matching stripes and assembling the pieces for all of your flag blocks. The process is identical for the large and small flags, no matter what size stripe you are using.
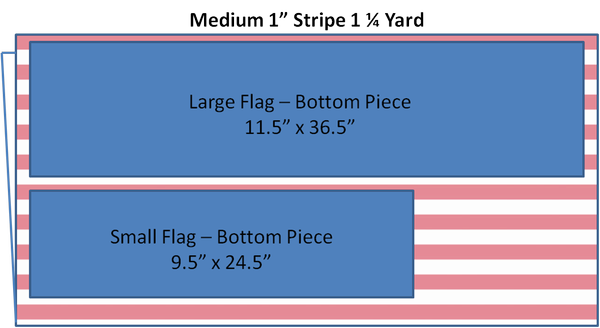

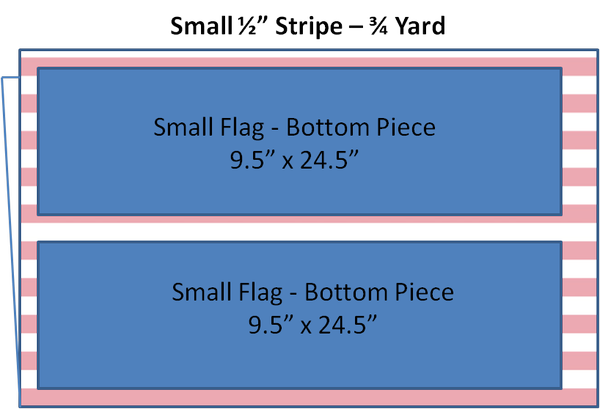
Above are suggested layouts for the Medium Striped Fabric. You’ll want to start by matching stripes and cutting out the Large Flag Piece, then do the same for the Small Pieces. See the suggested layout for the Small Stripe Pieces in the 2 diagrams below.
Below is a diagram showing you how the flags were arranged in the quilt and the various stripe sizes I used. Notice the quilt is made of three vertical columns.
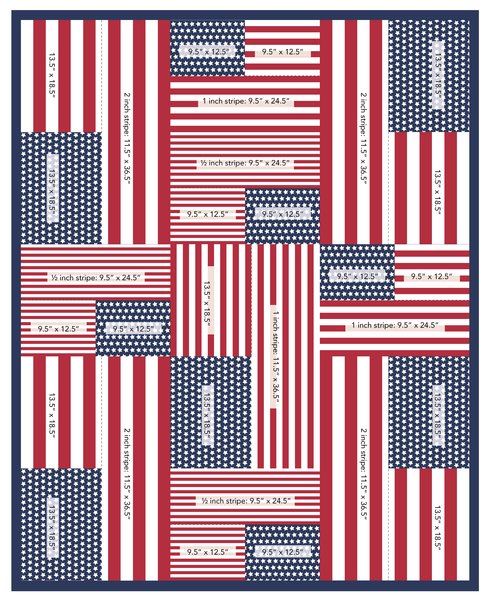
Beginning with the left column, sew the three flags together using a 1/4″ seam allowance to form one long row. Repeat for the middle and right column. Press each seam as you go.
Sew the left column to the middle. Press seams. Now sew the right column to the middle. Press seams.
There you have it! Have a great summer!