It’s finally here! Today begins our month-long Riley Blake Jersey Knit Love Fest! We have an amazing blog tour lined up for you, filled with some seriously talented pattern designers and bloggers.


To start off the tour, I have whipped up a SUPER easy shag pillow using this fantastic, easy-to-follow tutorial from V. and Co. I did make a few simple changes, which I will describe below.
To make this Monogram Shag Pillow, you will need:
- 2 – 20.5″ squares of Riley Blake Jersey Knit in Navy
- 2 – 20.5″ squares Fusible Easy Knit Pellon
- About 15-20 1.5″ wide strips of fabric cut into 4″ lengths
- 12″x12″ square of contrasting fabric for the Monogram Applique
- 12″x12″ square of Heat ‘n Bond Lite
- 20″ Pillow Form
- Large printed Monogram letter.

Cut your 20″ squares and your 1.5″x4″ fabric strips. You’ll end up with a hefty little pile of strips.

Press your Easy Knit Pellon interfacing to the back of each of your 20″ Navy squares of fabric. You can opt not to use the interfacing, but it does add stability to the knit, which you will appreciate later. In the tutorial on the V and Co. blog, she used cotton as her pillow base. Doing this will give the pillow stability without having to use any kind of interfacing, but since this is a Knit Love Blog Tour, we’re going with knit all the way!

Take one of your 20″ squares and fine the half-way point. Draw a line from top to bottom with a fabric marking pencil or marker.

 Continue to draw your lines 3/4″ apart.

Next, take your 12″ square of contrasting fabric (I used Riley Blake Jersey Knit Hot Pink Houndstooth) and a 12″ square of double-sided fusible adhesive. Press the Heat ‘n Bond to the back side of the knit fabric.

Print up a large, thick letter. For this example, I used Microsoft Word and a free font called, “Freshman.” I made it as large as would fit on one page. Pin the printed letter to the right side of your contrasting fabric piece.

Cut out your letter.

 Now peel off the paper backing of the fusible adhesive.

Position the letter where you want it on the 20″ fabric square (the square you already drew the lines on). I positioned mine in the lower right hand corner. Press in place.

Using a narrow zig-zag stitch setting, stitch around the edges of the letter.

Now we can begin sewing our 4″ strips into place. You can begin at one side, or on a center line, it doesn’t matter. The marked lines on your pillow are your stitching lines. Starting at the top of a line, begin sewing the strips into place by pinching them a little or even stretching them on each side to create a “bunching” effect, as the presser foot stitches through the center of the strip.

Stop stitching as you reach the edge of the letter. After you finish a row, begin the row next to it. Make sure to carefully hold the previous row’s strips to one side so they don’t get in your way as you are sewing the new row.

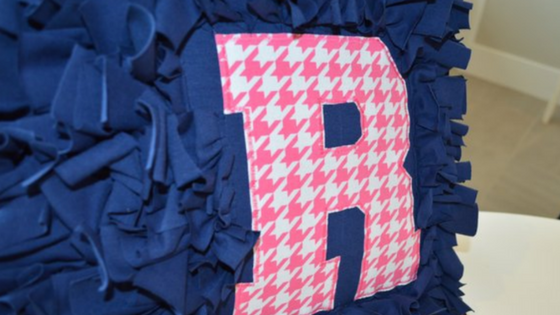
After all of your rows are sewing into place, take the row of fabric strips closest to the letter and guide them away from the monogram. Stitch over the base of those strips about 1/8″ – 1/4″, depending on your preference. Doing this will face the strips away from the monogram so you can see the letter.

 Here you can see how sewing the base of the rows surrounding the letter causes them to face away from the monogram and creates a frame effect.

Now take the top square which has the strips and monogram completely finished, and the bottom square, which is left plain, and line them up, right sides facing. Pin in place. Stitch around the edges using a 1/2″ seam, leaving about a 12″ opening (large enough to insert your pillow form). Clip the corners and turn right side out.

Insert the pillow form. Using a ladder stitch or simple slip stitch, hand sew the opening closed.

There you have it! The perfect gift for teens or college students!
We are so excited about the amazing pattern designers and bloggers we have lined up for you this month! Be sure to follow along for tons of jersey knit sewing inspiration!
 RBD Jersey LOVE Blog Tour Schedule:
March 2:Â Riley Blake Designs

March 3: Figgy’s

March 5:Â EYMM

March 6: Melly Sews

March 7:Â The Sewing Loft

March 9:Â Love Notions

March 10:Â Peekaboo Pattern Shop

March 11:Â Tea Rose Home

March 12:Â Sew Much Ado

March 13:Â Simple Simon & Co.

March 14:Â Tie Dye Diva

 March 16: The Cottage Mama

March 17:Â My Childhood Treasures

March 18:Â Smashed Peas & Carrots

March 19:Â Greenstyle Creations

March 20:Â Fishsticks Designs

March 21:Â Ellie Inspired

March 23:Â Sew Straight & Gather

March 24:Â Lucy Blaire Handmade

March 26:Â Free Time Frolics

March 27:Â Elegance & Elephants

March 28:Â Foo Foo Threads

March 30:Â Heidi & Finn

March 31:Â Lily Giggle

April 2: Violet Field Threads

April 3:Â Riley Blake Designs + Giveaway
