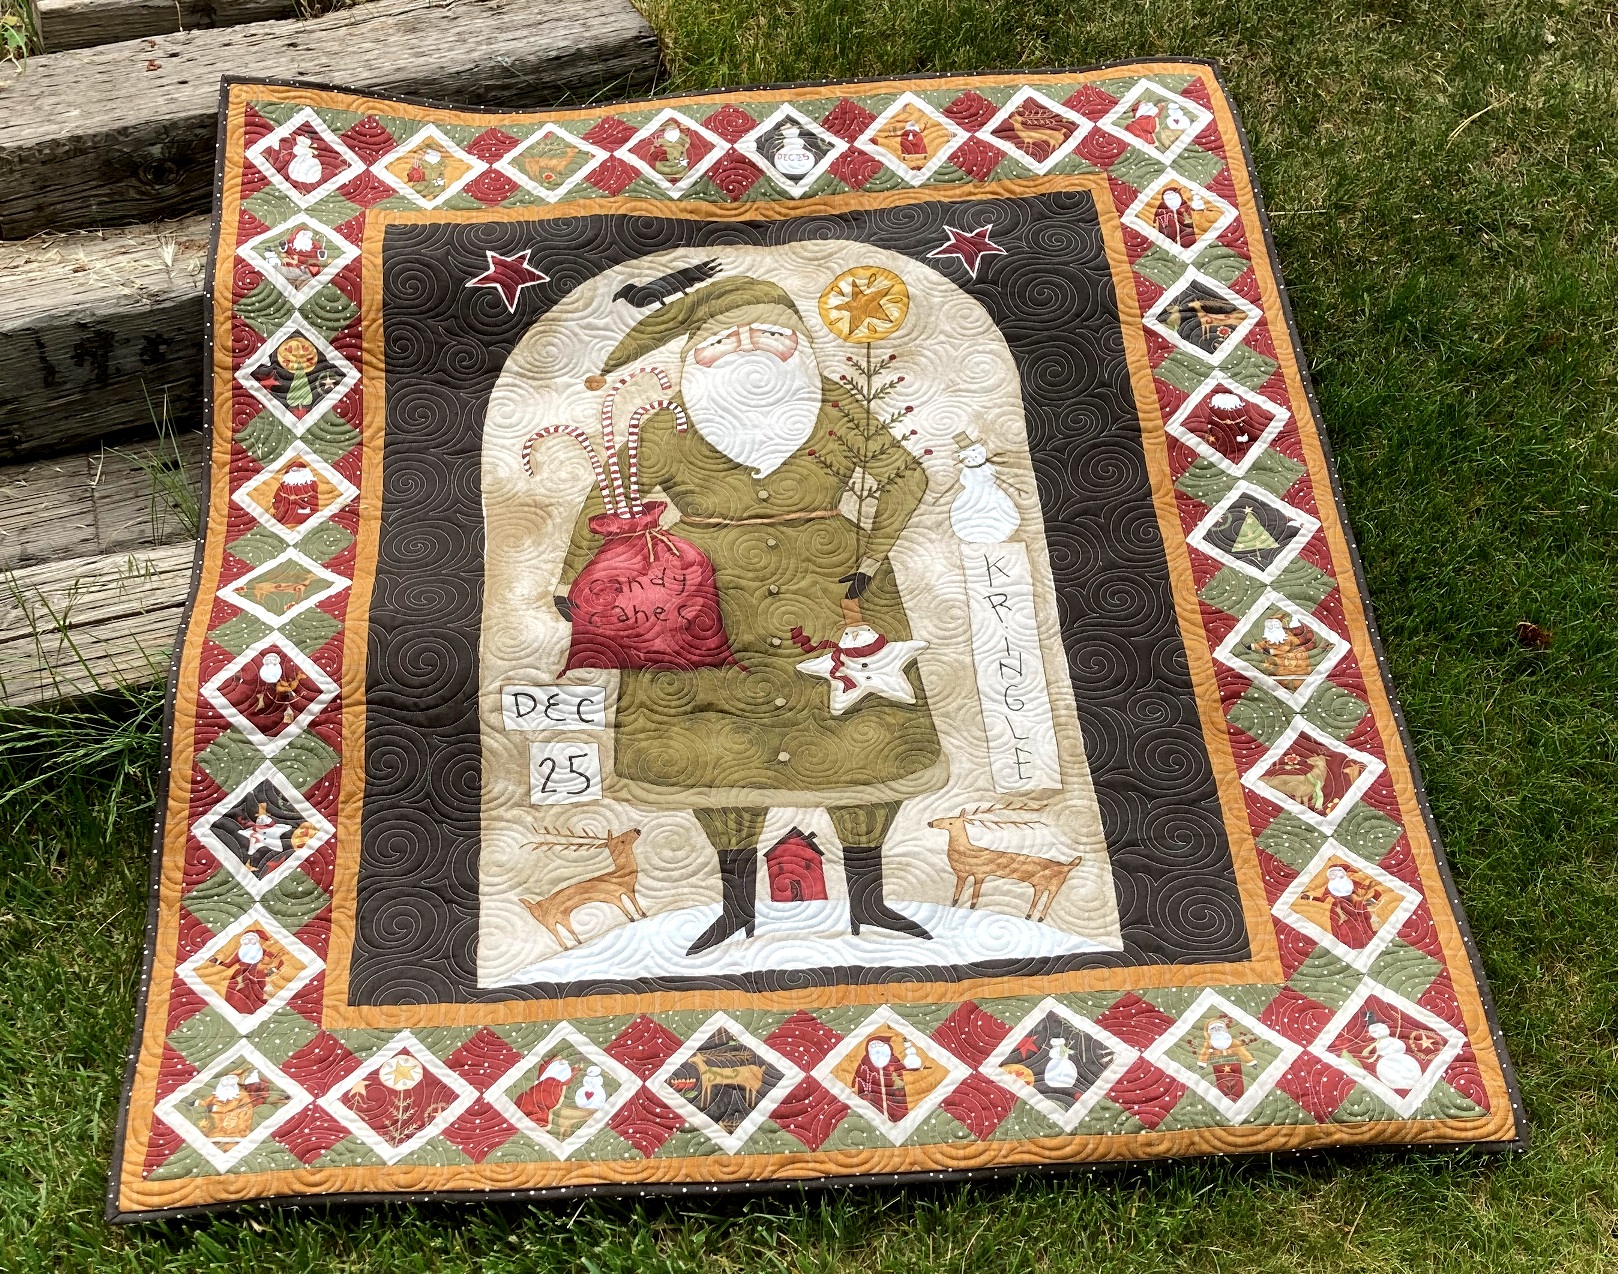
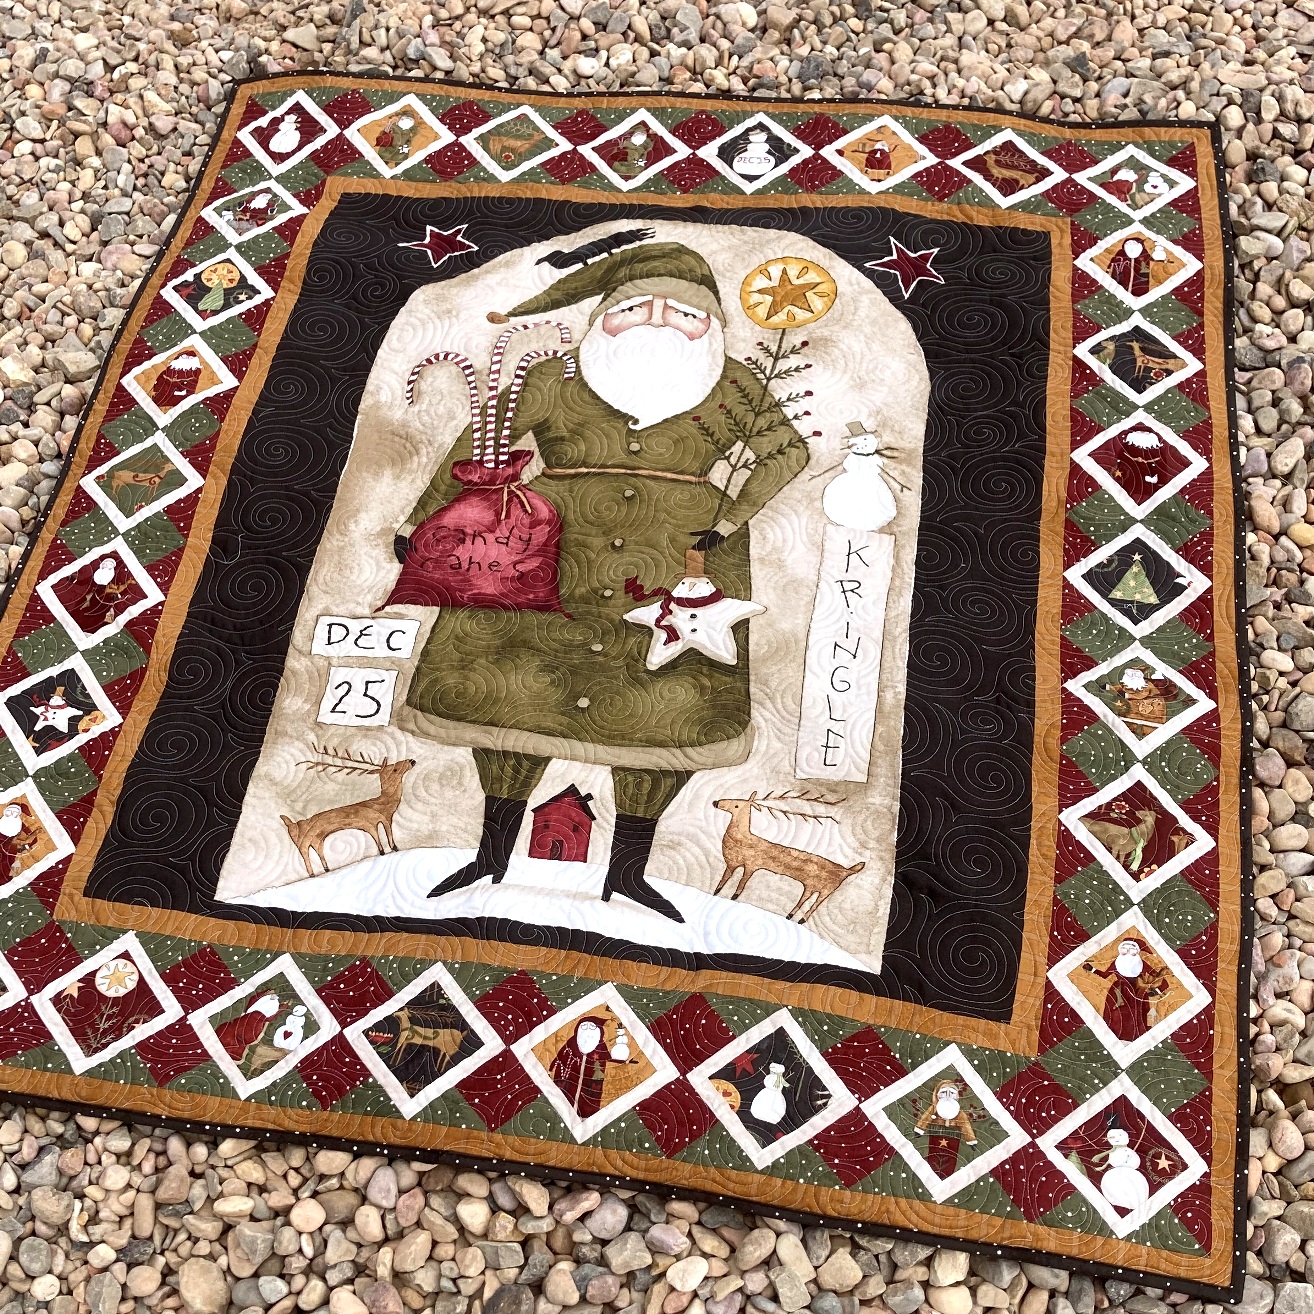
Hello Friends! It’s Melissa Corry from Happy Quilting here and I am thrilled to be bringing you a new quilt finish and a tutorial to go along with it! I just love a good panel, and they make for some stunning quilts!! I just love this Kris Kringle Panel from the Kringle Fabric Line by . It just has such a wonderful Old World Christmas feel to it . And I just love all of the reindeer, snowmen, and Santa’s in the prints from Kringle, so I did a featured fussy cut border to really make that panel pop!!!
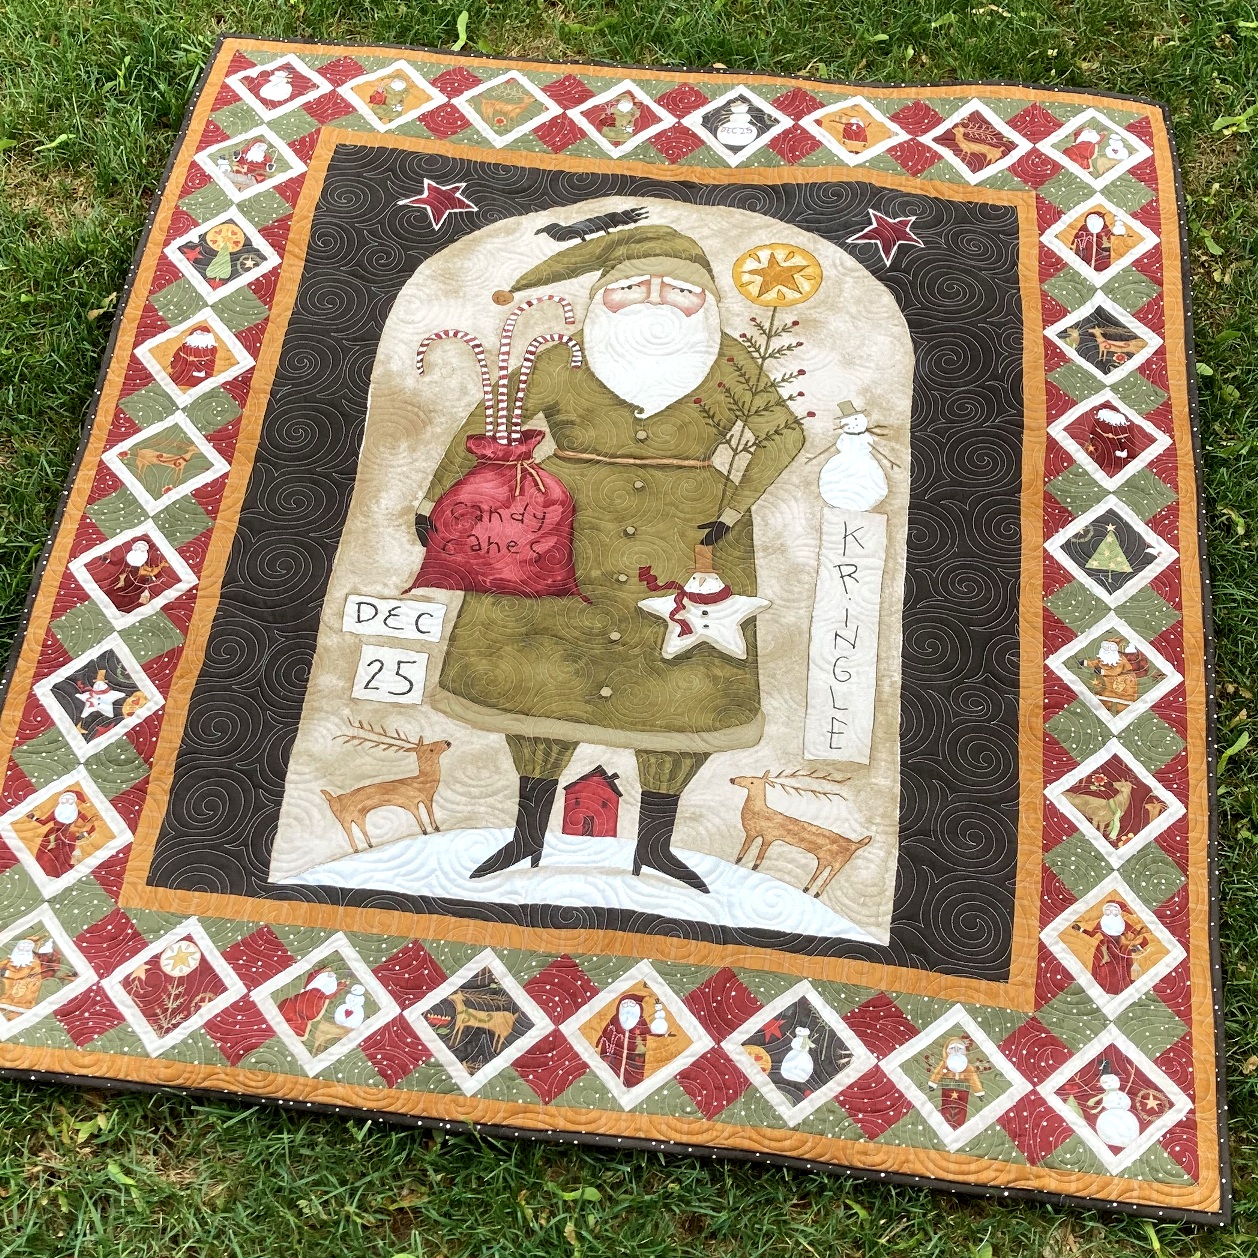
For our tutorial today, we are using the beautiful panel I mentioned, framed in a gorgeous gold stripe. Then, we get to whip up some fun square in a square pieced blocks to make that adorable fussy cut border. One more gold stripe border and a black binding, and you are done!! I just love the way the black and gold just make all of those fun vintage Christmas tones pop!! So great 😉
The quilt finishes at 48″ x 56″ so it makes for a perfect lap size quilt. It is a wonderful go-to Christmas gift that is easy to whip up, but also looks amazing!! So, let’s get to making your own!!!
MATERIALS NEEDED:
To make your own Kris Kringle Panel Quilt you will need
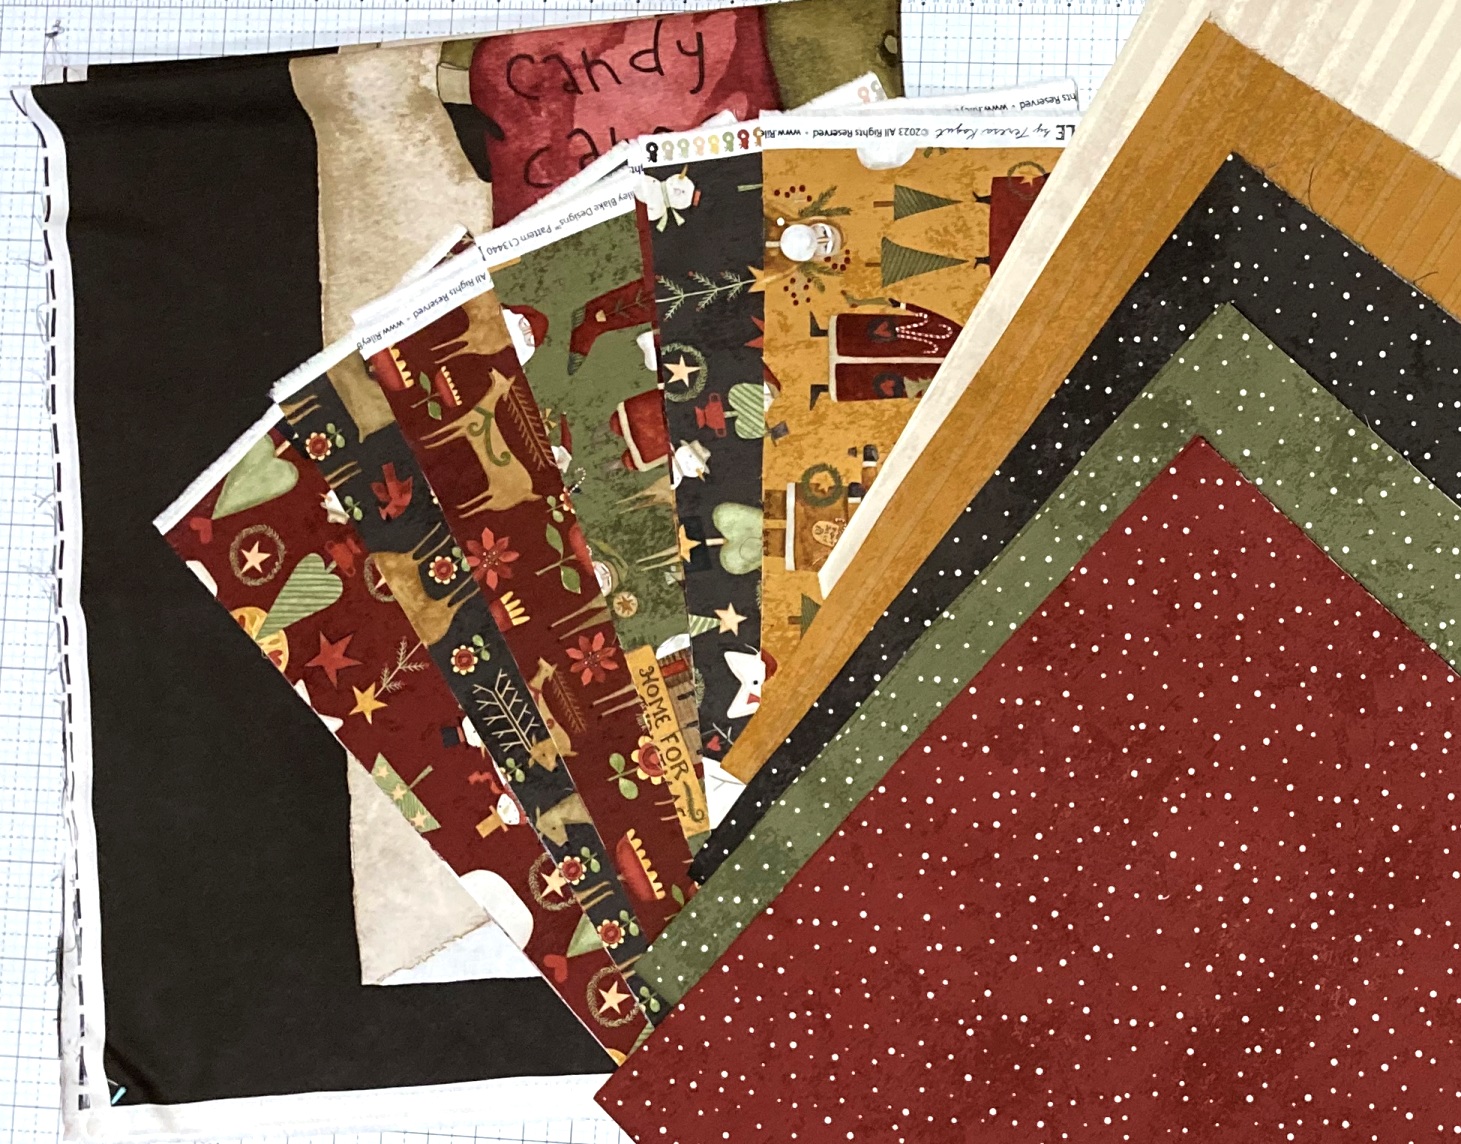
6-8 Fat Quarters in Focal Prints for Fussy Cutting – I used:
Kringle Main in Gold, Red, and Green
Kringle Jacks and Trees in Charcoal and Red and
Kringle Garden in Charcoal, Green, and Red
1/2 Yard of Kringle Stripes Cream
1/2 Yard of Kringle Stripes Gold
1/2 Yard of Kringle Polka Dot Red
1/2 Yard of Kringle Polka Dot Green
1/2 Yard of Kringle Polka Dot Charcoal – For Binding
3 Yards of Backing Fabric
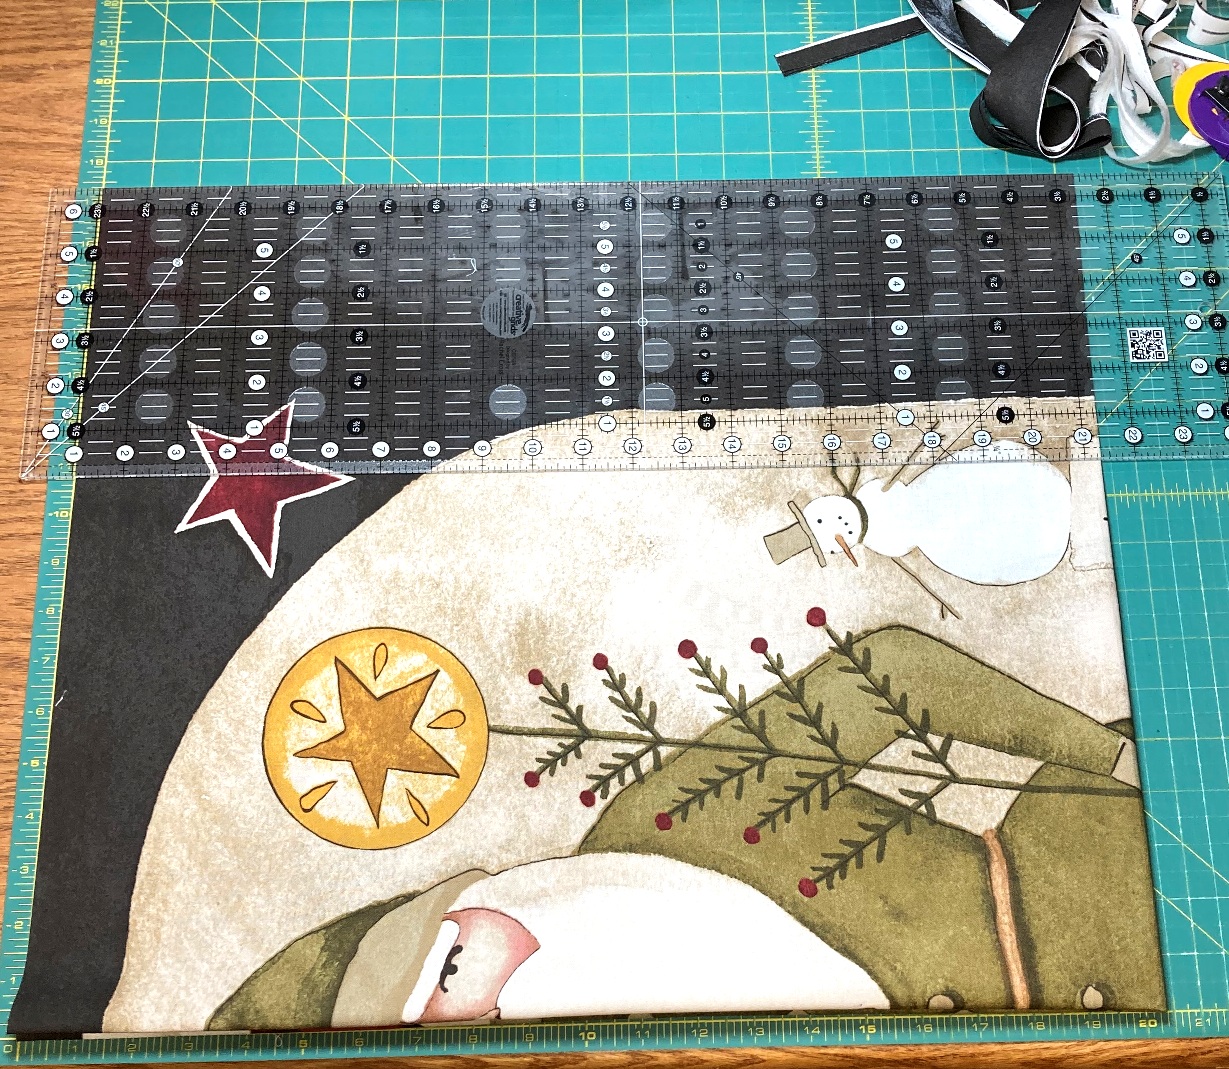
STEP 1 – CUTTING
Begin by Trimming the Panel to measure 34 1/2″ x 40 1/2″. The easiest way to do this is to fold your panel in half twice, and then align the panel as shown, with the folds along the 0 Horizontal line and the 20 1/4″ vertical line. Trim the raw edges on the 0 Vertical line and the 17 1/4″ horizonal line.
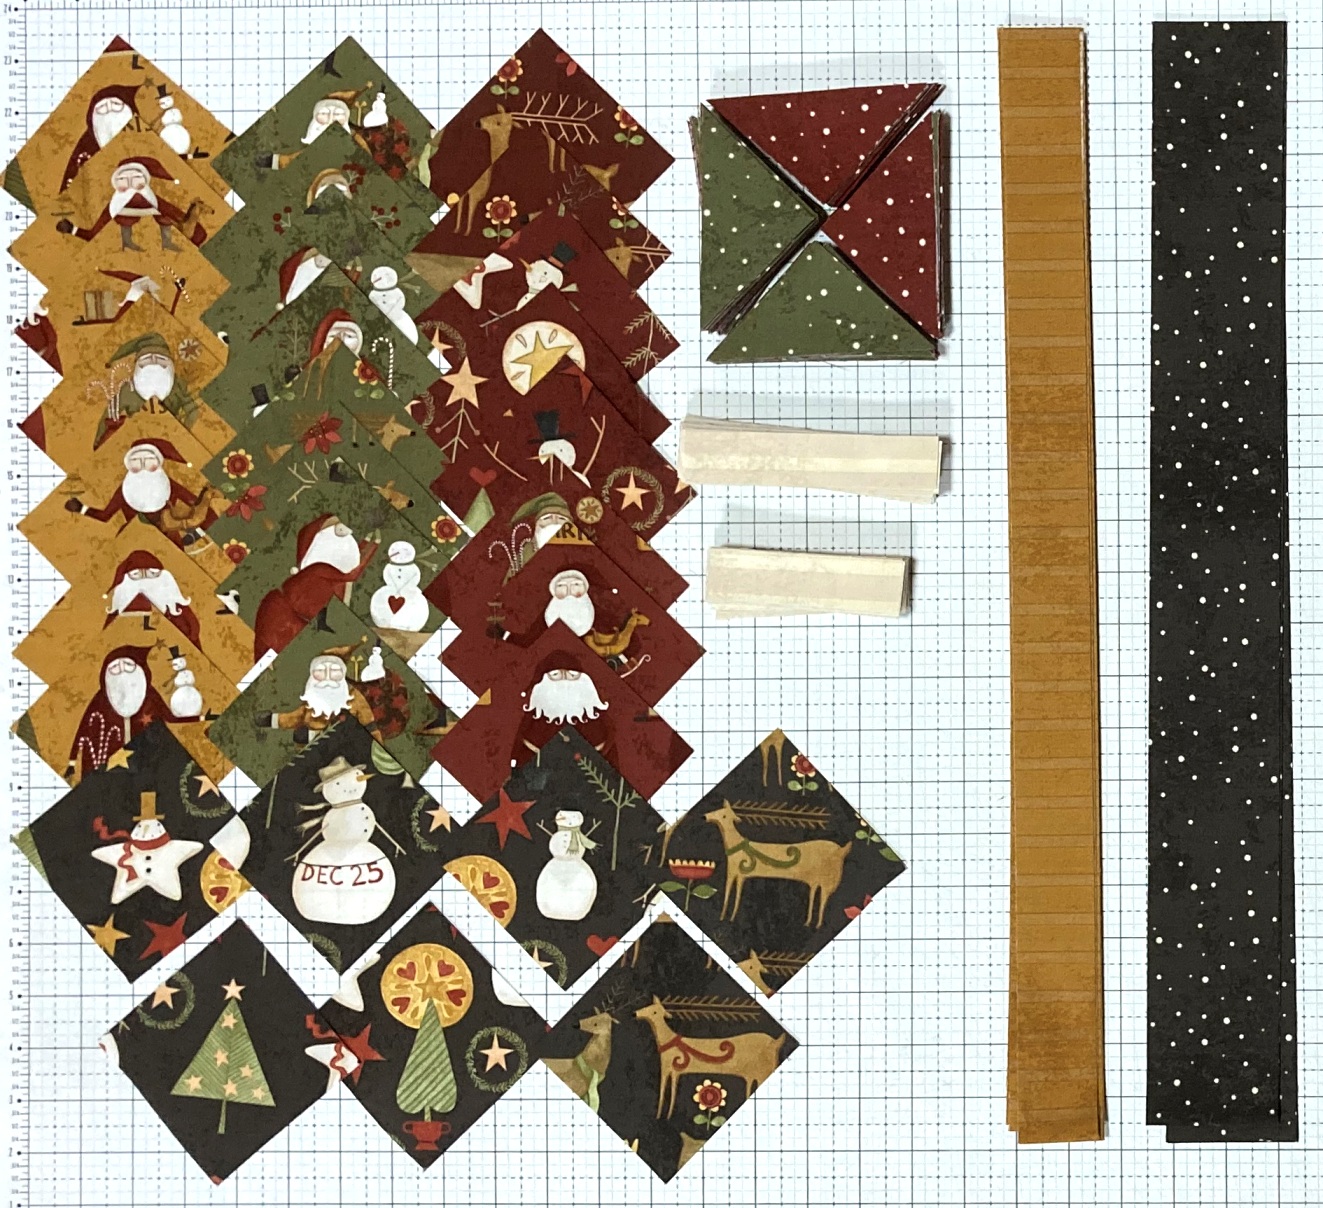
From the Focal Fat Quarters cut:
(30) 3 5/8″ x 3 5/8″ squares fussy cut on point.
From each of the Red Polka Dot Print and Green Polka Dot Print cut:
(30) 4 1/4″ x 4 1/4″ squares subcut in half diaongally twice to make 120 Red triangles and 120 Green triangles.
From the Cream Stripe Print cut:
(60) 1″ x 3 5/8″ rectangles and (60) 1″ x 4 3/4″ rectangles.
From the Gold Stripe Print cut:
(2) 1 1/2″ x 36 1/2″ strips and (2) 1 1/2″ x 40 1/2″ strips and (6) 1 1/2″ x 42″ strips.
From the Charcoal Polka Dot Print cut:
(6) 2 1/2″ x WOF Strips for binding.
I found it helpful when fussy cutting the 3 5/8″ square to make a plastic template. It was just quicker and easier to see where the fussy cutting lined up. If you don’t have plastic template material, I recommend marking a small square ruler.

STEP 2 – ADDING THE INNER BORDER
And with the cutting done, we are ready to do some stitching. Layout the Panel and the 2 Gold Strips 1 1/2″ x 40 1/2″ and 2 Gold Strips 1 1/2″ x 36 1/2″ as as shown below.
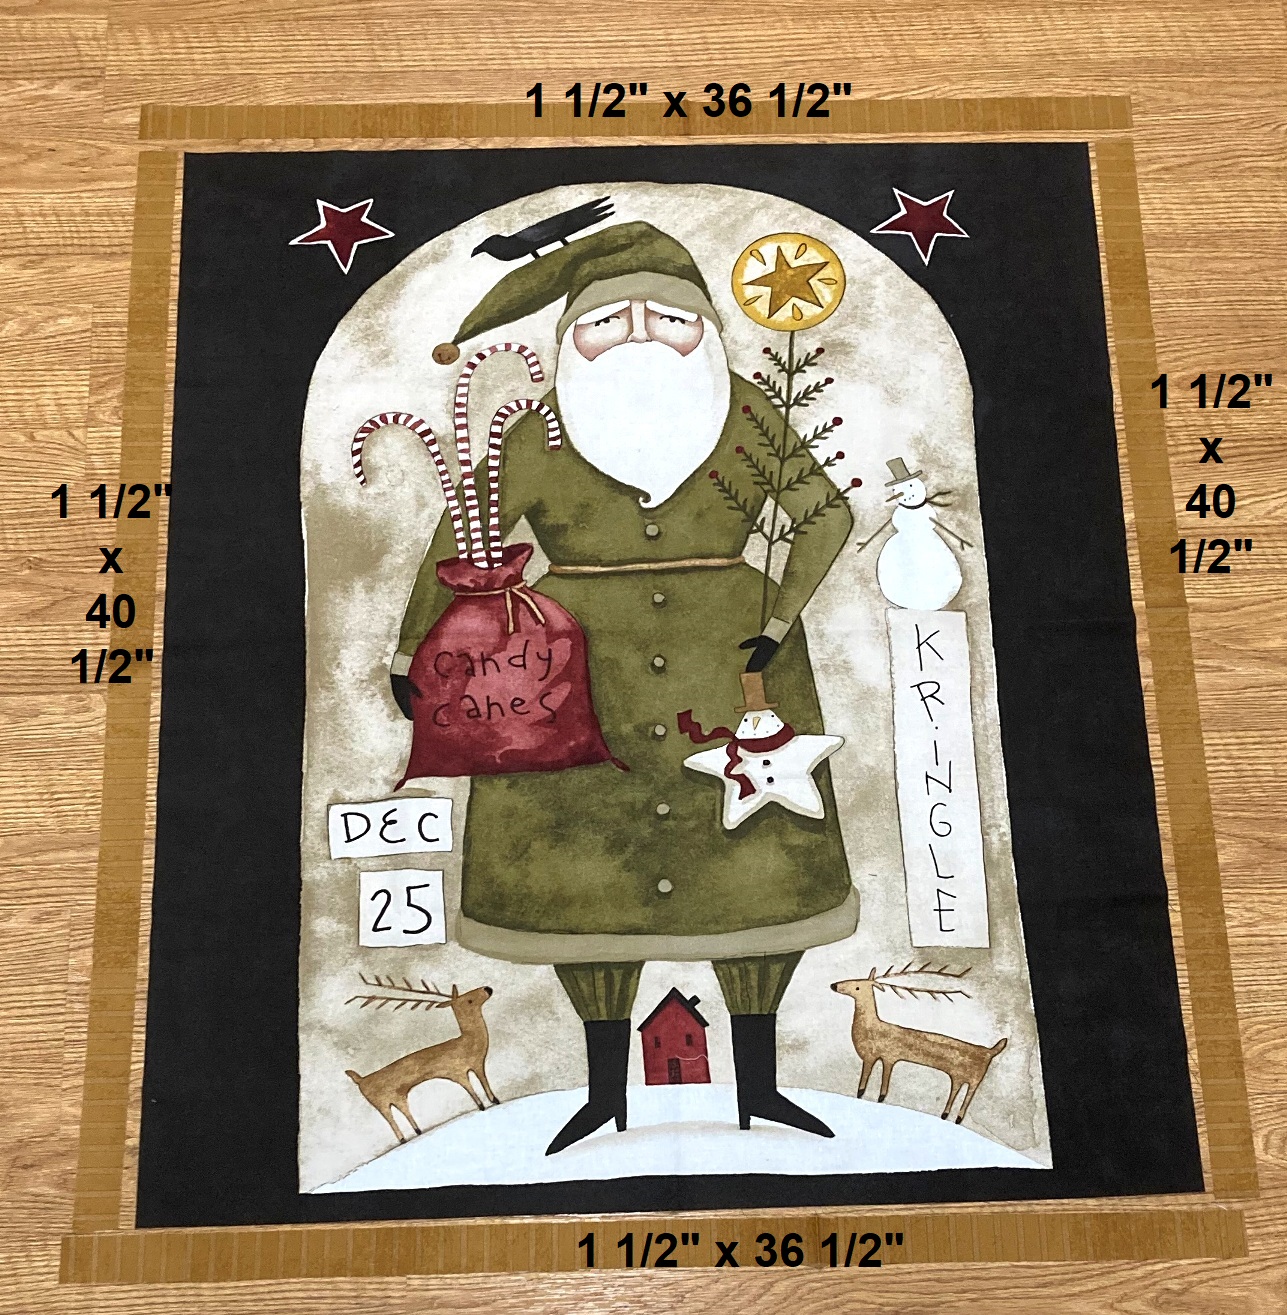
Place the side strips onto the sides of the Panel with right sides together. Align and pin the strips, and then stitch a 1/4″ seam along the two edges.

Press the seams out towards the Gold strips. Place the top and bottom strips onto the top and bottom of the Panel with right sides together. Align and pin the strips, and then stitch a 1/4″ seam along the two edges.
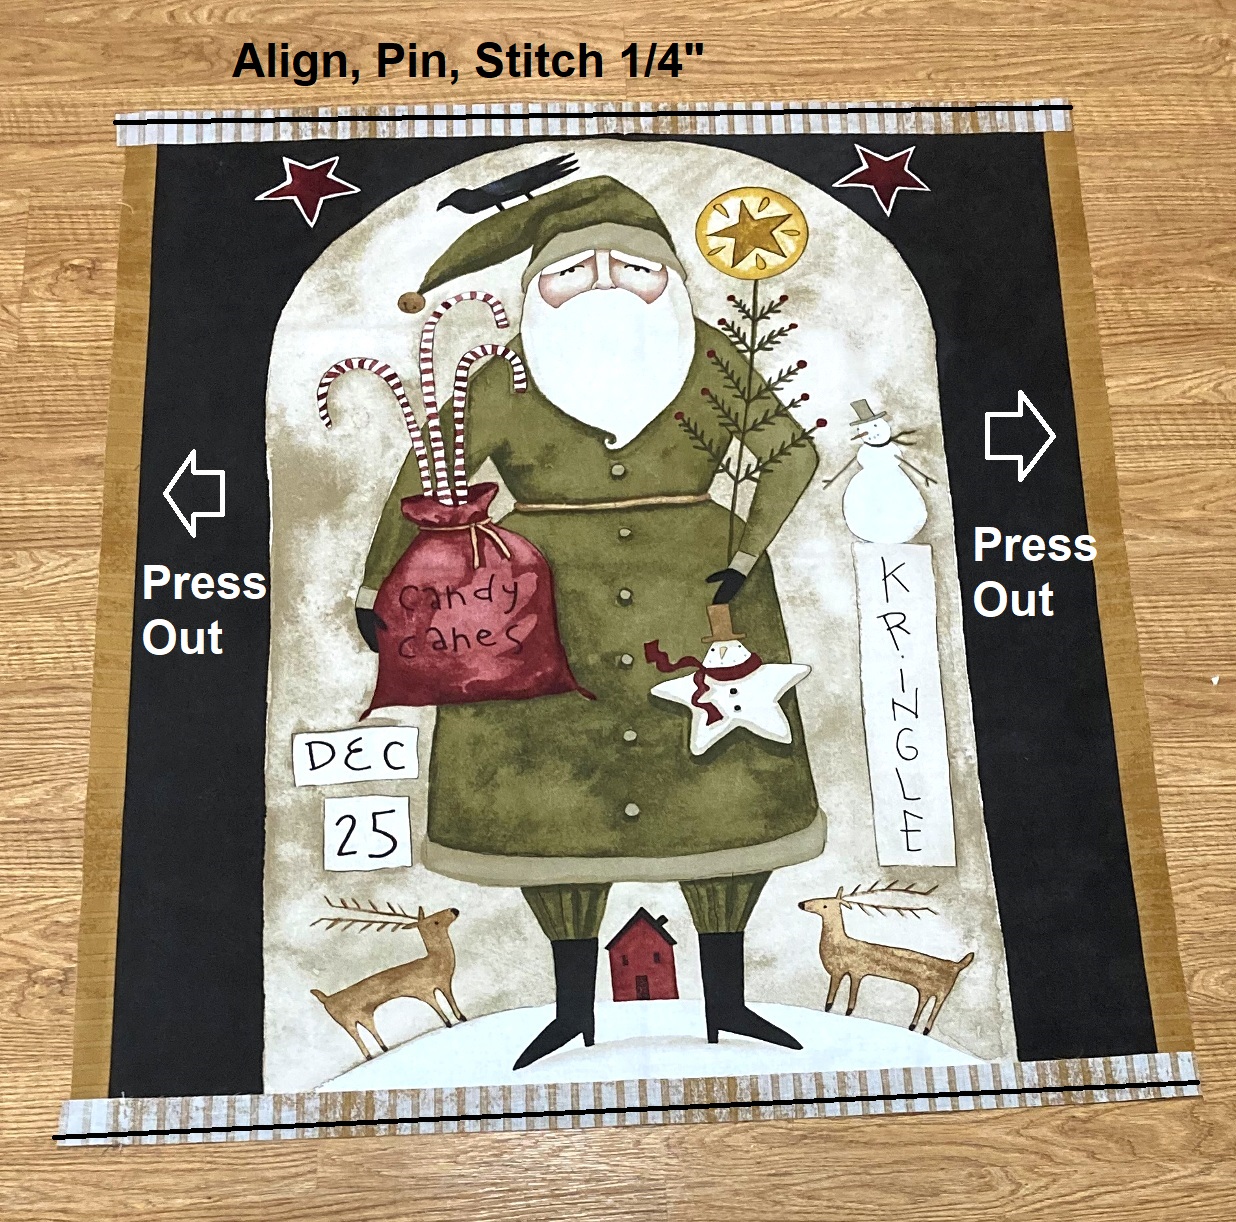
Press the seams out towards the Gold strips. You can now set the bordered panel aside for a minute while we make the patchwork border.

STEP 3 – ADDING THE PATCHWORK BORDER
So now we need to make the Square in a Square blocks for our second border. We will start with bordering the fussy cut squares. Layout a Fussy cut 3 3/8″ square, 2 Cream stripe 1″ x 3 5/8″ rectangles and 2 Cream rectangles 1″ x 4 3/4″ rectangles as shown below. Place the top and bottom rectangles onto the top and bottom of the square with right sides together. Align and then stitch a 1/4″ seam along the two edges. Press the seams out towards the Cream rectangles. Now, place the side rectangles onto the sides of the square with right sides together. Align and then stitch a 1/4″ seam along the two edges. Press the seams out towards the Cream rectangles.
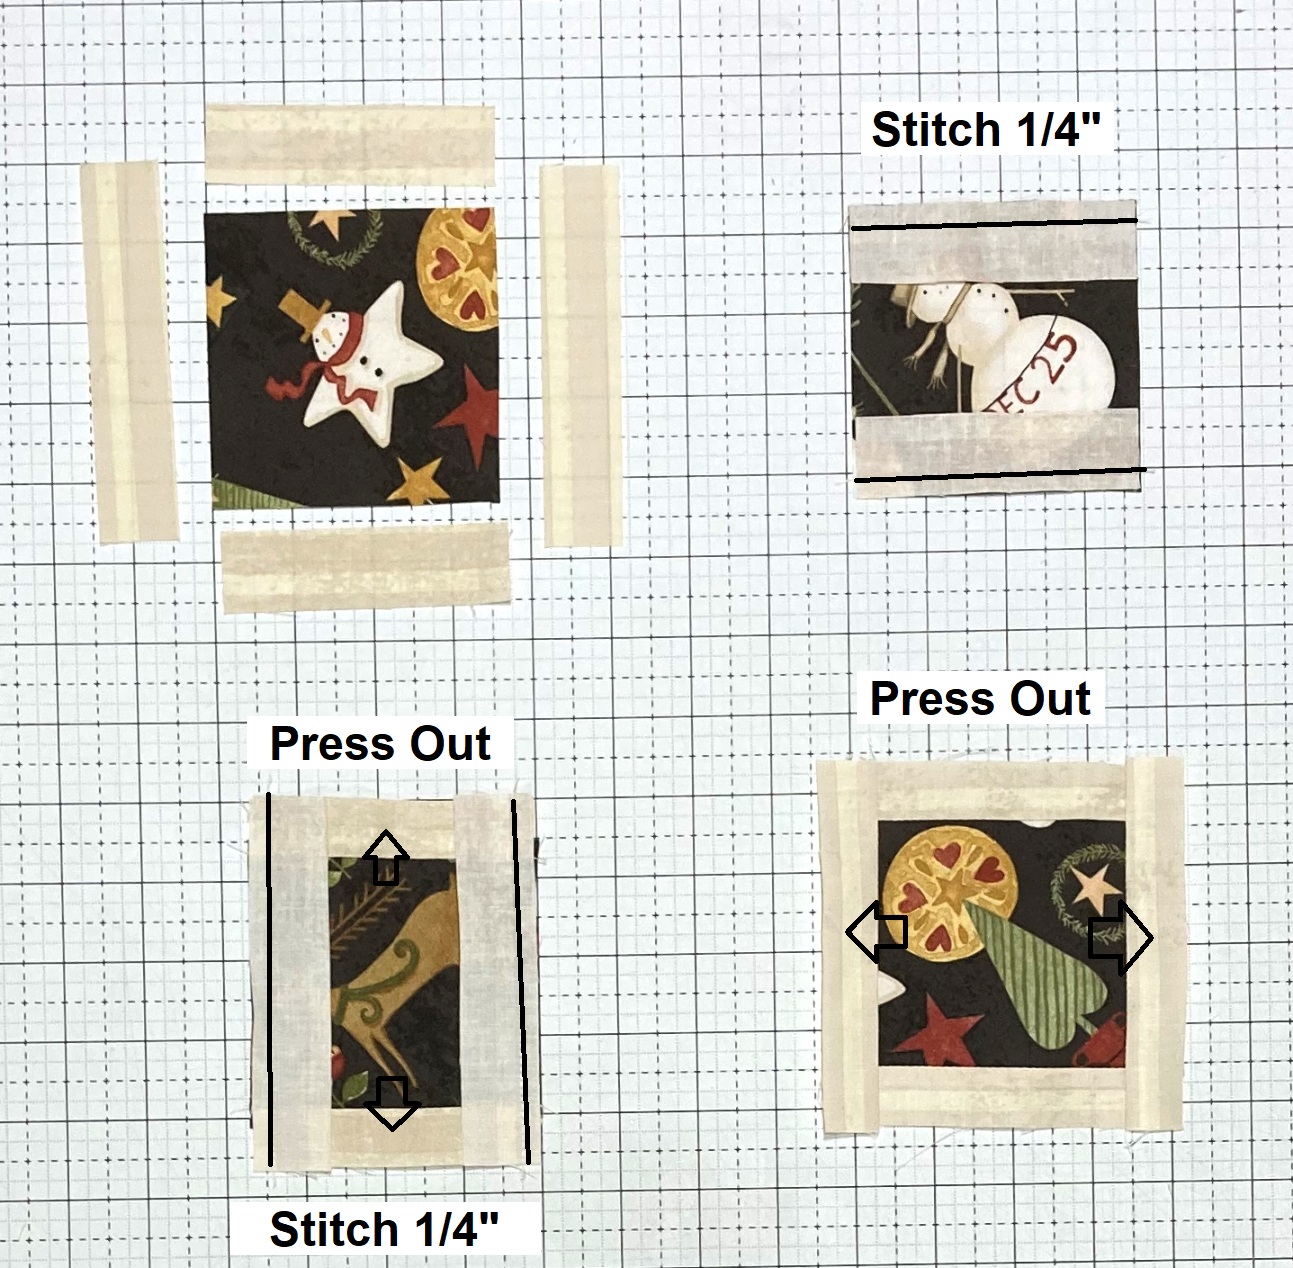
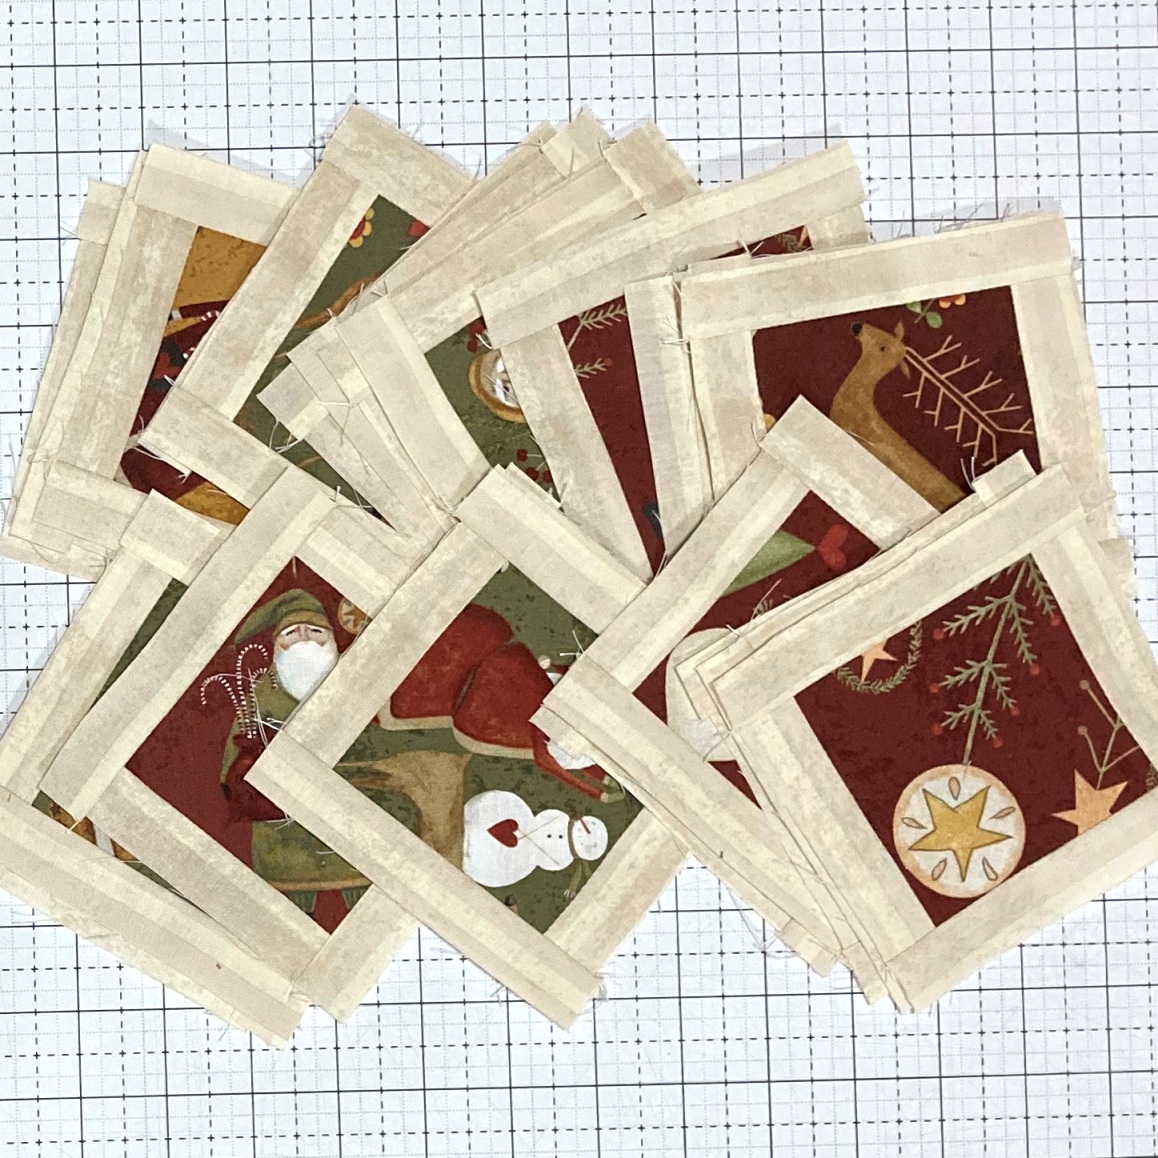
Repeat this process to border all 30 of the Fussy Cut squares.
And now, we are going to add the square in a square borders to each center square. To do this, layout 4 Green triangles and 4 red rectangles around the bordered squared as shown. Place the Green triangles onto the Red triangles with right sides together and aligning the edges. Sew a 1/4″ seam on all 4 units as shown. Press the seams open and then trim the tails from the Pieced Triangle Units.
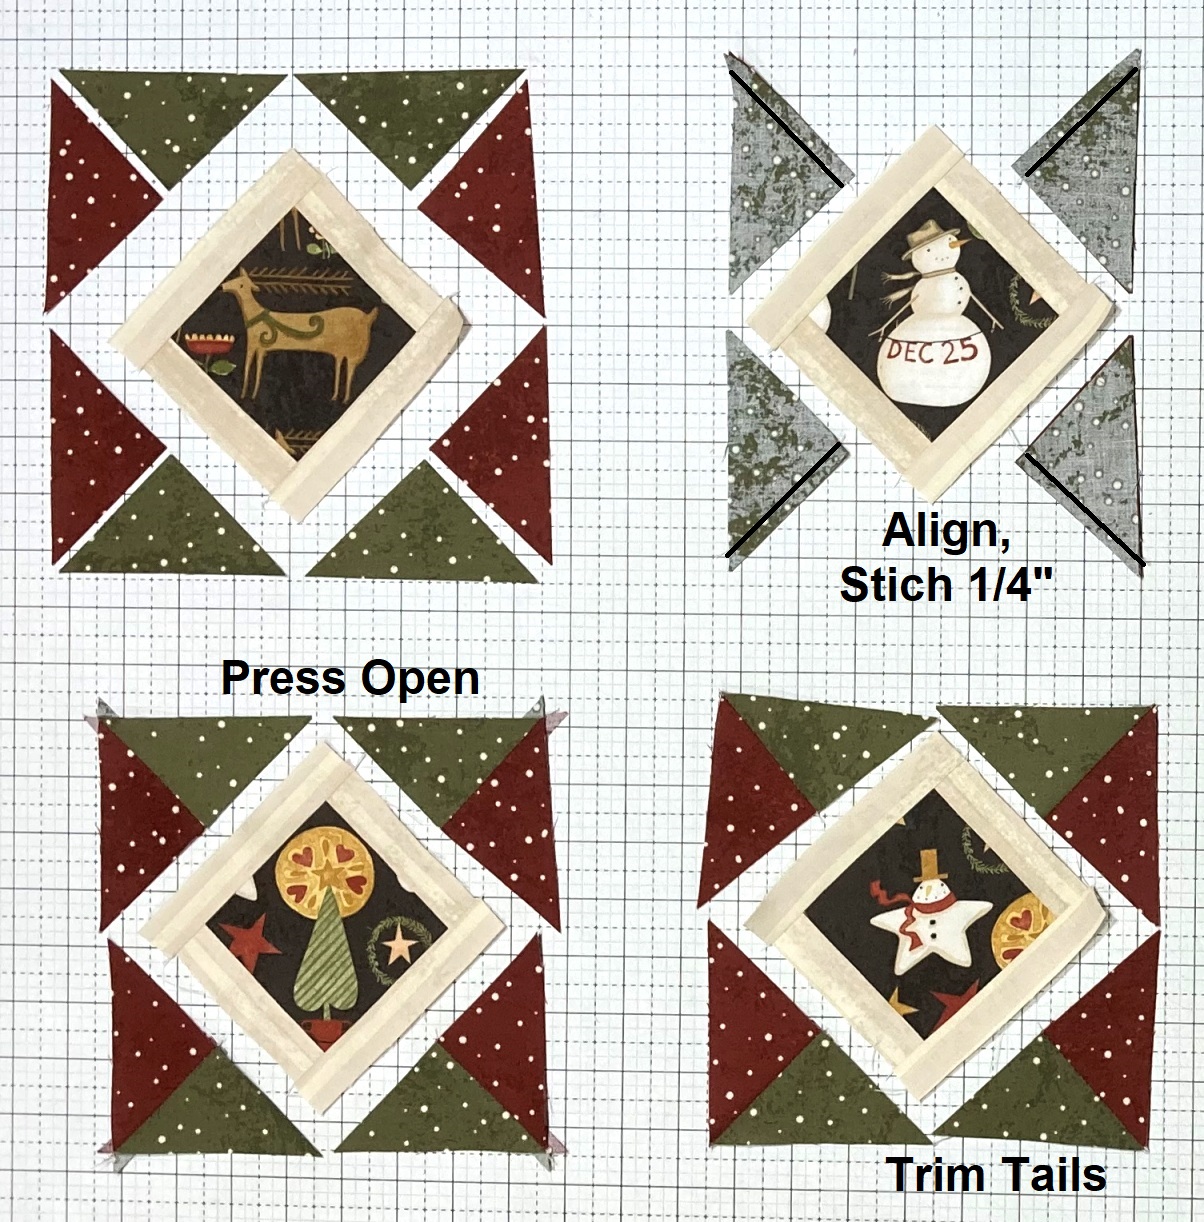
Finger press a bordered Fussy Cut square in half twice. Layout the square and the 4 pieced Triangle Units as shown. Place the top right and bottom left Triangle Units onto the square with right sides together aligning the seam with the finger crease. Pin and then Stitch a 1/4″ seam along the two edges. Press the seams out towards the Triangle Units. Now, place the top left and bottom right Triangle Units onto the square with RST, aligning the seam and crease. Pin and stitch a 1/4″ seam along the edges. Press the seams outwards and then trim the tails from the pieced block.
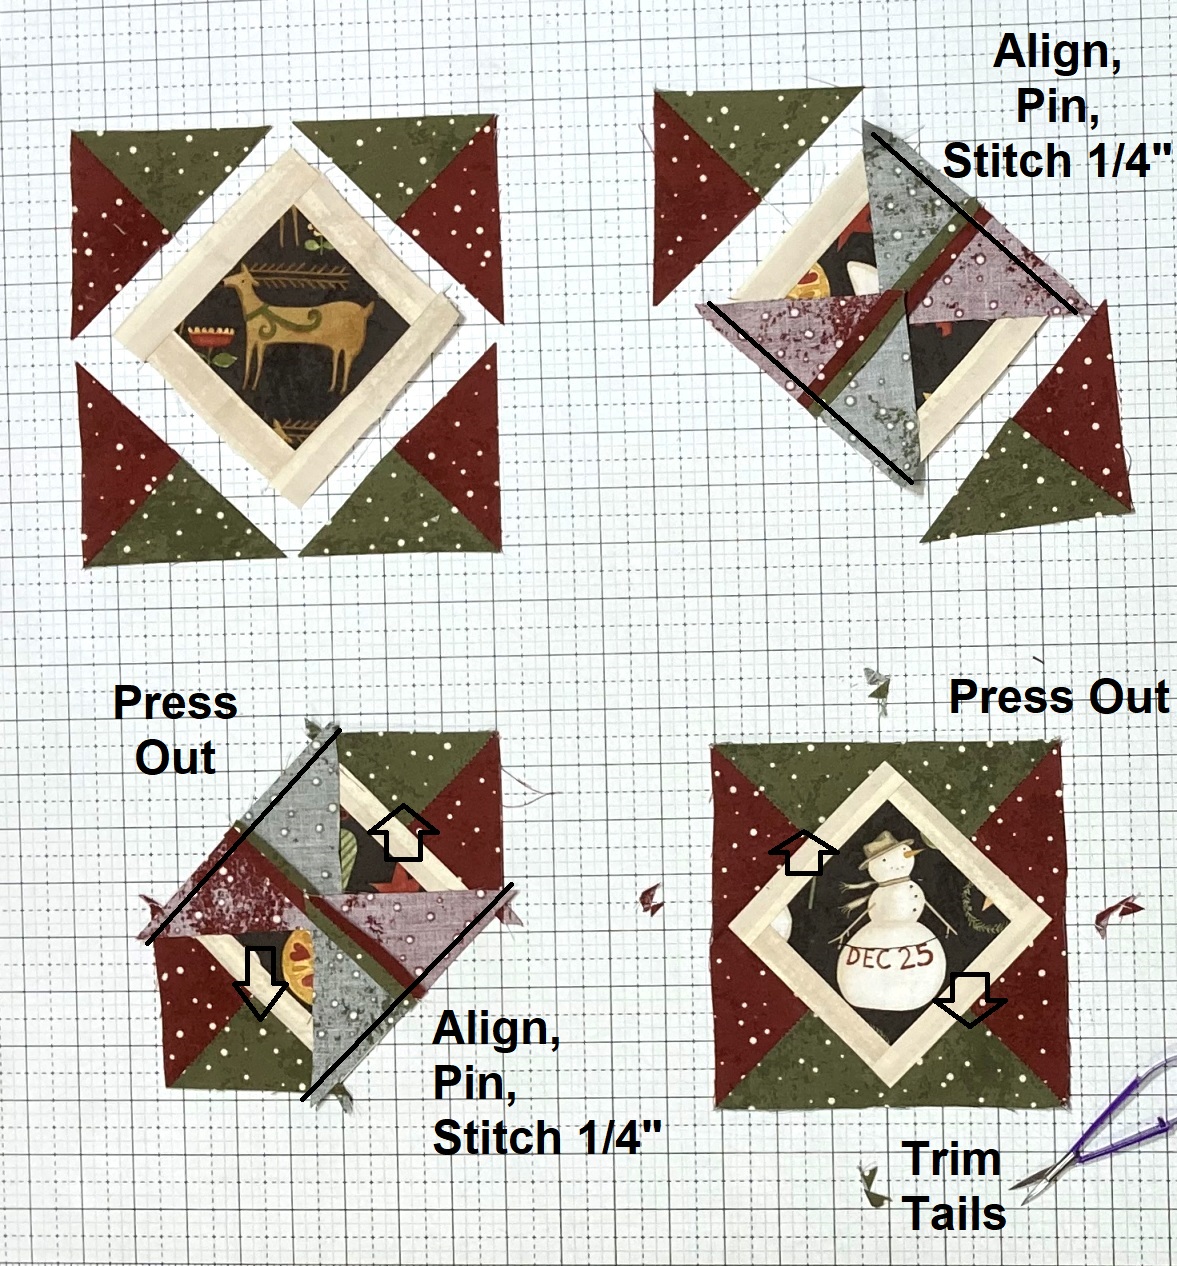
Repeat the last 2 steps to make a total of 30 pieced blocks.

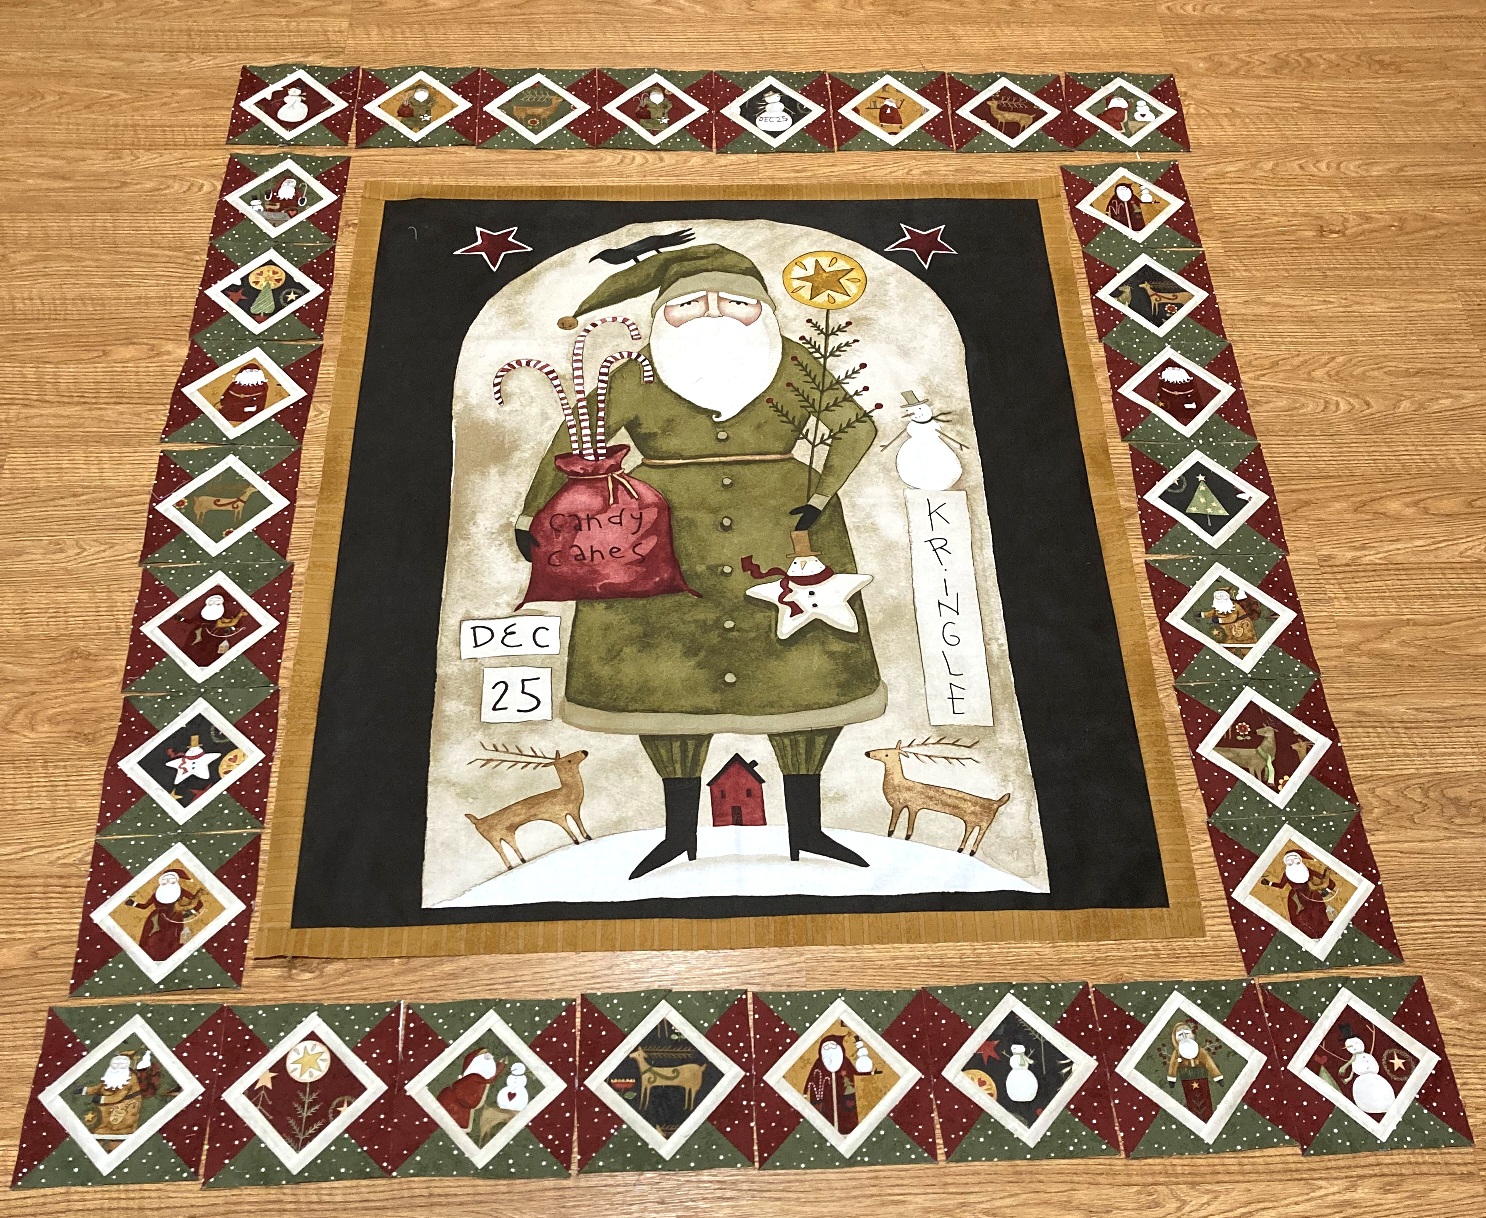
And now, with the pieced blocks made, we can whip up the border. Layout 8 blocks along the top and bottom of the panel, and 7 blocks along each side of the panel. Sew the blocks in the top and bottom into rows. Sew the blocks in the two sides into columns.
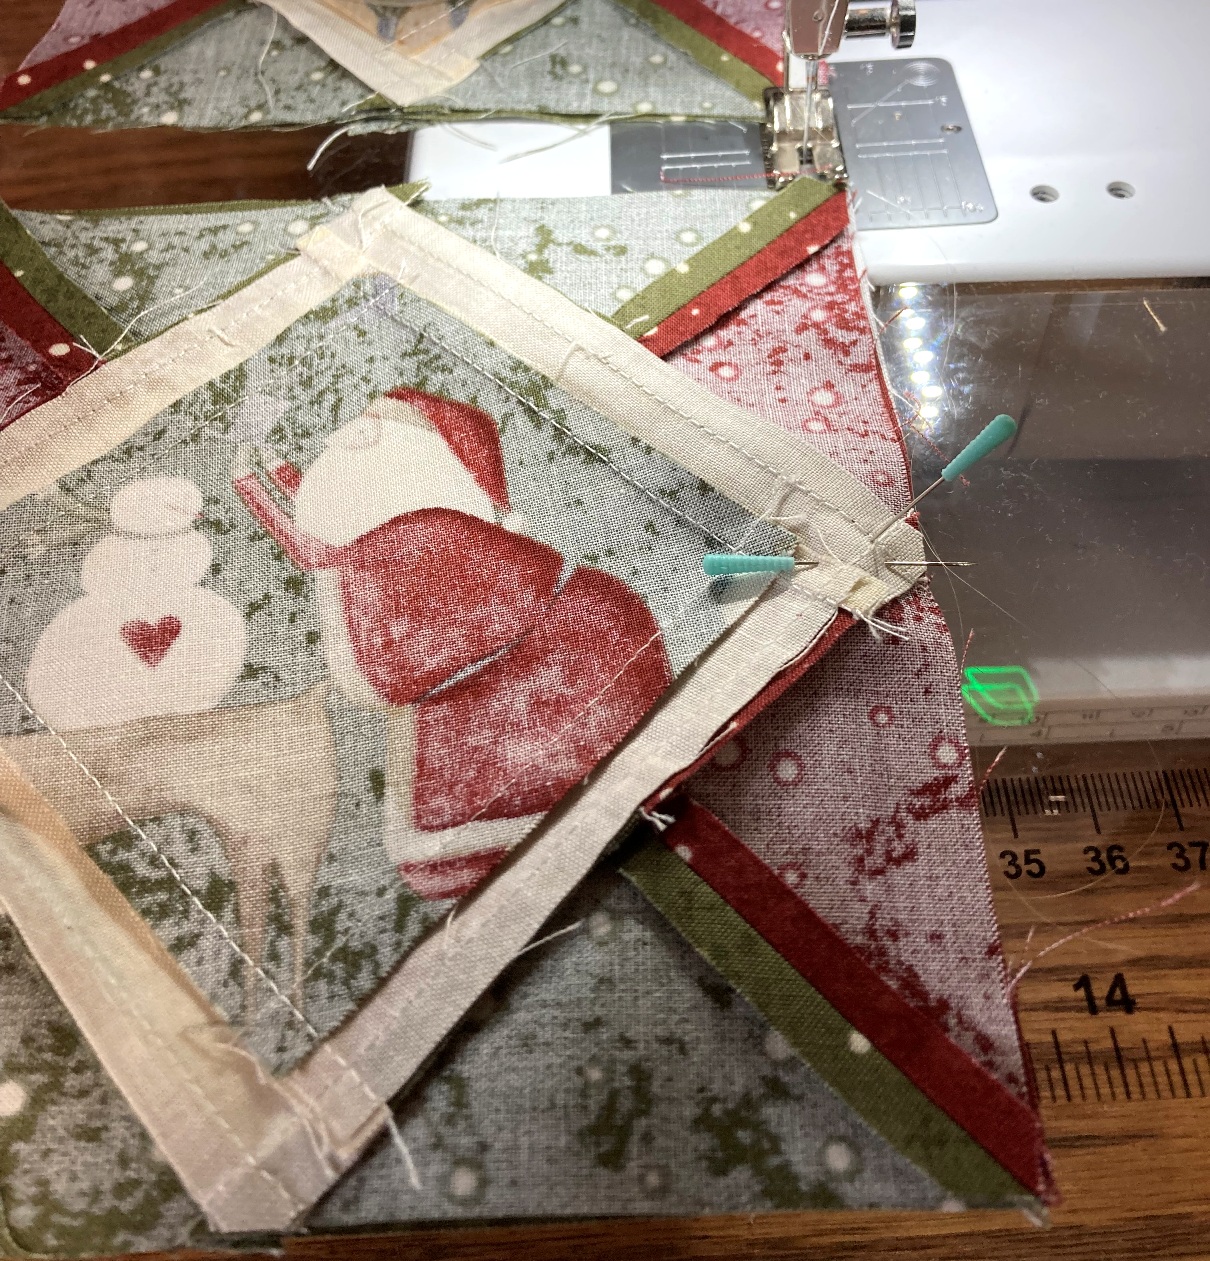
I find it helpful when sewing the blocks together to use this little pin trick. That way all of the points line up perfect!!
Once your block rows and columns are all sewn together, press the seams open and then lay them out around your panel again.
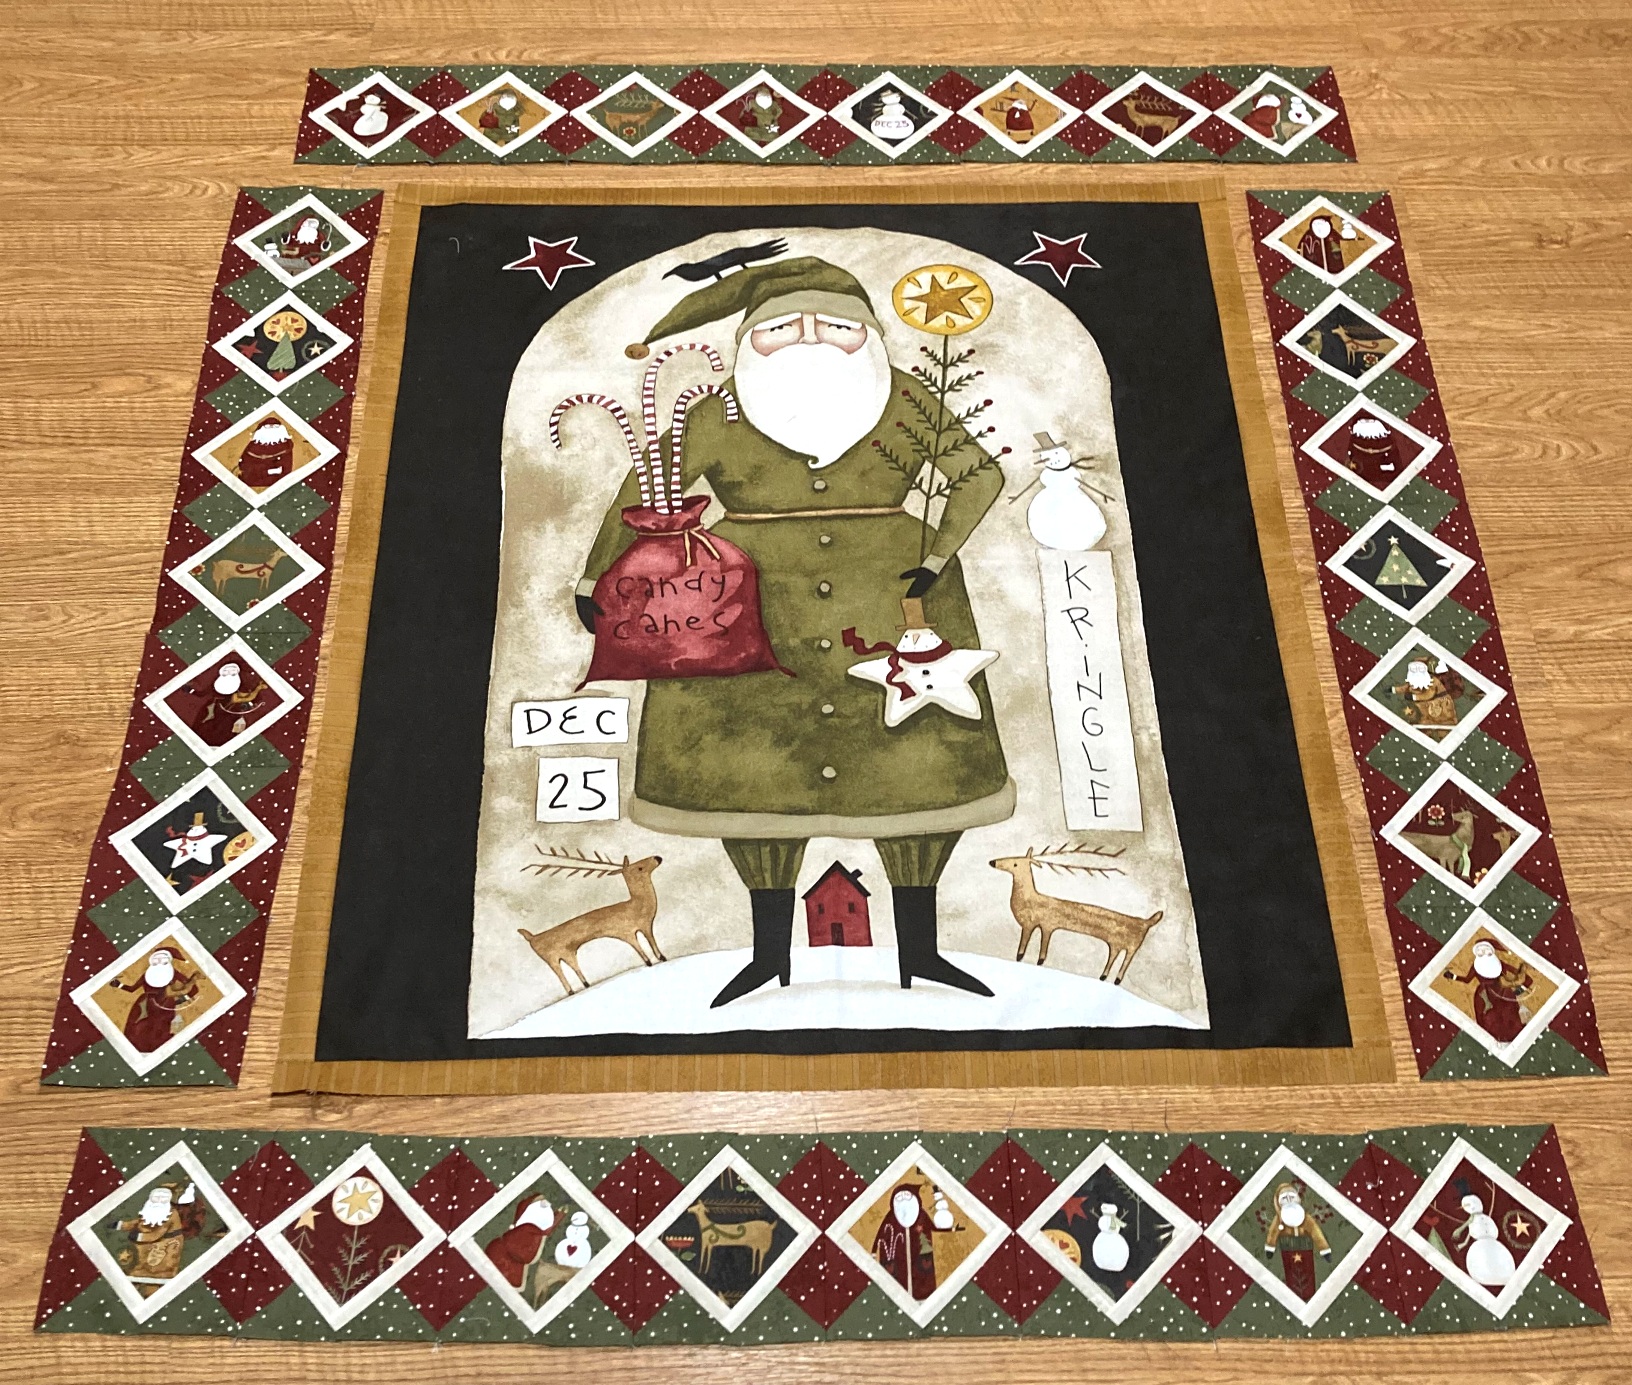
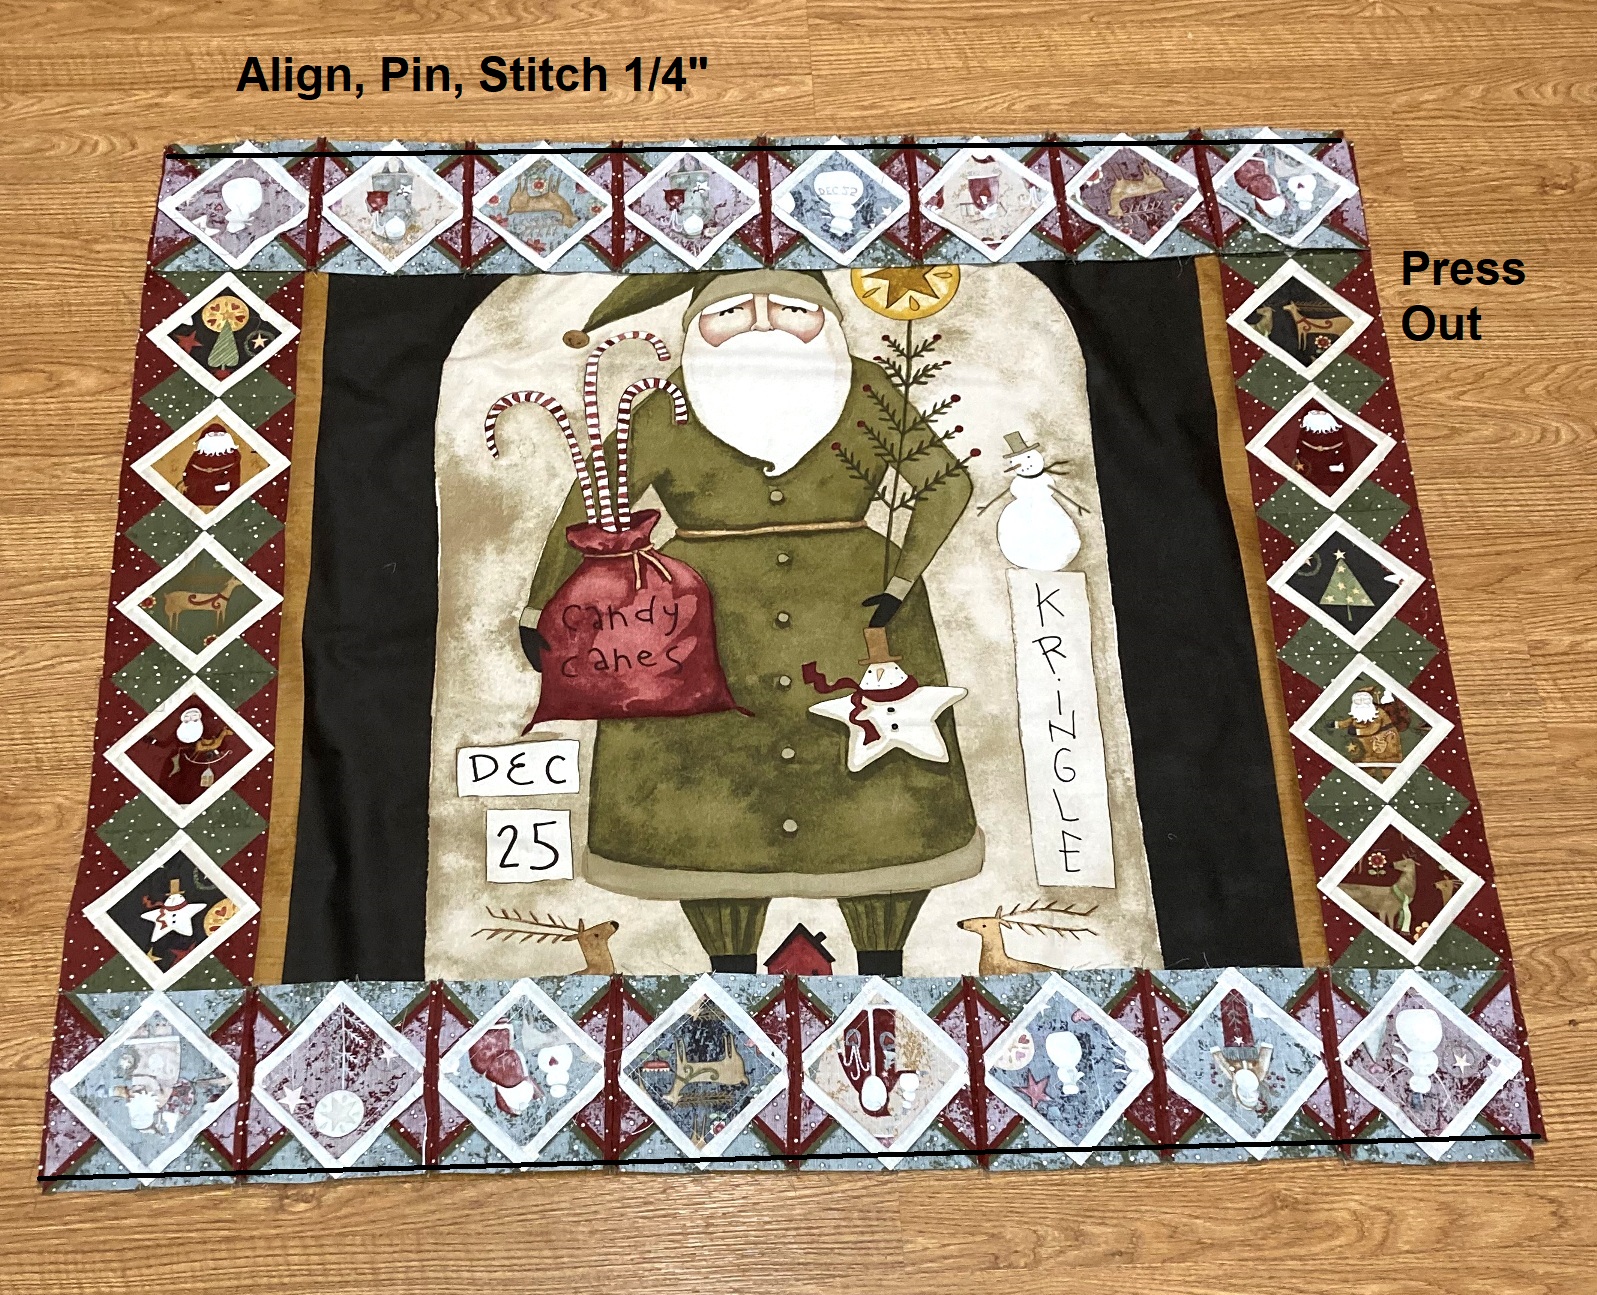
Place the side Patchwork Rows onto the sides of the Bordered Panel with right sides together. Align and pin the rows, and then stitch a 1/4″ seam along the two edges.
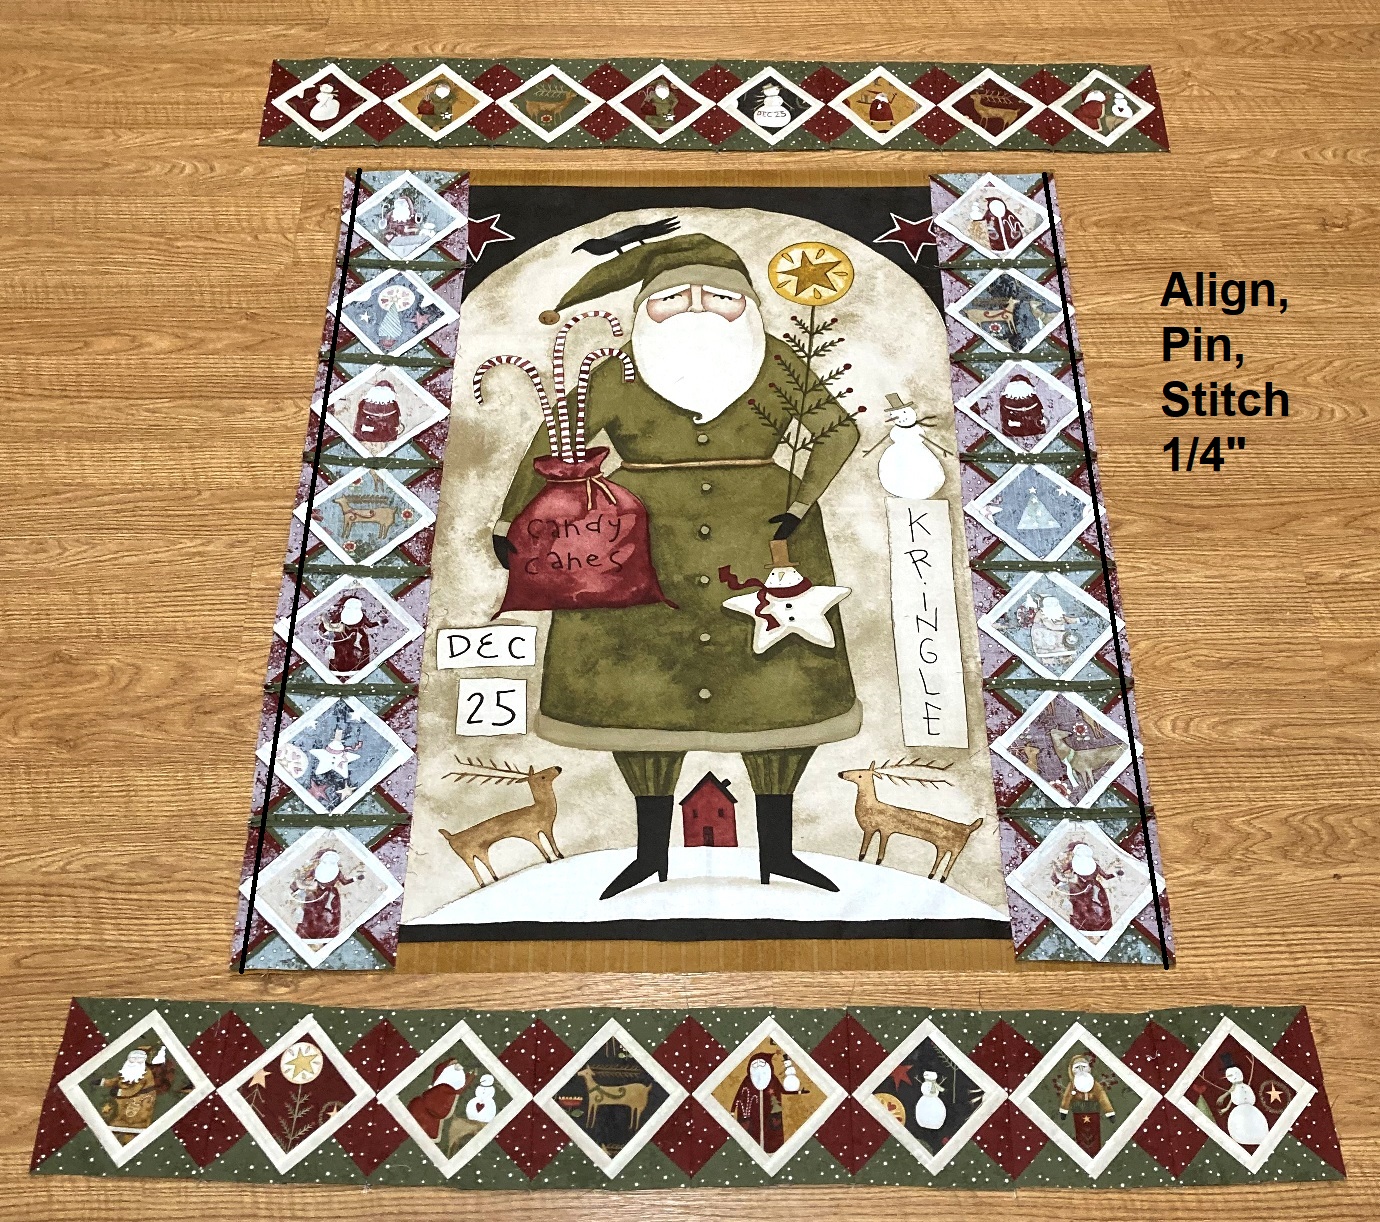
Press the seams in towards the Gold strips. Place the top and bottom Patchwork rows onto the top and bottom of the Bordered Panel with right sides together. Align and pin the rows, and then stitch a 1/4″ seam along the two edges. Once again, press the seam allowances in towards the Gold strips.
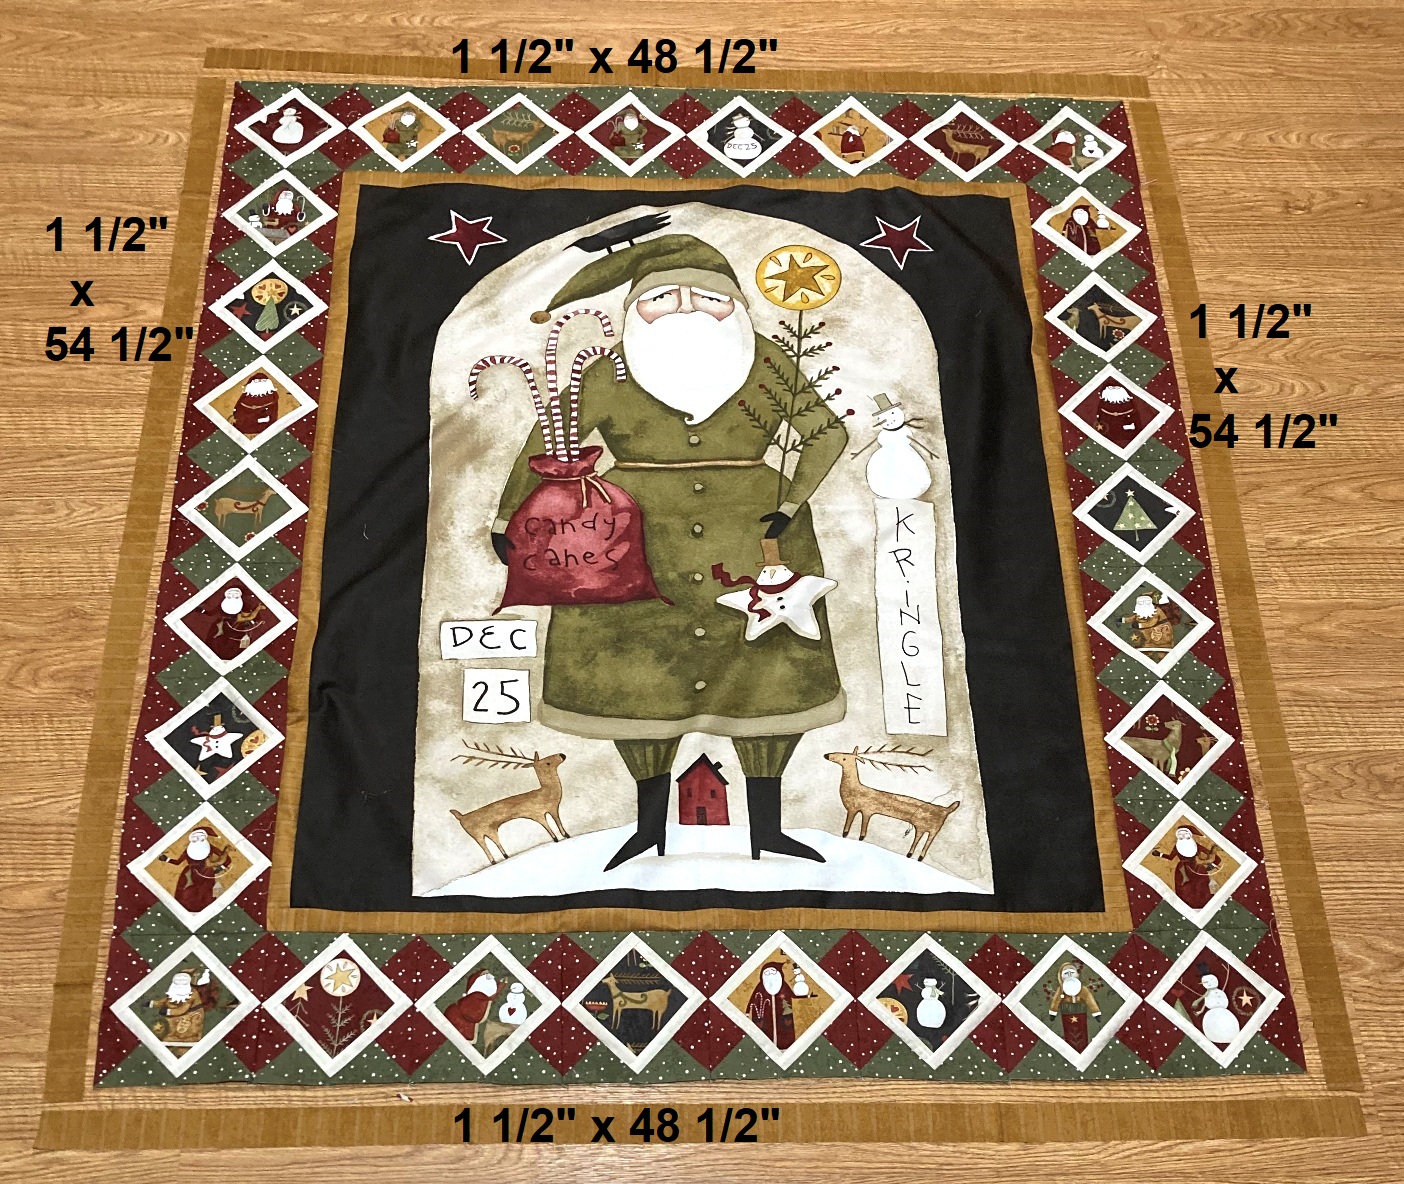
STEP 4 – ADDING THE OUTER BORDER
And now you are ready to add the final Outer Border. Sew the remainig 6 Gold Strips 1 1/2″ x 42″ together end to end. Cut 2 strips 1 1/2″ x 54 1/2″ and 2 strips 1 1/2″ x 48 1/2″. Using the same instructions for adding the Inner Border, add the outer Gold border.
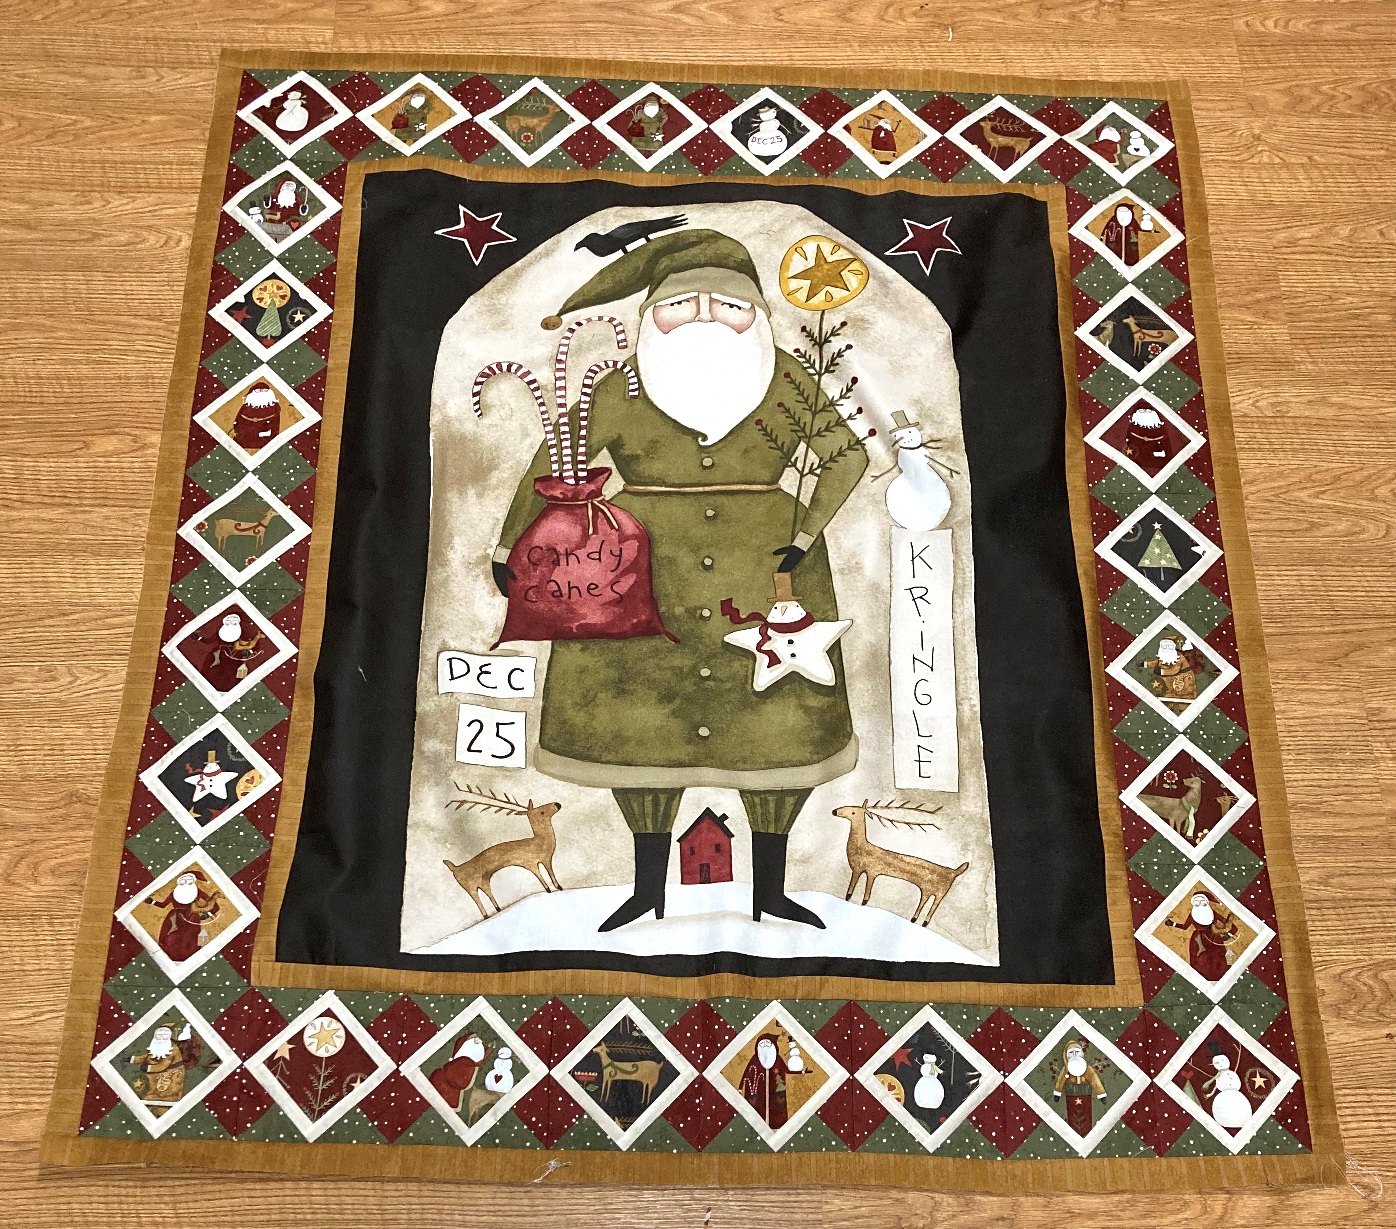
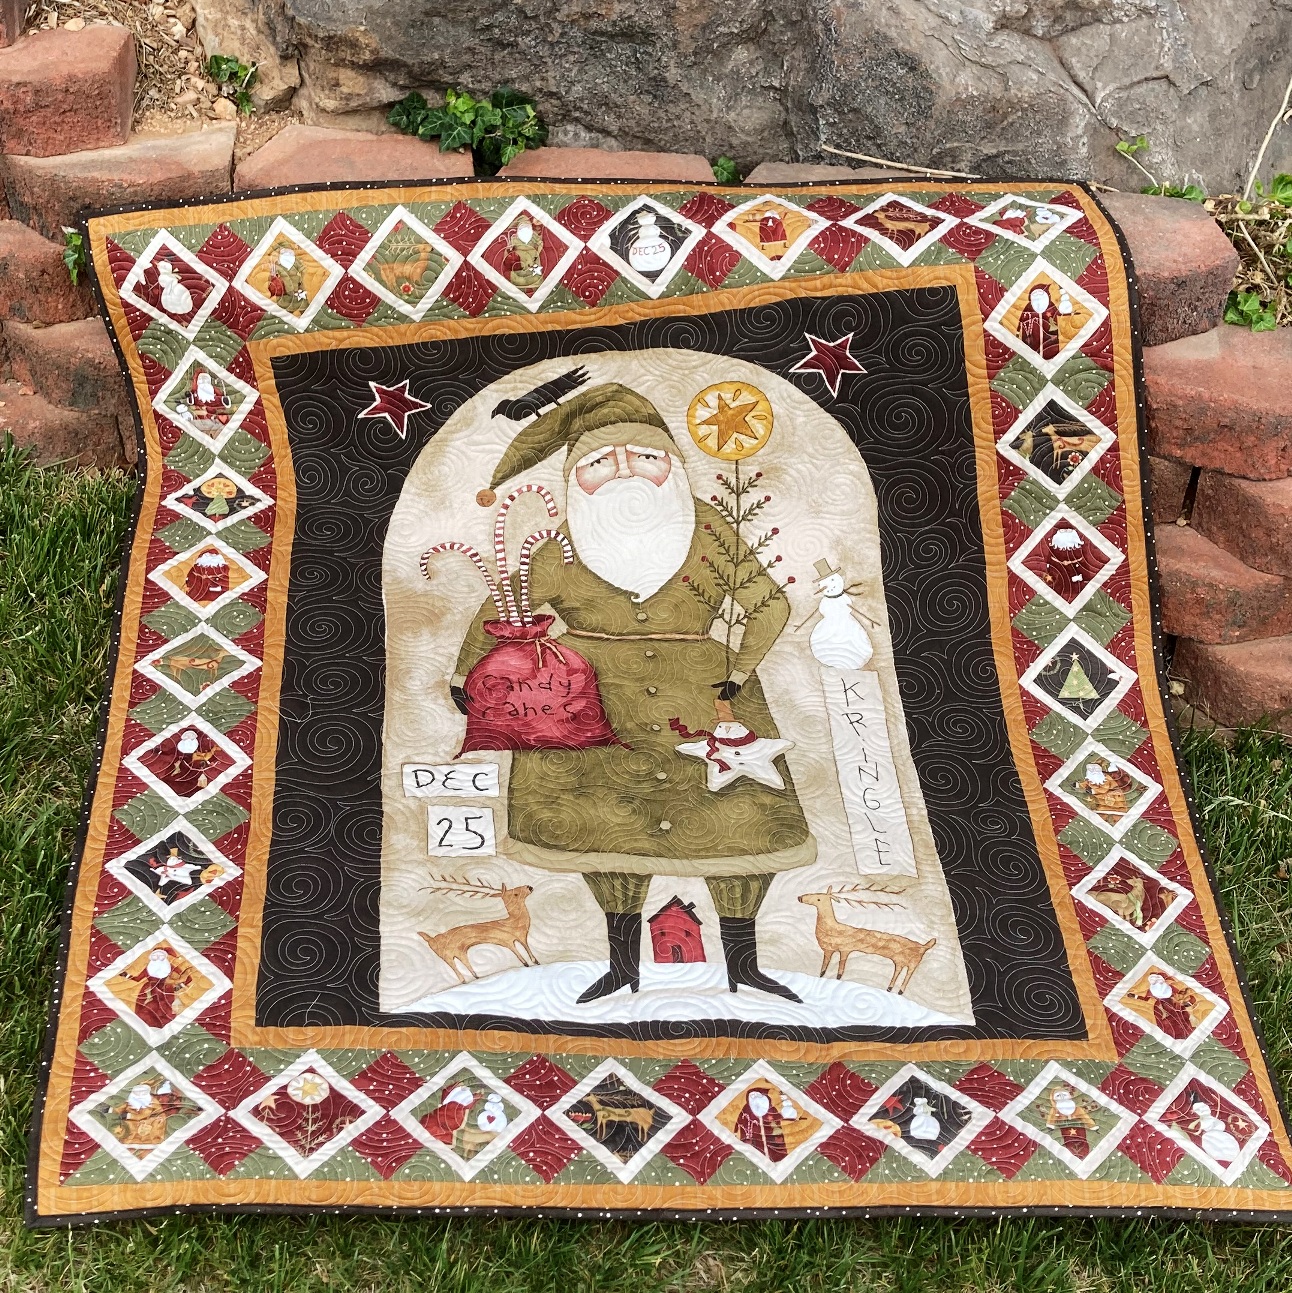
And just like that, you have a beautiful 48″ x 56″ finished Kris Kringle Quilt Top!!!! So fun!!!!
Isn’t it just so great how you can just add a few borders to a gorgeous panel and make such a striking quilt!!! Just so fast and so fun!!!
STEP 5 – FINISHING THE QUILT
Now all that is left is to finish the quilt!! Just Baste It, Quilt It, and Bind it!!!! Yup, three big things in one little sentence. If you are new to quilting and need some tips on how to Baste It, Quilt It, and Bind It, you can check out my Finishing Your Quilt Video Series. It will walk you through it all in step by step detail.
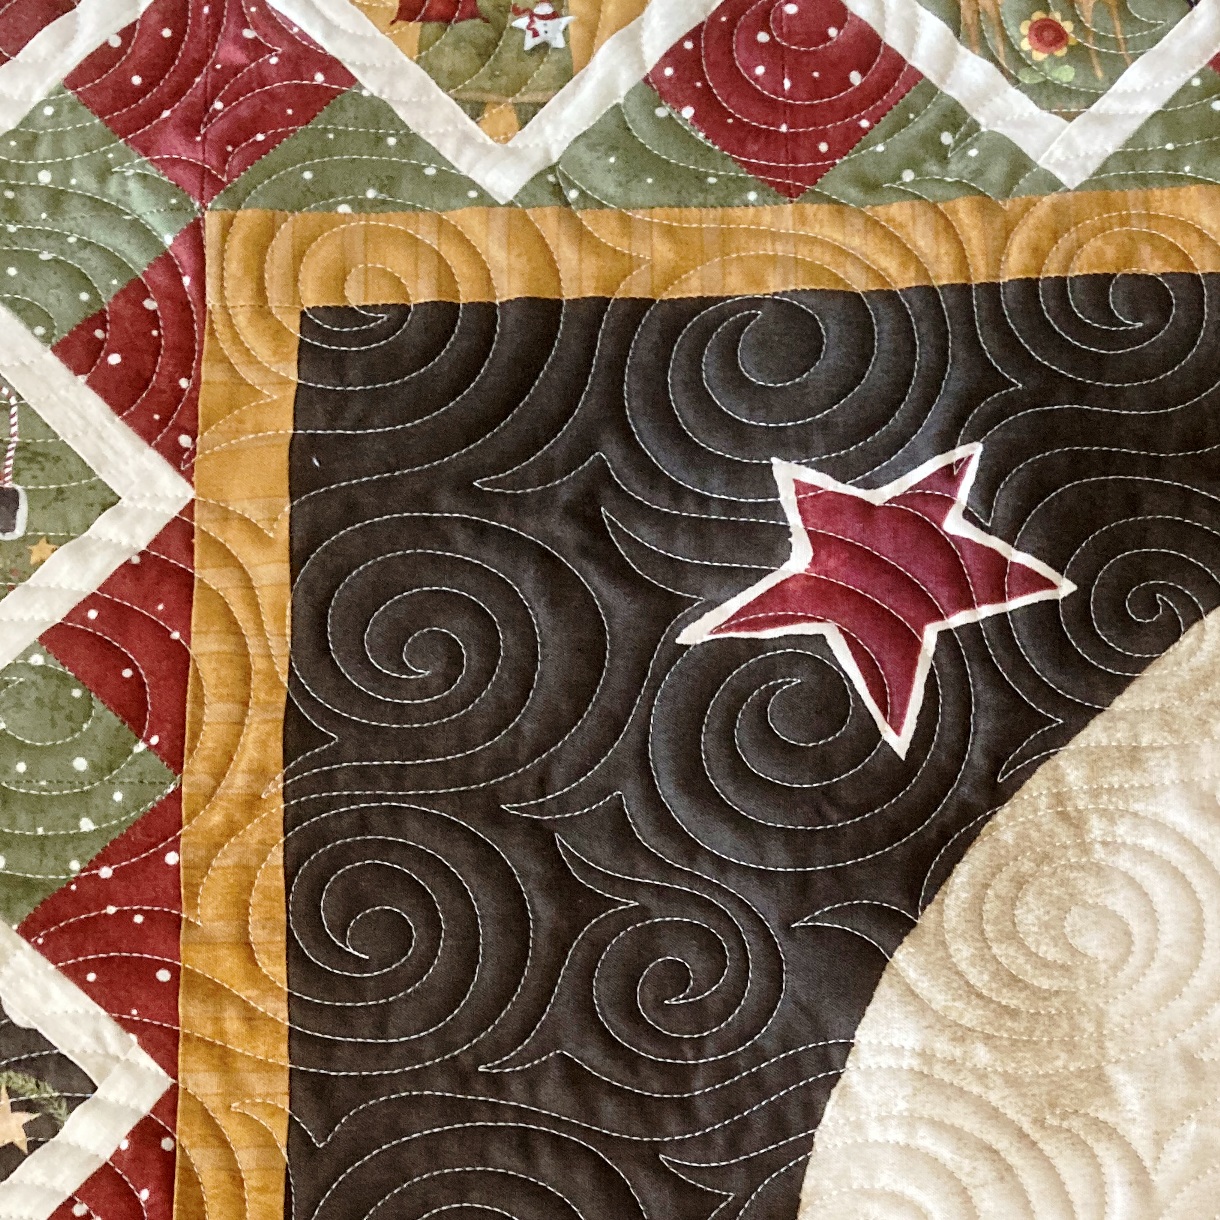
I quilted mine with an all over swirl design that I just love to stitch. It is so relaxing and fun, and also very fast, perfect for this fast, go-to, quilt!!! I used a white thread as I didn’t want it to stand out on Santa’s face 😉
I hope you have enjoyed this tutorial and if you make your own Kris Kringle Panel Quilt I would love to see it!! You can email me a picture at happyquiltingmelissa@gmail.com, or post it to social media with #happyquiltingwithmc 🙂 I can’t wait to see your Kris Kringle Quilts!!!
Thank you so much to Riley Blake Designs for having me here on their blog. And to see more of my Happy Quilting adventures, you can stop by my Happy Quilting Blog for a visit, follow me on Instagram @happyquiltingmc or visit my Happy Quilting Facebook Page. I just love being able to share lots of quilting goodness on a daily basis and would love to share it with you.
I hope you have a very Happy Quilting Day!!!