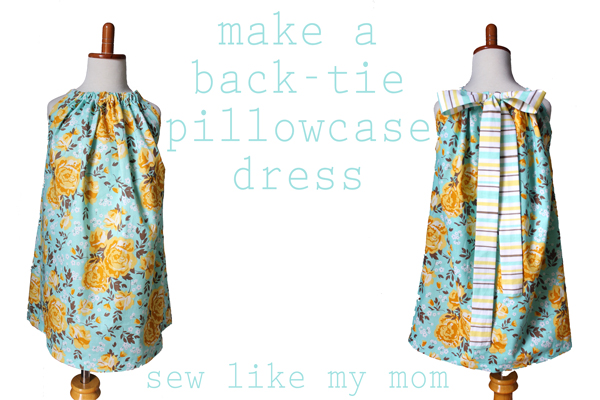
Hi Riley Blake Readers! I’m Melissa from Sew Like My Mom and I’m here to share a simple twist on an all time favorite style. I love Pillowcase Dresses. They’re such a wonderful project for everyone–from beginners to the most advanced seamstresses. They can be worn in all seasons, they’re a fast sew, they grow with the child, they take a relatively small amount of fabric to make, and there are nearly endless ways to personalize them. What’s not to love? Well for kids like my Chloe, it’s the ties. She hates the ties at her shoulders and fights with them the whole time she’s wearing the dress. I make them for a lot of holidays since their forgiving nature lasts us for lots of wearing, but she just doesn’t like wearing them. But with a quick and easy change, not only does it put a spin on the traditional style, but Chloe no longer feels smothered by her ties.
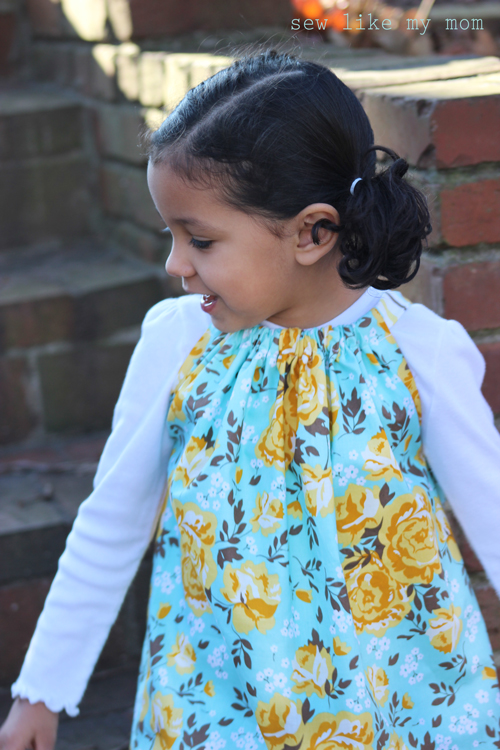
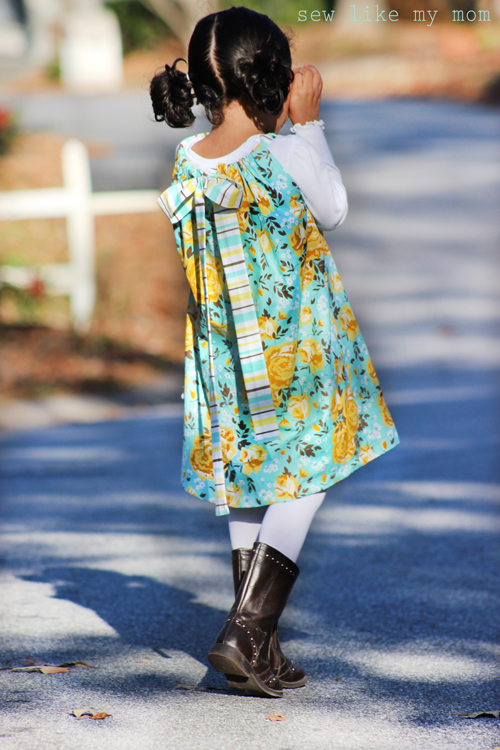
In fact, she loves these dresses! And I just think she’s so darn adorable in them.
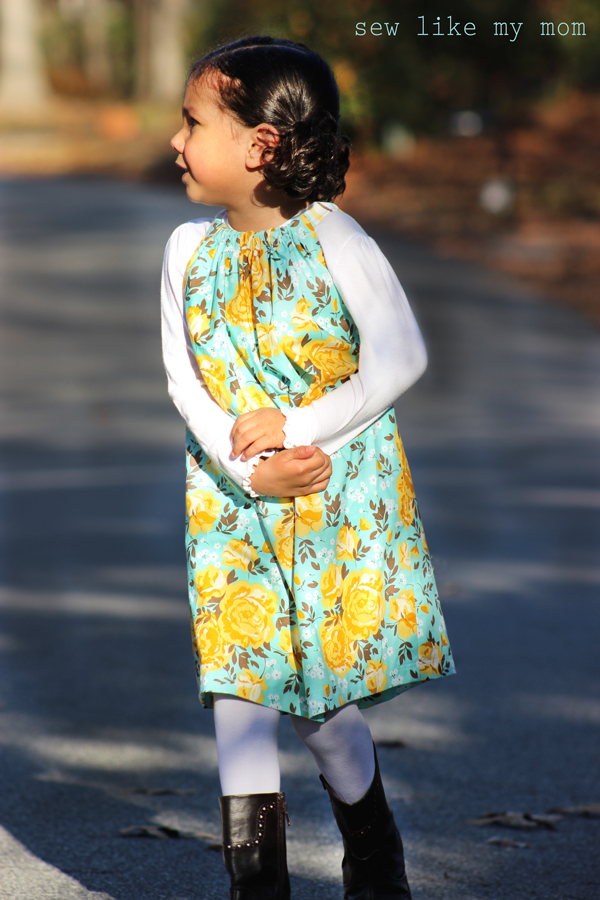
And I’m having a love affair with this mustard and blue combo. It’s a good winter floral that will take her dress right into Spring.
Changing the dress to tie in the back takes just a few minutes and makes such a sweet impact.

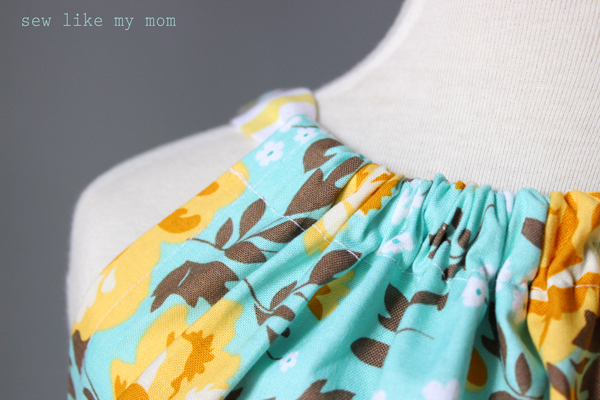
The simple modification will work with your favorite Pillowcase Dress pattern. Of course, I prefer mine! I did the serger method for this dress–love those smooth armholes!
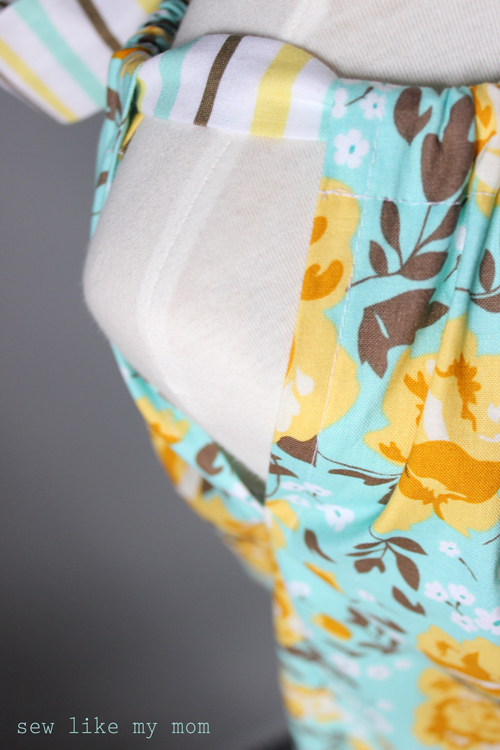
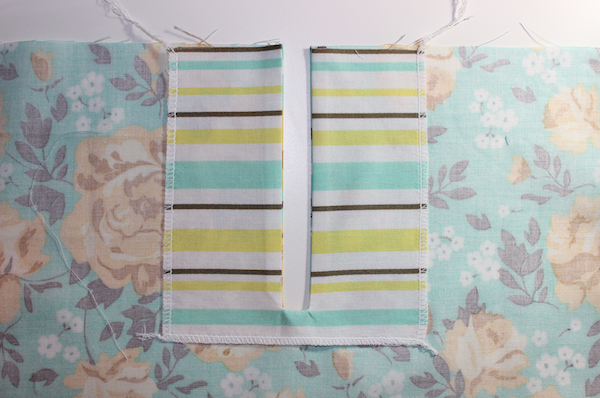
To create a back-tie pillowcase dress, all you need is an additional scrap of fabric. This dress for Chloe is a size 5 and I used a piece about 5″ wide and 7″ long. Finish the edges with a serger or a zigzag. **If you’re using my regular pillowcase dress method, add an extra inch for the casing. Finger press the middle of the dress and the middle of the extra piece and match the creases with right sides together. Sew from the top of one edge to the near bottom of the piece, then turn and go back up the other side.
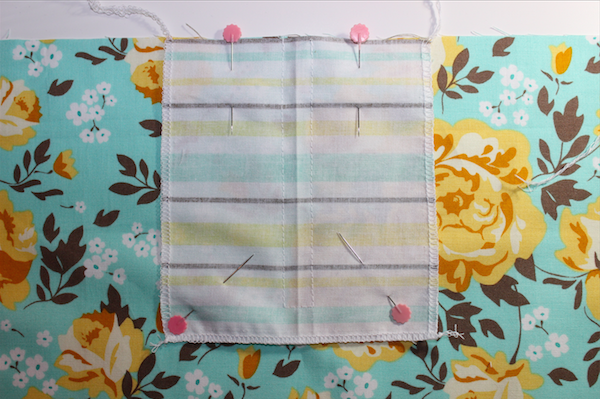
Cut along the crease, right down the center of the piece. Cut in a “Y” shape at the bottom, clipping all the way to, but not through, the corner.

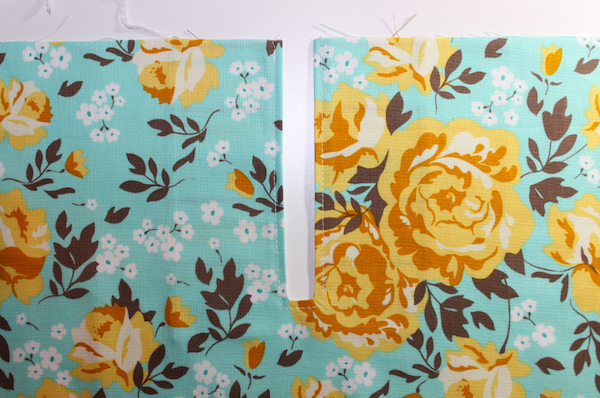
Turn the pieces right side out and press well.
Top stitch around the edge to keep your piece laying flat.
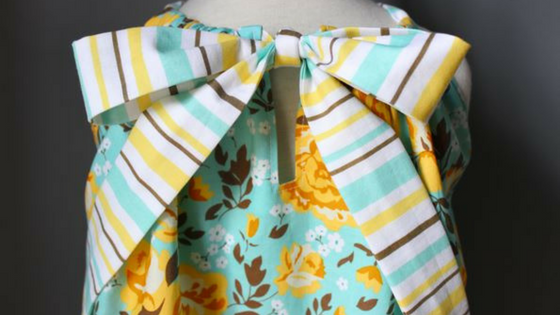
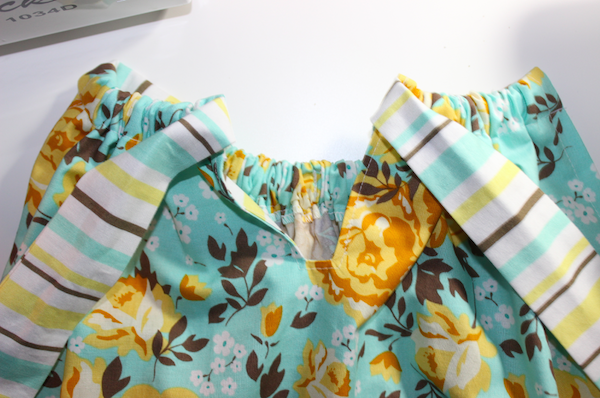
Then sew the rest of the dress as normal! When it comes time to tie, just have both ends come through the middle of the back. The space you created will allow them to tie without bunching.
Thanks so much for having me, Riley Blake! I’d love to see your creations–share them with me on my FB page, or tag me on IG @sewlikemymom