It’s Jamie again from Sew Brainy Designs and I’m back with my 2022 Make it Modern Pillows series! This year I’m bringing you some fresh and bold modern quilt blocks that were designed specifically to be 18″ pillows! They are quick and easy, plus they’re a good way to bust your scrap stash or show off that designer RBD fabric that you love!
In case you missed it, January’s pillow used 6″ Half Square Triangles to create a modern geometric design! You can get that tutorial below!
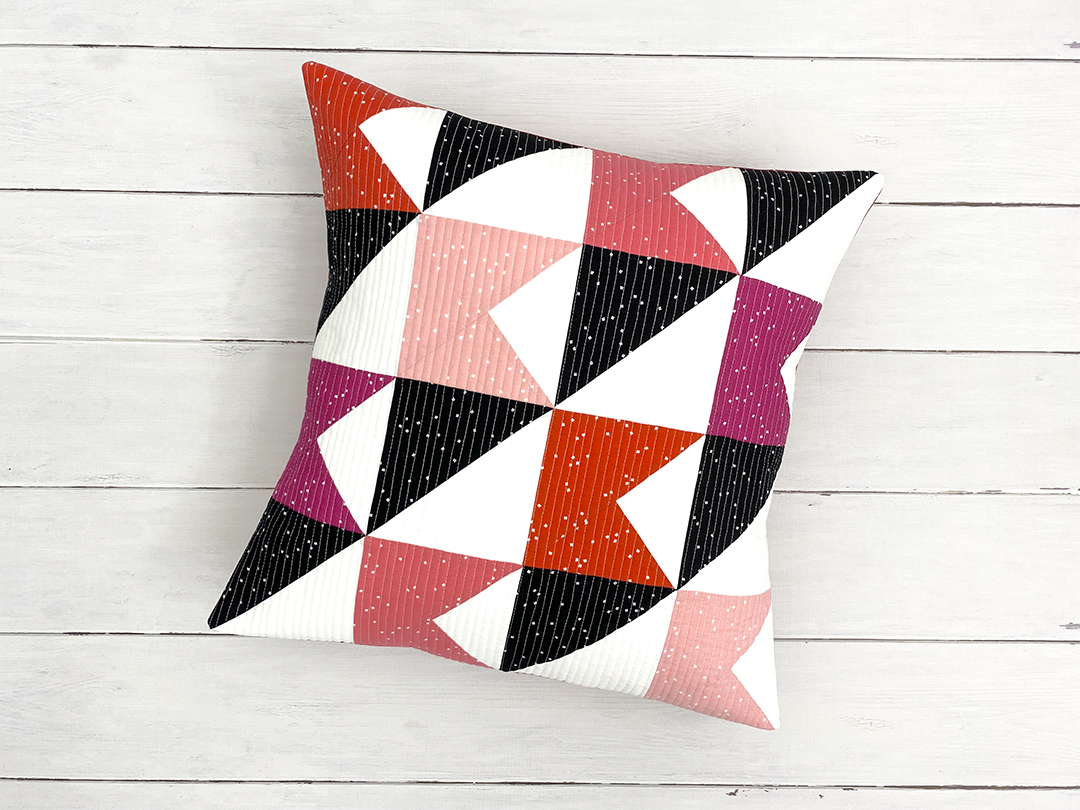
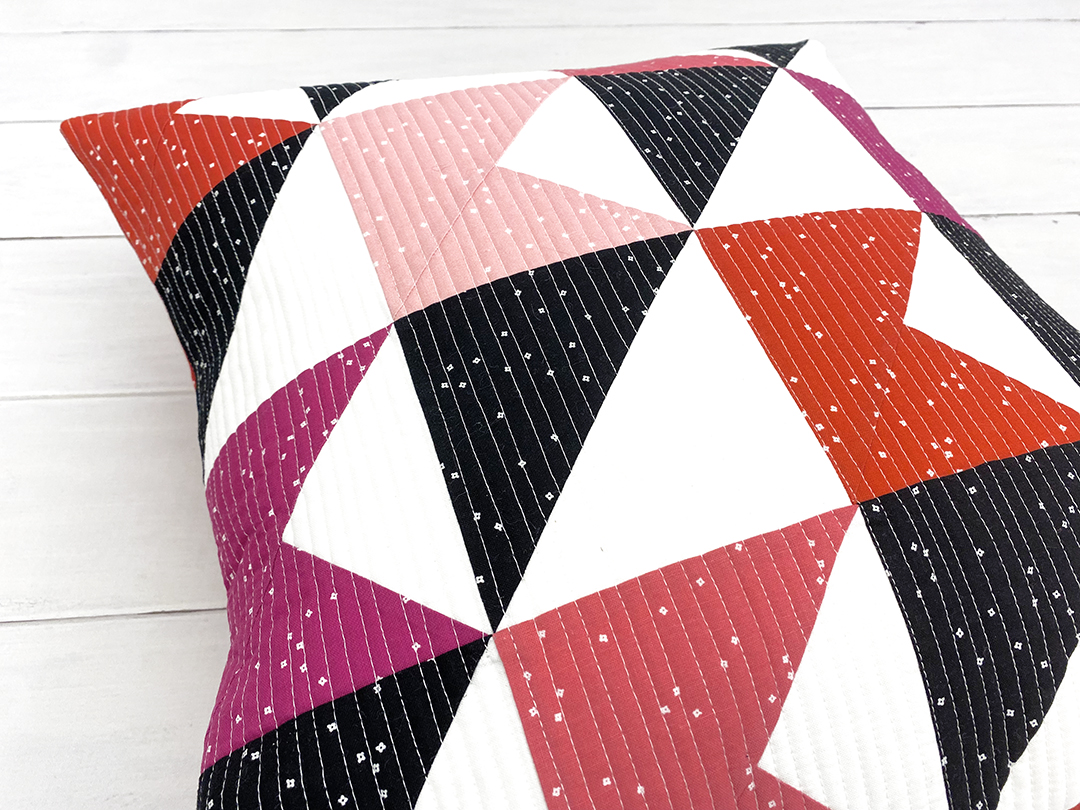
February’s pillow uses Quarter Square Triangles (QSTs) and Half Square Triangles (HSTs).
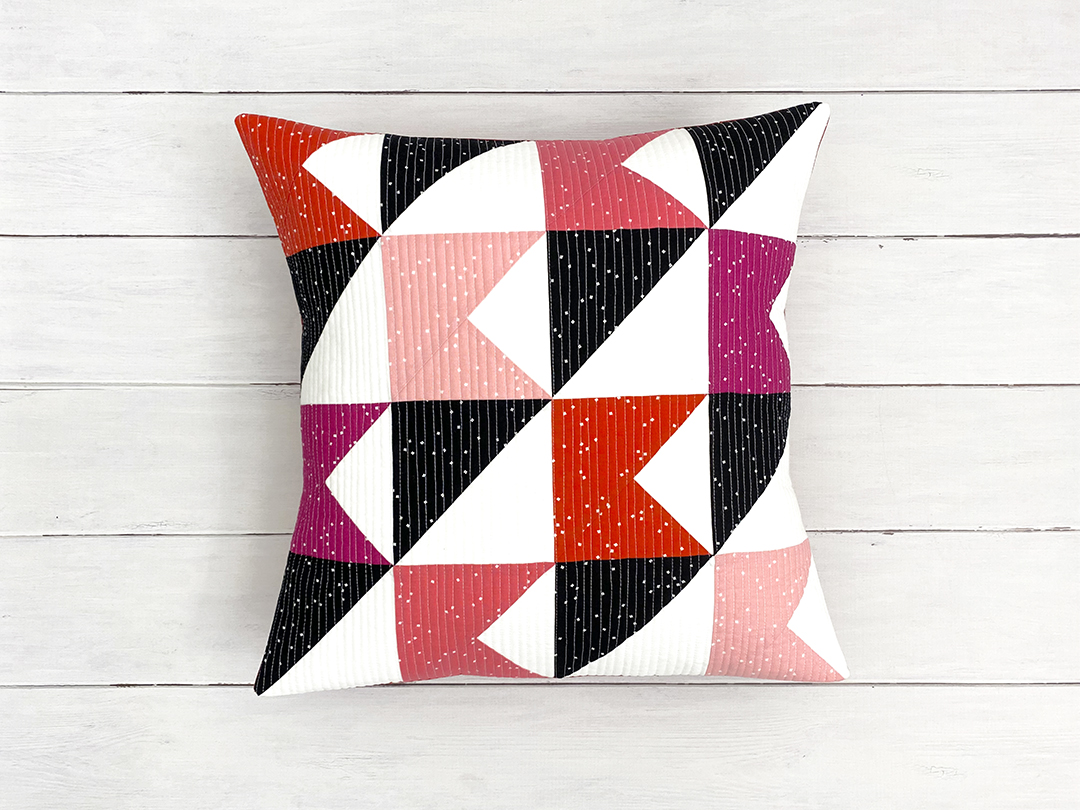
With Valentine’s day around the corner, I wanted this pillow to have bright pops of reds and pink. Goal achieved!
Since I’m a big fan of bright colors, I rarely use black. But it look so good here!

I went with matchstick quilting again using Aurifil 50wt. white thread. I love the texture these simple lines give!


This month’s pillow features Blossom Fabric by Christopher Thompson. Blossom is probably my favorite RBD basic. The colors options are fantastic and the random pattern hides seams perfectly! The colors I used (in order from left to right) were Black, Cranberry, Raspberry, Peony, and Red.
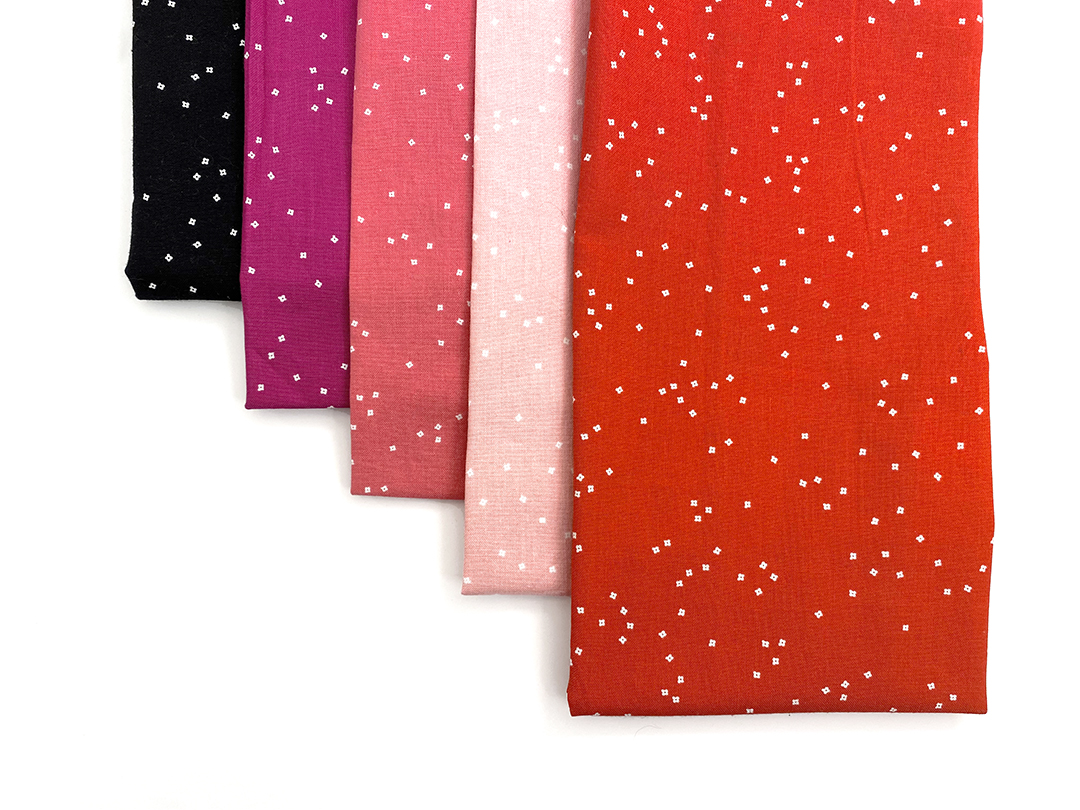
And I love that there are new colors of Blossom coming out all the time!


Now let’s make a pillow!
February Pillow Tutorial
Pattern Notes
- Please read through all instructions before beginning.
- Seam allowances are 1/4″ unless specified.
- WOF = Width of Fabric; pattern assumes yardage is a minimum of 42″
- RST = Right Sides Together
- HST = Half Square Triangle
- QST = Quarter Square Triangle
- Fat Eighth (F8) Precut = 9″ × 21″
- Fat Quarter (FQ) Precut = 18″ × 21″
- Press all seams open (or in preferred direction) unless specified.
Material Requirements
For the block (pillow top):
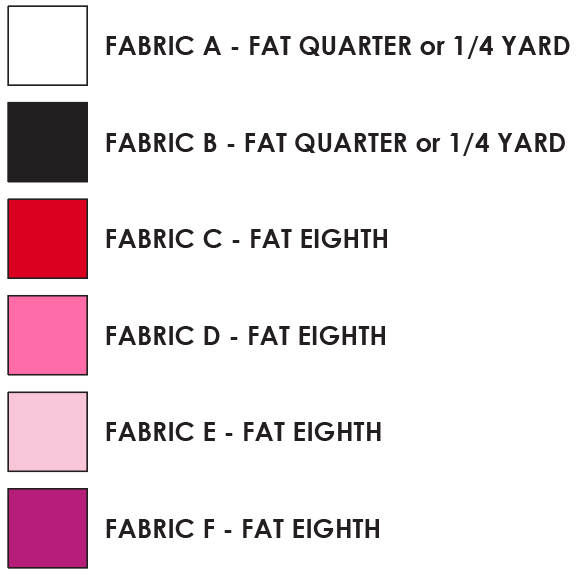
This pattern uses (1) background fabric [FABRIC A] and (5) accent fabrics [FABRICS B-F]. Below are the requirements to make ONE 18″ block.
For the pillow body:
- (1) 22-24″ square piece of muslin or other fabric (for quilting the top)
- (1) 22-24″ square piece of batting (for quilting the top)
- (2) 13″ × 18½” pieces of backing fabric (for the pillow envelope)
- (1) 20″ pillow form (my favorite one to use is the FJÄDRAR from IKEA!)
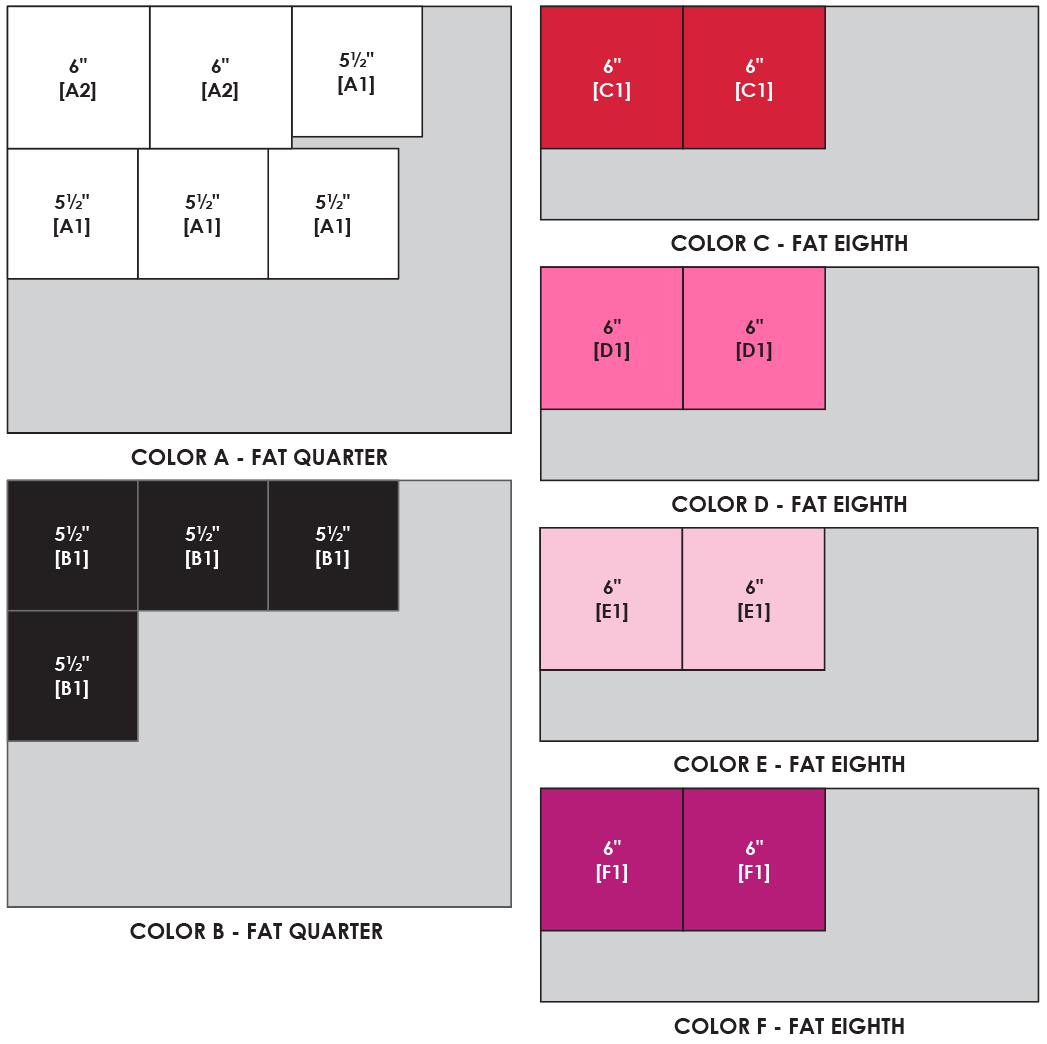
Cutting Directions
Cut the fabric below in the specified order and label each cut with the letter/number in the [bracket].
From FABRIC A, cut:
- (2) 6″ squares [A2]
- (4) 5½” squares [A1]
From FABRIC B, cut:
- (4) 5½” squares [B1]
From FABRICS C, D, E, and F, cut:
- (2) 6″ squares from each [C1, D1, E1, F1]
Piecing Directions
1. Pair (1) A1 and (1) B1 square RST to create HSTs using the two at a time method. Using your preferred marking tool on the wrong side of the A1 square, draw a center line diagonally from the bottom left corner to the top right corner. Stitch a seam 1/4″ away from the center line on each side. Cut along the diagonal line to create TWO HSTs. Press open and trim HSTs to 5″ square.
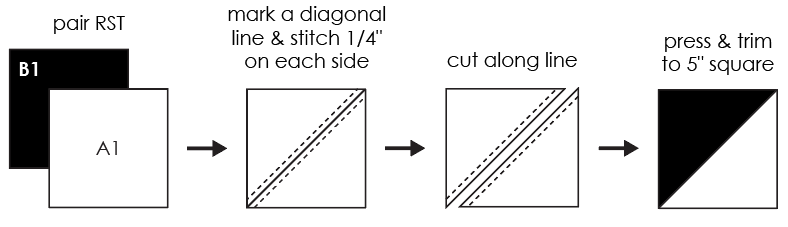
2. Repeat STEP 1 with the (3) remaining A1 and B1 squares to yield a total of EIGHT HSTs. Set aside for STEP 8.
3. Cut (1) A2 square in half diagonally in both directions to yield (4) small A2 triangles [A2-S].
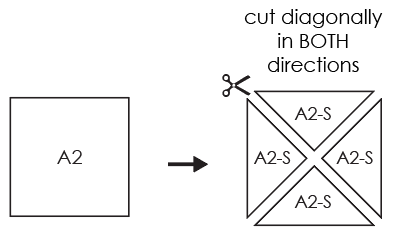
4. Repeat STEP 3 with the other A2 square to yield a total of EIGHT small A2 triangles.
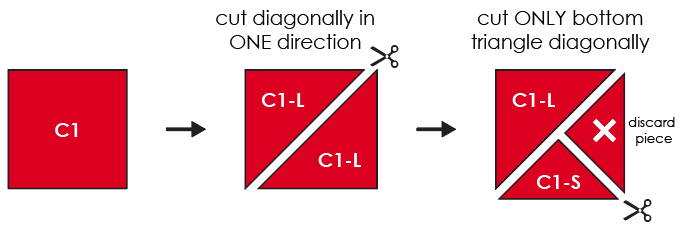
5. Cut (1) C1 square in half diagonally from the bottom left corner to the top right corner to yield (2) large C1 triangles [C1-L].
Then cut ONLY the bottom large triangle diagonally into two smaller C1 triangles [C1-S]. Discard the small C1 triangle piece on the right piece (noted below with the white X) as that will not be used. This is the section where you will piece in (1) small A2 triangle to form a QST.
💡 TIP: It may be helpful to use a fabric marking tool to draw out the lines before cutting. If you accidentally cut the top large triangle in half too, simply sew it back together using a SCANT 1/4″ seam. Also, if using directional fabric, make sure your fabric square is oriented correctly before you cut it.
6. Lay out the small C1 triangle [C1-S] from the previous step on the left side of (1) small A2 triangle [A2-S] as shown below. Sew the triangles together using a SCANT 1/4″ seam allowance and press open. Then sew the large C1 triangle [C1-S] on the left side of that unit to form the QST. The block should look like a letter K. Press the seam open and trim block to 5″ square.
💡 TIP 1: Using a scant seam allowance here helps to make sure that your block doesn’t end up too short.
💡 TIP 2: To help trim it correctly, keep the center point of the QST at 2½” from the edges.

7. Repeat STEPS 5-6 with the remaining C1, D1, E1, and F1 squares to yield EIGHT QSTs.
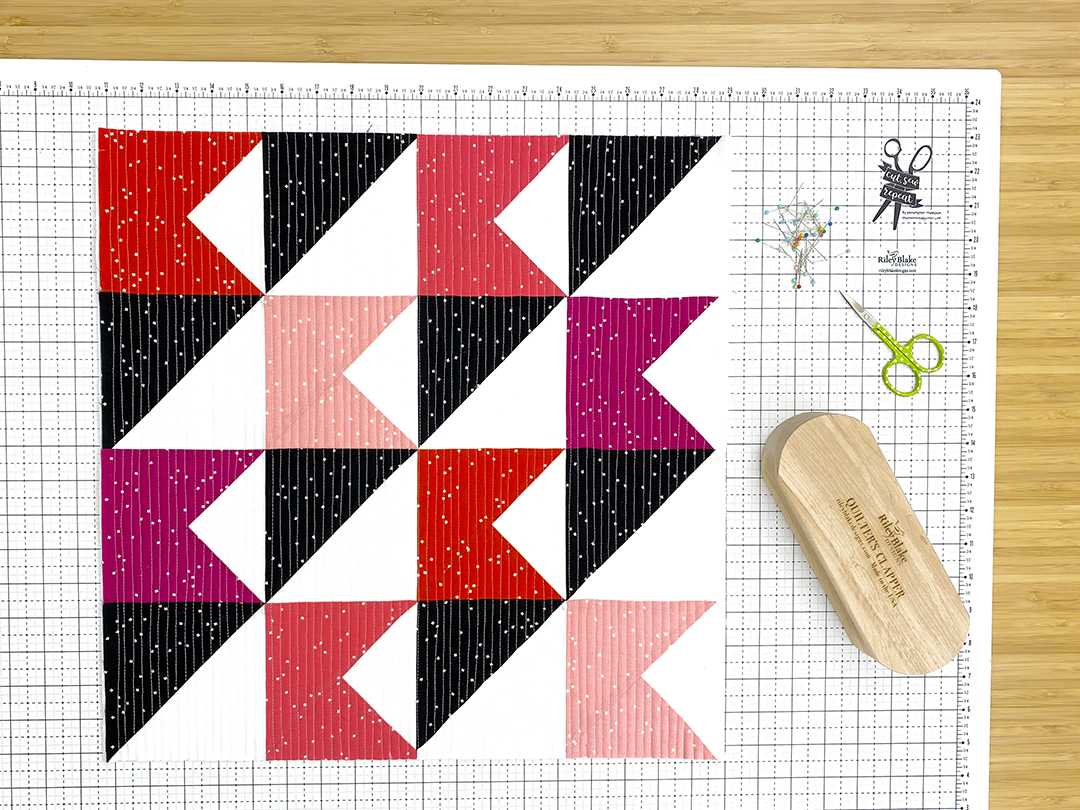
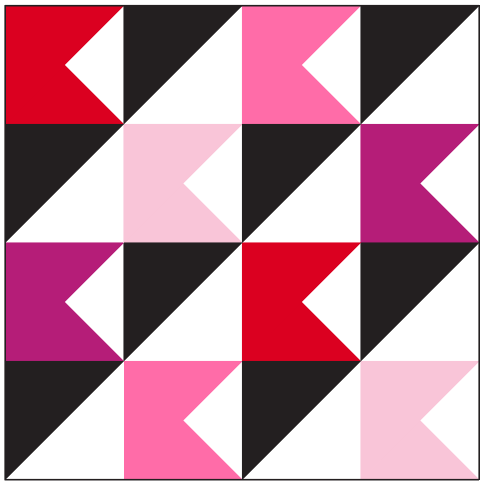
8. Lay out all HSTs and QSTs as shown below. Sew the FOUR blocks in each row together. Press seams open.
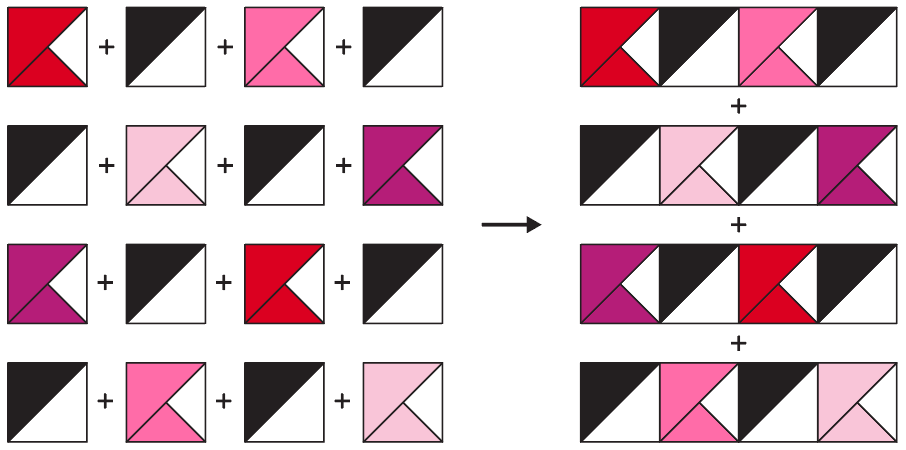
9. Sew the FOUR rows together. Press seams open.
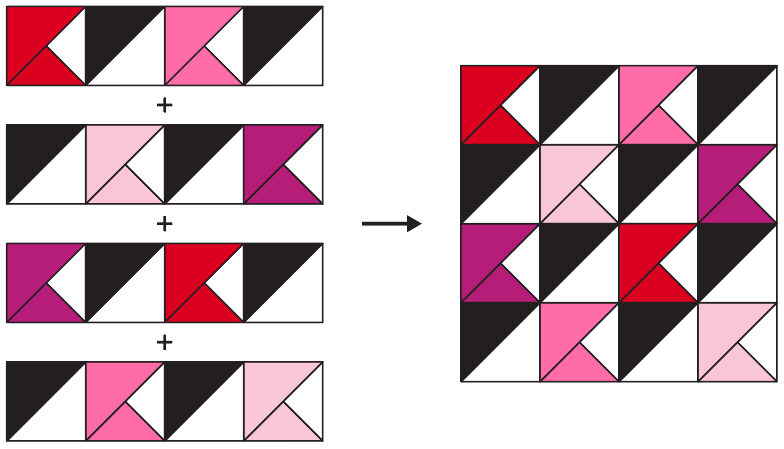
Your block is now complete!
10. Layer the completed block on top of the 22-24″ batting and muslin squares and quilt the pillow top as desired. When you are done, trim the block to 18½”.
Note – if you add dense quilting like I did, your top may shrink a bit in size. Just trim it to the largest square that you can. You can trim the width of envelope backing fabric a bit in the next step if needed in order to match your actual top size.
11. Create a finished edge on the long side of each of the (2) 13″ × 18½” pieces of envelope backing by folding 1/2″ of fabric over the wrong side TWICE. Stitch a seam near the edge to secure it.

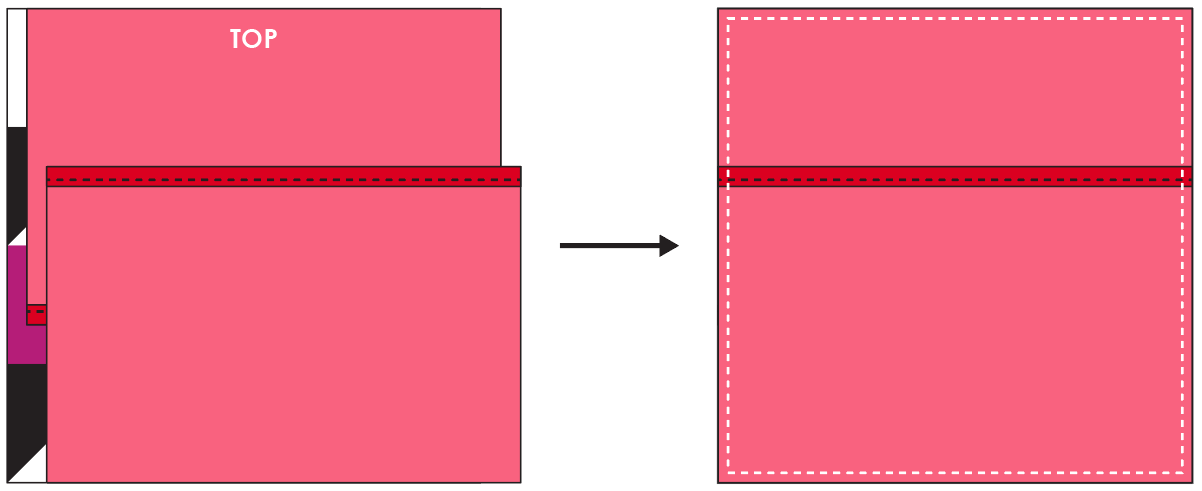
12. With the square top facing up, layer the envelope pieces RST on top of it as shown below and sew a 3/8″ seam around the edge of the pillow top.
13. Trim the edges of the corners a bit to reduce bulk. Turn the pillow case inside out and insert your pillow form. Your pillow is now done! Enjoy your fun modern make!
I can’t wait to see all the beautiful pillows everyone makes! They can be very addicting! Be sure to share them on social media! #makeitmodernpillows #iloverileyblake #sewbrainydesigns.
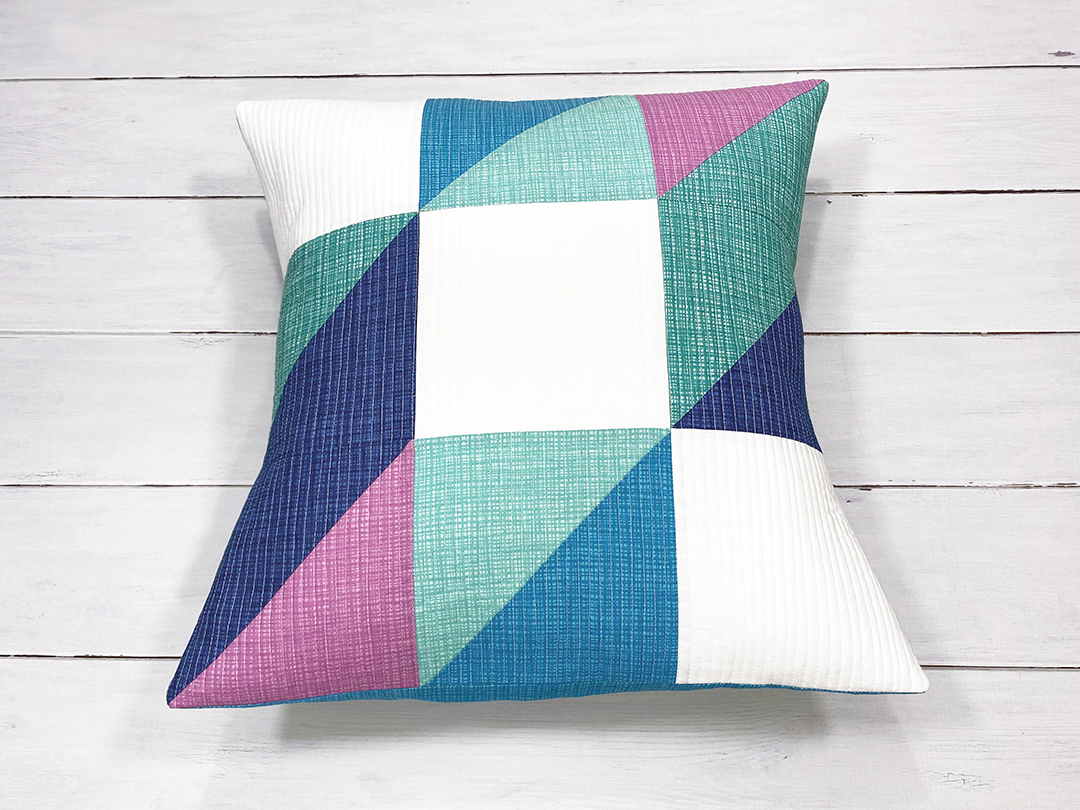
I’m also working on a 5-color version of all my blocks to make a sampler quilt. You can check out that post HERE on my blog. I’ll see you in March with some Shabby fabric and stained glass style geometric shapes!
Until later, happy quilting!
Jamie

Jamie is the creative brain behind Sew Brainy Designs. This self-proclaimed science nerd loves bright colors, big blocks, Mid-century modern design, and using as few seams as possible. Find all of her Make It Modern Pillows on the Riley Blake Designs blog!