
Hello There!! My name is Melissa Mortenson and I’m one of Riley Blake’s Fabric Designers. Today I’m going to share with you a project using some of my first fabric line, Derby Style! You can also find me over at polkadotchair.com on a regular basis sharing sewing and craft ideas and tutorials!

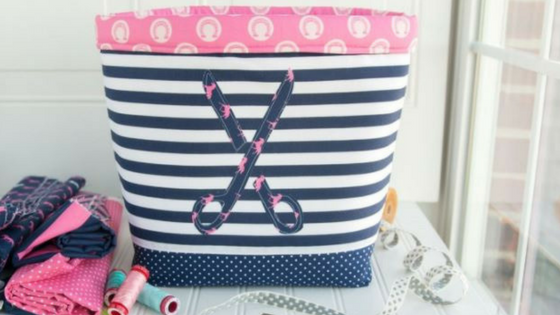
Today I’m going to show you how to make this nifty fabric storage bin! It’s roomy and soft and perfect for storing stuff in your sewing or craft room. For a little bit of extra detail I’ve added a scissors applique to the front. If you like the applique you can download the free template for it over on my blog.

Okay are you ready to make one? You’re going to need: 2 pieces of fabric cut to 12″ tall x 17″ wide for the basket front and back 2 pieces of fabric cut to 17″ tall x 17 wide for the basket lining 2 pieces of fabric 17″ wide by 6″ tall for basket bottom Fabric for scissors applique 1/4 “Foam Interfacing (I used Pellon) Lightweight Fusible Interfacing (I used Shape-Flex) Paper backed fusible web

Begin by cutting a 3”x 3” square from the bottom two corners of the 17” side of the 17” x 6” pieces and the 17” x 17” lining pieces.
Next sew the 12” x 17” basket front piece to one of the 6” x 17” pieces. Press the seam open. Repeat for the basket back piece.

Cut the interfacing to the same size as the sewn basket front and back pieces. Press the interfacing to the wrong side of the basket front and back pieces. Top stitch along both sides of the seam between the basket fabric and the bottom fabric. Do this for the front and the back pieces.
Print out the scissors template (can be found here). Trace it onto a piece of paper backed fusible web. Cut out loosely. Iron onto the wrong side of the scissors applique fabric. Cut out. Stitch around the outside of the applique.

Sew the basket front and back pieces together along the bottom seam. (Just the straight seam, don’t sew in the spot that you cut the 3” square from) Press seam open. Sew the two sides seams of the tote. Press seams open.

Pinch the bottom corners of the basket so that the raw edges of the portion of the bag with the 3” square cut out meet.
Stitch with a 1/2” seam allowance, making sure to backstitch. Turn right side out. Cut two pieces of foam interfacing the same size as the two lining pieces. Make a “sandwich” with the two lining pieces inside right sides facing and the two foam pieces on the outside facing the wrong side of the fabric.

Sew the lining pieces together the same way that you sewed the tote bag outside pieces together. If you have a walking foot it will be helpful for this step.

Slip the lining into the basket outside piece, wrong sides facing. Turn under the top raw edges 1/2″ and secure in place. Using a walking foot (if you have one) stitch around the top of the basket close to the fold.

For the last step fold the top of the basket over about 1 1/2″ … Now fill it up with all of your goodies! I hope that you’ll stop by my blog sometime and say “hello”. I’ve just started a block of the month series that I think you may like! The first block posts next week, this week we are chatting about fabric choices. I hope that you will join me!
