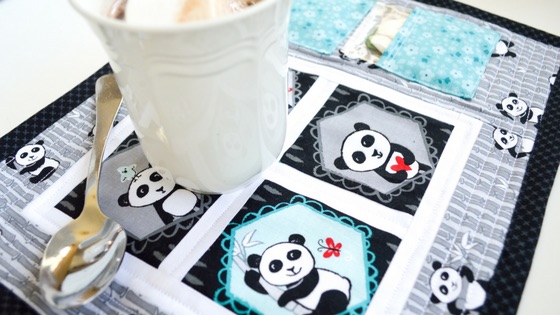
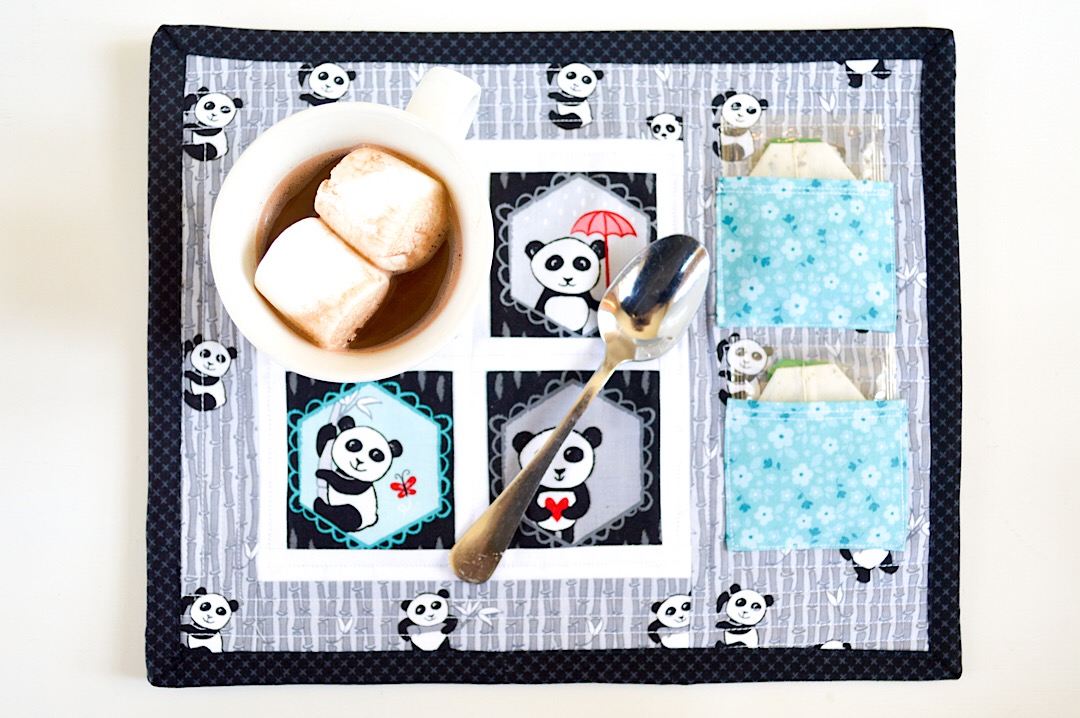
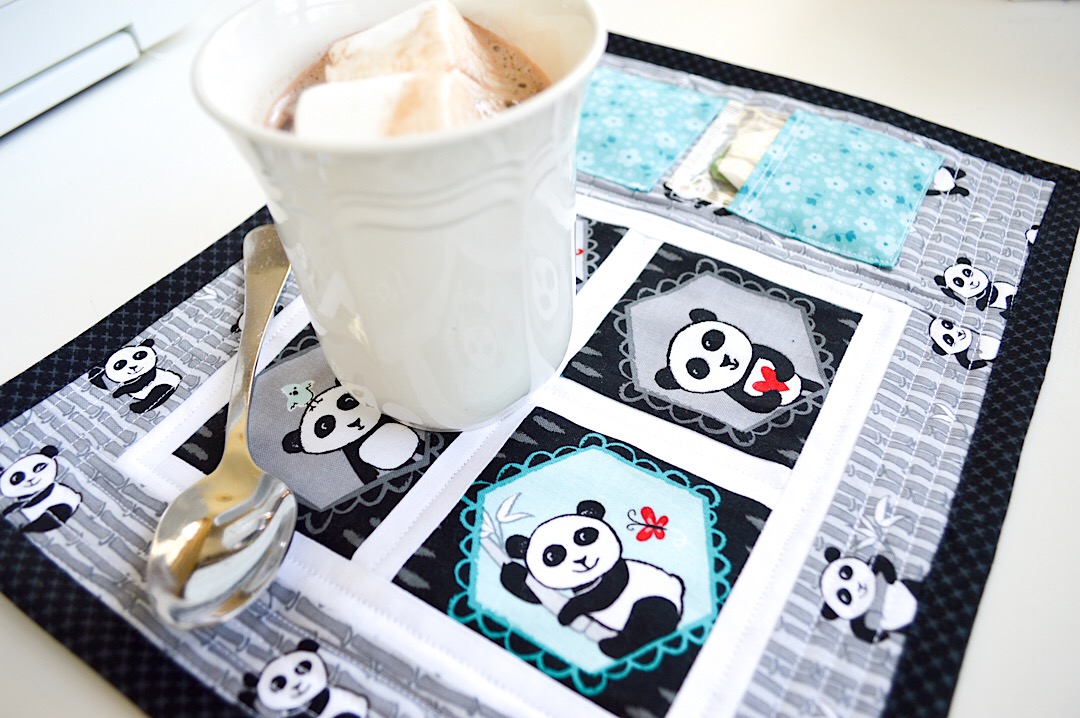
What is a mug rug, you ask? You could say it’s a mini quilt – very mini. Larger than a coaster, but smaller than a placemat – the perfect size for a nice hot cup of cocoa, a morning cup of coffee, or your favorite herbal tea, with a little room leftover for a few crackers or small snack on the side.
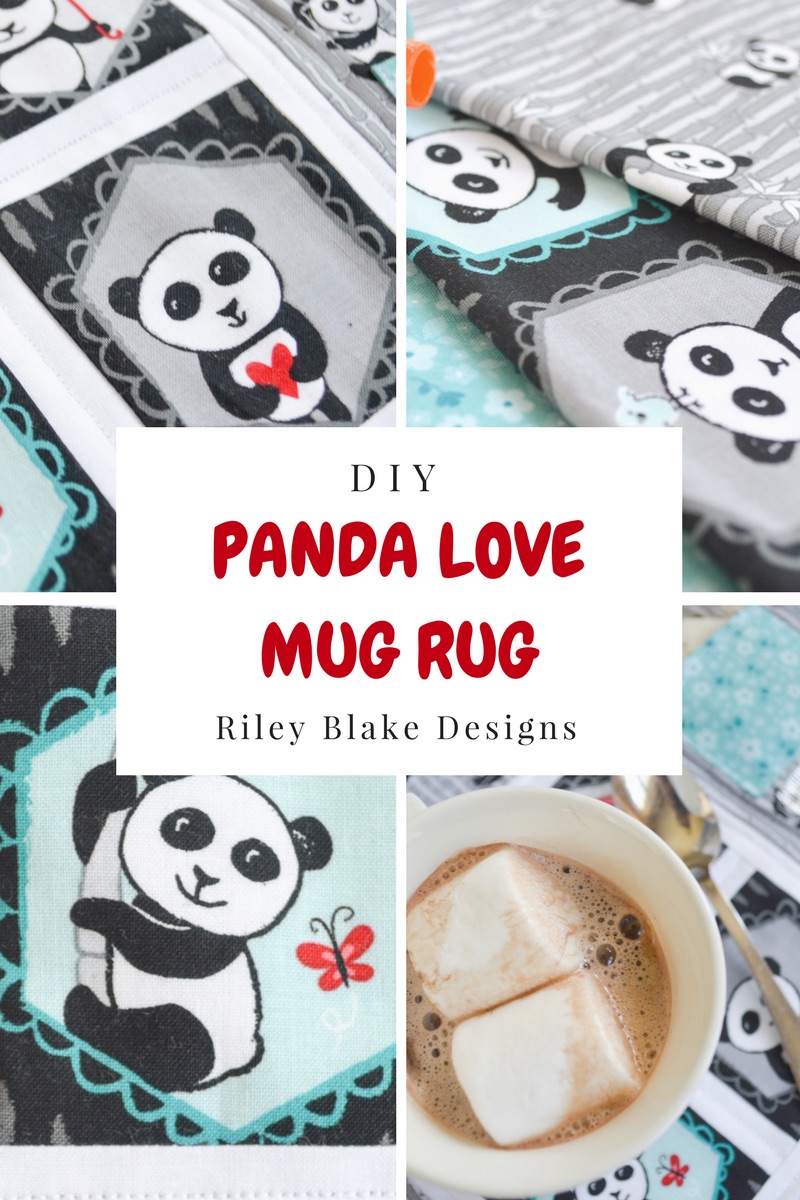
This little mug rug’s story began when I first laid eyes on Kelly Pannaci’s new fabric line, Panda Love.
The cute panda portraits seemed to be calling out to be fussy cut! I had no idea what I would do once I got them cut, but as they say, “well begun is half done,” so I moved forward with no concrete plan in mind!
And I’m loving how this turned out! The Panda Love fabric collection is loaded with all the cuteness we expect from pandas, balanced with complimentary prints that add pops of color and texture.

This little mug rug came together quickly without sacrificing style. It would make a great little gift for a coworker, a college student, for Mother’s Day, or just because! Here is how it came together…
The finished mug rug measures 10” x 12 1/2.” A 1/4” seam allowance was used.

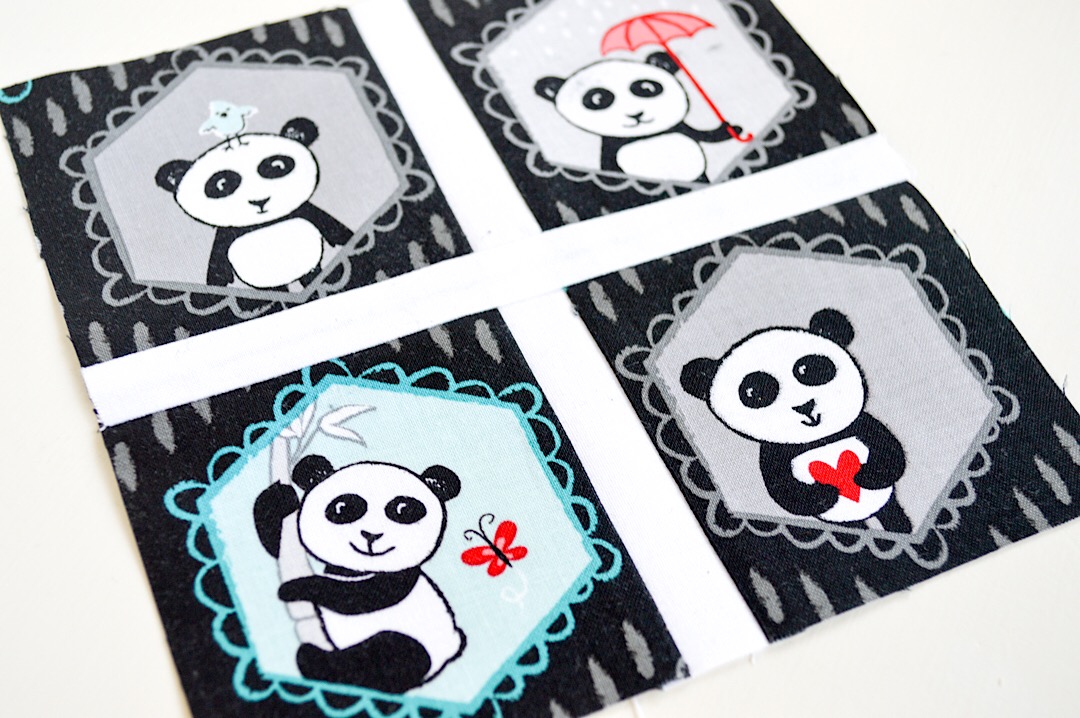
Begin by cutting out four pandas from the Black Panda Main fabric. Each of my four panda “portraits” measured 3”x3 1/4.”
Cut two 1” x WOF strips of Riley White solid fabric. You will use this as the border for your little panda portraits.
Start by sewing the 1” border between two panda portraits. Press seams toward the darker fabric. Repeat for the second set of panda portraits. You may have excess white border like I did above. Just trim that so it is flush with the darker fabric.
Next, attach the 1” white border strip between the two rows, as shown above. To reduce bulk, press toward the white fabric.
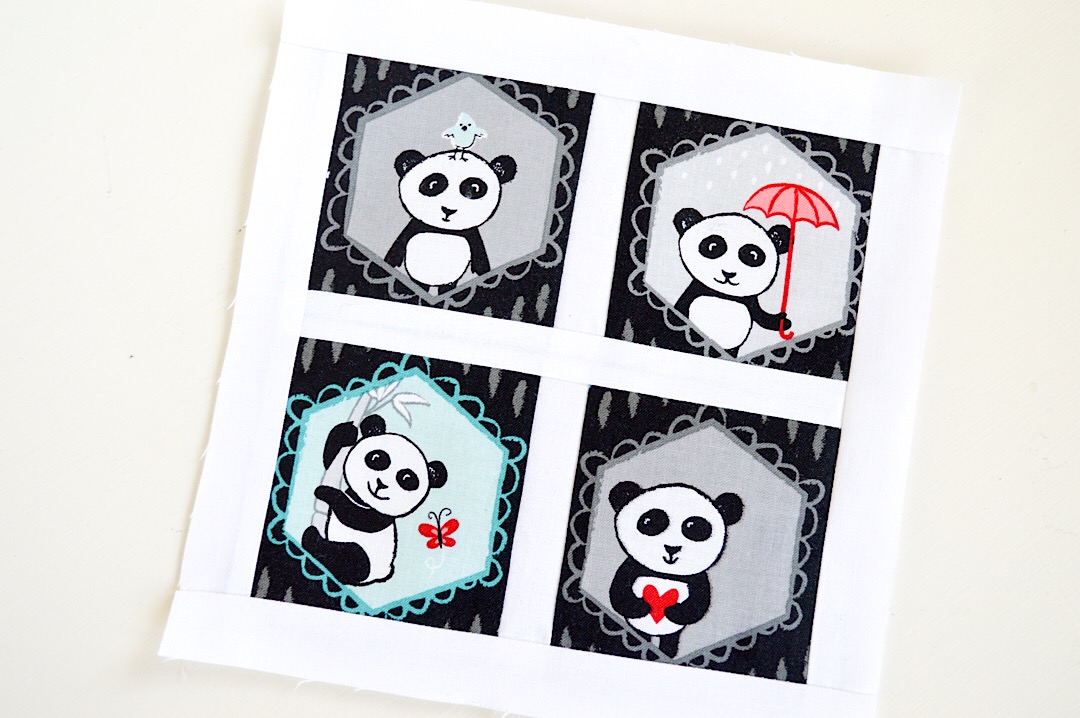
Now it’s time to add a border to frame the cute little squares. Start by adding the 1” white fabric strips to either side. Press toward the white fabric and trim the ends so they are flush. Next add 1” white fabric strips to the top and bottom, again pressing toward the white fabric and trimming the ends. You will end up with a square that looks like this.
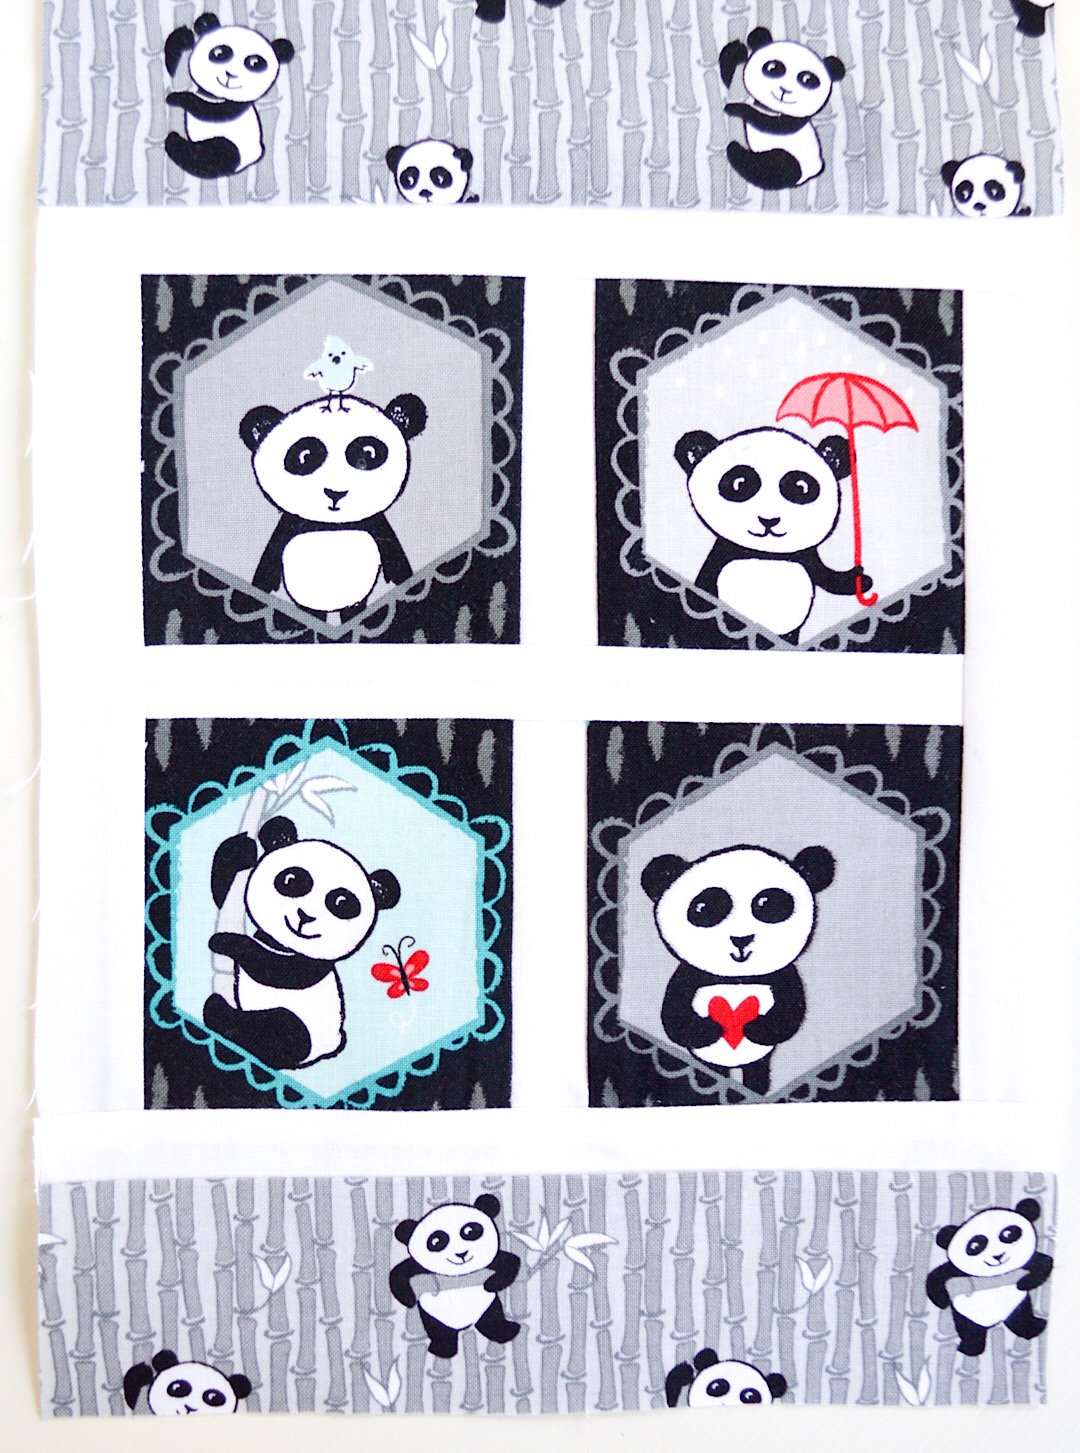
Still not sure where this little project was headed, I decided to continue by framing the portrait square – but only on three sides. As I began this part, I thought it might be fun to do something different with the fourth side – maybe extend it to make a placemat? Or add more panda portraits to create a table runner?
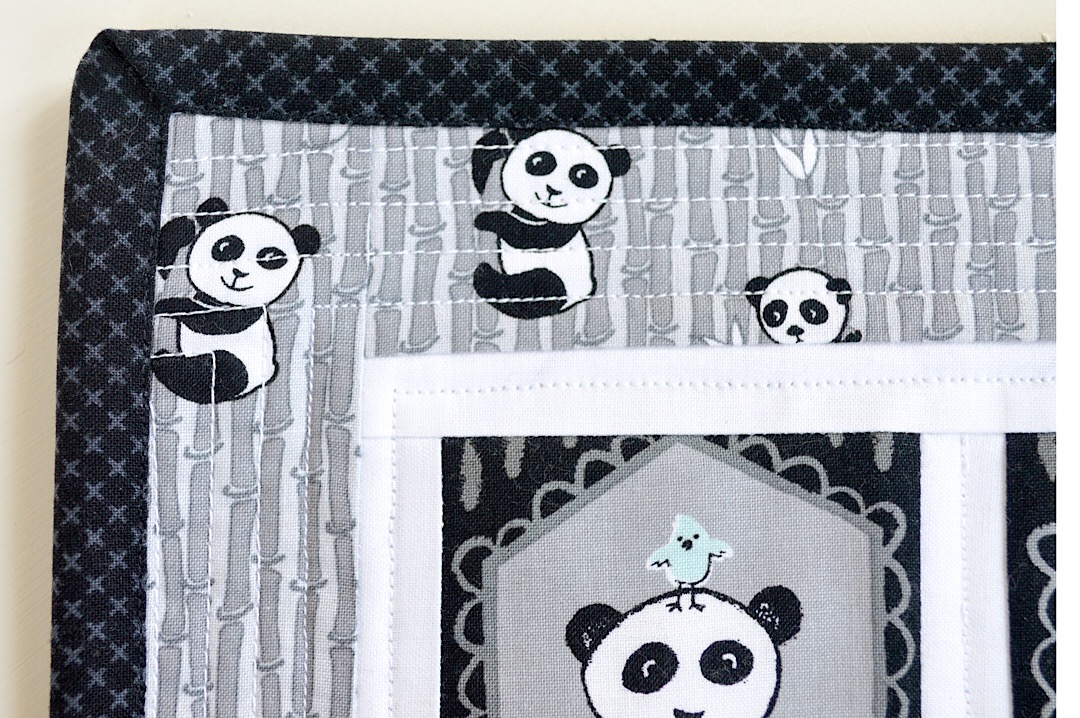
I used the Light Gray Panda Bamboo print for the top, bottom and sides. Because this fabric is directional, I cut two 2” x 7 1/2” strips, making sure to cut horizontally for the top and bottom. By cutting them horizontally, the pandas will be sure to face upright when they are attached to the top and bottom of the portrait square. After sewing them to the portrait square, press toward the darker fabric and trim the edges flush with edges of the square.
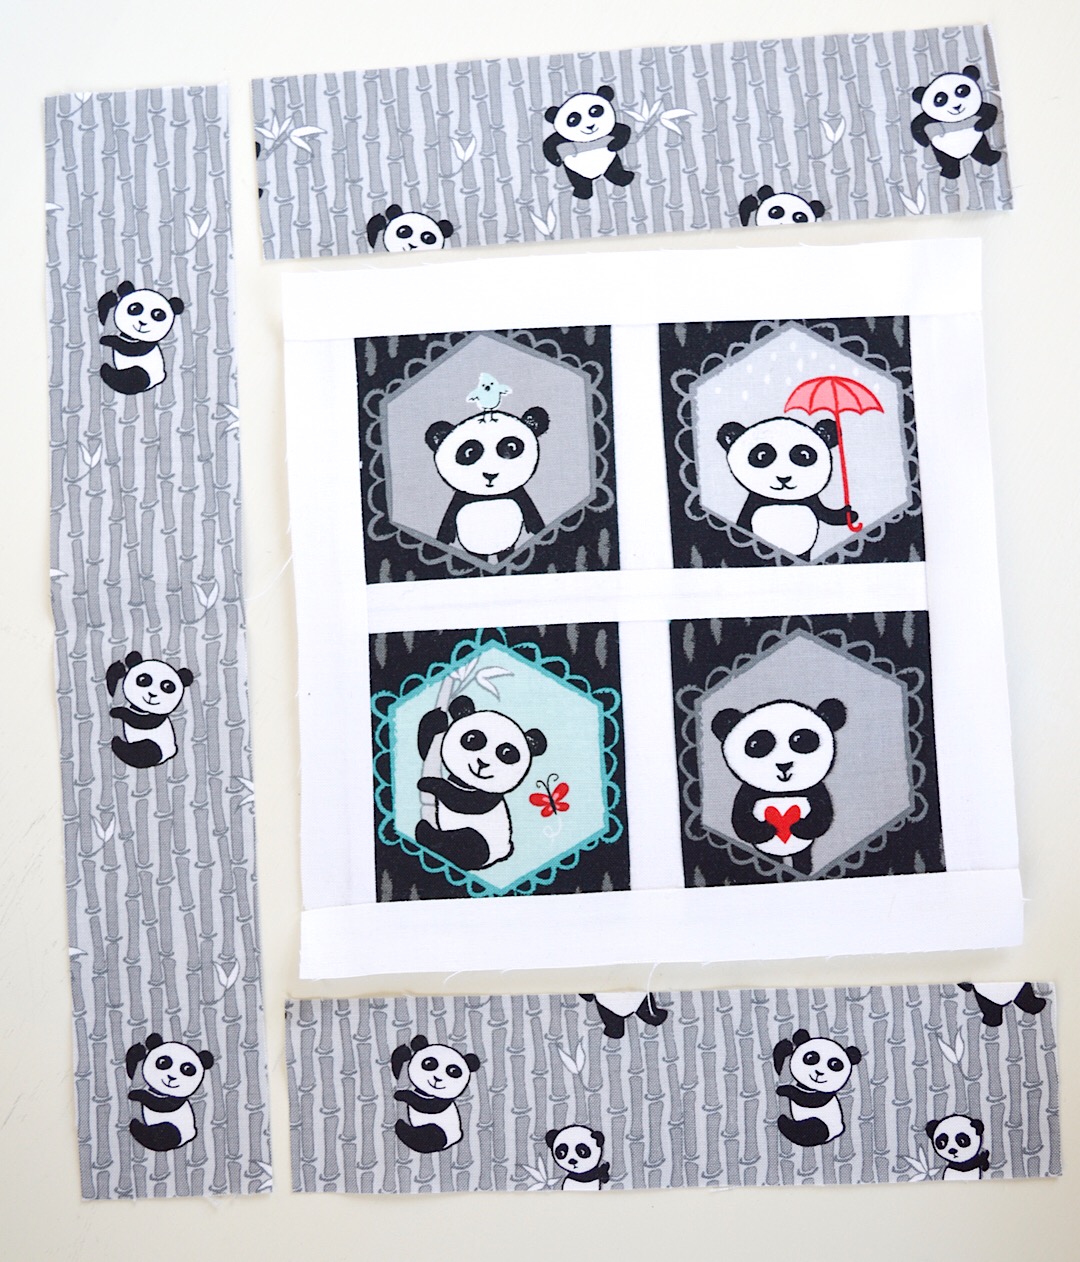
Next, it’s time to add a 2” x 11” strip to the left side of the mug rug. (This measurement is just a bit larger than what you actually need. I prefer to give myself a little margin of error – the excess can always be trimmed off later.)

*Tip: I wanted to feature the little climbing pandas on this side strip, so I centered them within a 2” section on my ruler and cut the strip.
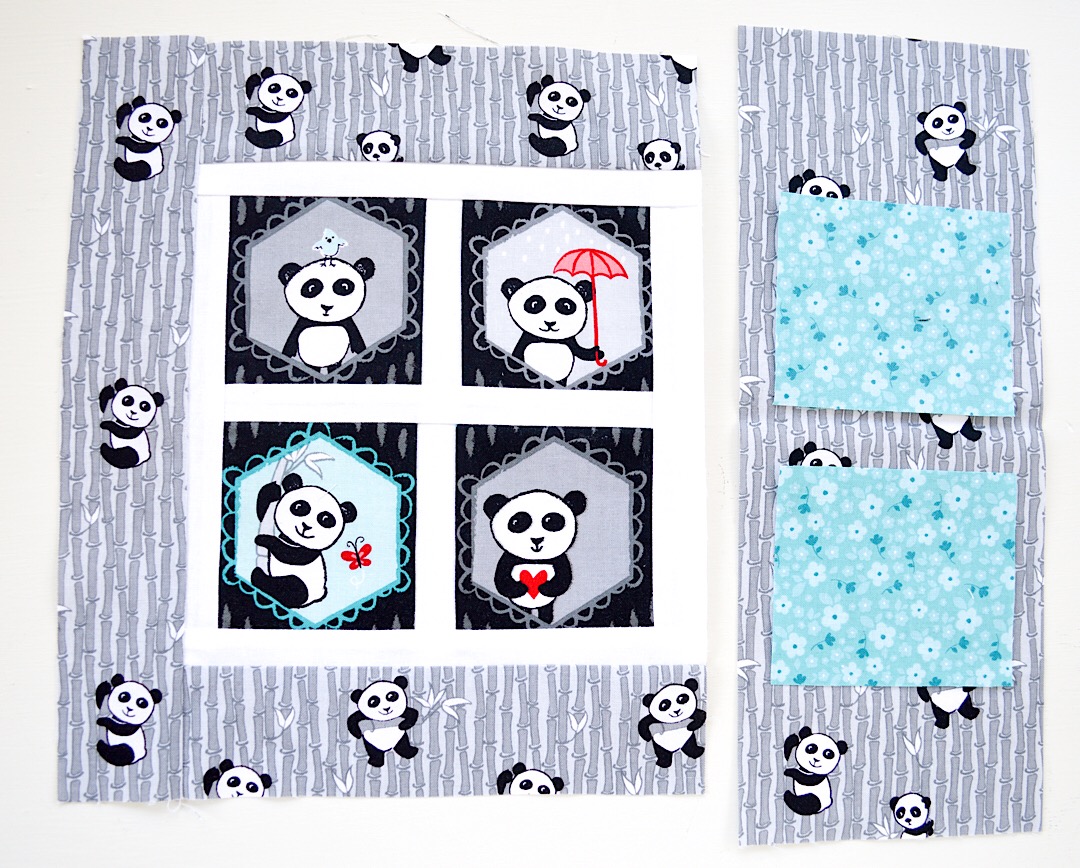
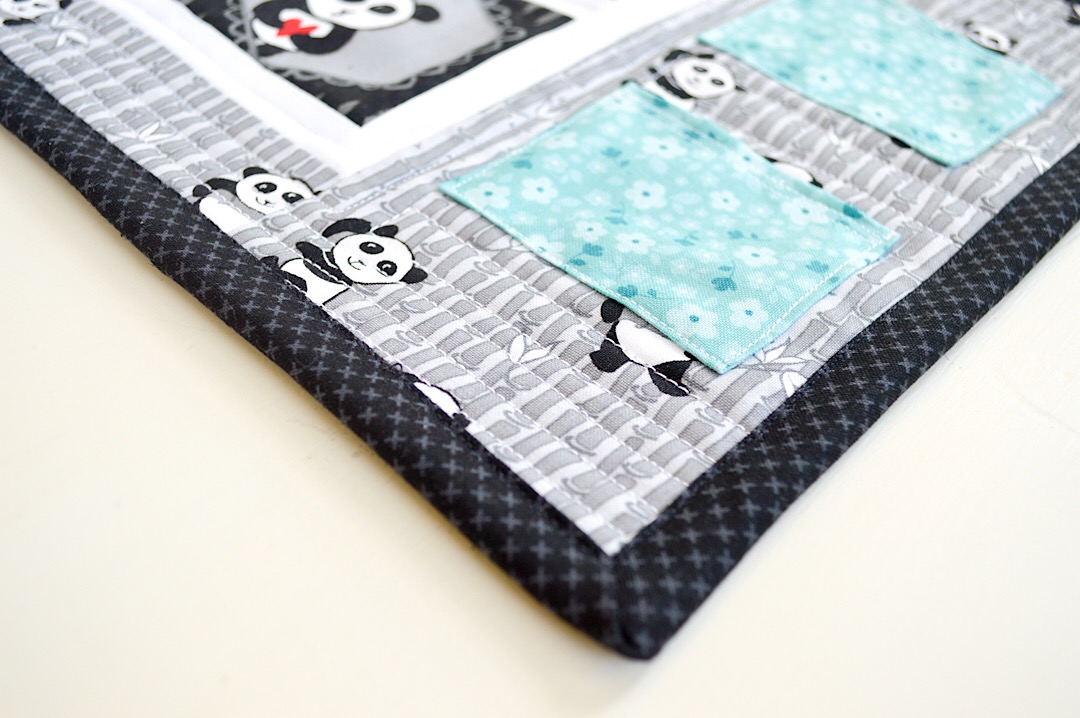
For the right side of the panda portraits, cut a 4.5” x 11” strip, again orienting the pandas vertically. You can see that by doing this, we have all of the pandas facing the same direction.
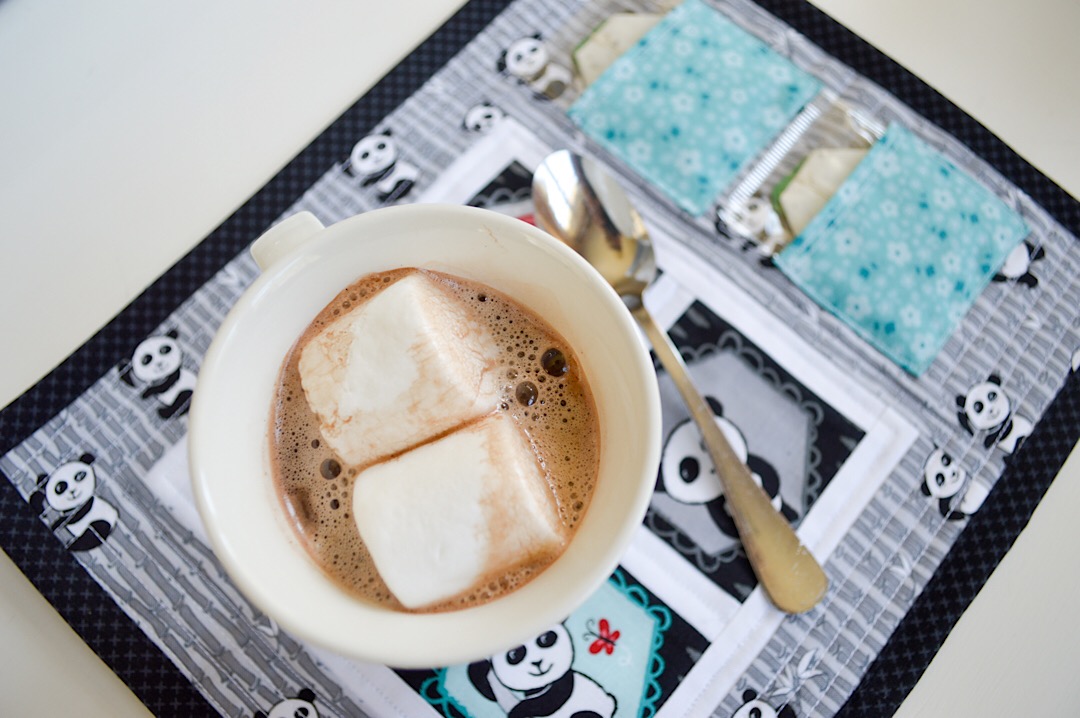
Finally, at this point, I knew what I wanted this to be! I decided I would add two little pockets to this wider strip, perfect for storing packets of my favorite peppermint herbal tea. And voila! It becomes a fun little mug rug!
For the pockets, cut two 3” x 3.5” pieces of a contrasting fabric. I used the cute little Aqua Panda Flowers print. You can see here, I played around with the pocket idea, figuring out size and positioning.

To prepare the pockets, press the edges under 1/4”. Top stitch along one of the wider edges. This will be the top opening of the pocket.
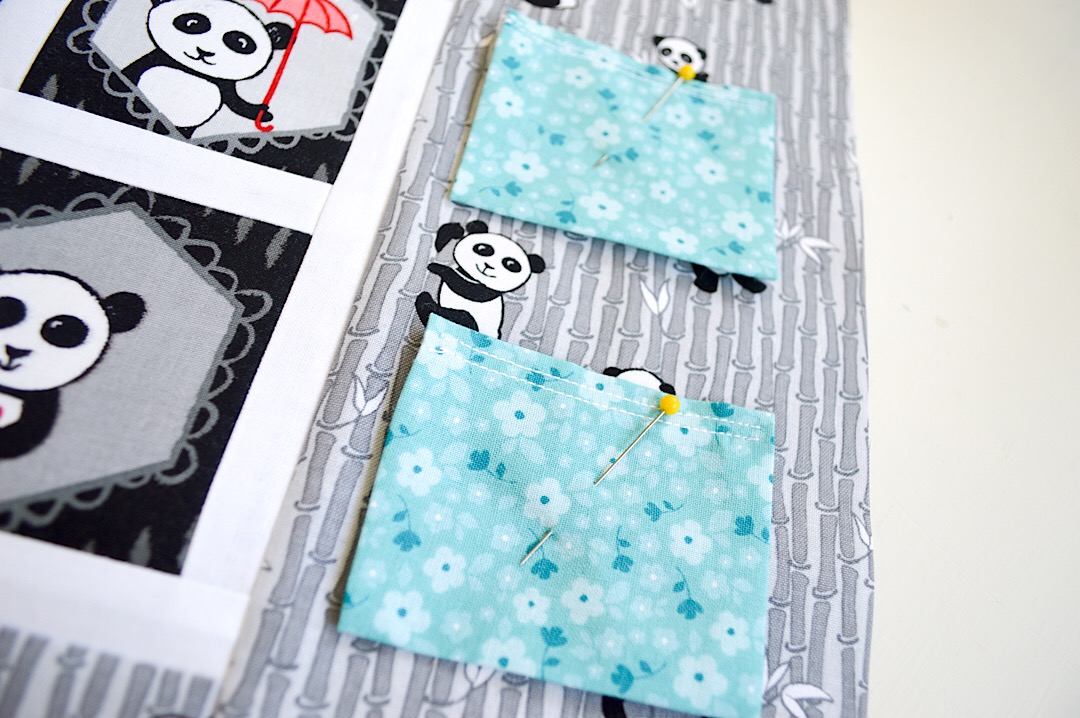
Arrange the pockets and pin into place. I tested the pockets with actual tea bags from my pantry to make sure they fit and that they can slide in and out easily, but still be slightly snug.
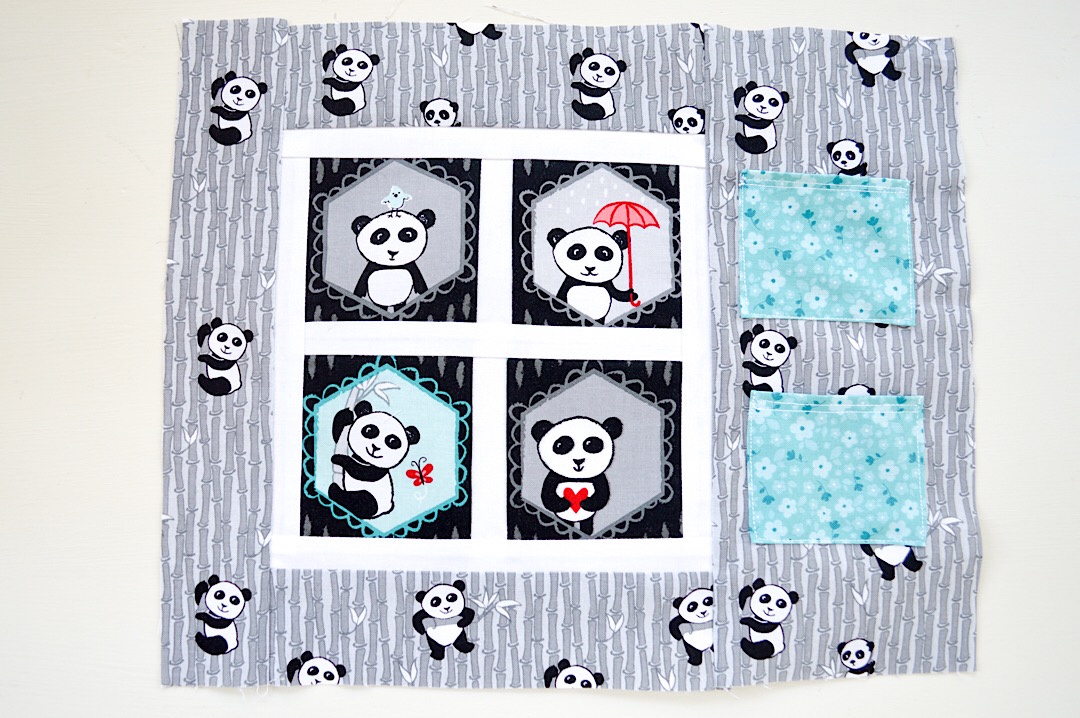
Stitch around the sides and bottom edge, keeping the stitches close to the edge of the fabric. Leave the top of the pocket open.
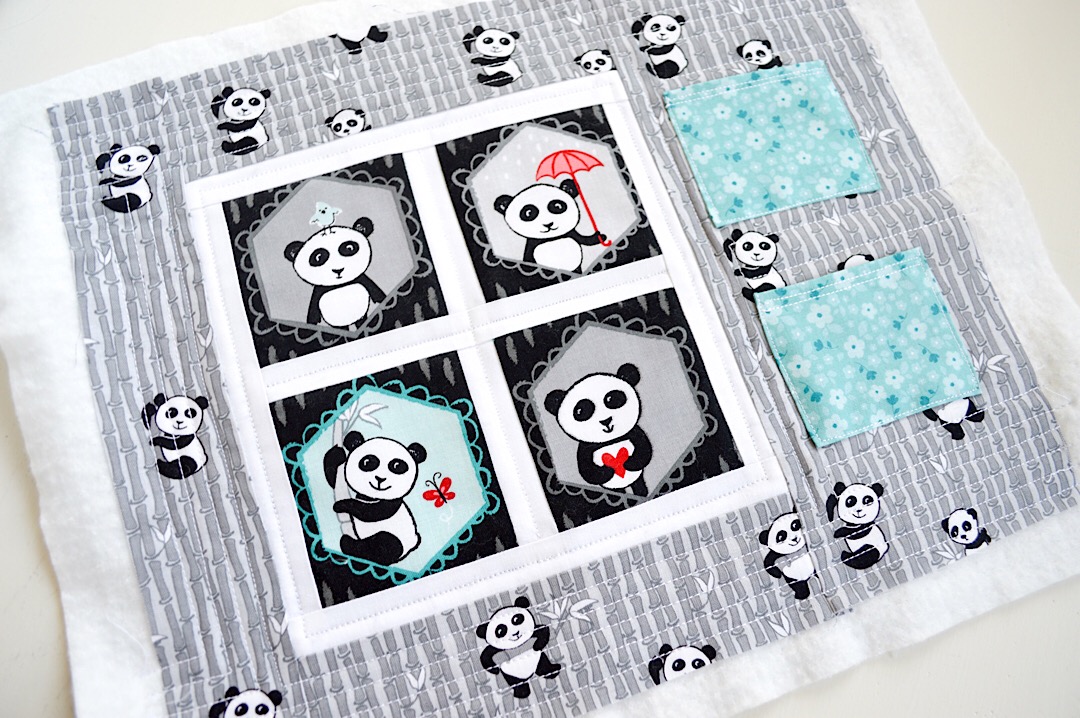
Now it’s time to quilt! Create your little “quilt sandwich” (fabric back, batting, top) and baste the layers. For this tiny project, spray basting is a perfect choice. It’s quick and easy and holds the layers together nicely.
Quilt the top according to your personal preference.

I started by machine quilting through the center of my white border strips.

I then moved on to quilting various straight lines around the bamboo print.
For the binding, I used this super cute little Black KISSES fabric, a new Riley Blake basic that is quickly becoming a favorite go-to print!

For the back of the mug rug, I used the fun Light Gray Panda Hexies print. I love the modern flair this print adds.
Aren’t those pandas cute?!
The Panda Love fabric collection is available now at your favorite local or online quilt shop. Be sure to follow Kelly Pannaci on Instagram @kellypanacci, where she is sharing many more projects featuring this fun fabric line.
We’d love to see what you are making with Riley Blake fabrics! Tag us on Instagram using #rileyblakedesigns.
Happy Sewing!