Shocker I know… It’s GINGHAM. And not just any Gingham, I only love and work with Riley Blake Design- “GINGHAM”. You may heard but we had a SAVE RBD GINGHAM campaign this summer over at sewwequilt.com. Gingham is a classic and I never ever TIRE of coming up with more creative projects to showcase it… WE did save the MEDIUM gingham. Thanks a heap RBD….WE so appreciate you… I think there will be more Gingham in my future. wink.
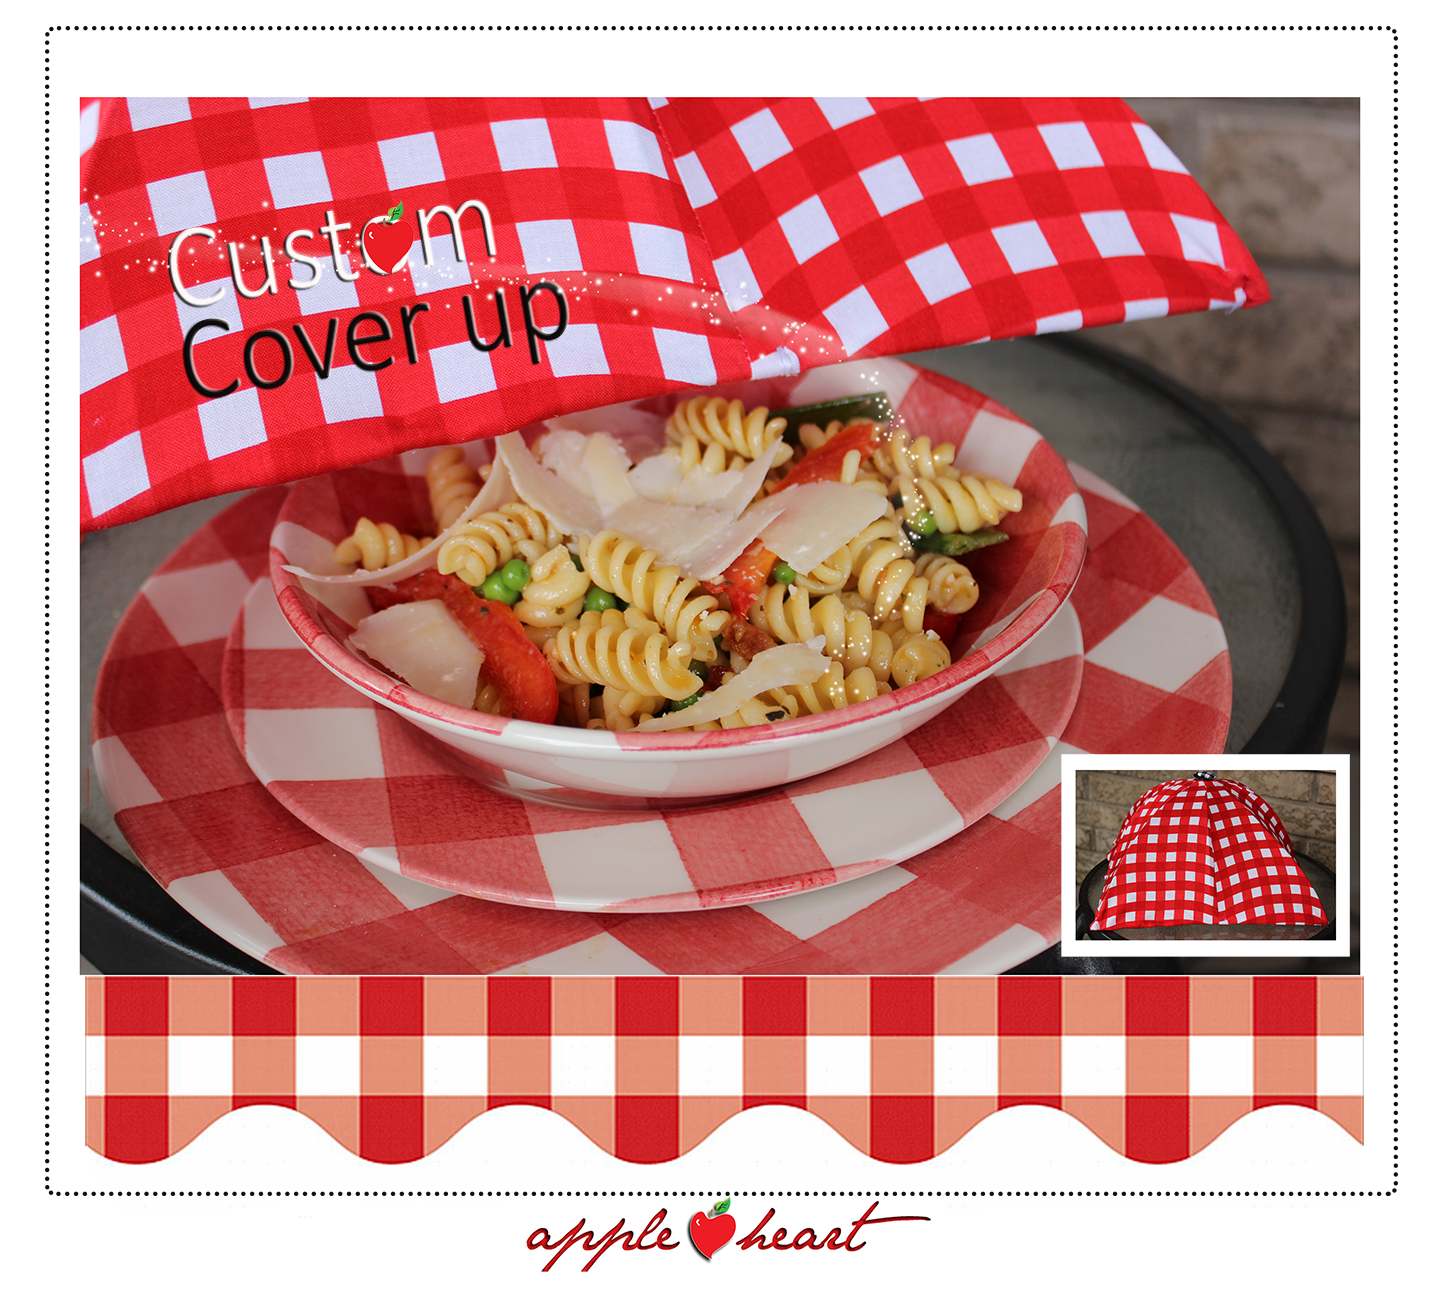
So WELCOME and thank you so much RBD for inviting me to be part of your design team … if you are still with me… and if you are at all interested in how to make your own CUSTOM FOOD saver, cover, tent, umbrella….it can be called me things…It’s purpose is to keep these things away from you…

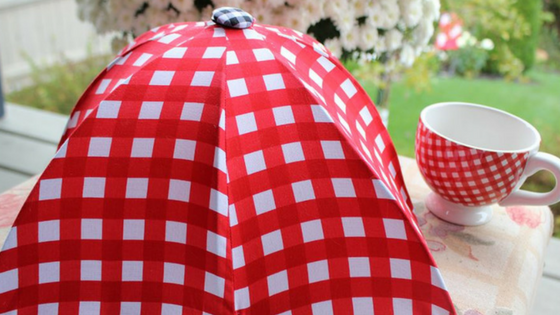
I am going to show you how to make a CUSTOM COVER! So it won’t matter if it is a SHADE for lamp, a small umbrella or a frame like this for a FOOD COVER…. The principles are always the same.
What you will need is the following
A FRAME ( mine is about 12 inches square)
1 yd of any fabric, I was not sure if I was going to use the black or red gingham..( chose red)
some craft paper ( I purchased a roll of freezer paper) If you need some HOLLER…2000 feet
Upholstery needle…( half circle ones)
and some Upholstery thread..Gutermann’s has the best. !
Wonder Clips ( you will know why soon)
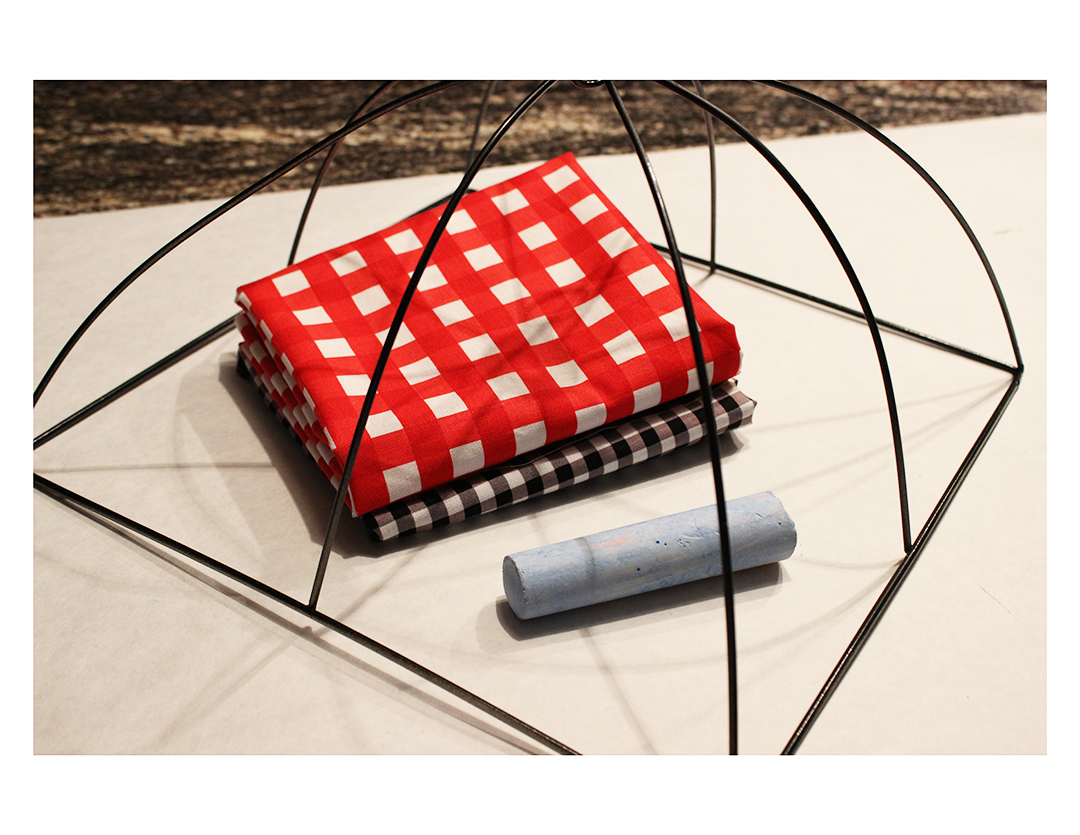 |
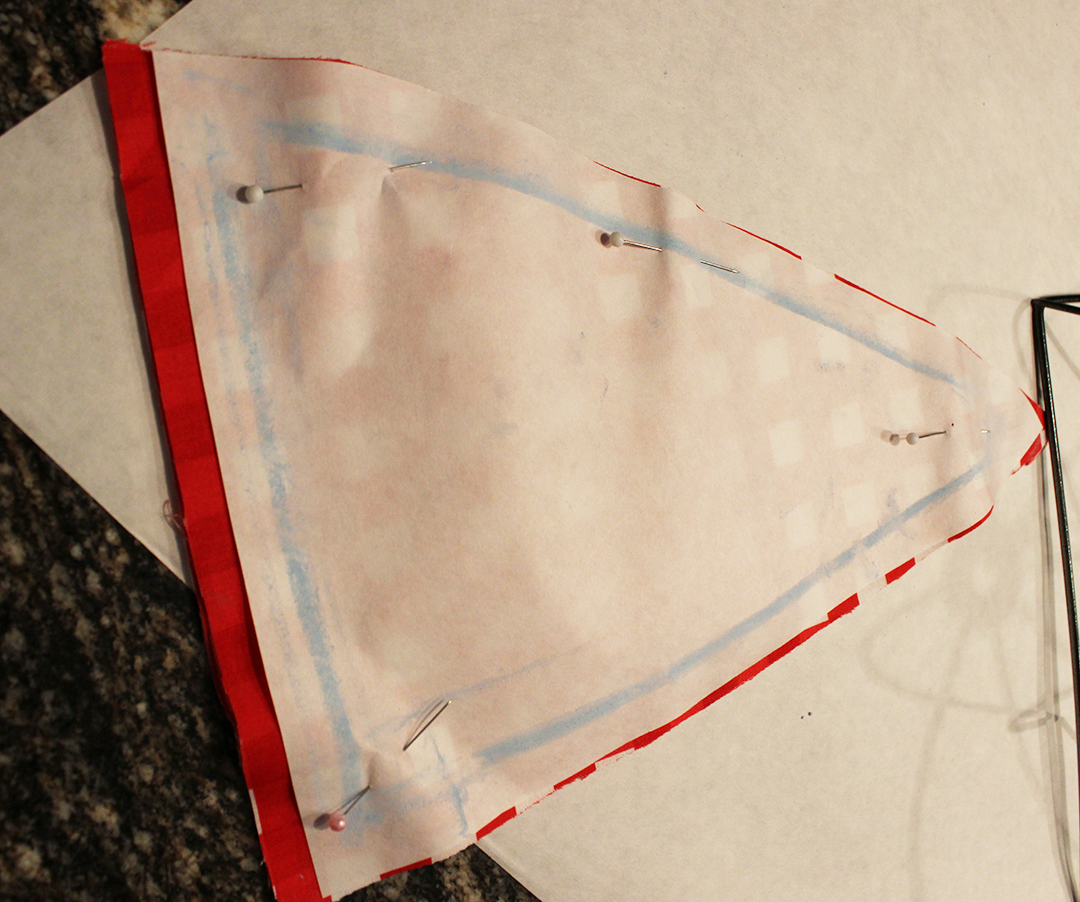
| 1. You have everything else you need…scissors, chalk, paper, ready… Cut a rectangular piece of paper, that will be a little longer and wider that one of the panels of your frame… |

2. You are going to lay your paper, shining side on wrong side and you will take your chalk and rub it against the frame and paper…
This will be your pattern….This will work with anything you want to do CUSTOM, chalk is your friend….well it certainly is mine… Freezer paper is my friend too as I have plenty till I die… they are always used for my pattern pieces…

3. Now you are going to cut your pattern but you will add 1/4 inch seam all the way around it… This is your PATTERN..
4. Fold material and fold again, so you have 4 layers and cut the first 4 panels and repeat.. You will need 8 ….note Umbrellas always have at least 8 panels, children’s size 4. This cover requires 8…..NOTE I added a little bit more in length to allow for a hem on the bottom of the cover.

5. You are now ready to sew them…Sew using 1/4 inch seam then press the seams one way… Keep repeating that till you have a 4 pairs, then sew up the pairs till you have one DOME shape cover…

6. Be sure to leave a bit of an opening at the top so you can pull a ring or button through….. Now just turn your hem 1/4 inch and sew and press, you will be turning it again and stitching it to your frame so don’t worry if it does not look finished…because it is not…
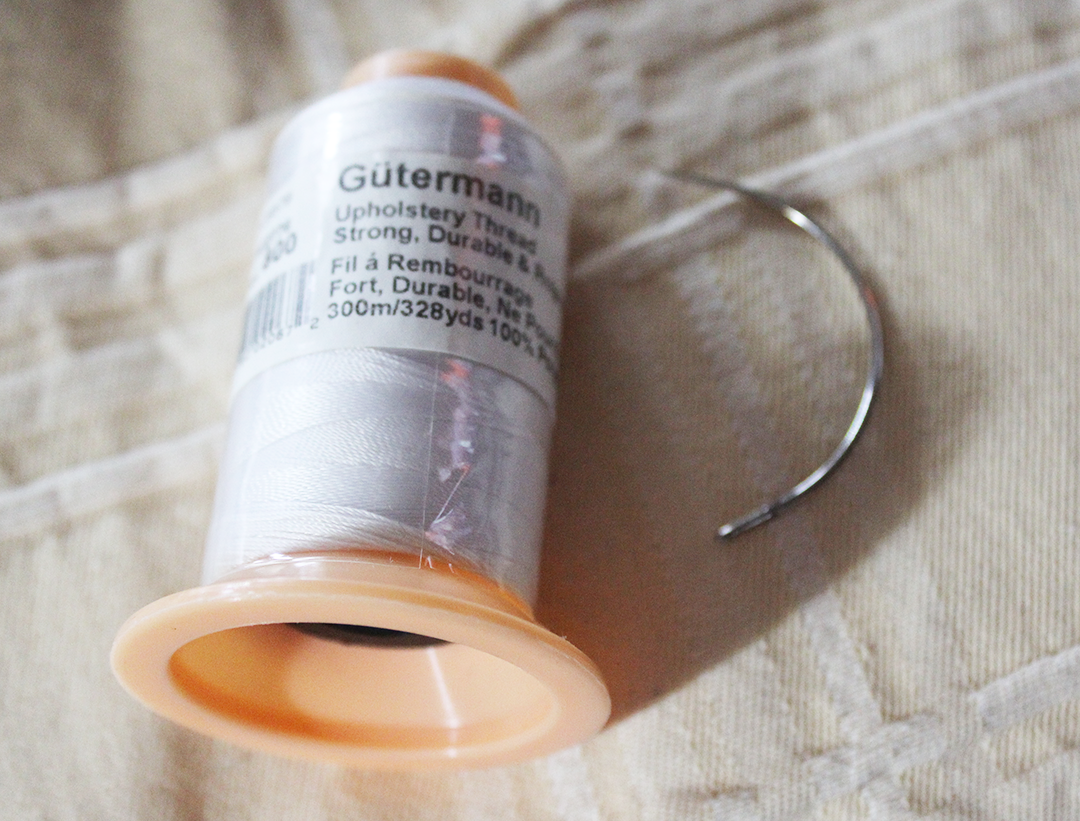
7. We are going to need this now…so thread your needle ( upholstery needle and upholstery thread….I tried cotton,
I tried polyester it just does not hold….) only Gutermann’s upholstery.
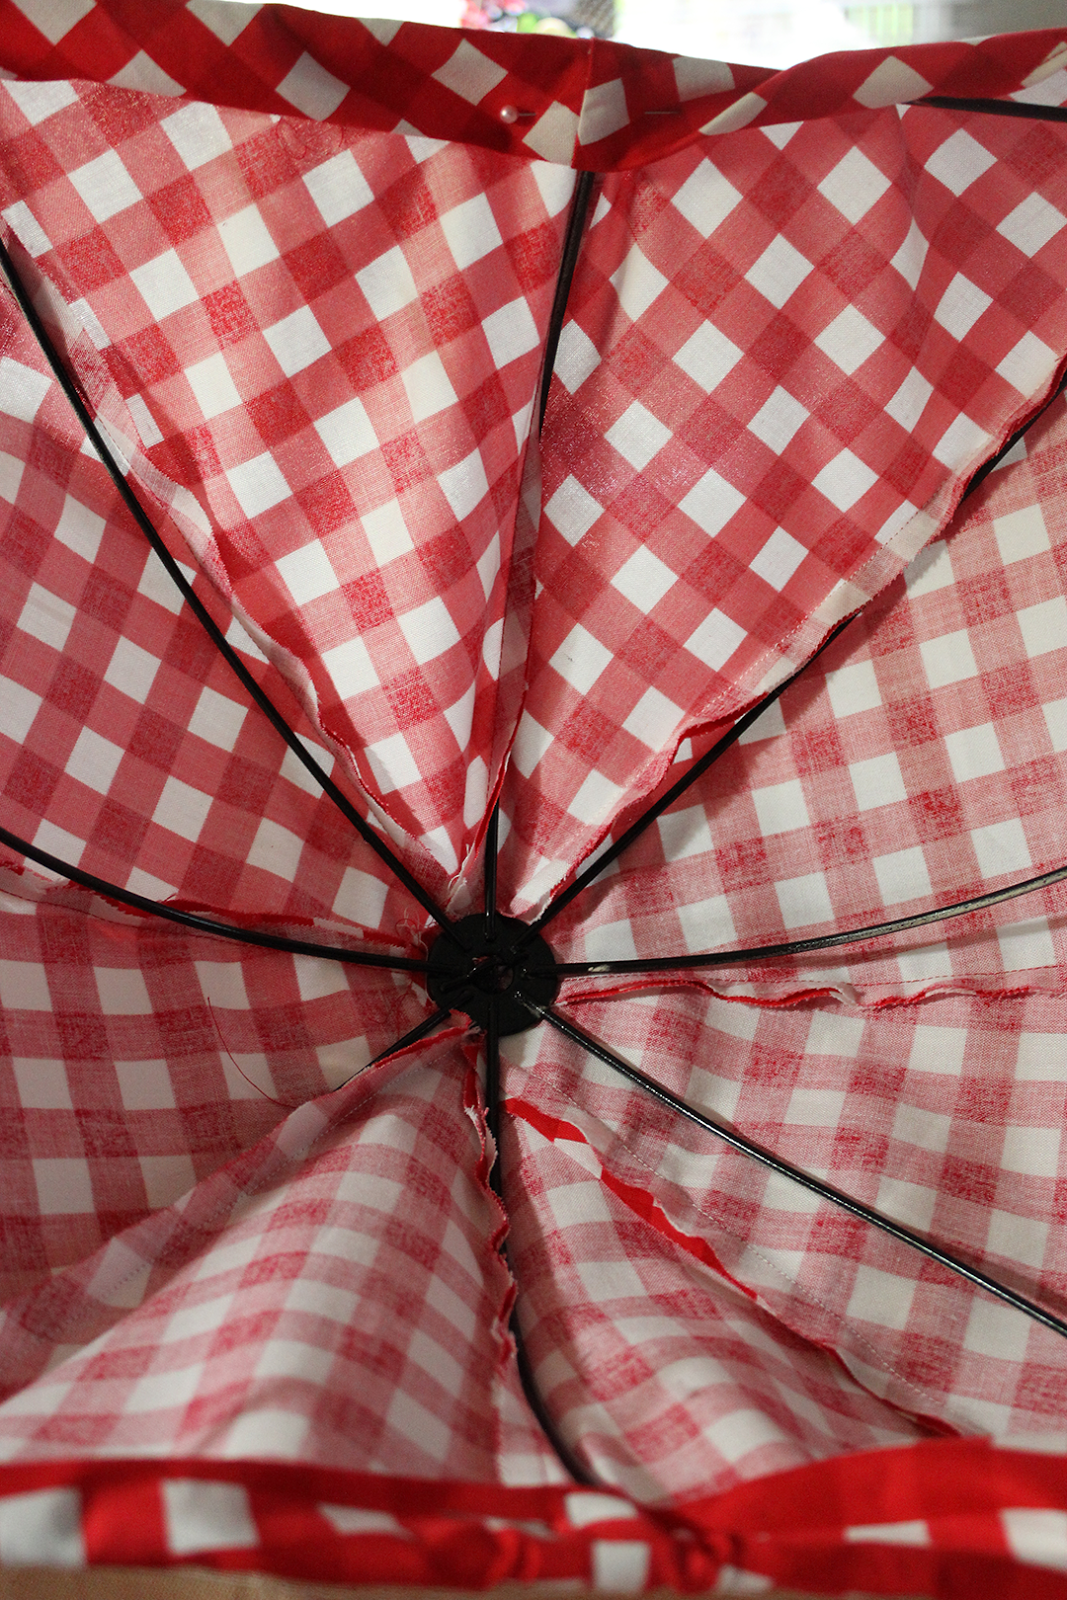
8. Now place your cover over the frame, turn it upside down and stretch fabric and pin it first…as tights as you can – Line up your seams with the Spine Panels….( frame)

9. Now remove PINS and replace with wonder clips.. you are now ready to anchor some stitches, start in the centre, make about 6 stitches, knot it.. go the other centre opposite side, and REPEAT the other centres….. Then you will do the same with the corners…. You will roll your hem underneath and stitch that to the bottom of the frame.
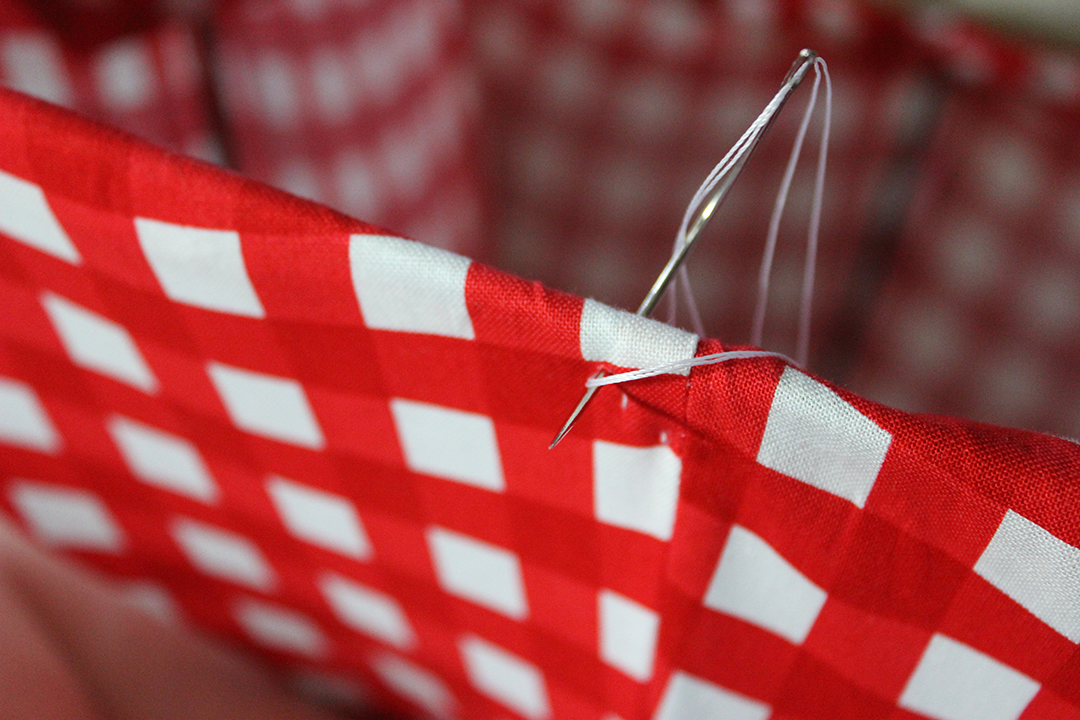
10. This is where a curved needle becomes ONE with YOU.. 6 loops around the frame …matching your fabric of course.. I used white upholstery Gutermann’s thread..

11. Once you have gone all around your frame at anchor points cover a button and stitch it on the top, and anchor it underneath on one of the seams…. See not so hard….YOU can now tackle many small custom cover or a lamp…
mmmmmm I think this would be a great lamp shade…