Hi Everyone! I’m Mandy and I blog at Sugar Bee Crafts, where you can find awesome craft, sewing, and diy tutorials – come check it out! I love being a part of the Riley Blake Design Team and bringing you simple sewing tutorials using super cute fabric.
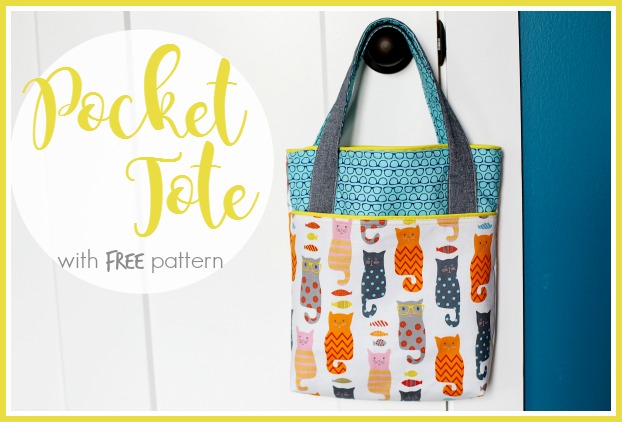
Today I’m showcasing this cute Smarty Cats Fabric in cream with a coordinating Novelty Glasses in blue. I can’t get over the cuteness of the cats in glasses! I knew immediately that it would be perfect fabric for a library bag, and so I came up with a simple Pocket Tote tutorial.
Pocket Tote, Library Bag
You’ll need: 1/2 yard main fabric 1/2 yard coordinating fabric 1/2 yard fusible fleece 1 pkg piping (optional) First up, cut all your pieces out: pocket, cut 13 in wide by 11 inches tall out of main fabric and coordinating fabric (2 pieces total), plus 1 fusible fleece or fusible interfacing bag, cut 13 in wide by 14 inches tall, 3 out of coordinating fabric, one out of main fabric (4 pieces total), plus 2 fusible fleece handles, 24 inches by 2 inches, 2 of coordinating fabric, 2 of main fabric, 2 of fusible fleece.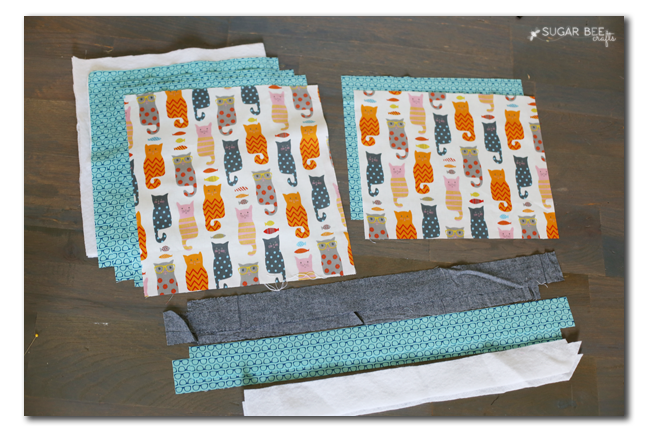
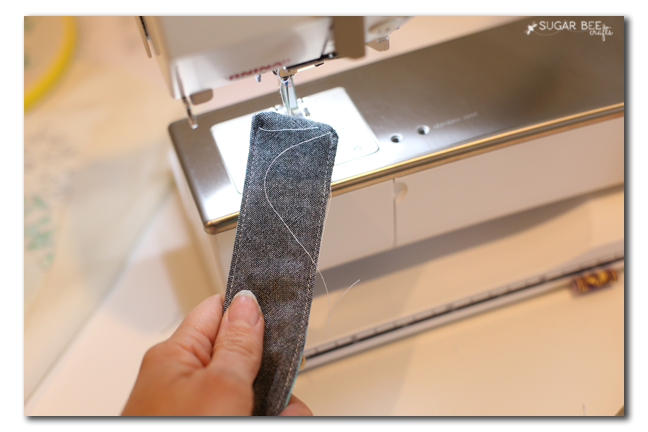
My least favorite part of making bags is the handles (I just want to get started on the main stuff!), so do those first and have them ready and done. Iron the fleece onto the back of the main fabric. Then with right sides together, sew a strip of main fabric to a strip of coordinating fabric along the long edges. Turn right-side out. Tuck ends in. Top stitch all the way around. Repeat for the other handle.
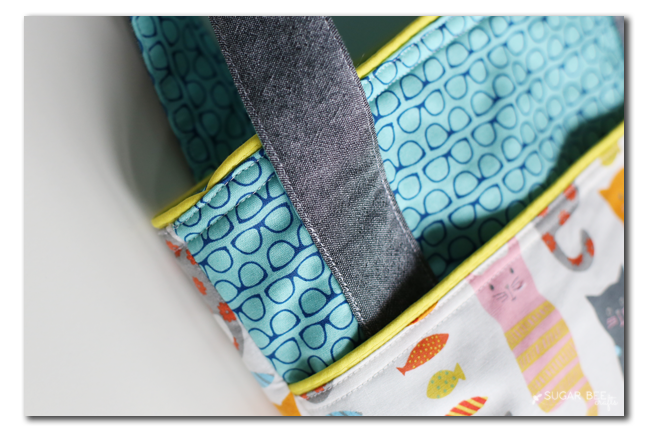
Next you’ll assemble the pocket. Iron the fusible fleece or interfacing to the back of the main fabric. Then with right sides together, sew the top of the two pocket panels together. Optional – in the seam, sandwich the piping (raw edge up, matching the other raw edges.)
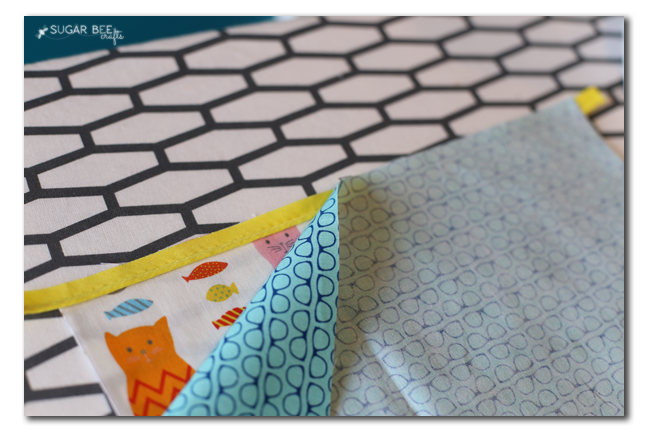
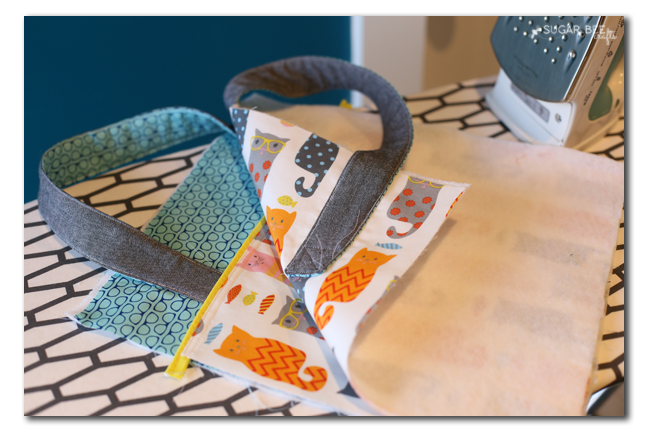
After sewing, turn it right-side out, so the two pieces have wrong sides together. Top stitch along the top seam that you just sewed. Set aside.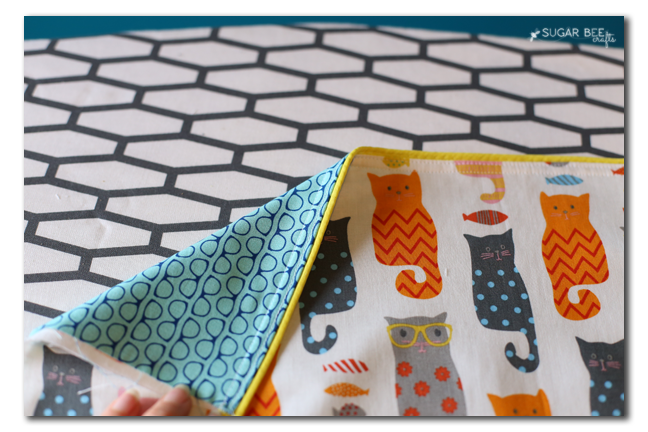
Next we’re going to work on the main bag. It is using the larger bag pieces you cut – you’ll need one of main fabric and one of contrasting fabric. Iron the fusible fleece onto the back of each of those.

Place your handles on each of those and sew them into place by sewing a square with an “x” in it near the bottom of the handle. Then sew up each side of the handle about 3 inches (do not sew the handle all the way to the top of the fabric – leave a couple of inches unsewn). The bottoms of my handles were placed 5 inches from the top and 2 1/4 inches from each side.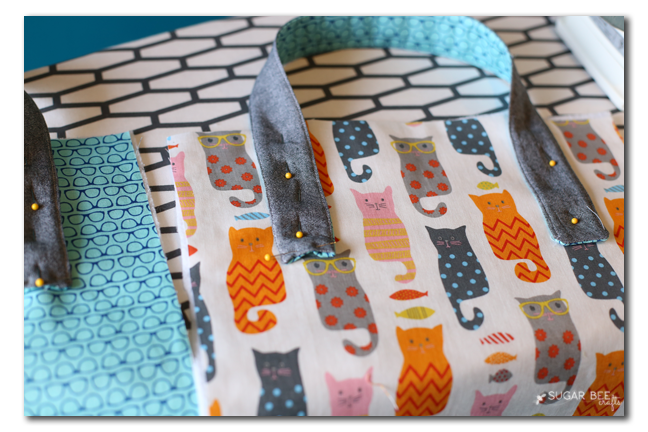
You can see the “x” at the bottom of the handles in the picture below. This is a view of the back of the finished bag: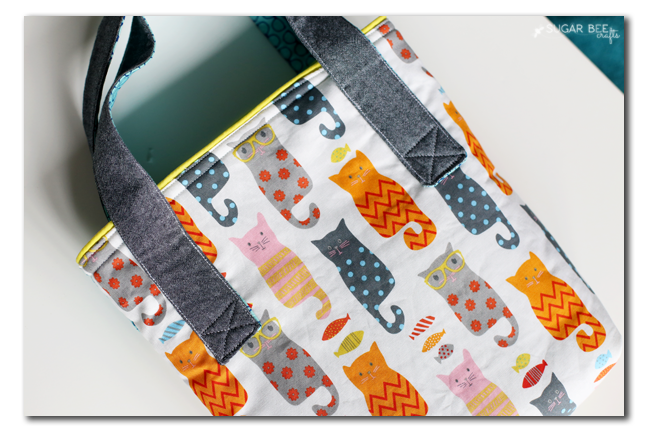
Place the bag piece out of contrasting fabric face up. Lay the pocket (face up) on top of it, matching the bottom edge. Optional: baste around the edges of the pocket piece.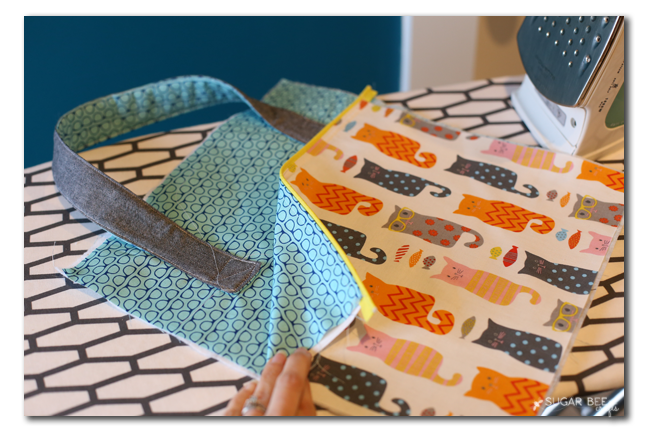
Place the other bag piece face down on top of that stack. Sew the sides and bottom, but leave the top unsewn. Place 2 bag lining pieces right-sides together and sew sides and bottom together as well. So you will have 2 “bags”, the main bag and the lining bag.
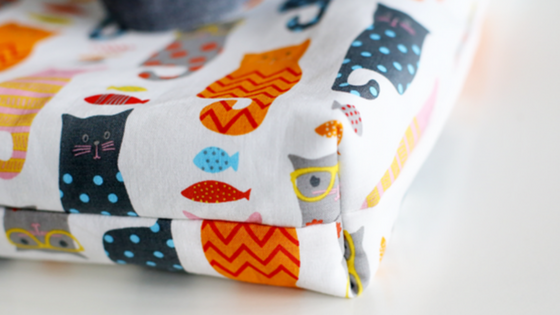
Next sew in a boxed corner. To do this, pinch the corner so that the side seam and the bottom seam are on top of each other and the corner forms a triangle.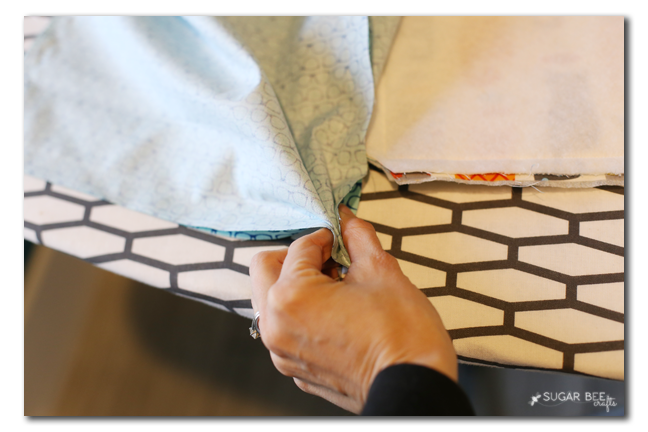
Sew the flat triangle about 1 1/2 inches in from the point. After sewing, clip off the excess.
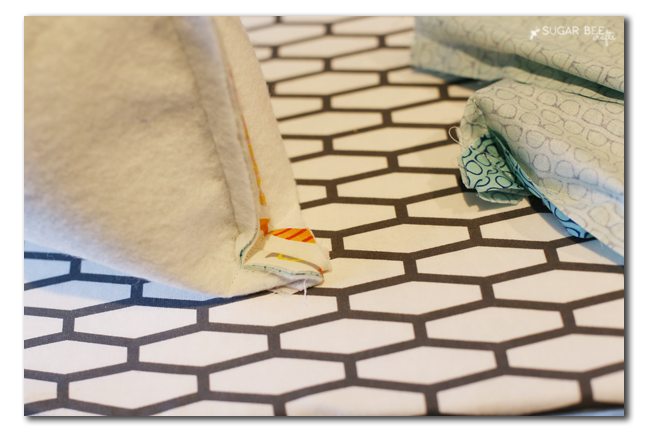
You can see the result of the boxed corner – it gives your bag sides and a bottom, instead of being flat.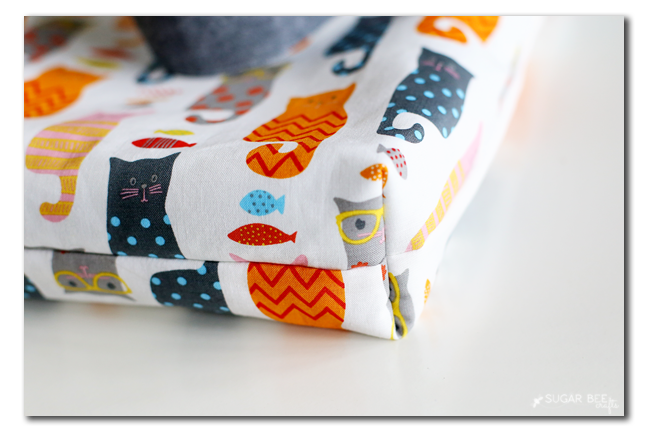
Now we’re going to put everything together! With the main bag inside-out and the lining right-side out, slide the lining into the main bag matching top raw edges (this makes right sides together) – be sure that the handles are tucked down in. Sew along that top raw edge all the way around, leaving about 3 inches unsewn. Through that 3 inches, pull the lining and main bag right-side out, then push the lining back down into the main bag. Optional: as you did with top pocket seam, you can sandwich in piping (not shown, cause I forgot it the first time!).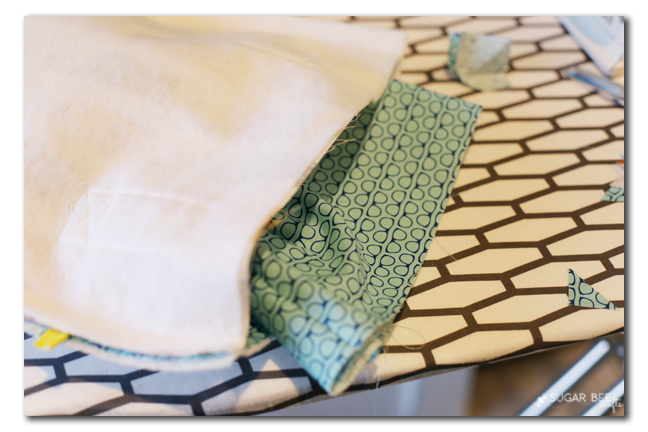
After you have it all turned right-side out, topstitch that seam. It will close the hole you used to turn the bag right-side out, and it will give it a nice, finished look.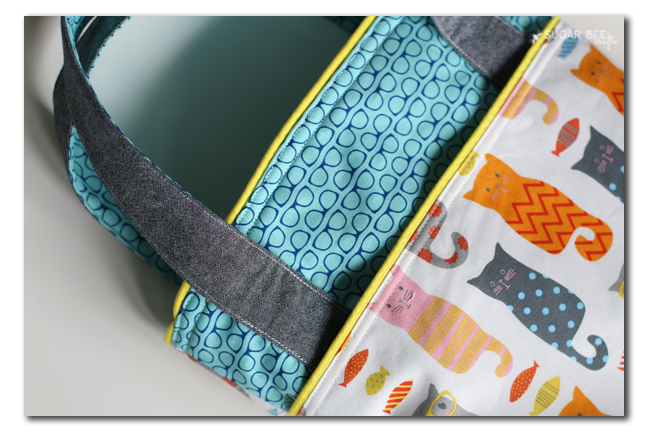
You can see where I accidentally have my piping seam in the front of my bag, instead of the side seam in the back – oops!! I’m just calling it a “design element” and going with it 😉
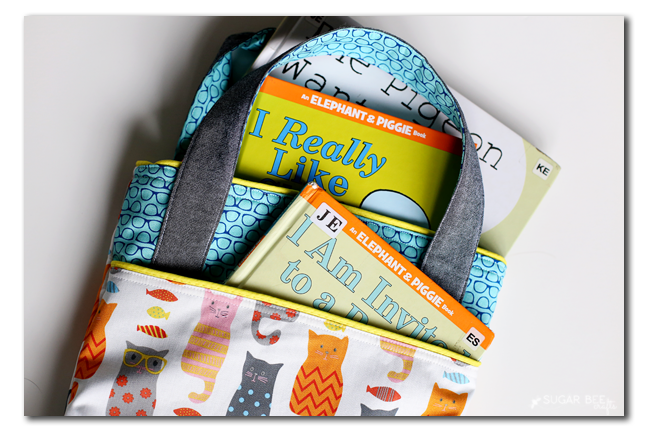
I hope you enjoy your bag as much I as do! I love the big front pocket – it just makes the tote that much more functional and awesome. And of course I can’t get enough of the Smarty Cats fabric!! Hope to see you over at Sugar Bee Crafts! – Mandy