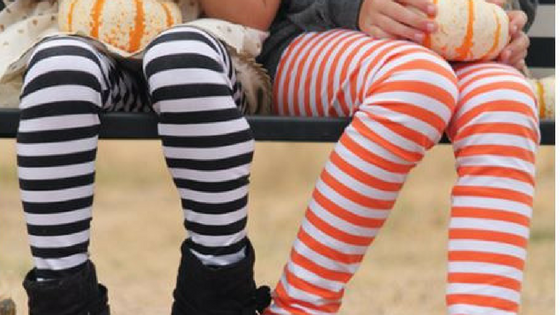
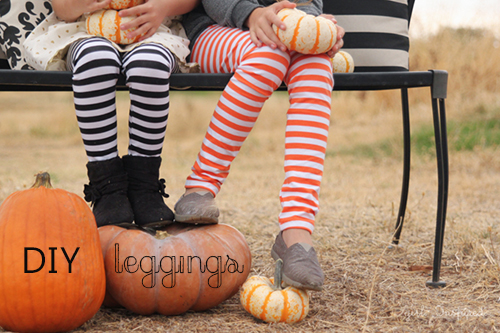
Hi friends! It’s Stef, from Girl. Inspired. The cooler days are rolling in and I can’t help but want to sew with lots of knits and cozy fabrics. I was really excited to get my hands on some of the Riley Blake striped knits – they are a thicker cotton jersey knit – so perfect for kid and adult basics like tees and leggings and they come in EVERY color! My girls live in leggings most of the fall and winter. They’re perfect with a tunic or layered with dresses and cardigans.

Today, I’ll show you how to sew up a pile of leggings by making your own pattern from a good-fitting pair of leggings already in your child’s dresser! You can use the following steps and create a paper pattern for the leggings or simply cut directly into the fabric. You will need: 1 yard of cotton jersey knit 1″ wide elastic ball point or jersey sewing machine needle pair of well fitting leggings or leggings pattern serger (optional) Let’s get started:
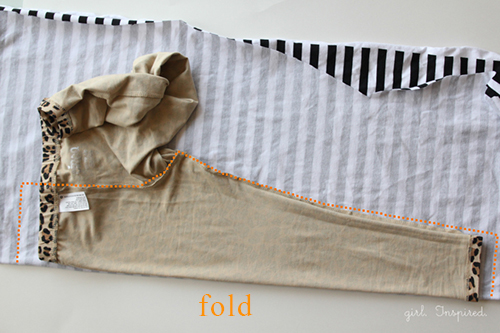
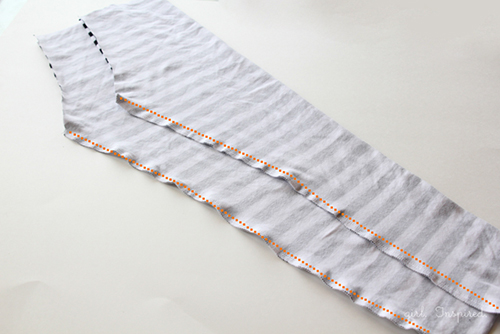
Turn the sample leggings inside out and lay them flat with the side of the leg along a vertical fold in the fabric you’ll be using. You want the stretch to go side to side. You can go up to about a size 7/8 with a yard of fabric (be sure to pre-wash to allow for shrinkage!). Draw a line or cut out one leg. You want to cut about 3/4″ below the cuff to allow for hemming. You also want to cut 1″ above the waistline to allow for the elastic waistband. Notice that the waist on the finished sample leggings comes in just a bit – cut the top of your leg piece straight – the elastic will pull it in when finishing. Also, use the backside of the pants as your template – we will adjust for the front in a subsequent step.
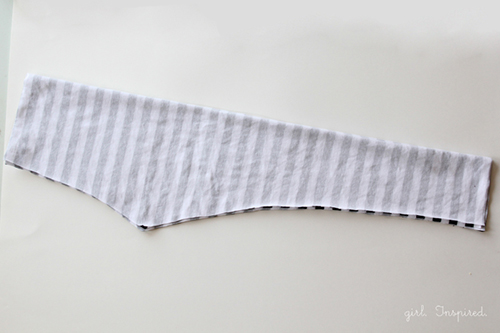
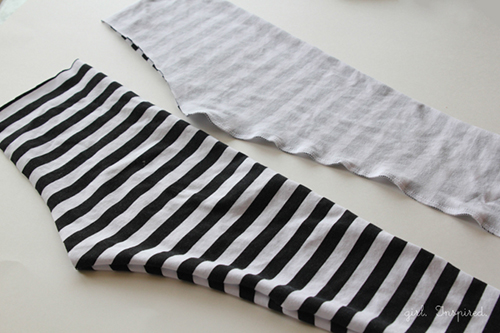
Cut two symmetrical legs on the fold. Be sure to match stripes vertically and between the two legs if using a patterned fabric.
Working on one leg at a time and with right sides together, sew from the crotch down to the bottom along the inner leg seam of the pant leg. Repeat for both legs. Use a 1/4″ seam allowance throughout this tutorial unless indicated otherwise. A serger is helpful for this sewing project, but not necessary. When you are not using a serger, be sure to use a ball-point needle on your sewing machine and a narrow zig-zag stitch or a stretch stitch.
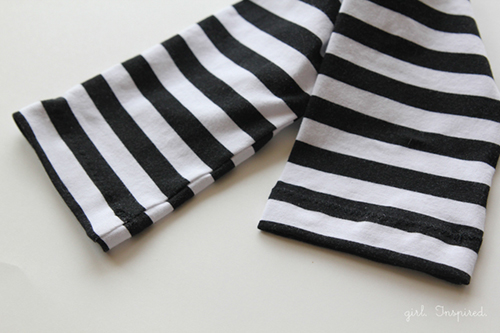
Turn one leg right side out. Open the top portion of the inside out leg and tuck the right side out leg inside. Match the seam lines and adjust the legs until the one leg is exactly lined up inside the other leg.
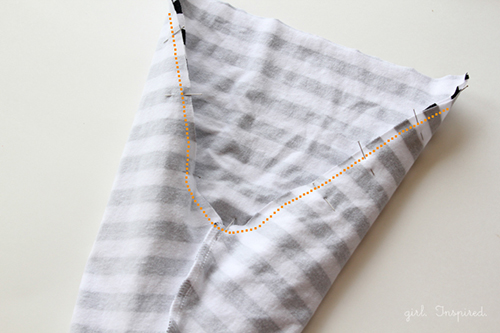
Pin the two legs together around the center front and center back lines. Be sure to match the crotch seams and then work out to match up the pattern extending to the waist. Sew together.
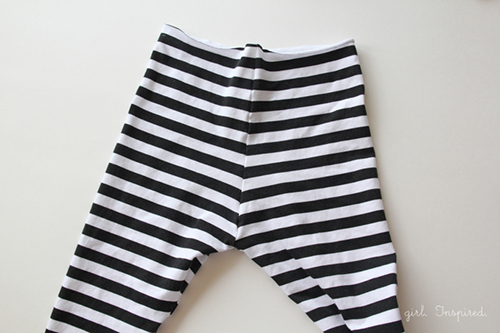
Your leggings will now look like the above picture. You may wish to stitch over the crotch seams a few times for reinforcement.
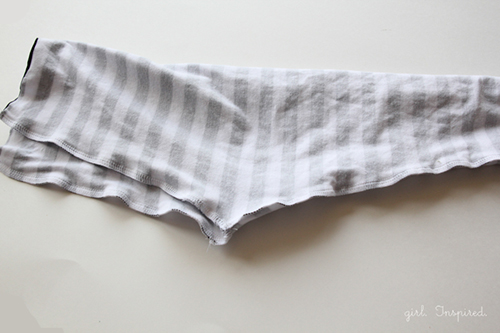
Turn the leggings right side out. Now, we’re going to adjust the waistline to create a front rise that is a bit lower than the back rise. Open the waist of the pants and pull the front seam to the right and the back seam to the left – see picture below.
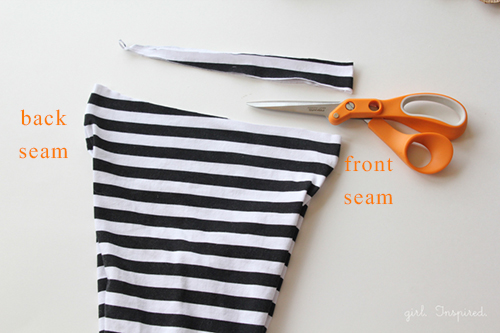
Cut a gently curved line from about 1″ down on the front seam up to meet the top edge at the back seam.
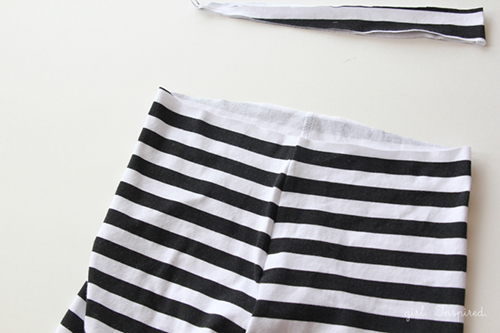
Now, when you lay the leggings back out flat in front of you, you’ll notice the back waistband is higher than the front waistband (you can adjust the rise difference for your child, if you like – 1″ is a good average).
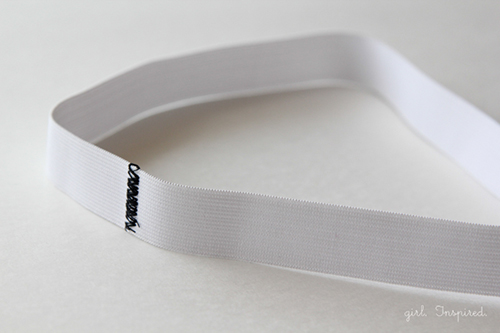
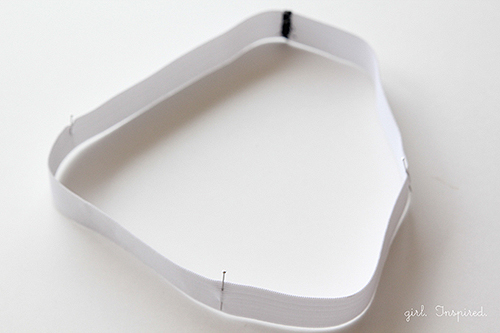
Cut a 1″ wide piece of elastic approximately 1″ shorter than your child’s waist measurement. Place the two ends of the elastic together and form a circle by stitching a zig-zag stitch back and forth over the two ends. Place a pin to divide the elastic circle into four equal parts.
On the inside of the pants waistband, match each pin in the elastic circle to the corresponding front, back, and side of the waistband. Your elastic will be a bit smaller than the waistband.

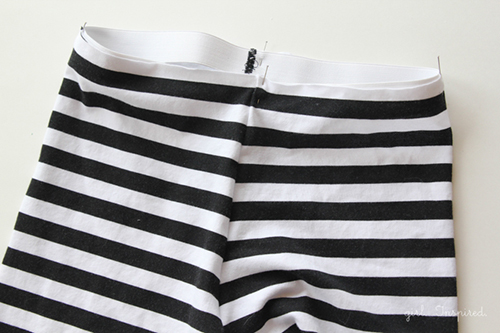
Sew the elastic to the top of the waistband, gently stretching the elastic evenly while sewing to fit it into the waist. Do not stretch the fabric waist itself. Be sure you’re using a serger or a stretch stitch here.
Turn the attached elastic into the waistband (toward the wrong side) and pin into place.
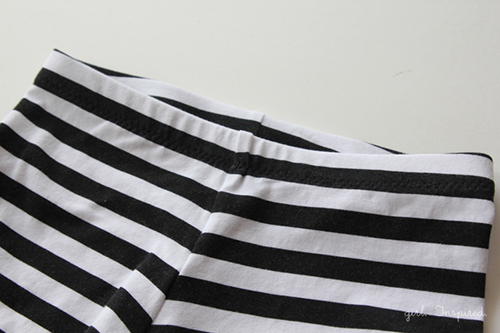
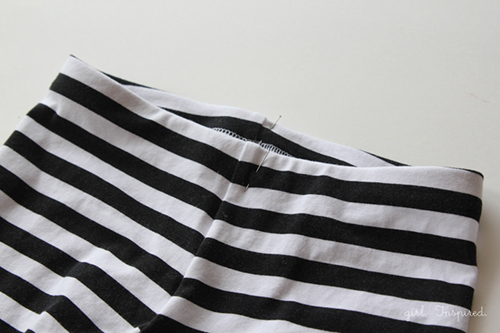
Use a narrow zig-zag or stretch stitch to secure the waistline hem by stitching about 3/4″ from the top edge.
Press the bottom hem of each pant leg up by 3/4″. Use a stretch stitch, zig-zag, or twin needle to finish the leg hems. All done!

Have fun sewing with the Riley Blake line of knits! They have some houndstooth coming in that I’m just dying to get my hands on! Stop over at Girl. Inspired. to see the other fall sewing projects I’ve been working on! Â See you soon!