Every once in awhile I get the itch to play with modern lines and simple solid colors. The only thing that often stops me from experimenting is the fear of messing up and wasting large amounts of fabric. This is where mini quilts enter into the picture. Mini quilts are a fantastic, worry-free platform for testing out new skills and designs.
I spent the majority of my life in the Southwest surrounded by the San Gabriel and Rocky Mountain ranges. For me, having mountains in my view gives a visual anchor, a sense of security, and the perk of helping directionally challenged people like myself easily orient ourselves to north, south, east and west.
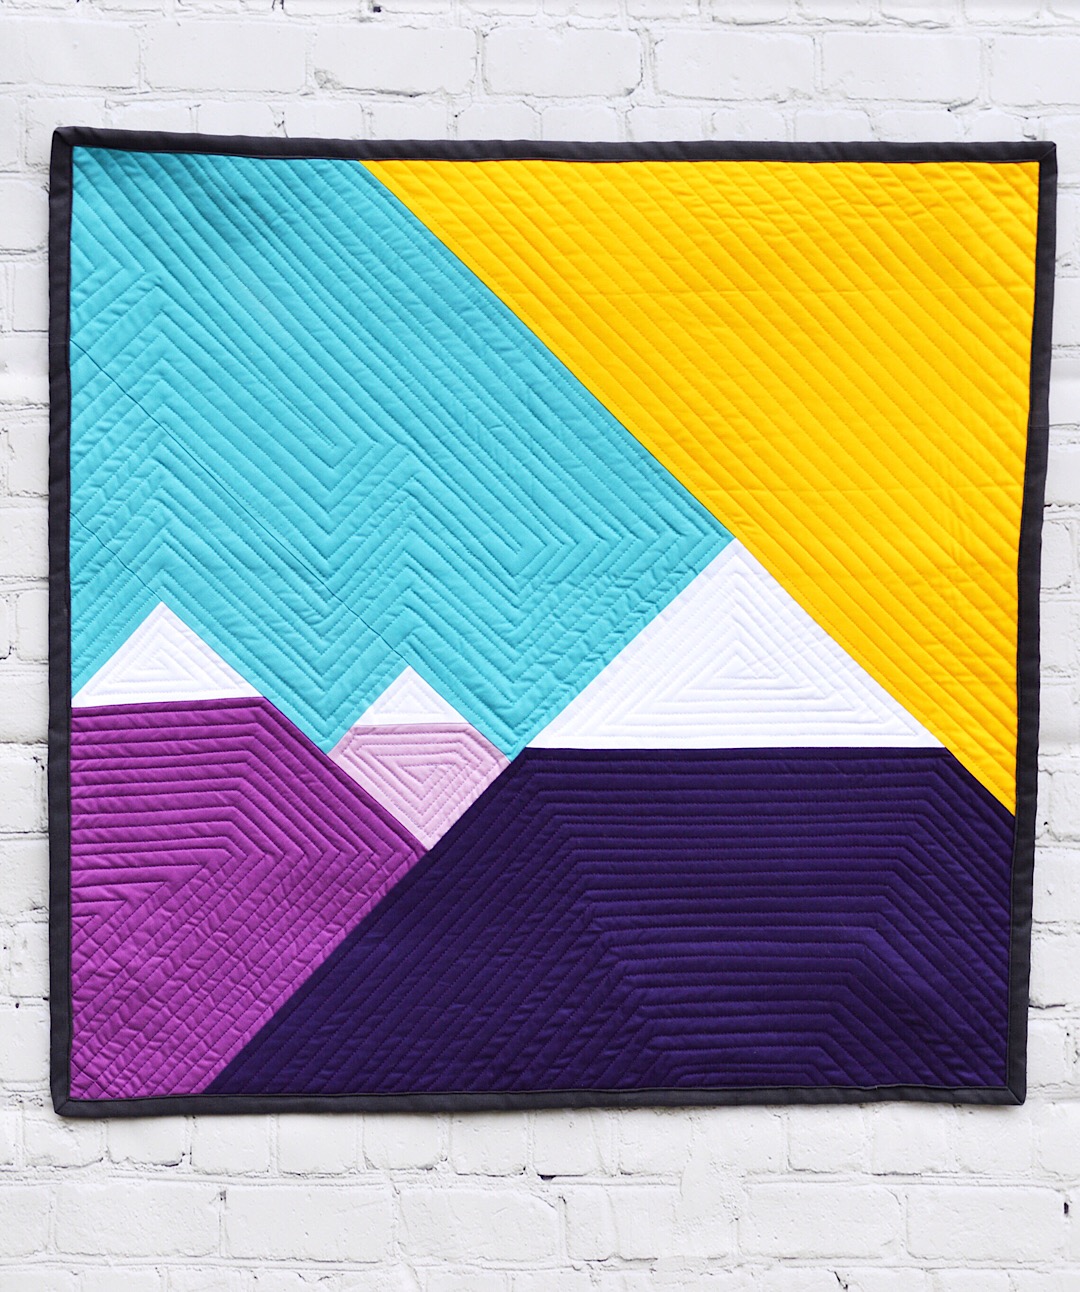
The past two years have been spent living on the East Coast, and while I absolutely LOVE living here, I do miss seeing those mountains in the distance, so I decided to try my hand at making a very basic modern mini quilt featuring, you guessed it, mountains!
The lines in this quilt are very simple. The most complicated piece is the large deep purple mountain, but I will walk you through the steps and you’ll find it really isn’t complicated at all.
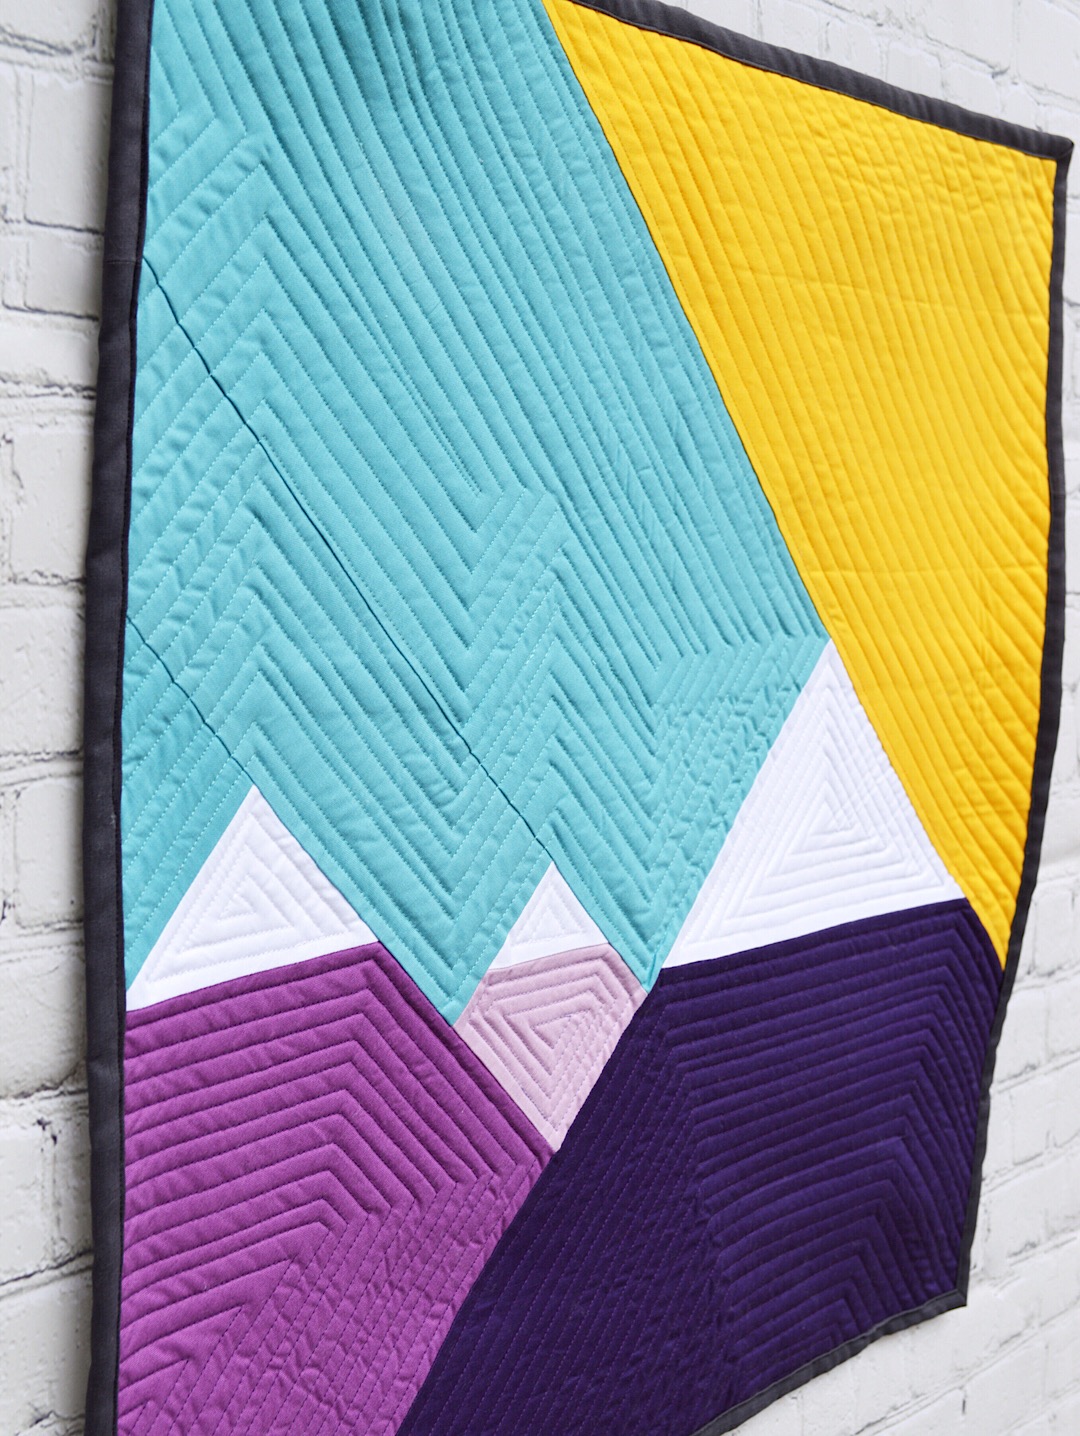
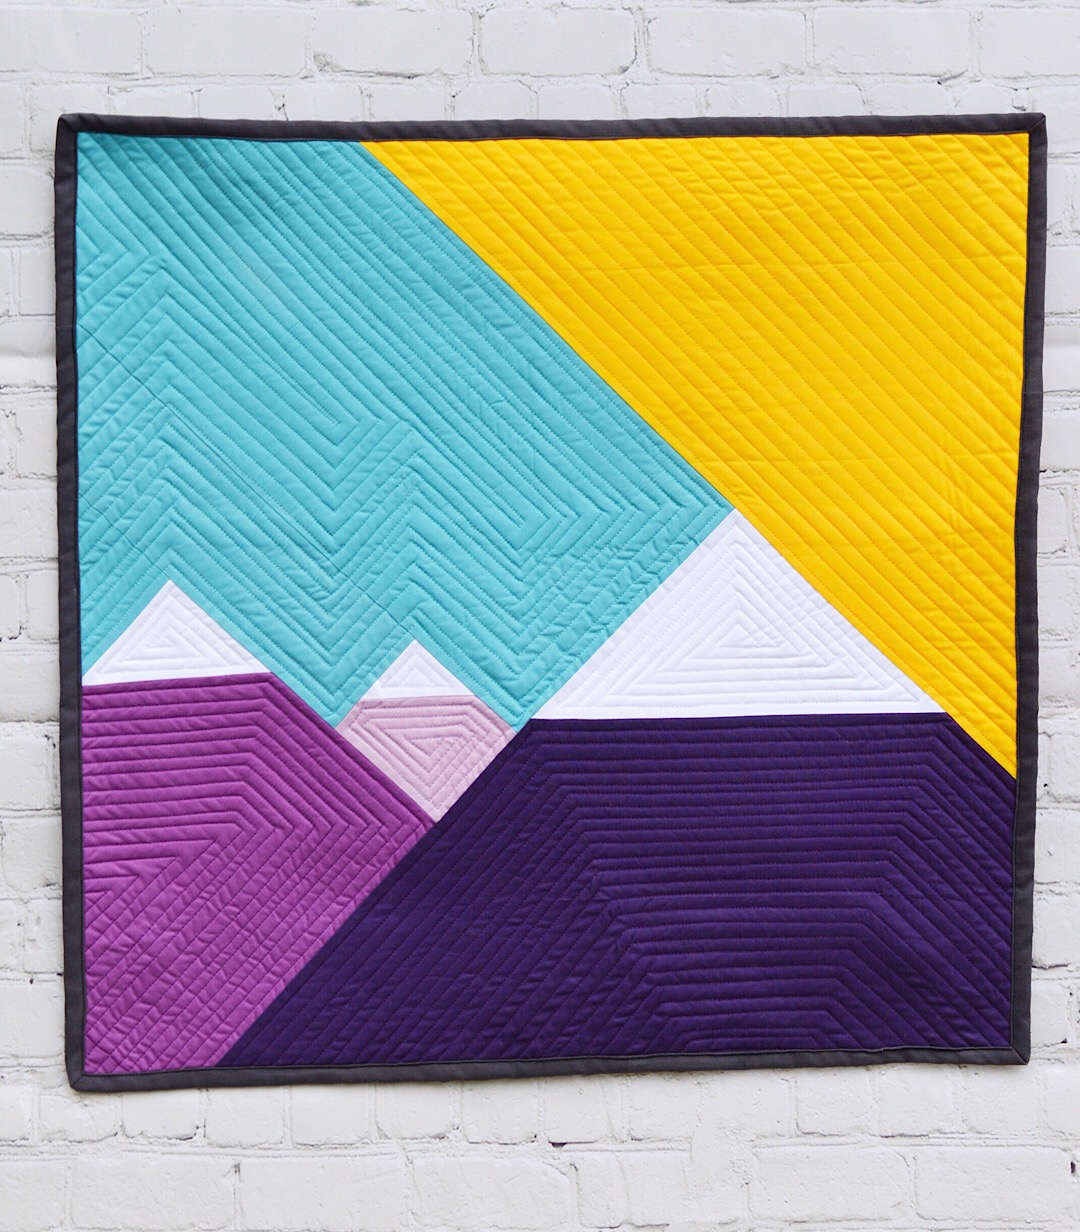
If your eye is drawn to a ridge in the middle of the quilt, it isn’t an optical illusion. I realized I was out of quilt batting, and only had small pieces left, so I decided to patch them together. No one will notice, right? Wrong. The flaw here is that instead of trimming both pieces so they butt up next to each other, I let the edges overlap slightly. The overlap is the little bump you see. So note to self: It is okay to piece together batting in project like this, but always take the time to make the edges fit side-by-side. No overlapping! So there you have it — your public service announcement for the day.
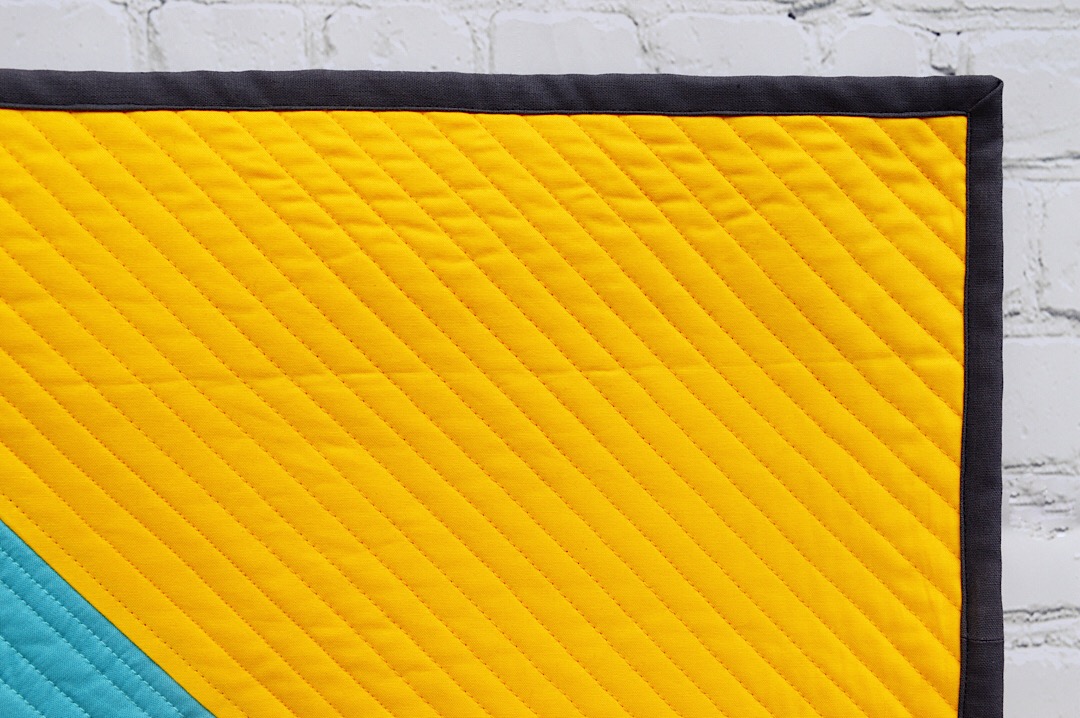
I decided to use Riley Blake Dark Gray Linen for the binding. I love the different texture it adds, and the deep gray color frames the quilt beautifully.
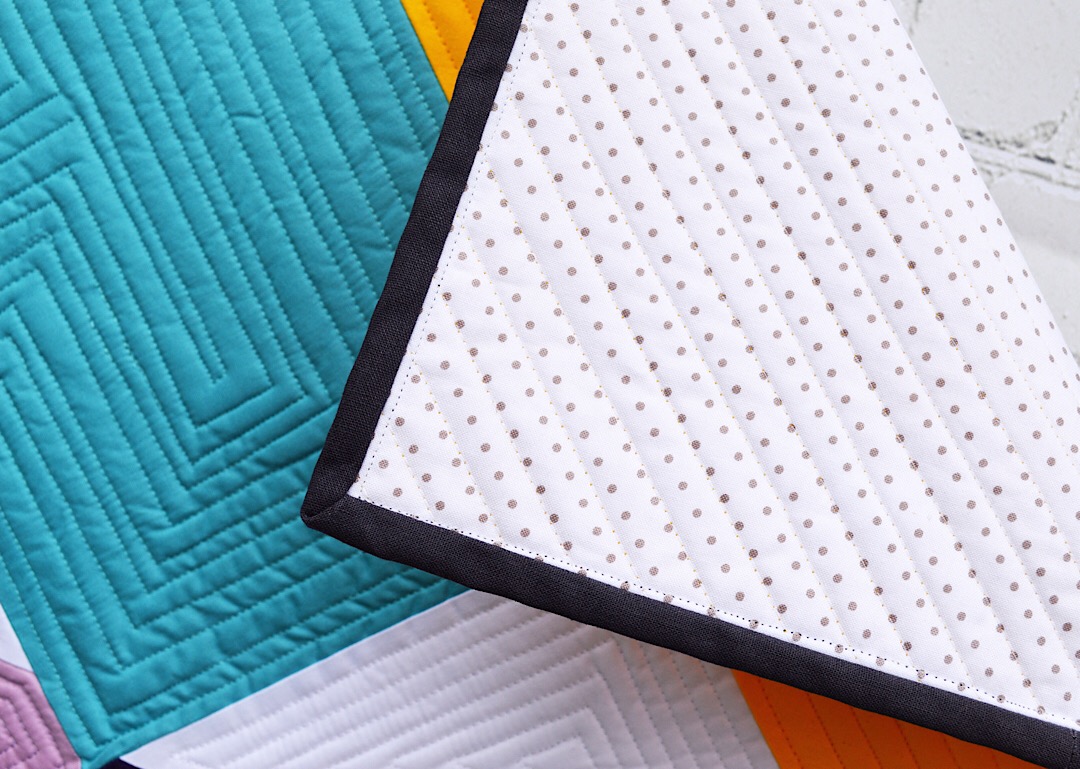
For the quilt back, I used Riley Blake Gray Swiss Dot Reversed. I use the Swiss Dot for the majority of my quilt backs because it coordinates with just about everything and it looks great!
Fabrics are Riley Blake Designs Confetti Cottons. Finished quilt measures approximately 24” square.
Seam allowance = 1/4”
For this project you will need:
- Daffodil – 18” x 18”
- Peacock – 8.5” x 18”, 3.5” x 12”, and 5” x 5”
- Eggplant – 1 Fat Quarter
- Purple – 3.5” x 4”
- Crayola Wisteria – 9.5” x 12”
- Riley White – One each: 8”, 4”, and 2.5” squares
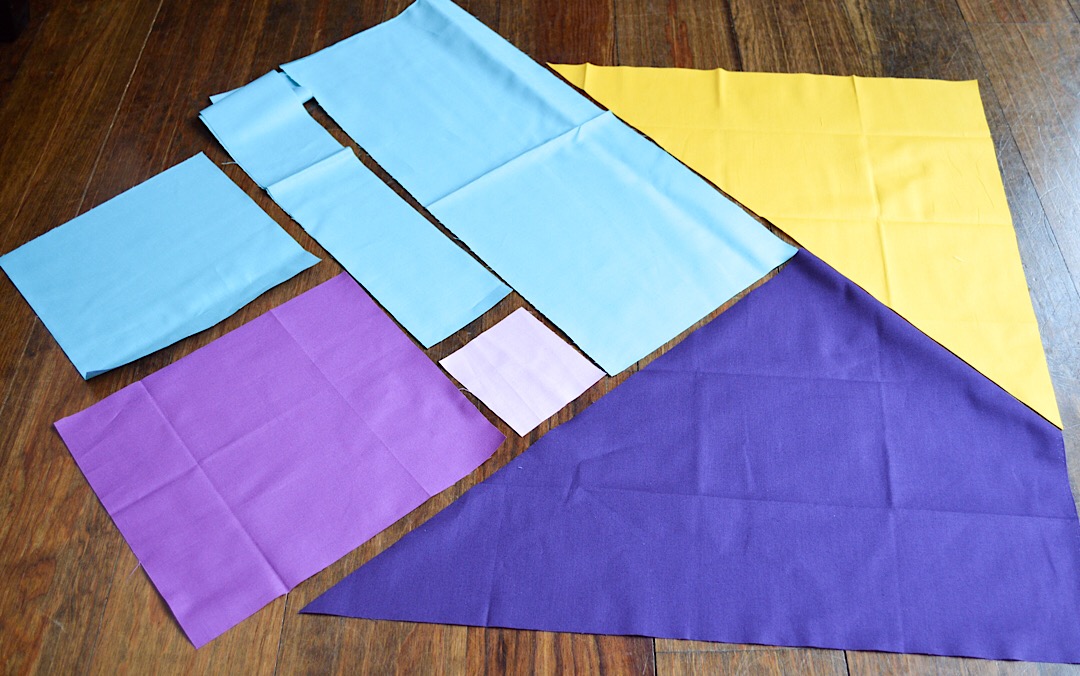
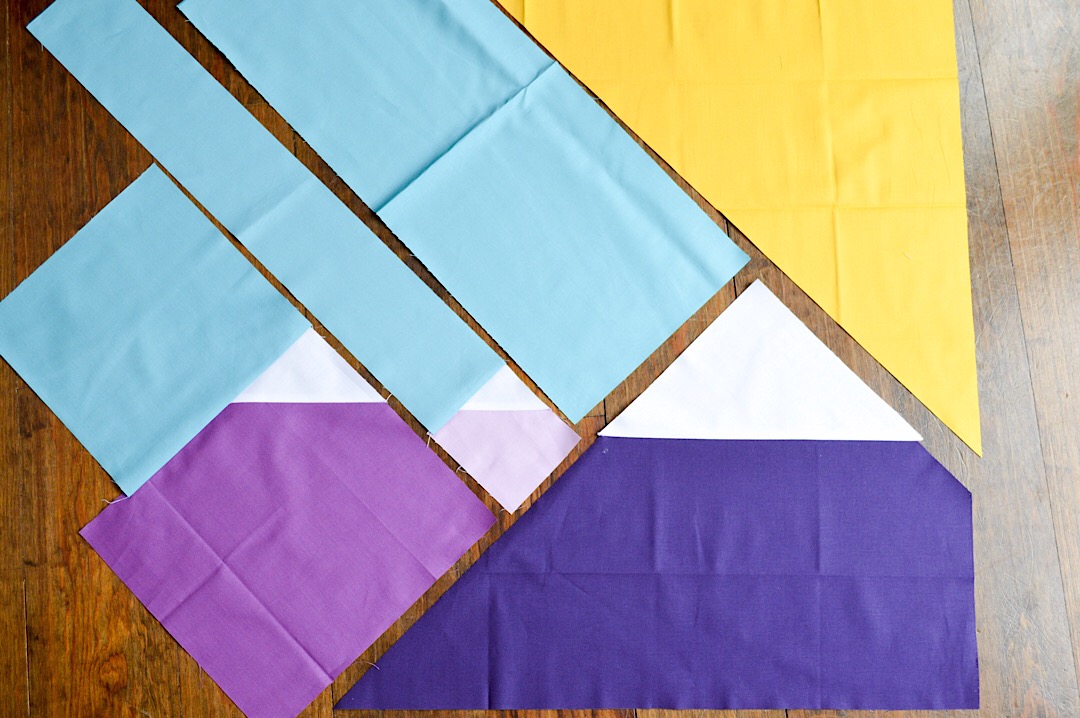
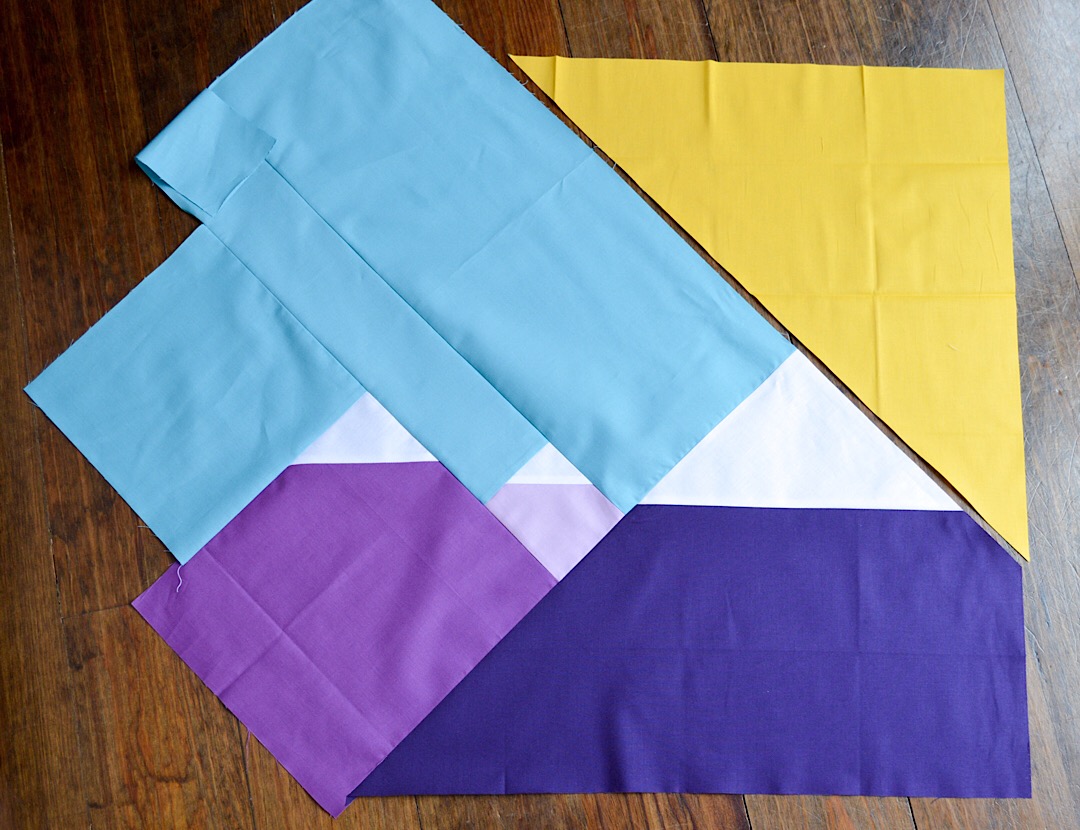
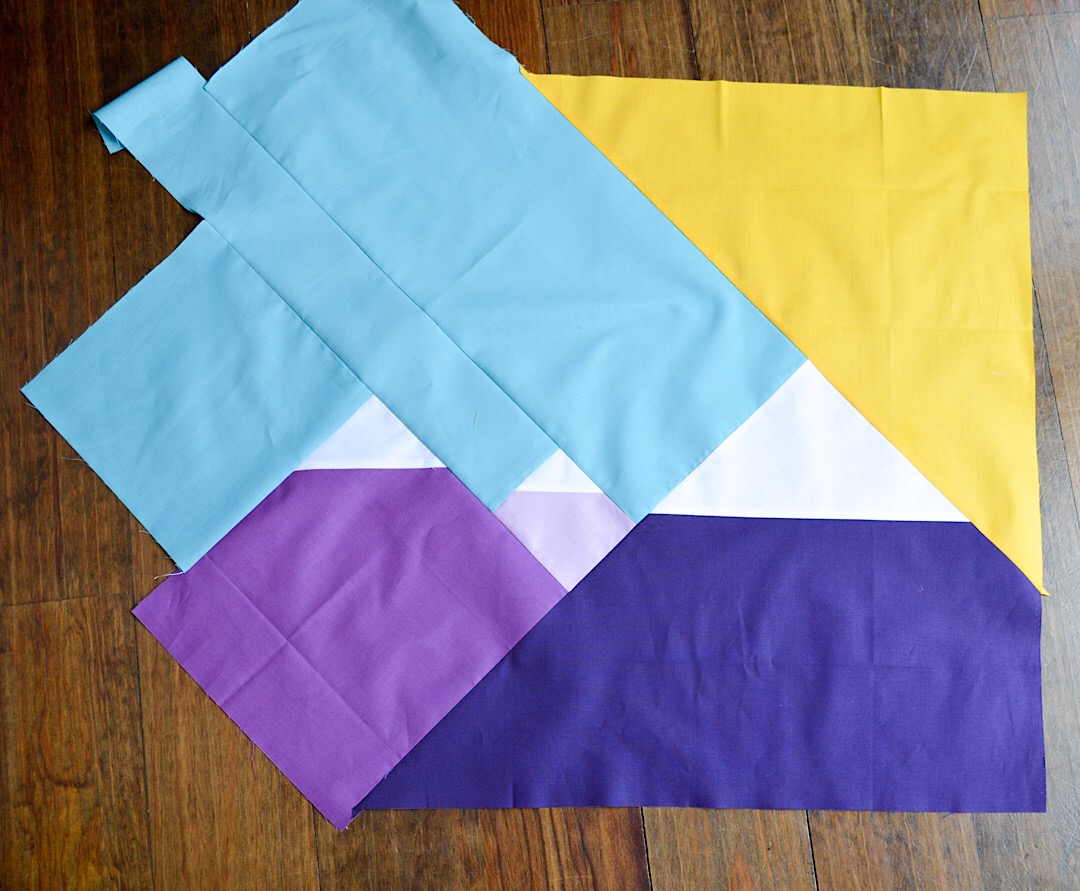
Once your pieces are cut, lay them out to get a basic visual of how they will look. (We will finish cuttin the Eggplant piece in the next step. In this photo the part that will be cut is folded under for planning/visual purposes.)
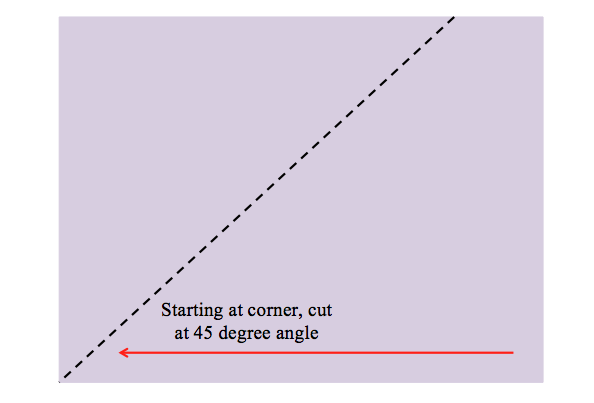
Let’s begin by prepping the Eggplant piece. Lay your Eggplant Fat Quarter on your cutting mat so that the long ends run horizontally and the shorter sides run vertically, as shown above. Using the 45 degree guide on your cutting mat, and beginning at the lower left hand corner, cut a 45 degree angle. Discard the top portion.
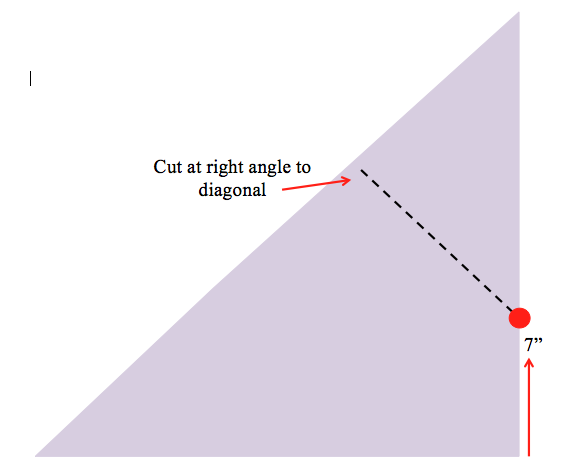
Now, on the right hand side, measure and mark 7” up from the bottom corner. Position your ruler so it lines up with your 7” mark and runs perpendicular to the cut edge, as shown above. Discard top portion. **You may want to mark the top point with a pin or marker (where the smaller red arrow is pointing to) because this will be your mountain peak. You will need to know this later on. Set this piece aside for now.
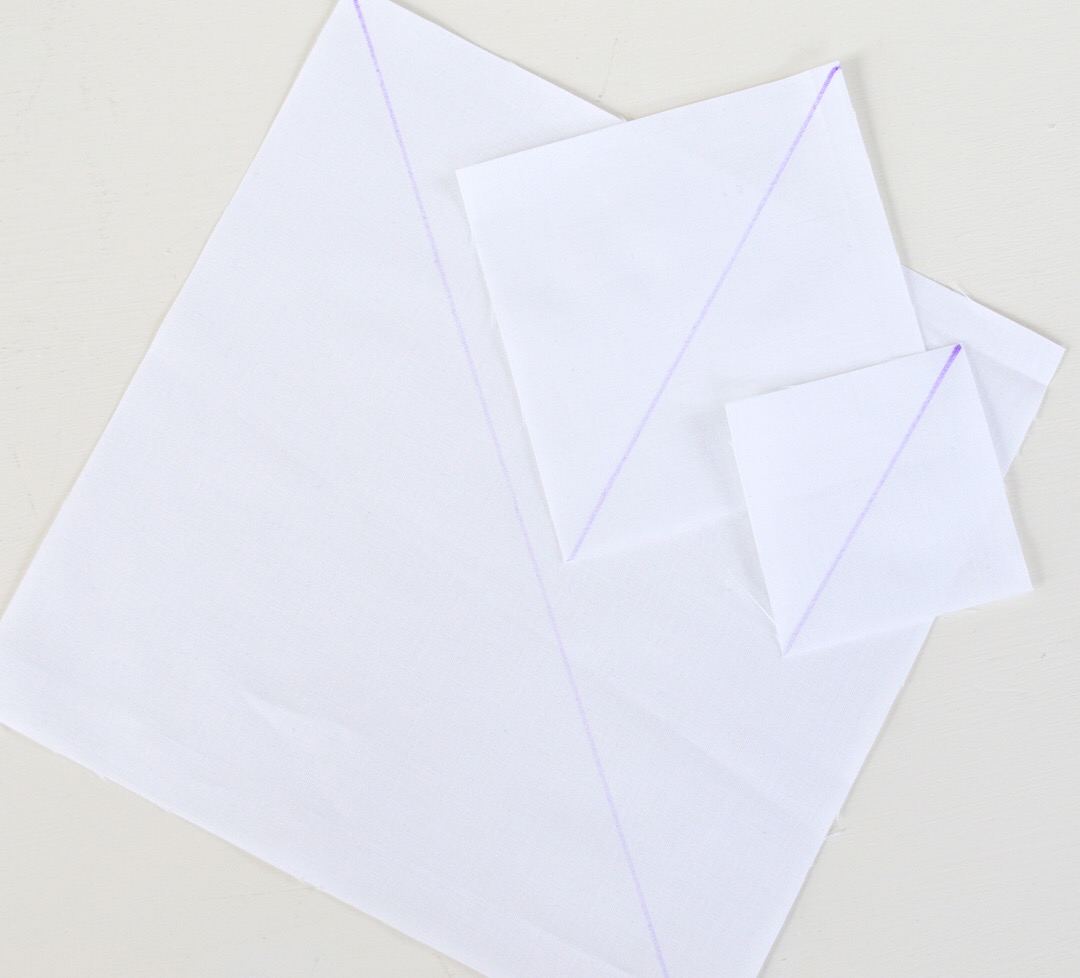
Cut out your white squares. Use your ruler to help you draw a diagonal line from one corner to the other.
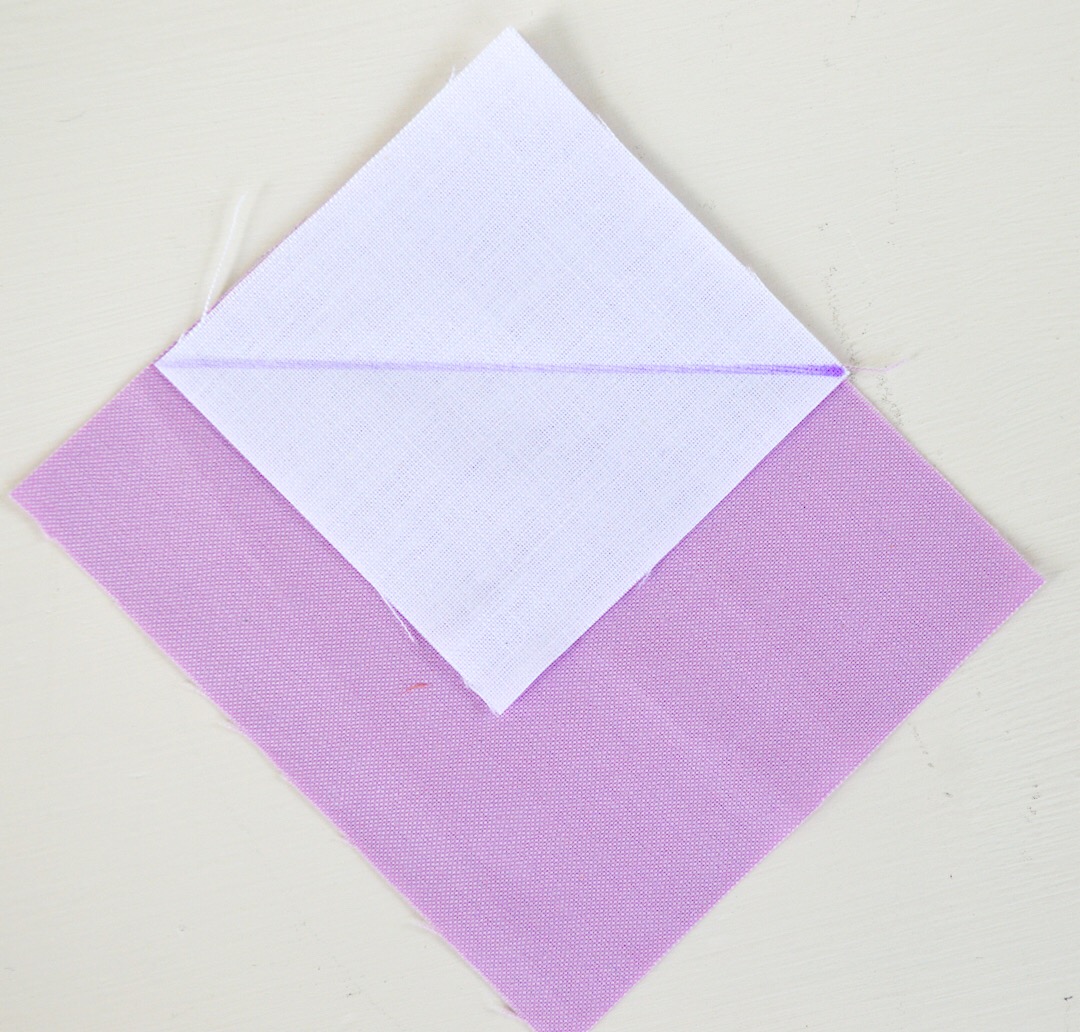
Let’s create our snow-capped peaks! Pair the 8” square with the Eggplant mountain, the 5” square with the Purple mountain, and the 2.5” square with the Wisteria mountain. Position the squares on the peaks as shown, so that the line runs horizontal. *Remember, for the Eggplant piece, your white square will be positioned at the peak which you marked in the earlier step.
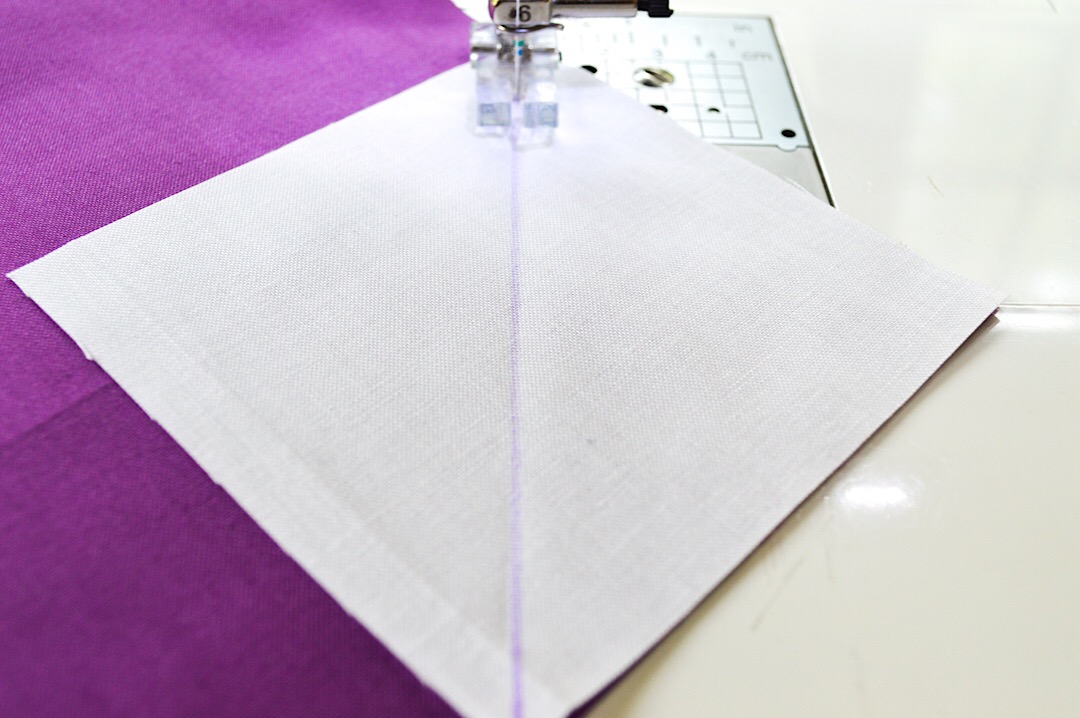
Stitch on the line.
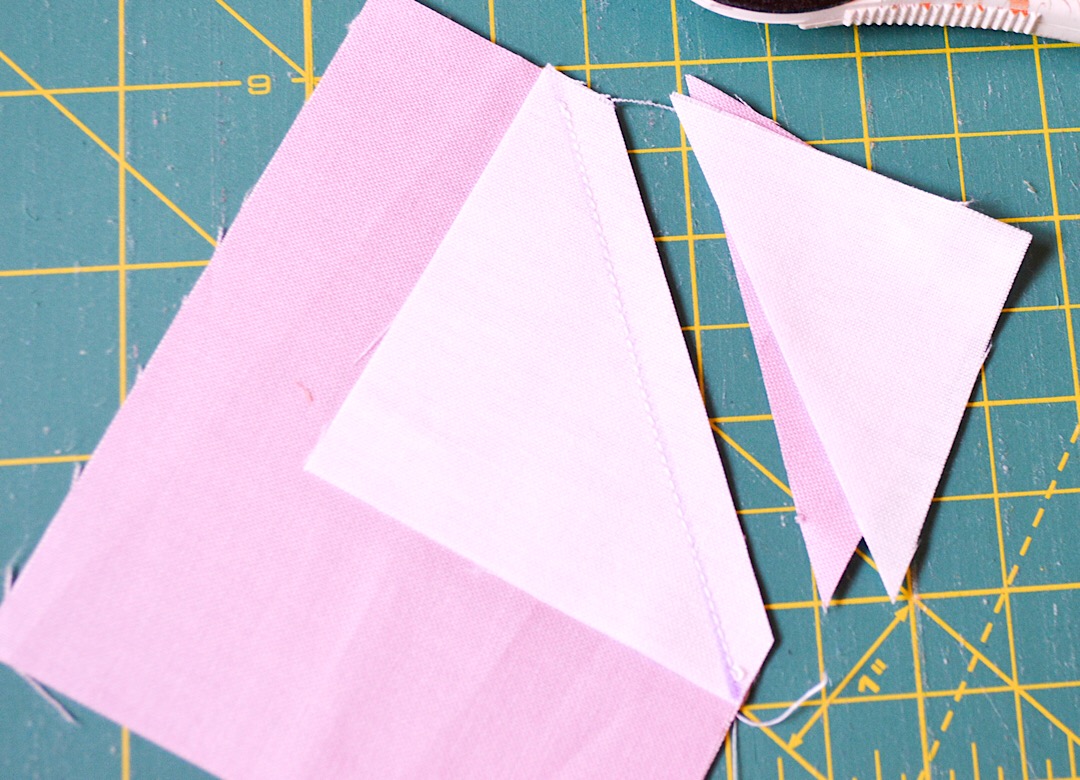
Trim 1/4” past stitching line, as shown above. Repeat for each of your purple pieces. Open and press seams.
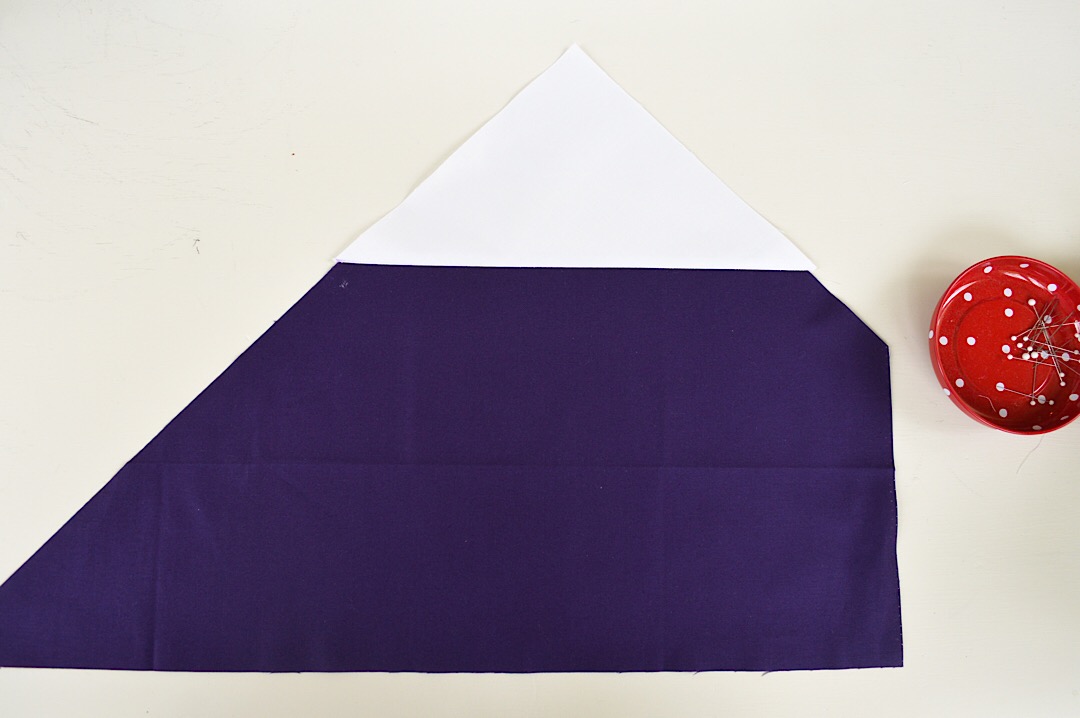
This is how that tricky Eggplant piece will look now that it is pressed and ready to go.
Sew the Purple and Wisteria mountains to their corresponding Peakcock sky strips as shown. Press seams.
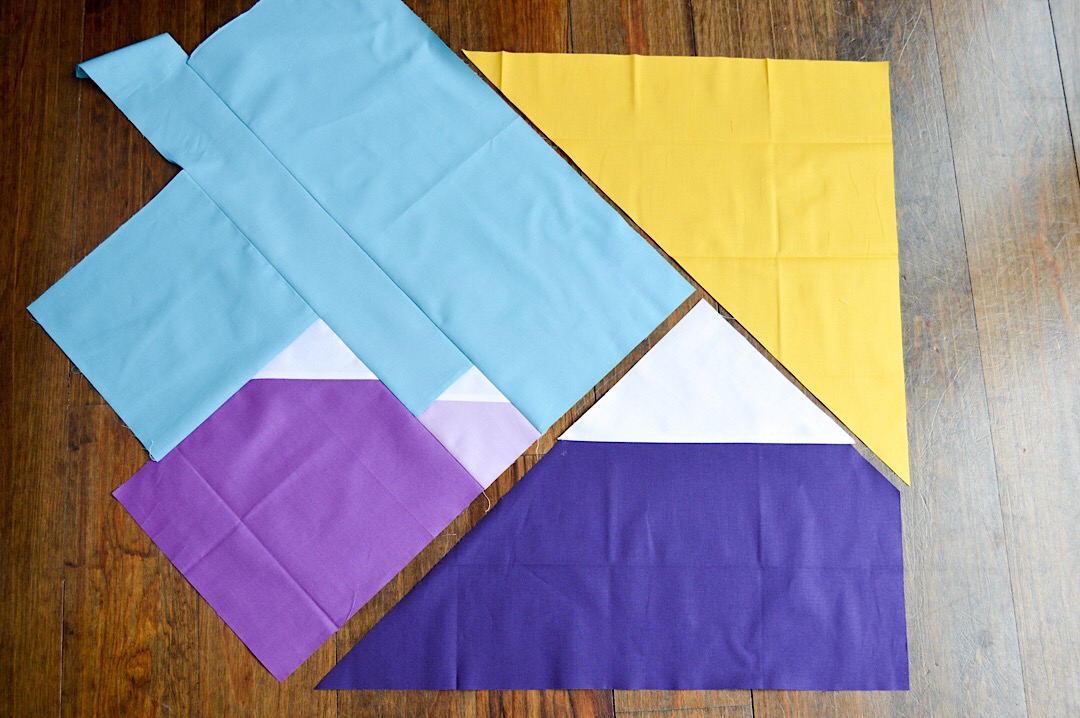
Sew the three sky strips together. Press seams. It is okay that you have extra sky. The excess will be trimmed later. You now have 3 sections to assemble. Easy!
Next, sew the sky section to the Eggplant mountain section. Press seams.
And finally, sew your Daffodil sun section. When you sew this piece, want to align the right side of this block, not worrying if the left side looks a little crazy at the moment..
Once you have everything assembled like the photo above, trim the top and bottom so everything is flush with the Daffodil and with the Eggplant edges. Finally, trim the left side so that you have a 24” square.
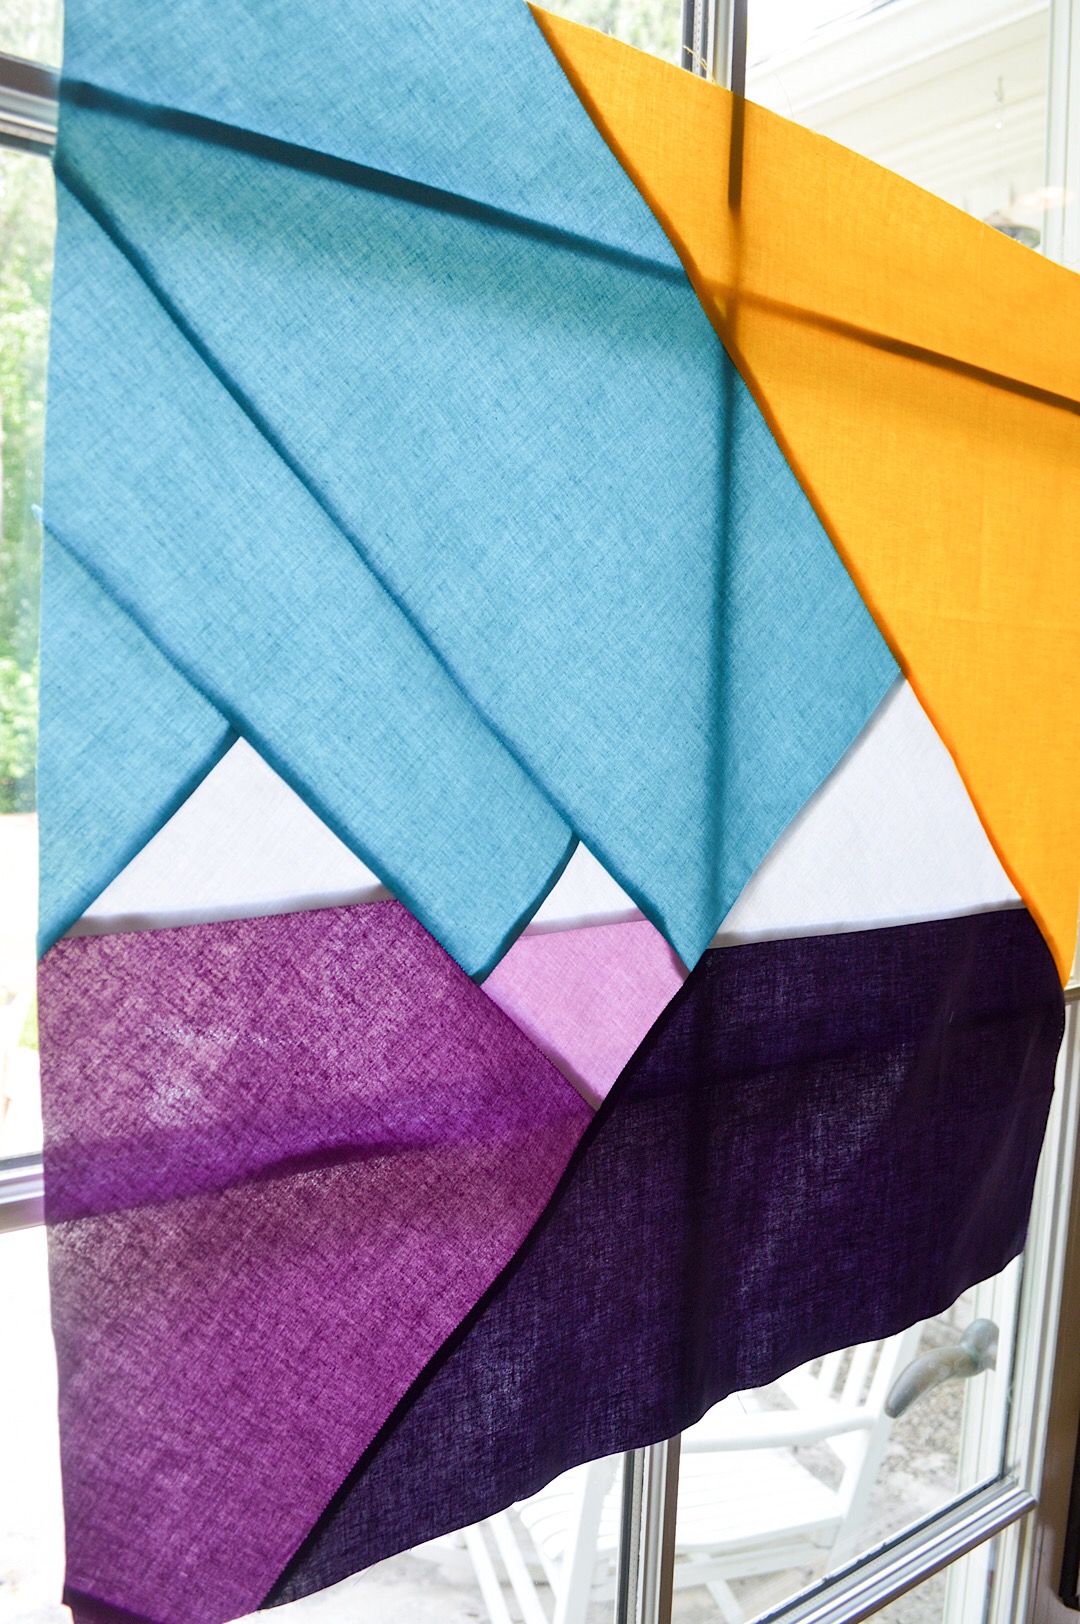
Here is a look at the block against the window. You can see all of the seam lines clearly. I love the stained glass look!

Next make your quilt sandwich. (Quilt Back fabric wrong side up+ batting + Quilt Top right side up). Baste.

Gather up some coordinating threads. I used these gorgeous colors from Aurifil.

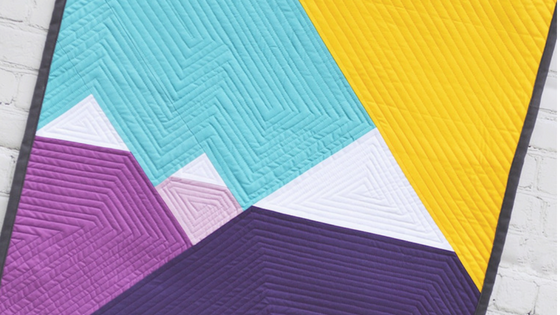
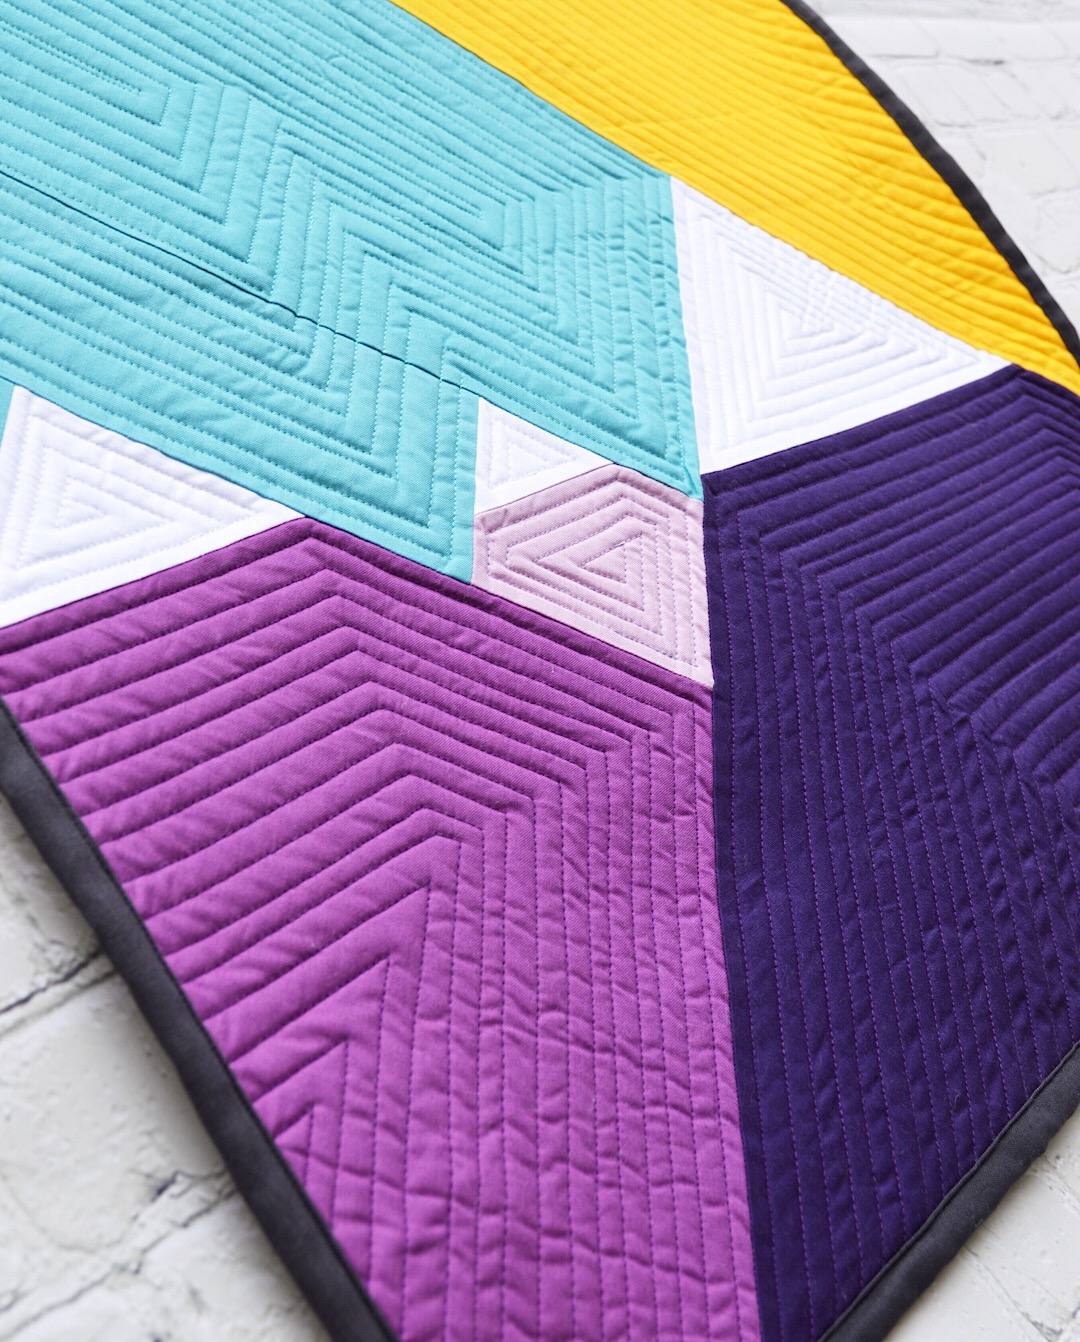
In your mind, think about how you want to quilt this. I decided I would keep it simple and modern with simple straight lines, 1/4” apart. I think adding some hand quilting or stitch variety could be a really interesting way to go. It’s all up to you and your imagination!
Once your quilting is finished, trim the edges so the batting and quilt back are all flush with the edges of the quilt top. Add binding and your are done!

I hope you have enjoyed this tutorial and that you have come away with the confidence to experiment with your own modern mini quilts. Show us what you are making with Riley Blake Designs Confetti Cottons on Instagram using #confetticottons and #rileyblakedesigns.
Happy Quilting!