I am so excited to be starting a new series here on the Penny Rose Blog! We will be focusing on making some very traditional quilt blocks from days gone by. However, the great part is that we are not going to piece them together by hand with needle and thread like they used to. I will be showing you simple quilt piecing techniques that make these blocks quite simple (with a little practice).
All of the blocks that we will be making are 12″ blocks when finished. At the end of the series, I will give you some layout options to stitch the blocks together to make your own sample quilt!
The first thing that we need to do is make sure you have a few items – our BSK – or basic sewing kit:
Sewing Machine – You will need a machine with a good straight stitch (you may need to shorten your stitch length to between 10-12 stitches per inch)
Cutting Mat
Rotary Cutter with sharp blade
Acrylic Rotary Cutting Ruler
Scissors
Pins
Penny Rose Fabrics! (This is the fun part)
Ready?
Rail Fence – Block #1
The block’s name comes from the appearance of the block. Just as a rail fence has many rails set together, the basic block consists of several strips stitched together. I will teach you the block with 4 strips, although there are many variations.

1. Cut a 2″ strip from 4 different fabrics. I used Civil War Miniatures and Shirtings for this block. For proper cutting techniques, watch this tutorial by my beautiful mother, Brenda.

2. Place Fabric 1 and Fabric 2 together with right sides facing, lining up the edges. Stitch a scant 1/4″ from the edge of the fabrics. *Note: It is imperative that you get your seam allowance correct, or your quilt blocks will not be the right size. I cannot stress this enough. Here is a great tutorial on how to get a perfect 1/4″ seam (along with some other great tips) by Deonn Stott.
Repeat for Fabric 3 and Fabric 4. Place right sides together. Stitch 1/4″ from edges.

3. Set seam by placing iron on seam.

4. Fold over top fabric and press (don’t iron) the seam to one side. Repeat for other 2 fabrics.
Deonn also gives some great pressing techniques in her tutorial.

5. You should have two strip sets that look like this now. When you stitch these two together, you’re going to stitch in the opposite direction of the first seams – note the arrows in the photo. This will prevent bowing.

6. Place two strip sets together making sure they are in the desired order. Stitch together with 1/4″ seam.

7. Set seam and press to one side.

8. We’re going to pause here and measure to make sure that our 1/4″ seams are perfect. The middle two strips should measure exactly 1.5″. Good? Okie dokie…moving on…

9. Place your ruler with a line matching up with one of the middle seams. Trim selvedge edges off.

10. Because I need to cut a 6.5″ section of the strips, and my ruler isn’t that big, I lined up the left edge and the top edge of the strip set with a line on the cutting mat. Measure 6.5″ from left and place ruler on appropriate line. Cut a 6.5″ section. Repeat to make 4 – 6.5″ sections.

11. Arrange your blocks as desired. I decided to make mine look like a ‘pinwheel’ with the darkest color in the middle.

12 Fold top right block with right sides facing onto the top left block. Stitch together with a 1/4″ seam. Repeat for bottom blocks.

13. Press seams to the right on the top section and the left on the bottom section.

14. Fold bottom section with right sides facing onto top section. Butt up middle seam so that it will make a perfect corner. Pin if desired.
15. Stitch together with a 1/4″ seam.

16. Note how the center seam matched up beautifully when I pressed the seams in opposite directions and butted them up against each other. Lovely!

17. Press that last seam to one side and…voila! Here’s your beautiful finished rail fence block!

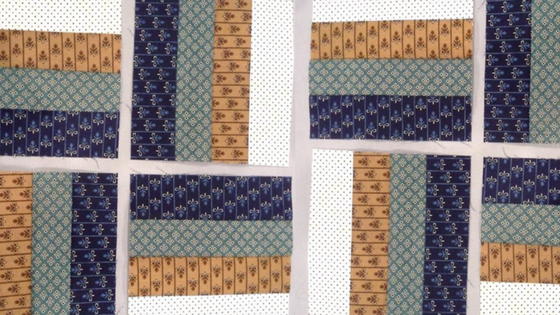
Here is a picture of what your rail fence blocks would look like with the ‘pinwheel’ setting.

How about a scrappy look?

Two different sets of blocks make it look like it’s woven.

The light color on the outsides of the block gives it a whole different look!
Stay tuned for more blocks coming every other Thursday!