Hello! This is Wynn from zakkaArt and I’m very happy to be part of this amazing project design team to share what I’ve made using the beautiful fabrics from Penny Rose Fabrics.

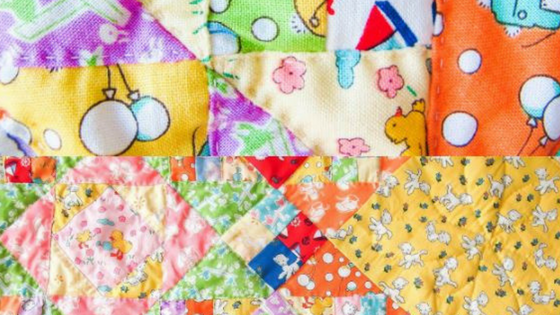
For this sewing, I have especially requested to use the pretty new Toy Chest fabrics. You know how much I love 1930s feedbags and each of these prints is a tribute to them. This Toy Chest Mini Quilt is a simple and versatile project that involves machine chain piecing and is great for beginners. You can choose to hand or machine quilt.
There’s no perfection to sewing but enjoy every single stitch!


This Toy Chest Mini Quilt has a Japan zakka feel with lace borders instead of bias binding. I also hand quilted it entirely just because I love hand quilting so much!
Finished size: 22″ x 22″
What you will need:
– one fat quarter bundle of Toy Chest fabrics
– 3/4 yard backing fabric (I used Milk Main Cream from Milk, Sugar & Flower collection)
– 3/4 yard cotton batting (fusible is preferred but it’s not necessary)
– 4 yards cotton lace (width about 1″ or more) or bias binding
Things to Remember
· Remember to read the pattern in full before starting
· Seam allowances are 1/4” unless stated otherwise
· Always press your fabrics before starting
· Press all seams as you go along
Step 1: Cutting fabrics
For economy blocks
Each economy block needs:
– 1 3″ square for centre
– 2 3″ yellow squares for inner triangles
– 2 4″ squares for outer triangles
You will need five (different colors) economy blocks
For small four-square patchwork
– 32 3″x1 1/2″ rectangles (assortment)
For big four-square patchwork
– 24 4″ x 2″ rectangles (assortment)
For connecting part
– 4 4″ green squares
– 12 4″ orange squares
– 16 3″ yellow squares
For corner squares
– 4 7 1/2″ yellow squares
Step 2: Making economy square

Cut squares for inner and outer triangles diagonally into half.

Arrange the fabrics to your desired position. Start by sewing two yellow triangles to top and bottom of the centre square. Open and press seams towards triangles.

Sew the next two yellow triangles to the left and right of the centre square. Open and press seams towards triangles again. Trim and square up the sides.


Next sew the outer triangles using the same method as the inner triangles.
Trim and square up the block to 5 1/4″.

Step 3: Making small four-square patchwork block

Pair up the rectangles and chain-piece them. You will get 16 pairs.


Press seams to one side. Cut half the squares to get two-square patchwork blocks.

Randomly pair the two-square patchwork and chain piece again. Press open the seams this time. Trim and square up to 2″ each.
Step 4: Making big four-square patchwork block

Repeat the same way as in step 3 to make big four-square patchwork. Trim and square up to 2 3/4″ each.
Step 5: Piecing connecting part with small four-square patchwork


Cut all the green, orange and yellow squares diagonally into half. Chain piece the yellow triangles to one side of each of the patchwork block. Press seams towards triangle. Then chain piece the remaining yellow triangles to the other neighbouring side of the patchwork block. Press seams towards triangle again. Now chain piece the green and orange triangles to the other two sides of the patchwork block using the same method above. Trim to 5 1/4″ x 2 3/4″.
Step 6: Assembly of mini quilt top


Arrange and piece all blocks together according to the drawing as shown.

#tip: Pin from the centre to make sure all the points match.
Step 7: Quilting
If you prefer to do the binding for this mini quilt, sandwich batting between quilt top (right side up) and backing fabric (right side down). Pin in place and machine or hand quilt to your desired pattern. Trim away excess batting and backing fabric. Bind as usual.

If you wish to try using the lace for edging, first round the corners of the mini quilt using a small bowl and trim.

Then baste the lace around the edges of the quilt.

Place the three layers in sequence – batting, backing fabric (right side up), quilt top (right side down). Pin in place and sew around the quilt top leaving a 4″ opening.

Trim away the excess batting (close to stitch line) and backing fabric.

Flip the quilt inside out and press flat (especially the edgings). Top stitch around the edgings of the quilt to close the opening as well. Machine or hand quilt to your desired pattern.

There you go! Now you have a pretty mini quilt for your wall!
Enjoy!