
Hi everyone! Today I have a quick and easy skirt tutorial for you. With older kids heading off to college, younger kids getting settled into their new classes, football games, meet-the-teacher days and back-to-school nights, I’m feeling some school spirit!

So I decided to whip up this easy little School Spirit Skirt. With the soft, stretchy new Riley Blake Waistband Elastic (available in 5 colors), this skirt comes together very quickly.

We seriously clocked this, and from start to finish, this little skirt was made in well under 30 minutes! Can’t beat that!
Let’s get started. For this skirt, you will need:
- Riley Blake 2″ Waistband Elastic: Waist Measurement + 1″
- Riley Blake School Colors Fabric: See Diagram Below
- Approx. 6″x8″ Piece of Double Sided Iron-On Fusible Adhesive
- Approx. 6″x8″ Piece of Contrasting Fabric for Applique
- Printed Applique

To determine your fabric measurement follow the diagram above. Cut the fabric 2-3 times the waist measurement. In the skirt pictured above, I cut the fabric 2x the waist measurement. My daughter’s waist was 24″ so I cut the fabric 48″ wide. If you want more fullness, simply add more width. 
With right sides together (RST), sew the short ends of the fabric using a 1/2″ seam allowance. Finish the seam with a zig-zag stitch or serger.

Fold the hem under 1/2″ and press. Fold again and press.

Straight stitch about 1/8″ from the top fold. I also added a straight stitch 1/8″ from the skirt hem, but it isn’t necessary.

Gather the waist. You can do this on your sewing machine or with your serger. Click here for instructions on using your serger to gather.

I used a serger to gather the waist because it saves lots of time. The serger already creates a slight gather, but to tighten the gathers a little more, find the two horizontal threads and pull gently, distributing gathers evenly.

Adjust the gathers in the waist so the waist measures about 3-4″ wider than your waist measurement. I went just a little bigger to be safe. We want the skirt to easily pull over the hips. Again, my daughter’s waist measurement is 24″. I adjusted the gathers to measure approx. 28″.

Locate the front, back and 2 sides of the waist. Mark with pins. Set aside.

Stitch the short ends of the waistband elastic together using a 1/2″ seam allowance.

Fold the ends toward each side and top stitch for a finished look.

Locate the front, back, and 2 sides. Mark with pins.

Now, with the WRONG side of the elastic facing the RIGHT side of the fabric, pin the waistband elastic to the skirt, matching the front, back, and 2 side pins. The elastic should overlap the fabric by about 1/2″.

Sew the waistband elastic to the skirt, using a zig-zag stitch. Pull the elastic gently as you sew each section to match the width of the skirt.
*For beginners, I suggest using the zig-zag stitch, but if you feel comfortable, you could try using a twin needle for a more finished look.

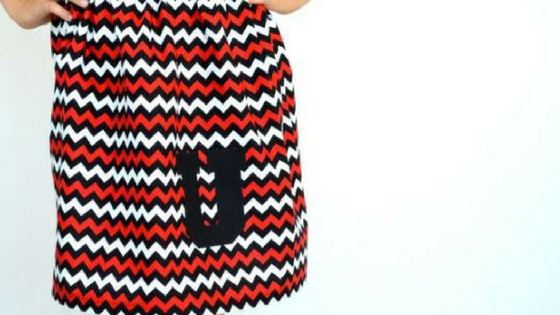
To add the applique, print up a letter of your choice, or use the “U” applique provided. If you are printing your own, use a large block font, like this “Freshman” font I used. Press the piece of contrasting fabric to the glue side of your fusible adhesive. Pin your printed letter to the fabric/fusible adhesive and cut out the letter.

Peel off the paper backing to reveal the shiny glue on the backside of your letter.

Position your letter where you want it on the skirt and press.

Stitch around the edges using a narrow zig-zag stitch.

That’s it! Easy peasy! I hope you enjoy making a whole bunch of these cute skirts. As always, be sure to share your finished projects with us on Facebook, Instagram, Pinterest and Twitter using #iloverileyblake.

