Hey friends! It’s Stef from Girl Inspired. and I’m so excited about today’s project! I fell head over heels for the gorgeous Wiltshire Daisy fabric line by Carina Gardner for Riley Blake. Upon receiving my order of yummy yardage, I discovered the absolute cutest surprise – a panel of doll clothes with the pattern pre-printed – all the parts and instructions together on one tidy fabric panel. Since my littlest girl, Addison, helped me open the fabric package, she was the lucky lady to score a new outfit for her dolly.

Although the step-by-step instructions are included on the doll panel, I wanted to take this opportunity to outline the steps in a visual way – today we’ll learn to sew together the blouse, capri pants, and bag contained on the doll panel. Let’s get started!

- Carefully cut each piece from the doll panel – pin labels onto the pieces if you need help remembering what each piece is. Do not discard the instructions.
- Match two collar pieces and sew around the curved edge. Trim seam allowance with pinking shears. Turn right side out and press well. Repeat for other set of collar pieces.
- Sew the front and back bodice pieces of the main blouse and lining together at the shoulder seams. Press seams open. With main bodice right side up, place collar pieces at the neckline, matching the front of the collar pieces in the center of the neckline. Baste into place using a 1/4″ seam.
- Serge along the bottom edge of the lining bodice pieces (front and backs). Serge along the inner back edges of the main bodice piece. Place the bodice lining over the main bodice and collar, matching right sides together and raw edges around the neckline. Stitch up the inner back edges and around the neckline.
- Turn bodice right side out and press well. Baste together the main and lining armholes.
 6. For each sleeve piece, sew a basting stitch between the notches. For the sleeve trim, fold the trim piece wrong sides together lengthwise and press. Matching right sides together and raw edges, serge the trim to the straight edge (sleeve bottom) for each sleeve. Press the seams up toward the sleeve and topstitch if desired.
7. Pin the top of sleeve, right sides together at each end of the bodice armhole. Continuing pinning up from each end until you reach the basting stitches. Pull the bobbin threads of the basting stitches to gather the center of sleeve and fit it into the remaining portion of the armhole. Stitch sleeve into place. Serge seam.
8. Turn the bodice inside out. Match the sleeve trim ends and bodice front and back along the side seams. Sew together to form the blouse. Serge to finish the side seams. Fold back the excess edge on the inner back seams. Serge along the bottom hem. Fold up the serged edge.
9. Top stitch down each side of the inner back and along the bottom hem.
10. The blouse is complete!

Capri Pants:
- (Note: I sewed the capri pants together differently than the instructions indicate.) With right sides together, match the two front capri pieces and sew/serge along the curved-inside top of the capri. Repeat with the two back capri pieces – the notches are on the top of the back capri pieces. Follow panel instructions to attach the waistband to the front top of the capris as shown.
- Fold the front waistband to the inside of the capri pants and topstitch it into place from the topside. Match the front capris to the back capris along the side seams and inseam of the legs. The back of the capris will extend up beyond the front waist band, so match them from the bottom up. Sew the pants together at the side seams and along the inseam. Fold the back waistband of the pants toward the inside (fold along the notches) and stitch it into place leaving the sides open. Insert a 5″ piece of 3/8″ elastic into the back waistband and stitch it down along each side – stitch right through the layers of the back waistband and go back and forth a couple times to secure.
- For the cuffs, match the short ends of the cuff piece right sides together and sew. Press the seam open – you should have a cuff loop. Match the raw edges, wrong sides together and press to the cuff. Now, with the pants right side out, slip the cuff over the bottom edge of one leg, matching the raw edges. Sew around the leg and serge to finish the seam. Repeat steps for the other leg and cuff.
- Fold each cuff down and press the seam toward the top of the pants. Topstitch if desired (not shown). Fold up each cuff and press well.

Bag:
- Place one main and one lining bag piece right sides together and sew across the top edge. Turn the pieces, matching wrong sides together and press. Topstitch along the top edge.
- Fold each hand piece right sides together and lengthwise. Sew across one short edge and along the raw long edge. Use a chopstick to turn each handle piece right side out. Press well. Topstitch 1/8″ from each long edge.
- Place both handles side by side, centered on the bag bottom. Stitch to join the handles to the bag bottom at each end as shown.
- Flip the bag bottom right side out and press the side seams toward the bag bottom. Topstitch to secure the seams where the handles are joined on each side as shown.
- With right sides together, fit and pin one side of the bag bottom to one main bag piece from Step 1. Stitch, then serge together – be sure you pin the pieces first so that the curves fit together correctly.
- Repeat for the other side of the bag. Serge the unfinished seam. Turn the bag right side out and you’re done!

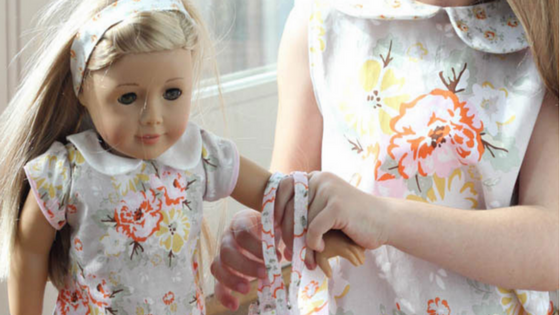
In addition, there is a darling little headband with quick and simple sewing instructions – I didn’t detail the steps here because it’s so straightforward.

Now, send your little one to go dress up her doll while you whip her up something cute to match!

The cutest, right? Addison is smitten with her doll’s new outfit and her sisters are waiting for me to order up two more doll panels for them! I just love the cute, coordinated outfit and it doesn’t get easier than having all of the pieces already printed up in one place! I’d love for you to pop over to Girl. Inspired. to check out the other projects we’ve been working on!