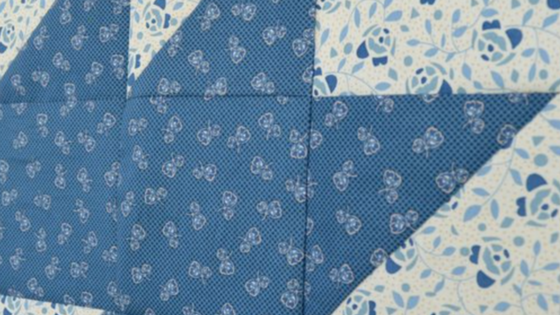
Hello everyone! Glad to have you along for another Traditional Block Thursday tutorial #tbt here at Penny Rose Fabrics. We are going to continue our Half Square Triangle blocks today by showing you how to make a Maple Leaf block.
This block is a traditional block that got its name from its shape. It really does look like a maple leaf! Its layout is a 9-patch block, just like most of the other blocks that we have learned so far. Ready? Here we go!

For this block, you will need the following pieces:
Leaf fabric: Two 5″ x 5″ squares, Three 4 1/2″ x 4 1/2″ squares, One 1 1/2″ x 8″ strip.
Background fabric: Three 5″ x 5″ squares, One 4 1/2″ x 4 1/2″ square.
I am using gorgeous blue and cream fabrics from the Penny Rose Forget Me Not collection. Forget Me Not, scheduled to arrive in June, was designed by Sue Daley for Penny Rose Fabrics.

Mark diagonal lines with a mechanical pencil on the back of two of the 5″ x 5″ background squares.

Place a 5″ background square on a 5″ leaf square with right sides together. Stitch 1/4″ from the marked line. You can chain stitch and repeat for the other 5″ background square and 5″ leaf square.

Turn squares around and stitch 1/4″ from marked line. You can chain stitch and repeat for the other 5″ background square and 5″ leaf square.

Cut on marked line. Repeat for both squares to make 4 half square triangles.

Set seam with hot iron. Press half square triangle seams toward leaf fabric.

Using a ruler with a diagonal line, place the diagonal line of ruler on seam, making sure that the block extends past the 4 1/2″ mark on the ruler. Trim top and side.

Turn block 180 degrees and line up diagonal line of ruler on seam and two trimmed sides on 4 1/2″ lines of ruler. Trim remaining two sides.
Repeat for all four half square triangles.

Now we are going to make the stem section of the block. Press 1 1/2″ x 8: leaf piece in half with wrong sides together.

Mark a diagonal line on the right side of the remaining 5″ x 5″ background square.

Line up raw edges of the strip with marked line and pin.

Stitch stem to background square 1/4″ from raw edges.

Fold finished edge of stem over raw edges and press.

Stitch finished edge of stem down with small zig-zag, decorative stitch or straight stitch. You could also stitch it down by hand. I chose a small blanket stitch.

Line up the diagonal line of the ruler with the center of the stem, making sure that the edges of the stem block extend beyond the 4 1/2″ ruler lines. Trim top and side.

Turn stem block 180 degrees and match up trimmed sides with 4 1/2″ marks on the ruler. Trim remaining two sides.

Lay out block segments to create maple leaf block.

Stitch block segments together with 1/4″ to create three rows.

Press rows so the seams go opposite from adjoining rows. The arrows show how I pressed the rows, but you could press it differently – just make sure the seams go in opposite directions from the row below or above it.

Butt up the seams and stitch the rows together with 1/4″ seam.

Press seams. Again, the arrows indicate how I pressed my seams, but you can press in whichever direction you choose.

Ta da! You now have a beautiful Maple Leaf block!

If you made a whole bunch of these blocks, your quilt might look something like this.

Or course we have to show you a scrappy look.

Now I’ll add an alternating block – a double 4-patch. Gorgeous!
Be sure to follow our Traditional Block Thursday Pinterest page, where you can find all of our ‘tbt’ blocks.
You can also get alerted to our latest blocks, news, and tutorials by following Penny Rose Fabrics at:
www.facebook.com/pennyrosefabrics
www.instagram.com/pennyrosefabrics
www.twitter.com/pennyrosefabrics
www.pinterest.com/pennyrosefabrics

