
Hi Riley Blake readers! Melissa from Sew Like My Mom here with you again with another amazing tutorial! It’s finally Spring and my girls LOVE skirts! I fell in love with this mermaid fabric the second I saw it but wasn’t certain what I wanted to do with it. But it spoke to me, ever so softly, and it said, “flat front skirts.”

They’re so happy! Okay, okay, mostly they’re happy to be outside and in the gorgeous weather. But they’re also happy to do it in these precious outfits!


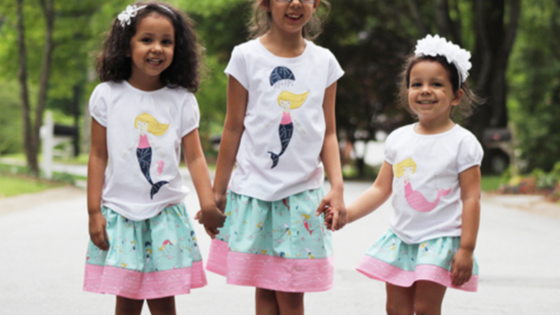
I just really love their faces in these!

I couldn’t help but appliqué some amazing matching tees!


Isn’t the fabric just perfection?! And the flat front is their favorite because it stops the bunching on their bellies when they sit down.

Are you ready to start making your own? They’re super duper simple, promise! You’ll need enough fabric to the pieces listed below. I managed to get both skirts out of a little over a yard of each fabric, so 1/2 yard of each should be plenty, but make sure you measure first! You’ll also need: 2″ elastic matching thread Cut fabric according to chart below.

Take your 2 skirt pieces, lay right sides together and sew one short end. Finish the seam and press it to one side. Do the same with your two contrast pieces. Then lay the contrast on the bottom of your fabric with right sides facing and sew down the long edge. Finish the seam.

Press towards the top of your skirt. Now fold the skirt pieces in half with right sides together and sew the other short ends together.

If you have a serger, finish the bottom edge and turn the hem up 1/2″ and press. If you don’t have a serger, turn 1/4″ and press, then another 1/4″.

Place your waistband pieces right sides together and sew down both short sides. Press seams to one side, then fold the waistband in half, wrong sides facing with raw edges matching, and press well. Gather skirt and sew it to the waistband, matching side seams, using 1/2″ seam allowance.

Fold the waistband back down on the fold, match raw edges, and sew the back half of the waistband to the seam allowance of the previous seam. This will enclose the back half of the casing.

Insert elastic into the casing, pinning carefully at the side seams.

Stitch in the ditch on both side seams to secure elastic in the back.

Sew the front half of the waistband in the same manner. Trim and finish the edge of the seam. Sew the hem and do any top stitching you wish and you’re done!
