 I blog over at Ameroonie Designs. I’m so thrilled to be here today sharing my next design team project
Last month my husband and I discovered that we were expecting again. With number 6 on the way it became clear that some rearranging of bedrooms was going to be in order. The easiest way to make room for baby would be to put the two little girls into a shared bedroom, they are 6 and 2 1/2. Because the room is pretty small, we thought bunk beds would give us the most bang for our buck. But, this left me with a dilemma. I wanted the girls to keep their beds made, but at their ages, tucking in a standard twin size comforter into the sides of a bunk bed would be challenging at best. So, I decided to create a small bunk bed comforter. One that would be the size of just the top of the mattress and make it simple for the girls to straighten and make.
While this might not be the size duvet you will want to make, the same steps would apply for making a larger one, you will just need to adjust the measurements and amount of fabric.
I love using knit fabric for a duvet cover, Riley Blake Designs knits are super soft and the additional width of the fabric means you have to purchase less yardage and there is less piecing. However, knit can really be a pain- the edges tend to curl and it requires patience to line everything up for both cutting and sewing. It’s worth it though, just take your time and pin a lot. One last note about the knits- this project makes a duvet cover that fits pretty well, the knits will shrink a bit, so make sure to prewash your fabric to ensure the cover will still fit after you wash it.


(sorry about flipping back and forth between fabrics, I made two of them and had to capture some of the steps in the second one that I forgot to get on the first)
Space your button holes along the side with the 2″ hem. For mine, they are 2″, 13″, 24″ and 35″ from one side. Sew in the button holes and set the flap aside.
My duvet ended up being just a bit longer than the width of the fabric, so I needed to piece a small section to the top of the back piece to make it long enough. Take the 5″ X 40″ piece of fabric and sew it to the top of one of the 40″ X WOF pieces.
Take the second piece of 40″ X WOF fabric and attach the 11″ X 40″ piece of fabric to the top. This will become the front of the duvet.
I wanted to create a small pocket for the duvet to slip into at the top of the duvet cover so the duvet would not peek out. Fold over the top of the front cover 6″, wrong sides together to create this pocket.

Before we attach the front to the back we need to tuck the hem tape into the corners. Cut 8- 6″ lengths of hem tape. Take two of the pieces of hem tape and tuck them against the folded edge of the top of the front piece of fabric.

This picture shows where the hem tape will be once it’s tucked inside the pocket.

This picture shows the hem tape tucked inside. Pin in place on both sides of the top of the duvet cover front.
Pin the front and back of the duvet cover together. The back of the duvet cover will be 1/2″ longer than the front.

Now we need to attach the flap. Pin the flap to the back of the duvet cover, right sides together. It will line up between the two sewn sides. Make sure to keep the front of the duvet cover out of the way so it doesn’t get caught in the seam. Sew the flap to the back of the duvet cover. Before we turn the duvet cover right side out we need to attach the last two pieces of hem tape to the duvet cover. At the bottom two corners, slide the hem tape between the two pieces of fabric within the seam allowance and stitch down, I used a tight zig zag stitch to do this, just make sure it’s fastened securely.
Turn the cover right side out and fold the flap to the front side of the duvet cover. Use the button holes to mark the placement for the buttons and sew the buttons on. Now you’re cover is ready.
**To create the duvet, I took a thin twin size duvet from Ikea and folded it in half along the length. The original width is now the height. When I measured it, it was a bit wider than I needed, so I cut 8″ off one short side so the duvet would fit on top of the bed correctly. I sewed around the three open sides of the duvet cover to create a new duvet that is half the size of the original one, and twice as thick.
Whether you create your own duvet or modify one, or make a larger cover, the final step is to attach the hem tape to the corners of your duvet. I used the same tight zig zag stitch to attach one end of the hem tape to each of the four corners of the duvet. Now your duvet will stay in place inside the cover.

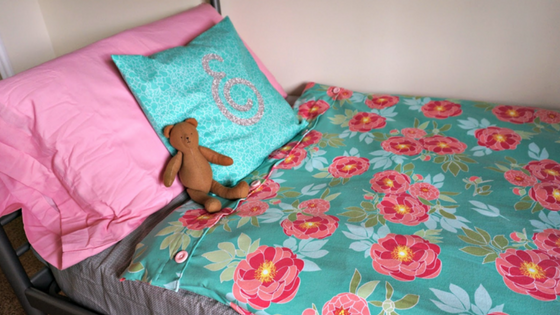
My girls love their new beds and they really love their soft duvets with their covers. And I really love that my 6 year old can make her bed herself, especially since she’s on the top, and I don’t want to have to climb up there every day. 🙂