Hi Everyone I’m Mandy!
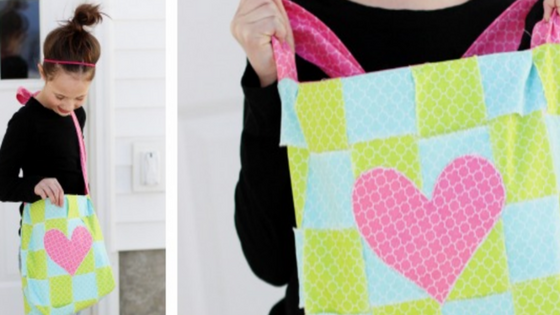
I blog over at www.SugarBeeCrafts.com – I love being a part of the Riley Blake Team and playing with all the super cute fabric! Today I have a fun technique to show you that I used to make this Woven Patchwork Tote.
I love the look of patchwork and how fun it is, but piecing together can take lots of work and time. I have a fun, super simple technique to share today that gives the look of patchwork, without all the work. It is something you may have done as a kiddo – just simple weaving of strips. You can make the tote any size you need. I used some books that the bag was intended for to figure out the size I needed. You’ll want 2 bag pieces, for a front and a back, and then we’ll use a box corner to add a slight bottom and side to the bag. Cut those 2 pieces out of lining fabric.

Also cut 2 pieces that exact size out of fusible interfacing. That will be the base for the woven outer layer. Then rip strips of your outer fabric (I used 2 colors, about 1/2 yard of each), in the size desired. My strips were about 1.5 inches wide. You can also cut the strips instead of ripping them, I just loved having a little fray to the edge so I ripped mine.

Now, place the interfacing with the glue side (shiny side) up. Then lay one of the colors of strips over the top of the interfacing (right side up). Then turn back every over strip, perpendicular slide in the other color strip, then put the long strips back into place. Then repeat, alternating strips. It’s a little hard to explain, but it’s a simple technique and I’m hoping the pictures below can help show you:

Once all your strips are woven, you will iron them down. This will adhere them to the interfacing and create a patchwork piece of fabric that you can sew into a tote. If you would like to add an applique (like my heart), you’ll want to sew that on before you assemble the tote.
Then with the two pieces of patchwork, right sides together, sew the sides and bottom together. Repeat for the lining.

I sewed in box corners to box out the sides and the bottom, but that’s optional. You do this by sewing off the bag corners as shown below. 
Next, with right sides together, sew the lining and the outer fabric together along the top edge, leaving about a 3 inch opening so you can turn the bag right-side out through the opening.
 After you turn it right-side out, you’ll want to top stitch that top edge – that will also close the hole that you previously left open. I love the finished look that top stitching can give a tote.

That’s it! Can you believe that a patchwork tote can be so quick?!


Hope to see you over at Sugar Bee Crafts, where you can find lots more simple sewing tutorials!