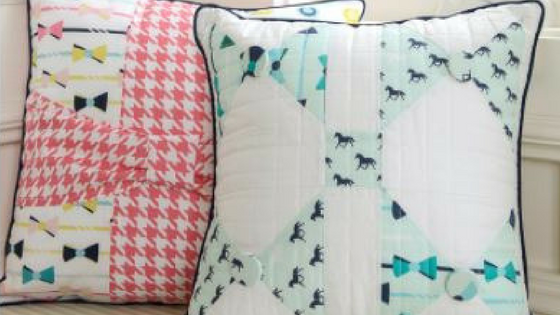
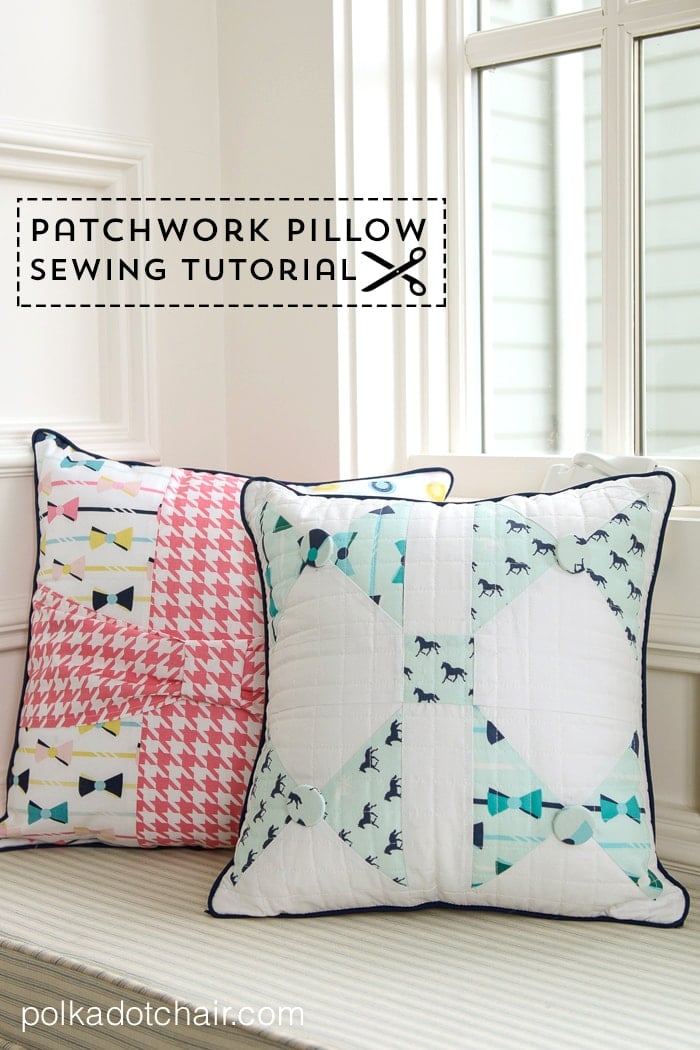
Hi there Riley Blake Designs Blog Readers, it’s Melissa Mortenson of polkadotchair.com here to share with you a sewing tutorial for this cute bow tie patchwork pillow. I’m very very excited that this pillow is made from the new Riley Blake Designs Derby Style Fabric line coming in January. I’m excited because I designed the line! It’s inspired by my home state of Kentucky and I hope that you like it! To see more about my inspiration for the fabric line and more photos of finished projects just visit this post on my blog. I am totally smitten with bow ties lately (as seen by the bow tie print on my fabric) and thought that it would be fun to make a bow tie pillow. The pillow is constructed simply with Quarter Square Triangles (QST) then straight line quilted.
If you’d like to make one here is what you’ll need:
- 2 fabric squares 7″ x 7″ (print fabric, I used 2 different prints)
- 2 fabric squares 7″ x 7″ (white fabric)
- 2 1/2″ square (print fabric)
- 4 pieces 2 1/2″ x 6″ (white fabric)
- 2 pieces 13 1/4″ x 2 1/2″ (white fabric)
- 2 pieces 17 1/4″ x 2 1/2″ (white fabric)
- 16″ pillow form
- 1 1/8″ flat covered buttons (4)
- 16 1/2″ piece of fabric for pillow back
- 1 package piping
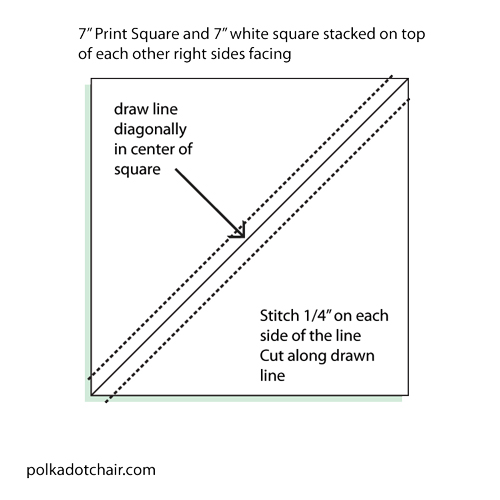
To begin you need to make your Quarter Square Triangles for the bow tie blocks. First we are going to make Half Square Triangle blocks (HST). To do this place one print fabric square (7″ x 7″) and one white fabric square on top of each other right sides facing. Using a fabric safe pen draw a diagonal line down the center of one of the squares. Pin the squares together and sew 1/4″ out from the center line on both sides of the line. Cut the block apart along the line you drew. Press seam to one side.
. 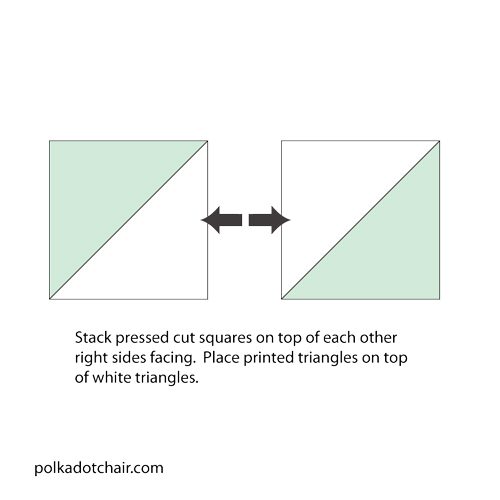
Next stack the two HST blocks on top of each other right sides facing with the print side of one block on top of the white side of the other block. Make sure the center seams are lined up and nestled together correctly. 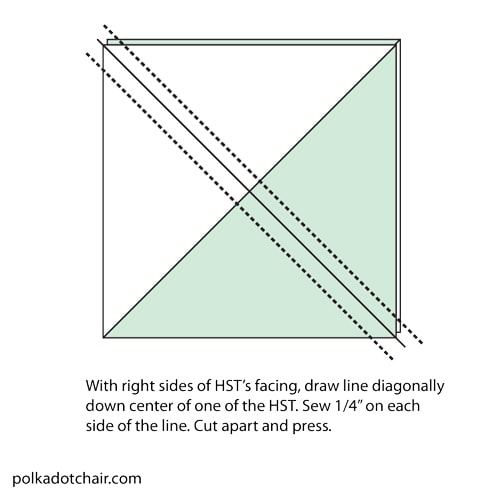
Next (with the right sides still facing). Draw a diagonal line down the center of one of the blocks on the opposite diagonal. Stitch 1/4″ on each side of the line and cut apart. Press open. Square up block to 6″ x 6″.
Repeat so that you end up with 4 QST. 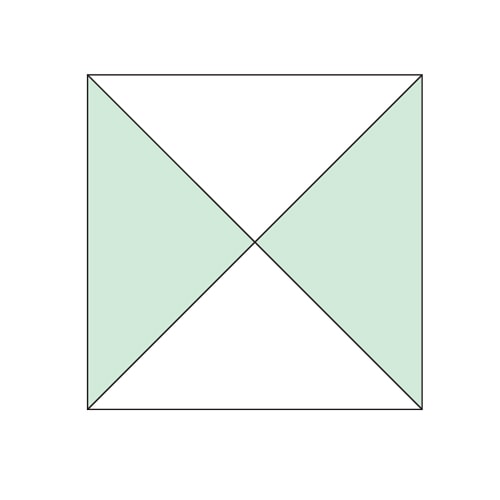
Next, sew 2 of the 2 1/2″ x 6″ white strips to two sides of the 2 1/2″ square. Press seams to one side.

Sew one QST block to each side of one of the 2 1/2″ x 6″ strips. Press seams to one side. Repeat for other 2 QST.
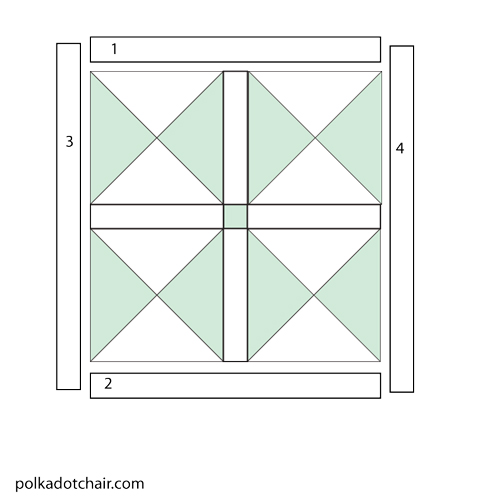
Finish assembling the pillow top by sewing the two QST blocks to the center strip. Then sew the 2 1/2″ x 13 1/4″ pieces to the top and bottom and press. Sew the 2 1/2″ x 17 1/4″ pieces to the 2 sides (as shown in the illustration). Trim block so that it is square and measures 17″.
Apply piping to the outside of the pillow (if you need a tutorial for applying piping to the outside of a pillow click here). Sew the pillow front and back pieces together leaving an opening to feed the pillow form into the pillow. Insert pillow form and stitch pillow closed.
Thanks so much for having me!! I’d love for you to stop by my blog sometime!! and keep an eye out for Derby Style in your local fabric store in January! Melissa 🙂