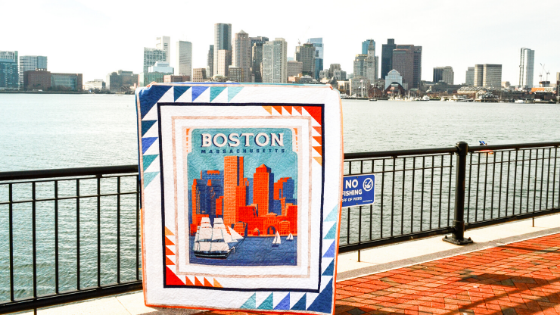
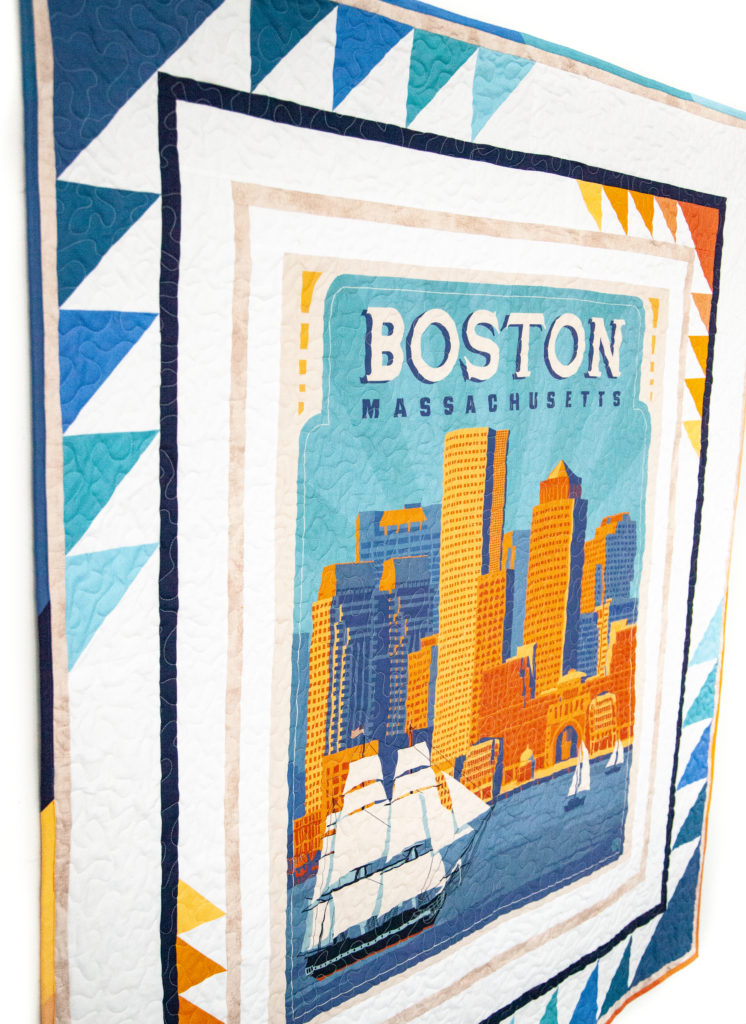
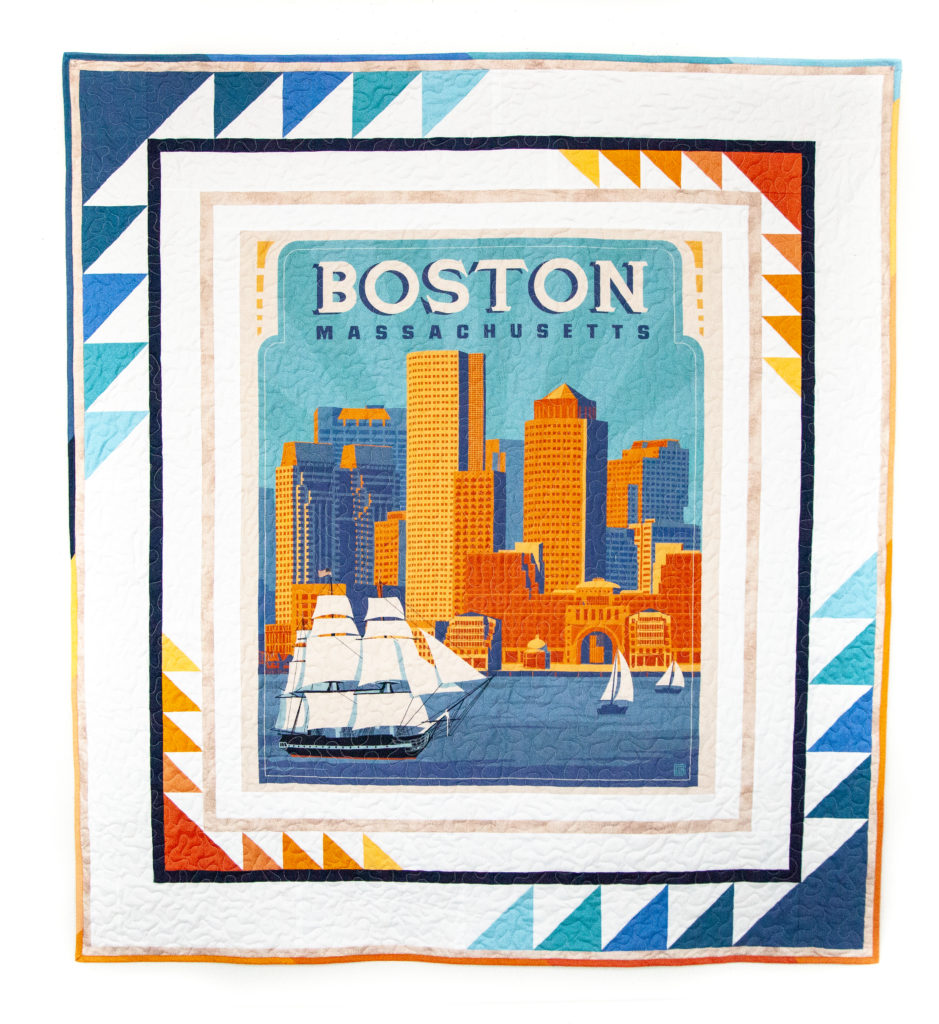
We’re always looking for fun, interesting borders for our panel quilts, and this Ombre Border just might end up being one of our all time favorites!
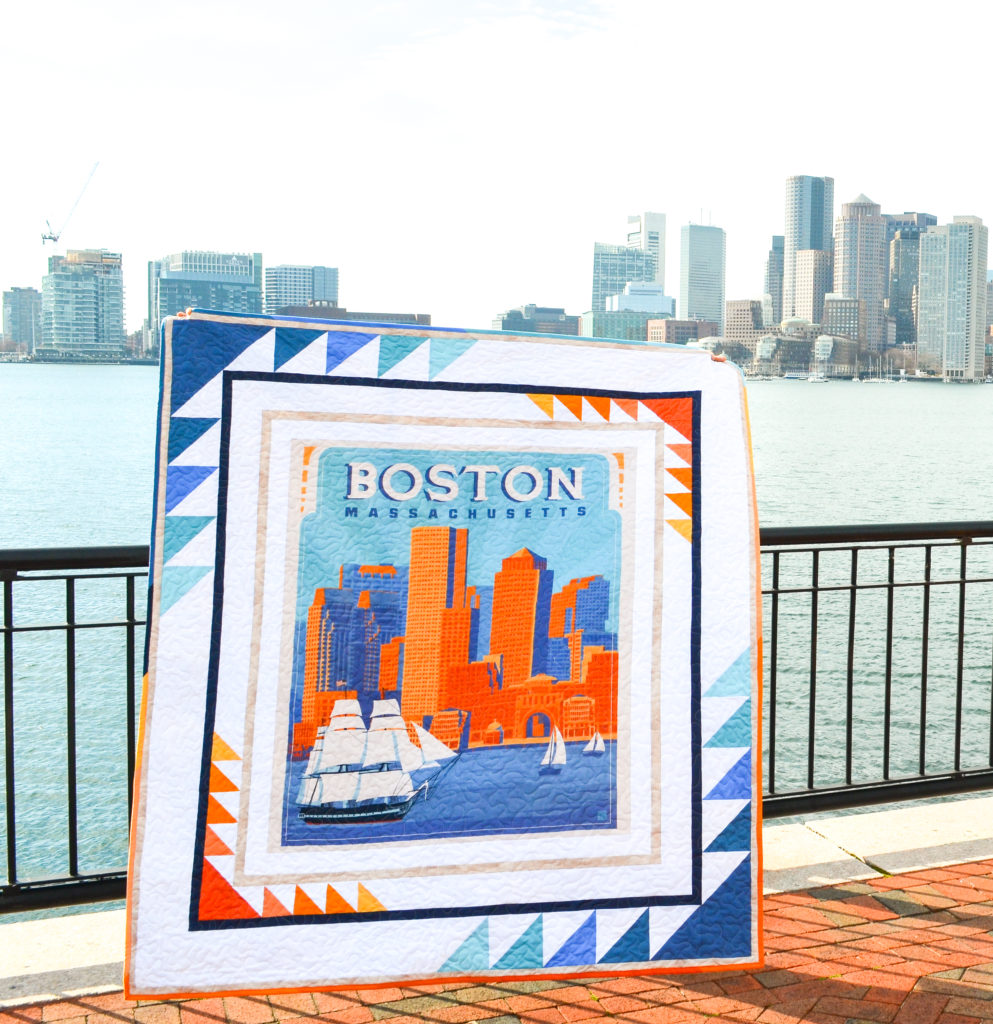
I wanted the borders of this quilt to echo the sails in the panel. I was inspired by this gorgeous NATIONAL PARKS QUILT by @buffaloflatsquiltco, but with no pattern, I decided to come up with my own spin-off using Confetti Cotton and Shabby basics.
To make this quilt, you will need:
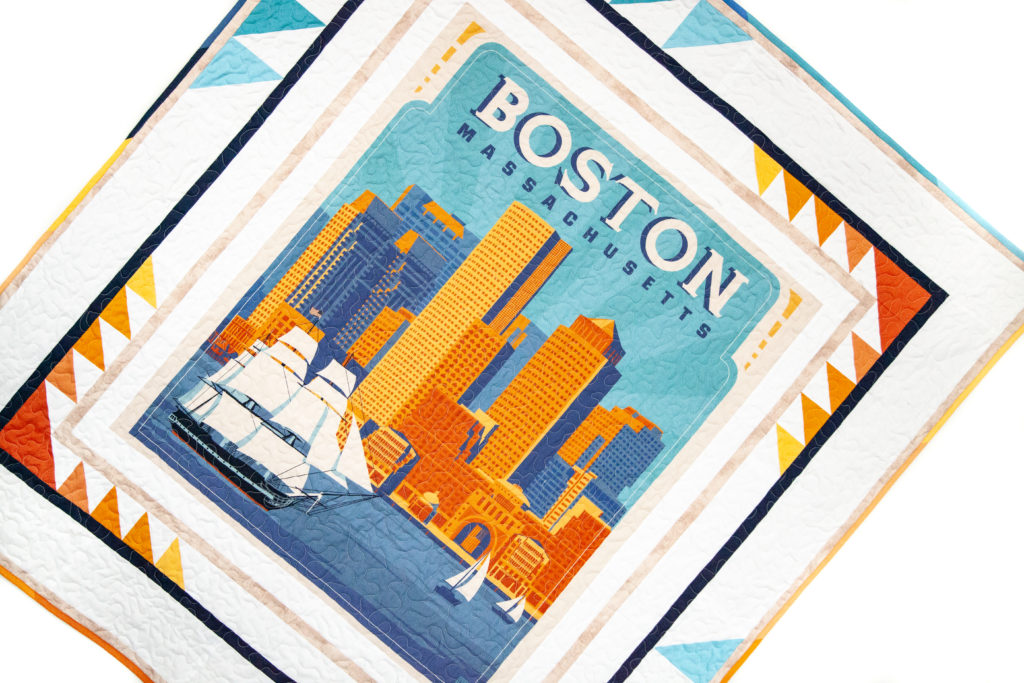
- Boston Destinations Panel
- 10 – 1 1/2″ x WOF strips Putty Shabby RBD Basic
- 6 – 1 1/2″ x WOF strips Navy Confetti Cotton
- 4 – 2″ x WOF strips Riley White Confetti Cotton
- 4 – 5 1/2″ x WOF strips Riley White Confetti Cotton
- 1 each – 6 1/2″ square in Confetti Cotton Autumn, Melon, Cheddar, and Harvest
- 5 – 6 1/2″ squares Riley White
- 2 – 3 1/2″ squares Confetti Cotton Autumn
- 1 each – 9″ square in Confetti Cotton Denim, Cadet, Blueberry, Bear Lake, and Sky
- 5 – 9″ squares Riley White
- 2 – 5 1/2″ squares Confetti Cotton Denim
- Quilt batting
- Fabric for quilt back
- Fabric for binding
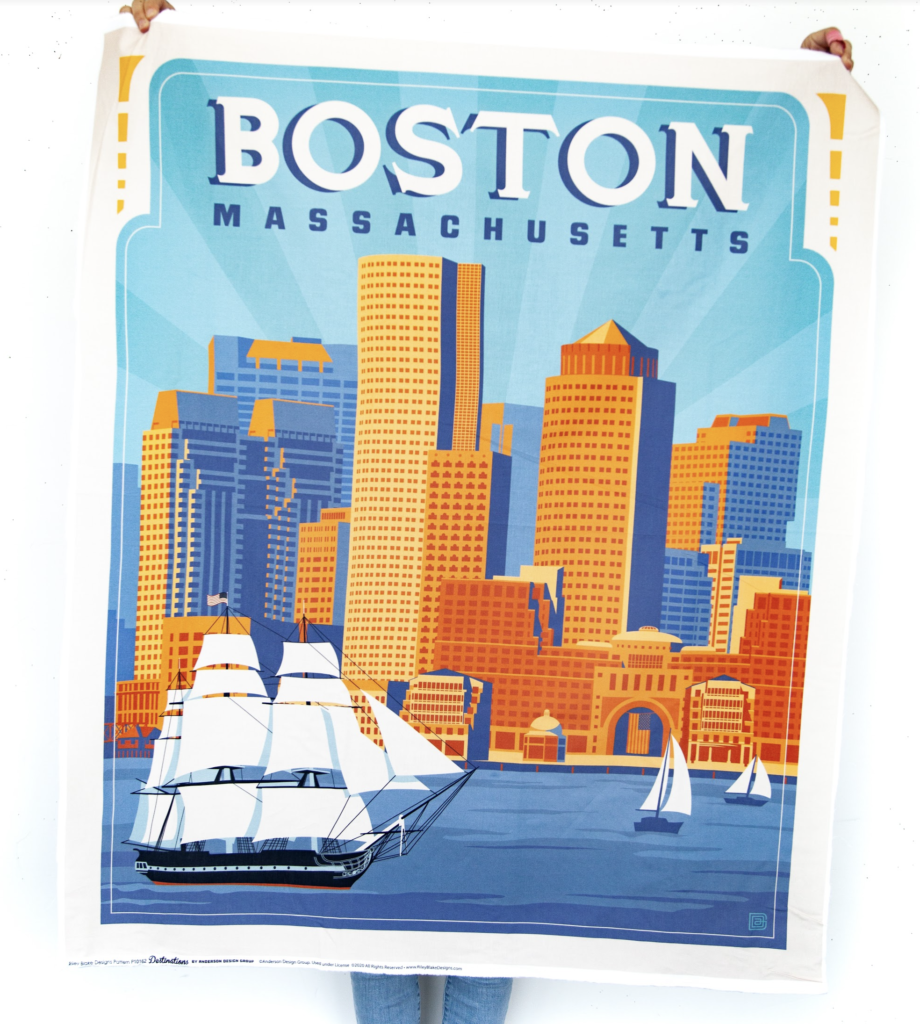
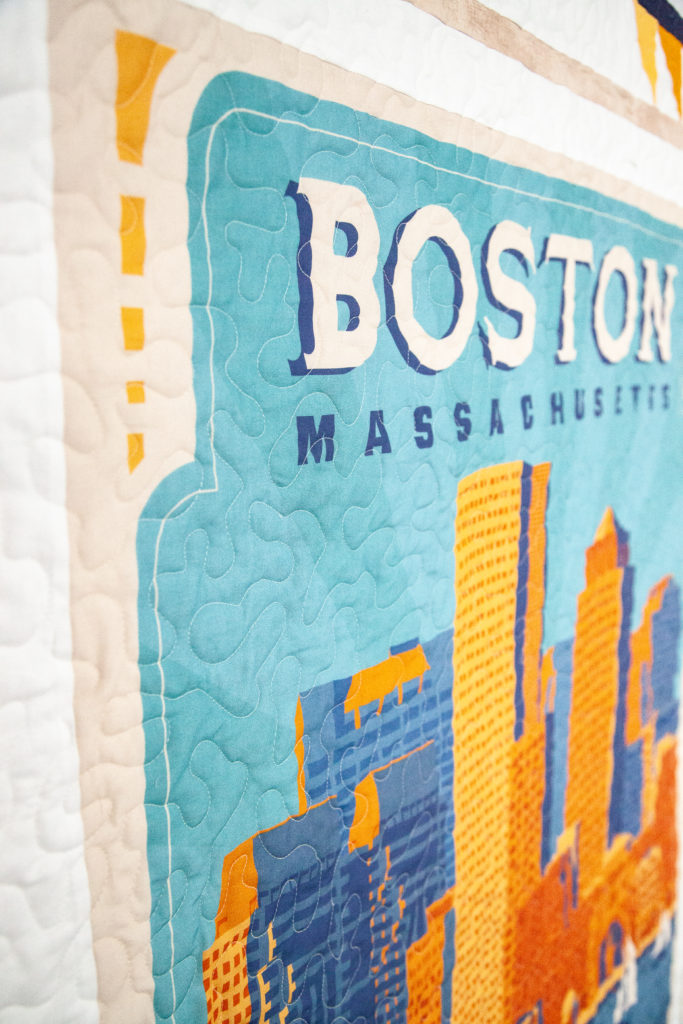
- To begin, trim your Boston fabric panel to 36″ x 42.”
2. Next, sew a 2″ Riley White Confetti Cotton strip to each side. Press seams. Sew 2″ White strips to the top and bottom. Press seams.
3. For the 1 1/2″ Putty Shabby border, I made one giant strip with all 10 pieces, sewing the short ends together. I did this because I will use it in 2 borders, and I know one WOF strip won’t be long enough so I will be adding more fabric anyway. This way I don’t have to have exact measurements. I can sew the strip to the sides, top, and bottom, trimming it flush with the end each time.
Sew the 1 1/2″ Putty Shabby strip to each side. Press seams. Sew to top and bottom. If you made one long strip like I did, set the rest aside for later.
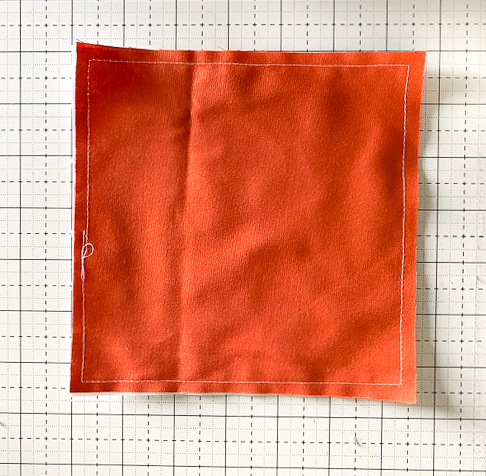
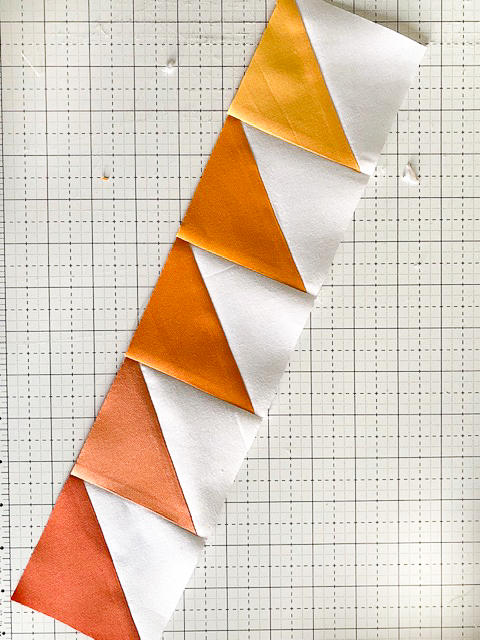
4. Our next border has the orange half square triangles. To make the half square triangles, pair one color 6 1/2″ square with one white square. Sew around the perimeter.
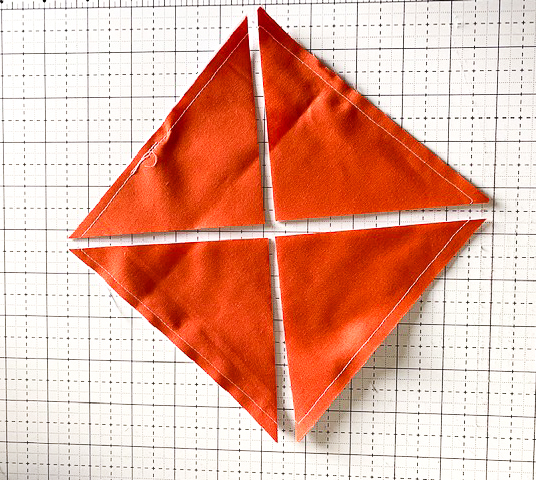
5. With your ruler as your guide, use your rotary cutter to cut through the diagonal both directions (shown above).
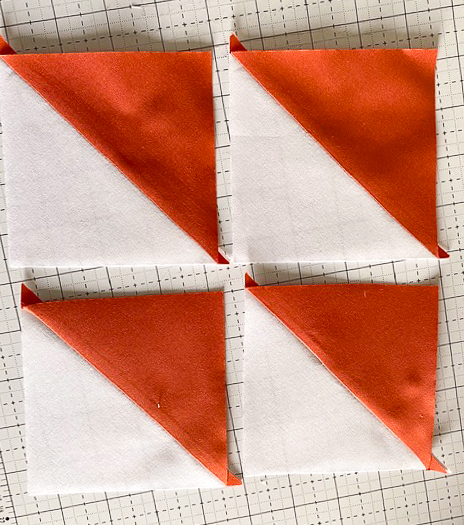
6. Press open. Trim to 3 1/2″ square. Repeat the steps above for all 5 orange colors.
7. We are going to make our side borders first. To do that, you are going to make two rows of 5 half square triangles with the white triangle facing right, and two rows of half square triangles with the white triangle facing left.
Refer to the above image for the color order and direction of your triangles.
8. Add the 3 1/2″ x WOF strip of Riley White to the end with the Harvest HST. Press seam.
9. Sew one of the border strips to the left side, aligning the edge of the dark/Autumn HST triangle to the edge of your lower left quilt bottom. The white portion of the HST will face toward the center of the quilt. Press seam. You will have extra white at the top — trim the white so the end is flush with your quilt top.
10. Repeat for the right side — except your triangles will start at the top. Press seams Trim the excess white so it is flush with the quilt bottom
11. For the top and bottom borders, you will repeat steps 8-9, with two differences. 1) you will be using the rows with half square triangles that face the opposite direction of your side rows. 2) Add the 3 1/2″ Autumn square to the end of each row so it is next to the same color (Autumn) HST block. **I recommend laying out your half square triangles here before you sew them together to make sure they are all facing the correct direction. It is easy to get it mixed up. Press seams. Sew the borders to the top and bottom, lining up the dark orange corner square so the seams match up with the side border seam. Press seams. Trim off any excess Riley White on the other end.
12. Add the 1 1/2″ Navy border strips to the sides, then to the top and bottom.
13. The next border is a repeat of the orange triangle border, but with the larger blue blocks.
Pair up your 9″ blue squares with the 9″ white squares. Follow the same steps above to create the half square triangles. Square them up to 5 1/2″.
14. Using the same instructions above, and referring to the picture for triangle placement, sew the side borders followed by the top and bottom borders. *Note the blue triangles are located in the opposite corners from the orange triangles.
15. Finally, add your 1 1/2″ Putty Shabby border that you set aside earlier. Start by sewing it to the sides, then to the top and bottom. Press seams.
That’s all there is to it! If you can make half square triangles, you can make this quilt! There are so many ways you could quilt this. I opted for a simple all over meandering design on my home machine. Fast and easy.
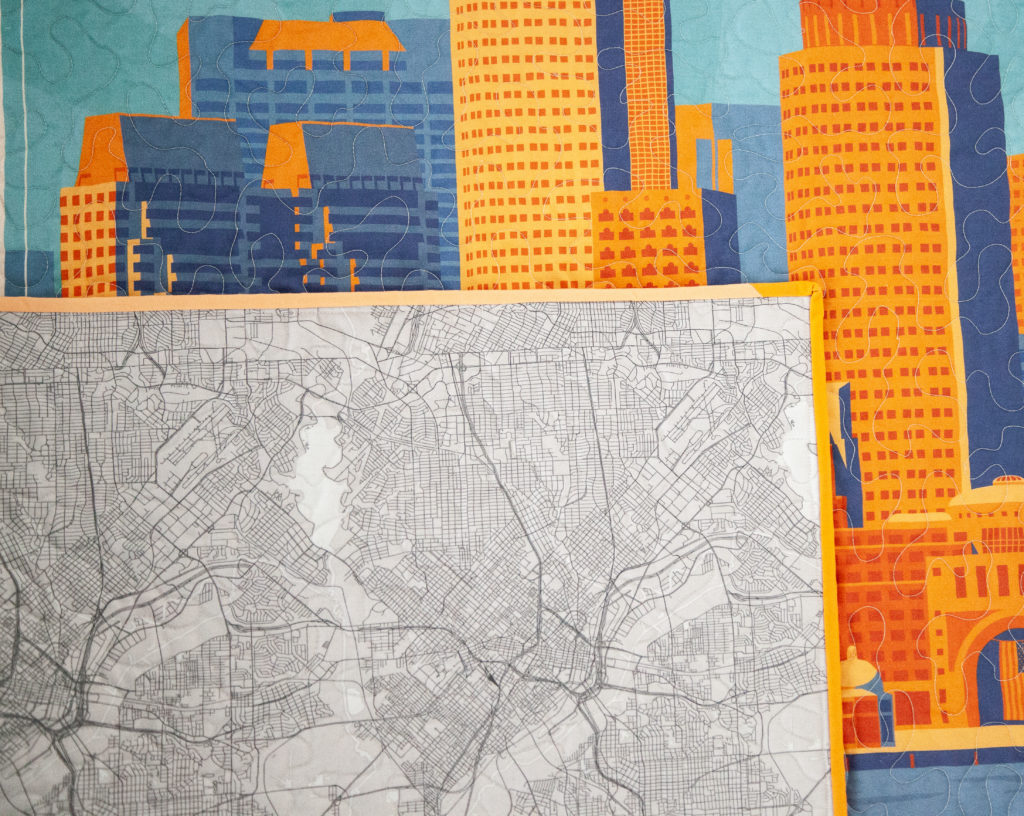
For the quilt back, I used the Gray Map print from the Destinations collection. Isn’t it cool?
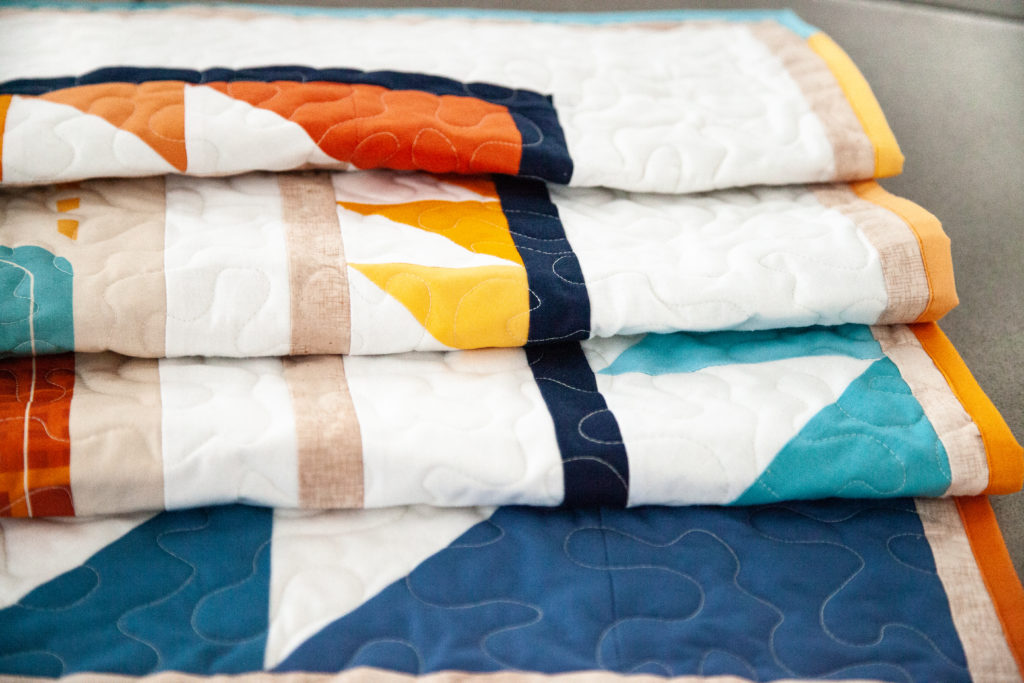
I had Confetti Cotton scraps left over, so I turned them into a fun, scrappy binding. This is a simple, modern border than can be easily modified in so many ways to make it unique to your quilt and taste. Increase the block sizes, change out the fabrics, widen the border strips….so many options! I hope you take this idea and run with it to create your very own panel quilt.
Destinations, by Anderson Design Group, is available now at your favorite local and online quilt shops. Pick up yours today and share your makes with us on Instagram using #destinationsfabric, #rileyblakedesigns, #iloverileyblake, and tag us @rileyblakedesigns.
One Comment
Pingback:
January 30, 2023 at 6:59 am