
Hi! It’s Maggie from Smashed Peas and Carrots! So glad to be here once again to share another easy and super useful tutorial with you. With summer on our heels and potluck season right around the corner I thought I’d make myself a few of these super cute DIY Reusable & Washable Baking Dish Coversto cover all the baked goods, dips, and salads I bring to different potlucks, picnics, and other random gatherings. I realized how even though my glass baking dishes came with these great plastic lids, I can NEVER find them! It’s like they are hiding from me!!!


These baking dish covers are seriously the best things ever! No more wasting saran wrap or foil to cover your dishes and I love that they are reusable as well as washable, holla! And using Riley Blake’s Farm Girlcottons makes them fit in just perfectly in your kitchen…have you seen the mason jar colorway?!!

Here is what you will need to make your own DIY Reusable & Washable Baking Dish Covers: 1 fat quarter of fabric (or more depending on the size of your baking dish!) 1/4 inch elastic roughly the circumference of your baking dish 1 package extra wide double fold bias tape safety pin


First, lay your baking dish face down on top of your fabric and cut around it in an oval shape leaving about 1 inch extra fabric all around.

Next, sew your extra wide double fold bias tape around the entirety of the fabric to make a casing for the elastic…go slowly and carefully around the curves! Make sure to leave a 1 inch opening at the beginning/end of the bias tape so that you can feed the elastic through!

For tips on how to sew bias tape, you can check on this great tutorial here!

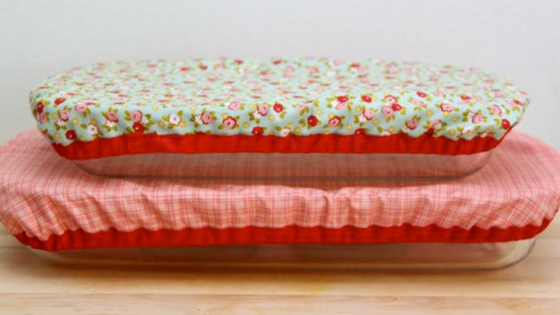
Now pin the safety pin to one end of the elastic and feed it through the bias tape casing. Once you get it all the way around, pull on the elastic and test it over your baking dish to make sure it is tight enough. Then sew the ends of your elastic together, clip the excess elastic off, and tuck the elastic inside the bias tape. Sew the remaining bias tape to the fabric and you are done!


Your baking dishes have never looked cuter!!!

Happy sewing and potluck-ing this summer!!! Thanks for having me again on the Riley Blake Design Team page, if you’d like to see more great tutorials, crafts, DIY, and yummy recipes please visit me over at my website: Smashed Peas and Carrots!