Hello fabric friends. I’m Amy and love to share my latest projects at my blog, Diary of a Quilter. Just in time for spring and Easter, I thought it would be fun to use Carina Gardner’s latest collection, Wiltshire Daisy, to create a quilted fabric basket and eggs.


The basket comes together quickly – and looks like patchwork thanks to the fun ‘cheater’ prints that are part of the Wiltshire Daisy collection.

The fabric requirements for this project are:
- 1/4 yard outside fabric (patchwork cheater print)
- 1/4 yard lining fabric (pink polka dots)
- 1/4 yard Pellon Fusible Fleece (987F)
- 1/2 yard Pellon Shape Flex 101

PATTERN TEMPLATE: CLICK HERE Using the pattern template, cut 2 outside pieces, 2 lining pieces, 2 Fusible Fleece pieces, and 2 Shape Flex pieces. For handle cut two 2″ x 8″ strips from exterior fabric and two 1 1/2″ x 8″ strips from Shape Flex.

Before you adhere the Fusible Fleece and the Shape Flex to the backs of the fabric pieces, trim 1/4′ off all the way around each piece. This will reduce bulk in the seams as you assemble the basket.

Following manufacturers instructions, adhere the Fusible Fleece to the wrong side of the exterior fabrics and the Shape Flex to the wrong side of the lining fabric.

This is optional, but I added some simple quilting lines to the exterior pieces after the Fusible Fleece had been adhered, just to give the bag some texture and to add to the patchwork look.

Pin two exterior pieces and two lining pieces right sides together. Sew 1/4″ seams on both sides and bottom of the units. (See black lines)

Press all seams open. To create a box-bottom for the basket bring the two edges of the notched squares together. Match up seam allowances to keep bottom square and pin edges together. Sew a 1/4″ away from the edge. Do this on both corners of the exterior piece but **only one corner of the lining piece.**

Fold down top edge of the basket where the handle will attach 1/4″ and press to crease. Turn exterior piece right-sides-out and place inside the lining piece.

Start by matching up seams and pin two layers, right sides together, all the way around the basket.

Starting on the right side of where the handle will attach, sew a 1/4″ seam all the way around the basket top, to where the next handle will attach. Leave a gap there and sew again around to the original side.

Pull bag exterior right-sides-out through the bottom corner left open in the lining. To close this corner, tuck edges in, pin and top-stitch the opening closed. (By pulling through the corner, the bottom of the basket looks neater.)

Tuck lining inside the basket exterior and use an iron to give the basket a good press and help shaping it. Pin all around the edges (make sure the seam is not rolled inside the two layers) and top stitch all the way around the top edge of the basket, leaving an opening again where the handles will be inserted.

Making the handle: Fuse Shape Flex to the back side of the two handle pieces and sew both long sides together. Turn right-sides out, press well, and top-stitch along both sides to give the handle a more finished look. Carefully trim away bottom corners to make handle easier to insert.

Insert one end of the handle about an inch down inside the opening for the handle. Finish top-stitching over the handle to secure it in place. (If you plan to carry heavy things in the basket, make sure the handle is extra secure.

Insert other end of the handle on opposite side and repeat to finish the basket.

When the handle is finished, the basket will have a kind of rounded appearance (see top basket in photo). If you would like your basket to have boxed corners (like the one on the bottom) there’s a simple step below. (I personally like it because it gives the basket a little more shape.)

Just pinch the two sides together at each corner and whip-stitch a few stitches at the corner to pinch those sides together. Use a coordinating thread to camouflage the stitches. Repeat at all four corners.

This will give the basket a little more of a box-y look. Either is fine!

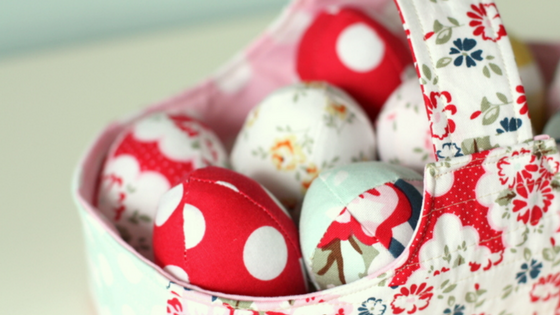
I also made a bunch of fabric eggs from Wiltshire Daisy to go in my baskets. To read more about how the eggs are made, visit my blog, Diary of a Quilter.
