Hello friends, this is Jennifer Long from, Bee Sew Inspired, fabric designer with Riley Blake Designs and doll and quilt pattern designer. I am so happy to be here today to share with you a fun quilt-y Halloween project with you! There is still time to wip up this adorable Haunted Castle wall hanging!
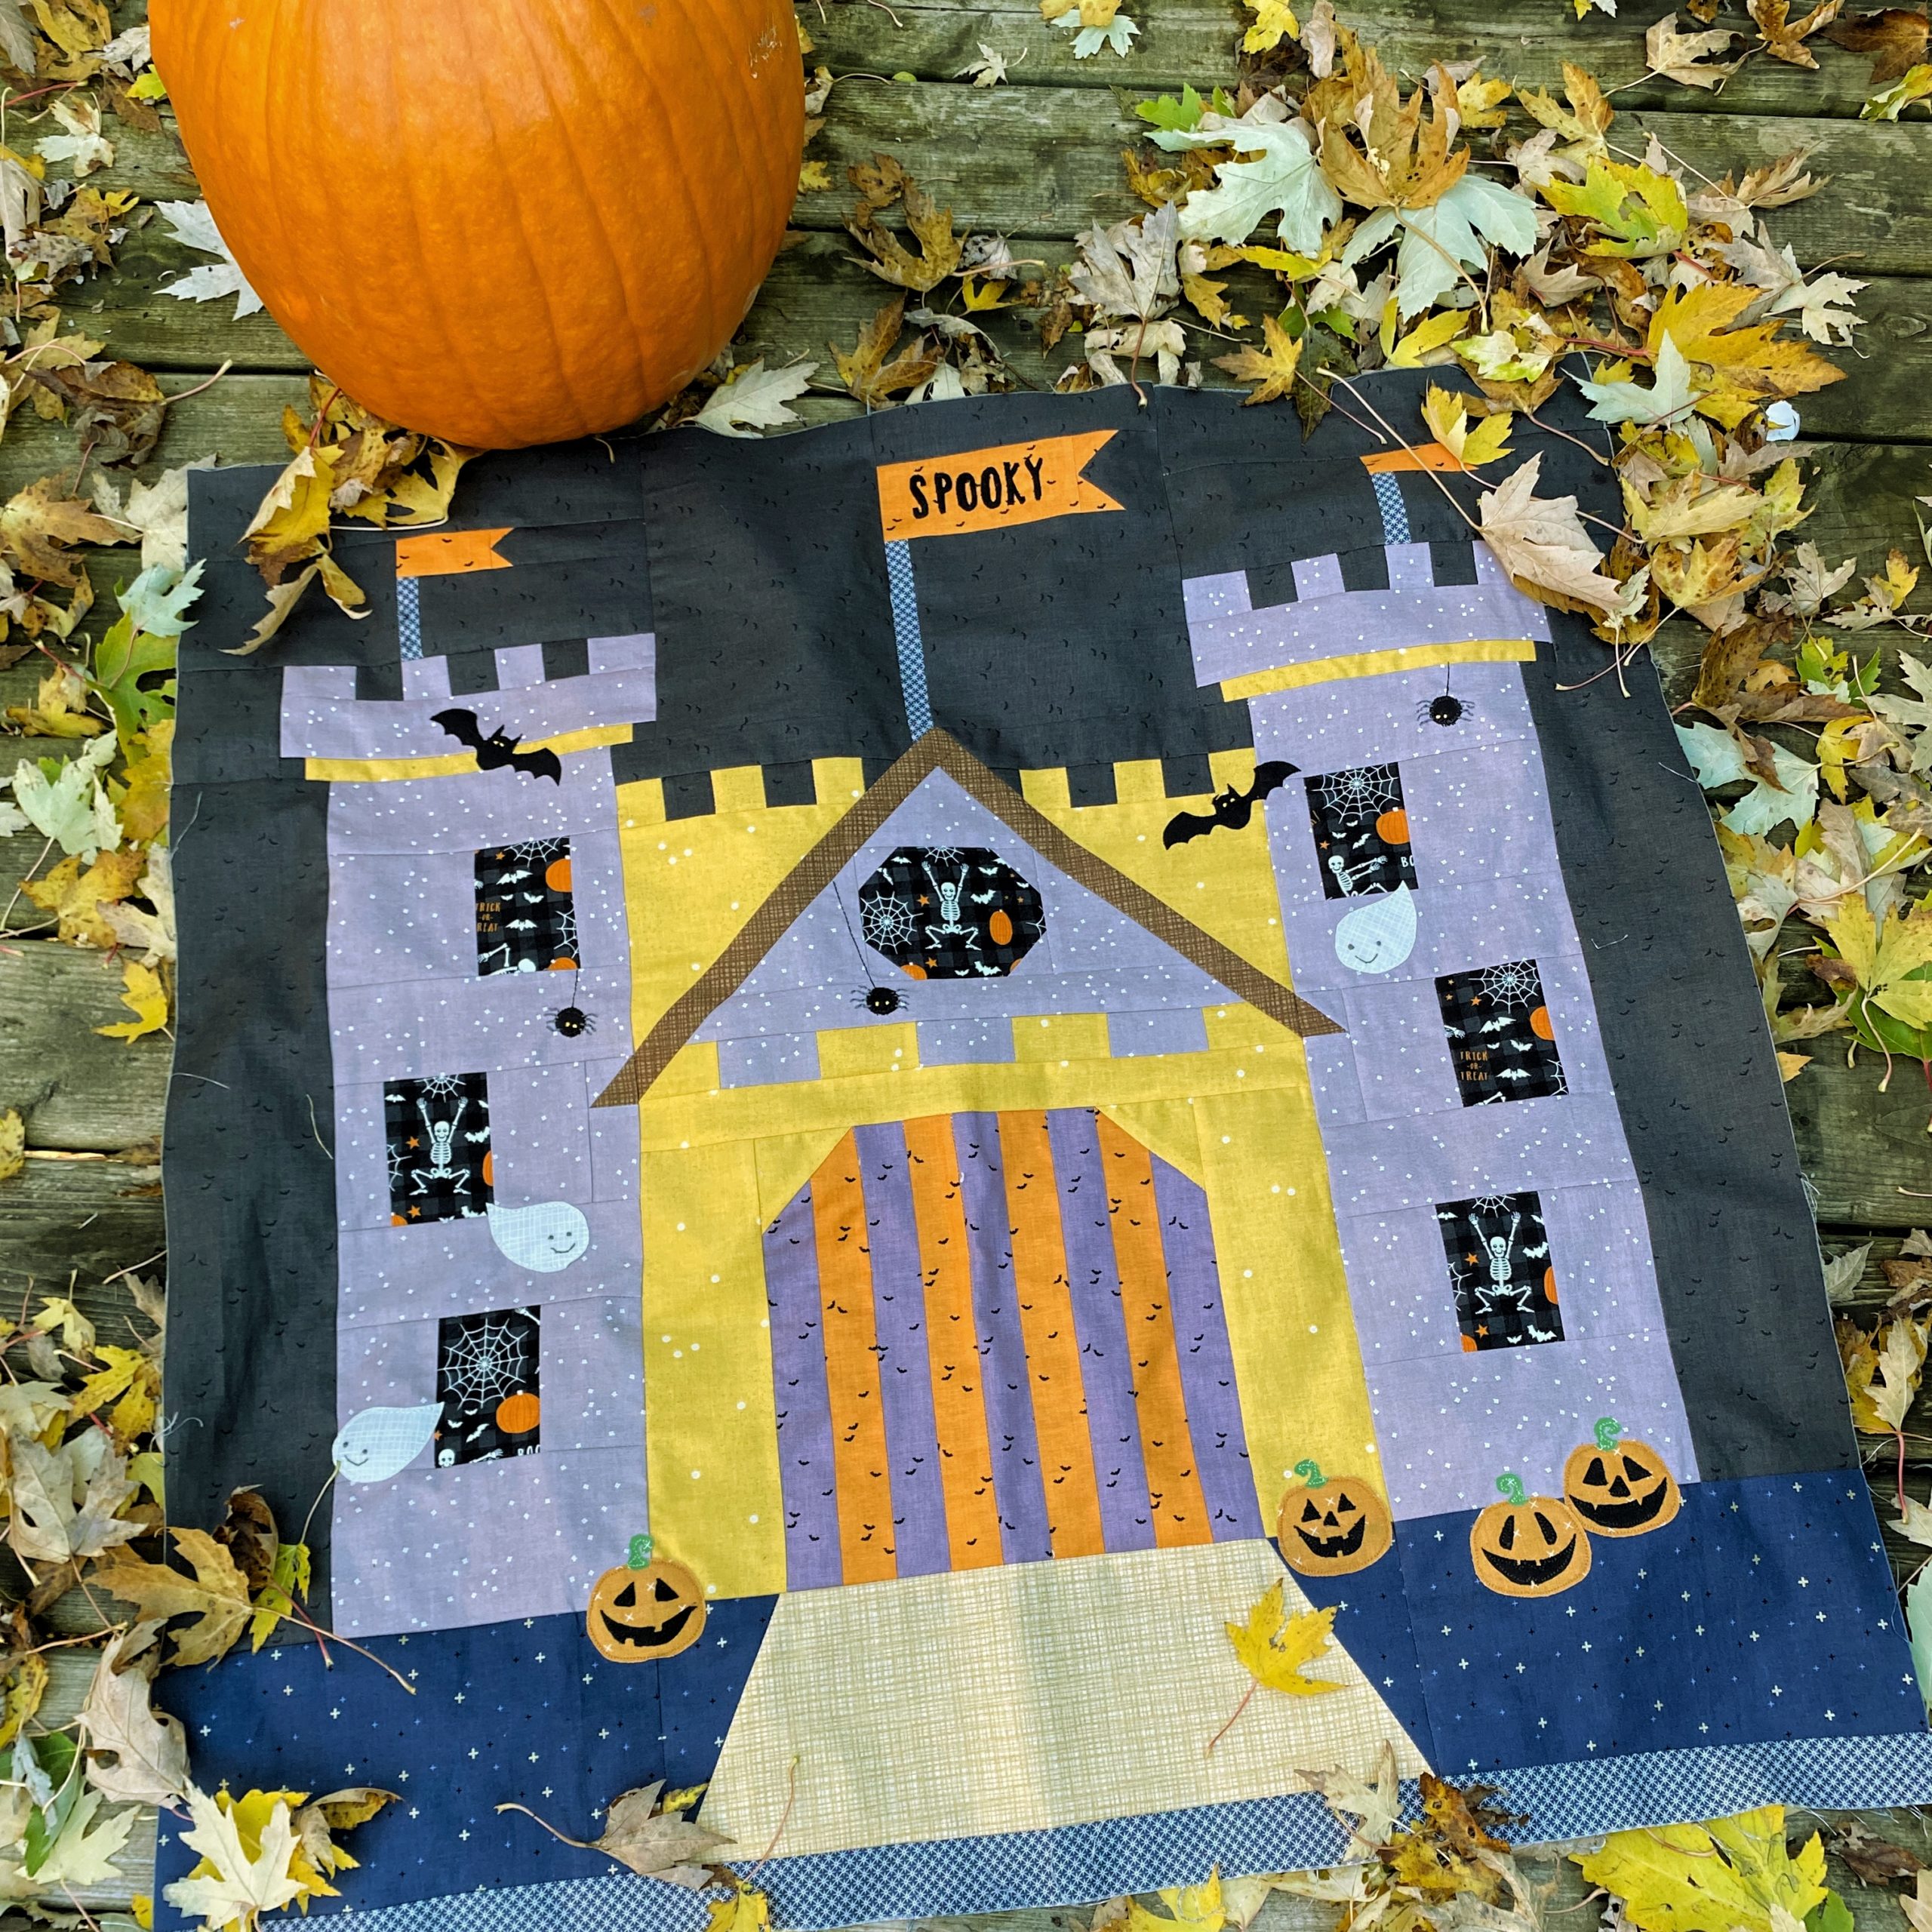
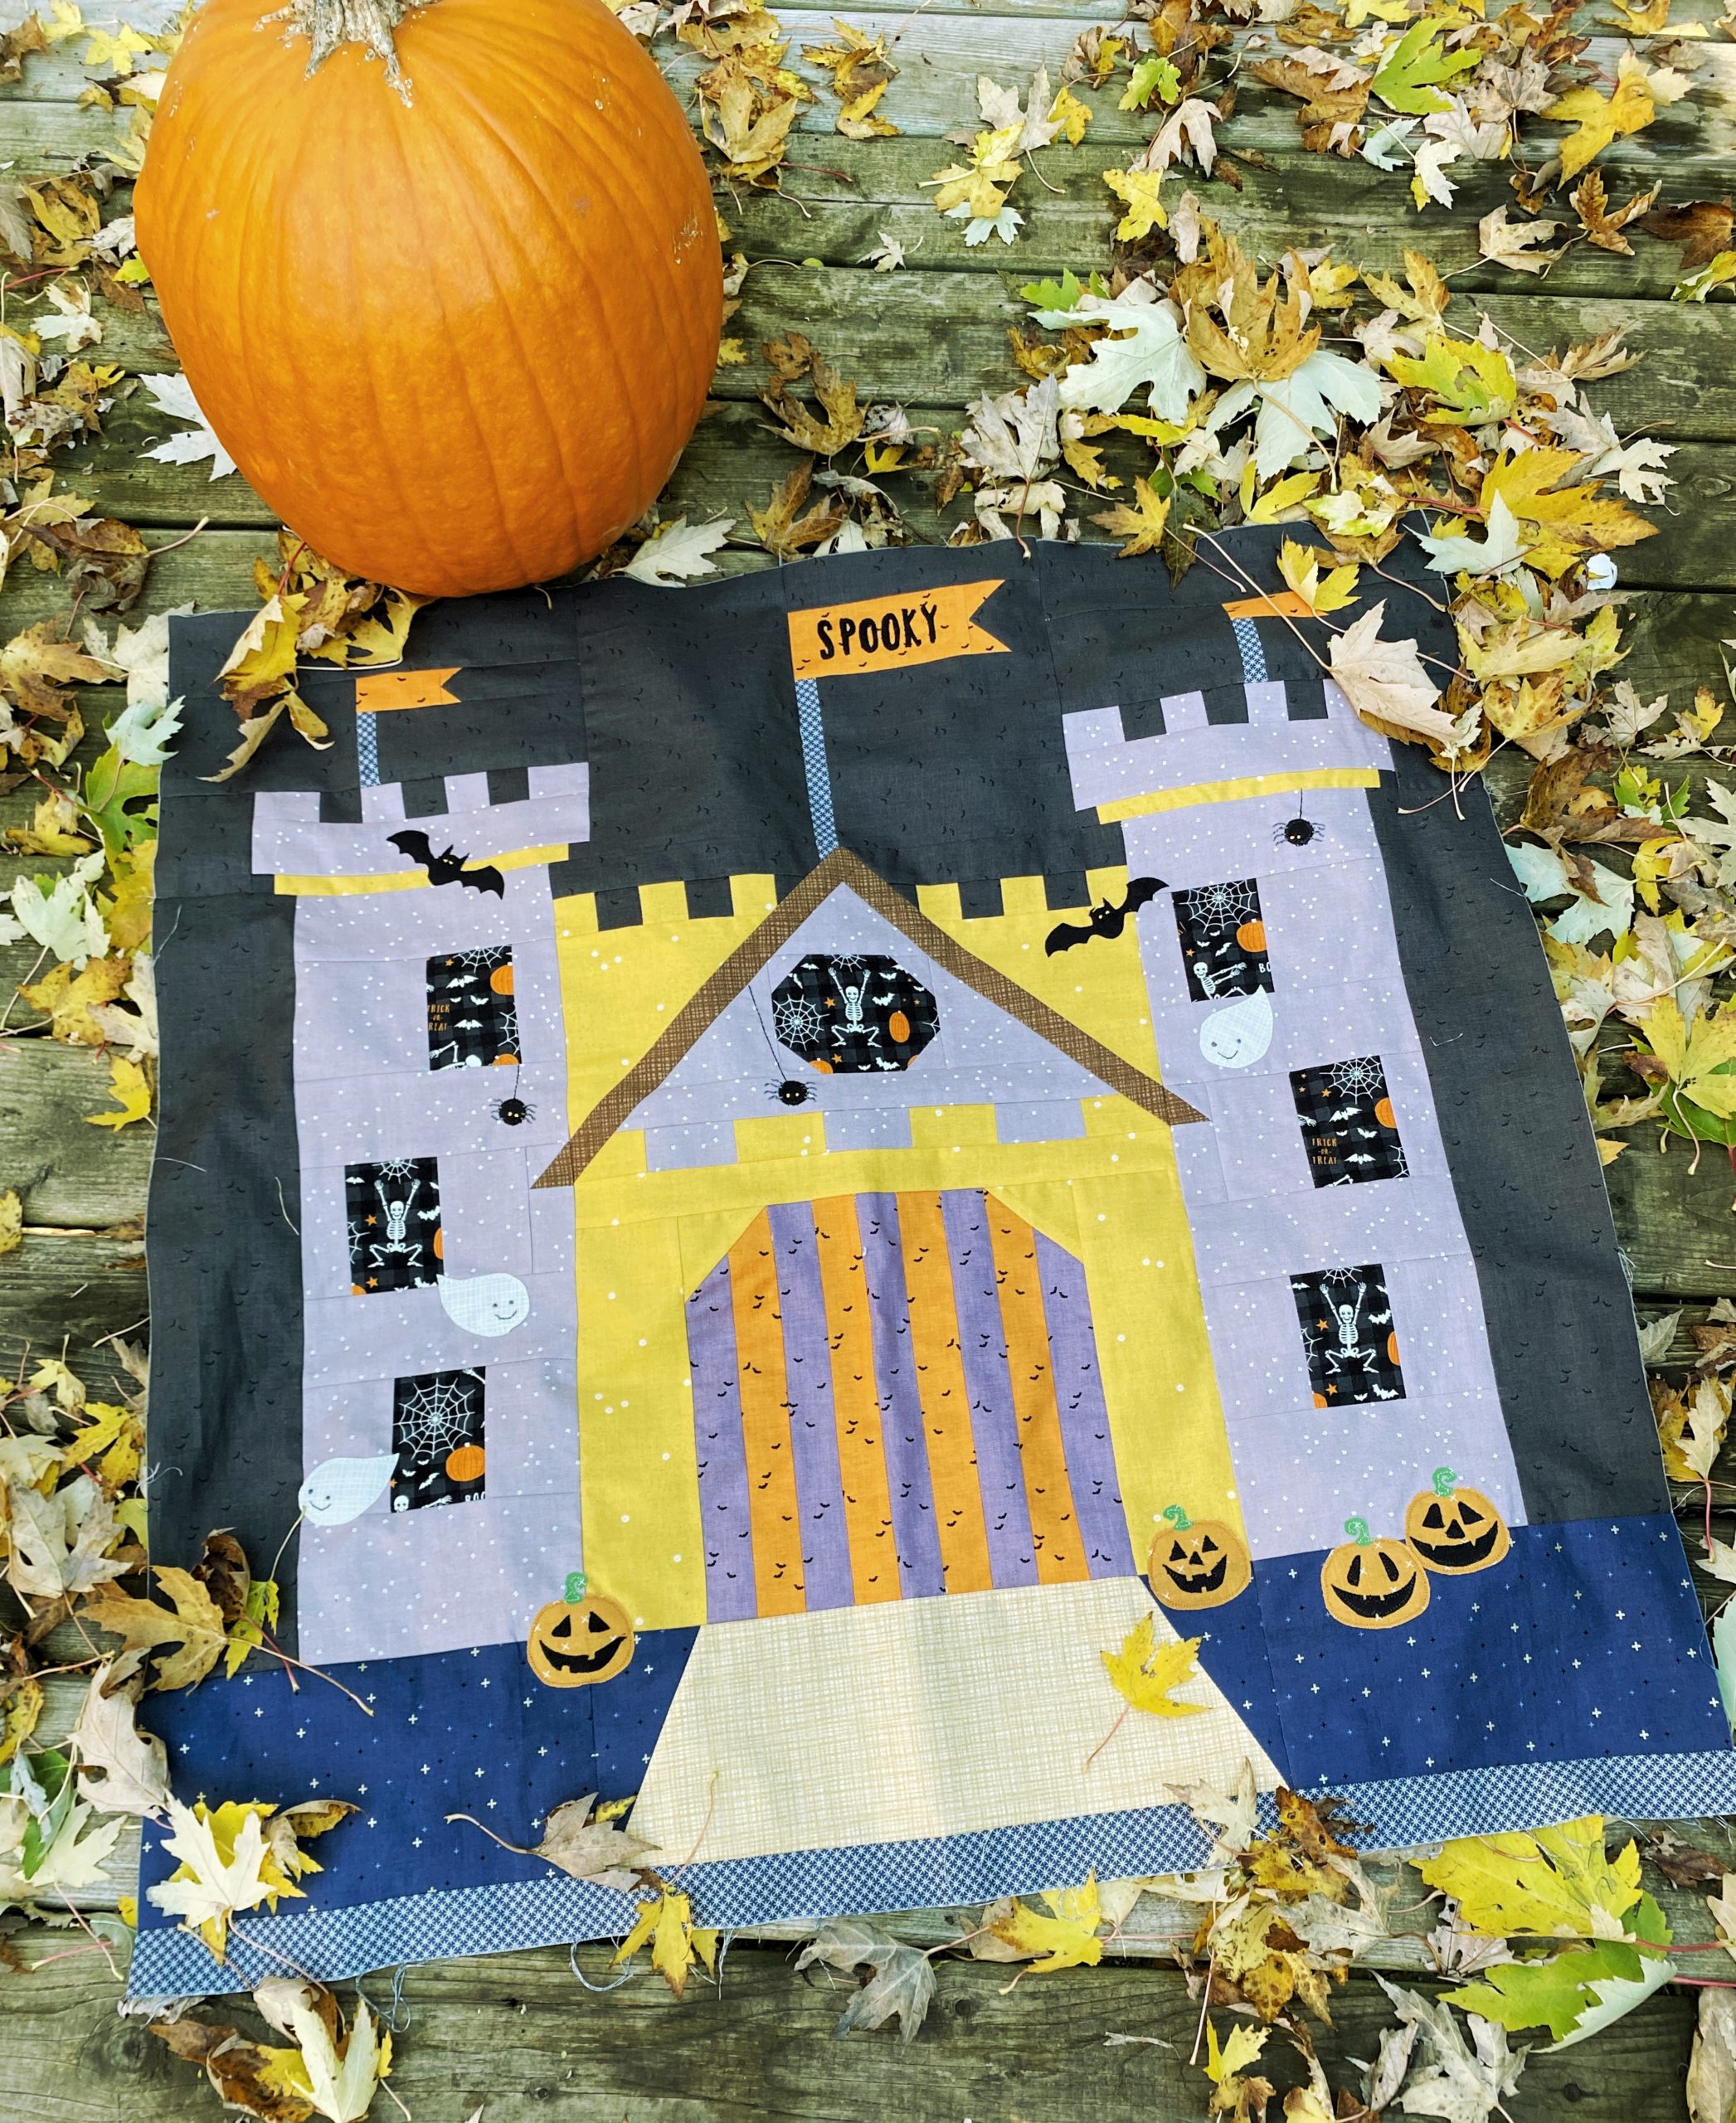
At Bee Sew Inspired this month, we released this Enchanted Castle Quilt Pattern. We had so much fun making the first block as part of the Enchanted Quilt that we decided to make a second Castle to be a wall hanging! The first castle we made integrates perfectly with all the other Story Blocks from Enchanted Story Quilt. The second castle we made became this adorable Haunted Castle – in a fun and not-so-spooky kind of a way – complete with ghosts, bats, spiders and Jack O’ Lanterns!
Imagine how pretty this would look as a huge throw pillow or a wall hanging using the colors you love for this time of the year.
Let’s get creative! Just gather the supplies below, then download the pattern/files. Don’t forget to share your project on social media using the hashtag #BSImakersclub and tag @beesewinspired
What You Need:

Patterns and Files:
Castle Quilt Pattern: Use the code “CASTLE20” for 20% off the pattern this month!!! https://www.beesewinspired.com/product-page/enchanted-castle-quilt-block
Applique Template Pattern: PDF template download https://www.beesewinspired.com/post/haunted-castle-applique-tutorial
SVG Cut Files: Optional SVG cut files if you prefer to have your cricut cut the shapes out for you. https://www.beesewinspired.com/post/haunted-castle-applique-tutorial
Tools
- Sewing Machine
- Rotary Cutter
- Quilting Ruler
- Self-Healing Mat
- Iron and Wool Mat
- Scissors
- Hand sewing needle
- Cutting machine such as a Cricut or ScanNcut (optional)
Materials
- Castle Block of the Month
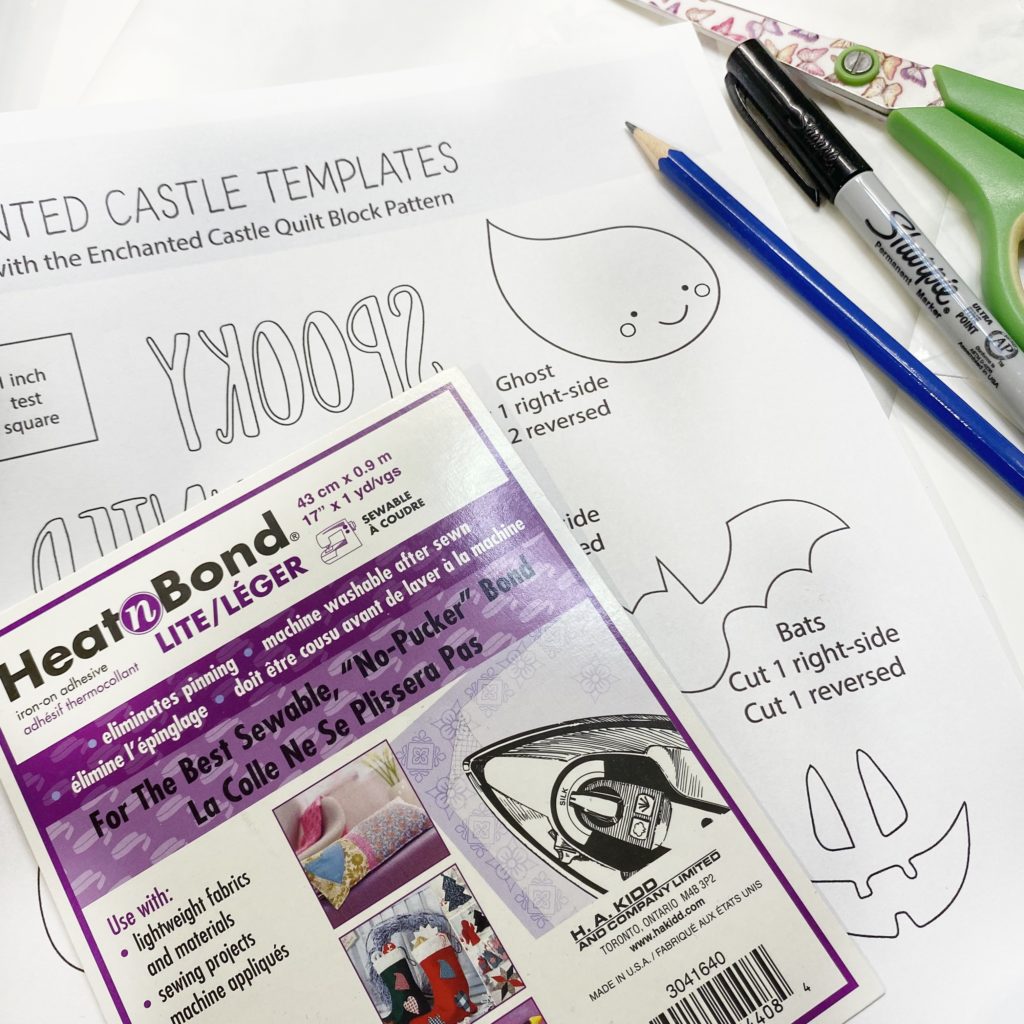
- Haunted Castle Templates
- Your favorite Riley Blake Designs Seasonal Basics
- Embroidery Thread in matching colors
- Thread
- HeatNBond Lite
Instructions:
1. Download the Castle Story Block of the Month by Bee Sew Inspired. Print out the pattern in Adobe Acrobat Reader, if you don’t already have this on your PC it is FREE to download. Use the 1″ test square on the pattern template page to make sure the pattern is the proper size! Assemble the Enchanted Castle Quilt Block. Read the Castle Quilt Tutorial HERE.
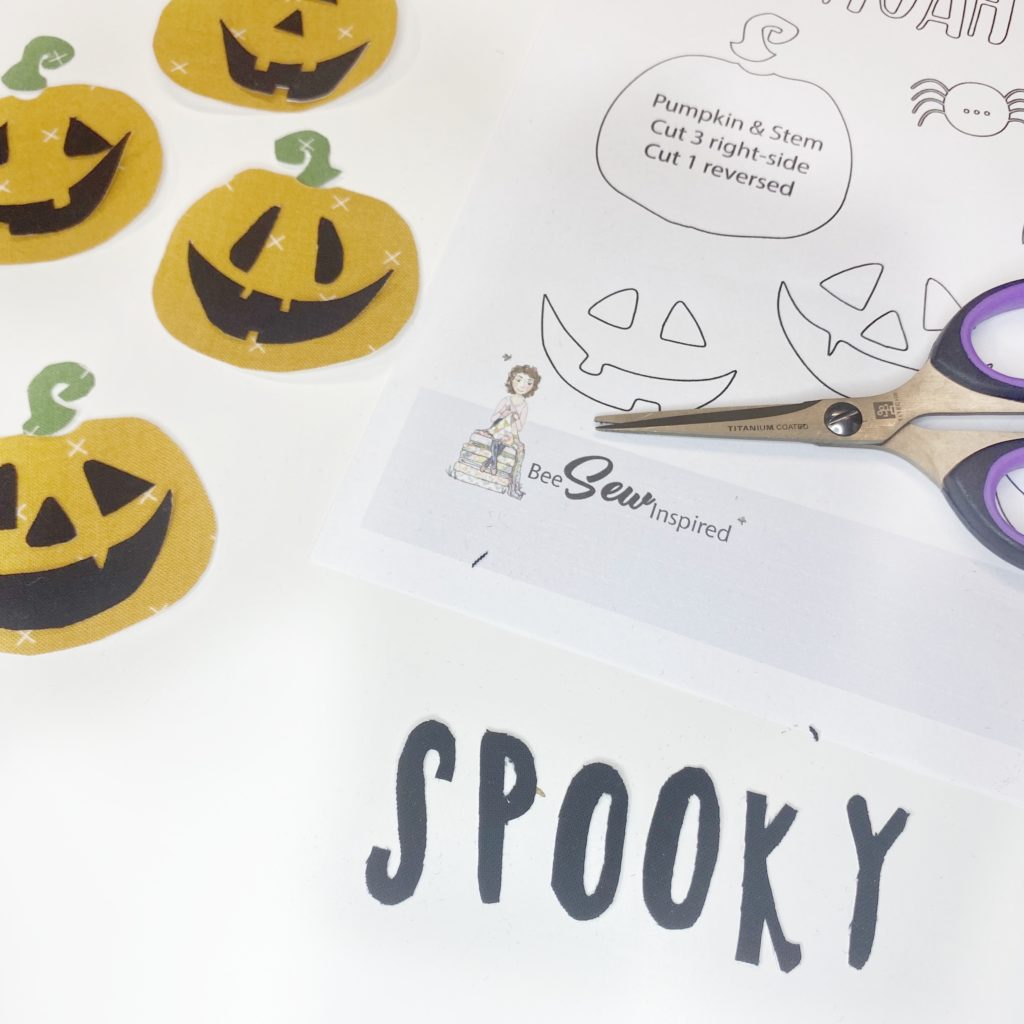
2. Print out the templates to create your Haunted Castle. We’ll be using these templates for a raw edge applique technique.
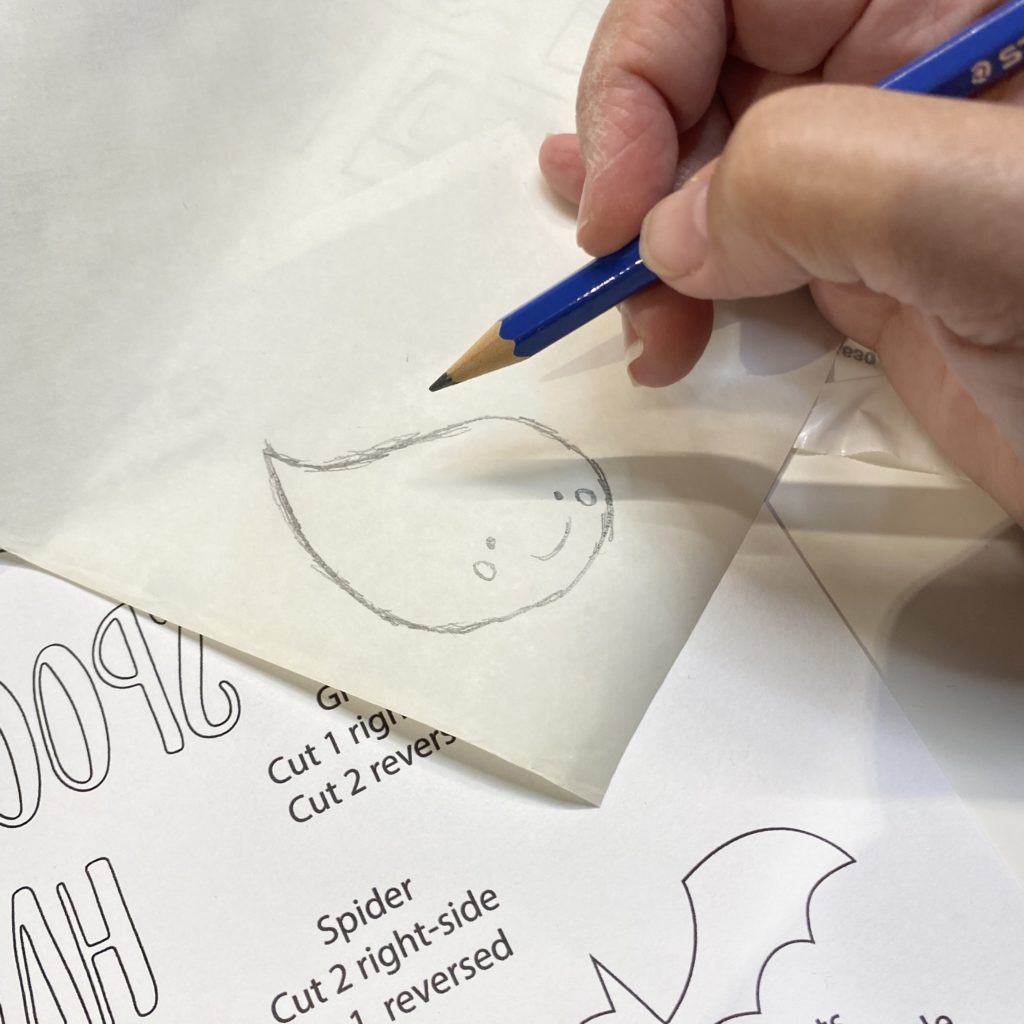
3. You can use a light box to trace out the shapes directly on the paper backing of the HeatNBond Lite. If you don’t have a light box set yourself up at a window, tape the template sheet to the window and then the layer of HeatNBond Lite so the natural light will help you trace the shapes. You can also cut out the templates and trace the contour of the shape with the help of your cut out.

4. Fuse the HeatNBond to the back of your fabric and trace out the shapes on the paper backing of the HeatNBond. This makes it much easier to cut out tiny shapes with accuracy.
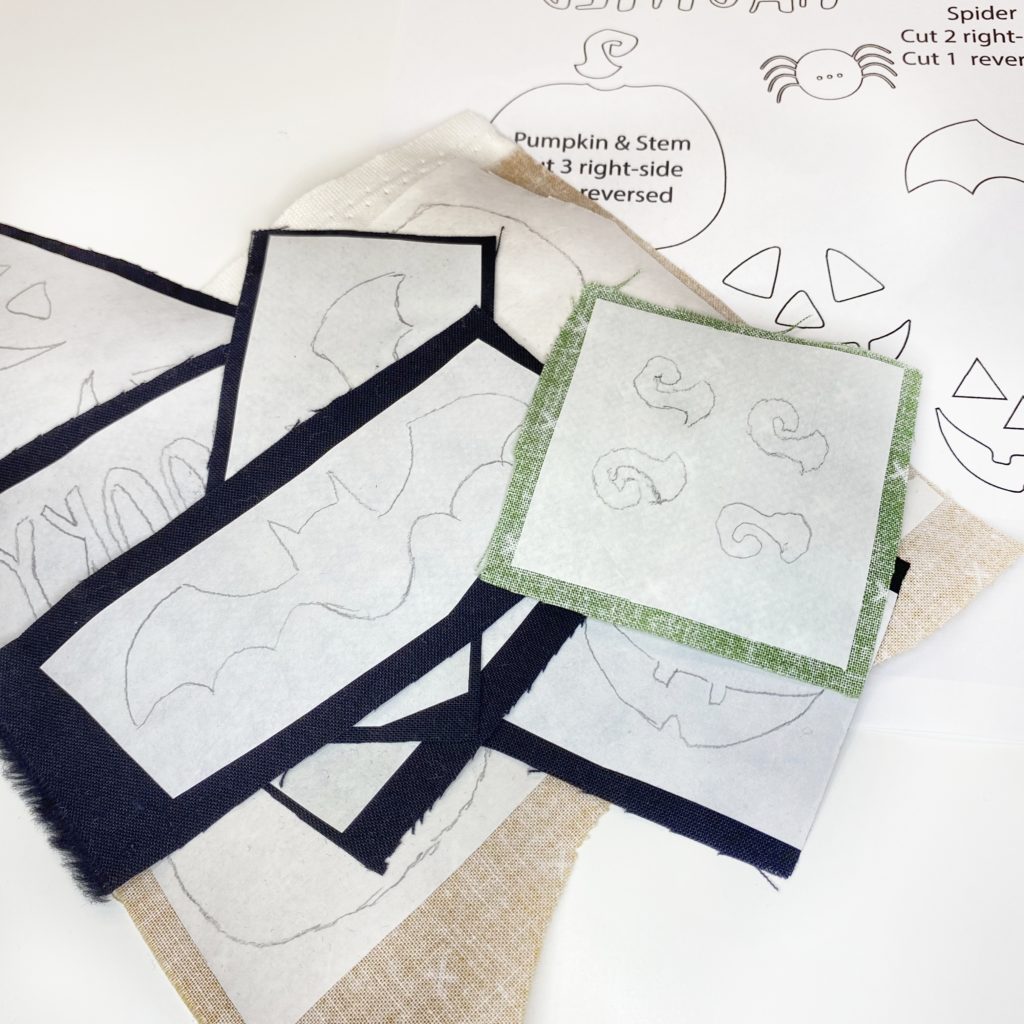
5. Once all your shapes are traced and fused to the fabric you’ve selected, you can relax on your favorite chair and cut all the shapes out on the drawn lines. Now you are ready to play!
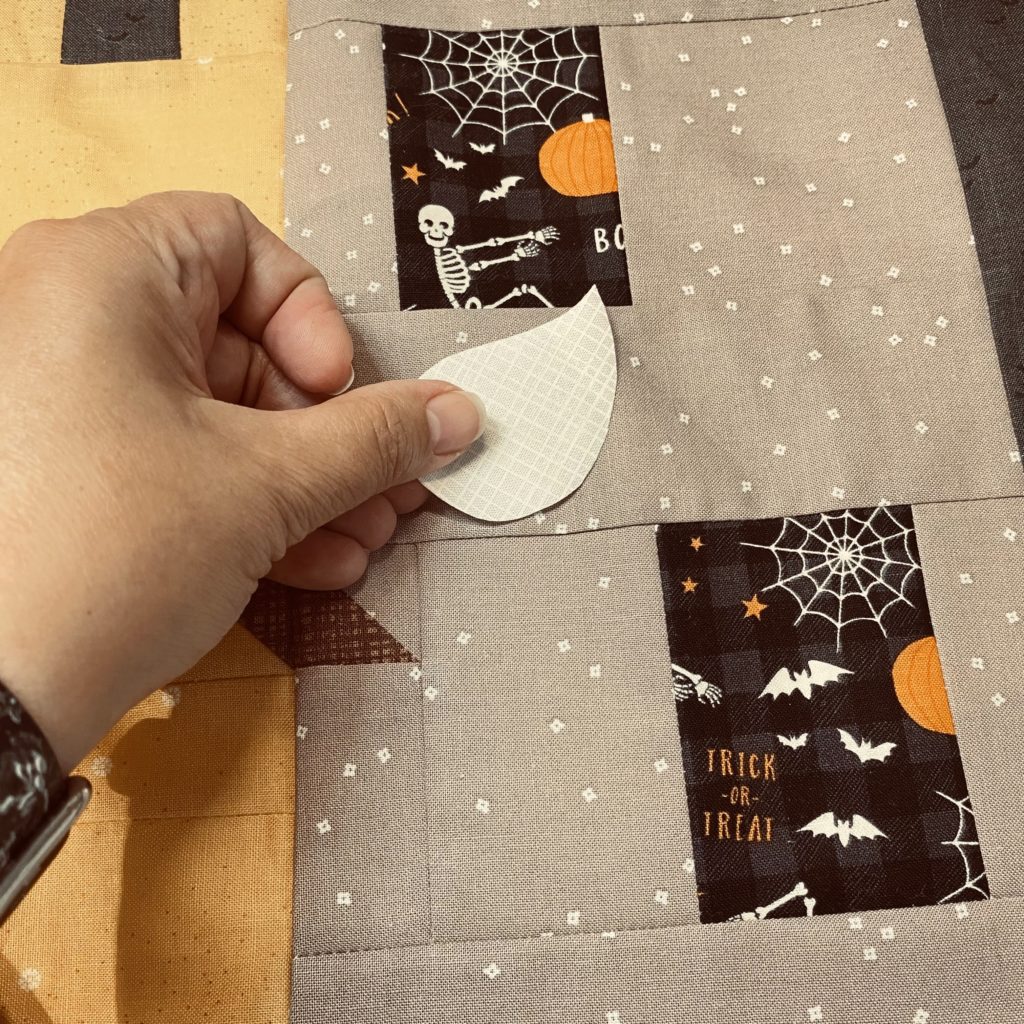
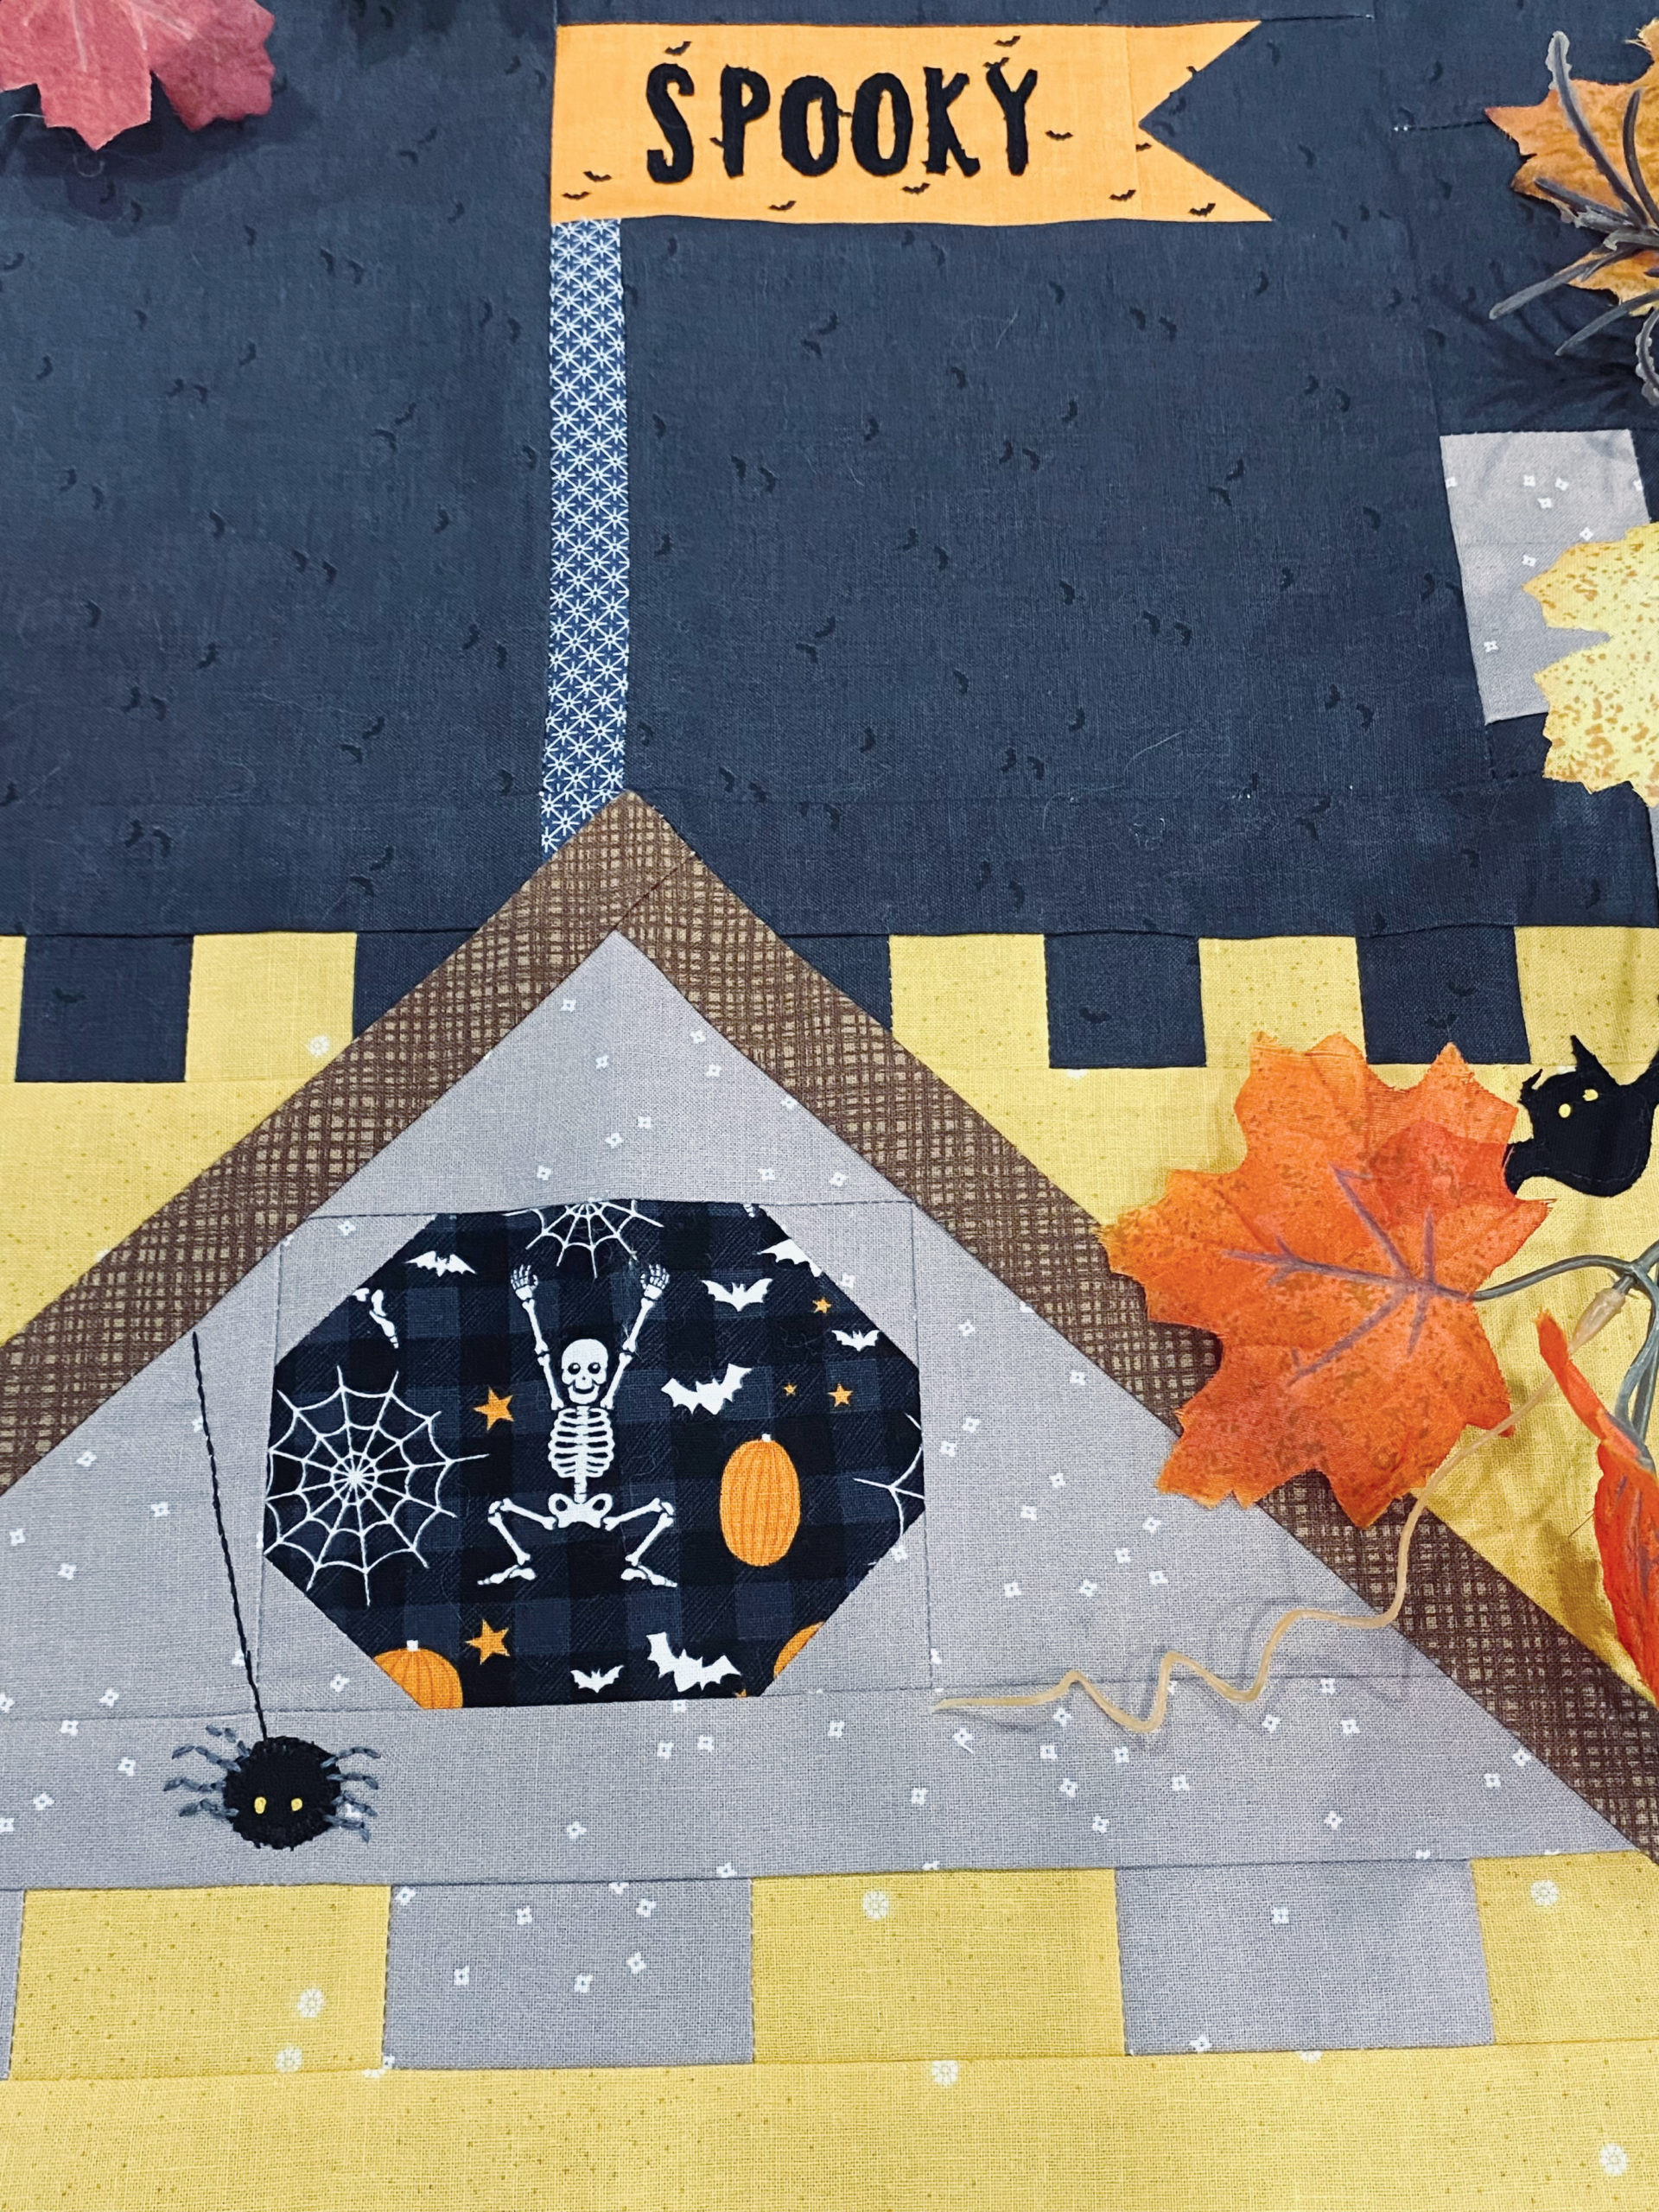
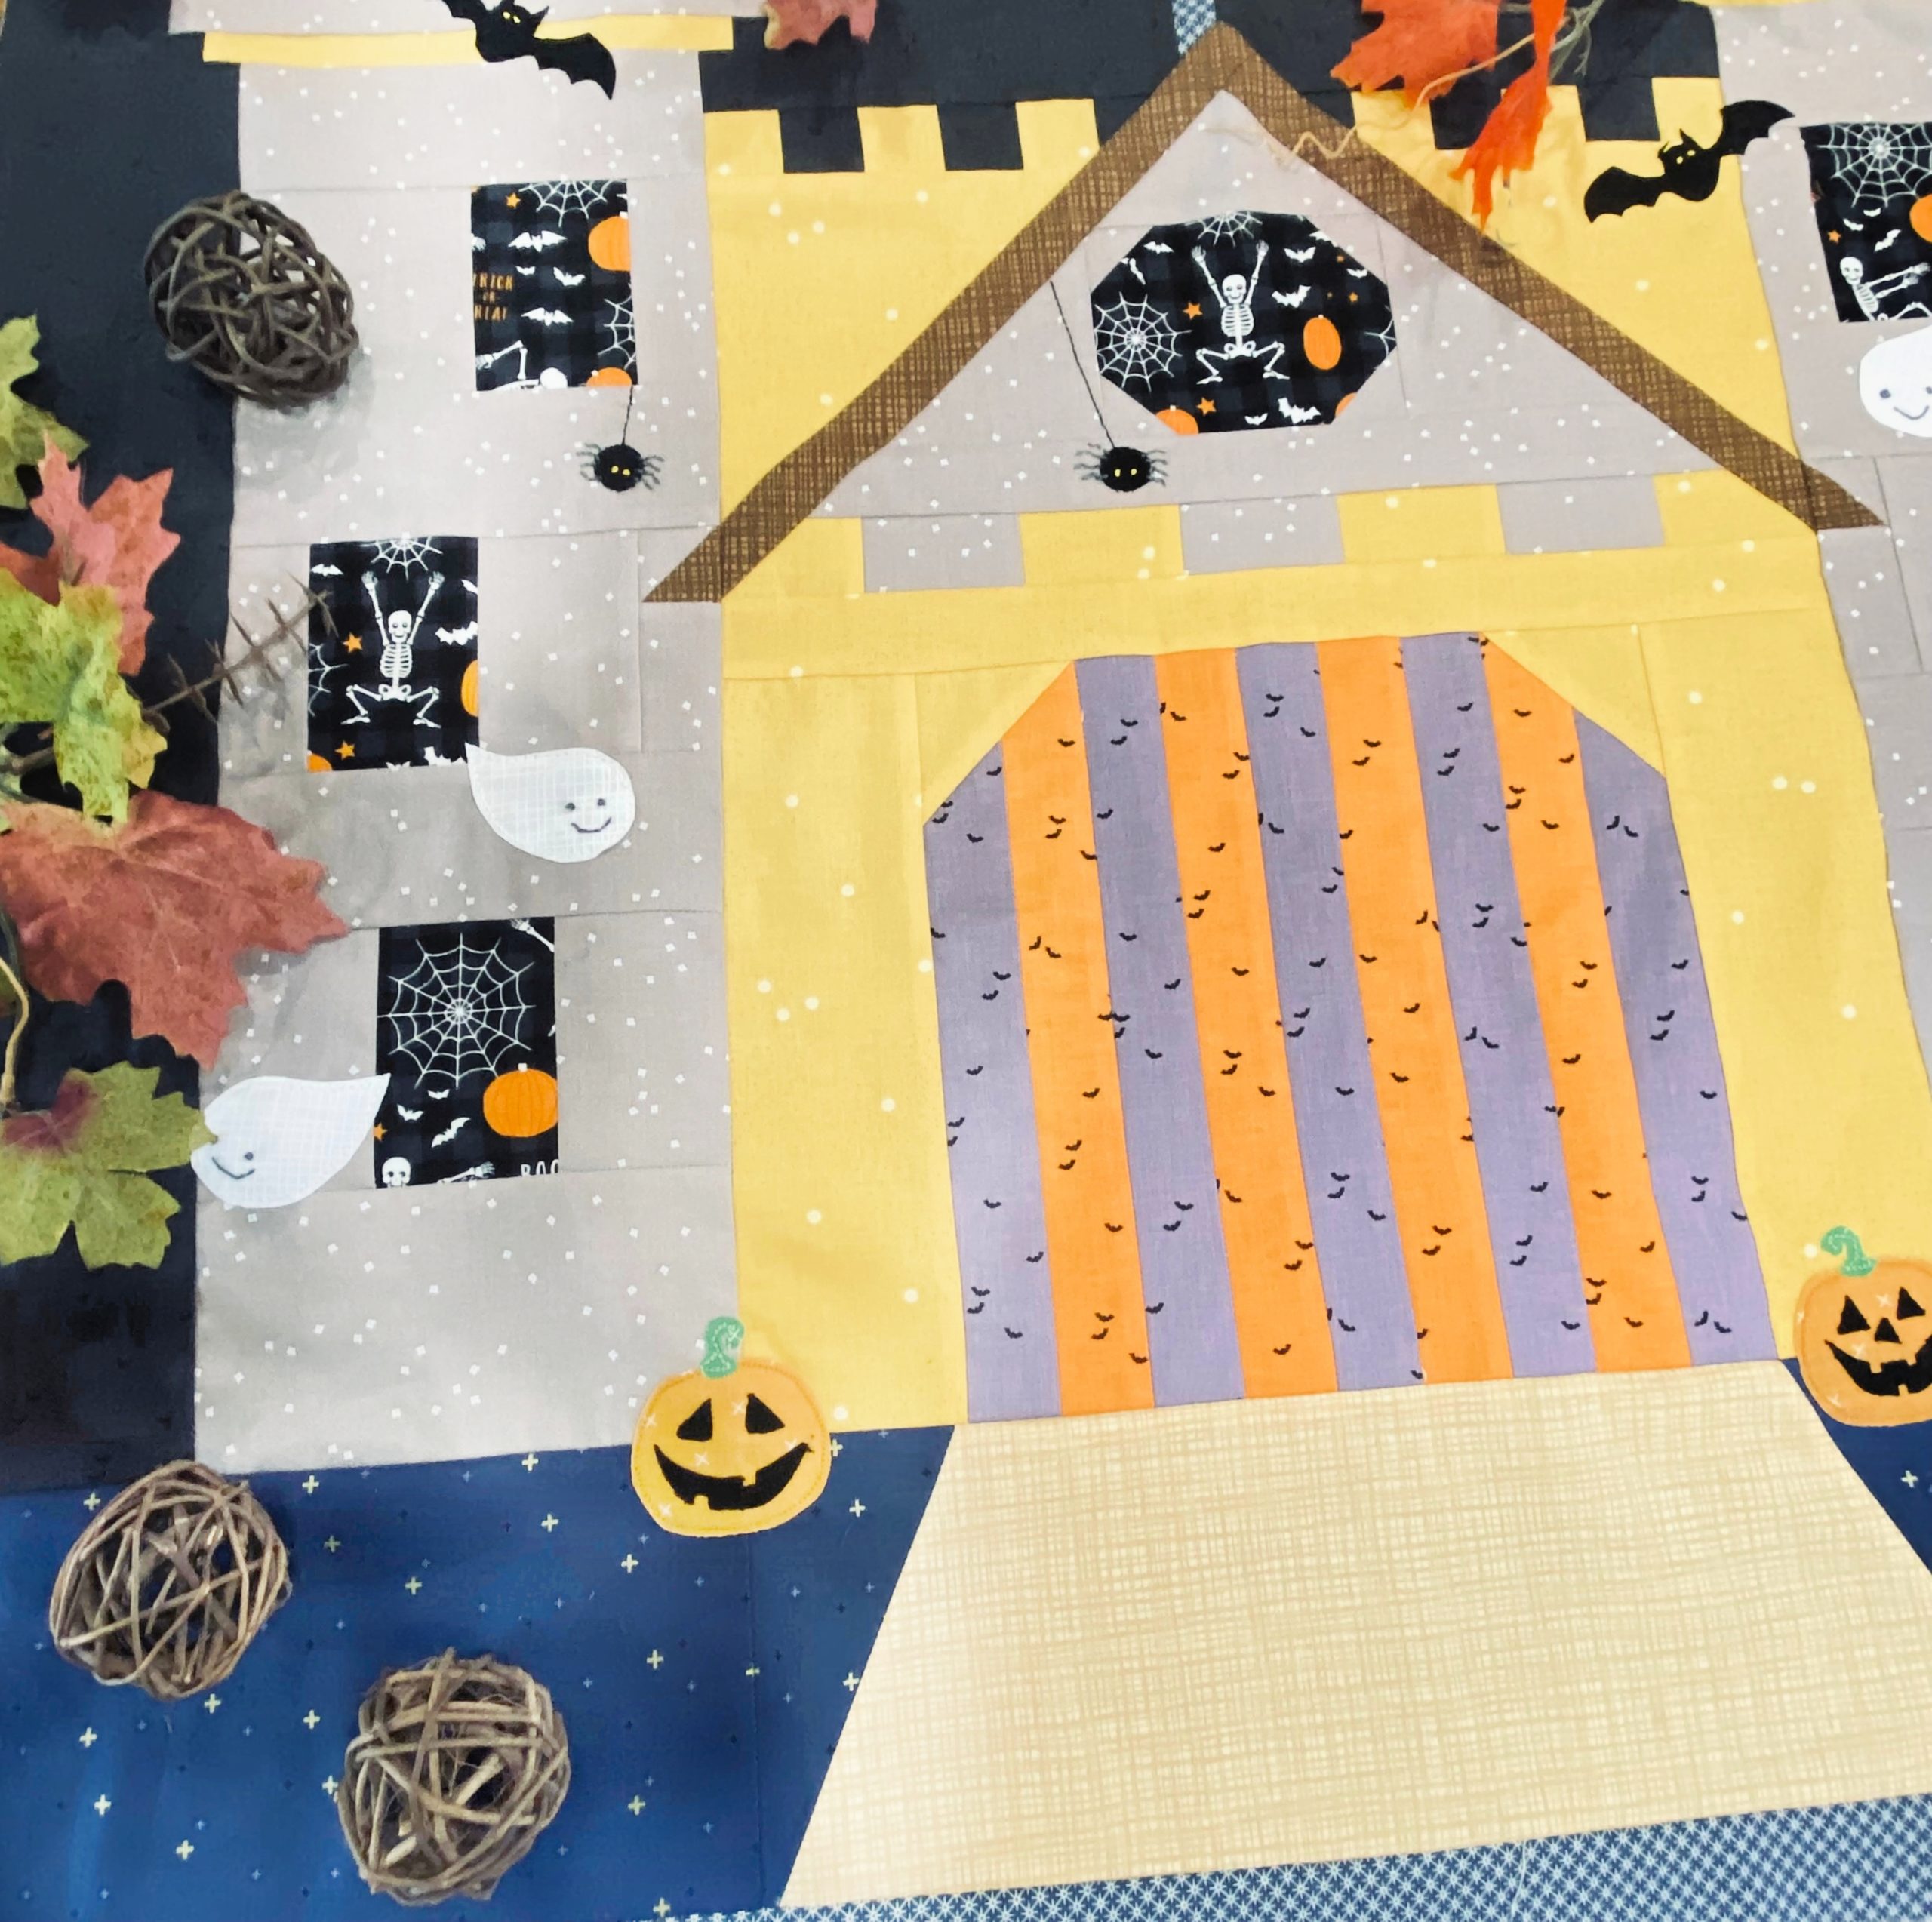
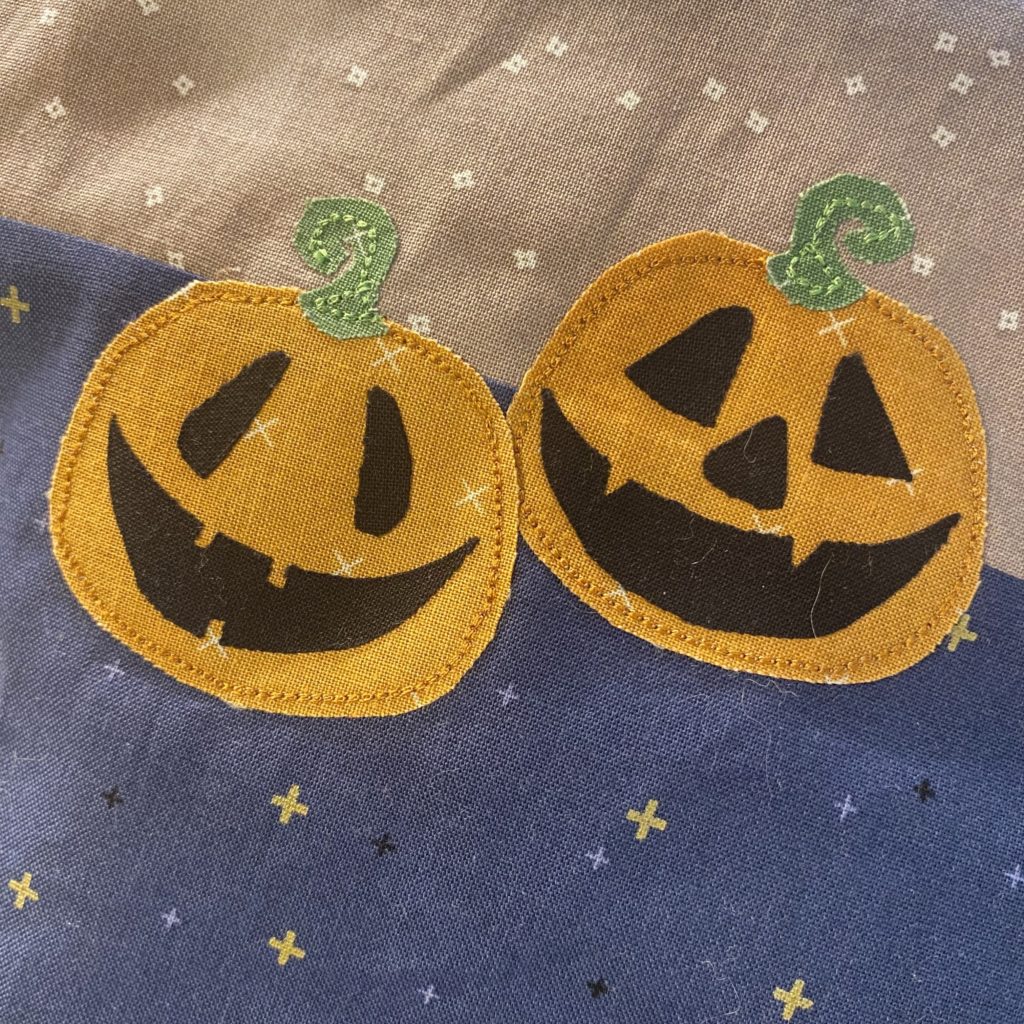
6. Play around with the placement of your shapes. You can make more Jack O’ Lanterns than we have shown here in the example or you may want to omit the spiders in your Haunted Castle. It’s all up to you!
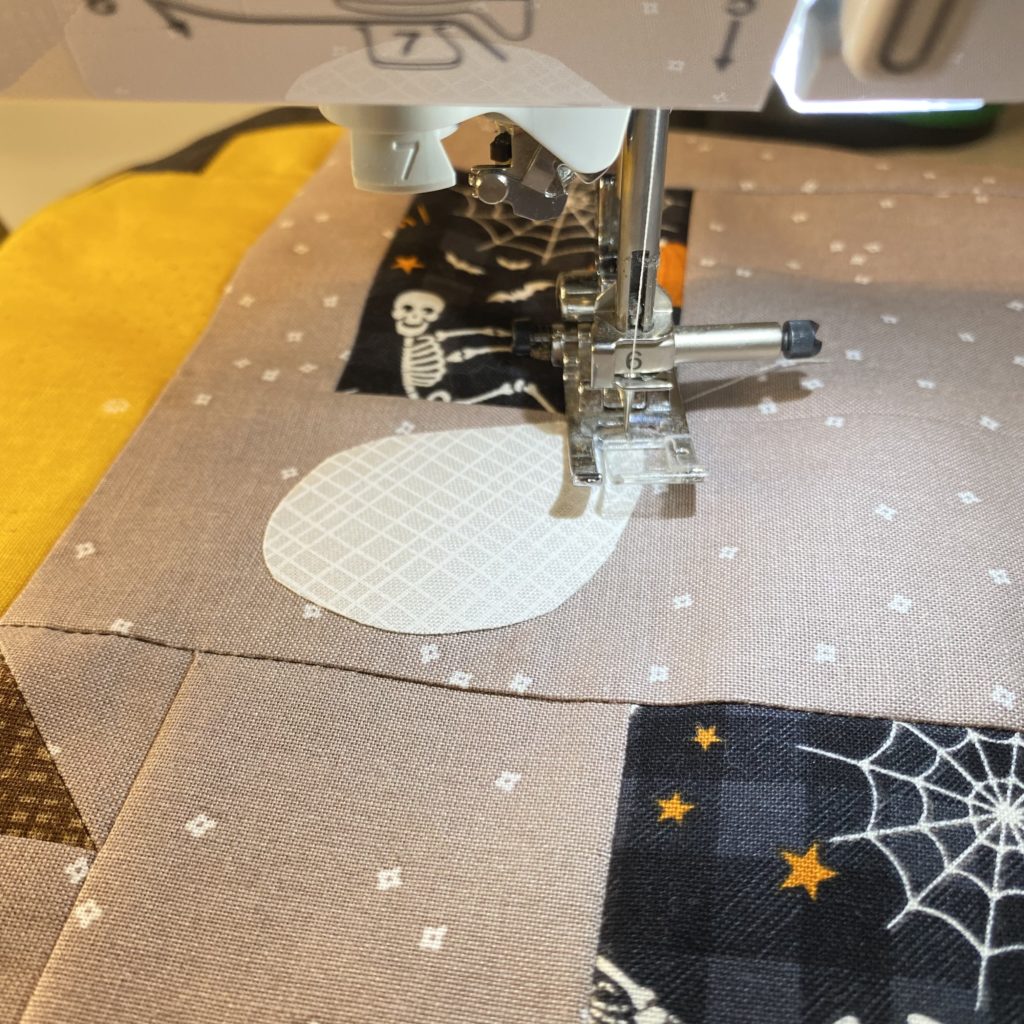
7. Once you’re happy with the placement of all the elements to be appliqued, remove the paper backing and fuse into place using your hot iron. You can now embellish using a blanket stitch around your objects or a triple stitch to keep everything in place. Work slowly for more accuracy in stitching into place.
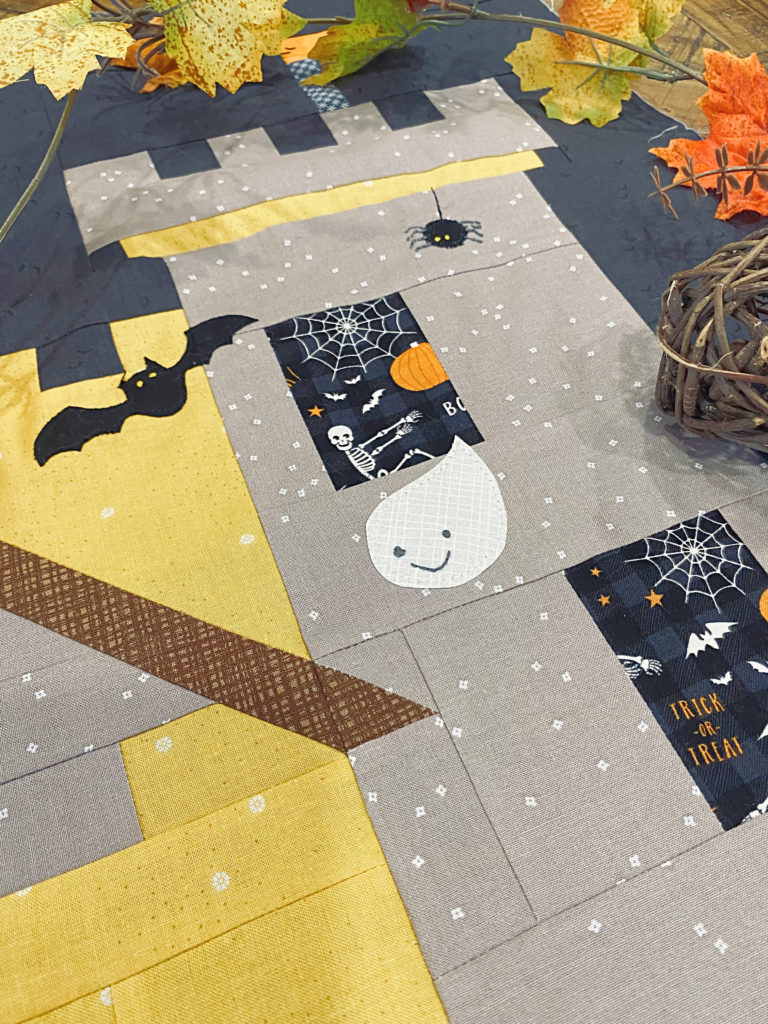
8. All your spiders, bats, and little ghosts are in place but we need to add detail to them! Using an embroidery needle and 2 to 3 strands of embroidery floss make French knots for the eyes and use a backstitch to create the little spider legs and the ghost’s smile. Use the templates to transfer the spider web details etc for embroidery.
Your Haunted Castle Quilt Block is complete!
Thank you so much for joining me today on the Riley Blake blog! If you like this tutorial, please consider signing up for my weekly newsletter at www.beesewinspired.com/sign-up
See you next time! Jennifer Long www.beesewinspired.com