 Hey y’all. I’m Melissa, from Melly Sews, and I am THRILLED to be part of the Riley Blake Project Design team! So, for those of you who don’t know me, I’m pretty picky about details. And I’m going to share a scary photo now – consider yourself warned about the original state of my ironing board.
 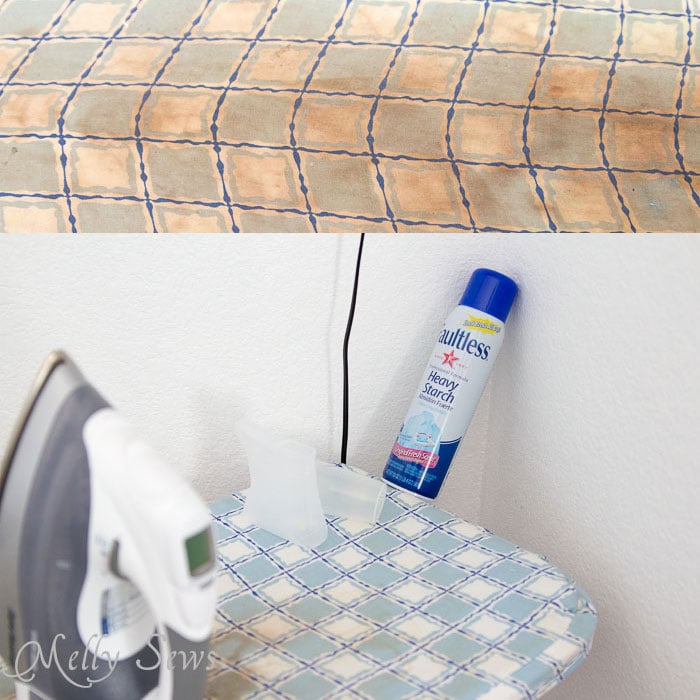 I’m kind of embarrassed by how bad that looks. Therefore when I started thinking about my first project, this one was an obvious eyesore in my pretty new studio. In addition to the ugly discoloration on my original cover, which is probably over 15 years old, I had this issue where the starch and water cups (for pouring water into the iron) kept falling off the end or getting in my way. So I not only wanted to do an ironing board cover, but also a storage pocket to keep these items close at hand but off the top of the board. “But Melissa,” you might be wondering, “Why didn’t you just buy a new cover? Or use one of the many tutorials out there to make yours?” Both valid questions. But remember where I said I’m picky about details? So 1) I didn’t like the ironing board cover prints and 2) I like my ironing board cover to be on TIGHT and firm. Which leads me to the answer to the second question – I didn’t use one of those tutorials because to get an ironing board cover on as tight as I like it, you have to do some more seaming than the cover tutorials that pop up first. So, are you picky about details too? Then let’s sew. I promise this way doesn’t take too much more time than tracing your ironing board and adding elastic, but it’s more firm, tight, and since I probably won’t change it for another 15 years, worth the time, effort and pretty Riley Blake Houndstooth fabric I got to use. For the ironing board you’ll need:
- 2 yards of fabric
- 3 yds drawstring cord
- 1/2″ wide double fold bias tape (I made my own out of the houndstooth fabric)
- This pattern piece
- 1″ wide hook and loop tape (like Velcro) – 2/3 yd
- 2 1″ wide strap slides
For the storage pocket you’ll need
- 1/2 yard each of main and contrast fabrics
- More 1/2″ wide double fold bias tape
To start, take the cover off your ironing board. You may want to keep it (or at least the padding from it) to go under your new cover. If you don’t keep the padding, you’ll want to add quilt batting to your materials shopping list. Lay your ironing board on the fabric, and trace around it, adding a 1/2″ seam allowance. 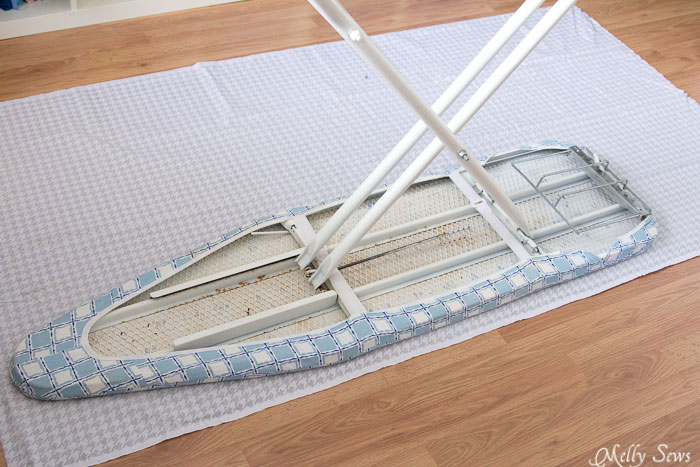 Trace just the pointy part of your fabric again, and cut out around the middle according to the dimensions to create the bottom portion of the narrow end.
 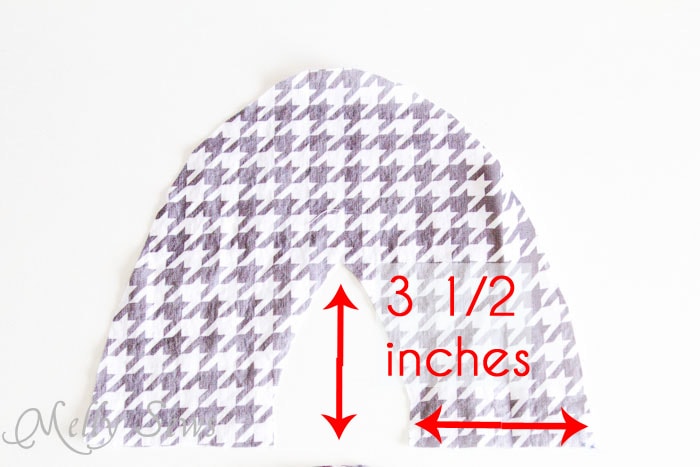 Cut 2 strips of fabric that at 3 1/2″ wide by 42″ long – these will go down the sides on the underside. Finally use the pattern piece (in the materials list above) to cut 2 for the rear corners. To assemble your cover, first sew the short ends of your 42″ long strips to the bottom edges of your point piece. Sew this to your top cover around the side edges, with a 1/2″ seam allowance.
 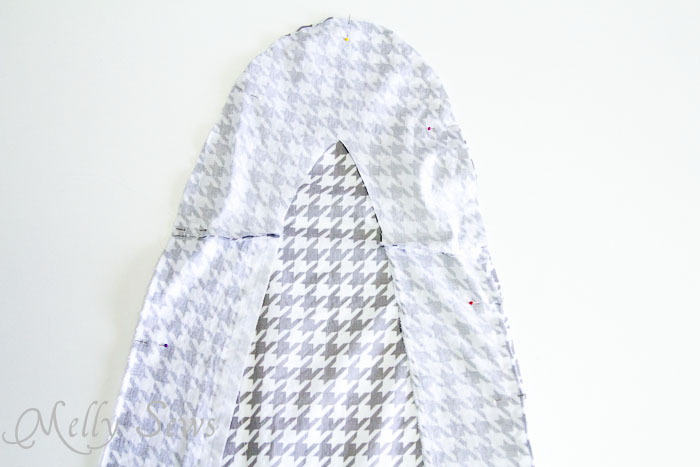 Pin your bias tape around the remaining unseamed edge of the underside. Sew down one fold of bias tape. Place your cord inside the bias tape, then finish folding it and sew down the other edge, making sure not to catch the cord in your stitching. You should have cord hanging out on both sides of your cover. Don’t sew across the ends of the tape – you want to leave the tape an open tube to pull your drawstring through. Need more hints on how to sew on bias tape? Check this post.
 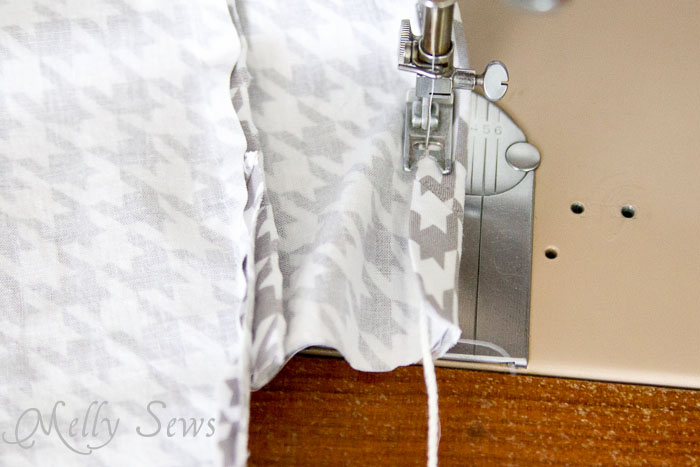 Finish the marked edges of the rear corners with bias tape. Pin the rear corners to the top cover as shown below, creating small 1/4″ pleats to get the corners to fit the top cover. The two pieces will overlap for about 1″ at the back, and will overlap the side pieces at the sides. Stitch, using a 1/2″ seam allowance.
  Use a safety pin and tie the cord that you left hanging out of the side piece around it. Make a small snip through the outermost layer of bias tape on each rear corner, and thread the safety pin into the bias tape. Make another snip for it to exit at the center back of the ironing board cover.
 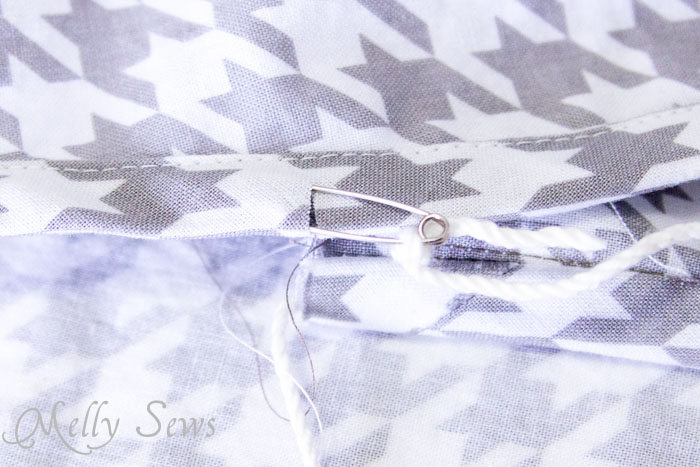 OK, if you’re just doing an ironing board cover, you’d sew on the velcro (scroll down for that step) and turn it right side out and put it on your ironing board. But since we’re also sewing a pocket, we’re going to do some more sewing before putting this cover on the board. Cut out your main and contrast pocket pieces to these dimensions.
 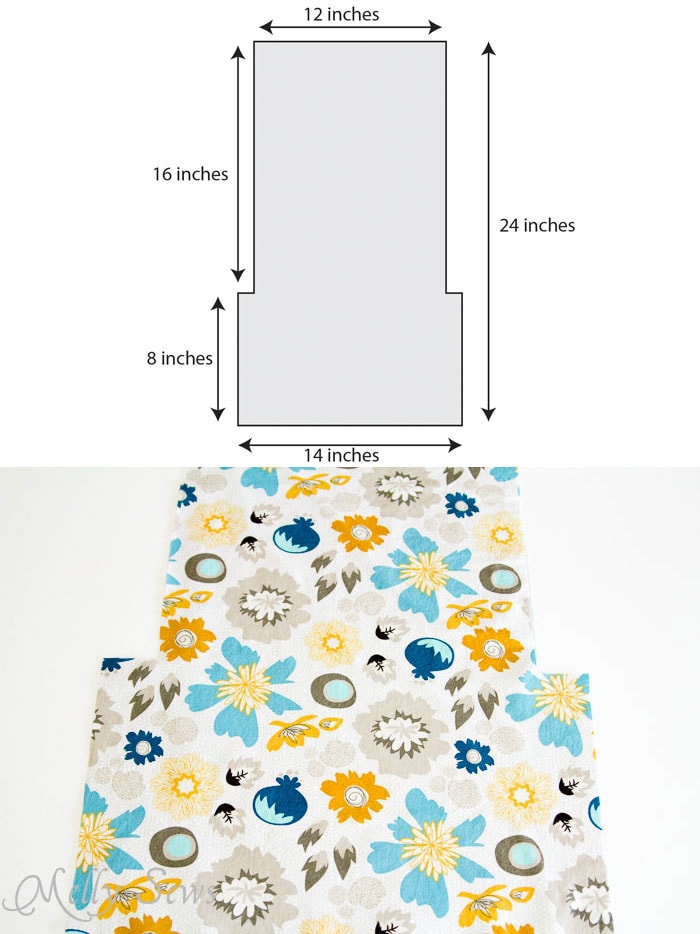 Place the two pieces right sides together and sew along the 14″ side. Turn right side out and press that edge. You can even toptstitch it to keep it from rolling if you want. Next, your going to fold those cutout corners together. This gives the pockets some depth. Follow the red arrows to fold; the black arrows indicate the next step.
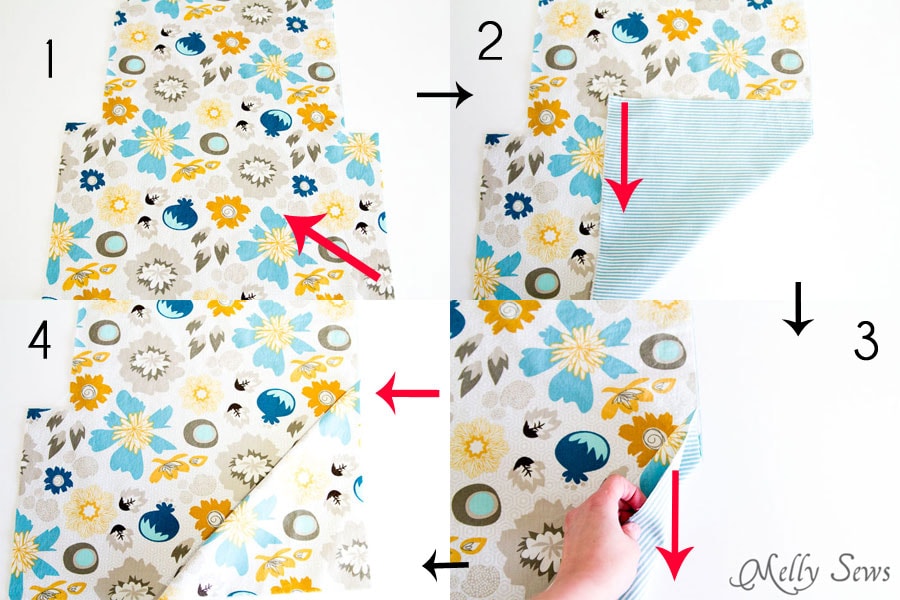
So you’ve basically made a large pleat at a 45 degree angle. Using a finger to hold those folds in place, now fold the 14″ finished edge of the pocket all the way up, so that the point indicated by the red arrow in step 4 becomes the bottom corner of the pocket. Pin.
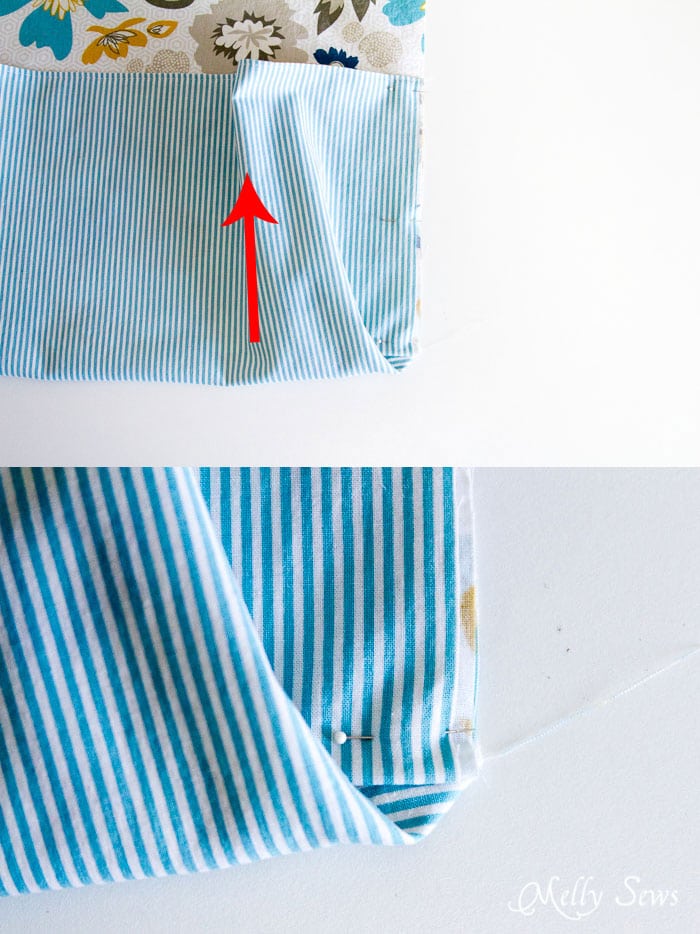
Repeat this on the left side of the pocket, so both sides of the pocket are straight. Pin bias tape down both sides, folding the bias tape 1/4″ to the wrong side at the bottom.
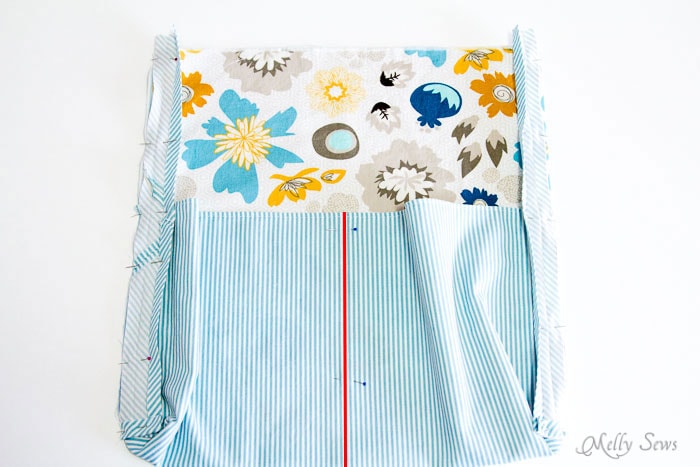
Then mark the center of the pocket (red line), so that you can stitch the dividing line and make the large pocket into two sections. Stitch the bias tape in place and stitch the center line.
Reinforce the top center of the pocket by stitching what I’ve always called a “chicken claw” – you stop about 1/2″ from the top edge with the needle down, lift the presser foot and turn the fabric slightly, stitch at an angle and backstitch on the same angle to your starting point, then stop with the needle down, angle your fabric the other way, stitch and backstitch to the starting point, then sew straight and backstitch to finish off.
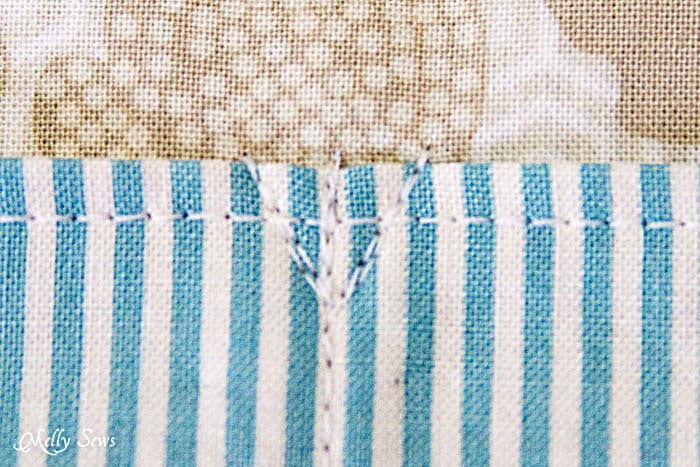
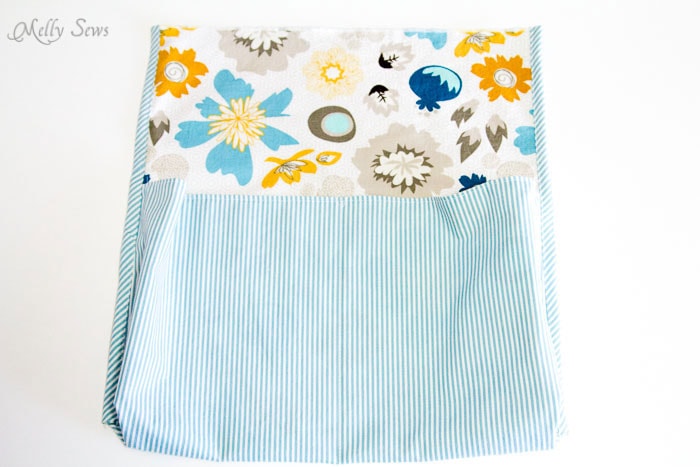
Here’s what your pocket should look like – two compartments with bias tape down the sides. The top edge is unfinished because that’s going to be sewn to the ironing board cover.
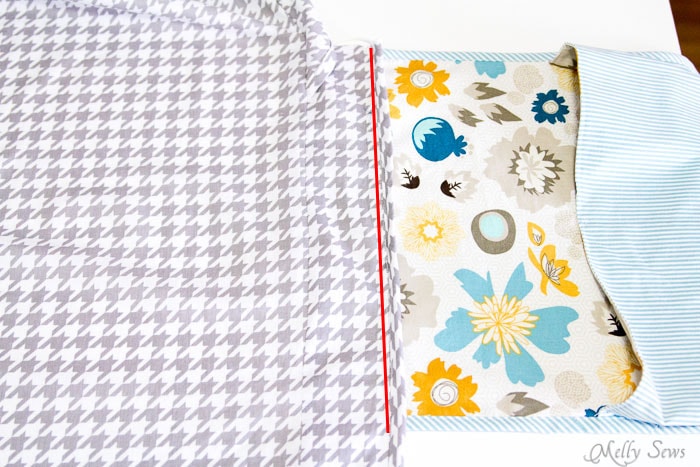
Stitch the pocket directly above the bias tape on the side you want it to hang from. I stitched two lines 1/8″ apart to reinforce this.
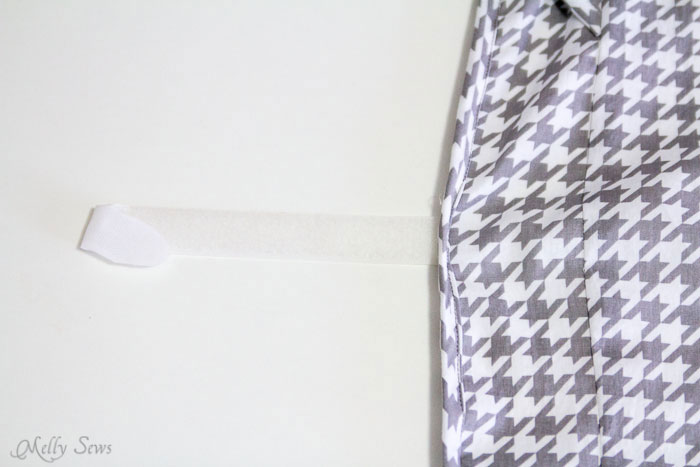
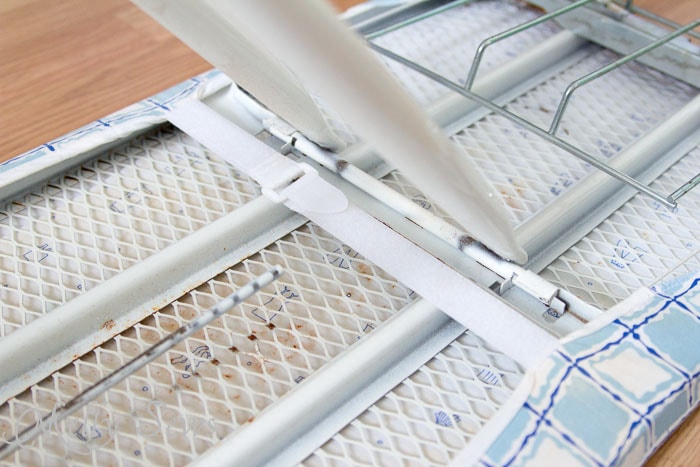
Next mark the crossbars of your ironing board on the cover, and stitch the hook and loop tape at those places. Cut the velcro into 12″ pieces, and sew both of the hook pieces on one side. Push the end of the loop side of each piece through one side of each strap slider and stitch before sewing the loop sides onto the other side of the cover, directly across from the hook tape pieces.
Now put the cover on your board. Use the hook and loop tape pieces to hold it securely (and tightly) in the middle – you can see how this worked with my old cover – it’s the same way with the new one.
And tighten the drawstring at the rear as tight as possible before knotting it. Now your cover should be very fitted and tightly on your board.
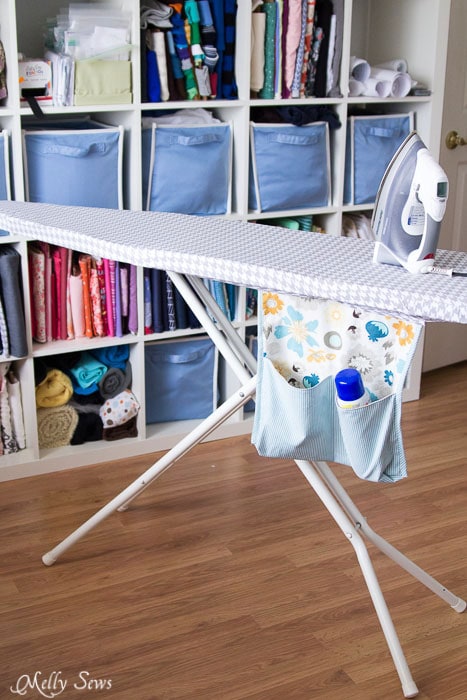
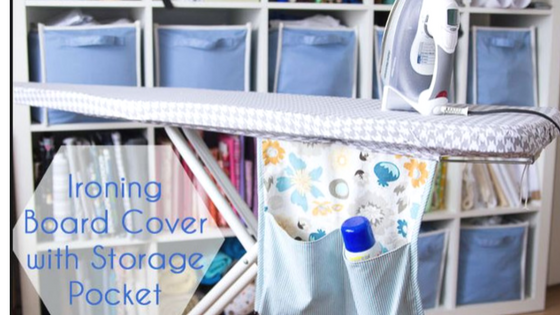
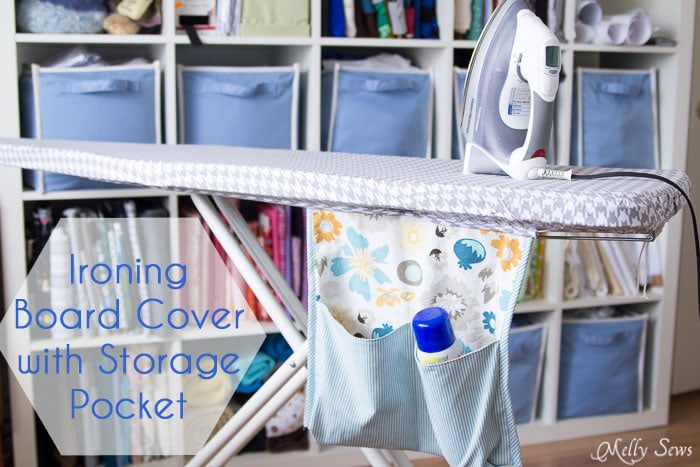
With a super cool pocket hanging down!