
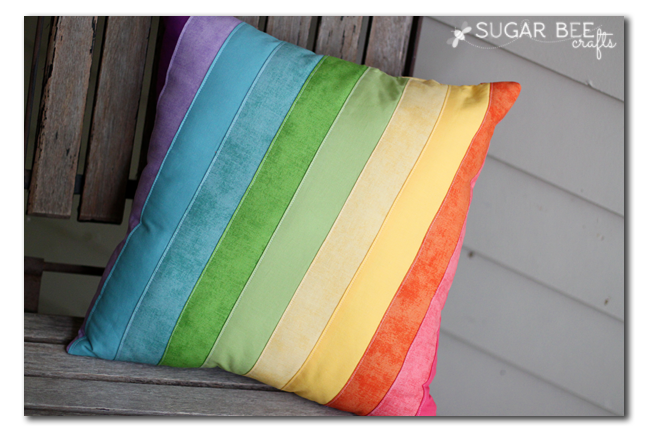
Hi Everyone! I’m Mandy and I blog over at www.SugarBeeCrafts.com– come check it out! Today I’m showing off a super fun Quilted Rainbow Pillow that I made using a Rolie Polie pack from Riley Blake – I just love using precuts – it makes everything that much easier 🙂
I orginally planned on some fun fabric to back the stripes, but I ended up loving the look of stripes on both sides so that’s what I went with – – both ways are cute though!
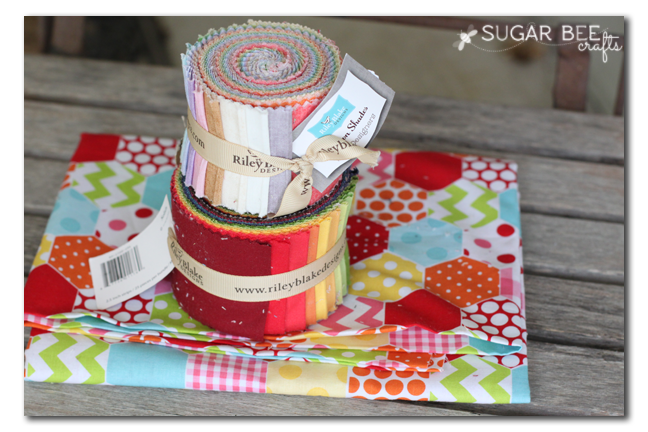
First you will want to lay out the precut strips of fabric in rainbow order. I used a mix of strips from both sets show above. I pulled out the brightest colors that were calling to me.
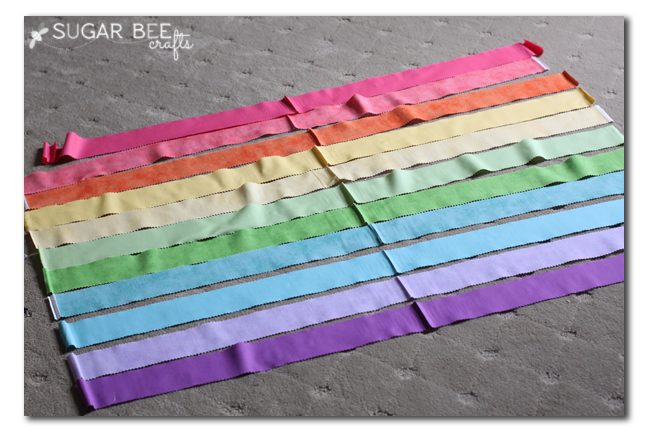
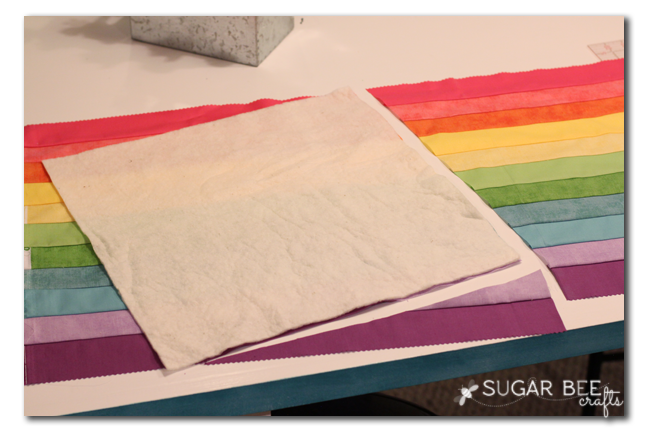
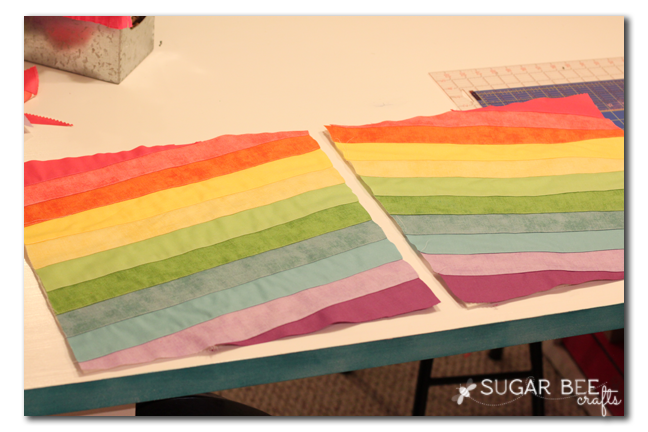
Then simply sew all the strips together – just straight-line sewing! After seeing them together, I knew I wanted a slight slant on my stripes. That comes in the next step. Cut a piece of batting to the size of pillow you desire. Then use that batting as a template, set it on a slant across the strips that you just sewed, as shown below. Then cut around it. Repeat for other side of the pillow.
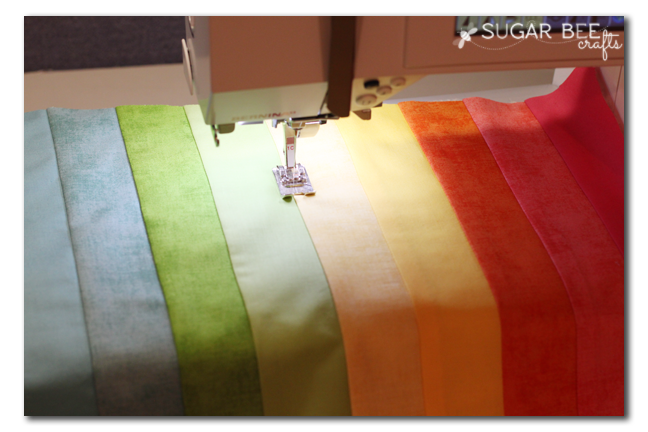
Next comes the “quilting” – don’t be intimidated! It’s just sewing on the top of the fabric. With the batting underneath, sew along the edge of each of your strip seams. It will give the pillow an overall more finished look. Repeat for other side.
Almost there!
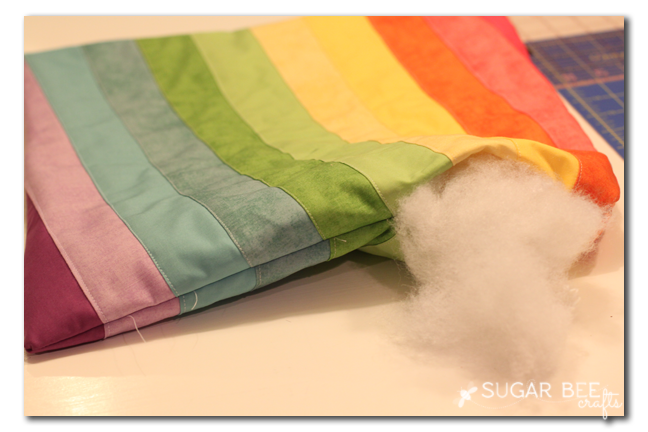
With right sides together, sew the front and back of the pillow together, leaving a small opening one one edge. Turn right-side out through that opening. Insert stuffing through that opening, making it nice and full.
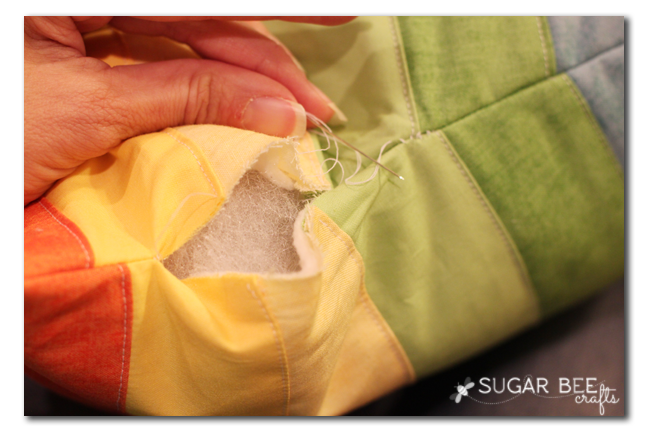
Whip stitch the opening closed.
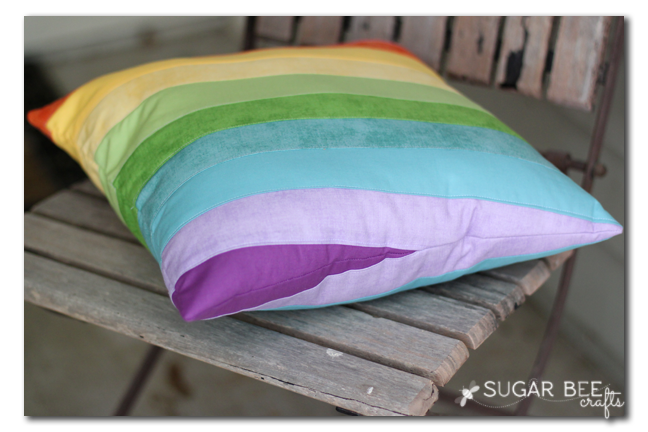
That’s it! Step back and enjoy! I love the fun look of the slight slant to the rows.
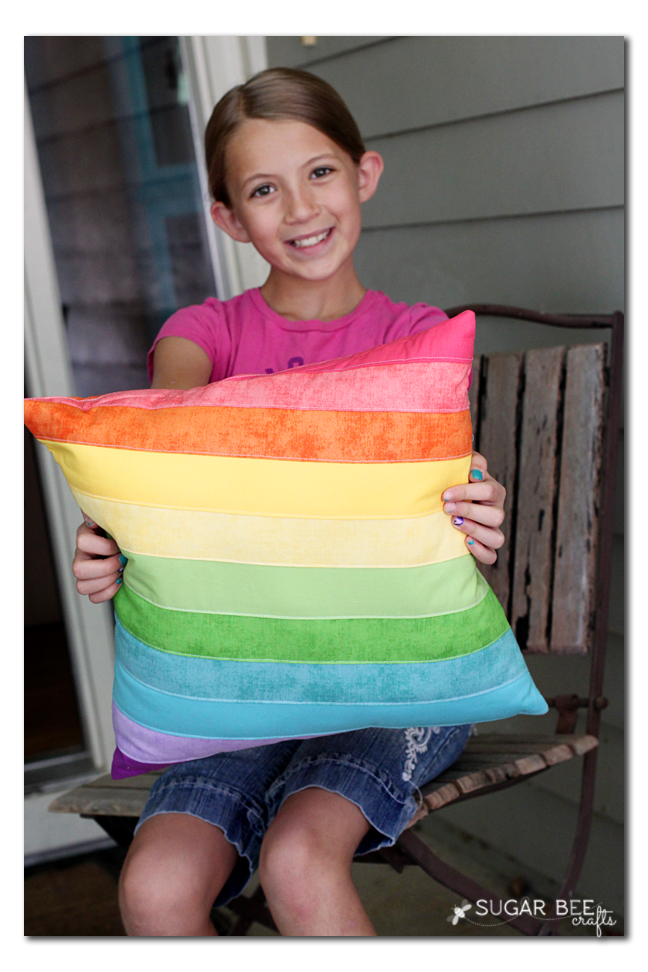
One of my girls was planning a rainbow room, but has since changed direction – – but no worries, I love it so much I want to use it myself!
 ÂBe sure to check out more fun sewing tutorials at www.SugarBeeCrafts.com!