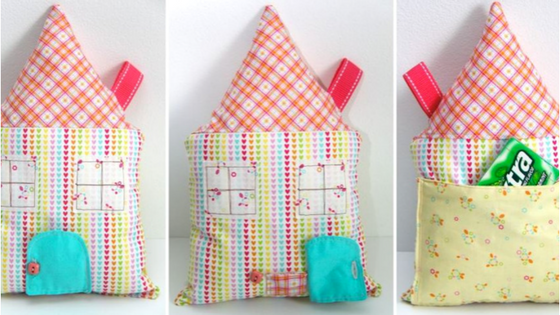

Hello! It’s Maggie from Smashed Peas and Carrots and I’m so excited to be here again. Today I’m sharing a fun tutorial for a Tooth Fairy Pillow that has two hidden pockets! My oldest daughter is starting to lose her teeth and has been “borrowing” my son’s little tooth pillow so I thought it was finally time I made her one. I think she agrees!

I wanted to make a Tooth Fairy Pillow that looked like a little dollhouse with a little pocket for her tooth hidden behind the door. This is what I came up with and I think it turned out perfect! I also added a hidden pocket in the back for the Tooth Fairy to place a gift. Normally our Tooth Fairy leaves a pack of gum, a gold dollar coin, and a little note which all fits perfectly in this pocket!
I thought Riley Blake Designs’ Sweet Home by Melly & Me was perfect for this project and just screamed Penny! I love the bright colors…and those little hearts. I die. So cute!

You can use fat quarters to make this project as you only need small cuts of fabric. Above you can see the dimensions you need for the different parts of the pillow. Not shown is the back pocket, as it’s totally optional to add on to it. If you would like to make the back pocket you will need two pieces of fabric measuring 7 x 9 inches.
Other supplies needed:
Two 2.5 inch pieces of wonder under
Fray Check and Wax Paper
6 inch piece of belting or trim (shown in picture above)
Poly-fil or other type of stuffing
Button
Chopstick
*Please note that all seam allowances are 1/2 inch and all topstitching is using a 1/8 inch seam allowance.

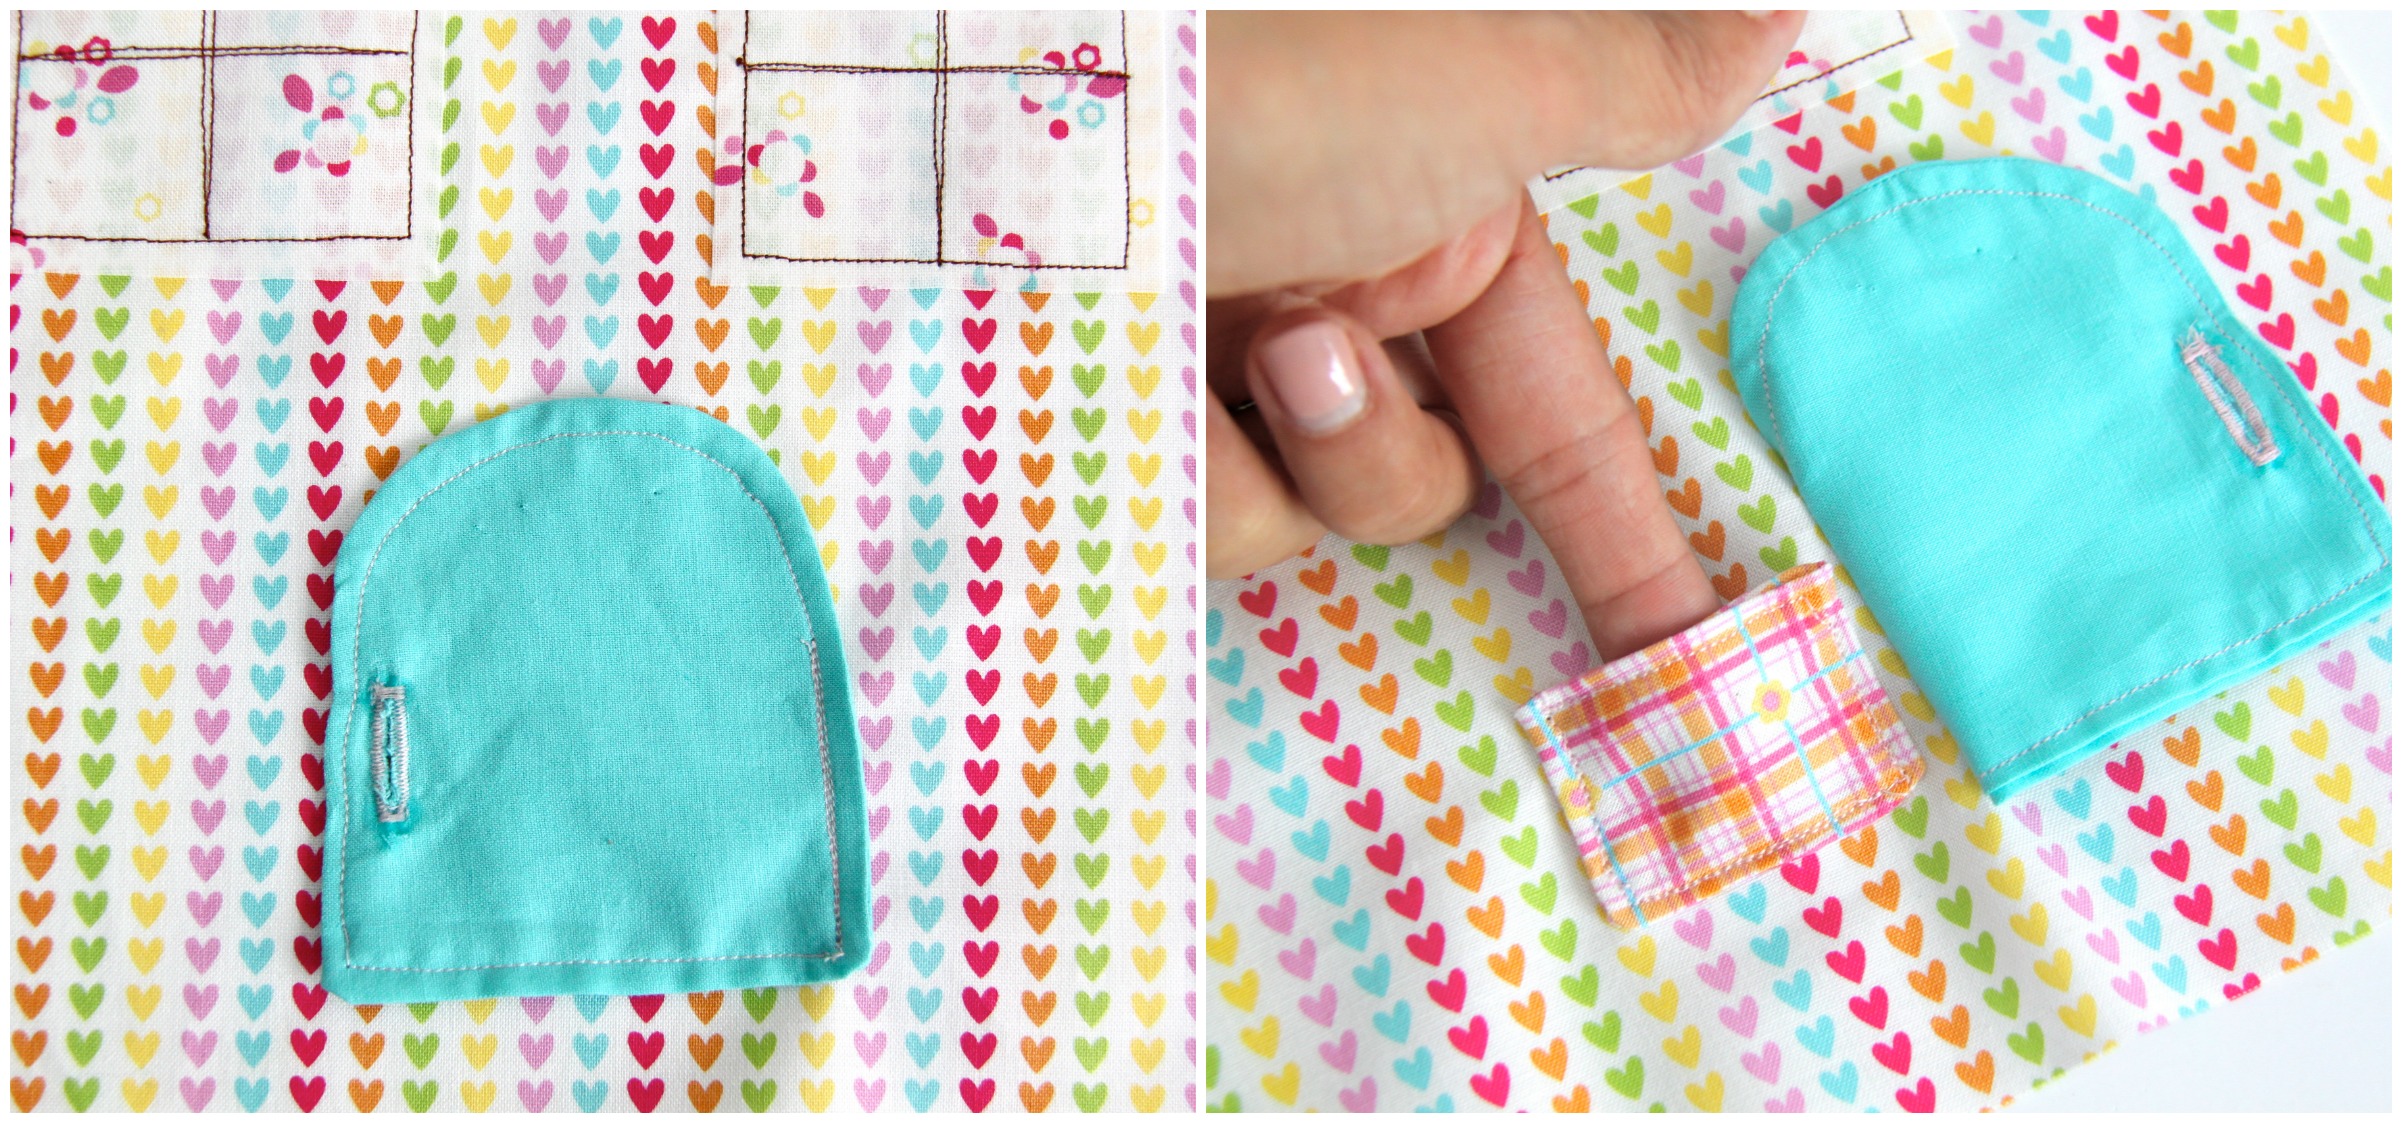
First thing you will do is make your pocket(s), the tooth pocket and the back pocket (if you are making that one!) Just place each set of fabric right sides together and sew around the two sides and the bottom leaving the top open for turning.Make sure to clip the corners when you are done and then flip the pocket right side out. Fold the opening inward and top stitch around the entire pocket. Set the tooth pocket aside and if you are making the back pocket you can place it onto the piece of fabric that will be the back of the house and sew down the two sides and the bottom like the last picture above to make your pocket!

Next we are going to put the roof on. Just place the triangle tip pointed side down with the right side of the fabric facing the right side of the back of the house fabric and sew together (you can serge the edges here if you like). Do the same with the front of the house piece of fabric and the front roof. When you are done make sure to press and top stitch those two seams!

Next let’s make the windows! First, take your two window pieces and place them on a piece of wax paper, this will help save your surface from Fray Check! Drip Fray Check around each edge of the window and let dry. Once dry you will take your iron and press the pieces of wonder under to each window. When cool, peel off the protective paper and place the sticky side down onto the front piece of the dollhouse like two windows would be placed and press each window with an iron for 5-10 seconds.
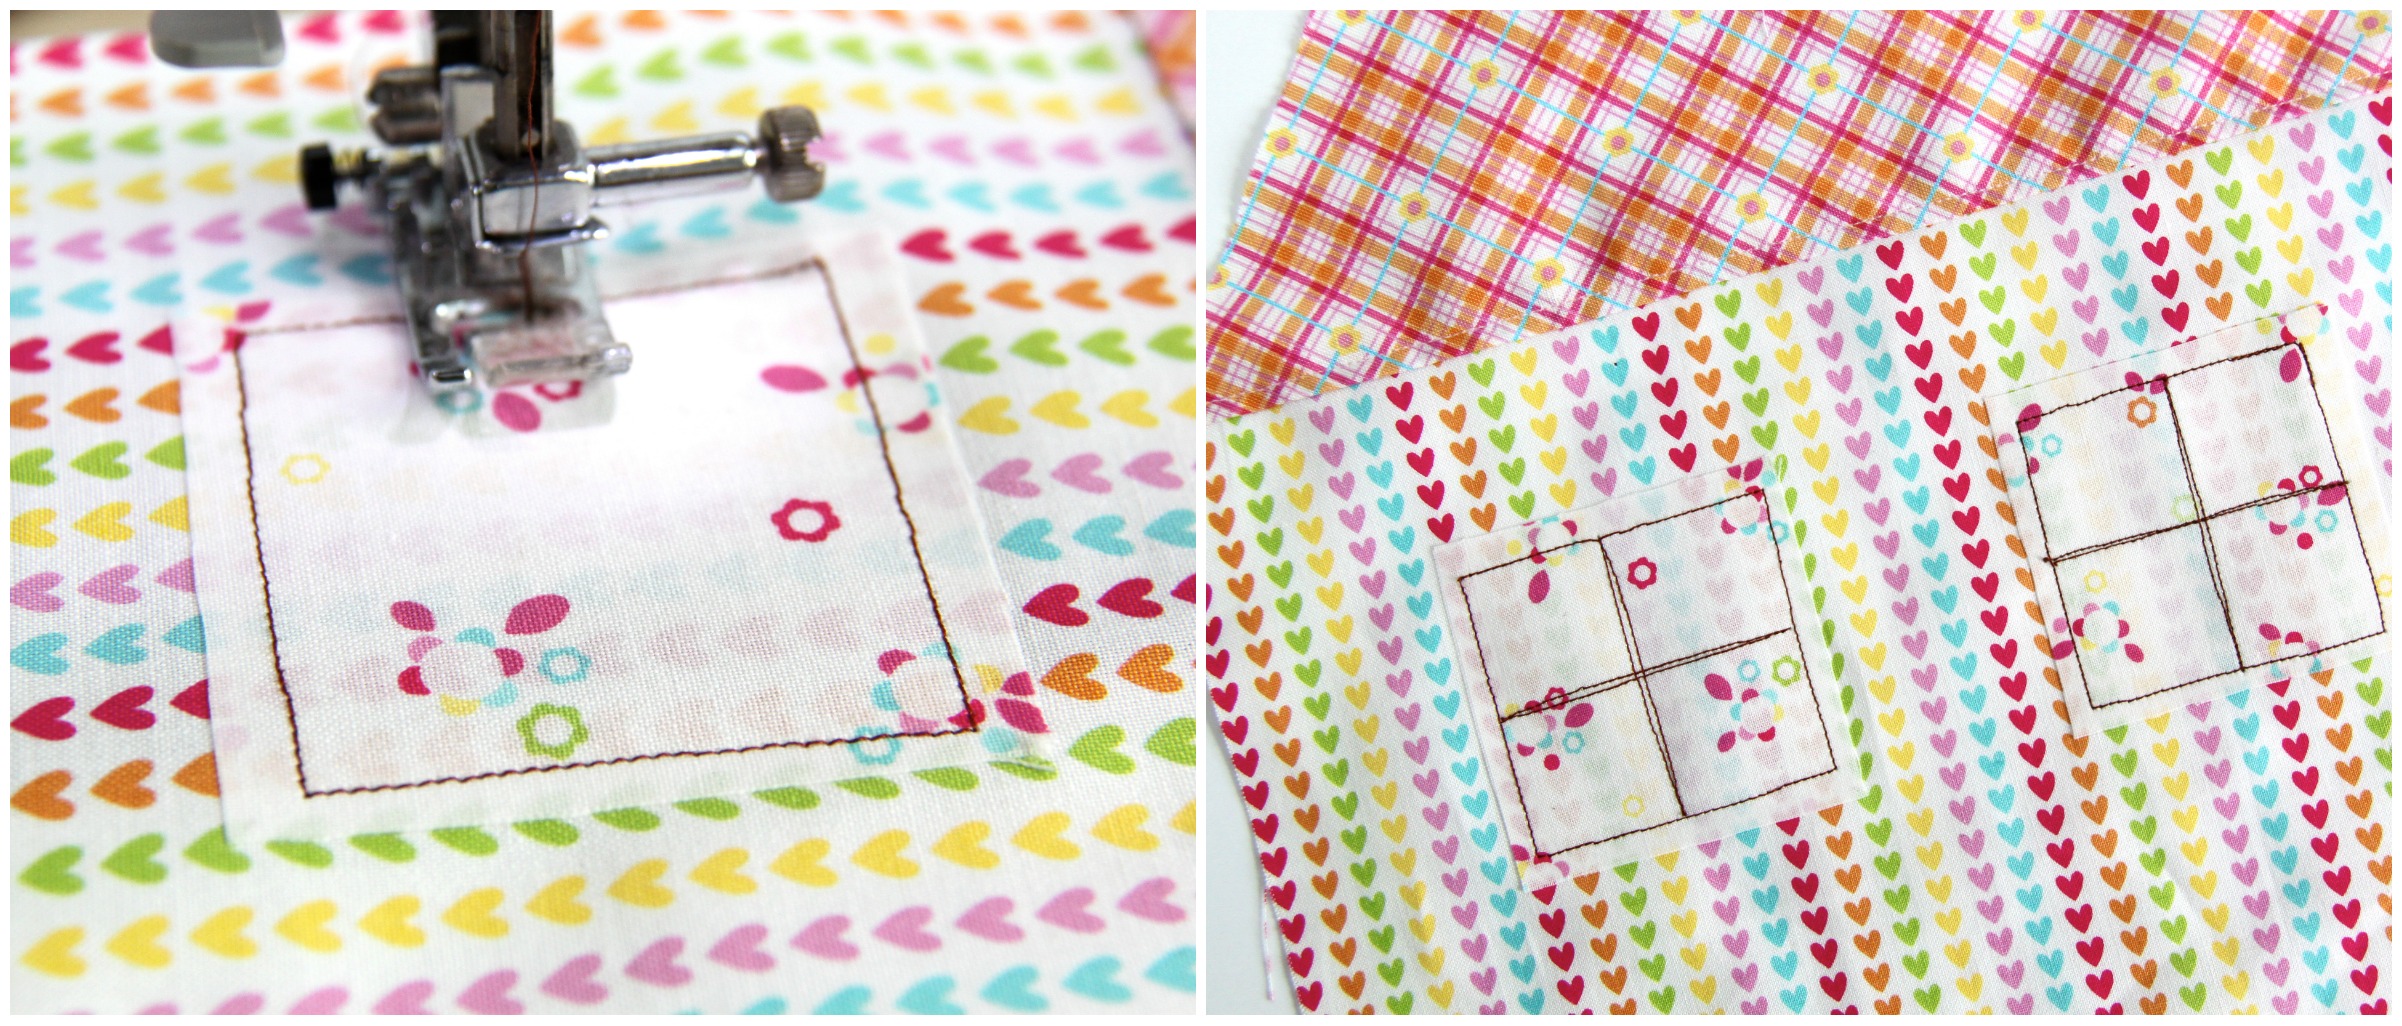
Now you can go ahead and stitch your window outlines, I made mine imperfect as I like that look for this dollhouse but you can be neat and tidy if you like!

To make the door, you will place right sides of the door pieces together and sew along from one side of the door to the other, leaving the bottom open for turning. Then turn the door right side out, fold the opening in, and top stitch around the entire door so it looks like the picture above. If you want to make the door so that it buttons closed, now is the time to pick out a button and make a buttonhole on your door. You can always choose to hand stitch the button onto the door’s front and leave it be, it will still look super cute and the tooth pocket will still keep that tiny tooth safe!
Place your door so that it is centered under the windows and pin in place. Sew the door on where the hinges would be, for this dollhouse that is on the right. Next open up the door and sew in the tooth pocket (making sure to leave the top open for the tooth!) If you are sewing a button onto the house and not onto the door’s front you will want to make sure that the tooth pocket is off center and closer to the hinge part of the door!

Next, grab your 6 inch piece of belting or trim and place it horizontal to the roof like the picture to the left above. Then place the backside of the house over top, right sides together, and sew all the way around the house leaving a 5 inch opening at the bottom to stuff.

Stuff your house as full as you would like, making sure to get into all the corners. I find a chopstick helps a lot in doing this! Then once it is filled to your liking, you can either hand stitch the opening closed or top stitch the bottom edge of the doll house with your sewing machine. Lastly, don’t forget to hand stitch your button onto the door or front of the house depending on which option you decided upon earlier!

Thanks so much for having me today, please stop by my blog and say hello (www.SmashedPeasandCarrots.com!) I hope you enjoyed this tutorial and have fun making a few for some special little people in your lives!
Love, Maggie