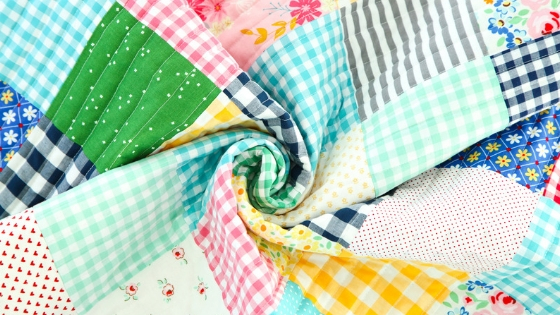
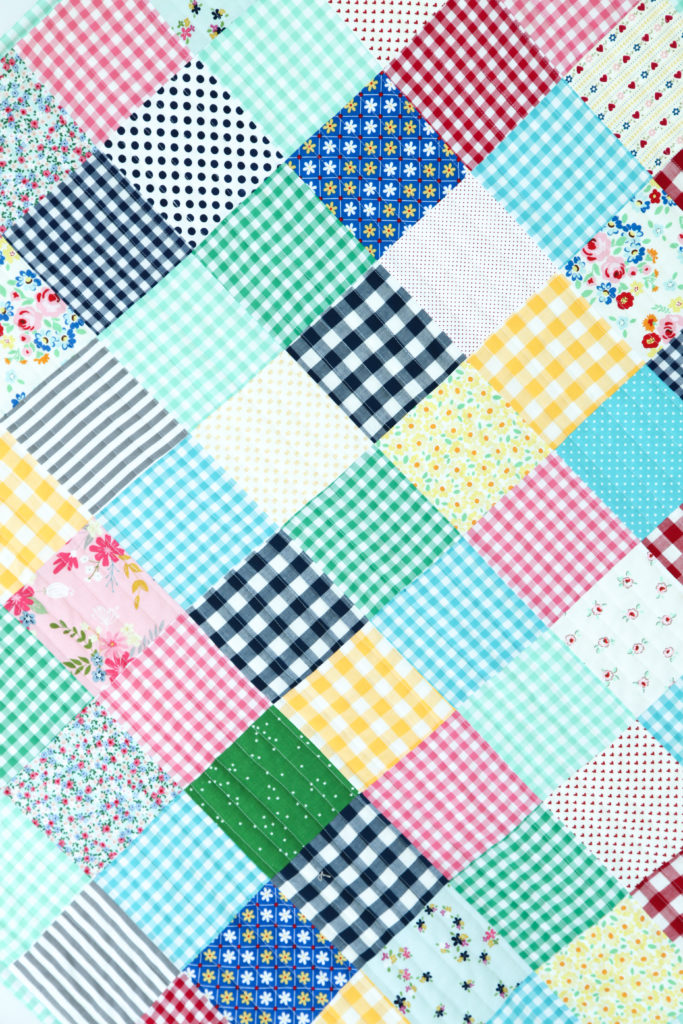
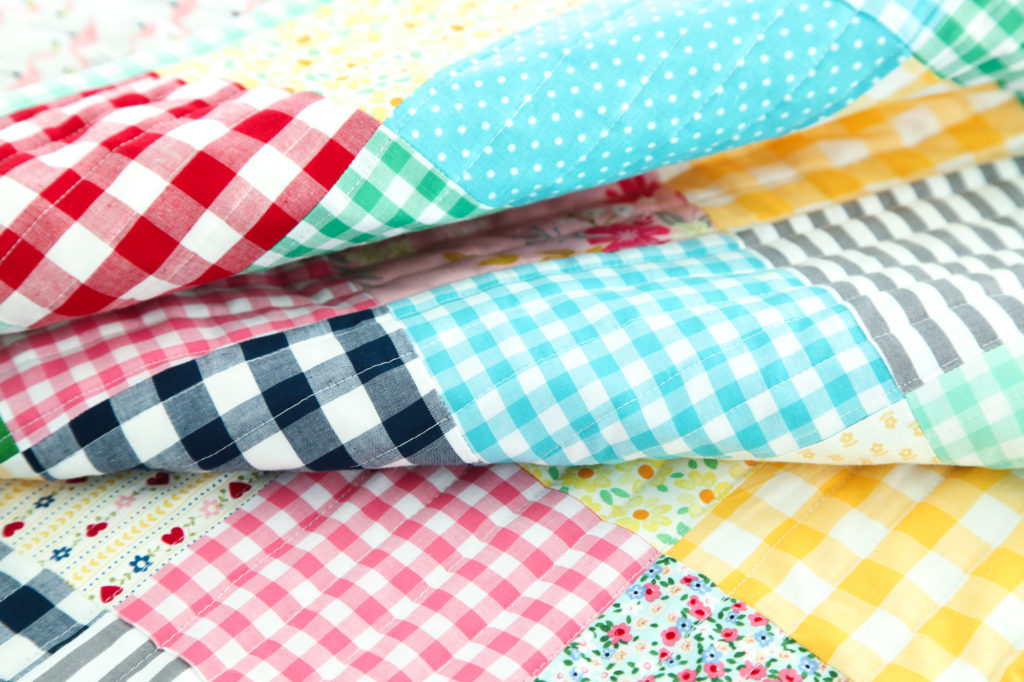
There might be nothing more versatile and nostalgic than a classic gingham print, which is why this patchwork gingham quilt is giving us all the happy feels!
I combined our entire Woven Gingham collection with a random assortment of Riley Blake designer prints for a bright, eclectic, timeless baby quilt that is as easy on the eyes as it is to make!
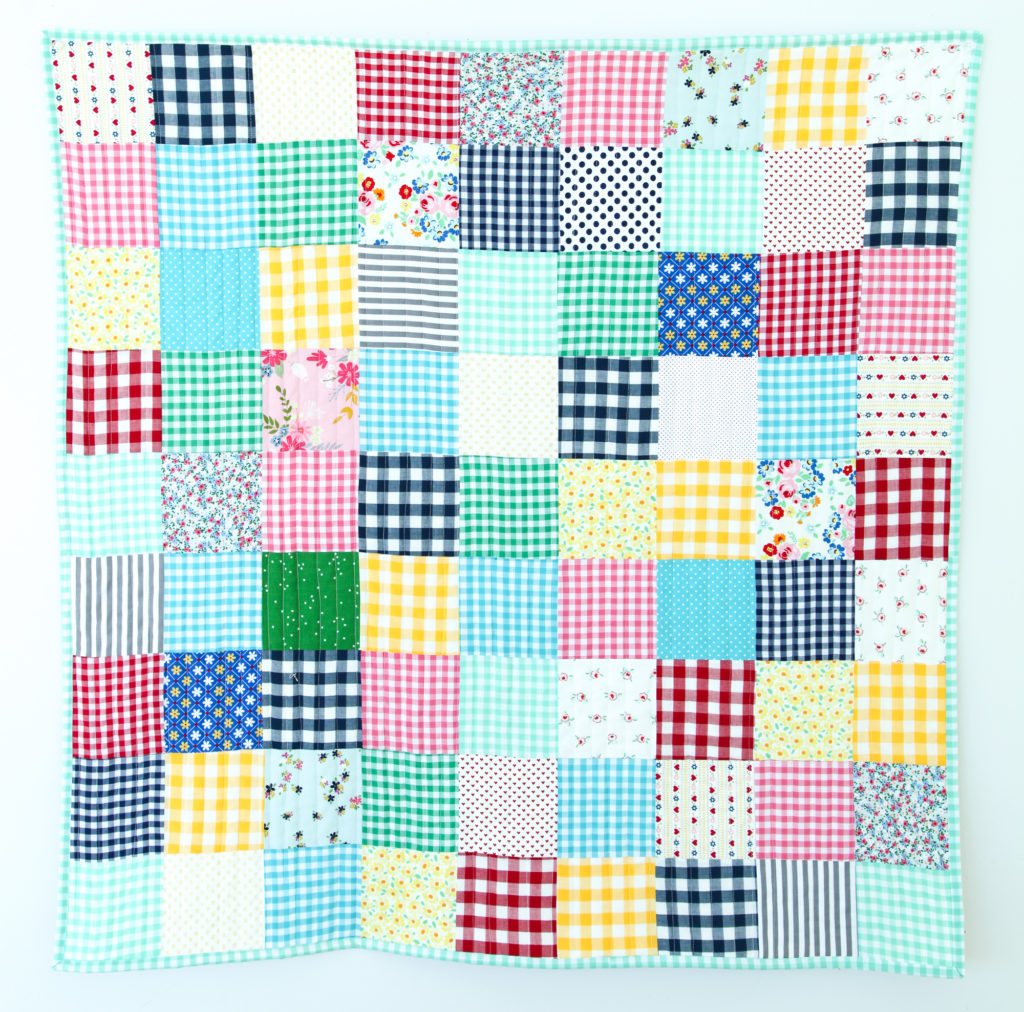
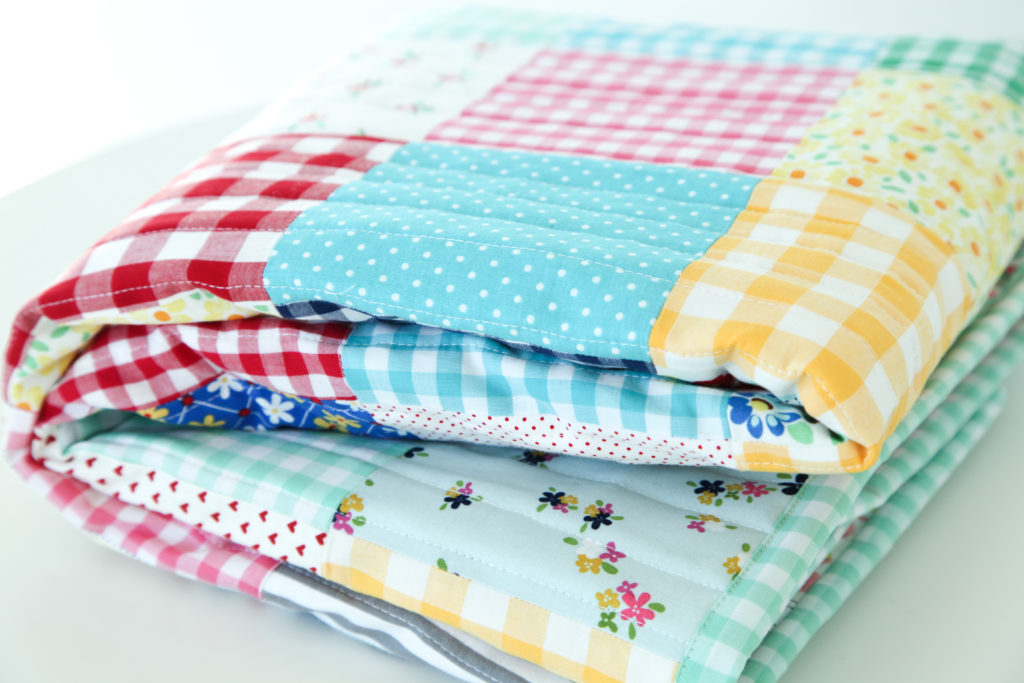
How cute is this?! This little baby quilt measures approximately 40″ x 40″.
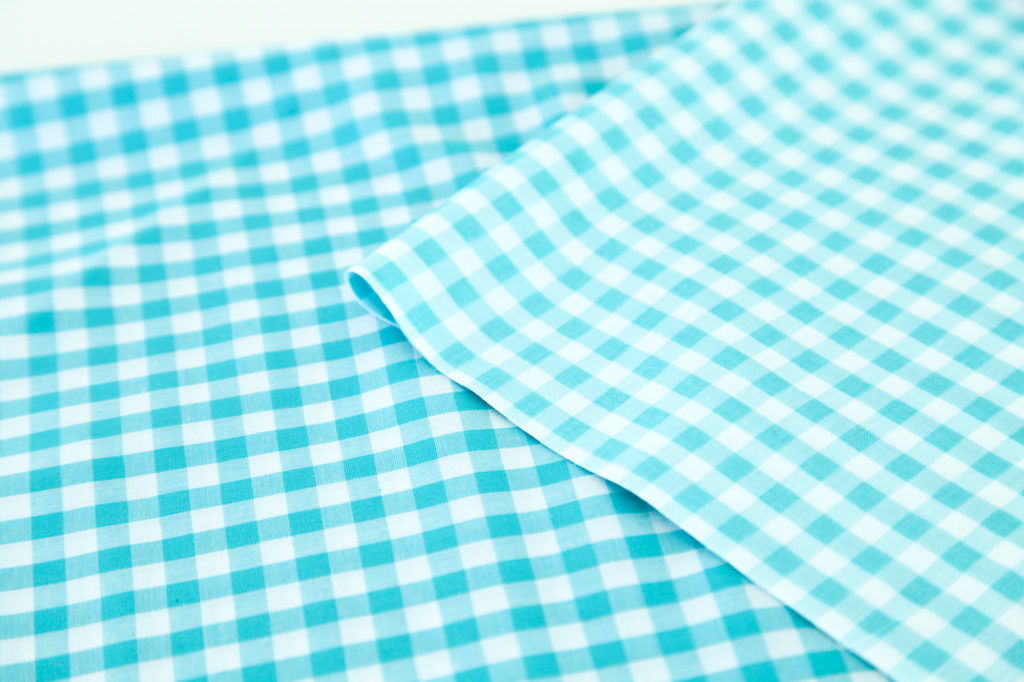
Riley Blake Designs Woven Gingham is different from our printed gingham. Here are both fabrics side-by-side. Hard to tell the difference, right?
Here is a close-up of the printed cotton gingham. The printed gingham is a traditional medium weight quilting cotton. The gingham design is printed onto the fabric instead of woven into it. As you can see, one side has the printed design while the other is white.
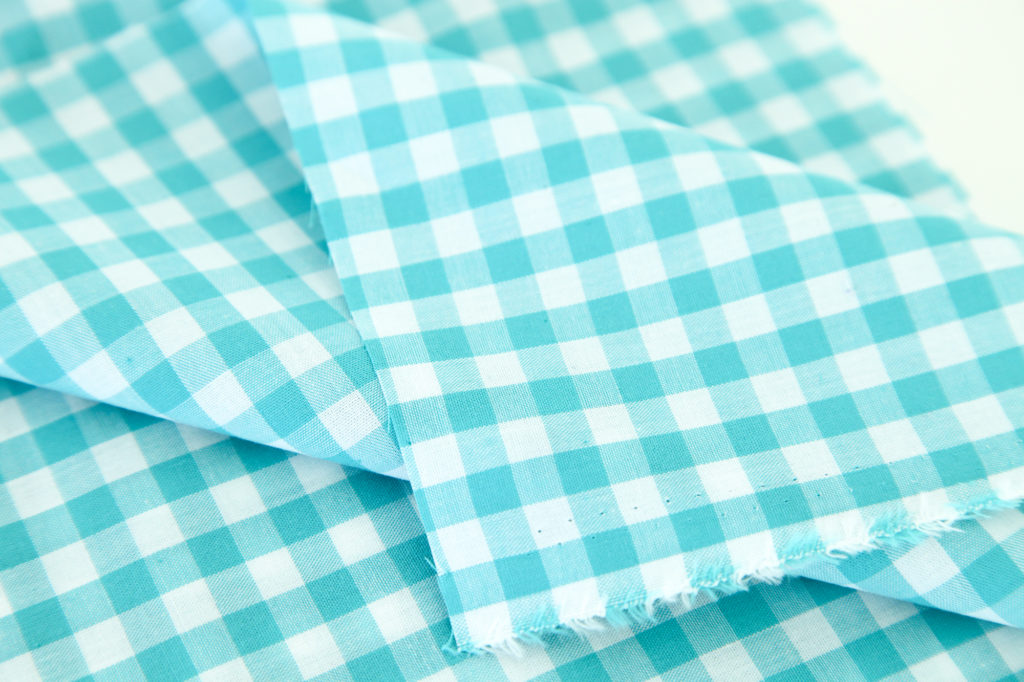
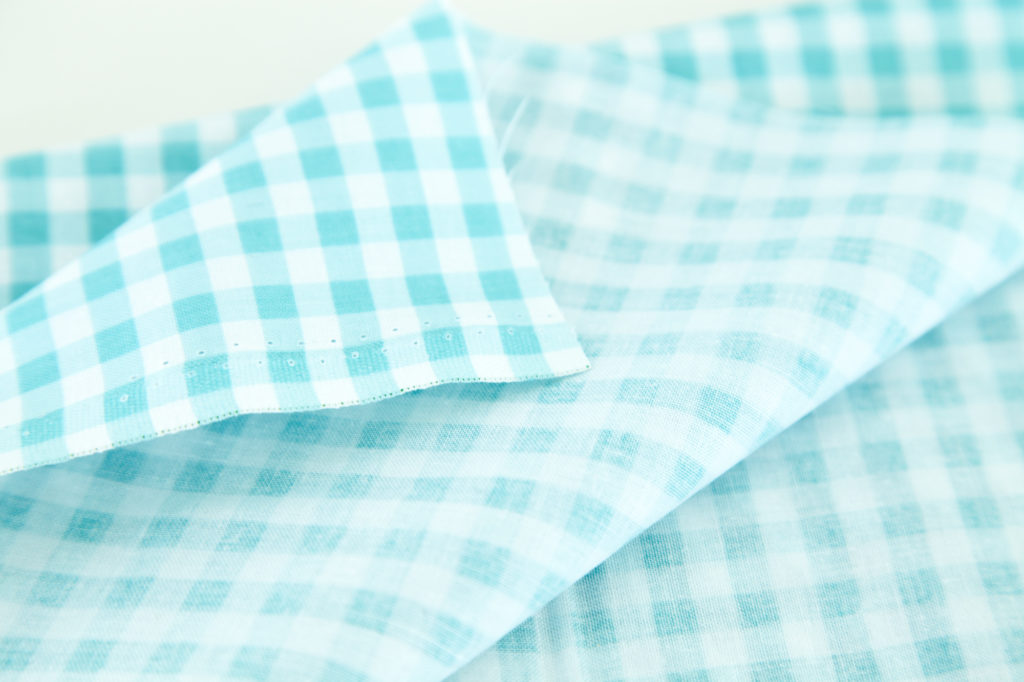
And here is the woven gingham. Each thread is dyed and then woven to create the gingham pattern. Because it is woven, both sides of the fabric are exactly the same. The woven gingham is also a lighter weight fabric than the printed gingham. It feels like a nice cotton lawn. The lighter weight gives it a nice, soft drape. The drape, paired with the fact that the weave creates a pattern on both sides of the fabric, makes woven gingham a natural choice for clothing.
However, just like cotton lawn, woven gingham is also a great option for quilting, as you can see. To make this quilt, you will need:
- 81 – 5″ squares in a combination of Riley Blake Woven Ginghams and colorful Riley Blake designer fabrics.
- 5 – 2 1/2″ x WOF strips 1/4″ Woven Gingham in Mint for binding
- 1 1/2 yards fabric for quilt back
- quilt batting
Arrange all of the squares in nine rows of 9 squares. I kept my arrangement pretty random – sometimes placing ginghams side-by-side, and sometimes alternating them with a designer print. Once you have them arranged exactly how you like them, sew each row together. Press the seams in each row in opposite directions. For example, press all of the seams in Row 1 to the right. Then press all of the seams in Row 2 to the left. Continue alternating each row.
Now sew the rows together, butting up the seams and pinning in place. Because you pressed the seams in opposite directions, they should butt up against each other nicely so there is very little bulk.
When the rows are all sewn, press the seams open.
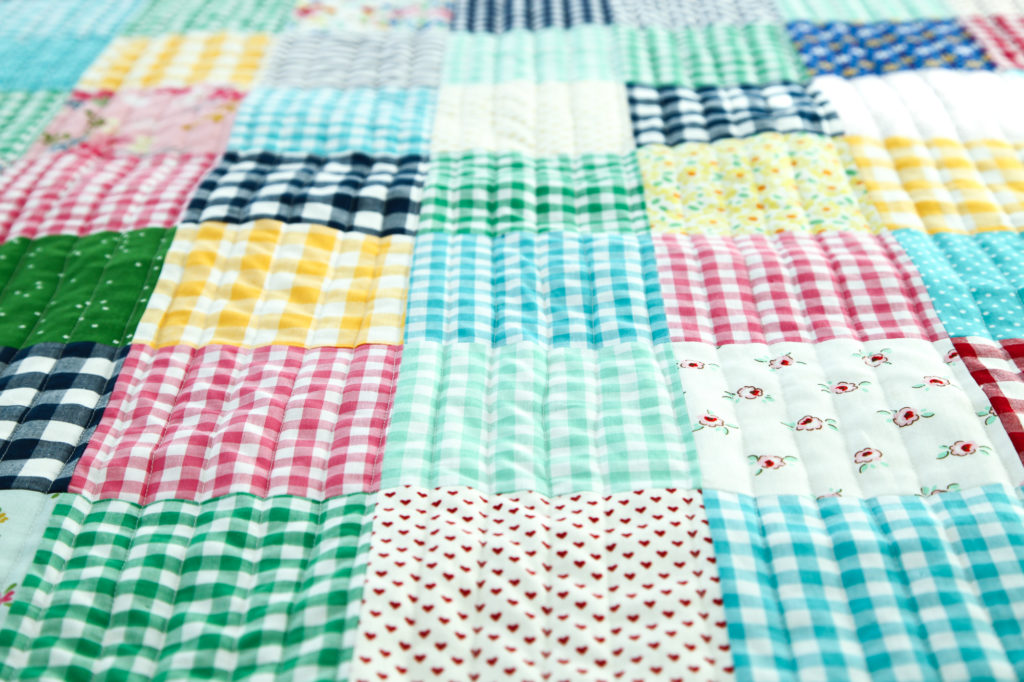
Make your quilt sandwich (quilt back + batting + quilt top) and baste. I opted to quilt this on my machine with straight-ish lines. Easy!

Make your binding by sewing all of the 2 1/2″ strips together at the short ends so they make one long strip. Press the seams open. Now fold the 2 1/2″ strip in half lengthwise, wrong sides facing, pressing as you go.
Attach the binding. If you are new to quilting, Amy Smart has a great tutorial for FAST MACHINE BINDING.
1/4″ Gingham is one of my favorite go-to choices for binding quilts. It just looks so cute!
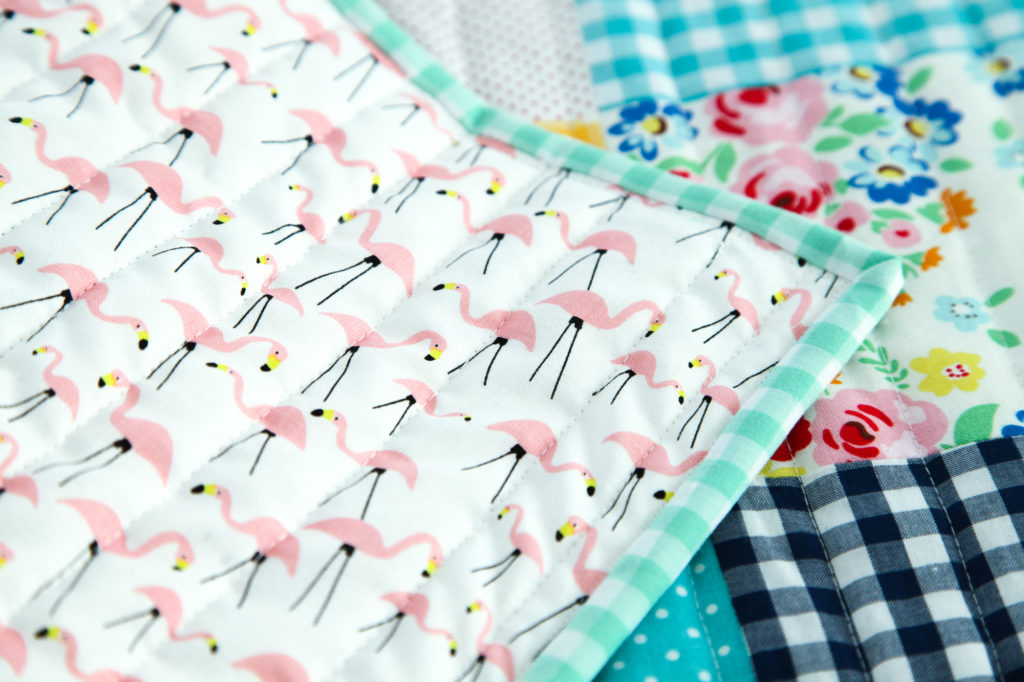
Every quilt needs a fun surprise, so I decided back my quilt with this adorable Flamingo print from Shawn Wallace’s brand new collection, GNOME & GARDENS, which will arrive in stores this month. I mean, what goes better with classic gingham than retro flamingo lawn ornaments? Am I right?
That’s all there is to it! Such a sweet and simple quilt for endless playtime and snuggles. LOVE these cheerful colors!

To make a larger quilt, you can either cut larger squares, or add more 5″ squares to get the size you want. Because it is such a scrappy quilt, you really can’t go wrong!
Riley Blake Designs Woven Gingham is available now at your favorite local and online quilt shops. Pick up yours today and share your makes with us on Instagram using #rileyblakedesigns #iloverileyblake #fabricismyfun, and tag us @rileyblakedesigns.
Happy Quilting!
One Comment
Pingback:
February 15, 2019 at 8:27 pm