Did you happen to see our last Hoop Ornament Tutorial? It was an easy Scrappy Patchwork Ornament, perfect for using up those last little adorable scraps you can’t bring yourself to throw away. Today, I have another fun and SUPER scrappy project for you — we’re talking teensy tiny scraps here!
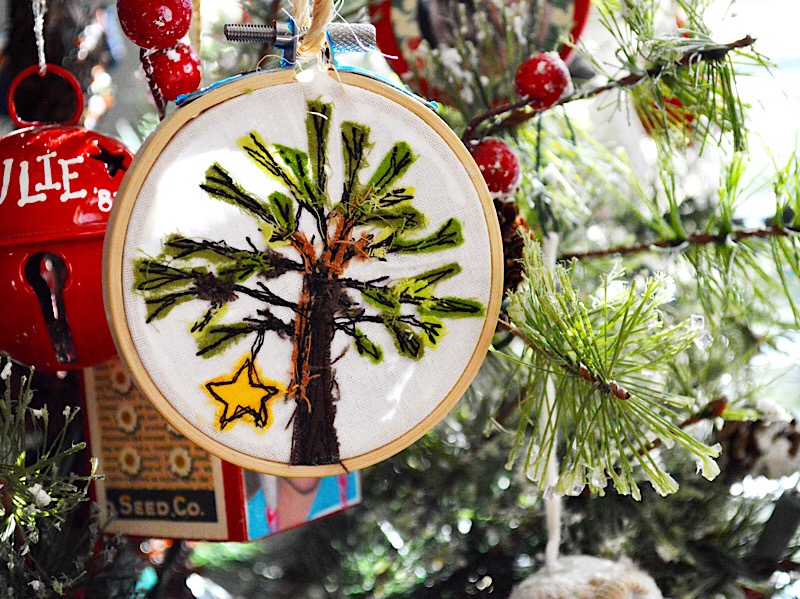
I love this project because it is completely personalized. The design of this ornament is completely up to you. Where I live, Long Leaf Pines are everywhere you look. These trees are recognizable with their long skinny trunks topped with branches of evergreen at the tippy top. I decided to use the Long Leaf Pine as the subject matter for my ornament, but you can apply this technique to any subject matter you desire.
Free motion machine applique is a mashup of applique and “Scribble Embroidery”, named because of it’s freeform scribbled lines. No perfectionists allowed here!
For this project you will need:
*3” Wooden Embroidery Hoop
*Roughly 5” square piece of background fabric
*Scraps of fabric in various sizes and colors of your choice
*Tacky Glue
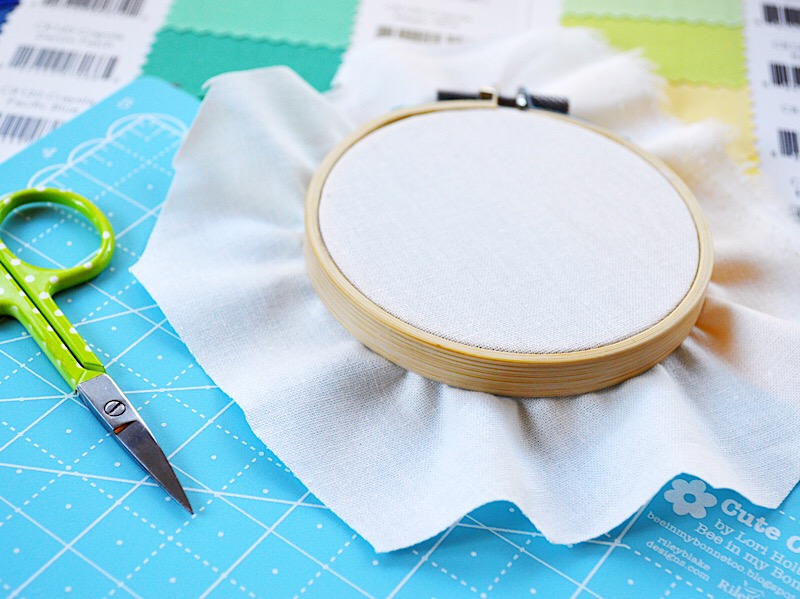
To begin, place the fabric in the hoop. I like to do this because it creates an outline of the hoop so I can see my working space. You could just as easily trace the circle with a fabric pen. I simply find it more convenient to do it this way. For the fabric, I used Riley Blake Linen in White.
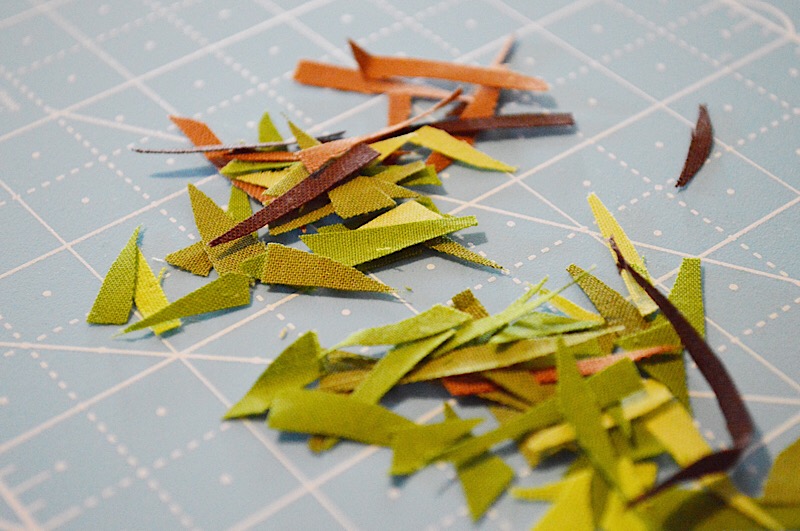
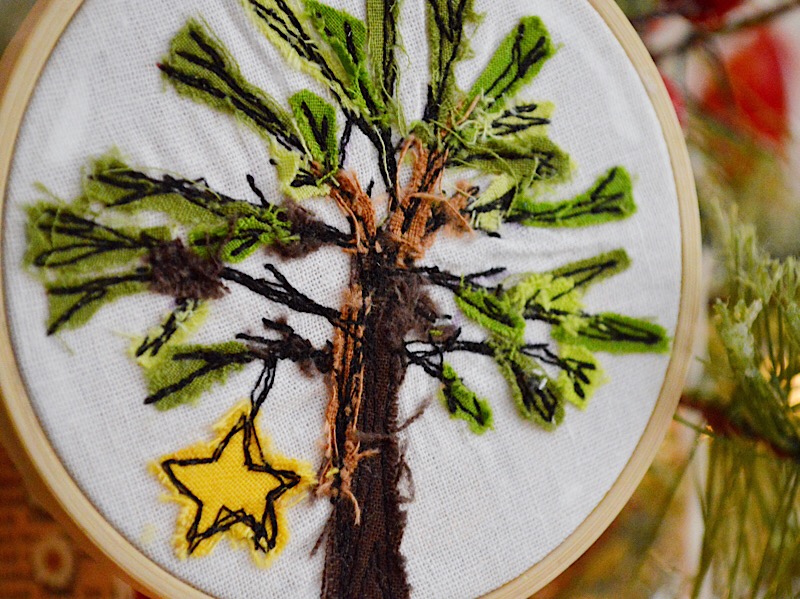
Next, I used Riley Blake Designs Confetti Cottons in various shades of green and brown, cutting them into tiny little pieces.
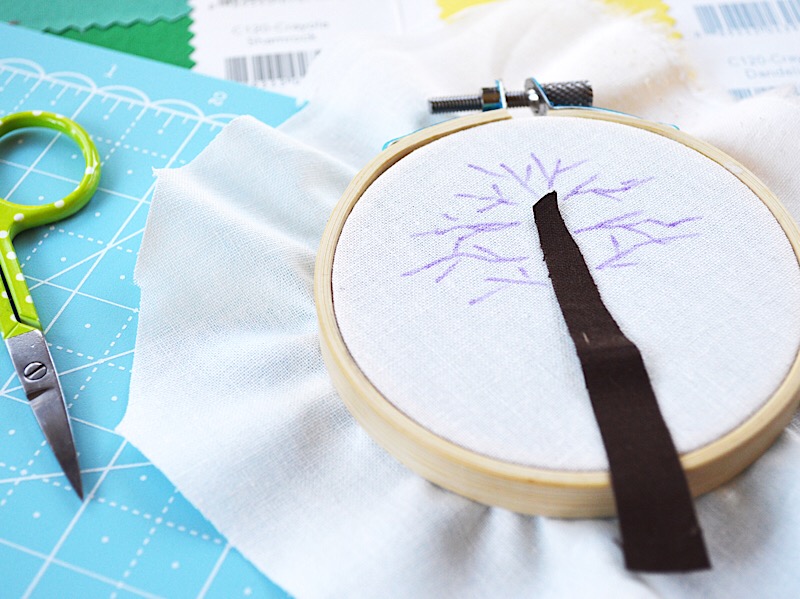
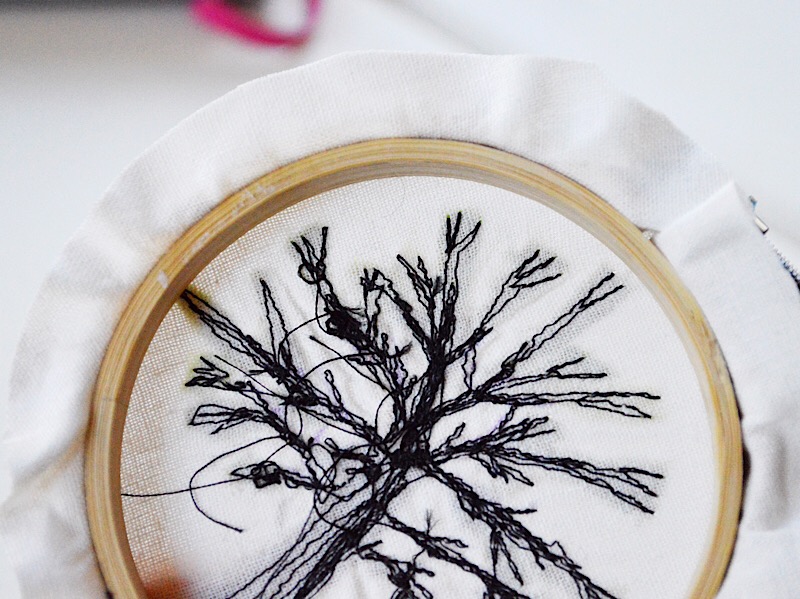
I cut out a tree trunk in Riley Blake Designs Confetti Cottons “Brownie.” I positioned the trunk where I wanted it just for reference. Then I sketched out some branches using a fabric pen.
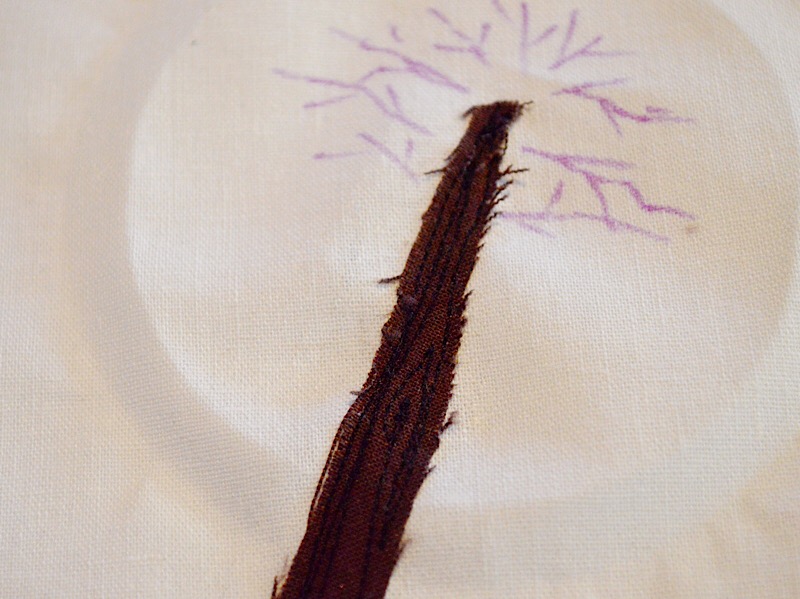
Next, it’s time to remove the hoop and start sewing! *You can see here that the hoop left a clear outline of the circle I need to work inside of. To begin sewing, attach an embroidery foot to your machine and lower the feed dog. Choose your thread color. I decided to use black to give it the look of an actual drawing. Reposition the tree trunk where you want it and start sewing. There isn’t any hard fast rule here. Just make sure the trunk is sewn securely on each side, filling in the middle with stitching as desired. Don’t worry about the fraying threads. This is expected and is part of the charm of this project.

I decided to add a couple patches of a lighter brown using scraps of Confetti Cottons “Cinnamon.” Note how tiny these pieces are. Sometimes your pieces will be just a sliver in size. It might feel strange to be tacking down such a small piece of fabric, but I promise you’ll feel more confident as you go!
Next, I stitched the branches by following my sketched outline. Notice I went back and forth to add a bit of thickness to the branches. The ends of the branches will be covered with green, so don’t try to get them too perfect.
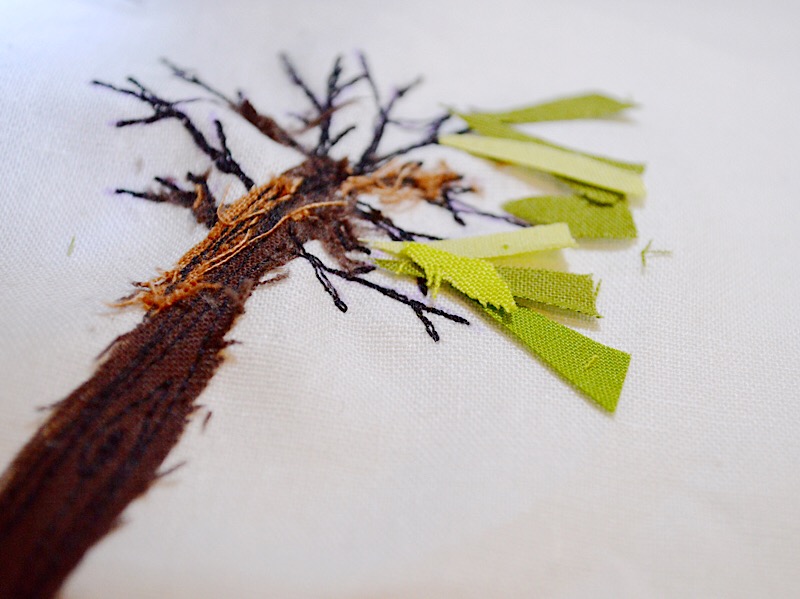
For the leaves, I wasn’t sure how to begin, so I started by arranging some scraps of different colors in various layers just to get a visual on how this would look. Once I “caught the vision,” I removed most of the pieces and began sewing the green pieces on one at a time.
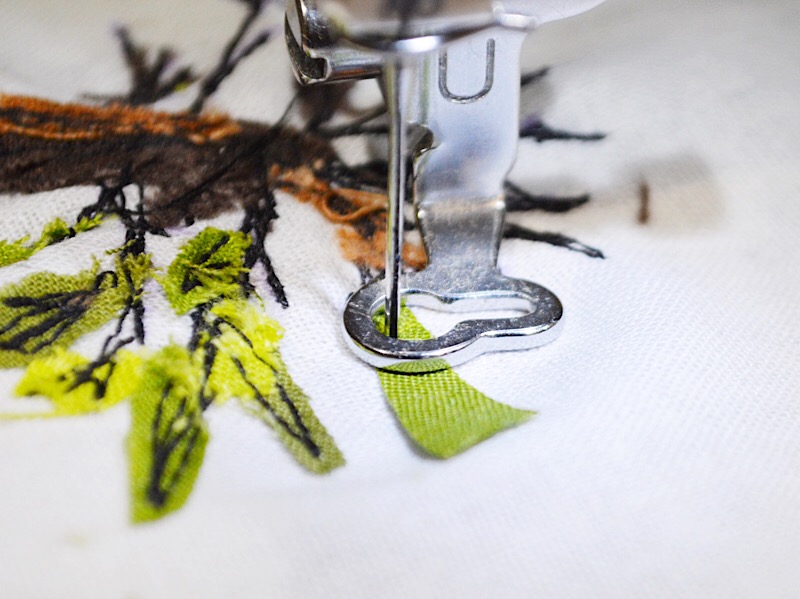
To do this, I laid a piece partially over the branch outline I already stitched. Then I carefully set my needle into the down position.
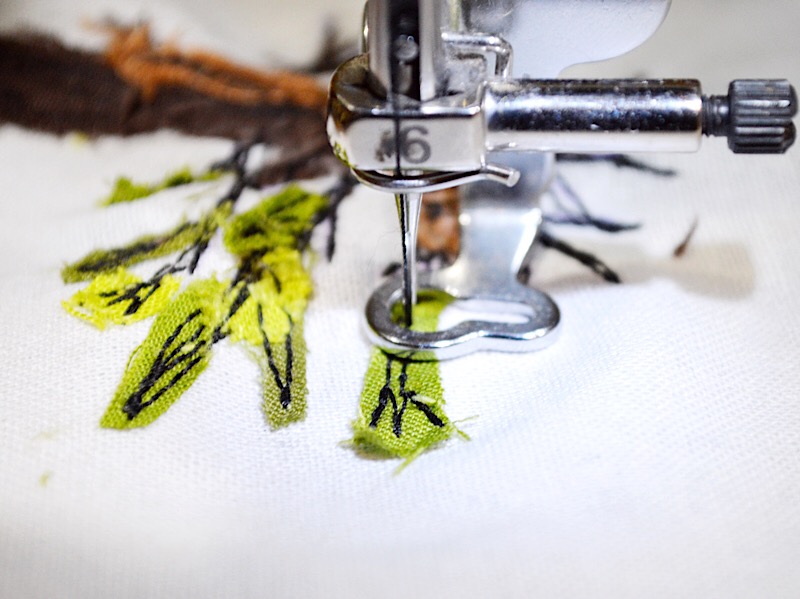
Next, I stitched over the green, creating a branch outline on the green, making sure my new stitching merges into my original branches. Don’t worry here if you have excess fabric. You can trim it closer to the stitching later. Continue layering different shades of green until all of the branches are filled in the way you like. I added a few more tiny bits of brown and I also added a little star which looks like it is hanging from the tree. For the star, I simply sketched out a little and very imperfect outline, cut it out, and stitched it on the same way I did the greenery and tree trunk. Easy!
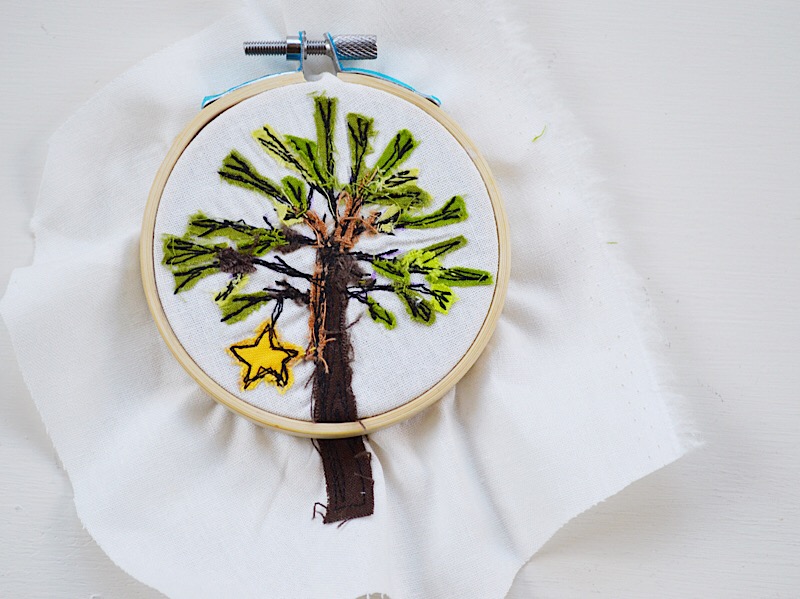
Once I felt like I had everything just the way I liked it, I placed the fabric back in the wooden embroidery hoop. I like to gently pull it nice and tight before tightening the metal clamp all the way.
Trim the fabric around the edge of the hoop, leaving about 1/2”, which will wrap around the hoop.
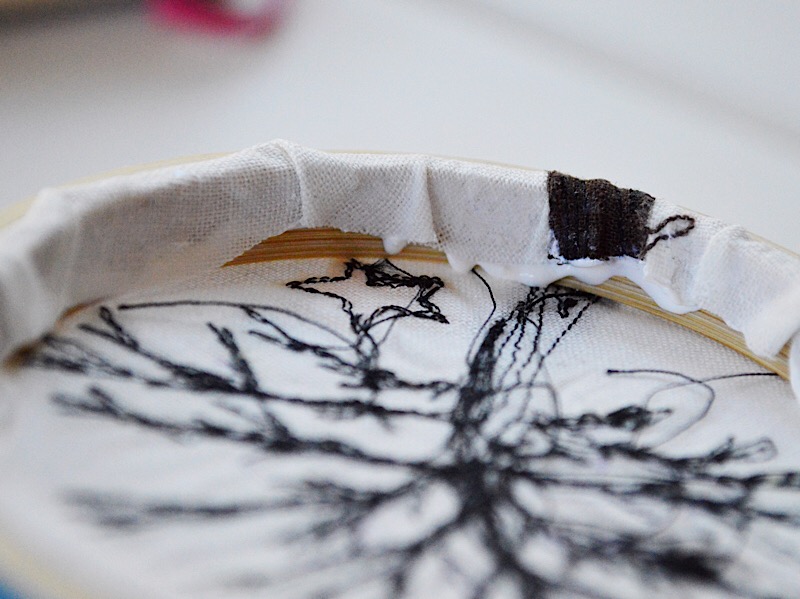
Apply tacky glue (not too much like I did here) around the hoop rim and inside, and fold the excess fabric over. Hold it in place for a moment until it stays in place without your help.
You could add a little bow at the top, if you like. I decided to leave mine as is, in keeping with the natural theme of this ornament. I added a loop of twine for hanging the ornament. Ribbon would work great here as well.
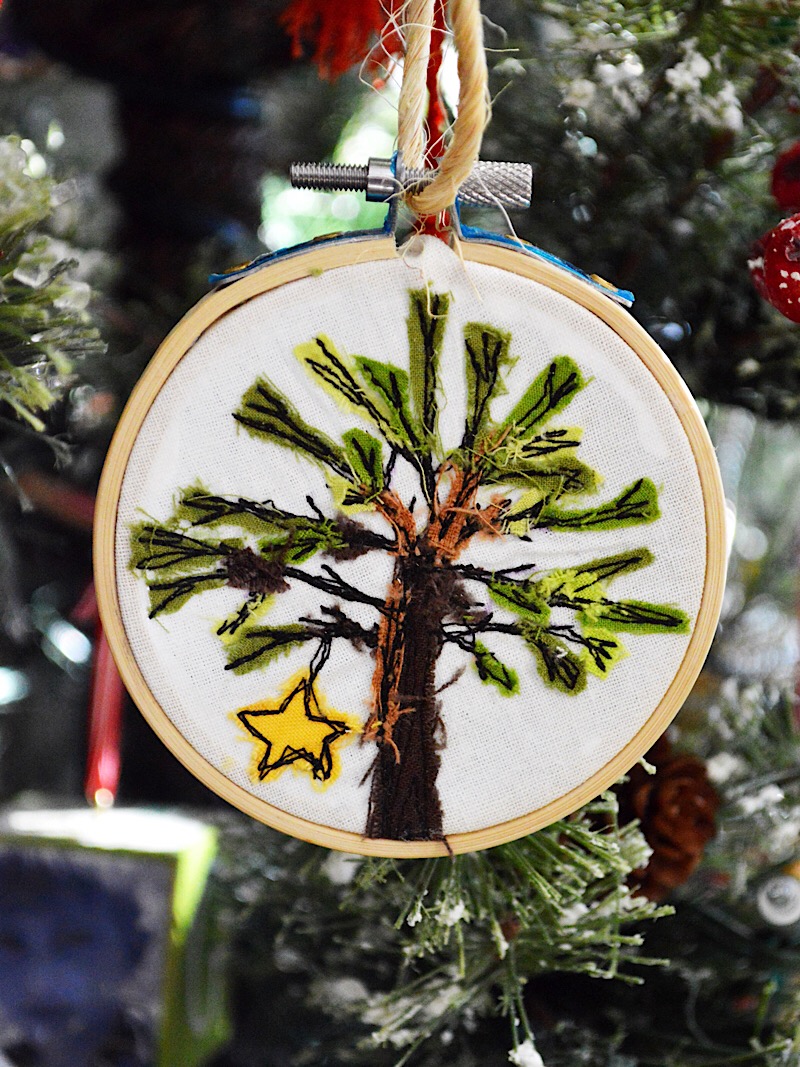
That’s all there is to it! All that’s left is to hang it on the tree and enjoy!
Happy Sewing!